
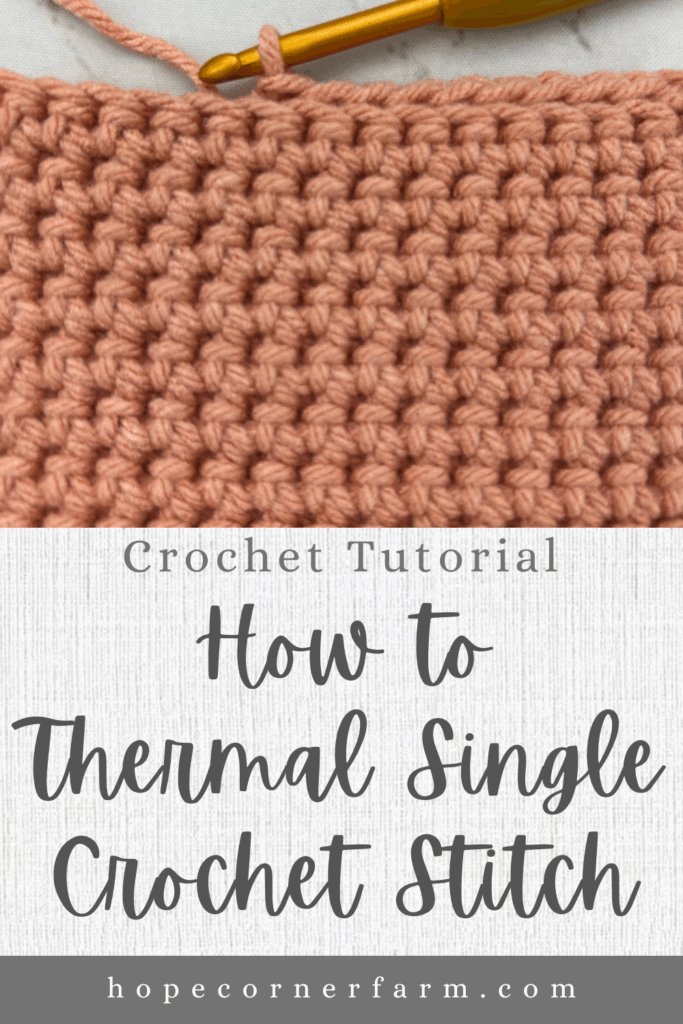
How to Thermal Single Crochet Stitch (Photo + Video Tutorial with Step-by-Step Instructions)


If you love cozy, textured crochet stitches, the Thermal Single Crochet Stitch is a must learn! This stitch creates a thick, double layered fabric that’s perfect for warm blankets, potholders, scarves, and other projects that need extra durability and insulation. In this tutorial, you’ll find step-by-step written instructions, a detailed photo guide, and a full video tutorial to help you master the Thermal Single Crochet Stitch with ease. Whether you’re a beginner looking for a new challenge or an experienced crocheter searching for a versatile stitch, this guide will walk you through everything you need to know.


First, check out our video tutorial on our You Tube Channel! Subscribe to get the latest crochet fun from Hope Corner Farm Crochet!
What is the Thermal Single Crochet Stitch?
The Thermal Single Crochet Stitch is a thick, double layered crochet stitch that’s created by working single crochet stitches into the unused loop of stitches from the previous row. This technique locks two layers of fabric together, resulting in a dense, durable, and highly insulating texture. Unlike regular single crochet, the thermal version produces a sturdy fabric that’s perfect for making hot pads, potholders, blankets, scarves, and any project where warmth and structure are important. While it may look complex, the thermal single crochet is surprisingly simple once you learn the technique, making it a rewarding stitch for both beginners and experienced crocheters.
What You’ll Need to Crochet the Thermal Single Crochet Stitch:
Yarn of Choice (I used a size 4 medium weight yarn for this tutorial – more specifically Lion Brand The Cottony One in the color Sage)
Crochet Hook of Choice (I used a size H 5.0 mm crochet hook for this tutorial)
Scissors
Yarn Needle
This crochet tutorial is written using US Crochet Terms
What Crochet Terms Will I Need to Know for the Thermal Single Crochet:
Photo Tutorial How to Thermal Single Crochet Stitch:
Ready to see the Thermal SC in action? Below, you’ll find a step-by-step photo tutorial that walks you through each part of the stitch. Follow along with the pictures and written instructions to learn exactly where to place your hook and how to build the thick, double-layered texture that makes this stitch so unique.
Stitch Count and Multiples for the Thermal Single Crochet Stitch:
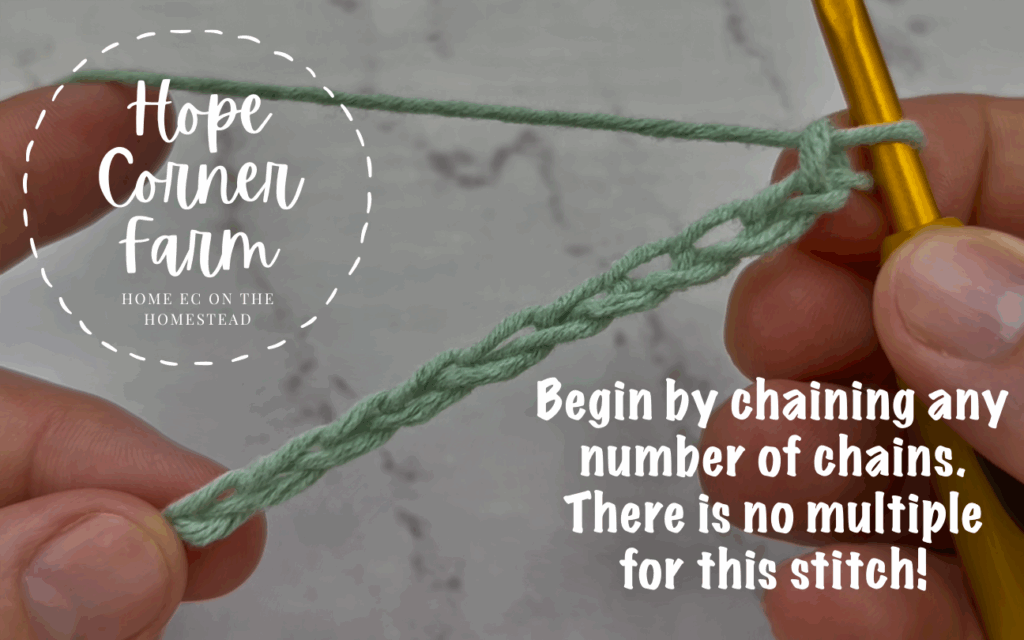
To begin, there is no multiple for the Thermal Single Crochet Stitch. Simply begin by chaining any number.
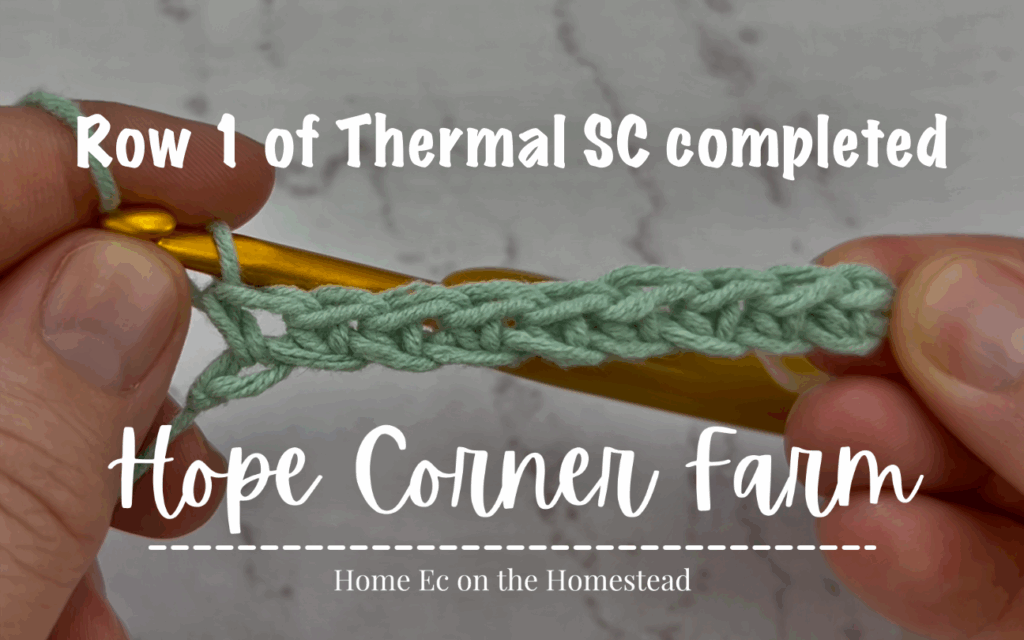
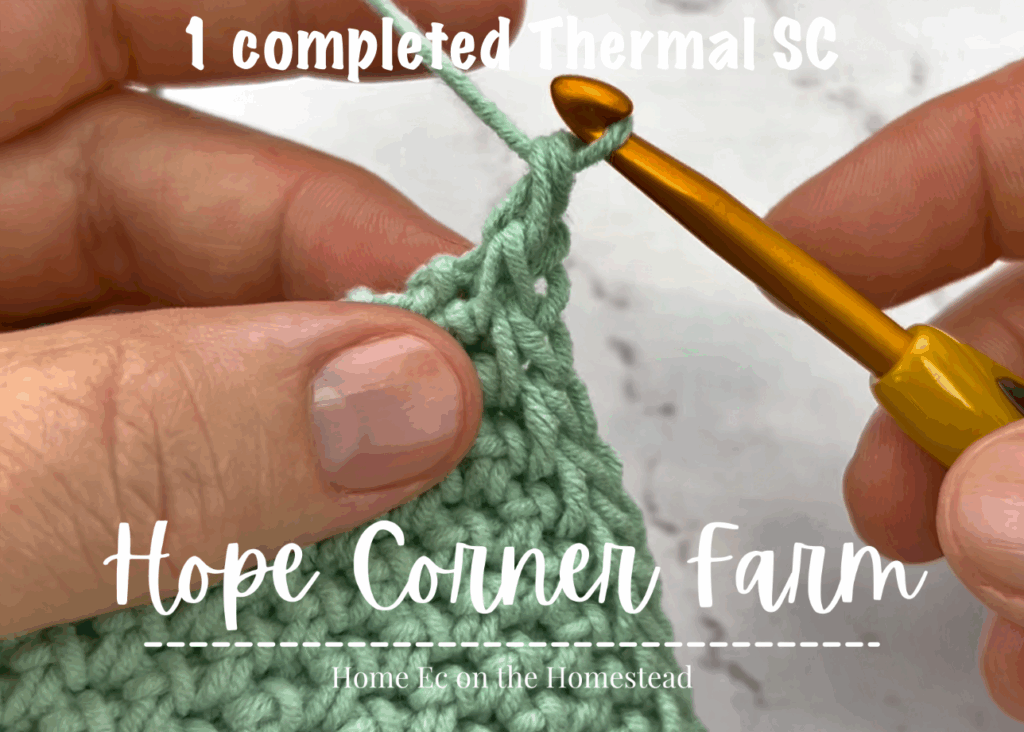
Row 1 of the Thermal Single Crochet Stitch:
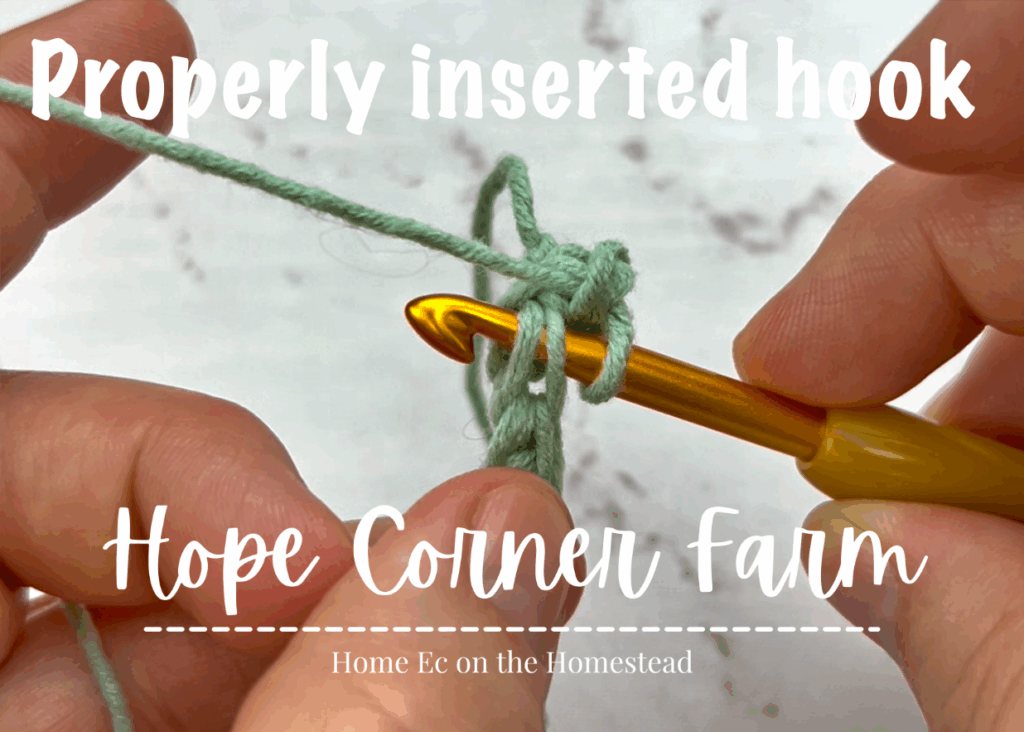
First begin by working a single crochet stitch into the 2nd chain from the crochet hook.

How to Work Into the Chain:
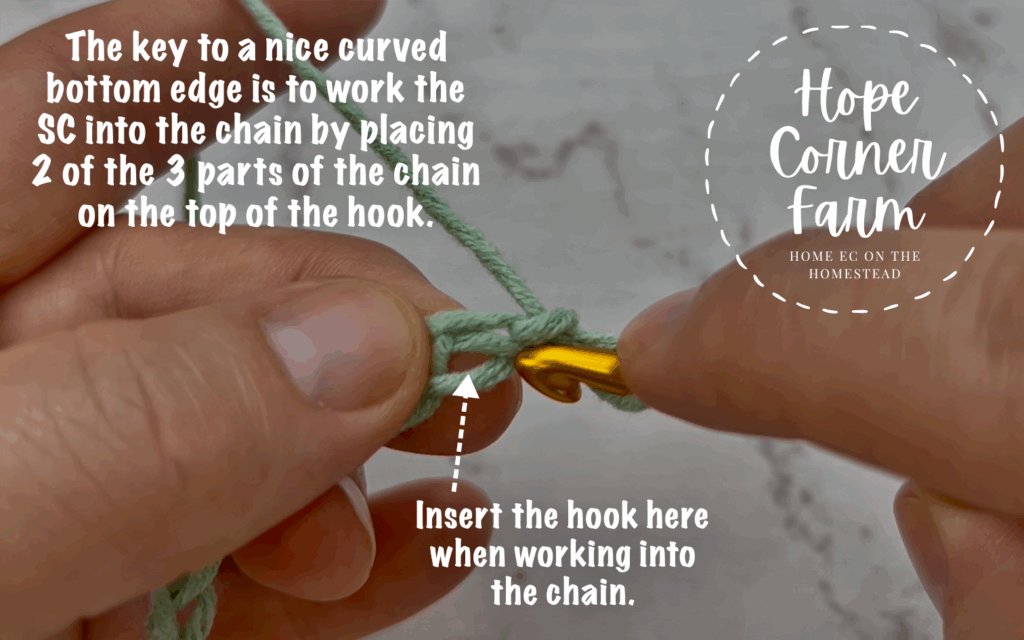
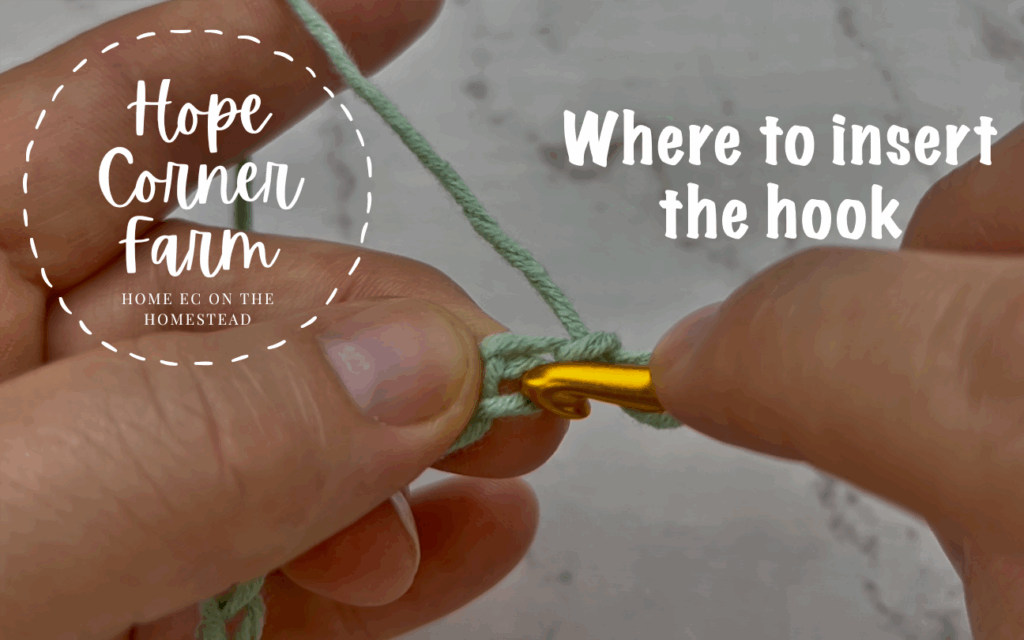
Now when inserting the crochet hook into the second chain from the hook, work it so that 2 of the 3 parts of the chain are on the top of the crochet hook. This helps to create a nice rounded bottom edge for the crochet project. See the pictures below for details.

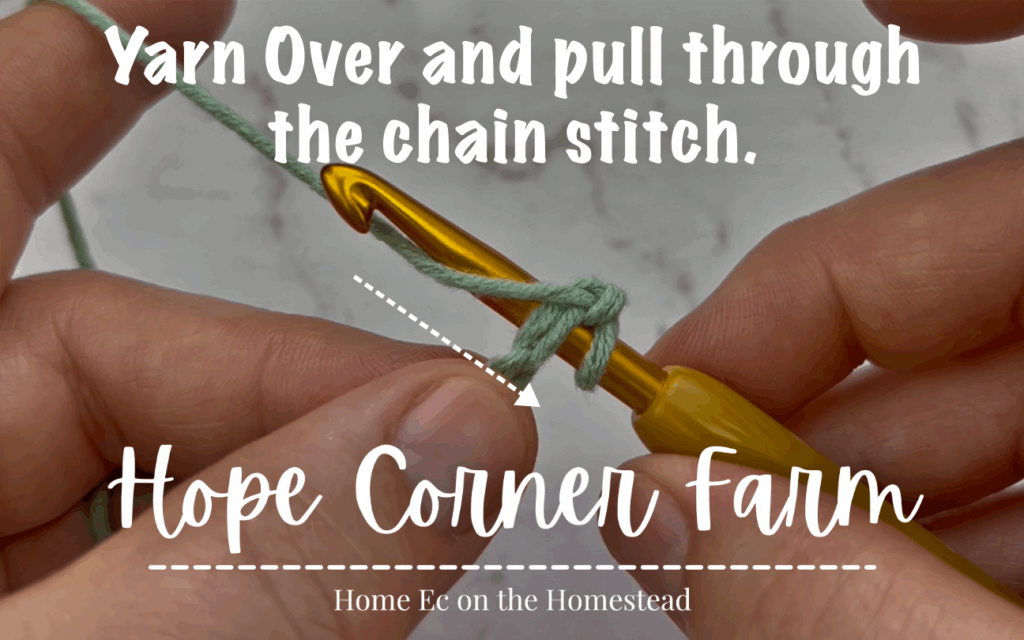
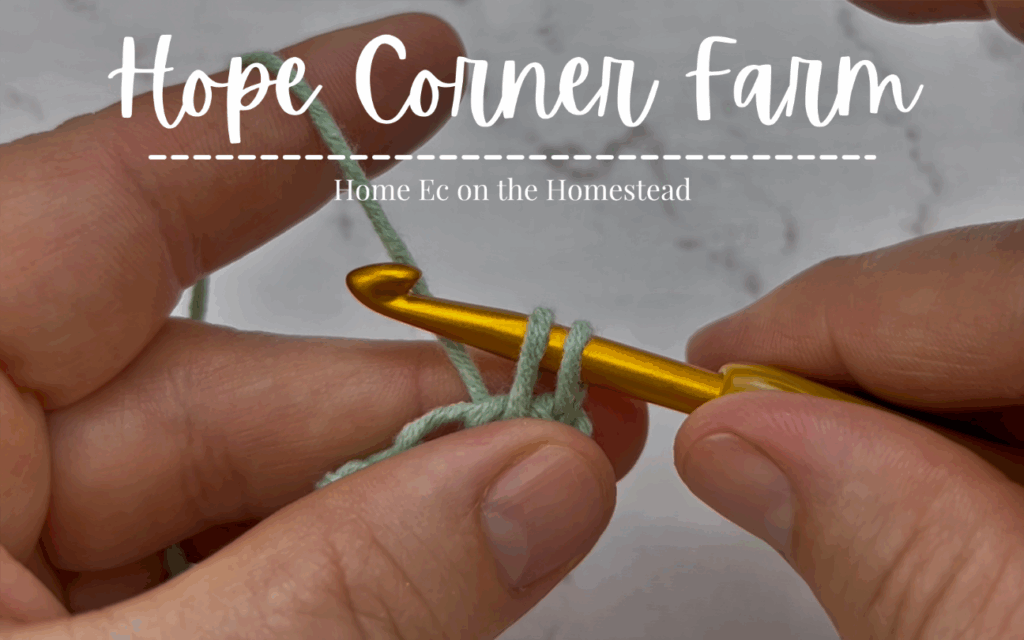
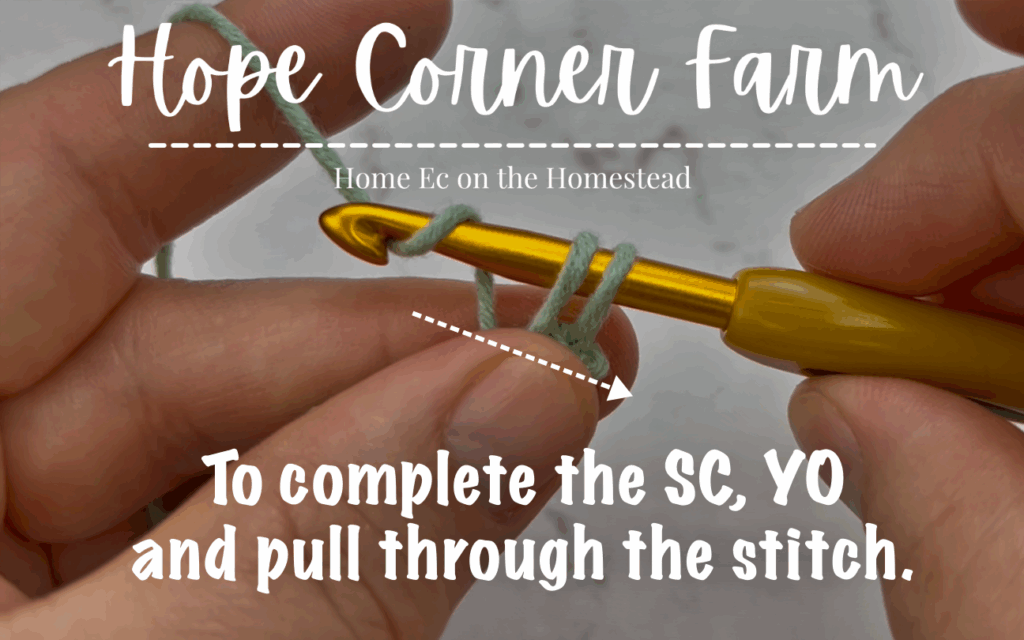
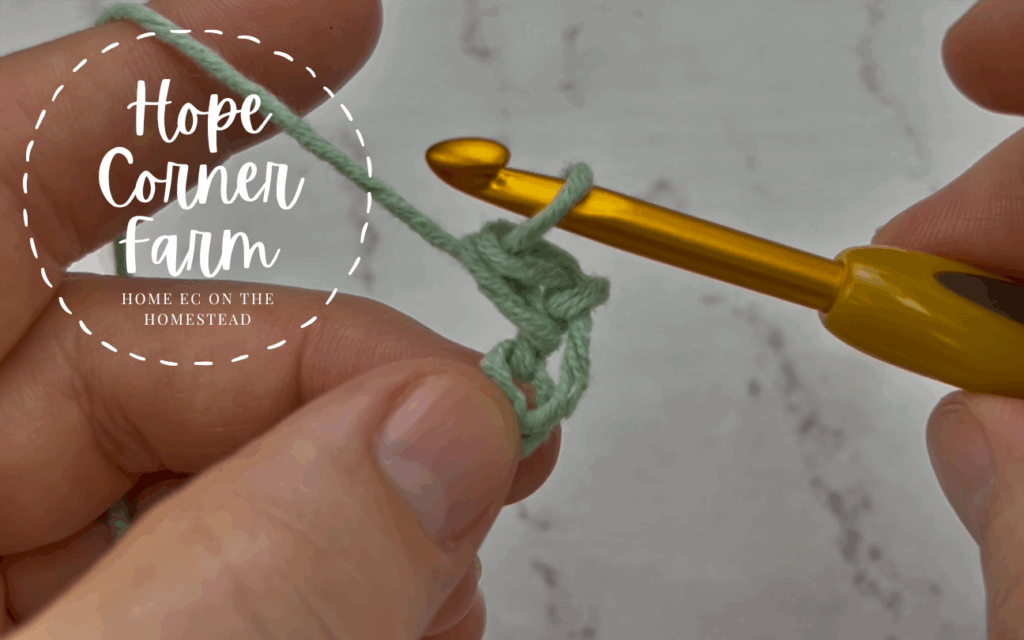
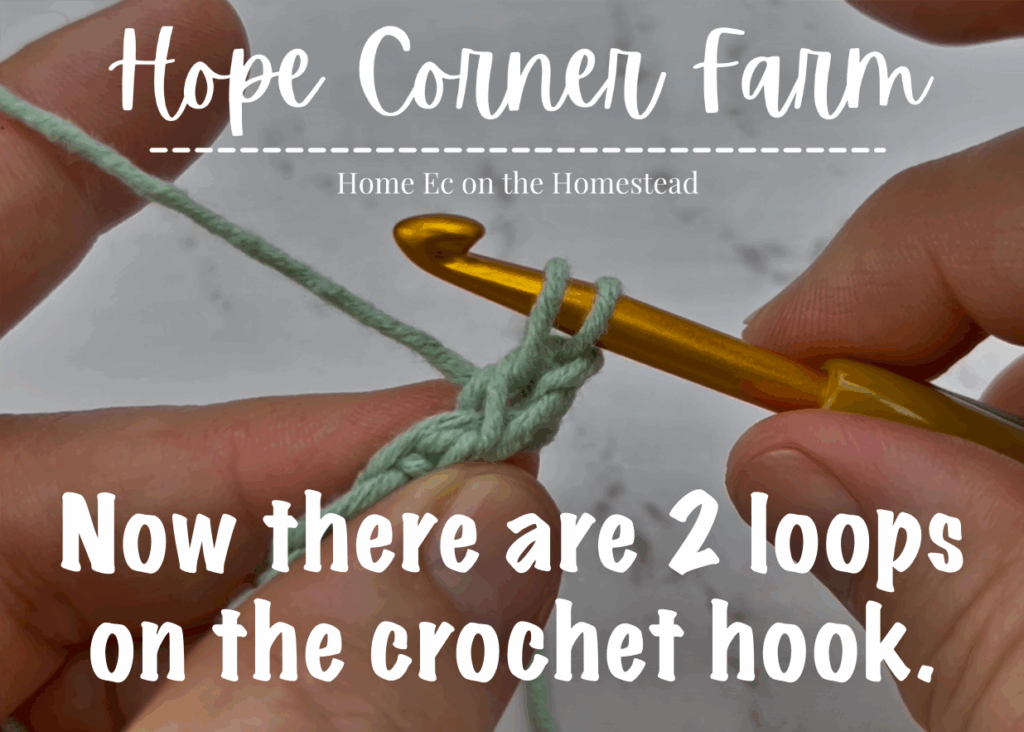
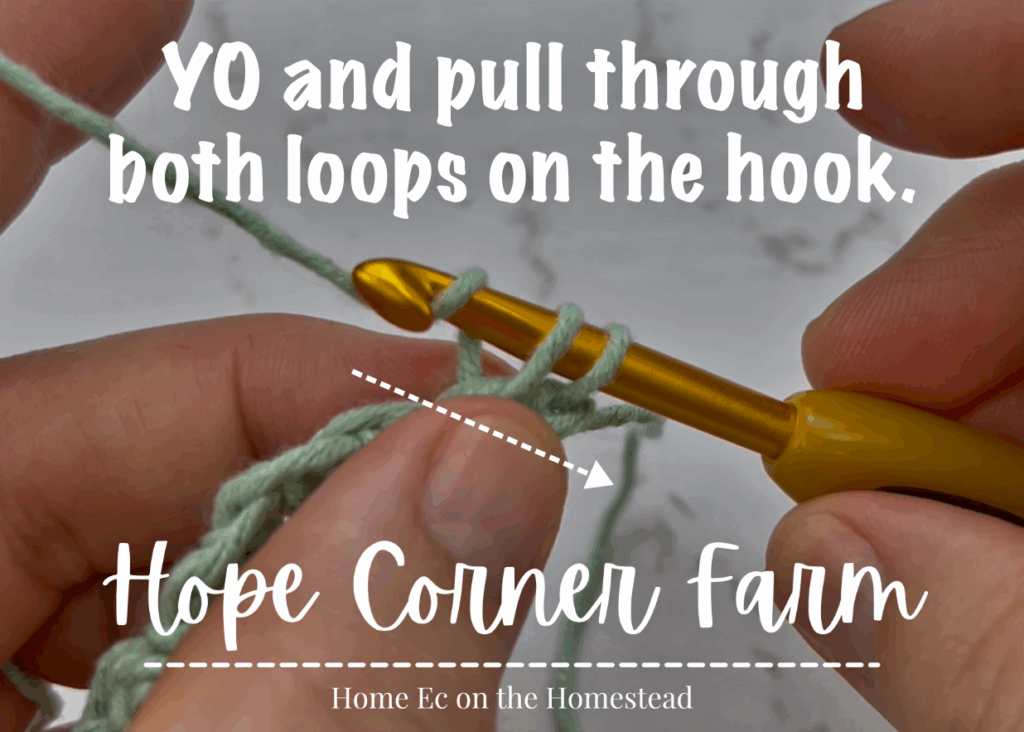
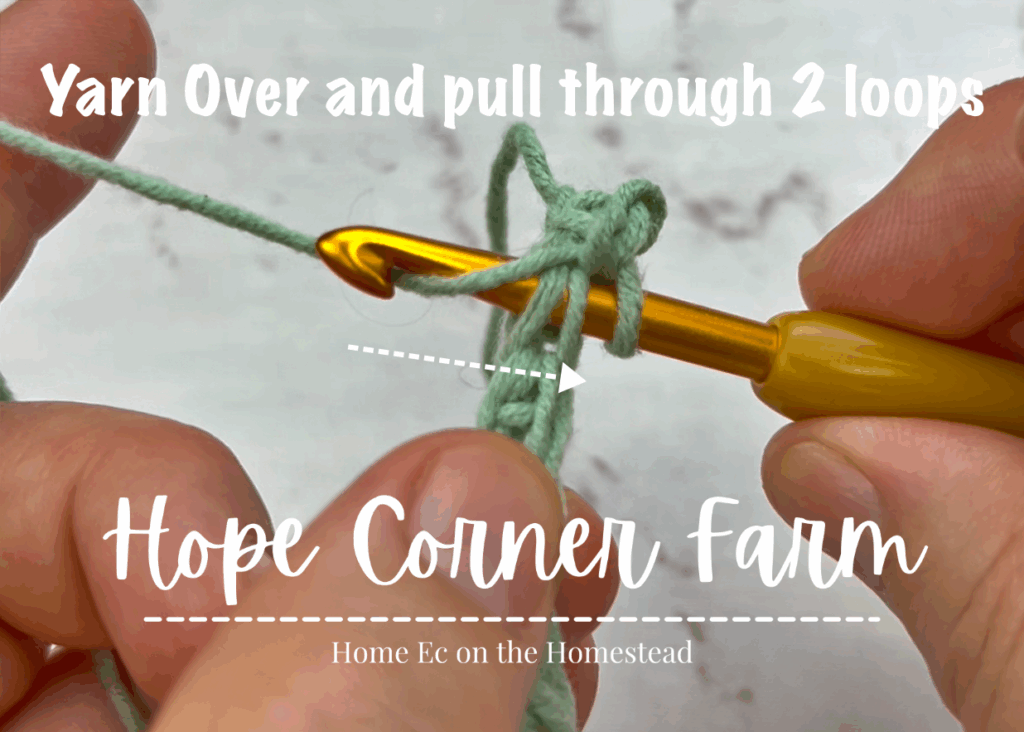
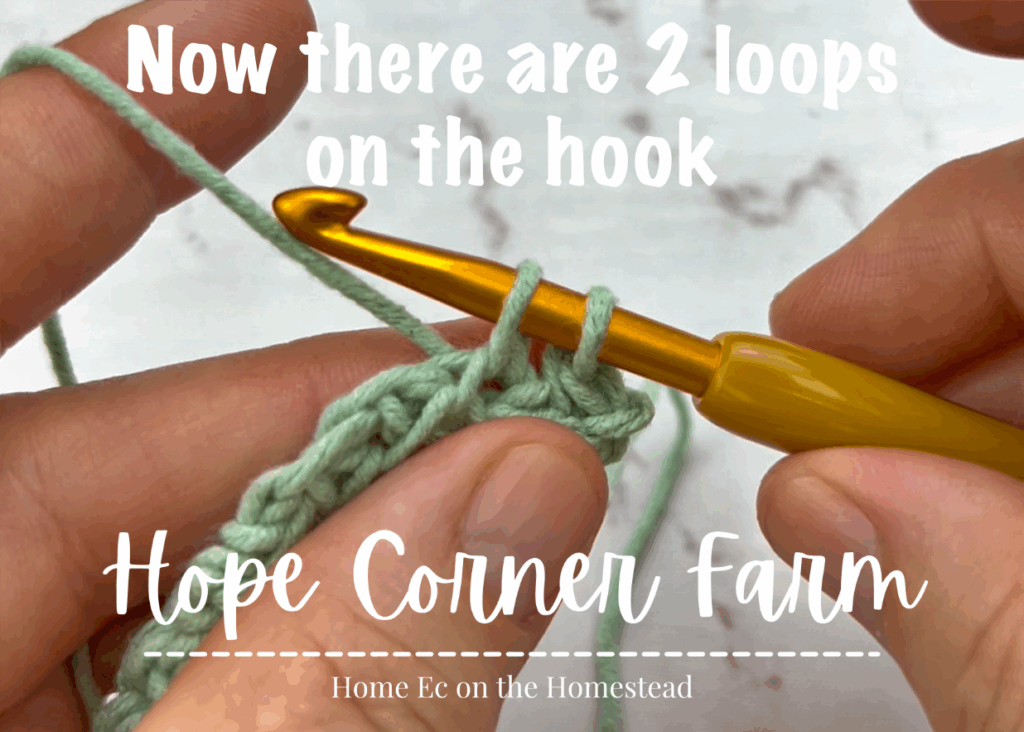
Finishing the Single Crochet:
Next yarn over and pull through the chain. There will be 2 loops on the hook. Then yarn over again and pull through both loops to complete the single crochet. Repeat across the chain (this row is a row of regular single crochets worked the same way into the chain).
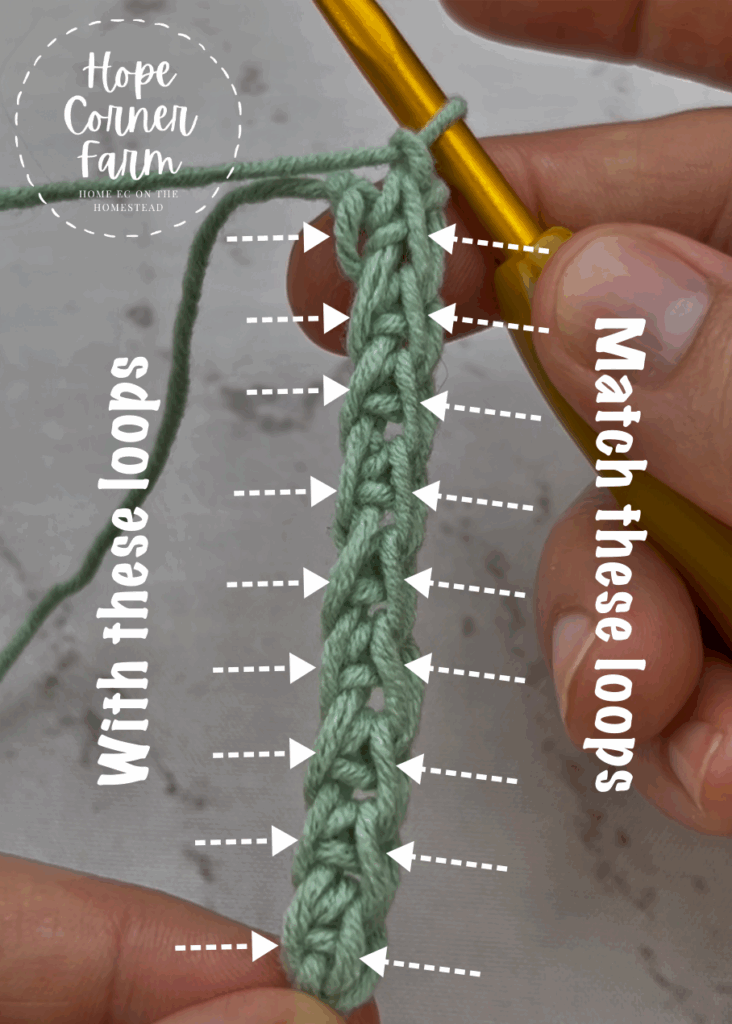
How to Thermal Single Crochet Row 2:
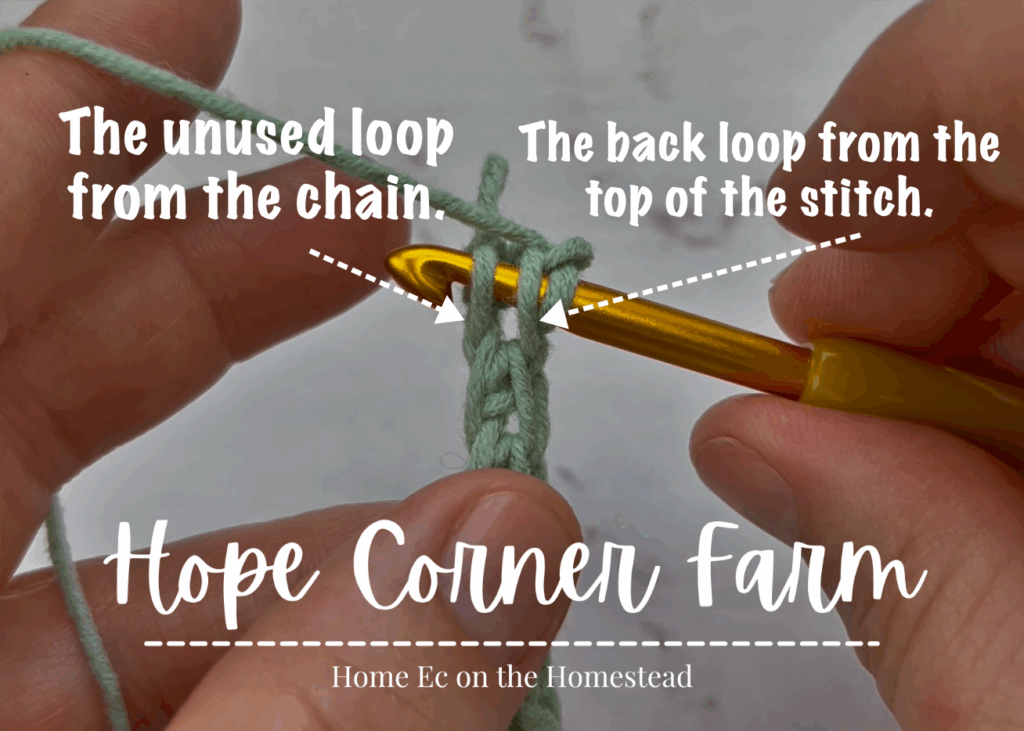
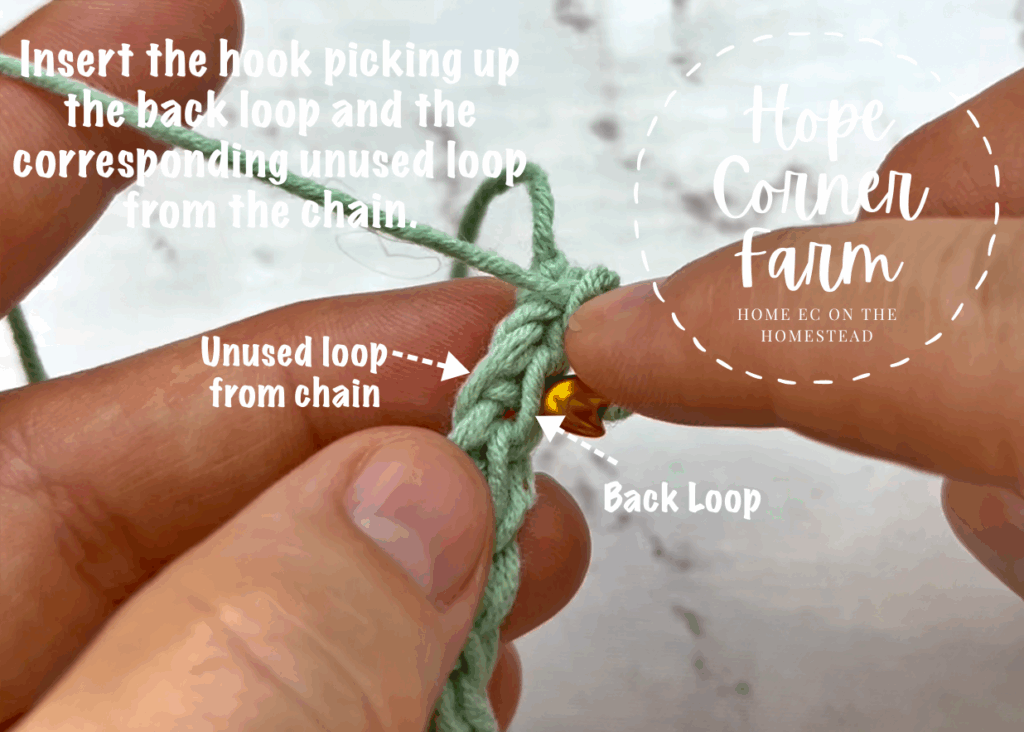
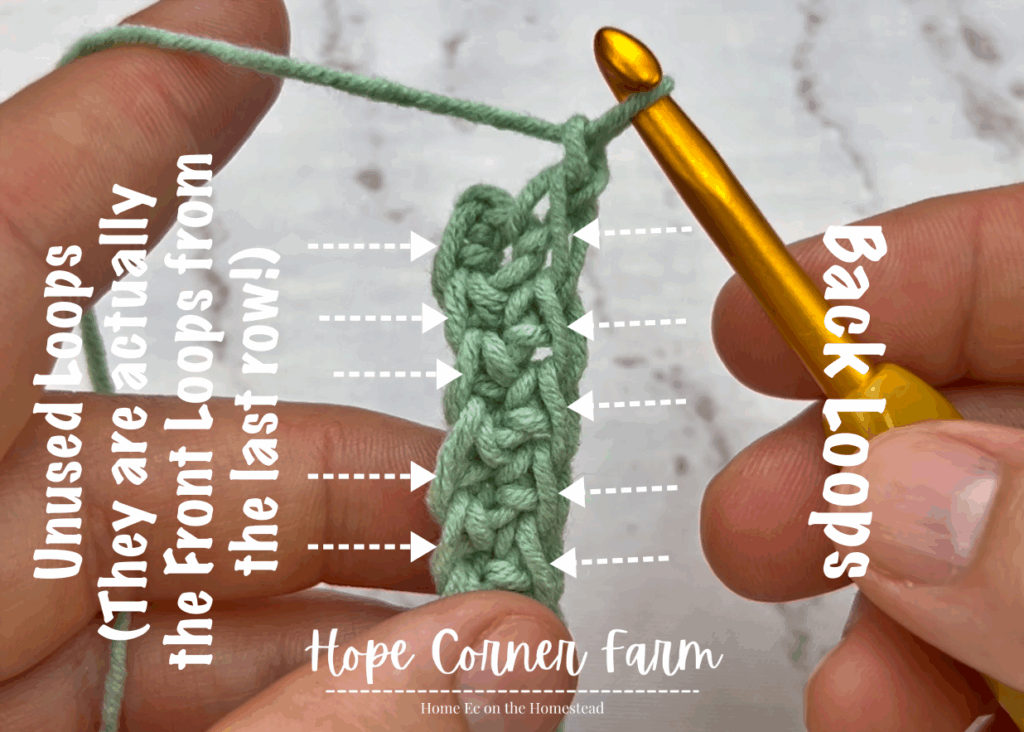
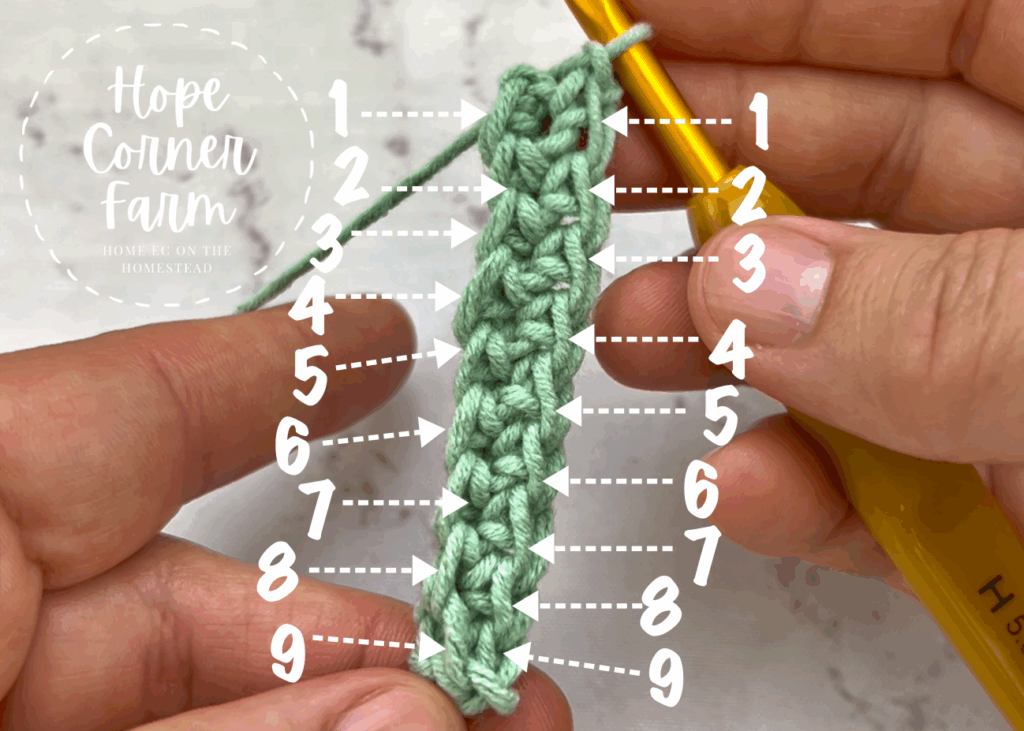
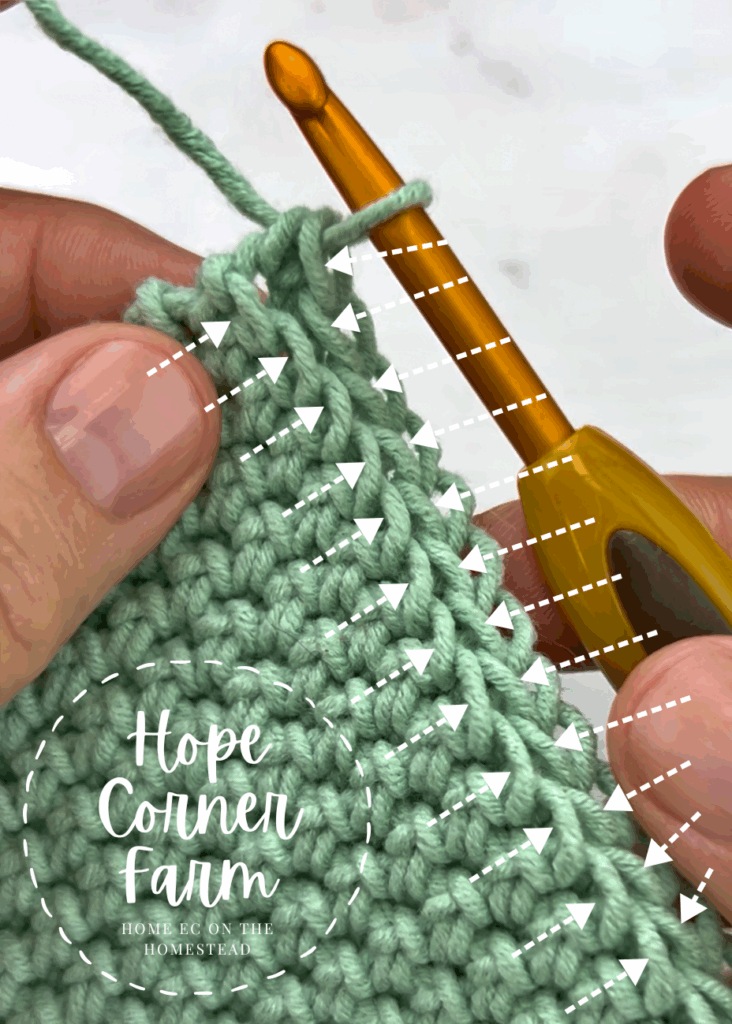
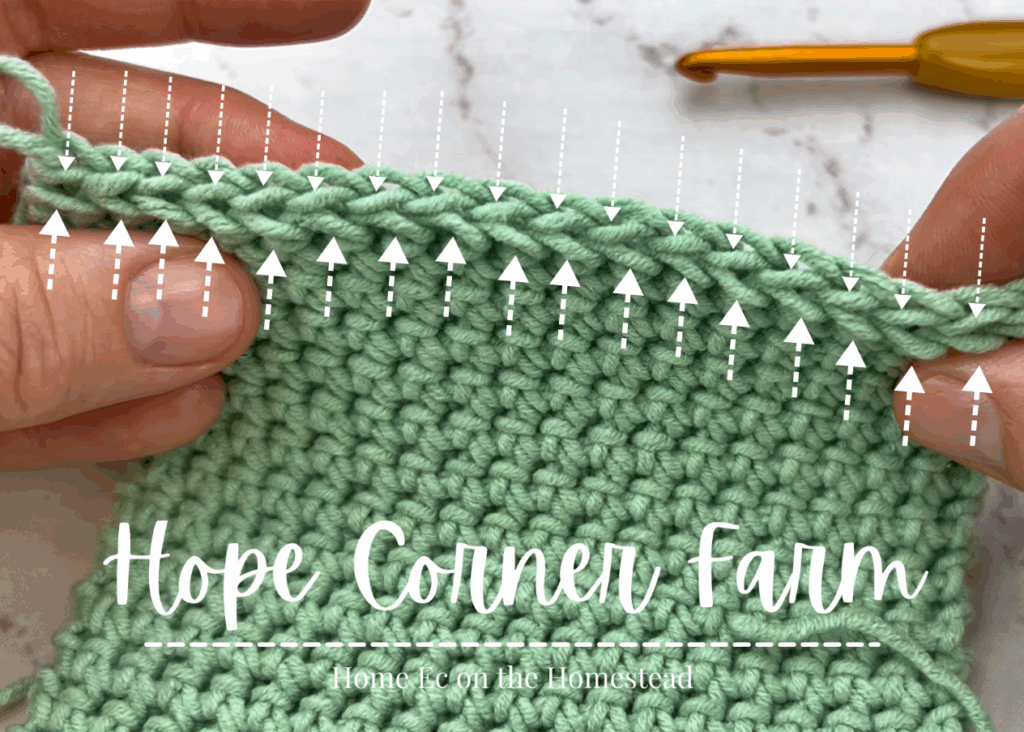
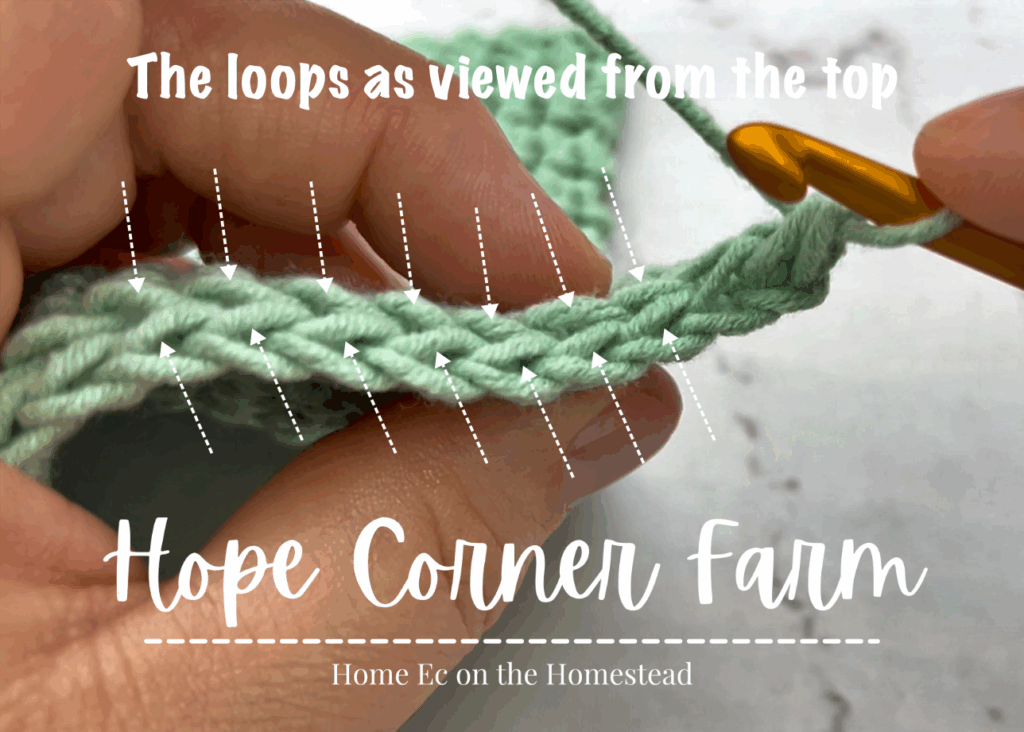
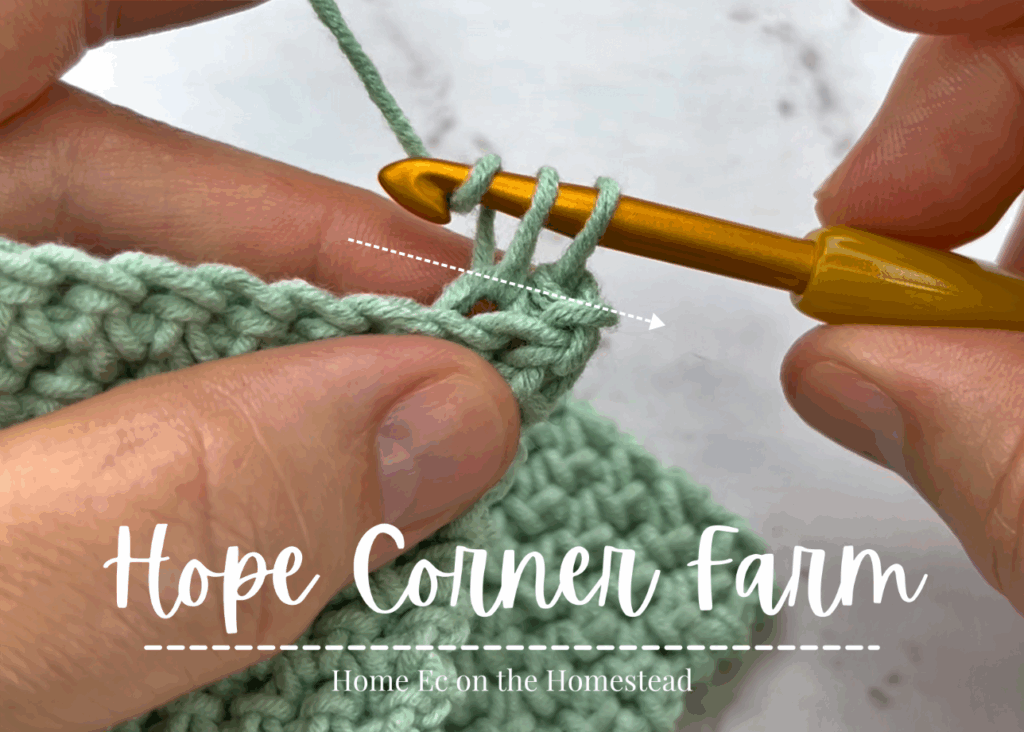
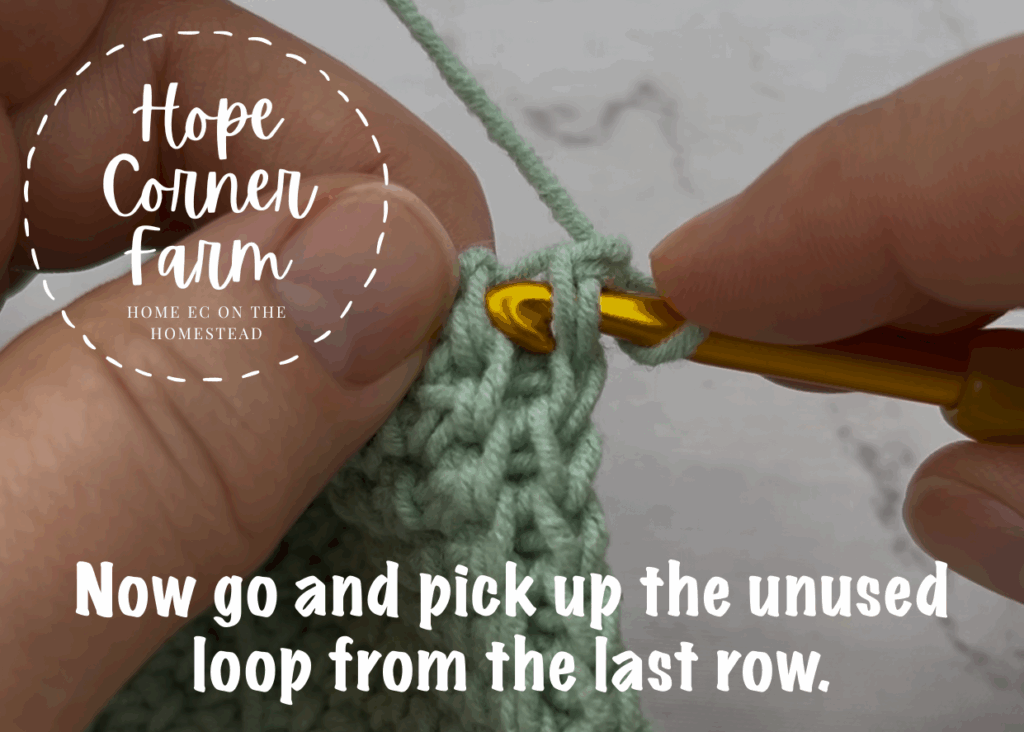
First it is important to identify where we work this row of stitches. The Thermal Single Crochet works a single crochet stitch across the BACK LOOP ONLY as well as the UNUSED LOOP FROM THE PREVIOUS ROW. For Row 2, this unused loop is the 3rd part of the chain that we did not work into from Row 1. See the picture below for details. Note: I do not really turn my work with this stitch until later rows because it is easier to identify what loops to work into when holding my crochet the way I do in the picture.
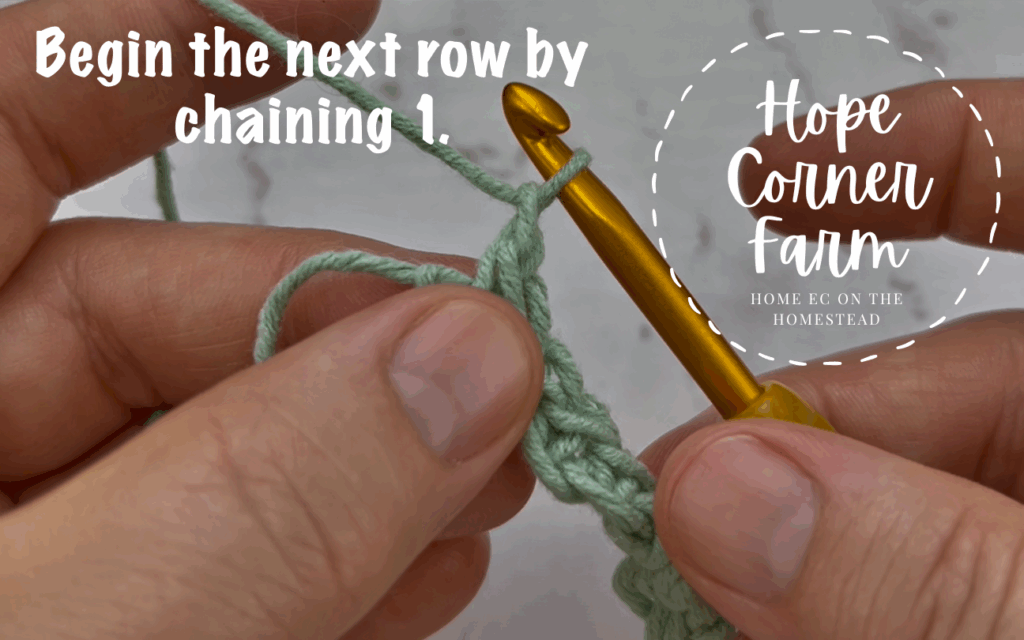
Row 2 Step 1:
Now to start Row 2 chain 1, but DO NOT turn your work.
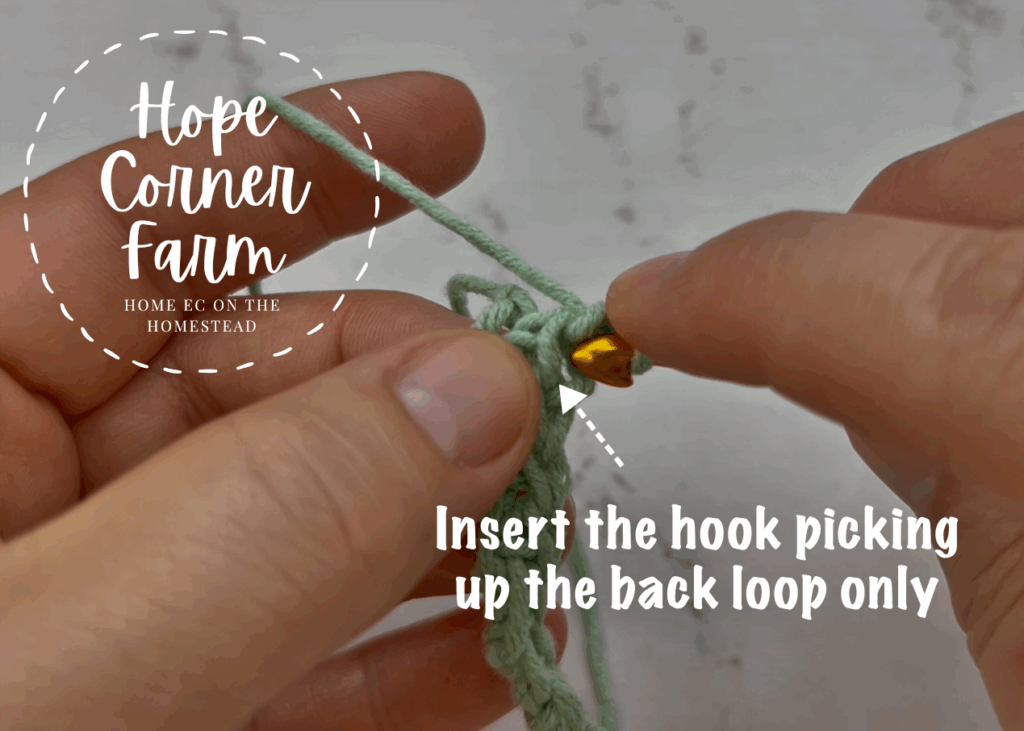
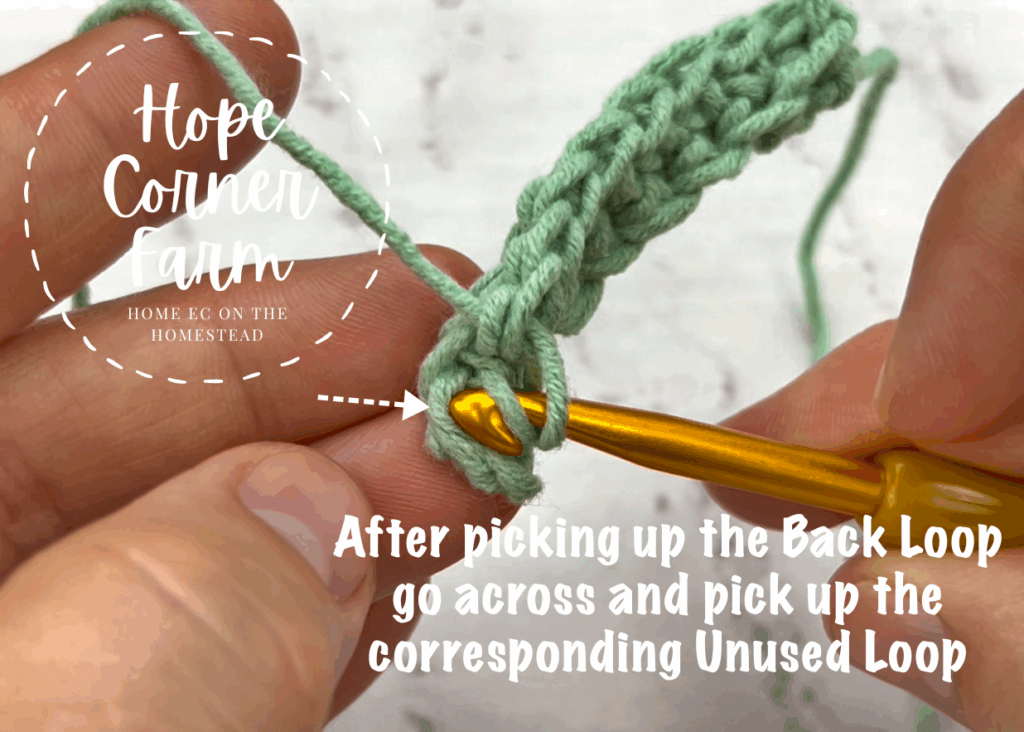
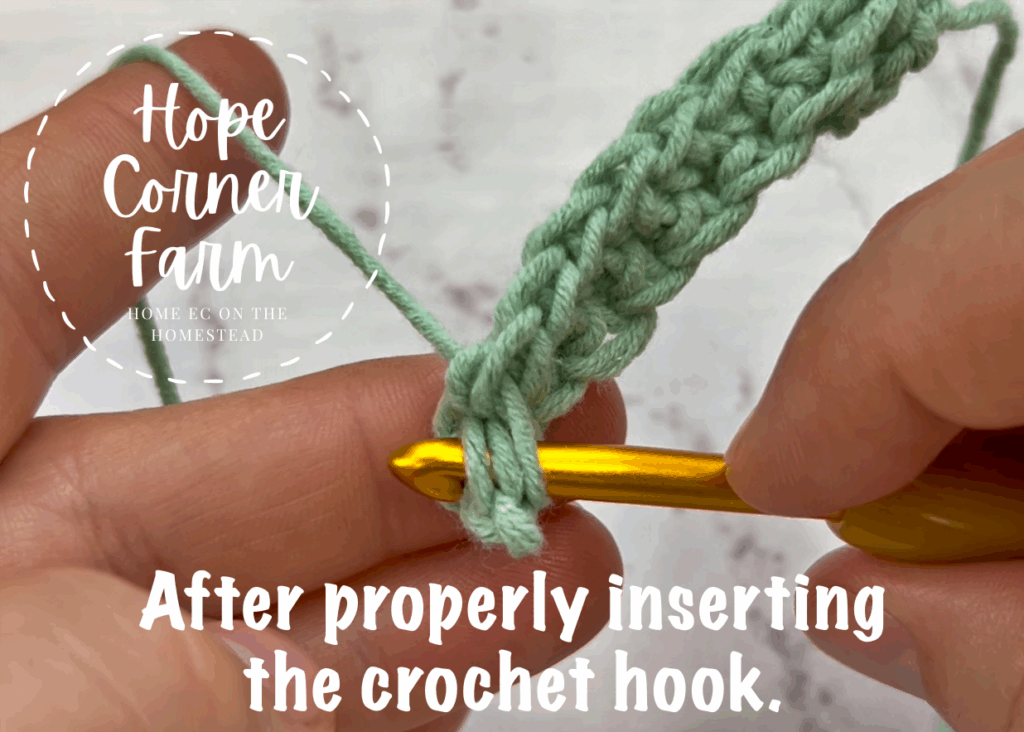
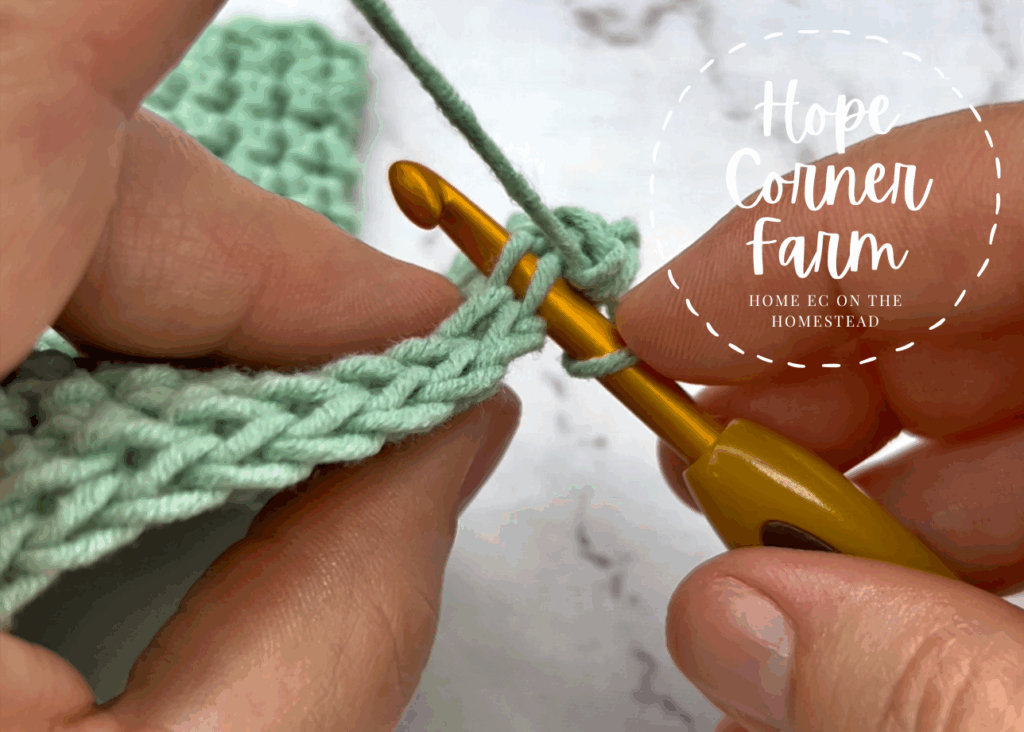
Step 2:
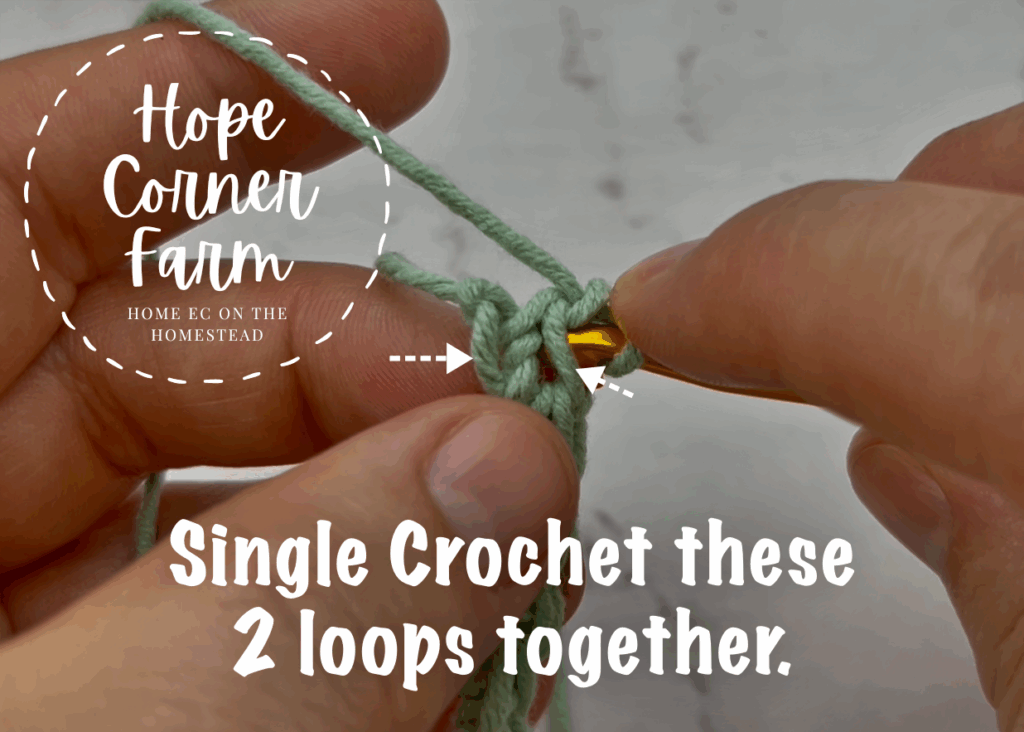
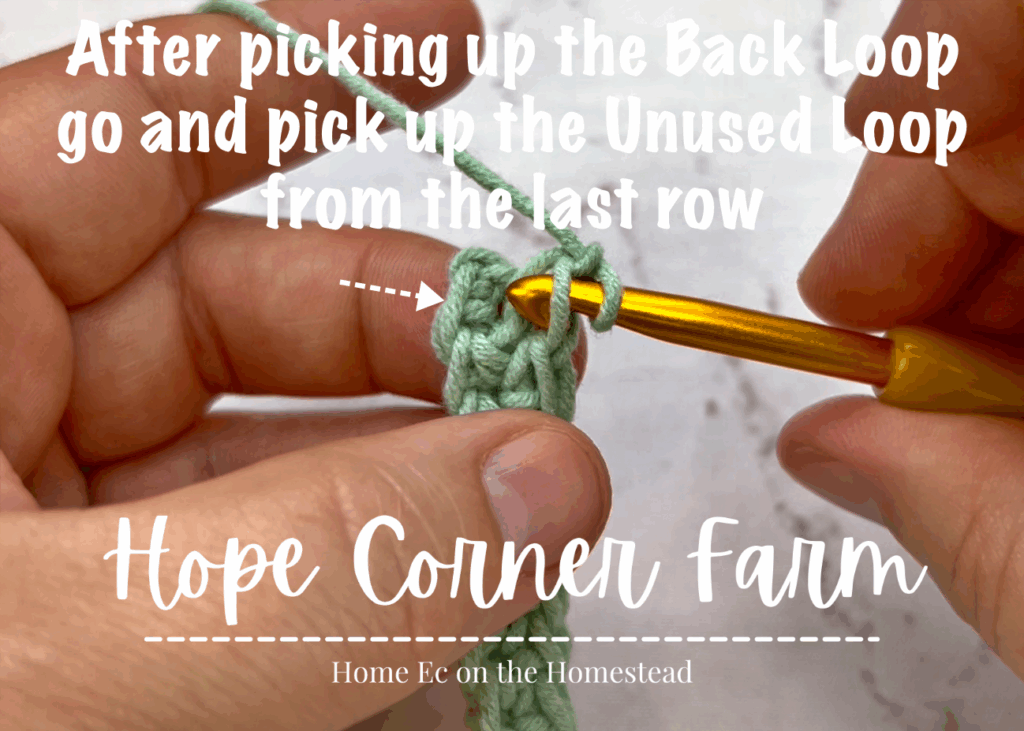
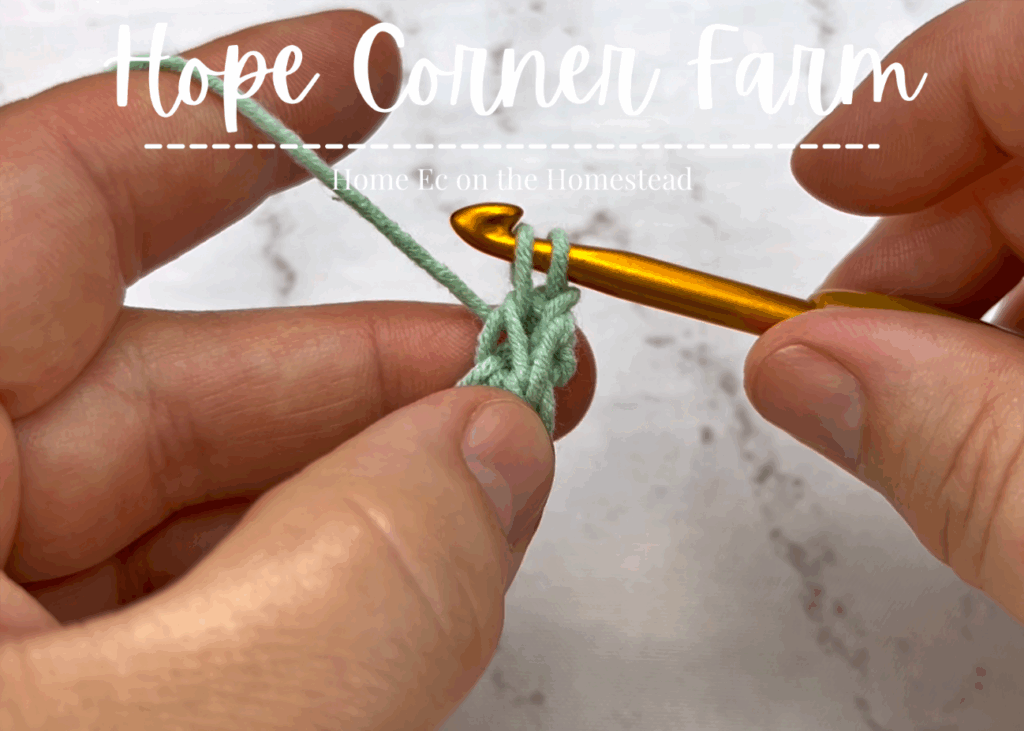
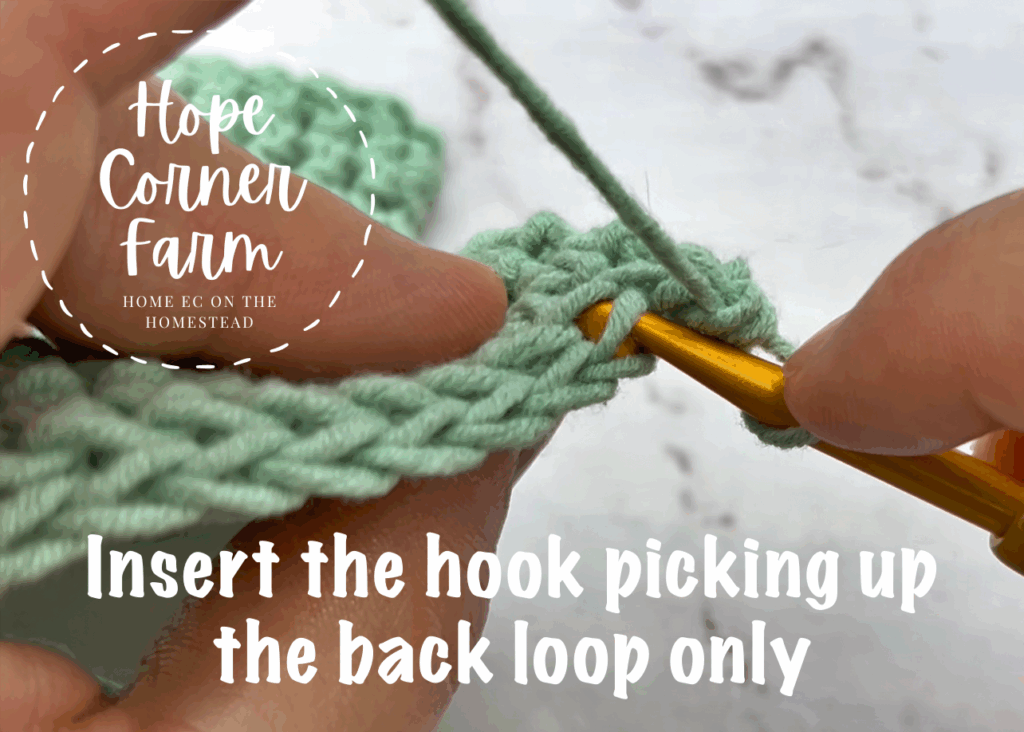
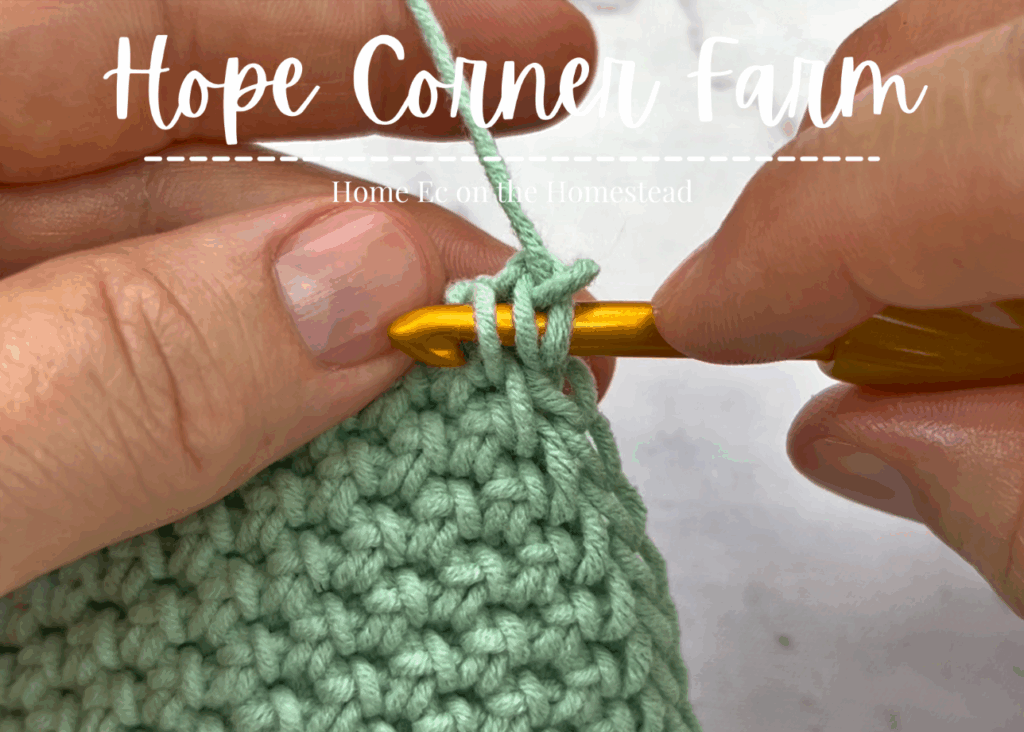
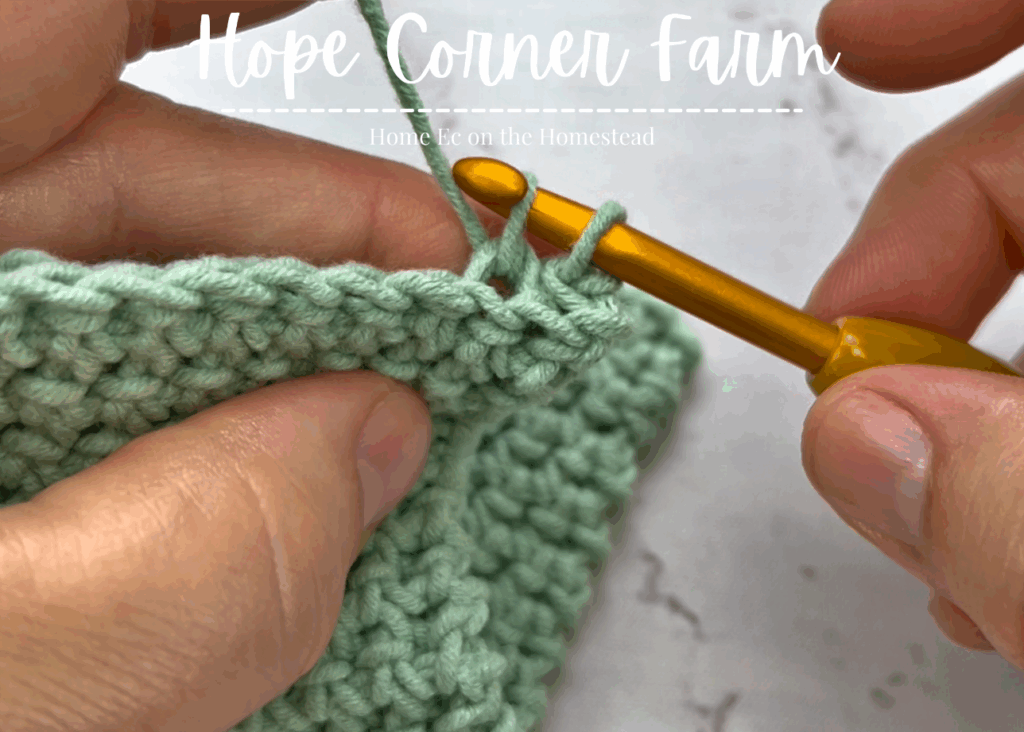
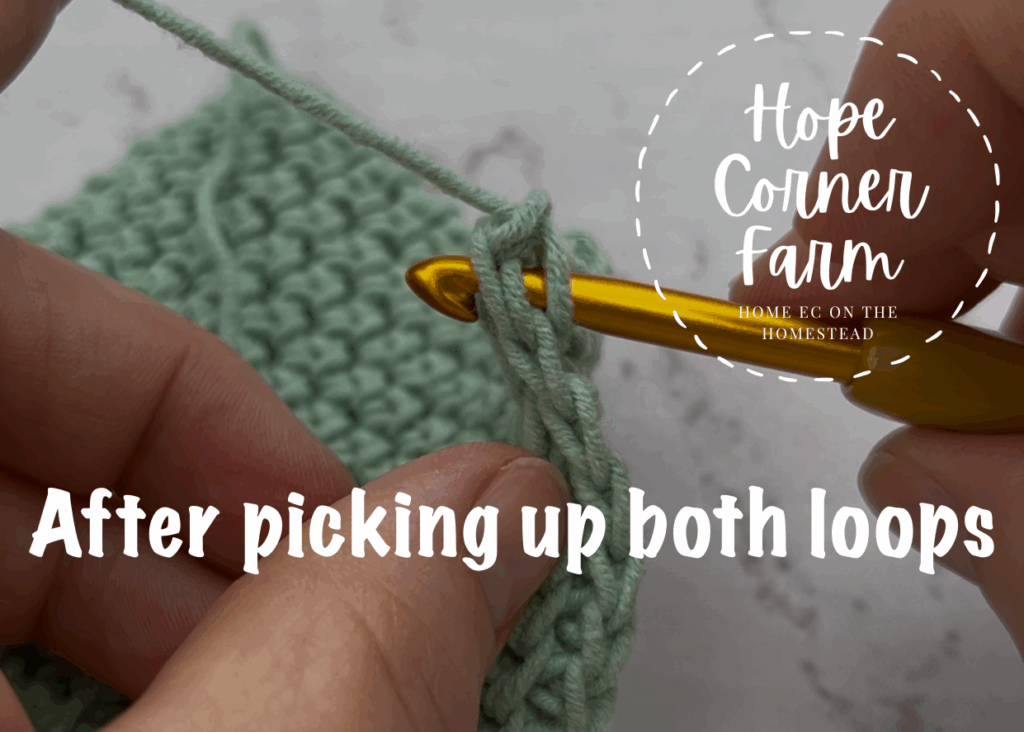
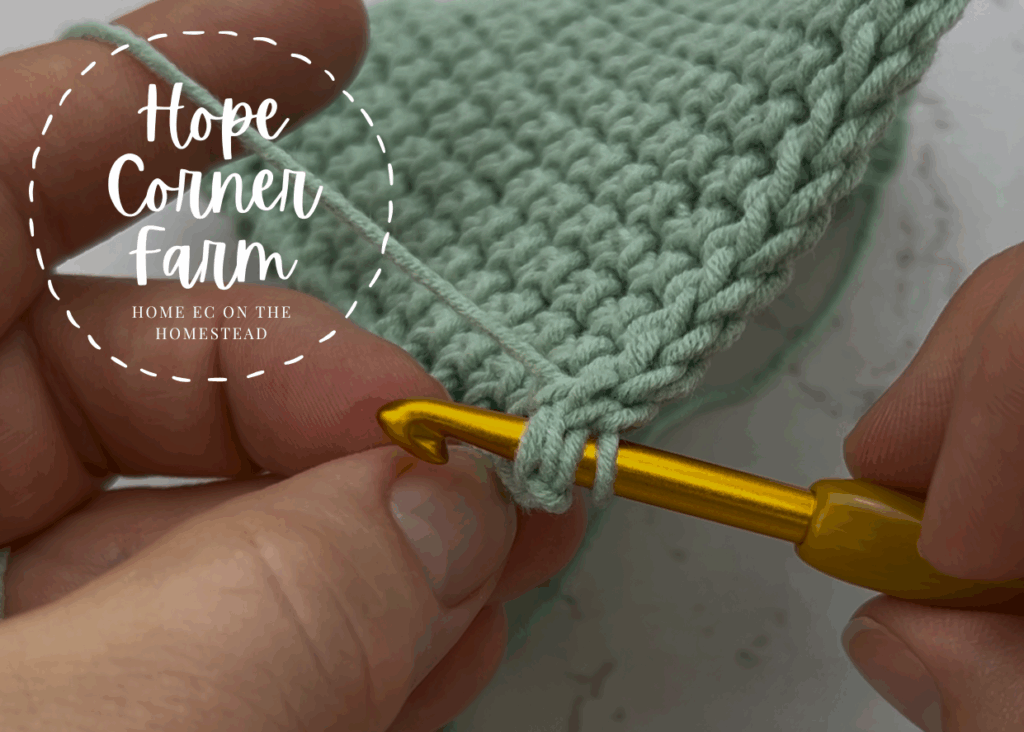
Next after chaining 1, insert the crochet hook picking up only the Back Loop and then pick up the Unused Loop. For the Thermal Single Crochet we will be single crocheting these 2 loops together.
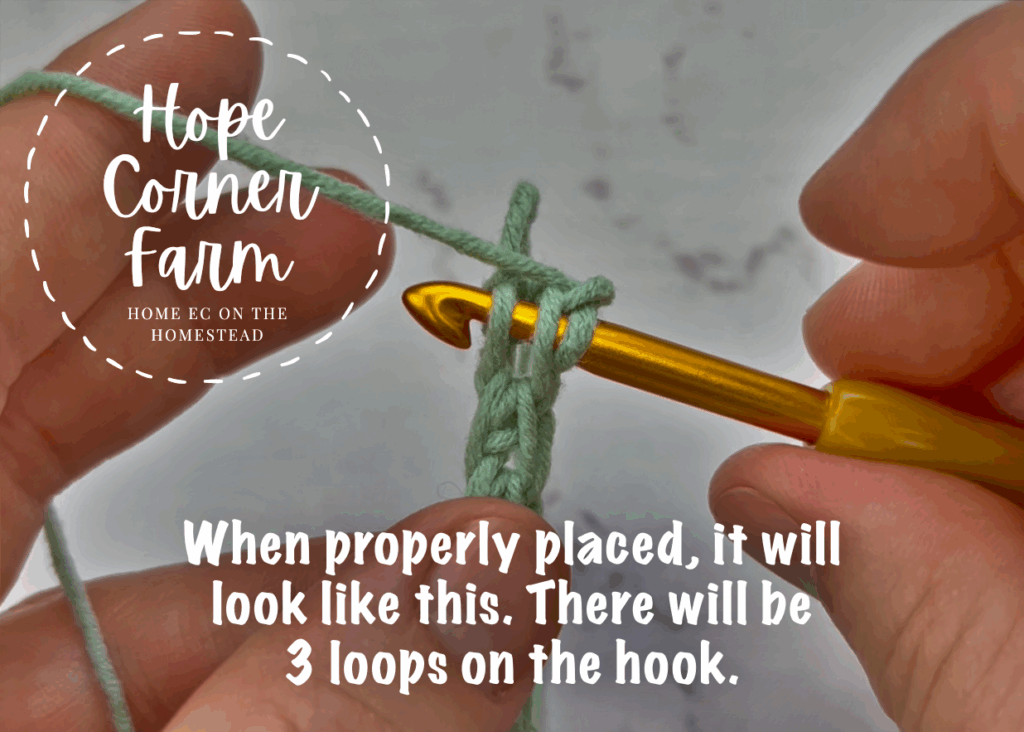
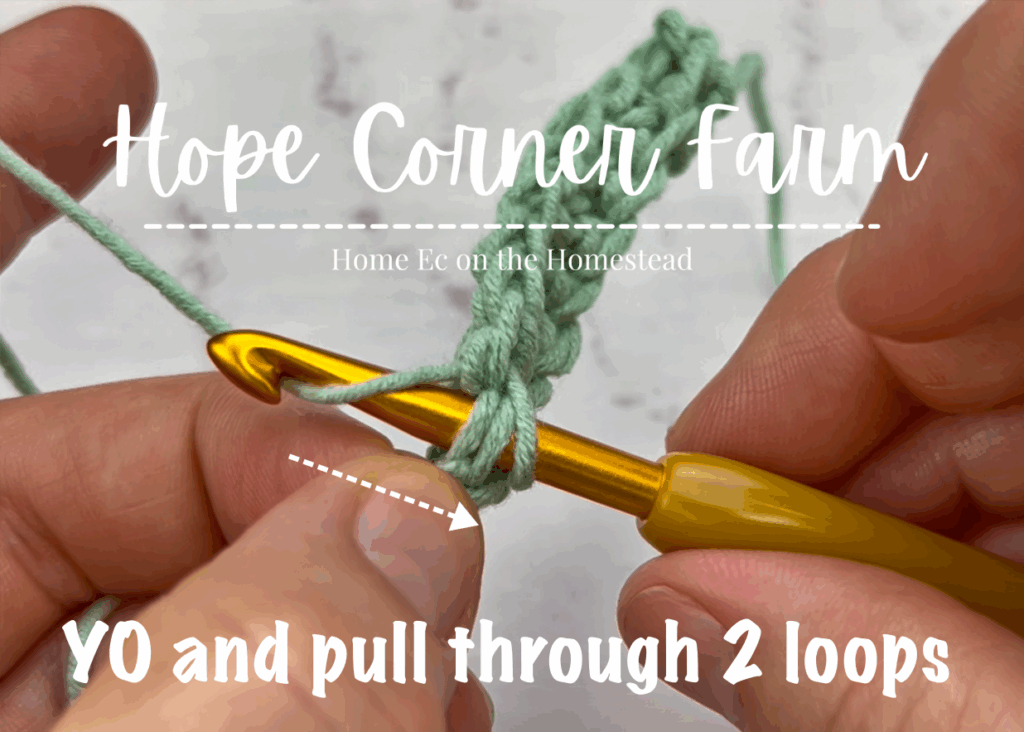
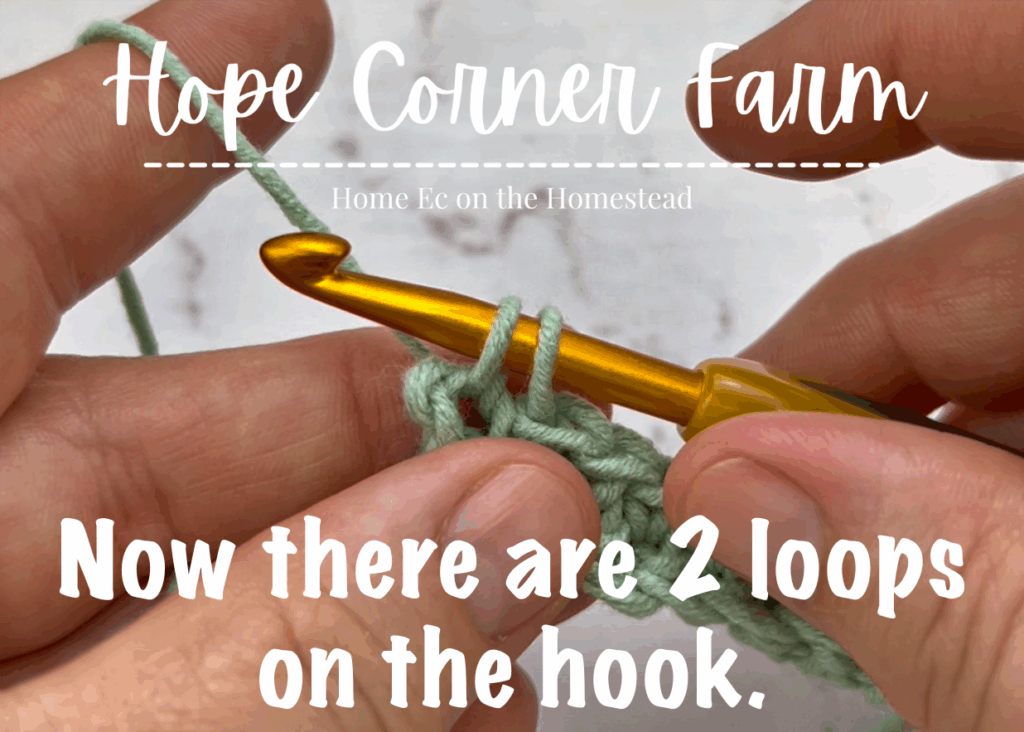
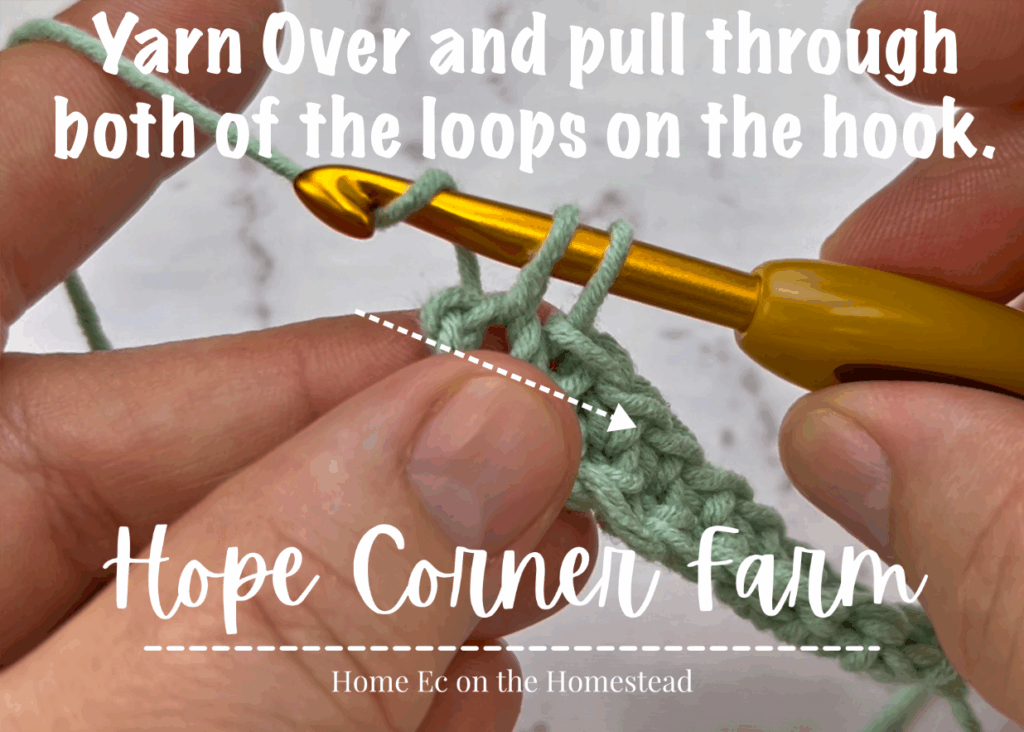
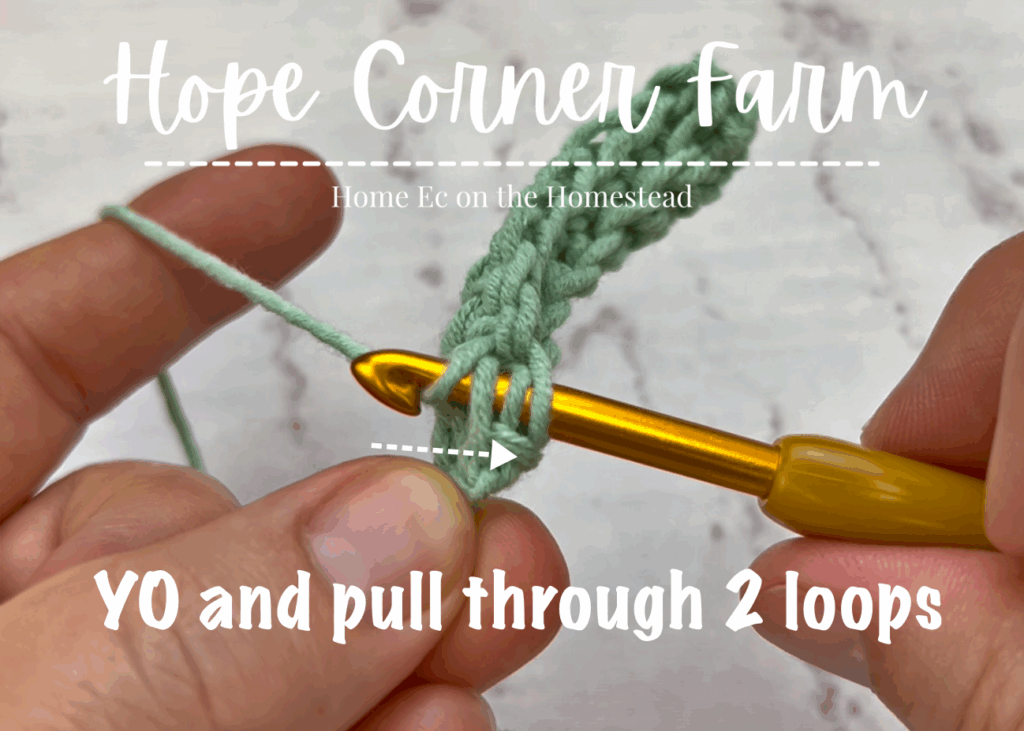
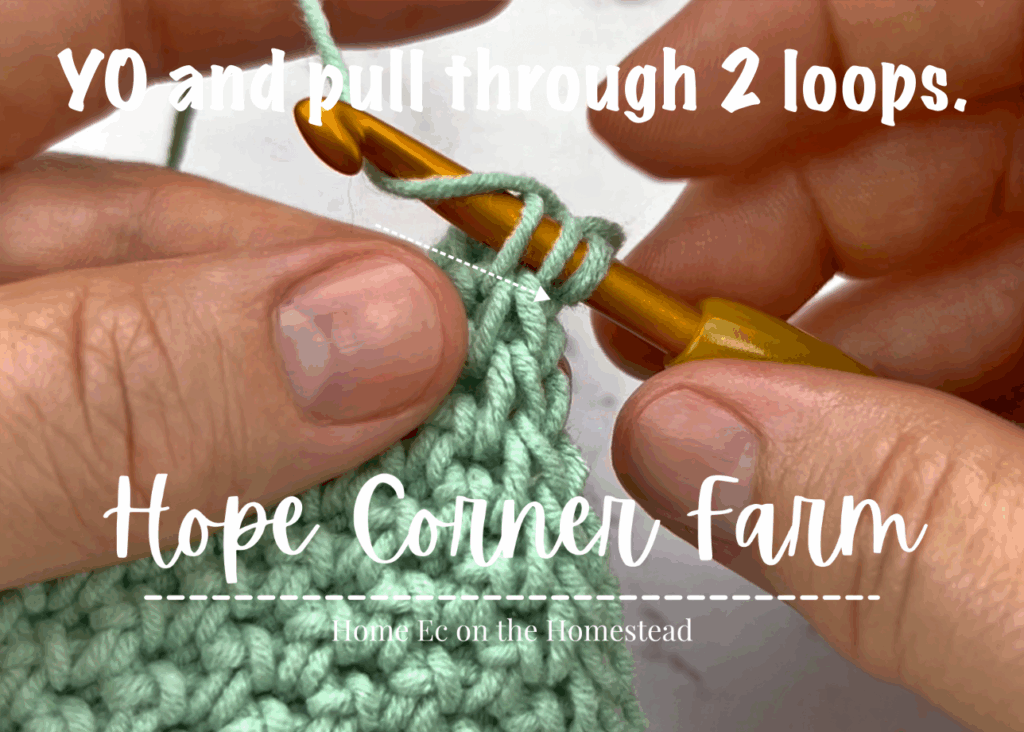
Thermal SC Step 3:
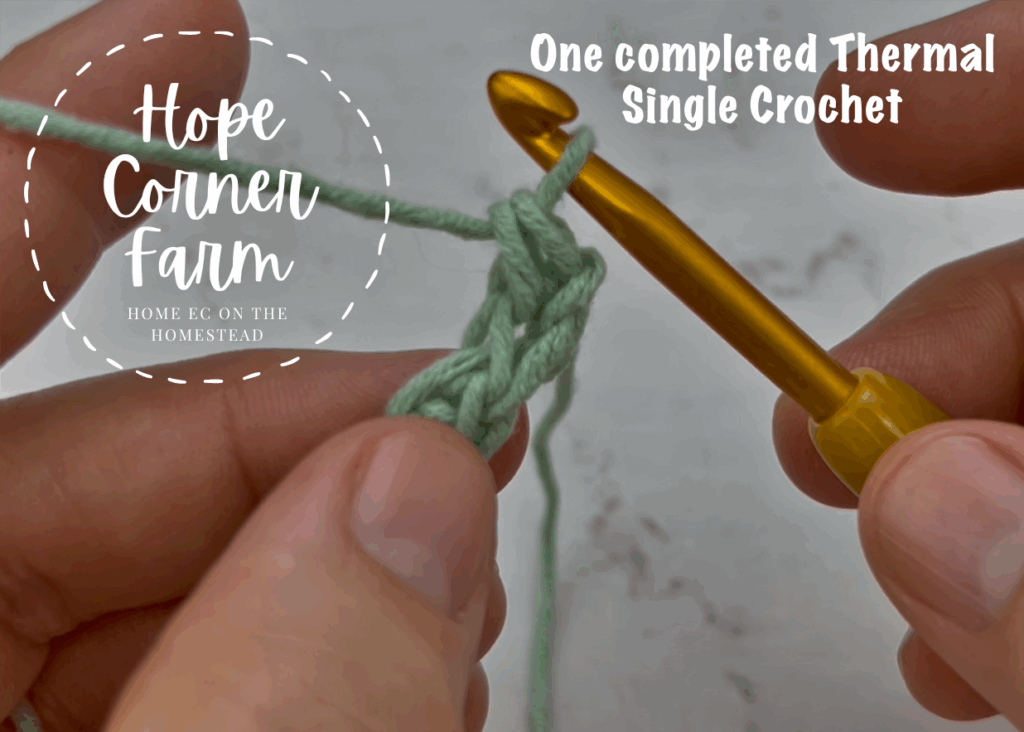
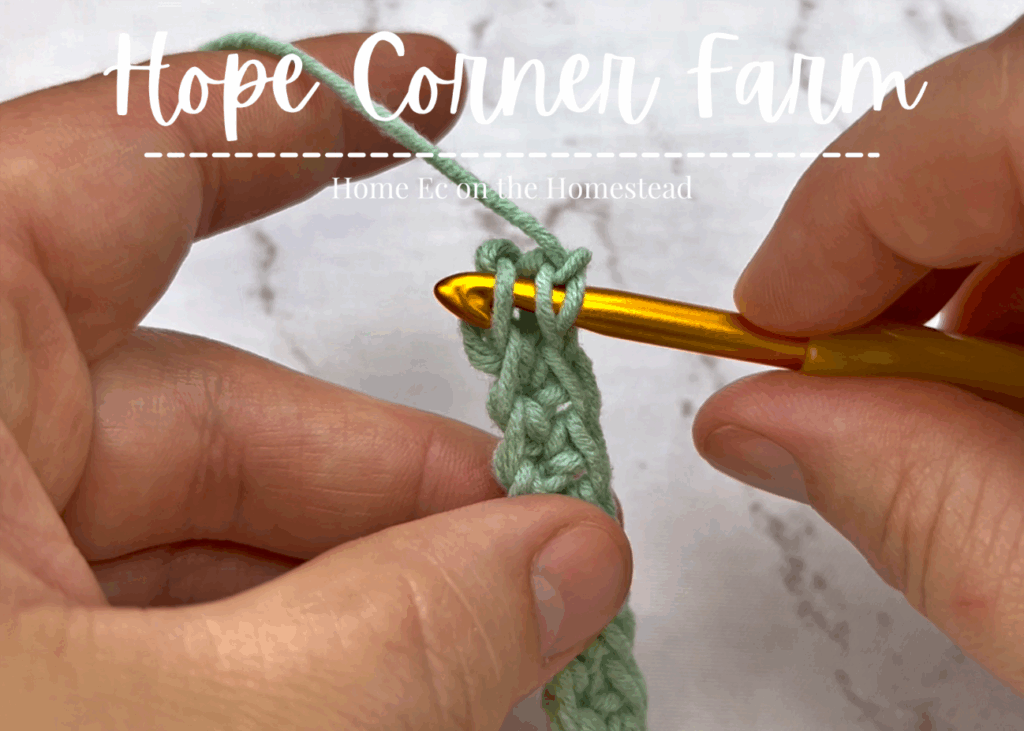
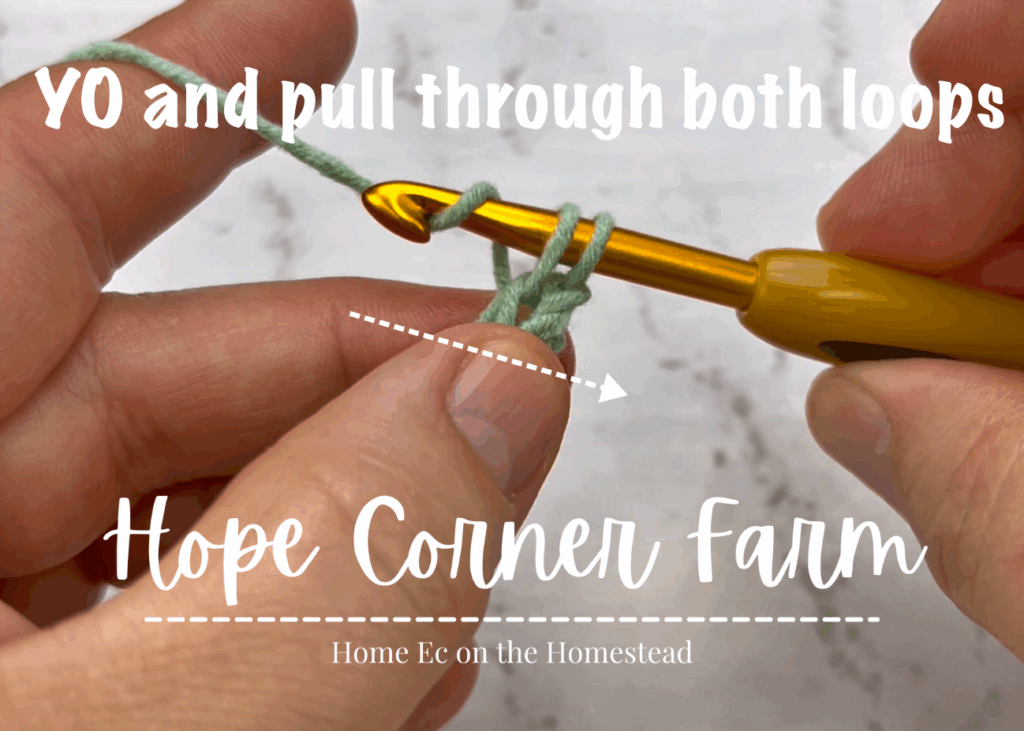
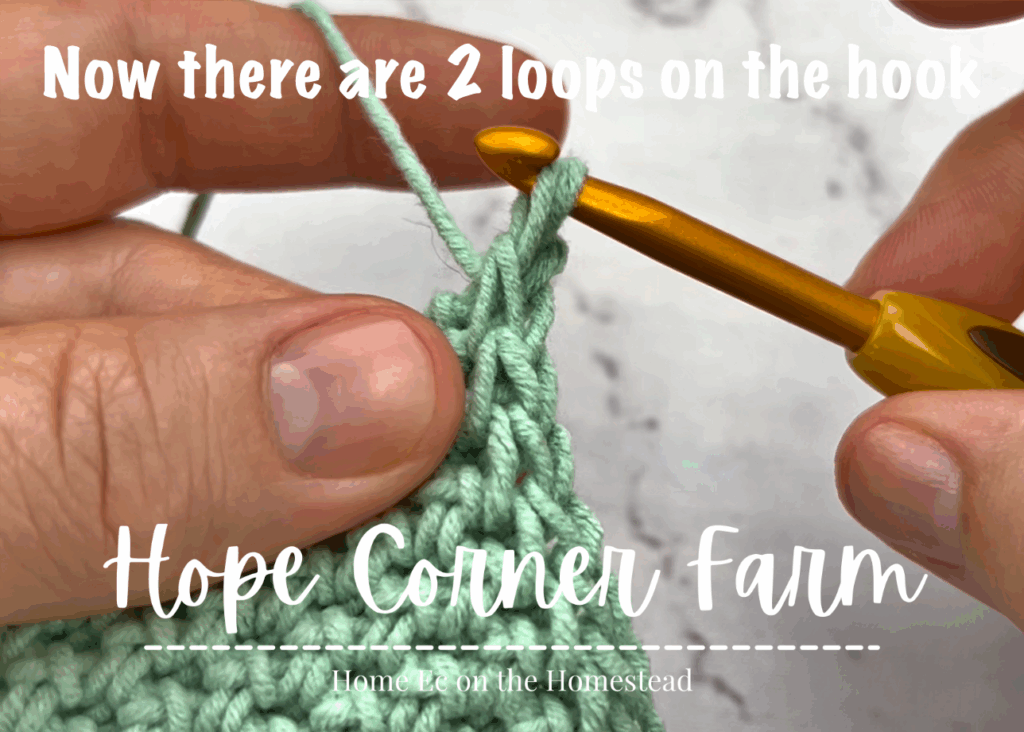
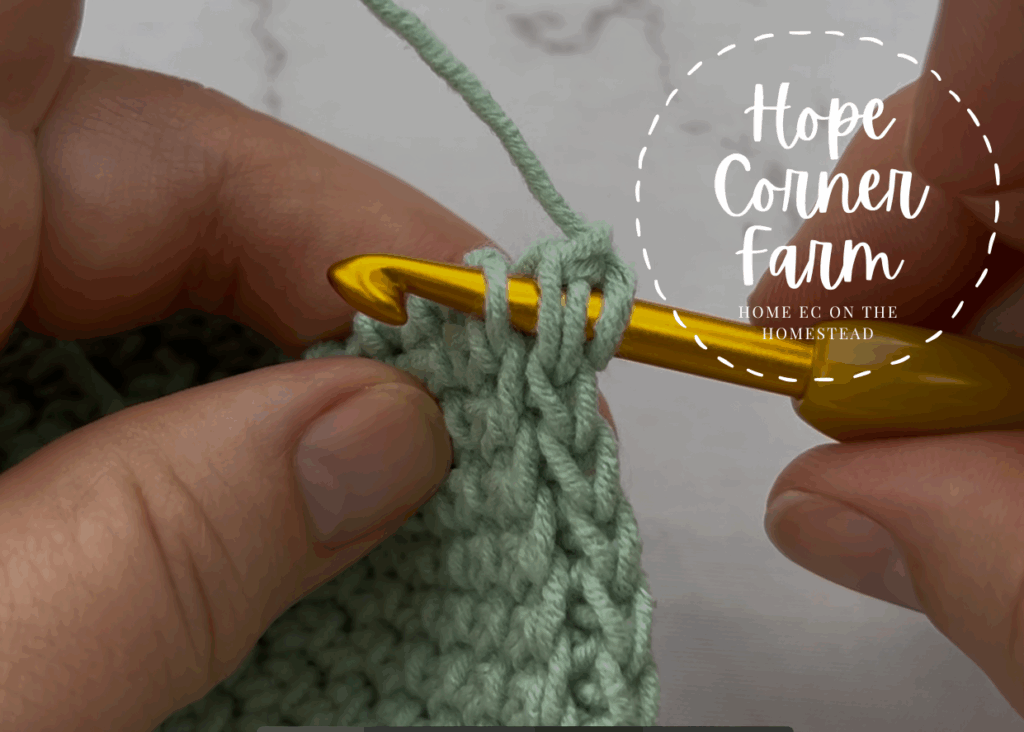
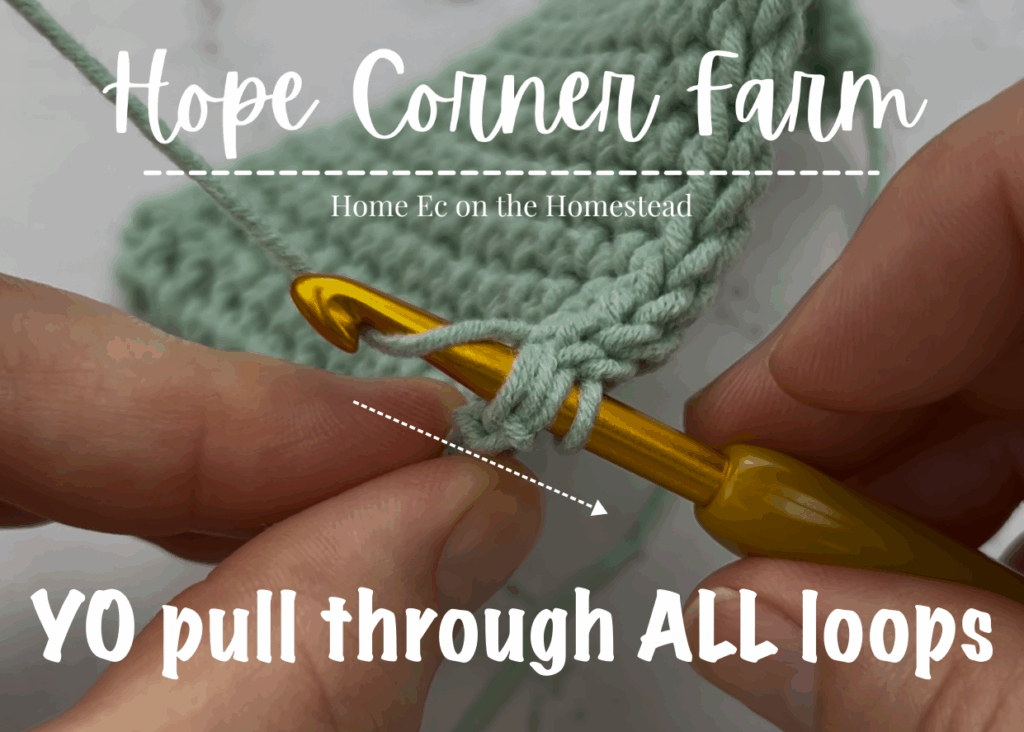
Now yarn over and pull through 2 of the loops on the hook (we are pulling through the Unused Loop and the Back Loop). There will be 2 Loops remaining on the hook at the end of this step.
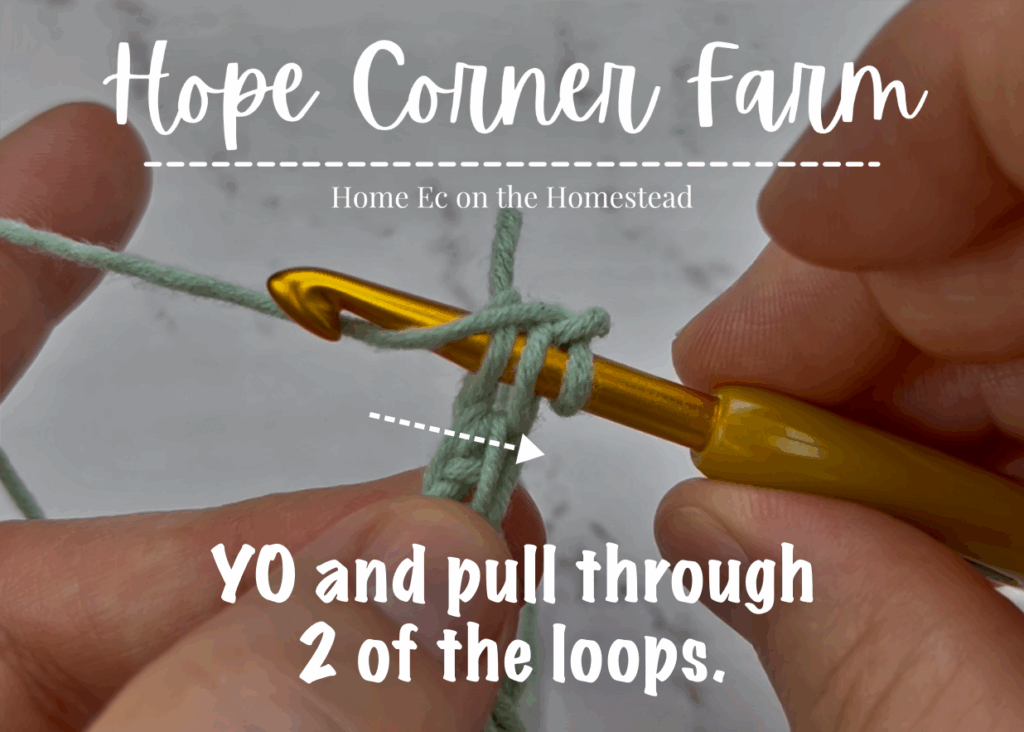
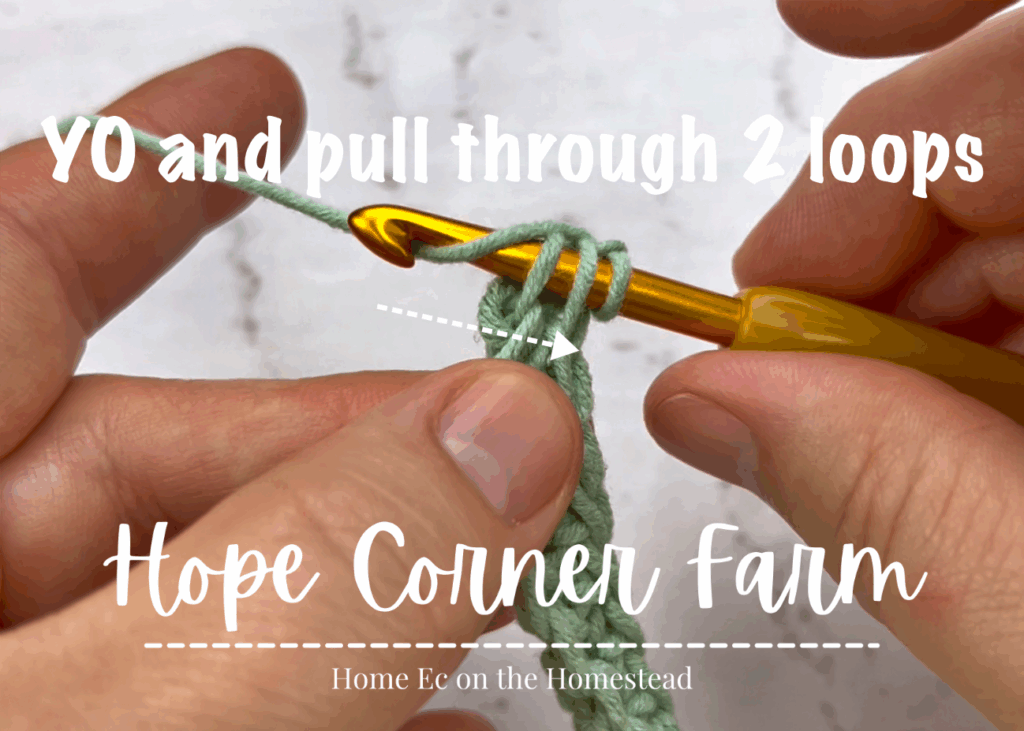
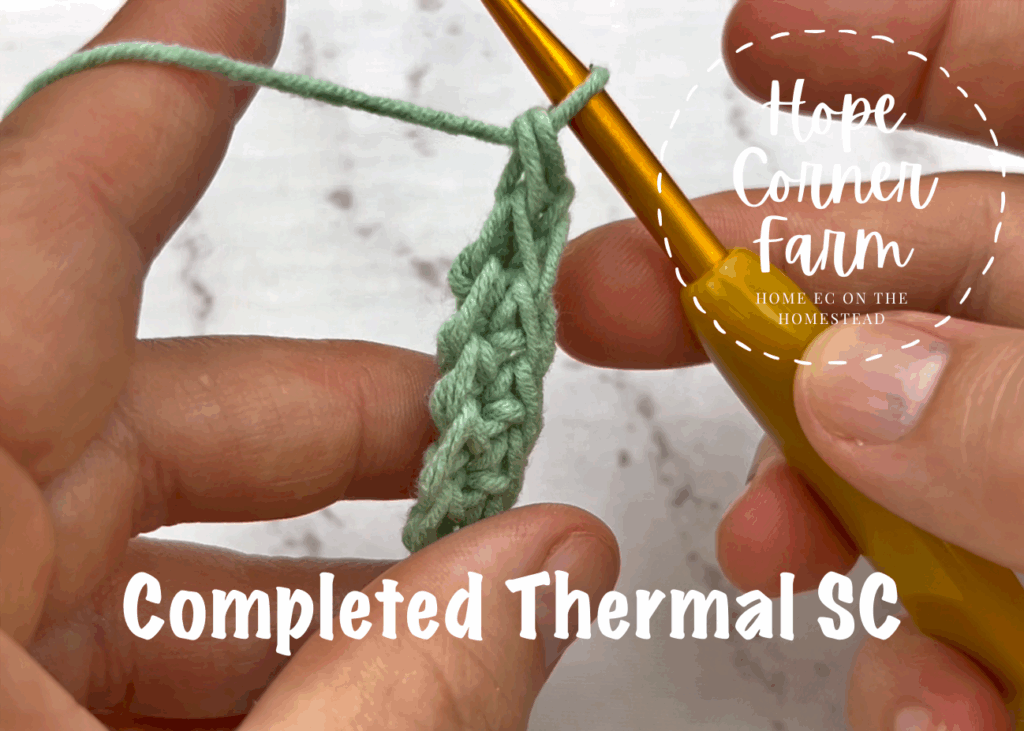
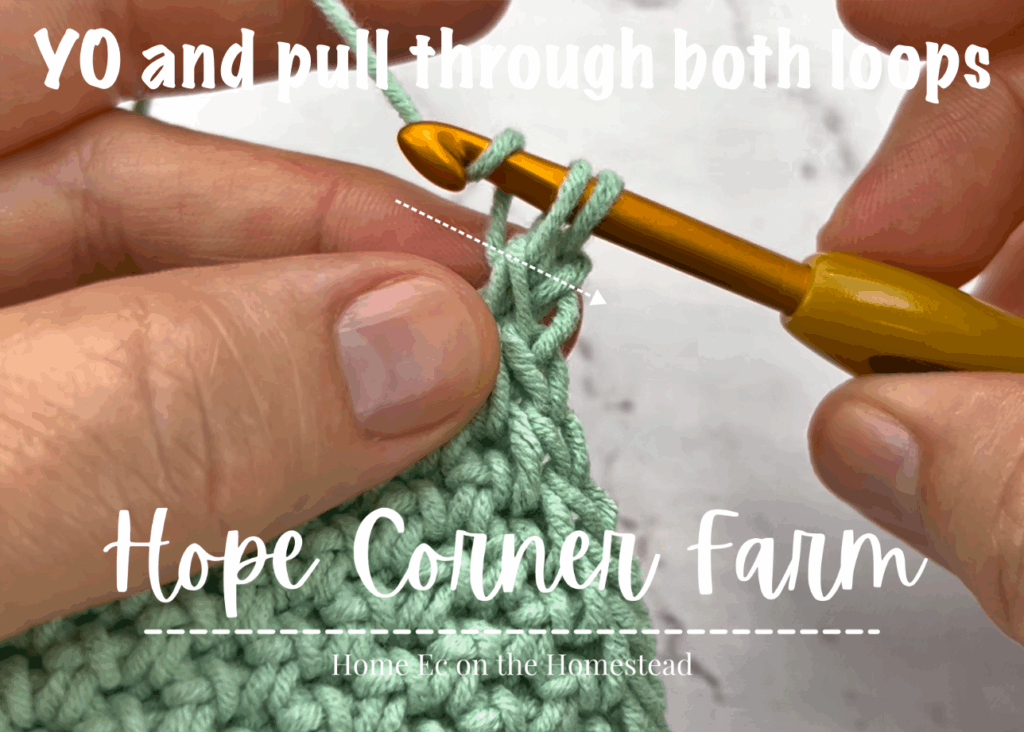
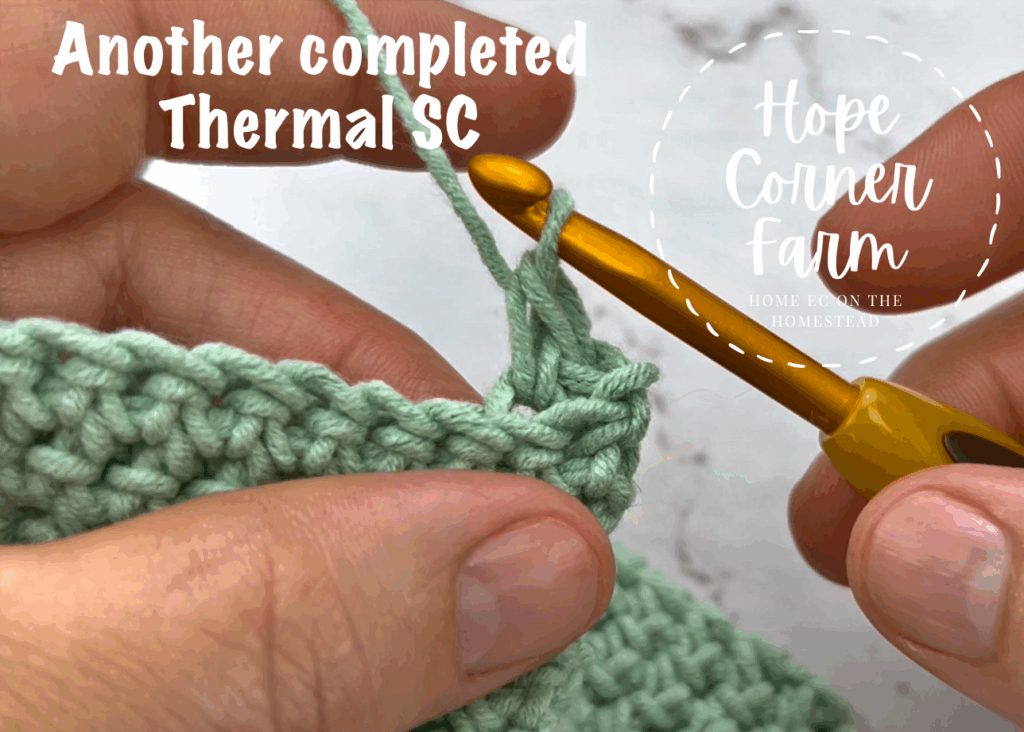
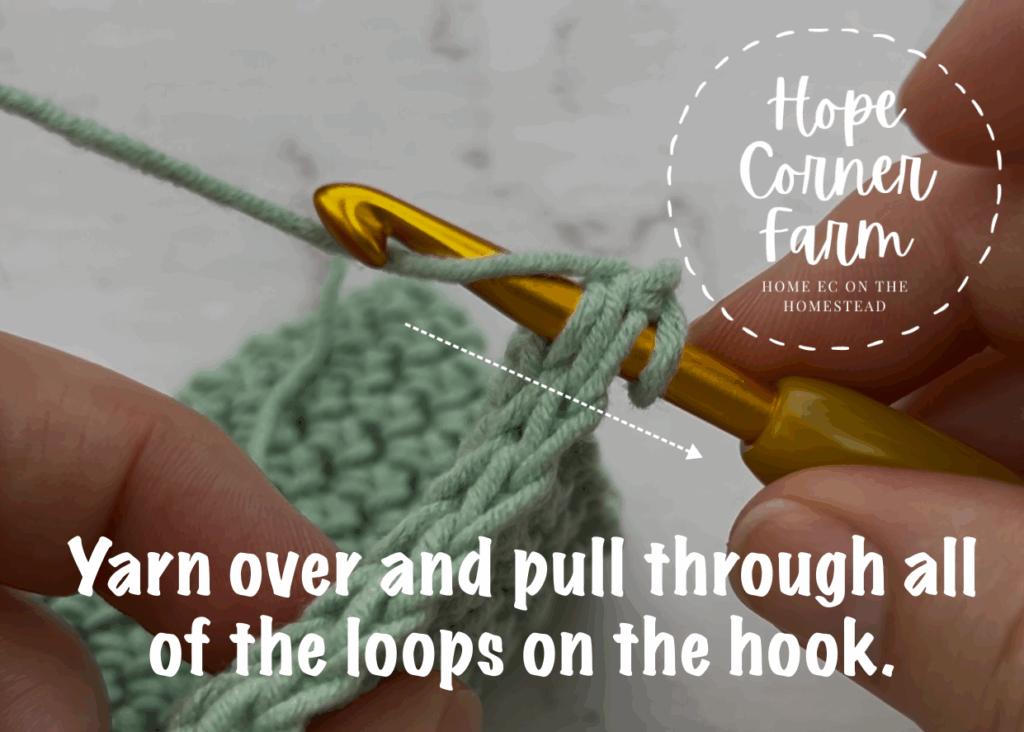
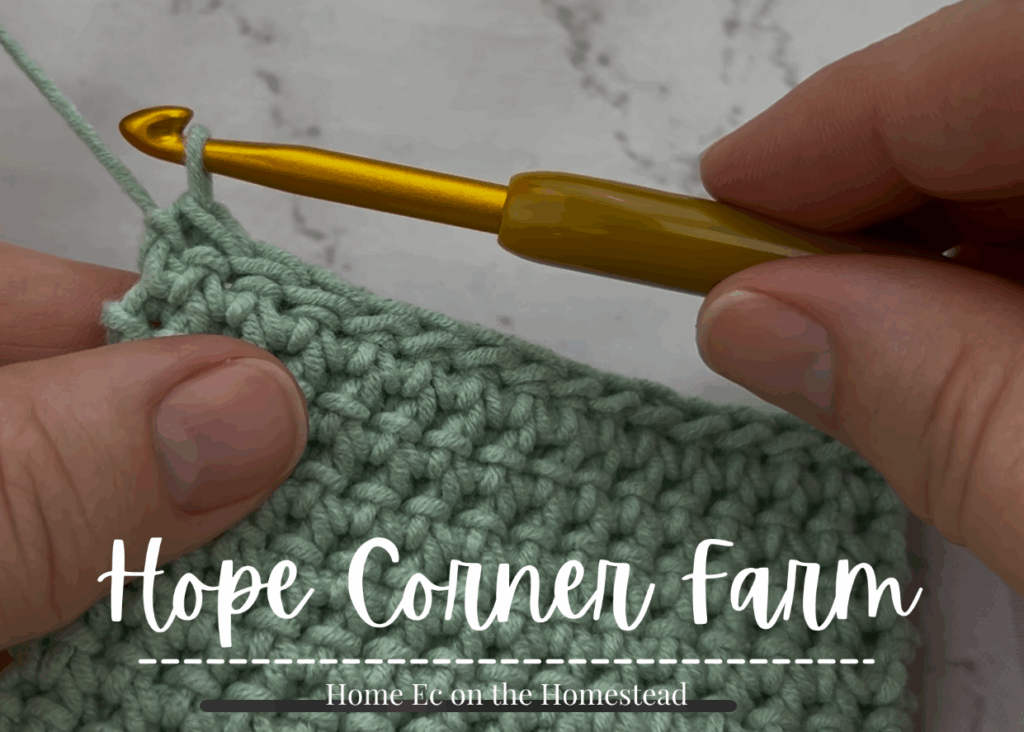
Finally yarn over and pull through the remaining 2 loops on the crochet hook. This completes 1 Thermal Single Crochet Stitch.
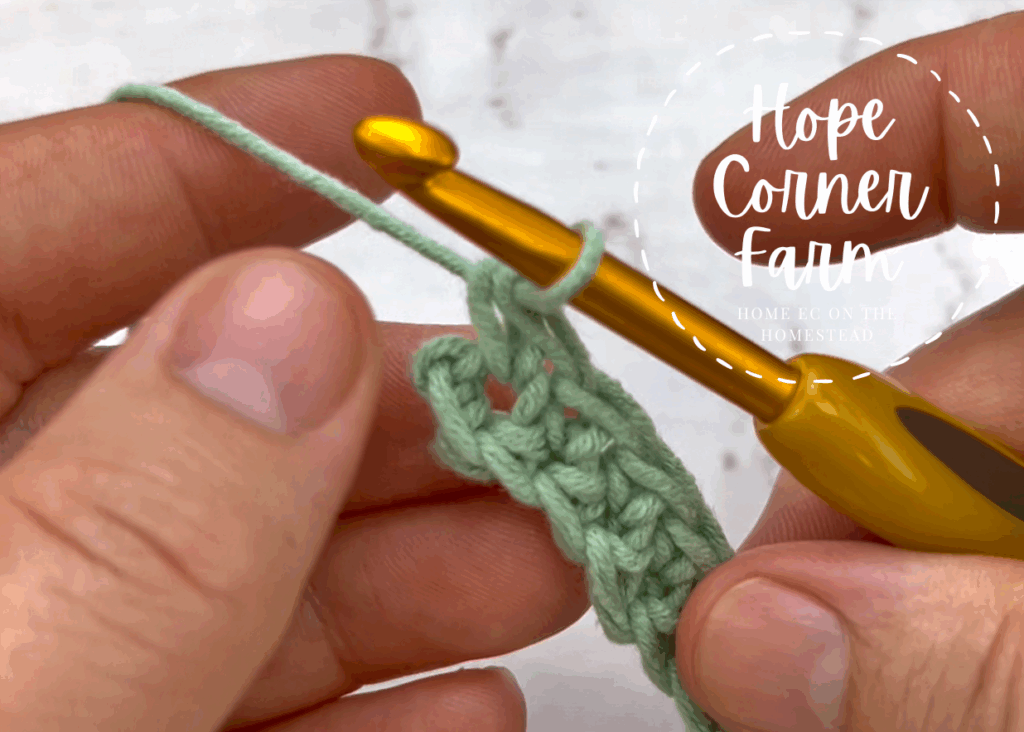
Second Thermal Single Crochet for Row 2:
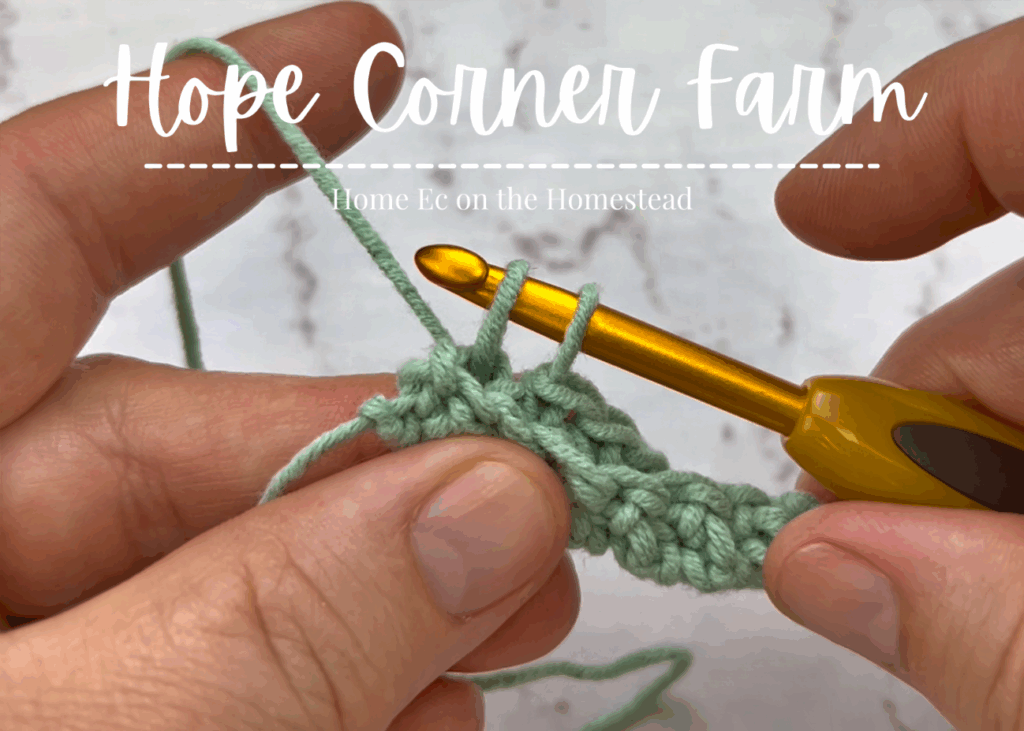
Now for the second Thermal Single Crochet we repeat. First insert the crochet hook picking up the Back Loop and the Unused Loop.
Step 2 Second Thermal SC:
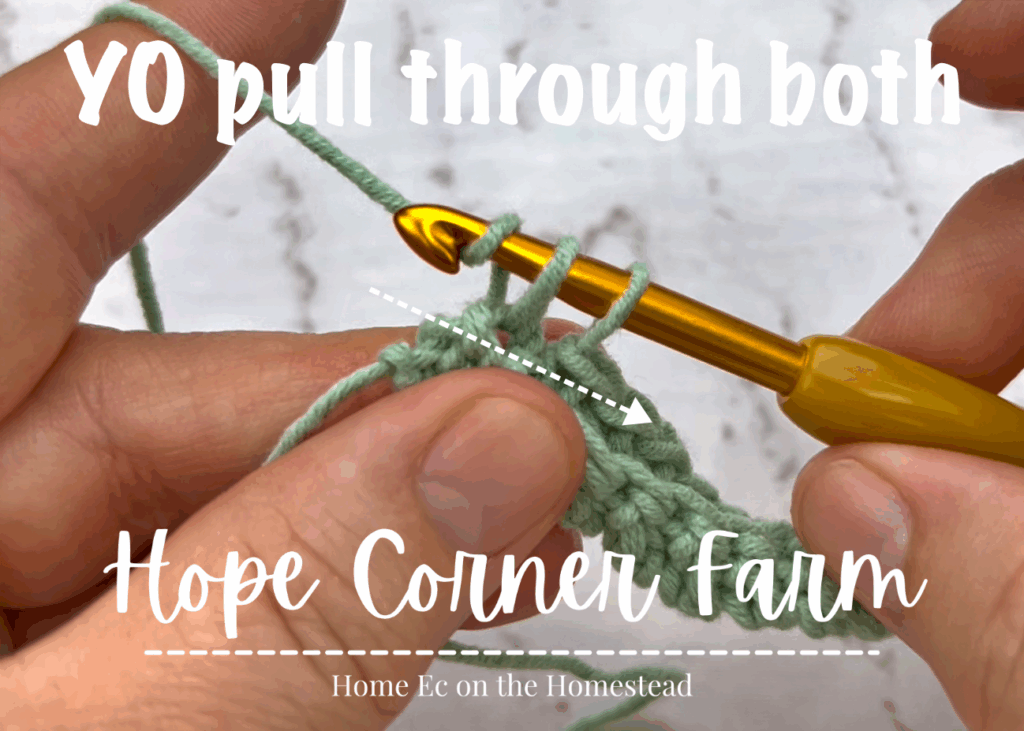
Next yarn over and pull through 2 loops. There will be 2 loops remaining on the hook at the end of this step.
Second Stitch Step 3:
Finally Yarn Over and pull through the remaining 2 loops on the hook. This completes a second Thermal Single Crochet Stitch. Repeat across the row.
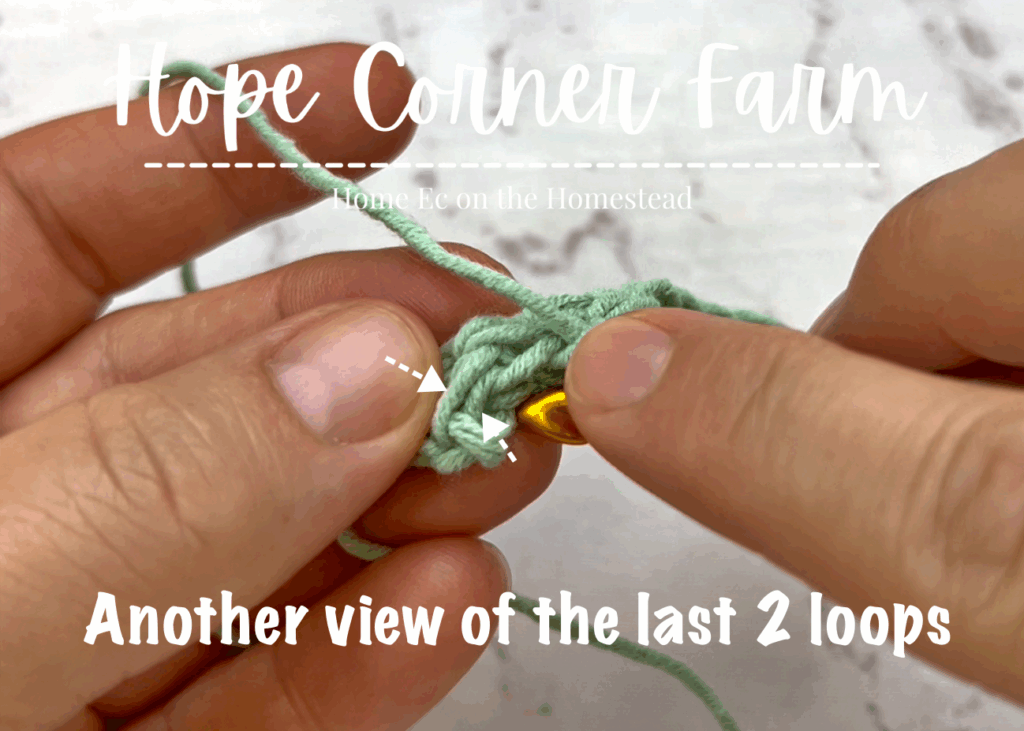
Final Stitch of Row 2:
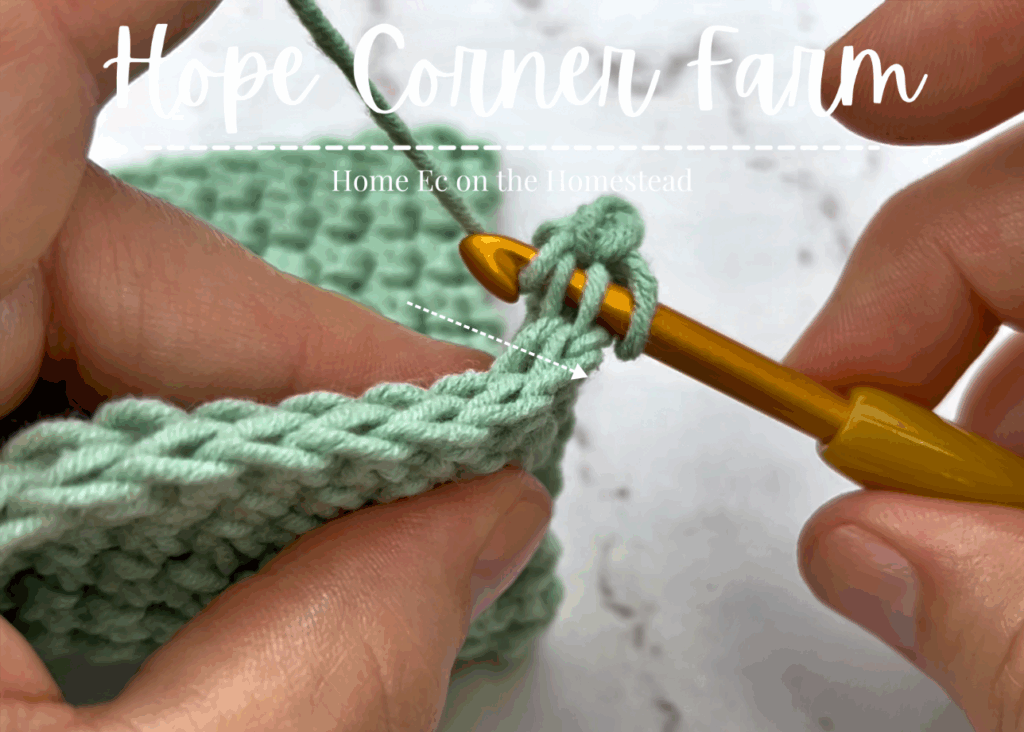
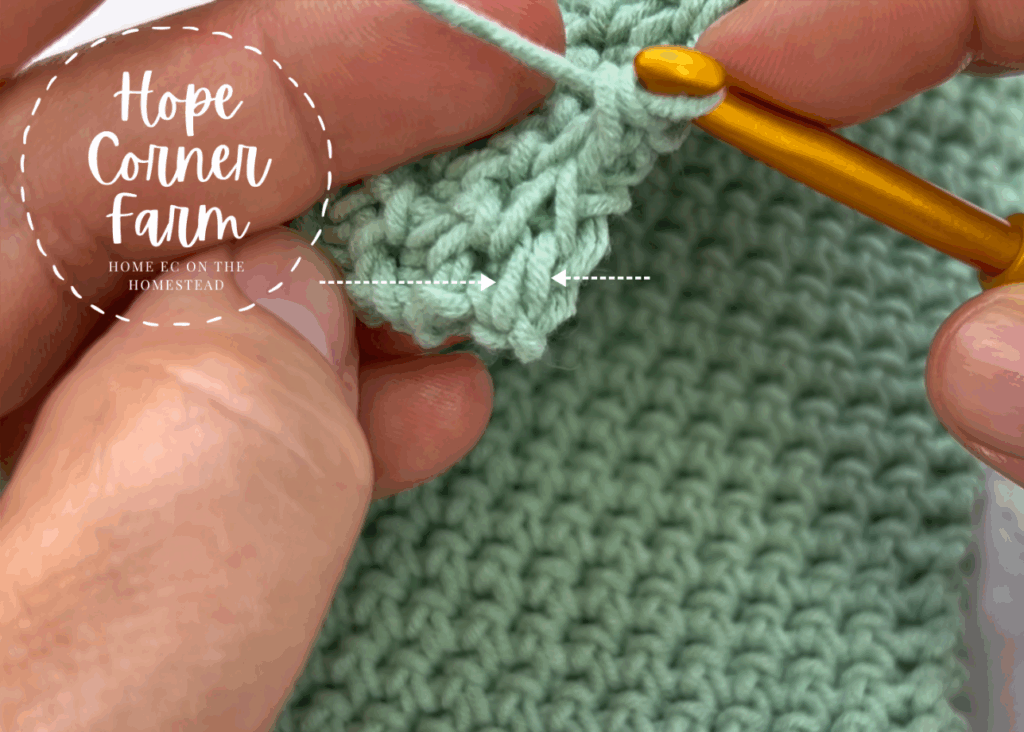
Now for the final crochet stitch of the row it can sometimes be difficult to see which loops to work into. Remember, just like every Thermal Single Crochet we insert the crochet hook making sure to pick up both the Back Loop and the Unused Loop. See the pictures below.

Step 2 Final Crochet Stitch of Row 2:
Next Yarn Over and pull through 2 loops on the hook. There will be 2 loops remaining at the end of this step.
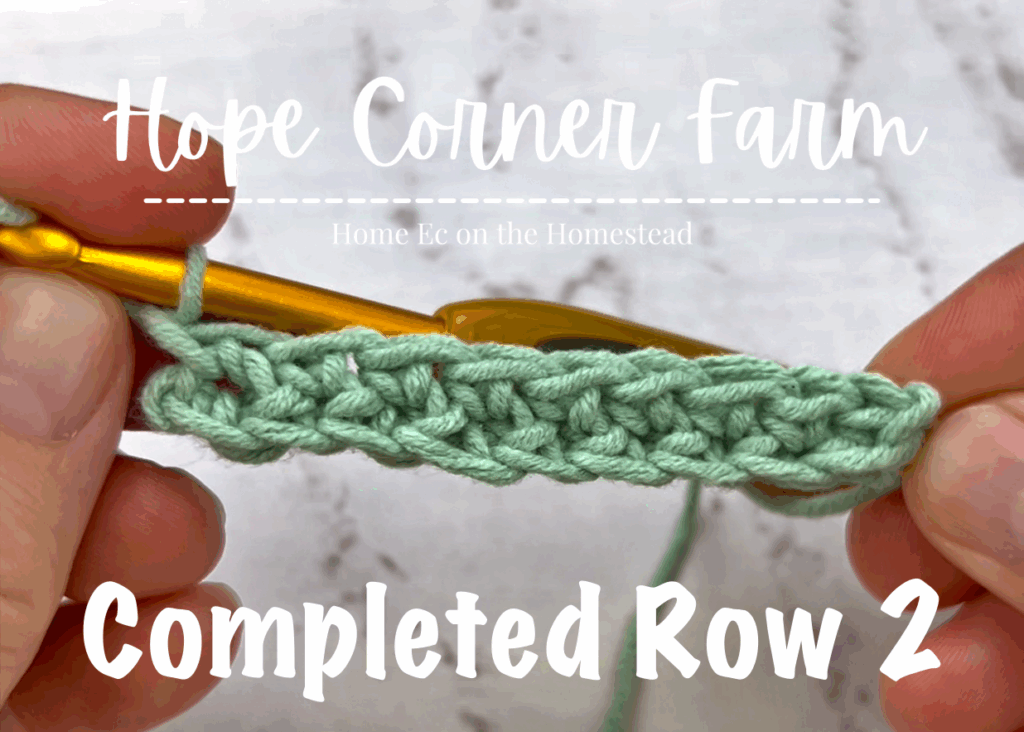
Row 2 Finishing the Last Thermal SC:
Finally Yarn Over and pull through both loops. This completes the last Thermal Single Crochet of Row 2.
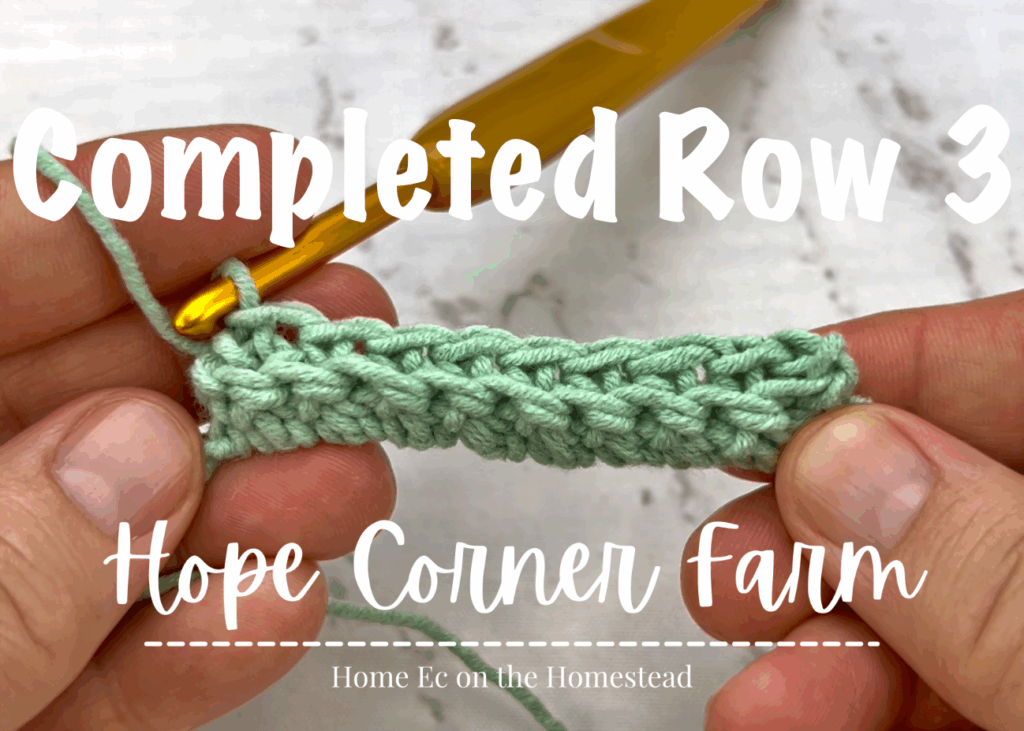
Thermal SC Row 3:
For this and all of the remaining rows of Thermal Single Crochet, work the Thermal Single Crochet into the Back Loop and the Unused Loop (the Unused Loop is technically the Front Loops that we did not work into from the previous row of stitching).
Step 1 Row 3 (and beyond):
Begin this row by Chaining 1. Insert the hook into the Back Loop and the Unused Loop.
Row 3 Step 2:
Now yarn over and pull through 2 loops of yarn on the crochet hook. There will be 2 loops of yarn remaining on the hook at the end of this step.
Step 3 Row 3 (and beyond):
Next yarn over and pull through both loops to complete the Thermal Single Crochet Stitch. This completes one Thermal SC. Repeat across the row.
Final Stitch of Row 3 and Beyond:
Again the it can sometimes be difficult to see the loops for the final stitch of the row. Be careful and make sure you are identifying the correct loops. Complete the final stitch using the same steps.


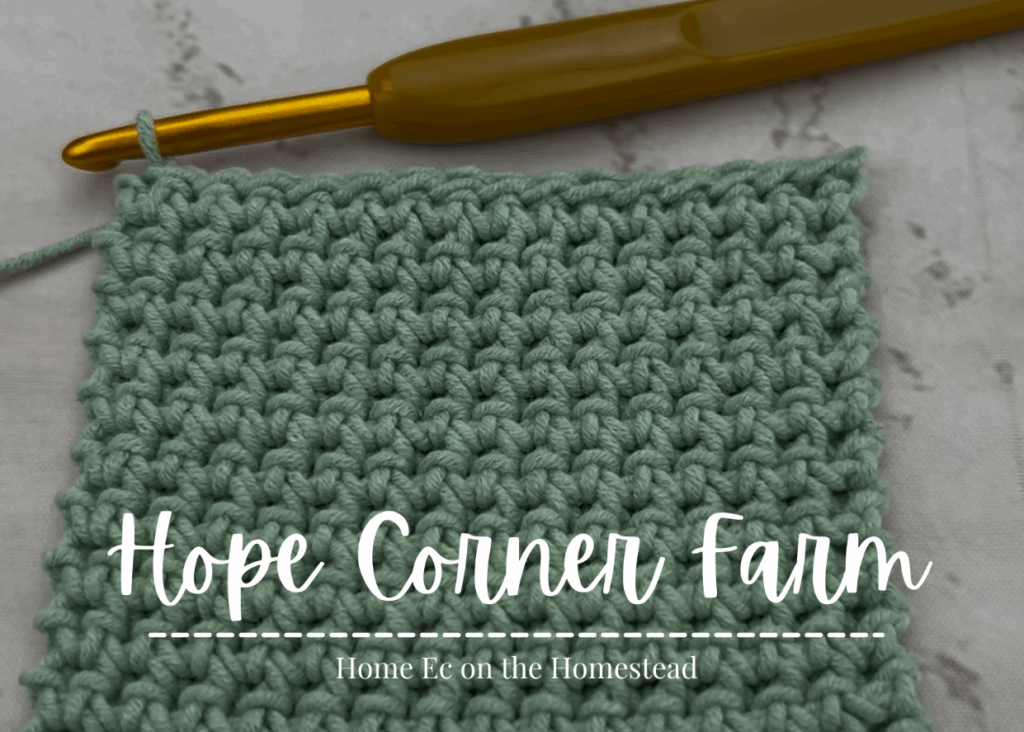
Remaining Rows of Thermal Single Crochet Stitches:
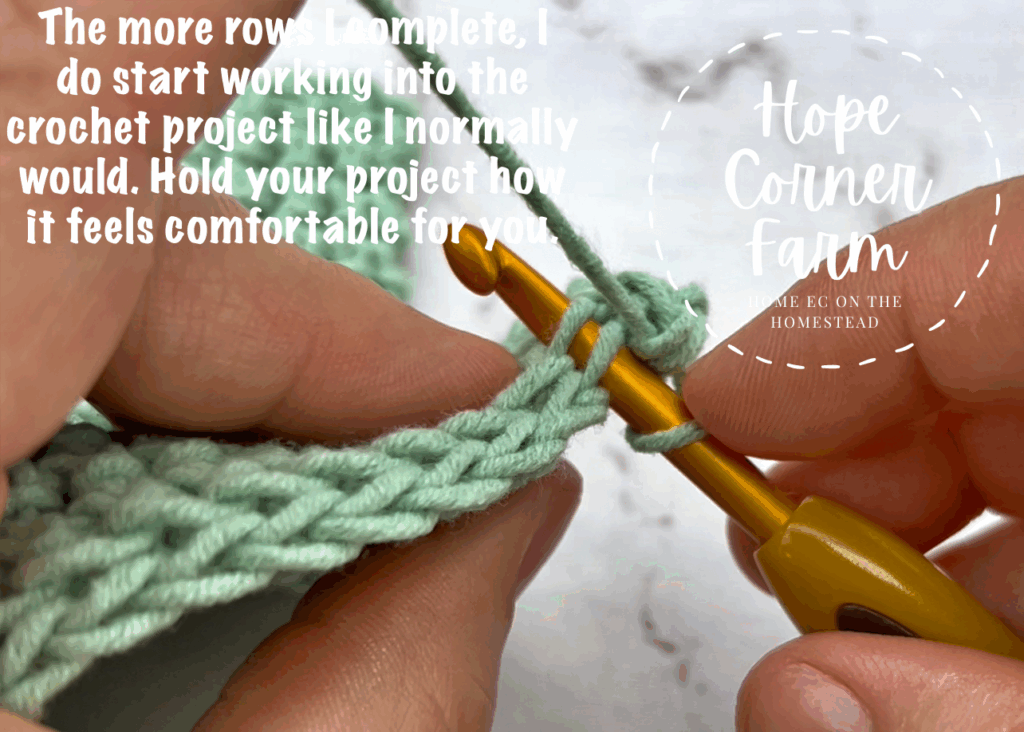
Now we keep repeating these steps for each remaining row where we are creating Thermal Single Crochet Stitches. I do start turning my work after chaining when my project gets a little bit bigger. See the photos below to see what it looks like at that point.

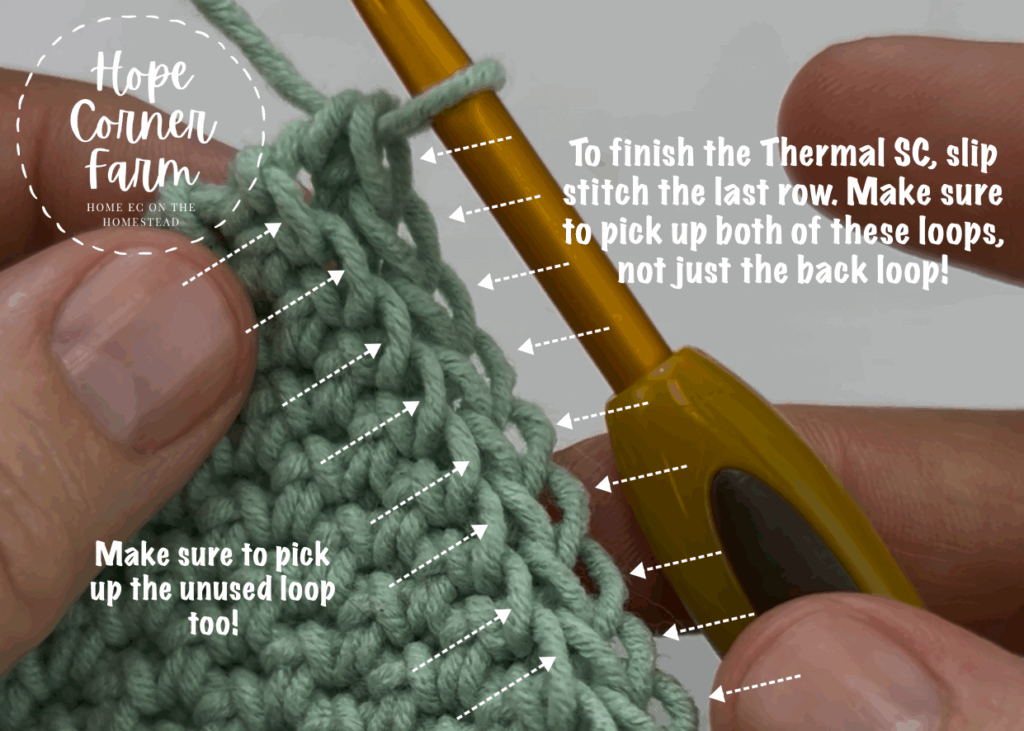
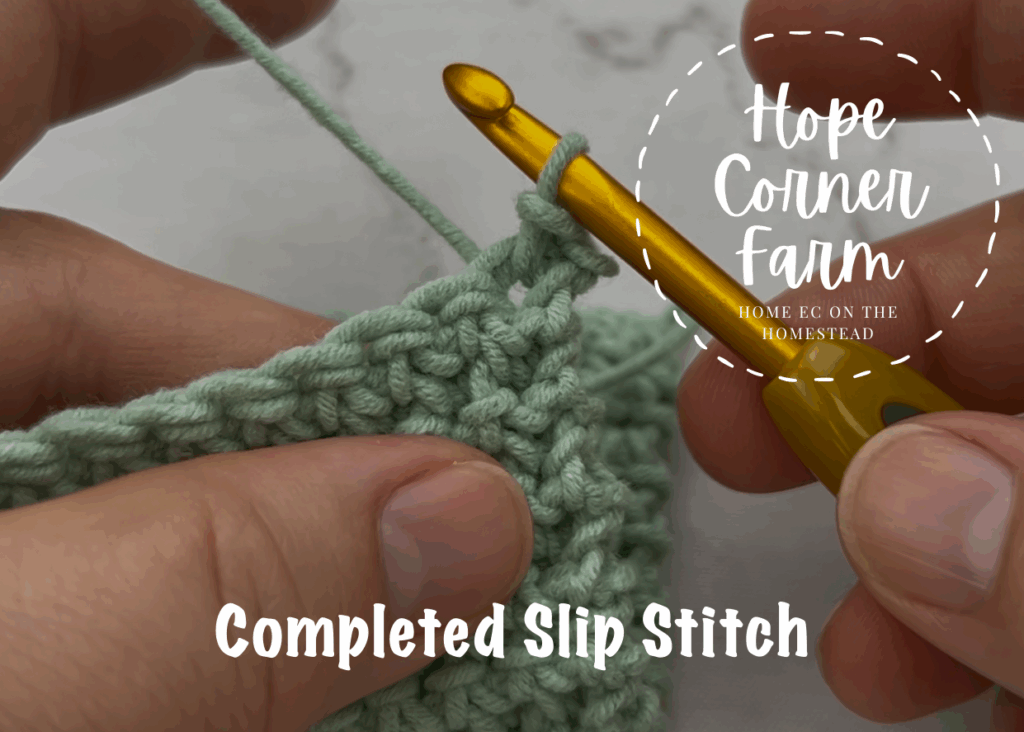
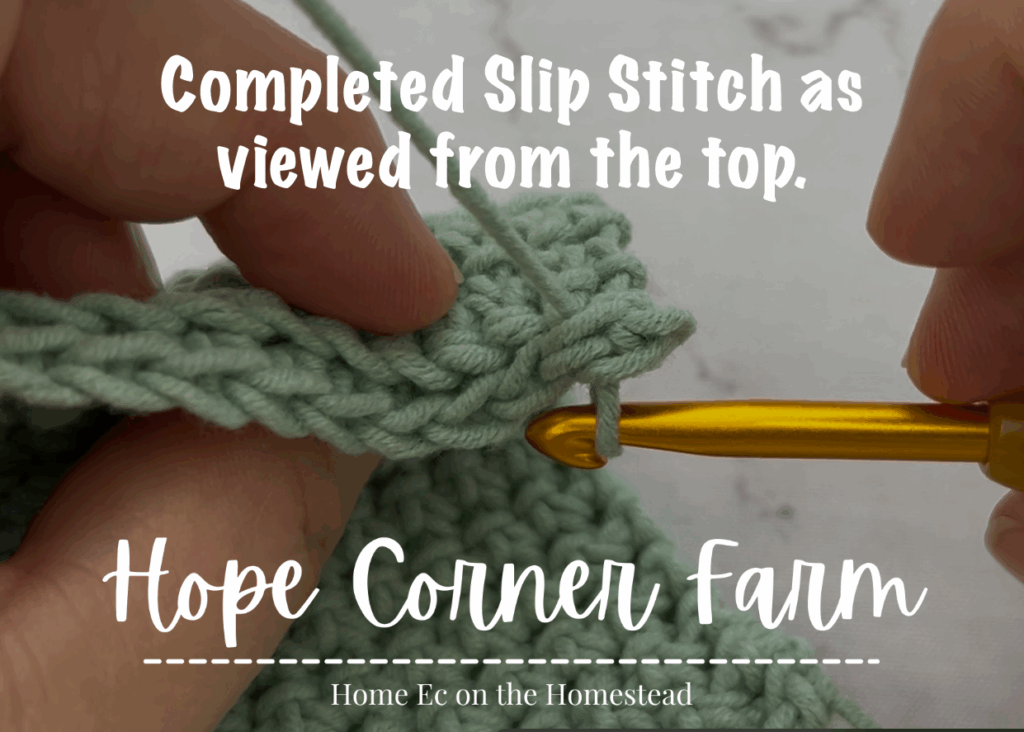
Finishing Row:
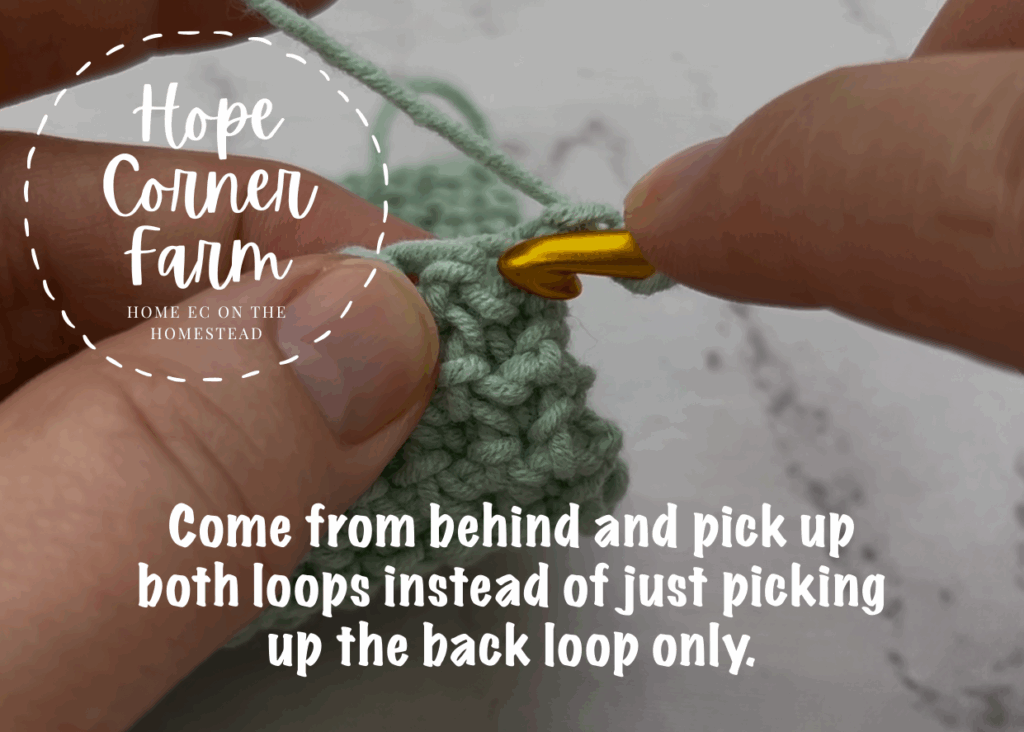
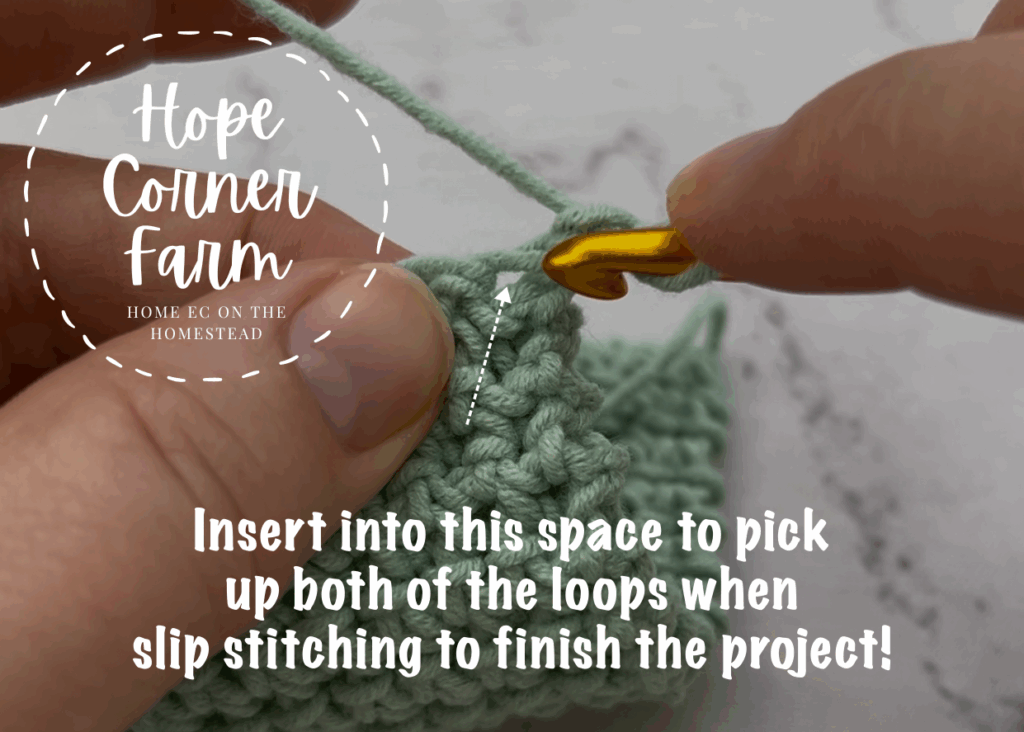
Finally to finish off a project using the Thermal Single Crochet Stitch I use a slip stitch for the final row. This will create a more rounded edge, as well as get rid of the ledge of unused loops from the previous row. When slip stitching, make sure to pick up both loops from the top of the stitches, as well as the unused loop. There will be an additional loop on the hook for this step. See the pictures below.

How to Thermal Single Crochet Stitch Video Tutorial:
Written Instructions Only:
To Start:
Begin by chaining any number of chains. There is no multiple for this crochet stitch.
Row 1:
Now begin by working into the second chain from the crochet hook. Place a single crochet into the second chain. How you insert the crochet hook is important for this stitch. Do not work into the back bump of the chain. Insert the crochet hook so that 2 of the 3 “legs” or parts of the crochet stitch are on top of the hook. 1 part or “leg” should be on the bottom of the crochet hook. Continue placing single crochets in the same manner across the chain.
Row 2:
Chain 1 and slightly turn your work. To create a Thermal Single Crochet Stitch work a single crochet, but insert your hook picking up the BACK LOOP only, as well as the unused loop from the previous row (the 1 leg of the chain that was on the bottom of the hook). Continue in the same way across the row.
Row 3 and Beyond:
Again chain 1 and slightly turn your work. Work a Thermal Single crochet by single crocheting into the back loop only as well as the unused loop from the previous row (the front loop that we didn’t work into from the row before this one.
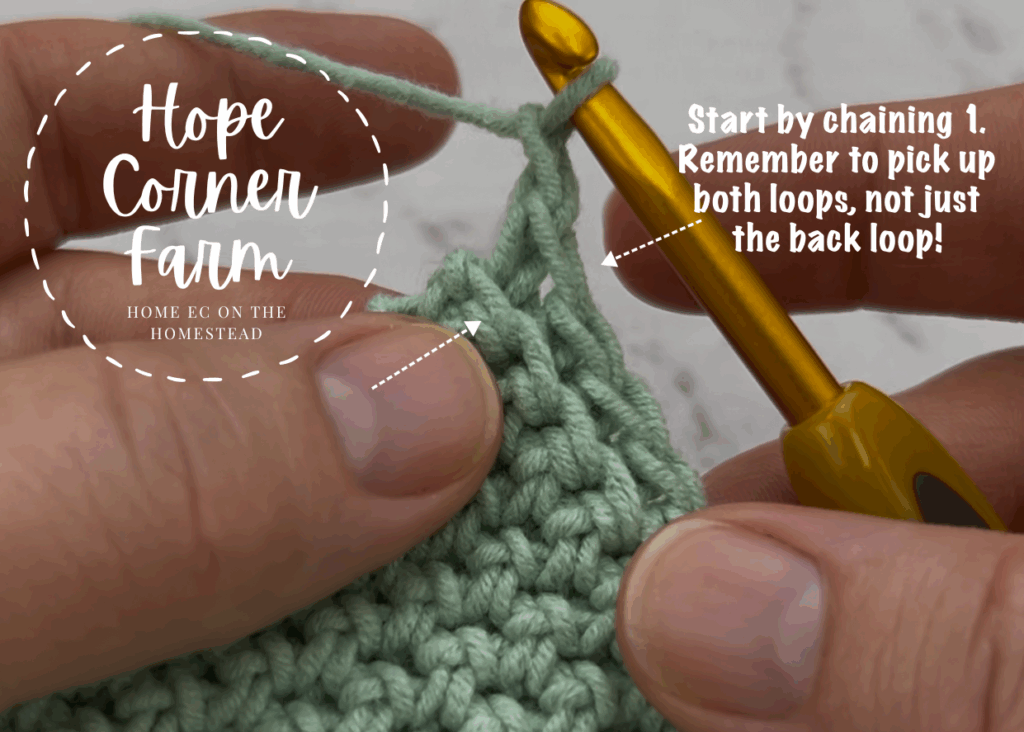
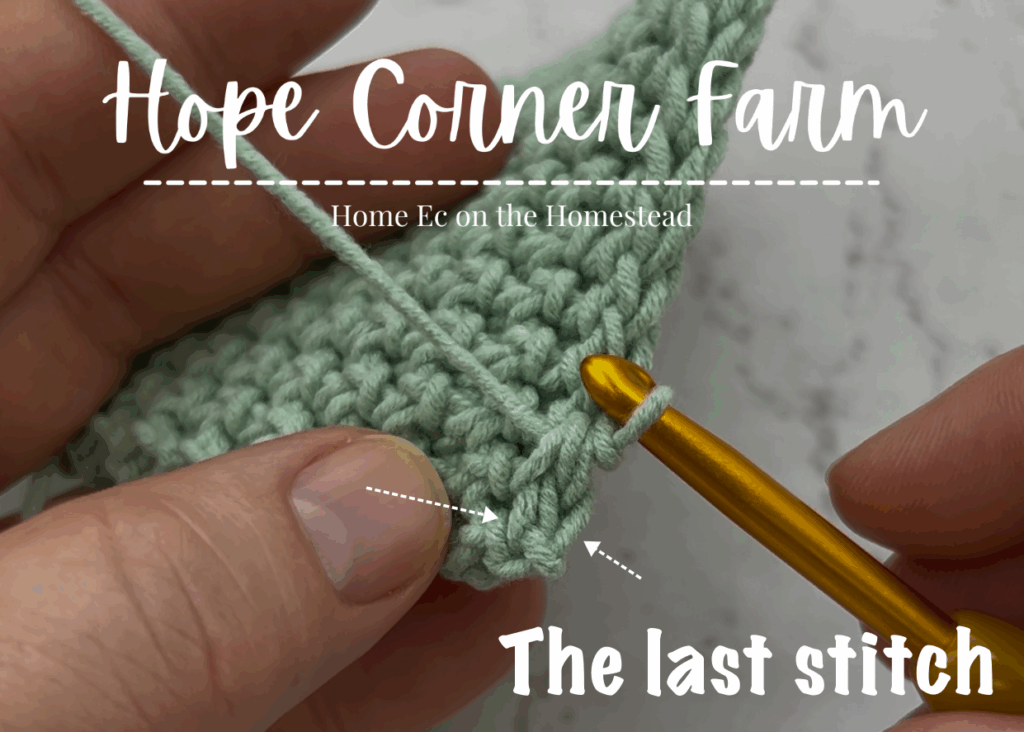
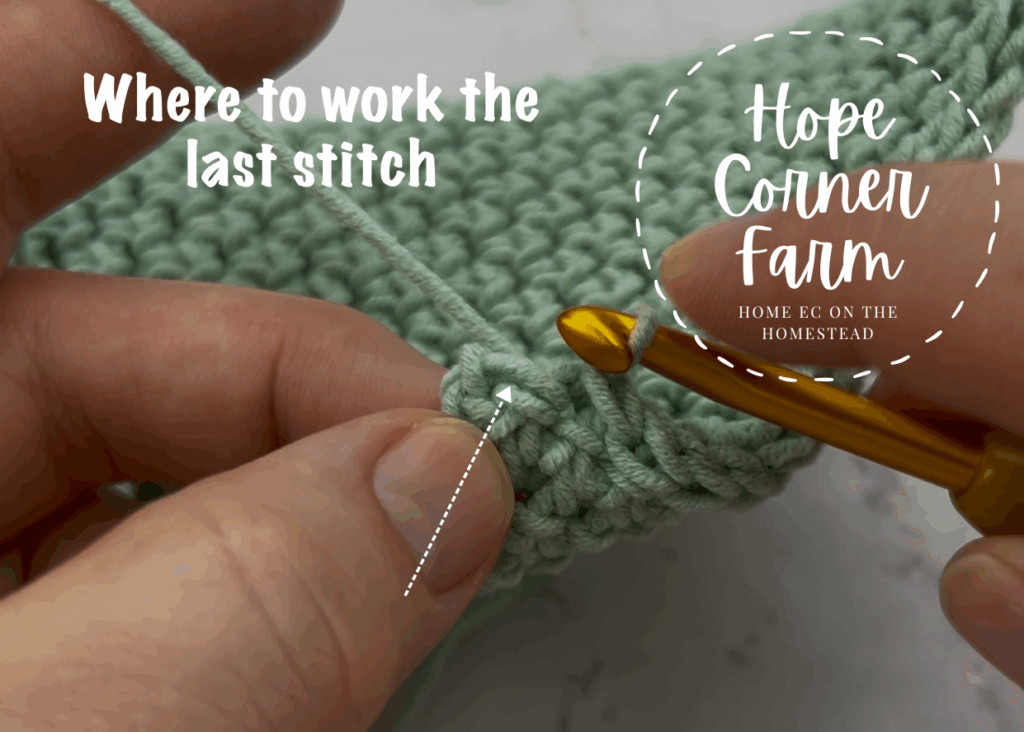
Finishing Row:
Now chain 1 and turn. Work a Slip Stitch in each stitch across the row. For the slip stitch pick up both loops (not just the back loop) as well as the unused loop when you insert your crochet hook.
Enjoy learning new crochet stitches? Don’t miss out on more!
Subscribe below to get free crochet patterns, tutorials, and inspiration delivered straight to your inbox. If you want more crochet fun delivered to your inbox hop on over and join my newsletter!

Join my creative community and keep your crochet queue full of beautiful, fun-to-make projects!
If you loved this tutorial and want more crochet inspiration, come connect with me on social! Subscribe on YouTube (Hope Corner Farm Crochet) for full, step‑by‑step videos, follow along on TikTok and Instagram for quick tips and reels, pin your favorite projects on Pinterest, and join the conversation on Facebook. Don’t forget to tag your makes with #HopeCornerFarmCrochet so I can cheer you on and share your beautiful work!
Happy Crocheting,

Love this crochet stitch? Check these other crochet tutorial out!
And that’s it! You’ve mastered the Thermal Single Crochet Stitch! This cozy, double-thick stitch is perfect for projects that need a little extra warmth and texture, from potholders to blankets and everything in between. If you enjoyed this tutorial, be sure to check out some of my other stitch guides on the blog. My stitch tutorials include how to crochet the thermal double crochet stitch for an even loftier texture, the herringbone double crochet stitch for a beautiful woven look, and the paired half double crochet stitch for subtle texture and strength. Keep exploring, keep creating, and happy crocheting!