
How to Crochet a Double Magic Ring (Photo + Video Tutorial + Written Instructions)


If you’ve ever struggled with closing the center of your crochet projects tightly, the Double Magic Ring is a game changer! This technique creates an extra-secure, adjustable center that won’t come undone, which makes it perfect for amigurumi, granny squares, hats, or any project worked in the round. In this tutorial, I’ll walk you through how to crochet a Double Magic Ring step-by-step with clear photos, a full video tutorial, and written instructions so you can follow along in whatever way works best for you. Once you learn this method, you’ll never want to go back to the regular magic ring again!


First, check out my video tutorial my You Tube Channel! Subscribe to get the latest crochet fun from Hope Corner Farm Crochet!
What Is the Double Magic Ring (Double Magic Circle) in Crochet?
The Double Magic Ring is an easy way to start crochet projects that are worked in a circle, like amigurumi or granny squares. It’s just like the regular magic ring, but you wrap the yarn around your fingers twice instead of once. That second loop adds extra strength and helps keep the center from ever loosening or opening up. It’s a simple trick that makes your projects look neater and last longer, and once you learn it, you’ll wonder how you ever crocheted without it!
Materials Needed for the Double Magic Circle:
Yarn of Choice (I used a size 4 medium weight yarn for this tutorial: More specifically Red Heart Soft Yarn in the color Turquoise)
Crochet Hook of Choice (I used a size J 6.0mm crochet hook)
Scissors
Yarn Needle
This crochet tutorial is written using US Crochet Terms
What Crochet Terms Will I Need to Know for the Double Magic Circle?
Crochet Double Magic Ring Step-by-Step (Photo Instructions)
Now that you know what the Double Magic Ring is and why it’s so useful, let’s walk through how to make one step-by-step! Below, you’ll find a photo tutorial that clearly shows each stage of the process, from wrapping the yarn to closing the ring. Take your time with each step, and don’t worry if it feels a little tricky at first. Once you’ve practiced it a few times, the motion will become second nature. Let’s get started!
How to Start the Double Magic Ring:
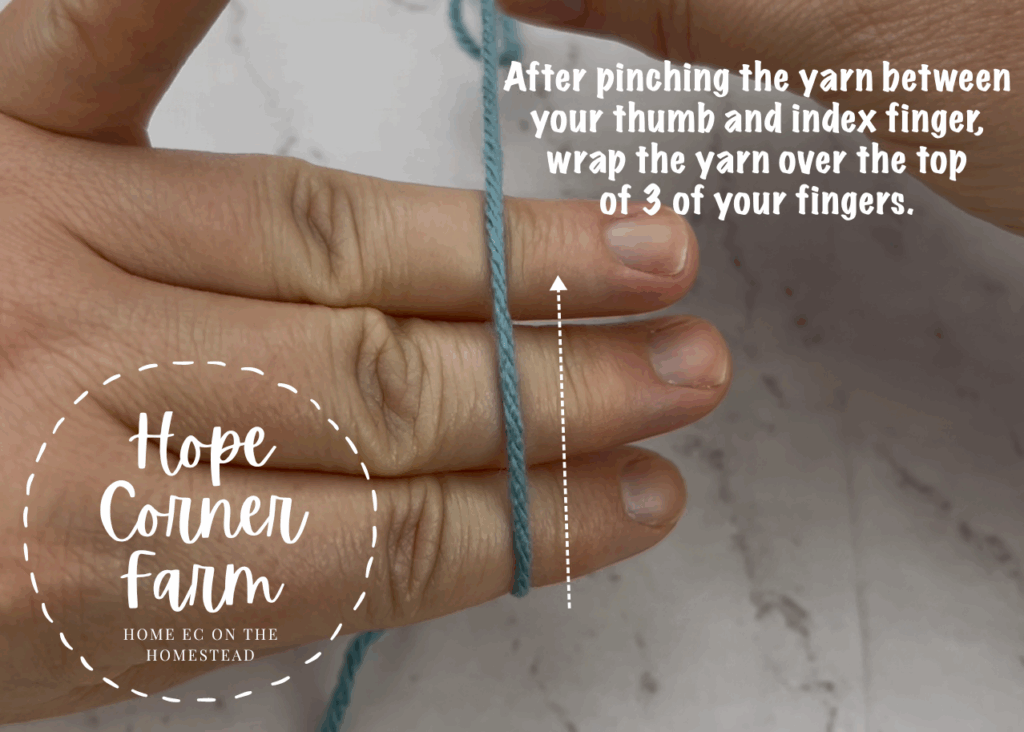
Begin by pinching the yarn between your thumb and index finger of your off hand (yarn holding hand). Make sure you leave a yarn tail that is at least 6″ in length.

Step 1:
Now wrap the yarn up and over the top of 3 of the fingers on your yarn holding hand.
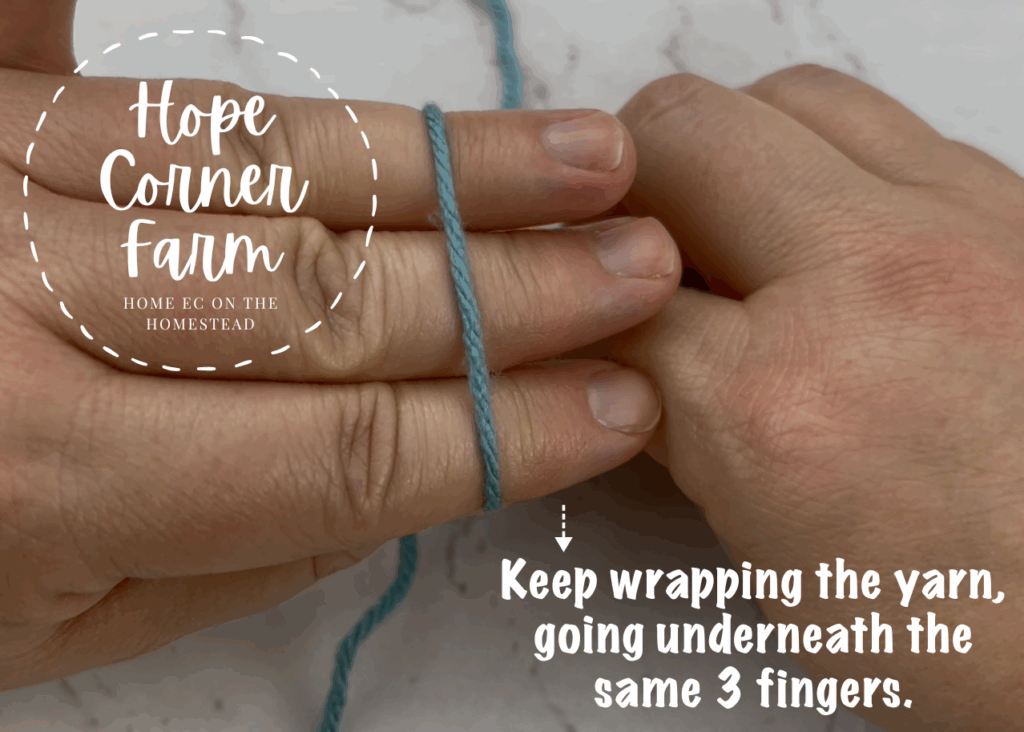
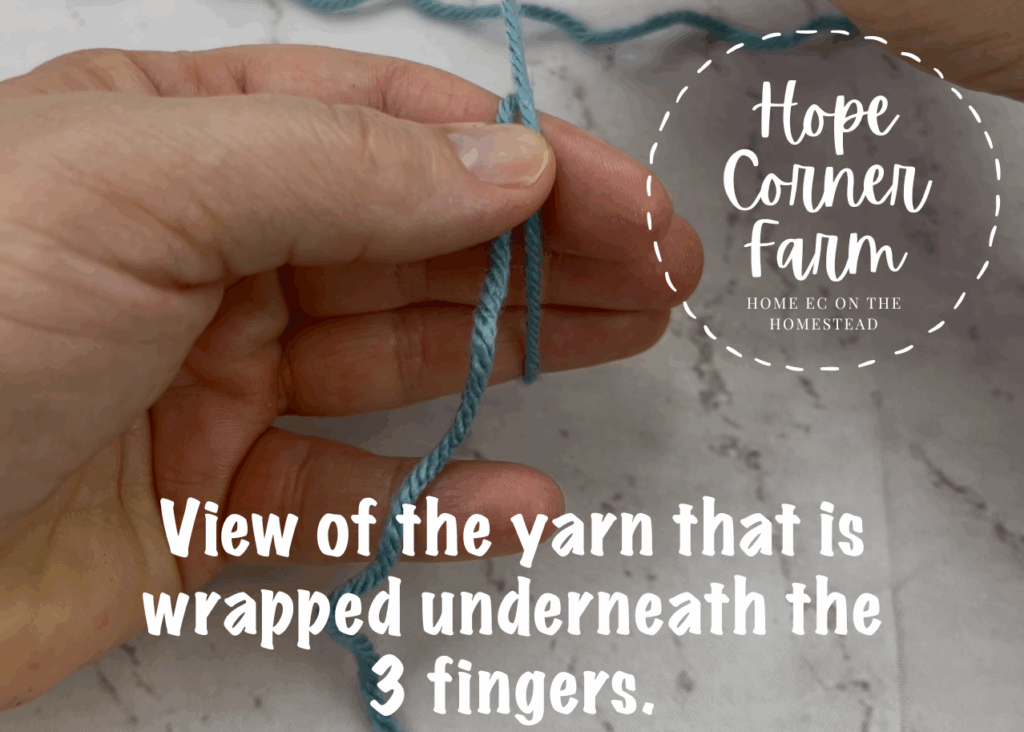
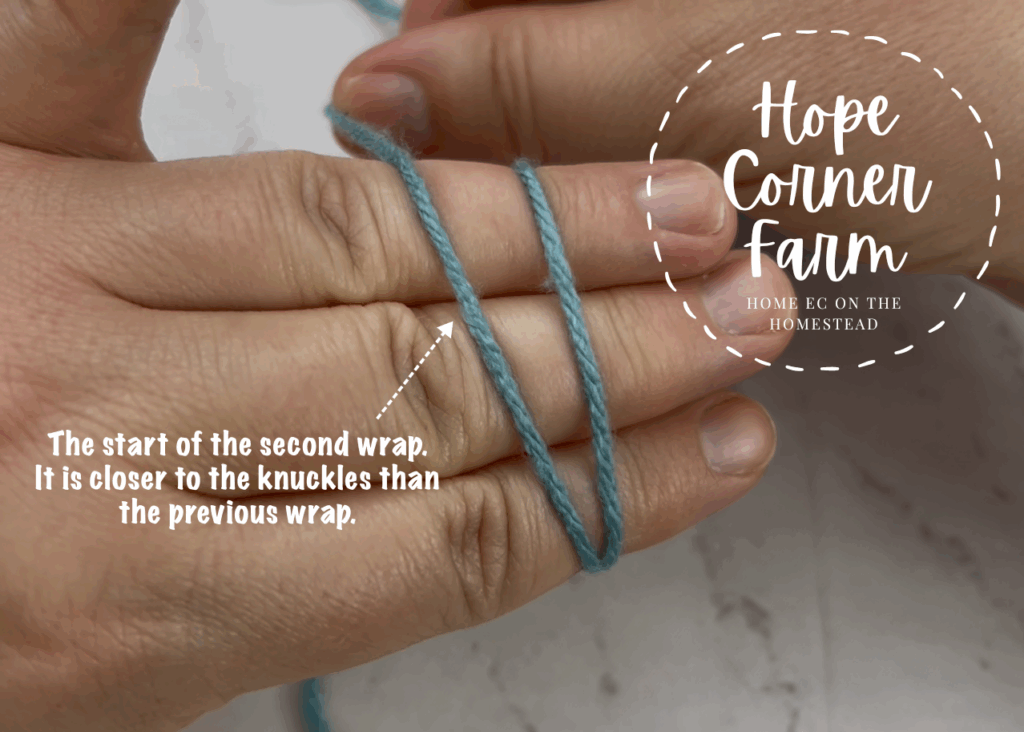
Double Magic Circle Step 2:
Next keep wrapping the yarn down and underneath of the yarn holding hand.
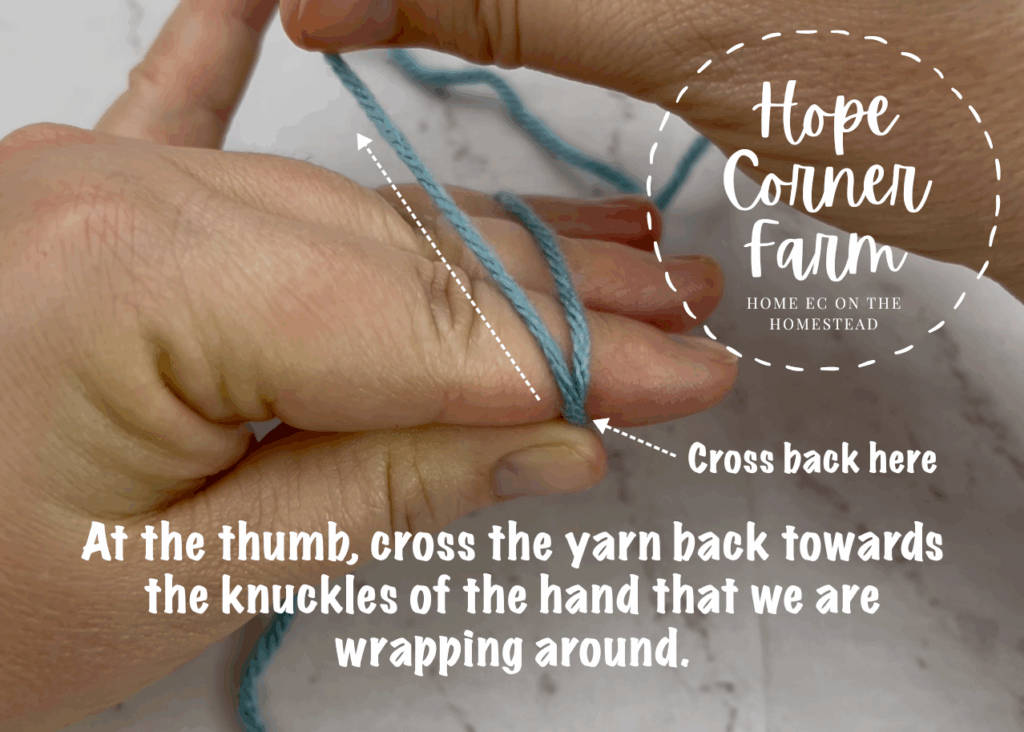
Step 3:
Now where the yarn is pinched at the thumb, wrap or cross the yarn back closer to the knuckles on the yarn holding hand. Continue and create another wrap over the top of the hand.
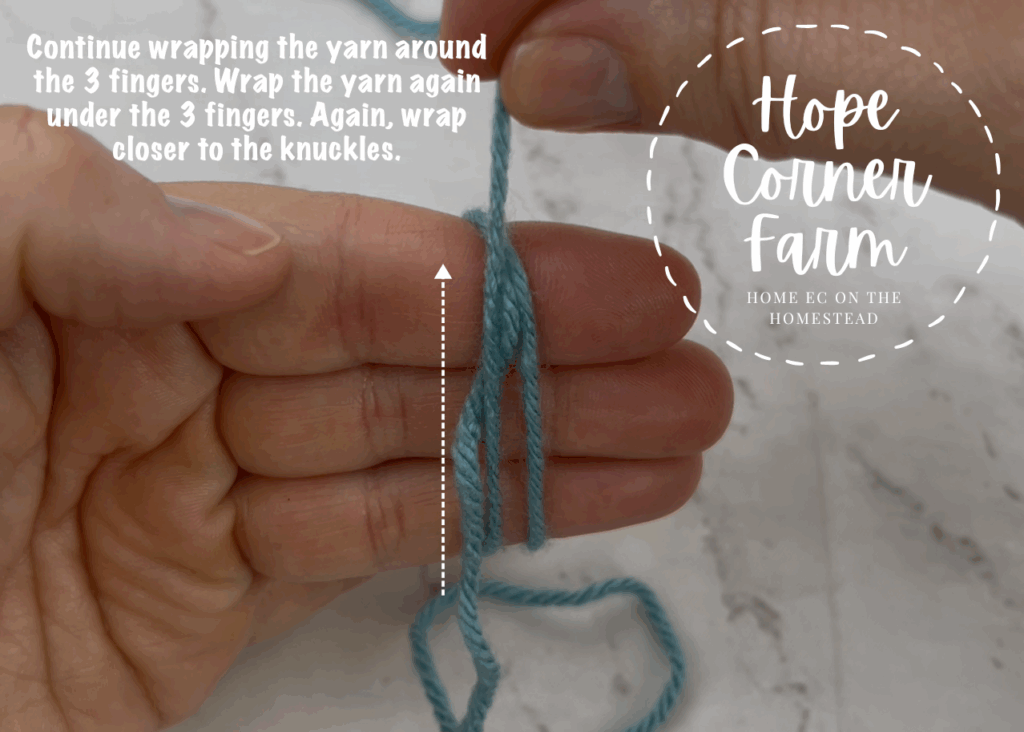
Double Magic Ring Step 4:
Next wrap again on the underside of the yarn holding hand.
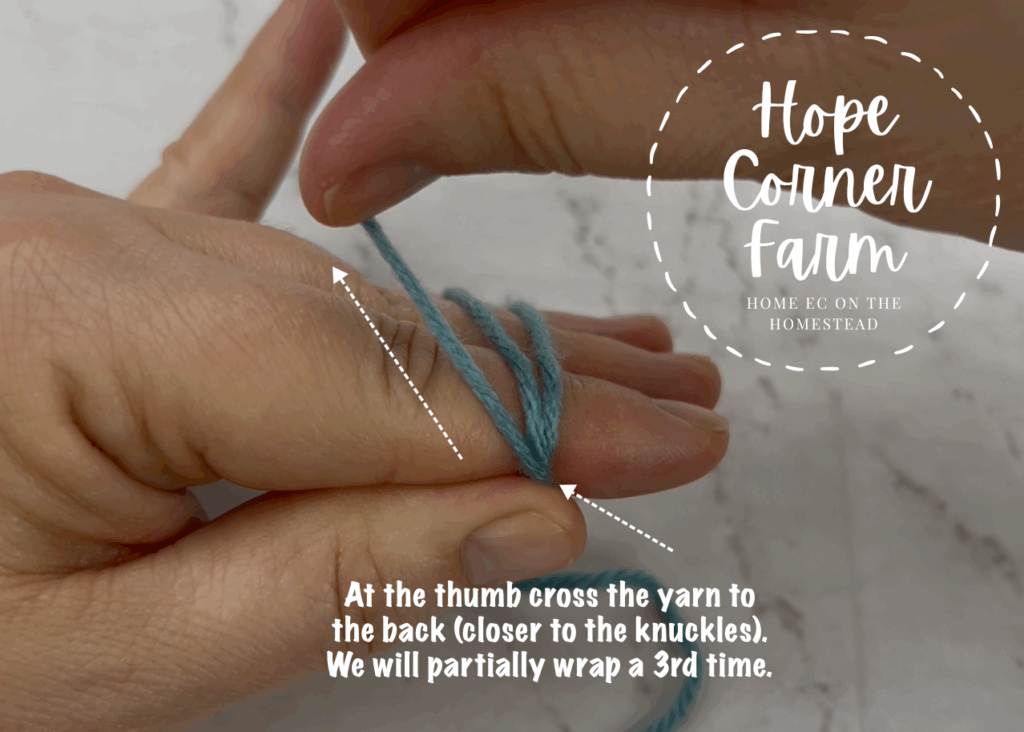
Step 5:
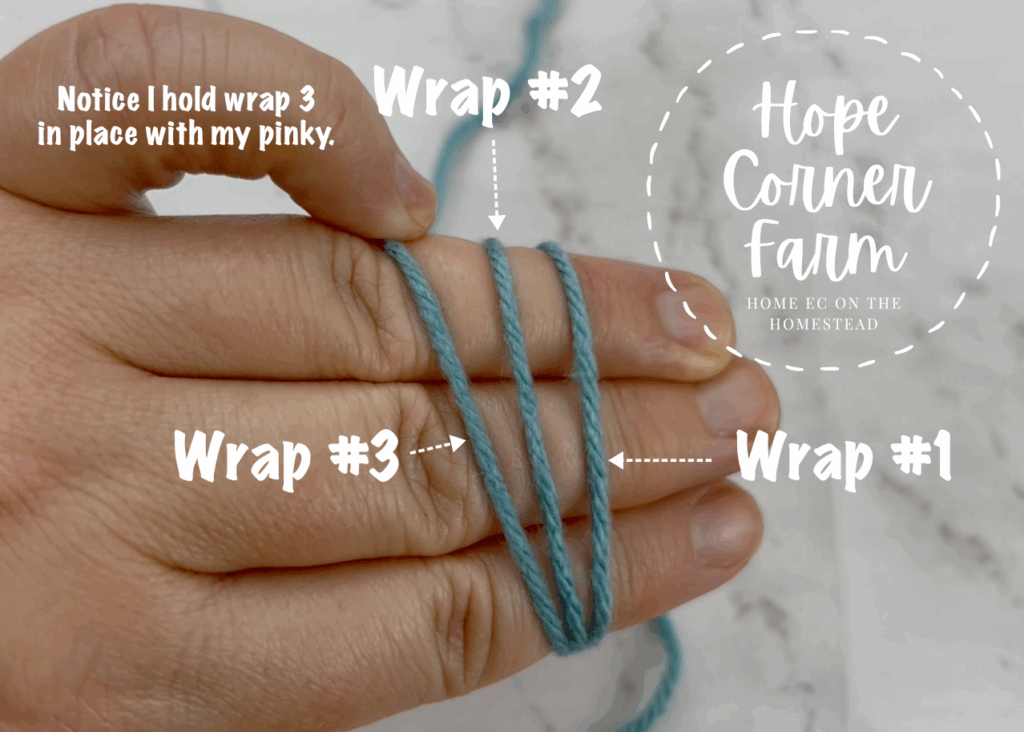
Again at the thumb, cross the yarn back behind the other 2 wraps of yarn (closer to the knuckles). Hold this wrap in place with the pinky finger of your yarn hand. There will be 3 wraps of yarn across the top of the yarn hand at this point.
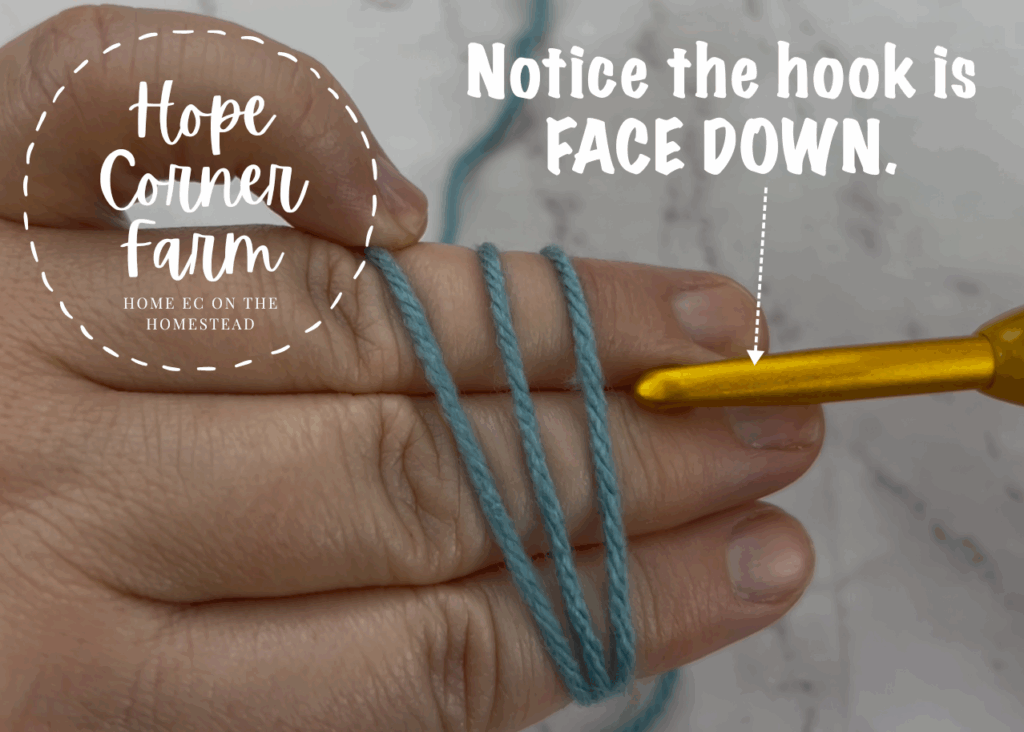
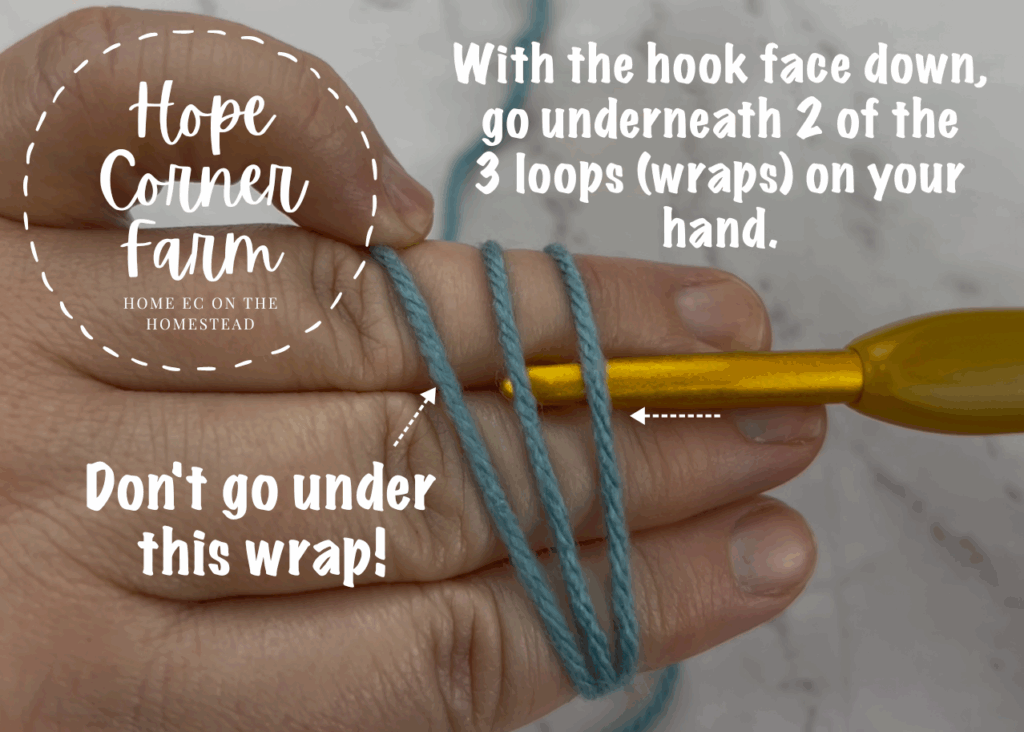
Double Magic Ring Step 6:
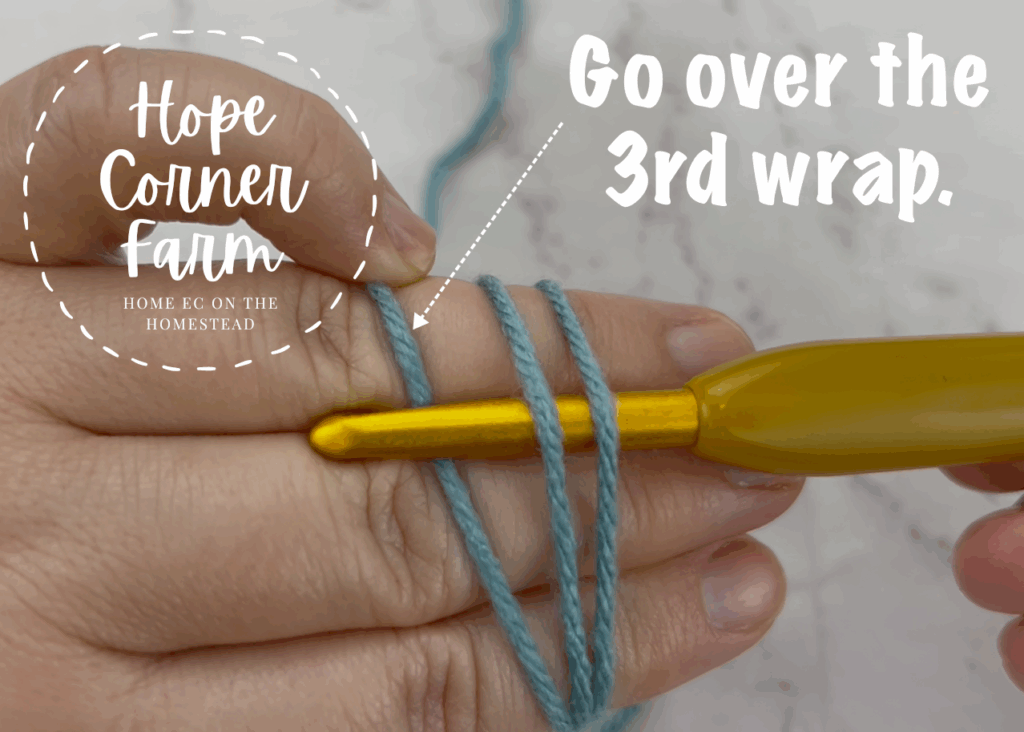
Now we are ready to bring in the crochet hook. Begin by facing the nook of the crochet hook DOWN towards the hand. Slide the hook underneath 2 of the 3 wraps on the hand. Take the hook and go over top of the 3rd wrap (the one closest to the knuckles).
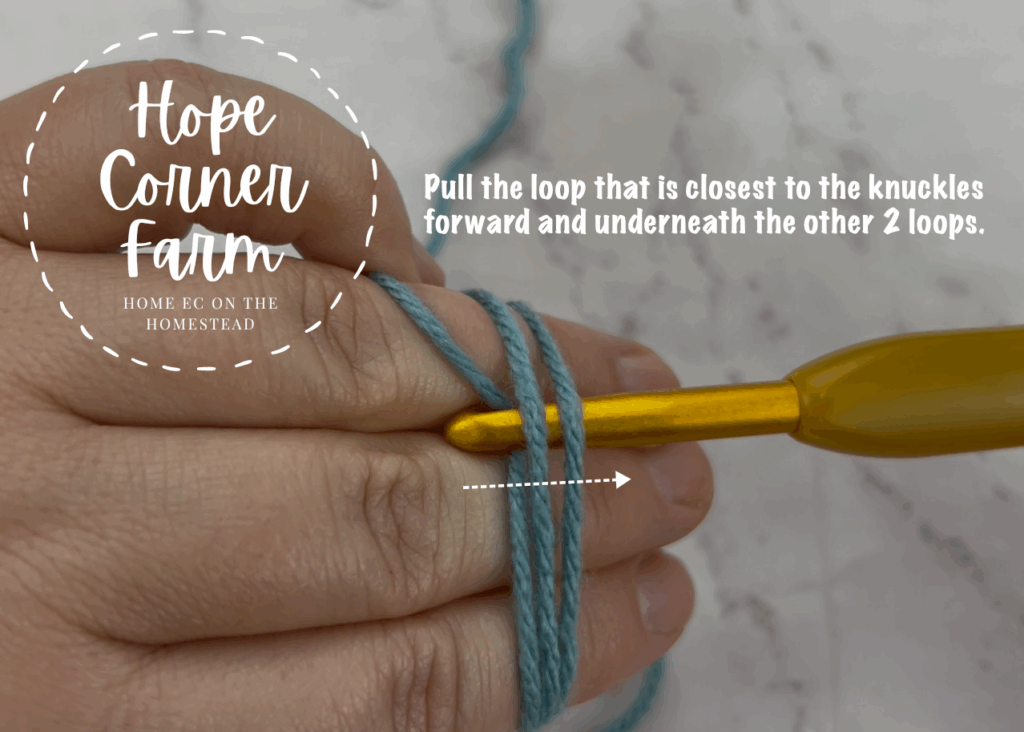
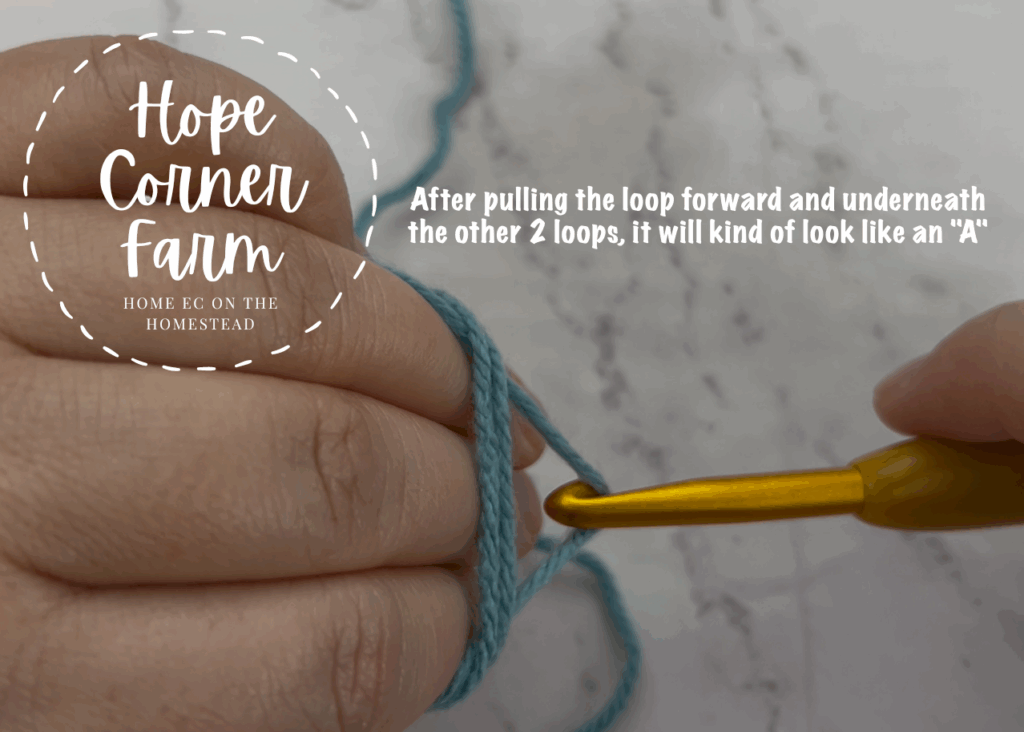
Step 7:
Next pull the 3rd wrap forward (toward the fingernails) and UNDERNEATH the other 2 wraps. The yarn will kind of look like an A at this point.
Double Magic Circle Step 8:
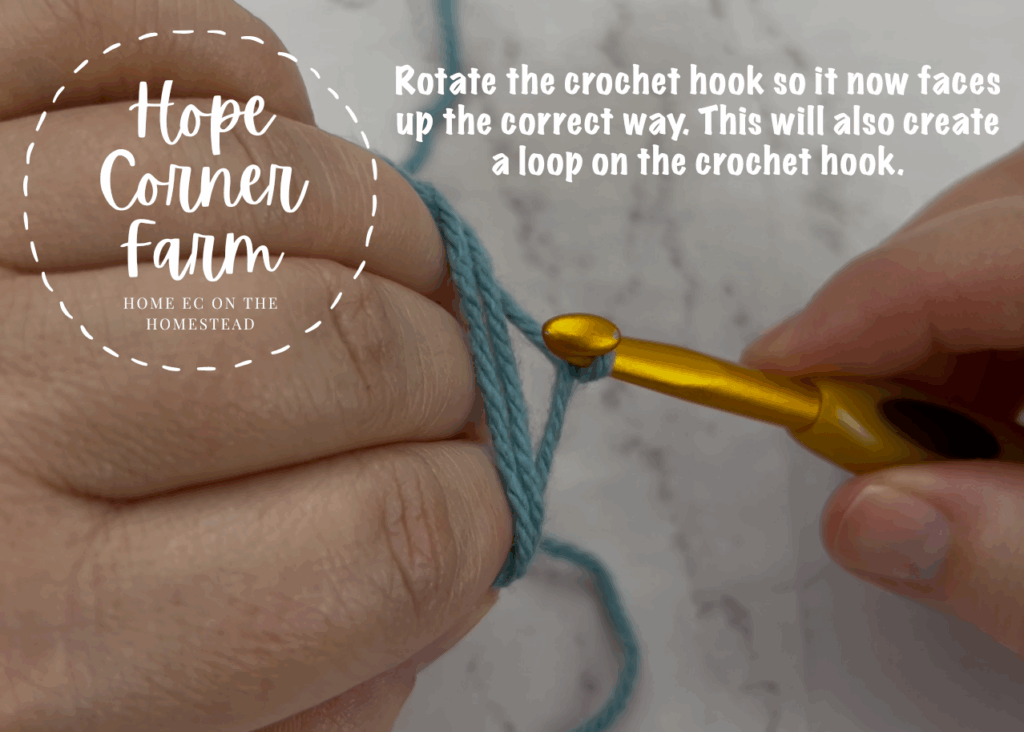
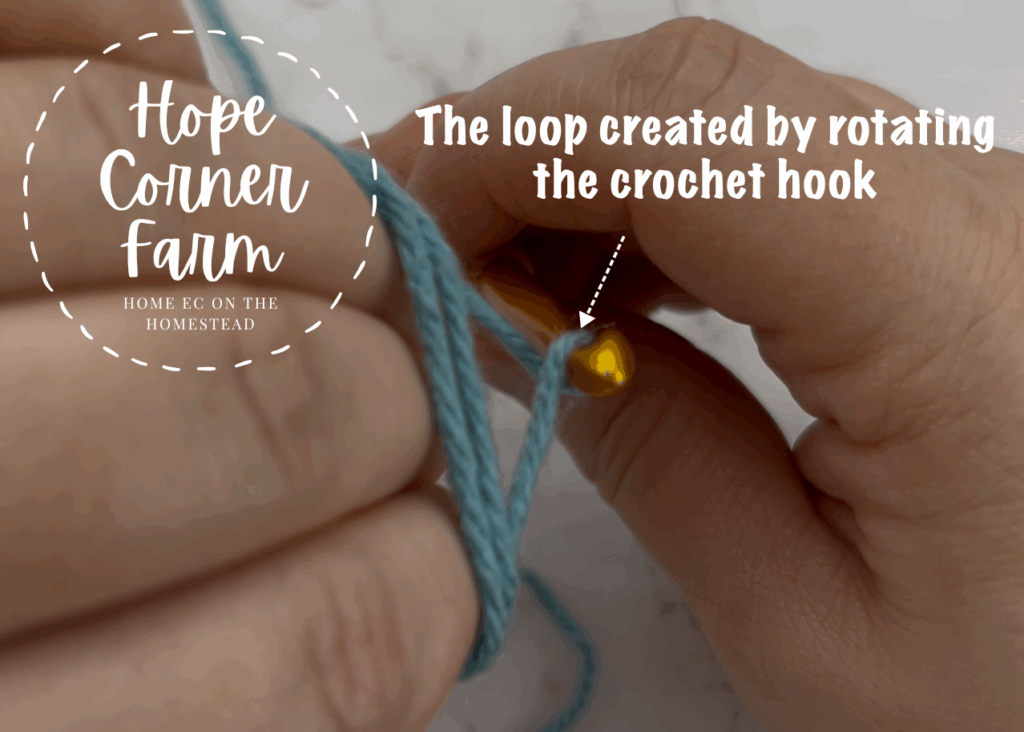
Now gently rotate the hook so that it is face up. This will create a loop on the hook.
Step 9:
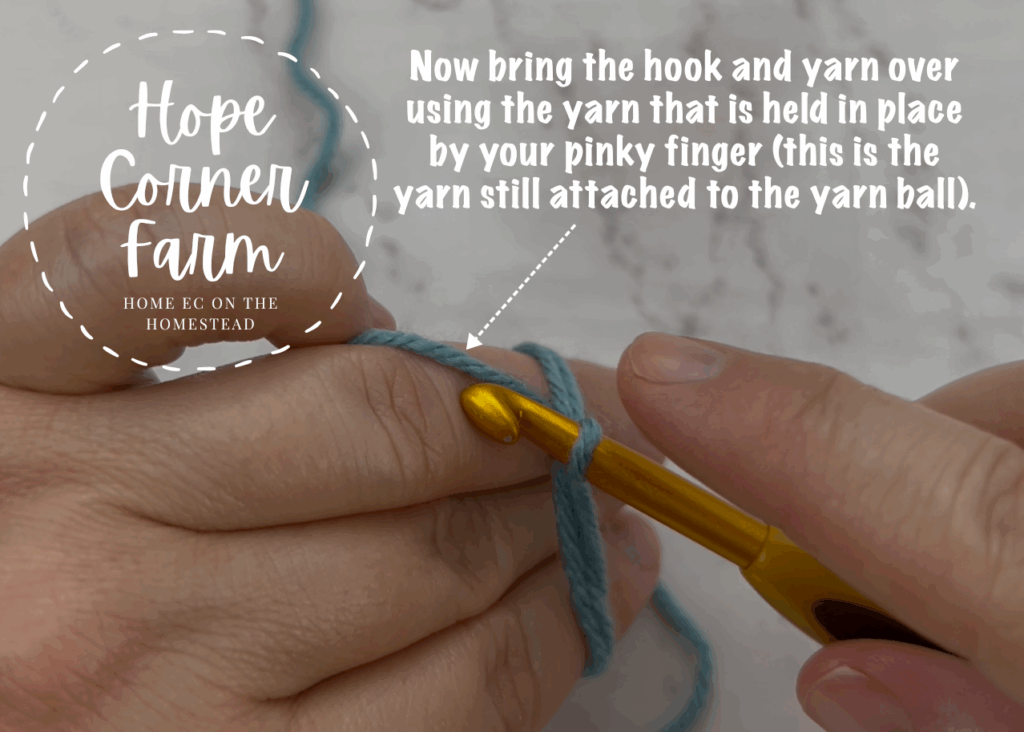
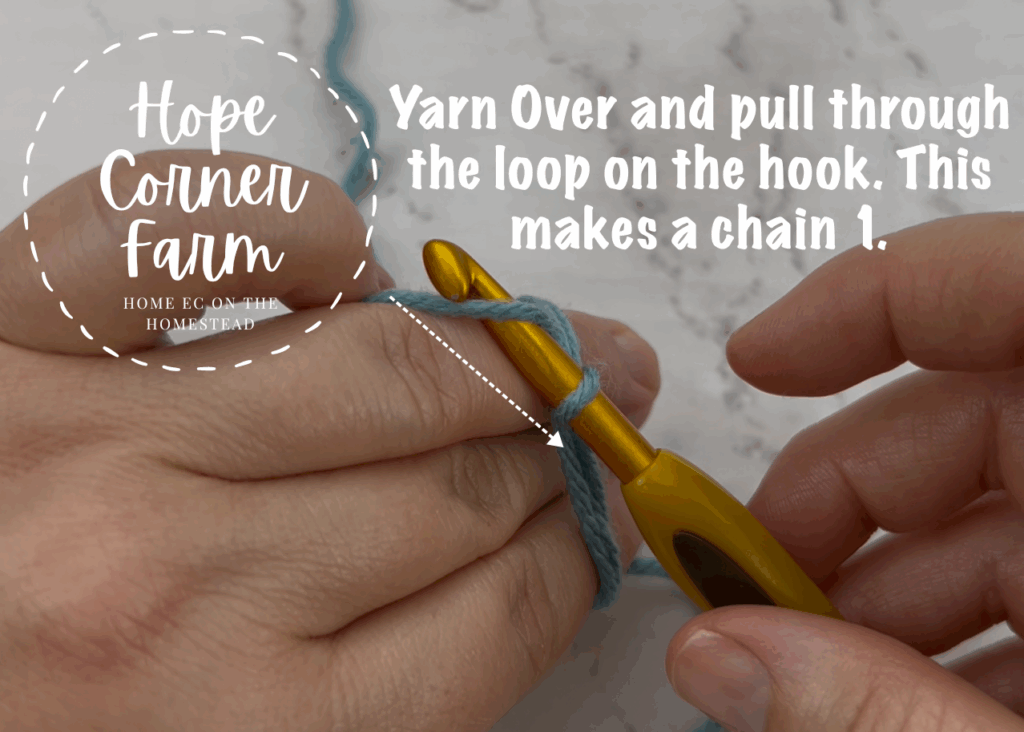
Next yarn over with the yarn that is held in place by the pinky finger.
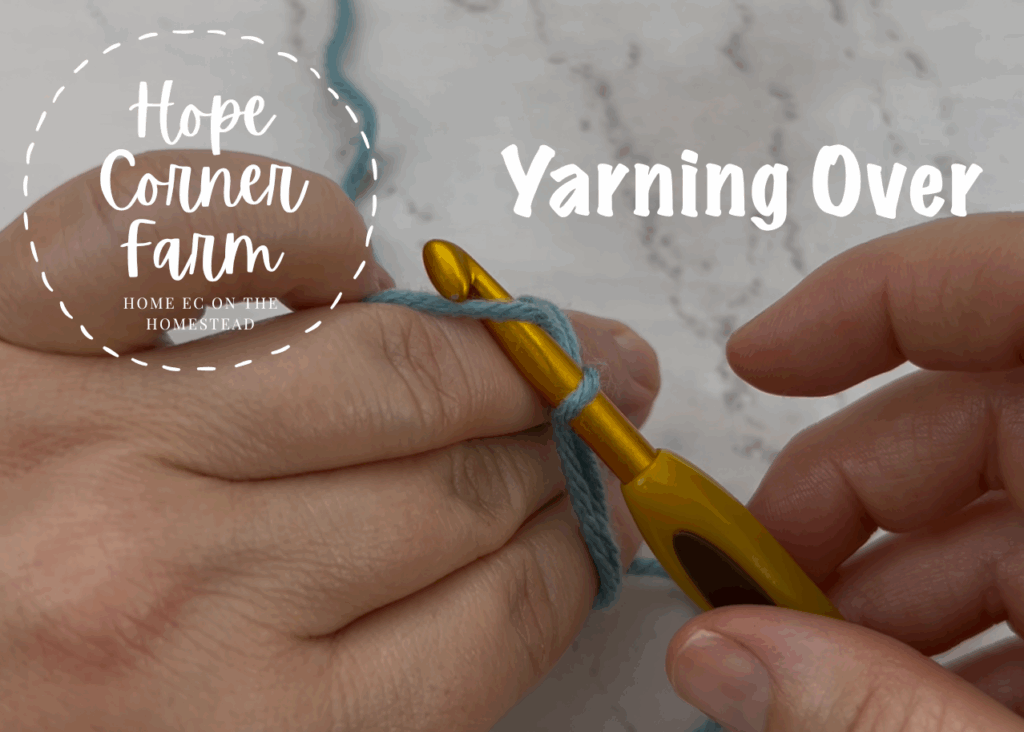
Double Magic Ring Step 10:
Now pull the hook through the loop on the crochet hook. This is a chain 1.
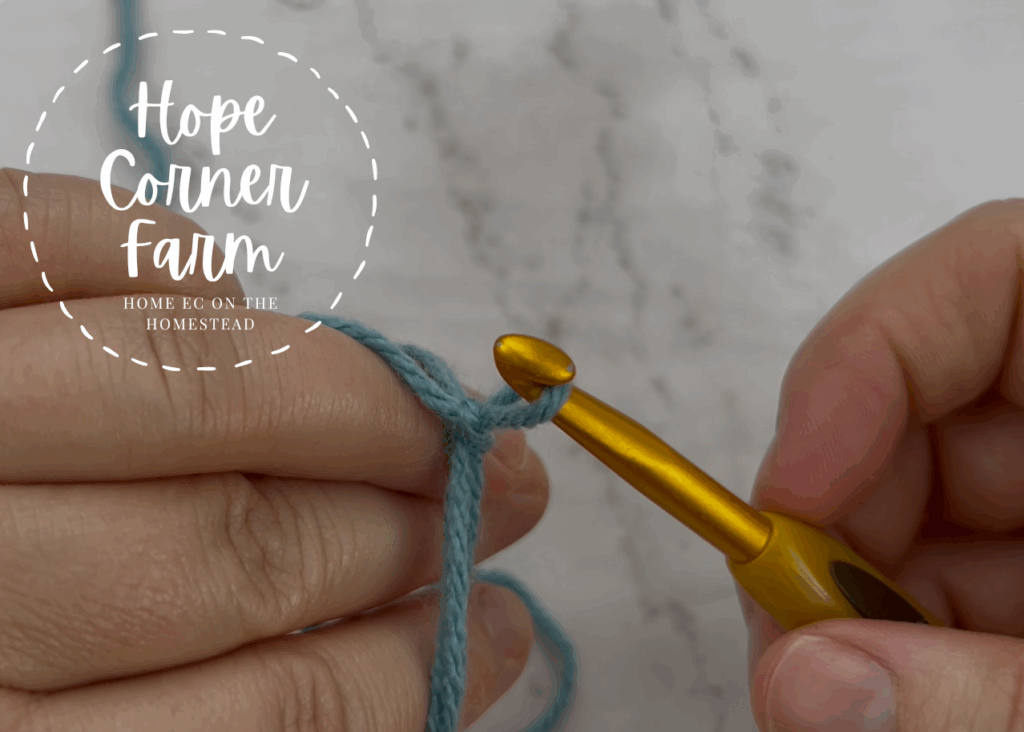
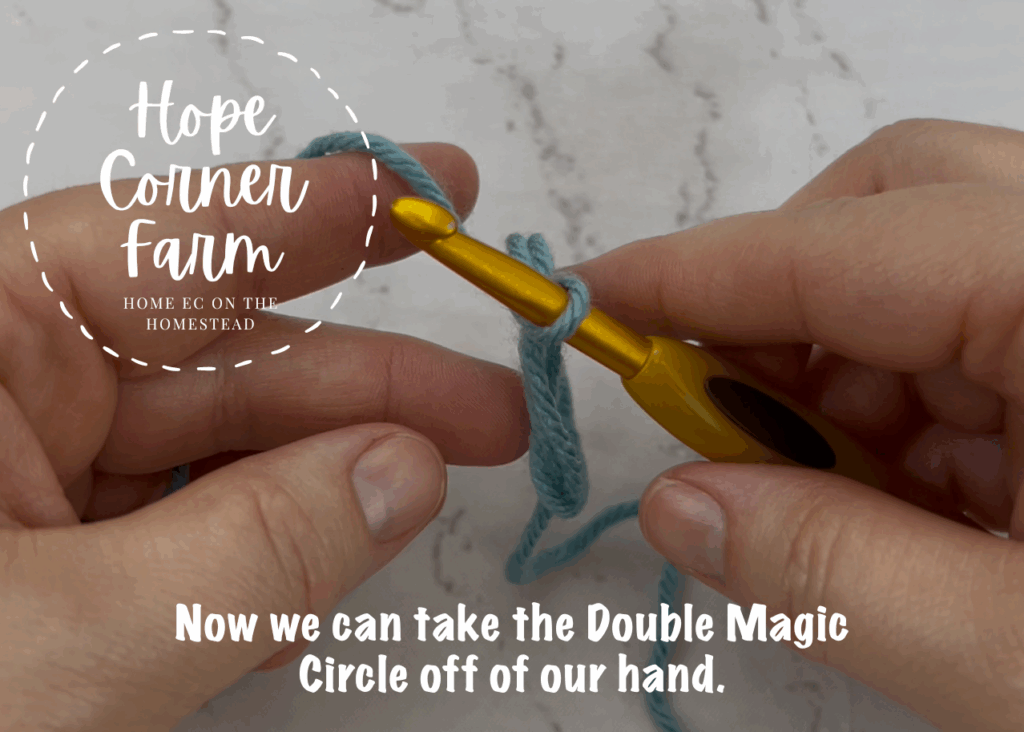
Step 11:
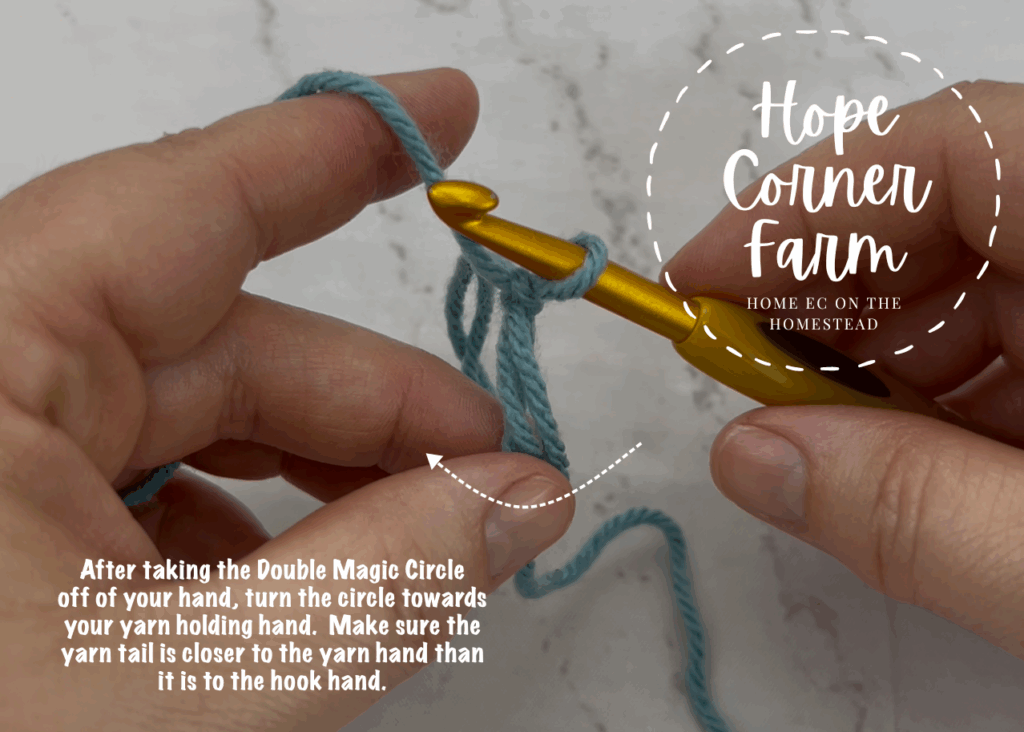
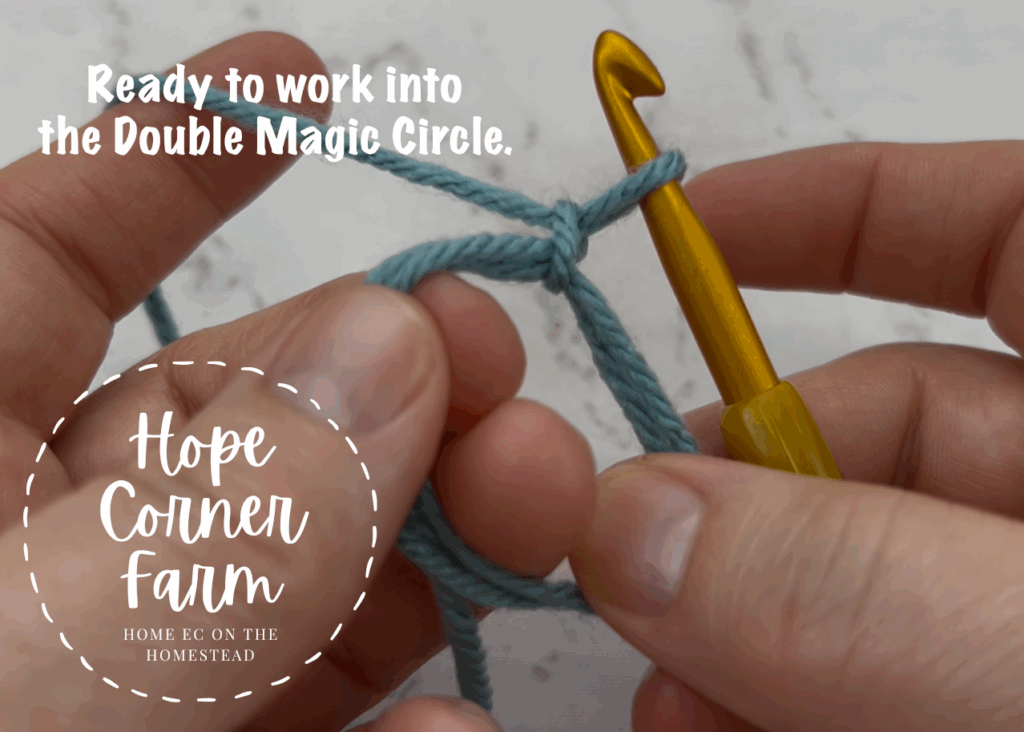
At this point we are able to now take the double magic ring off of the off or yarn holding hand. You will need to slightly turn the ring so you can work into it. The yarn tail should be on the side of the ring that is closest to the yarn holding hand. After turning the double magic circle, hold it in place with your off hand. Now you are ready to crochet into the circle.
Double Magic Circle Step 12:
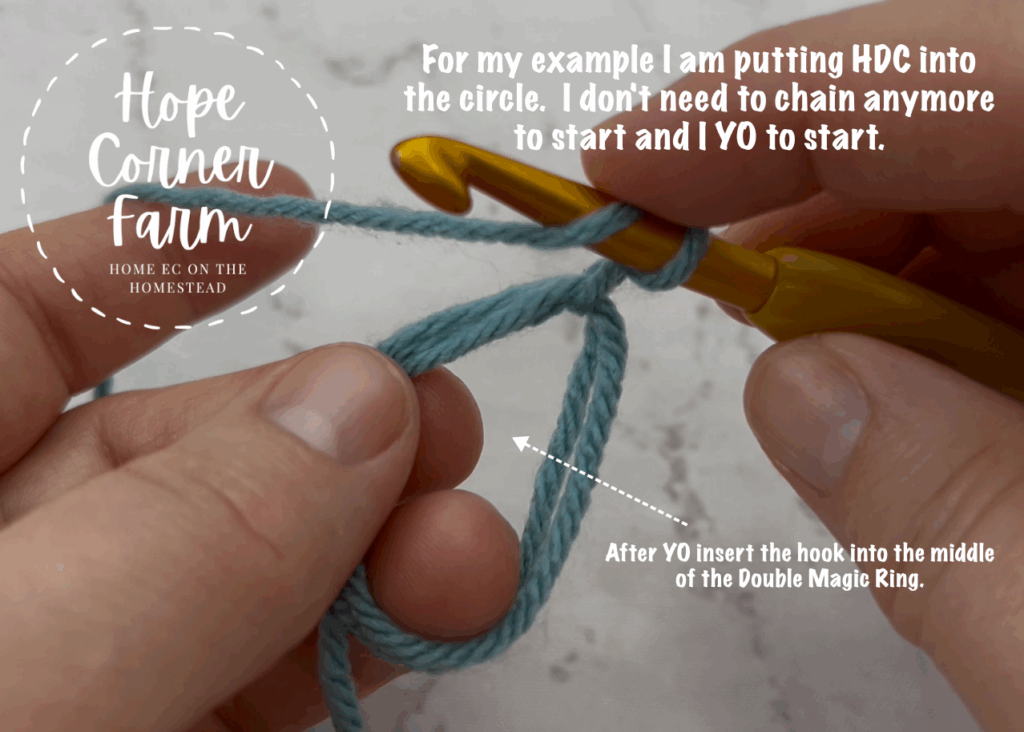
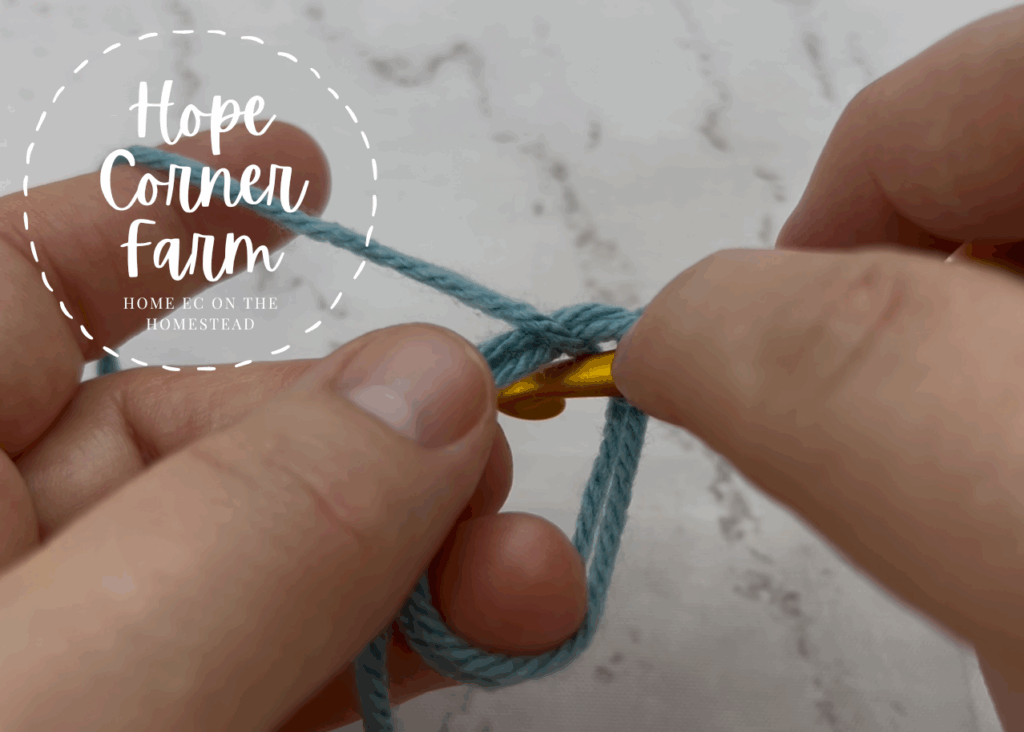
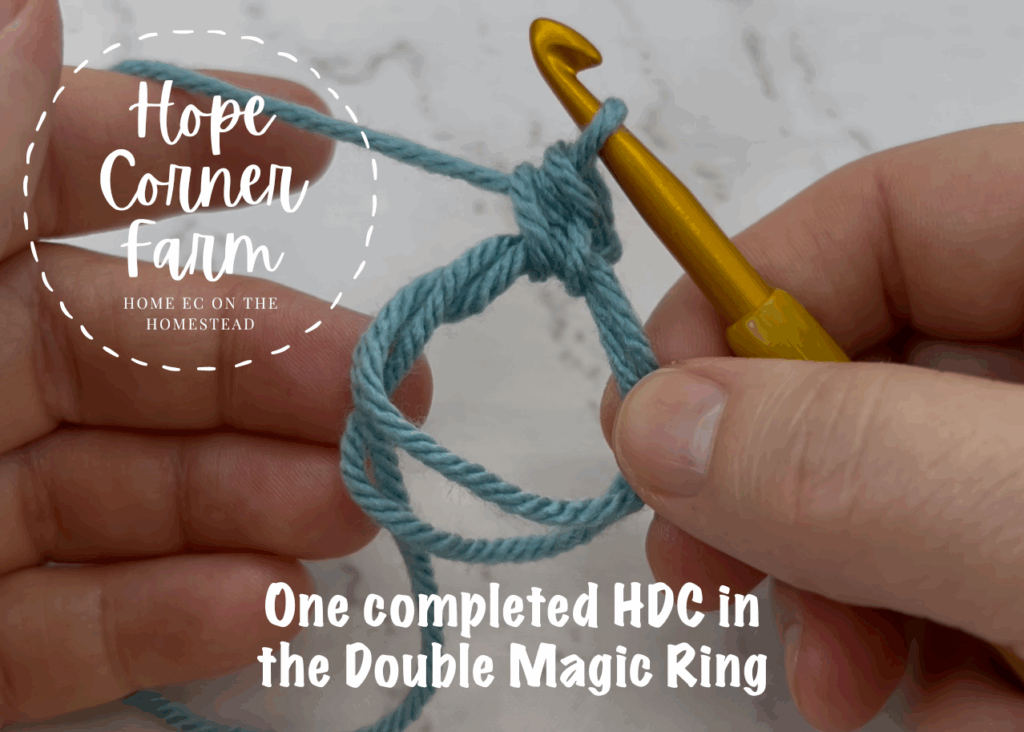
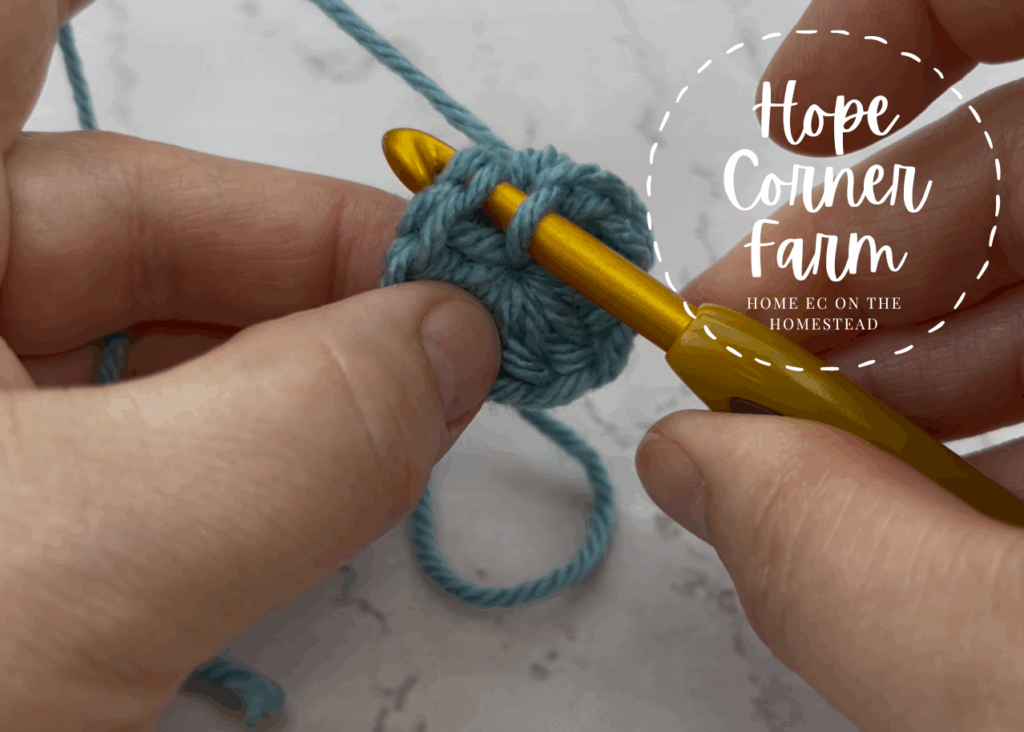
Finally we are able to crochet into the double magic circle. How you do this depends on what type of stitch you are working into the ring. If it is a double crochet or taller stitch, you will need to chain at least one more time before working into the circle. In this tutorial, I will be placing half double crochets into the ring. I did not need to chain again.
Now to work a HDC into the ring, I yarn over and insert the crochet hook into it.

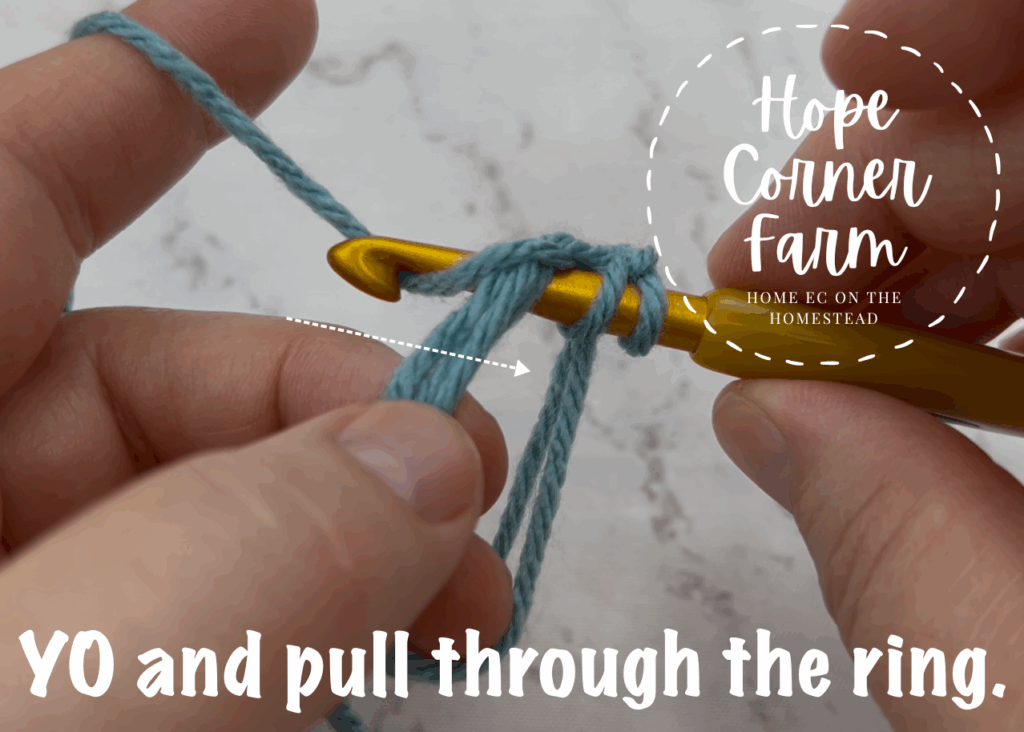
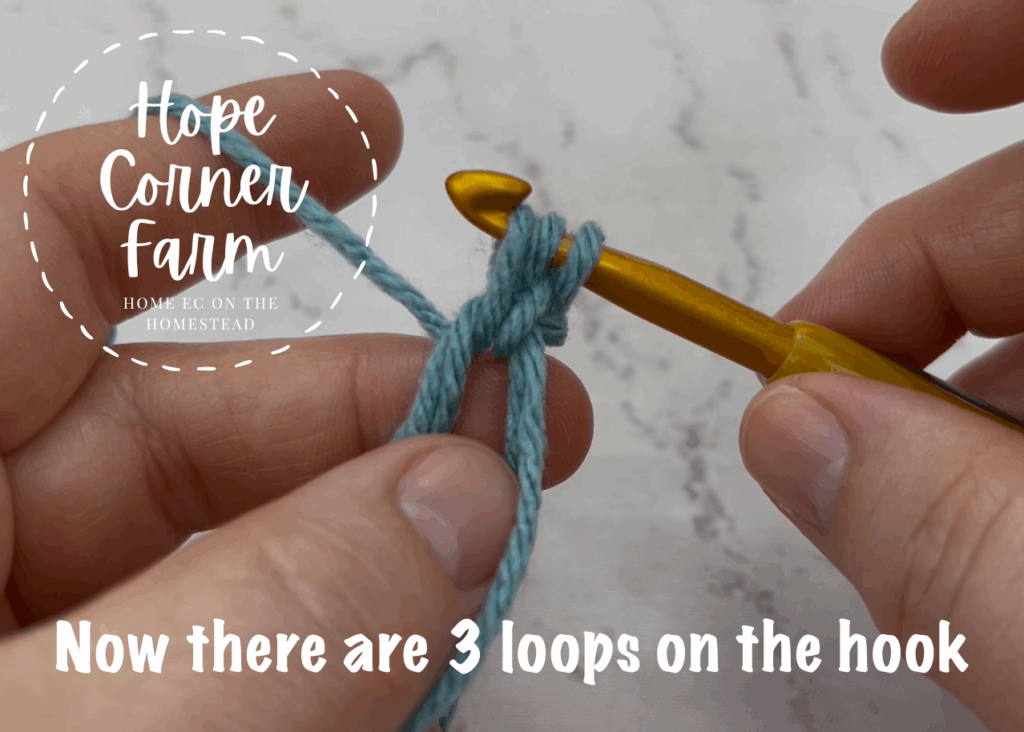
Step 13:
Next yarn over and pull back through the double magic ring. There will be 3 loops of yarn on the crochet hook at this point.
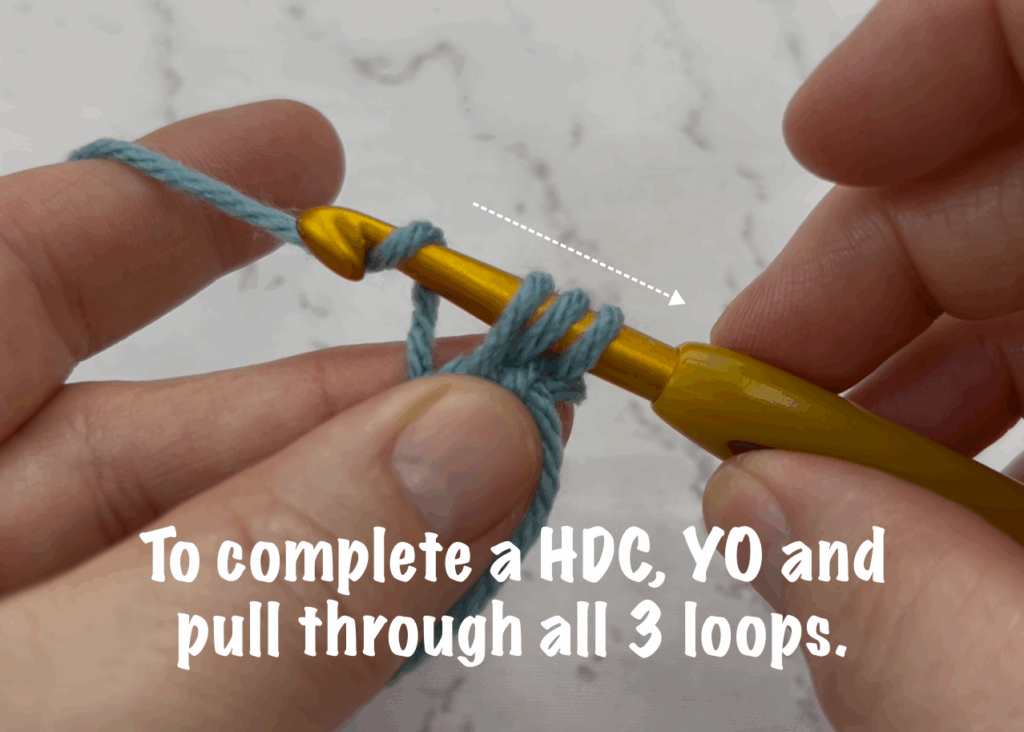
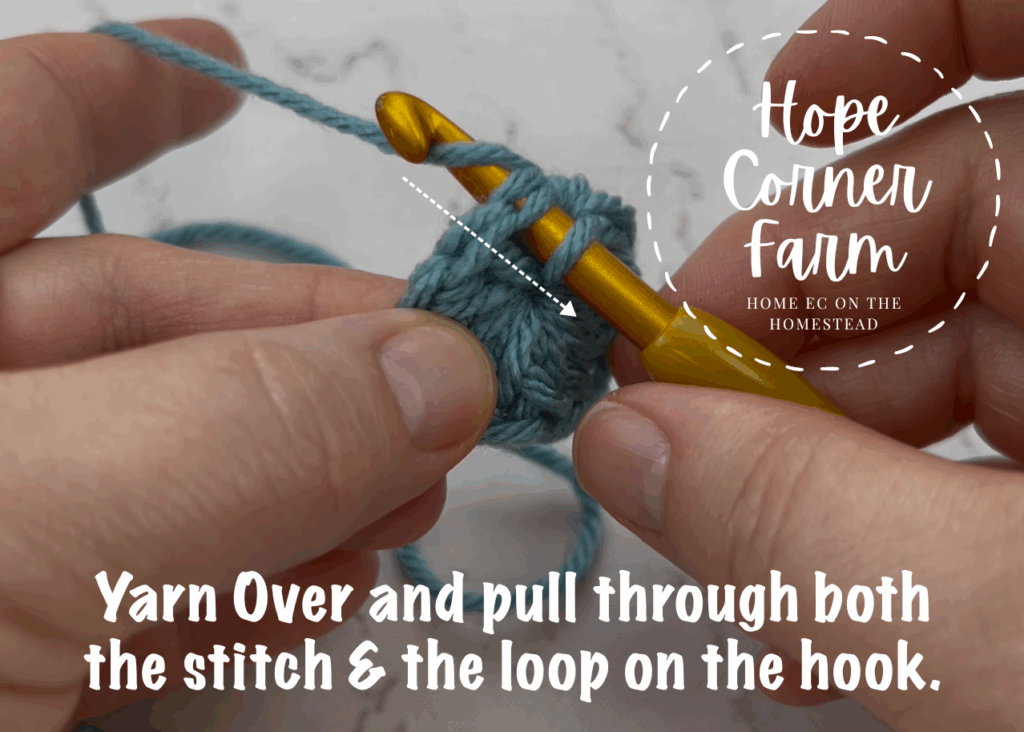
Double Magic Ring Step 14:
Now to finish a half double crochet stitch, yarn over and pull through all 3 loops on the crochet hook.
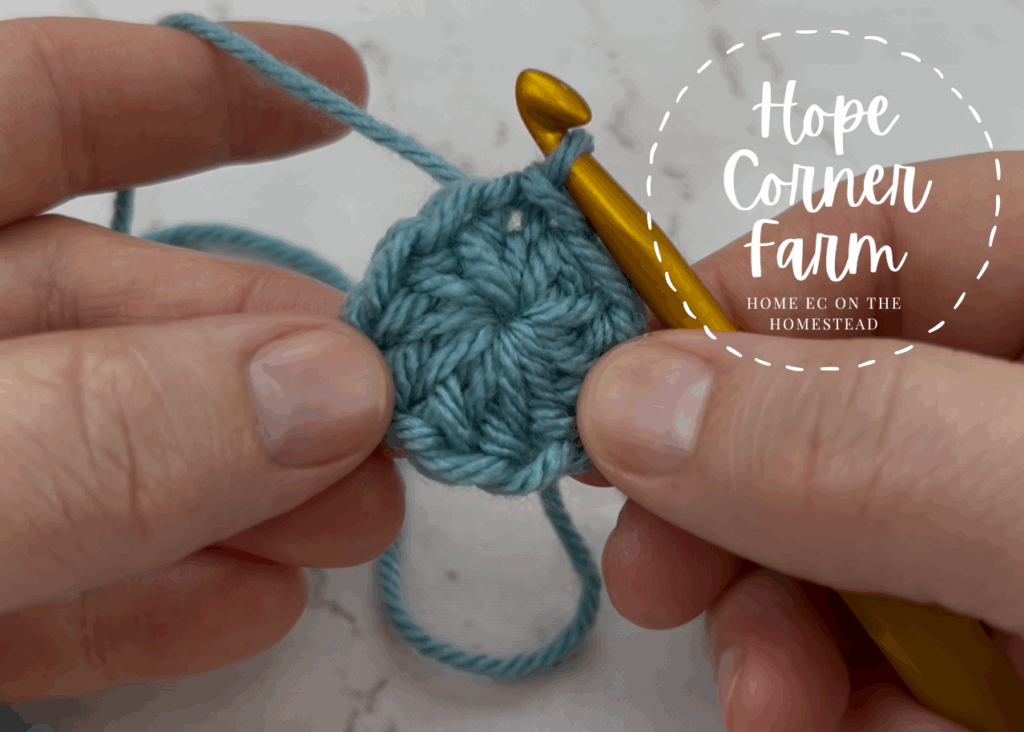
Step 15:
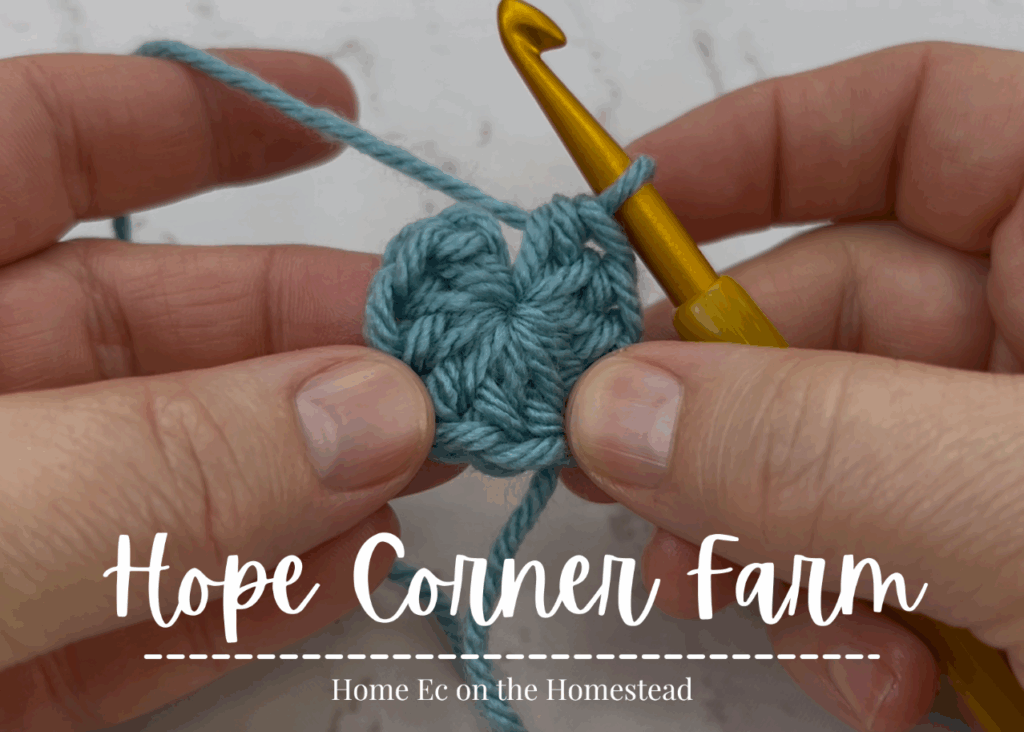
Continue working as many stitches into the Double Magic Ring as needed.

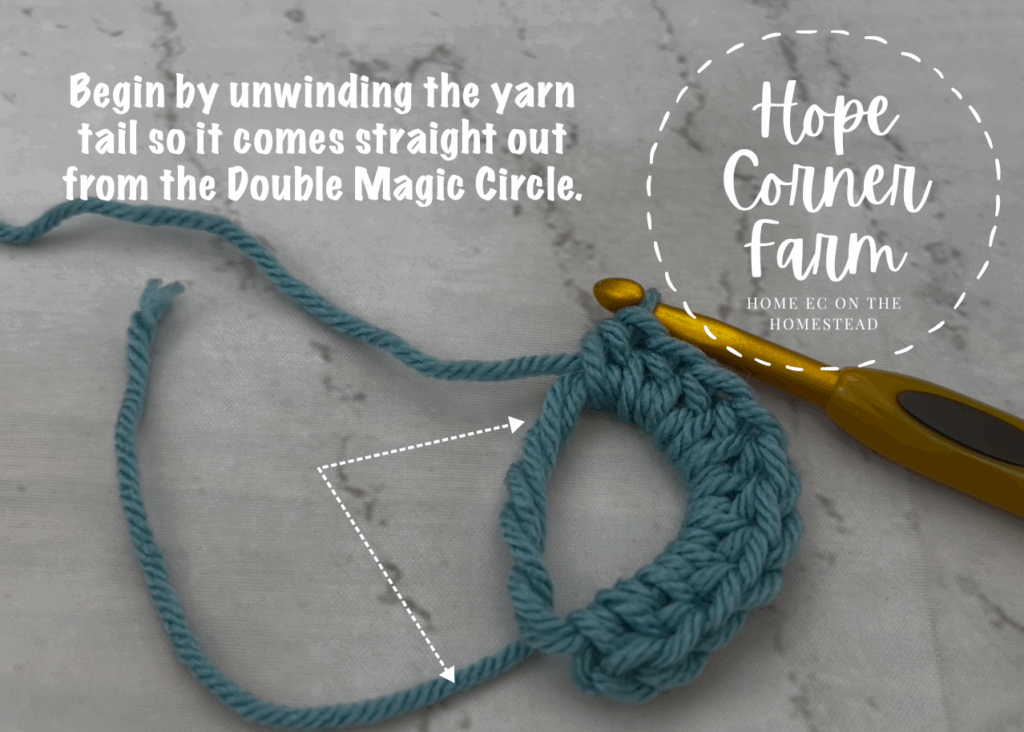
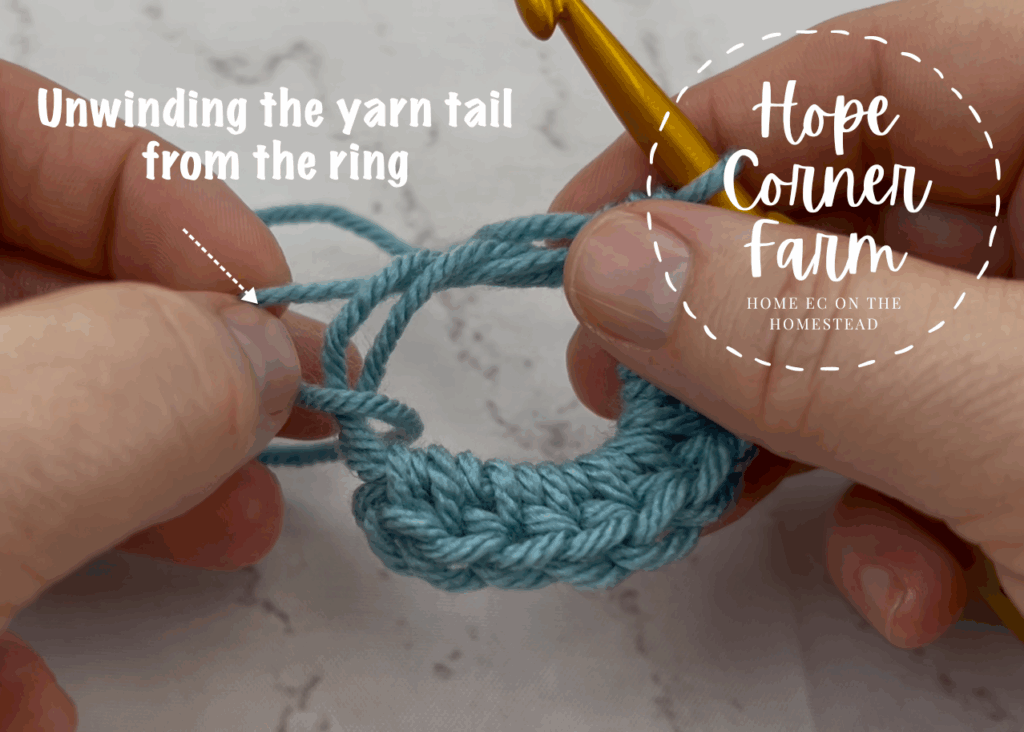
Closing the Ring:
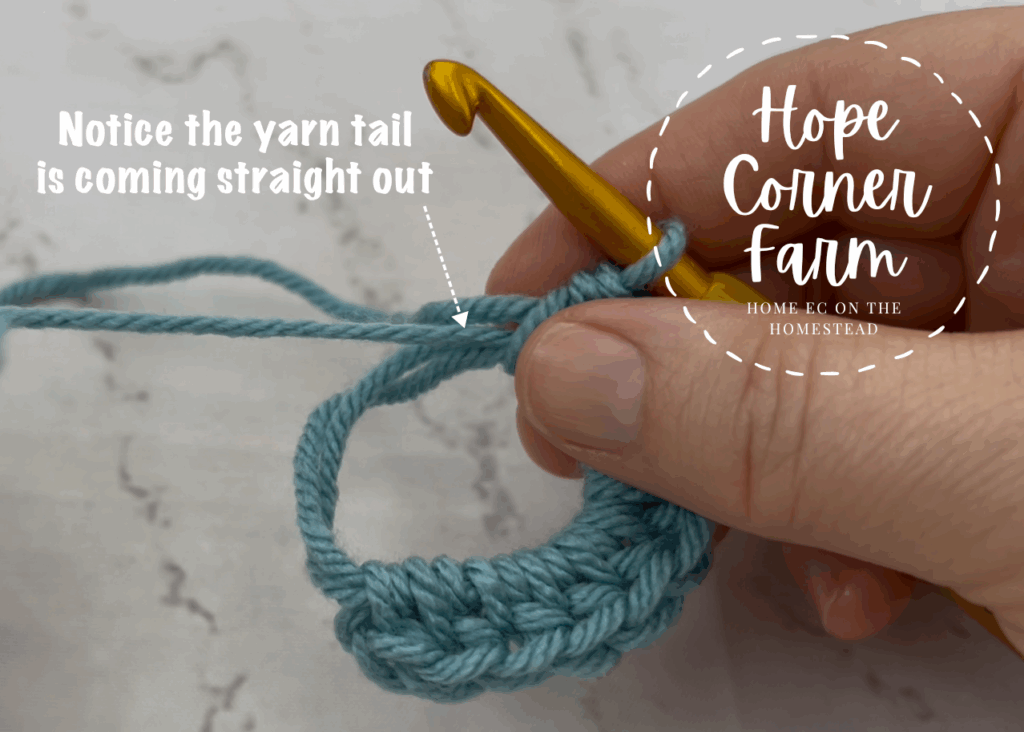
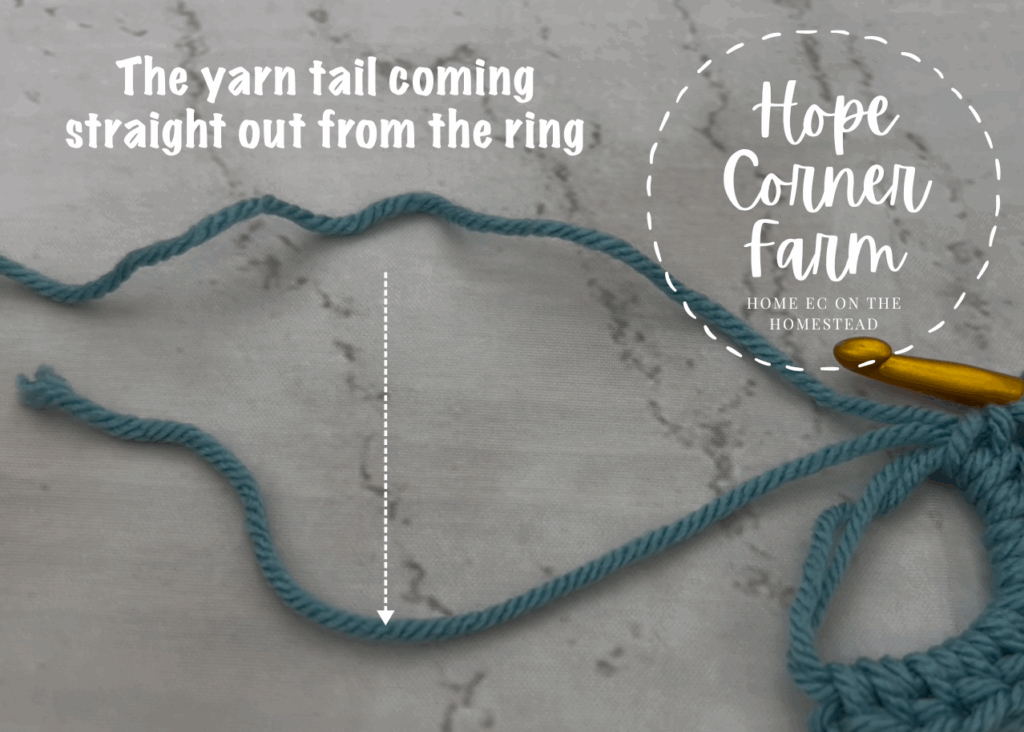
Now to close the circle the first step is to unwind the yarn tail from the ring. The yarn tail needs to come straight out from the last stitch crocheted into the ring.
Double Magic Circle Step 16:
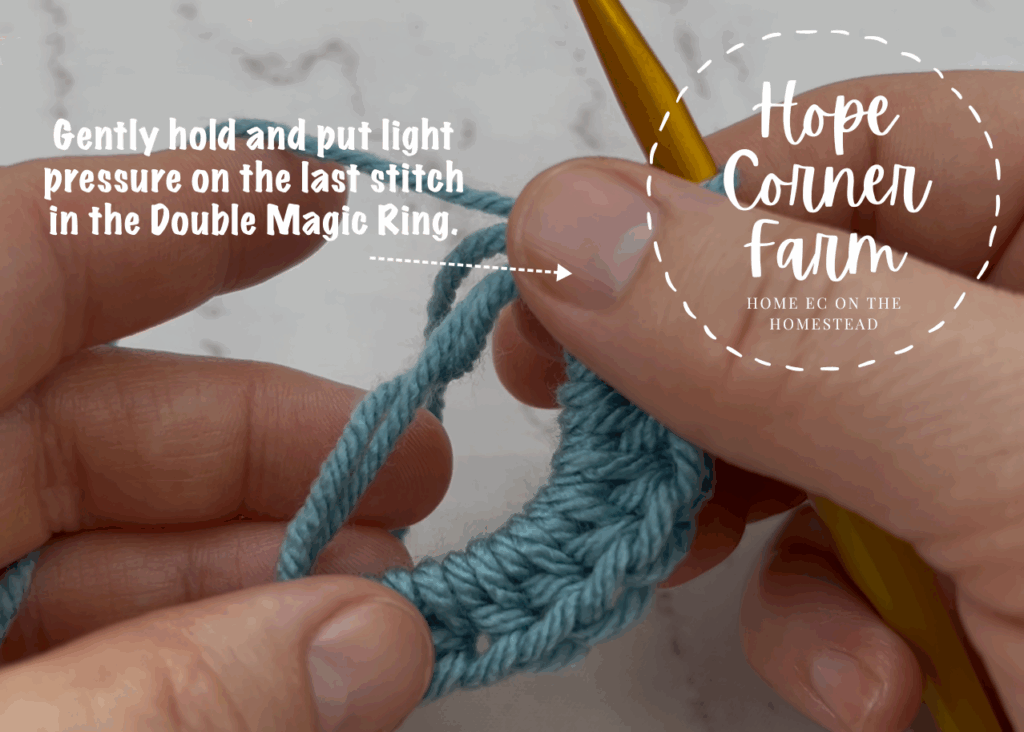
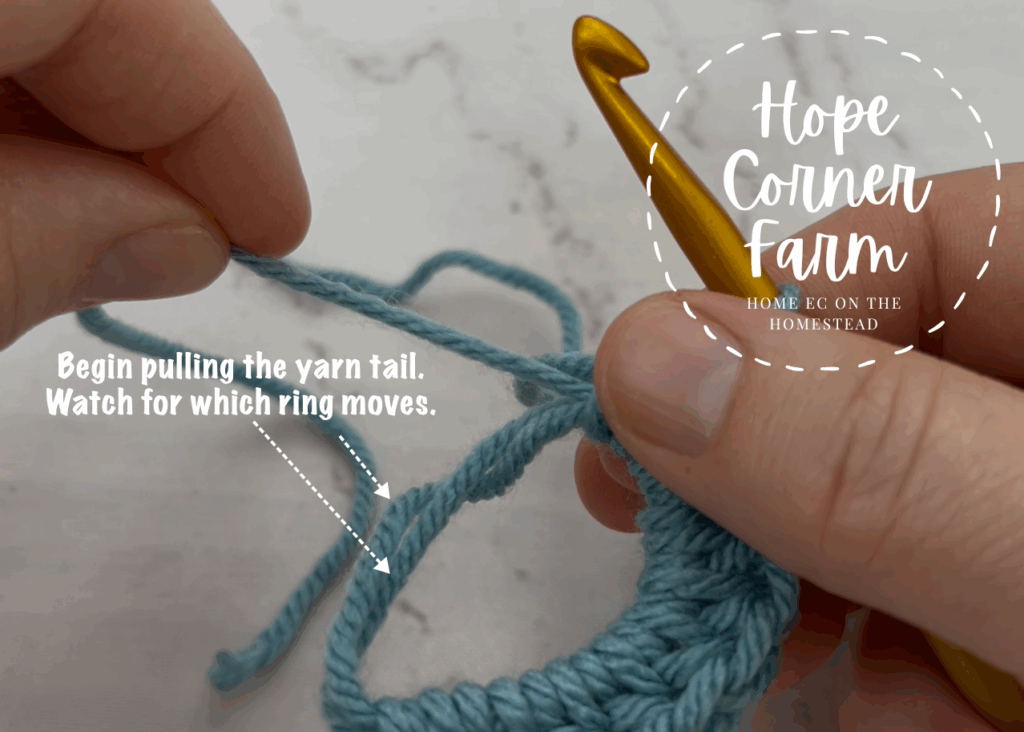
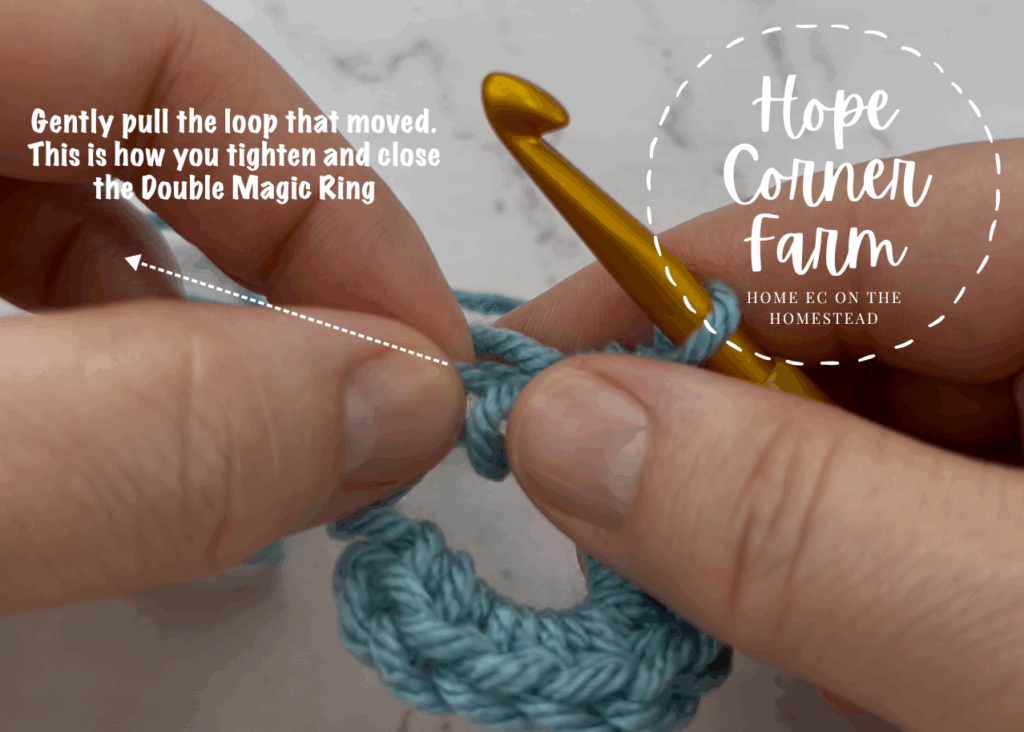
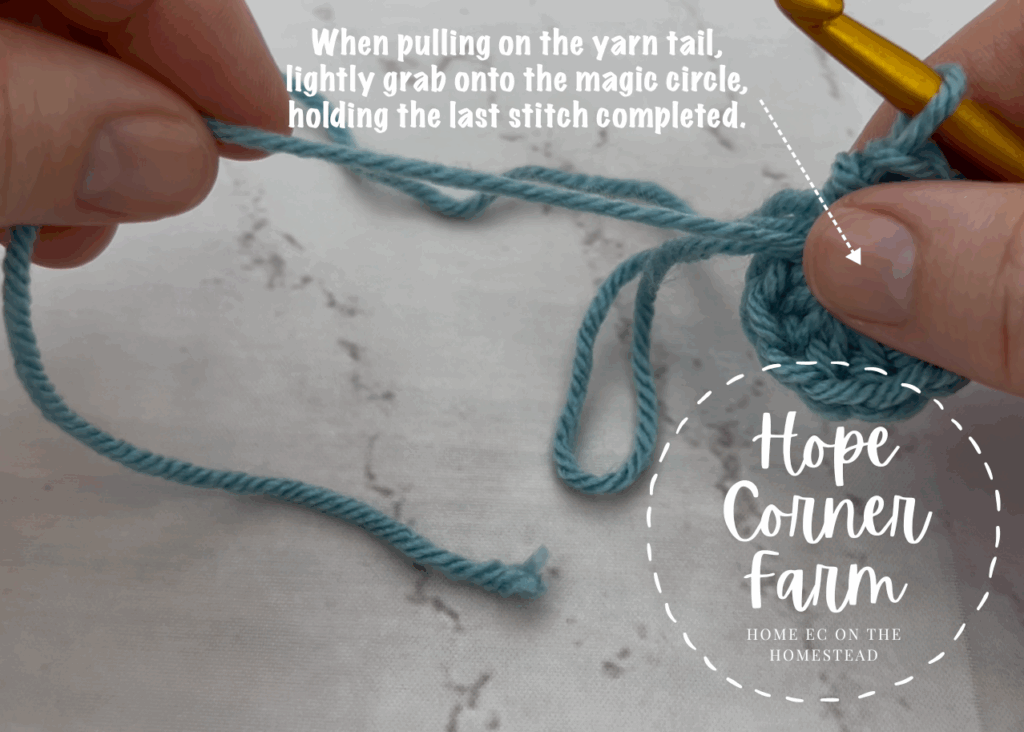
Next gently pull the yarn tail. We ARE NOT closing the ring by pulling on the yarn tail only. Put some gentle pressure on the last crochet stitch we put in the ring. Pull on the yarn tail. Watch for which loop moves. We will initially close the ring by pulling on the loop that moves.
Step 17:
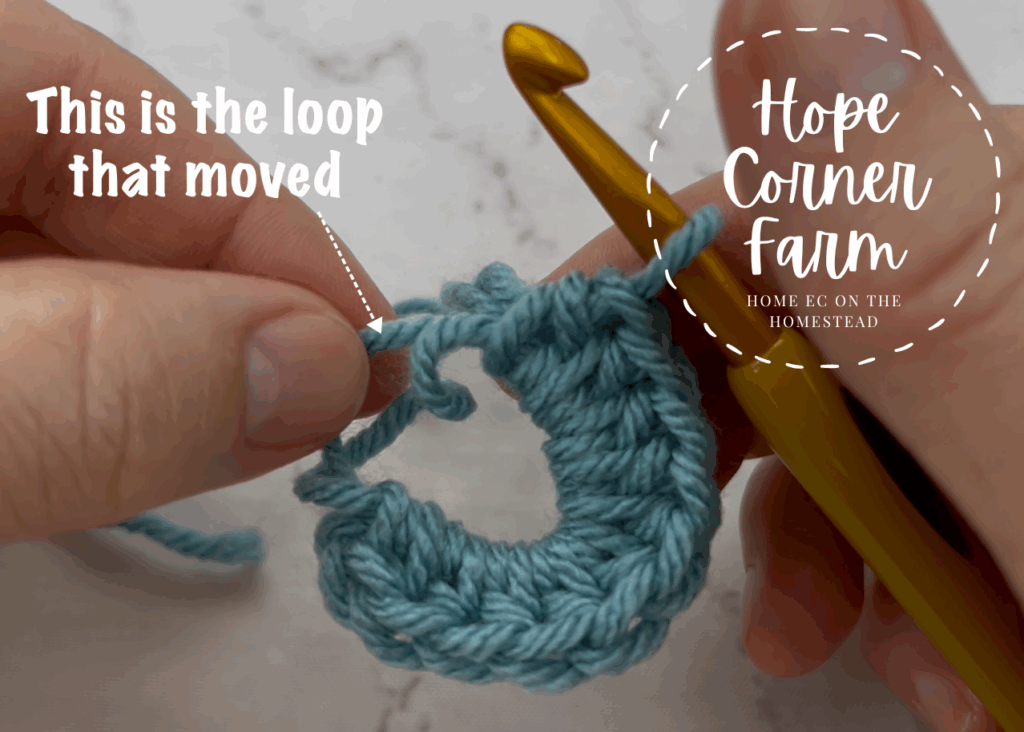
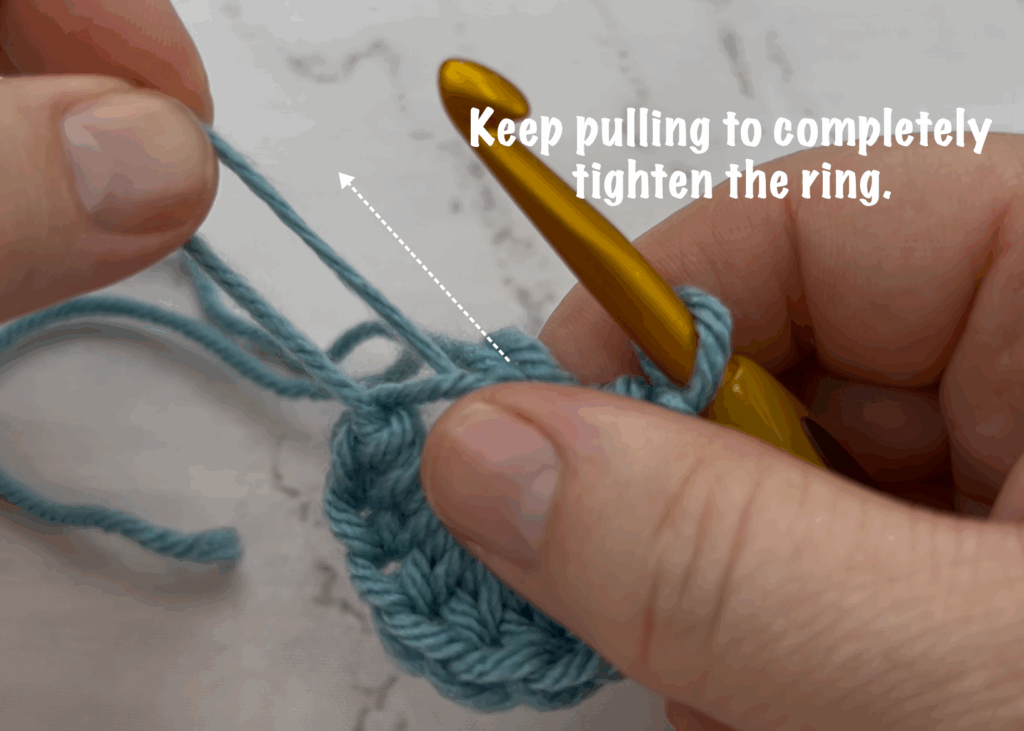
Now after identifying which loop moved, grab onto the ring that did move. We gently pull on this loop to close the Double Magic Ring. Begin pulling on the loop closer to the last stitch that was place in the ring. Pull until the circle is closed.
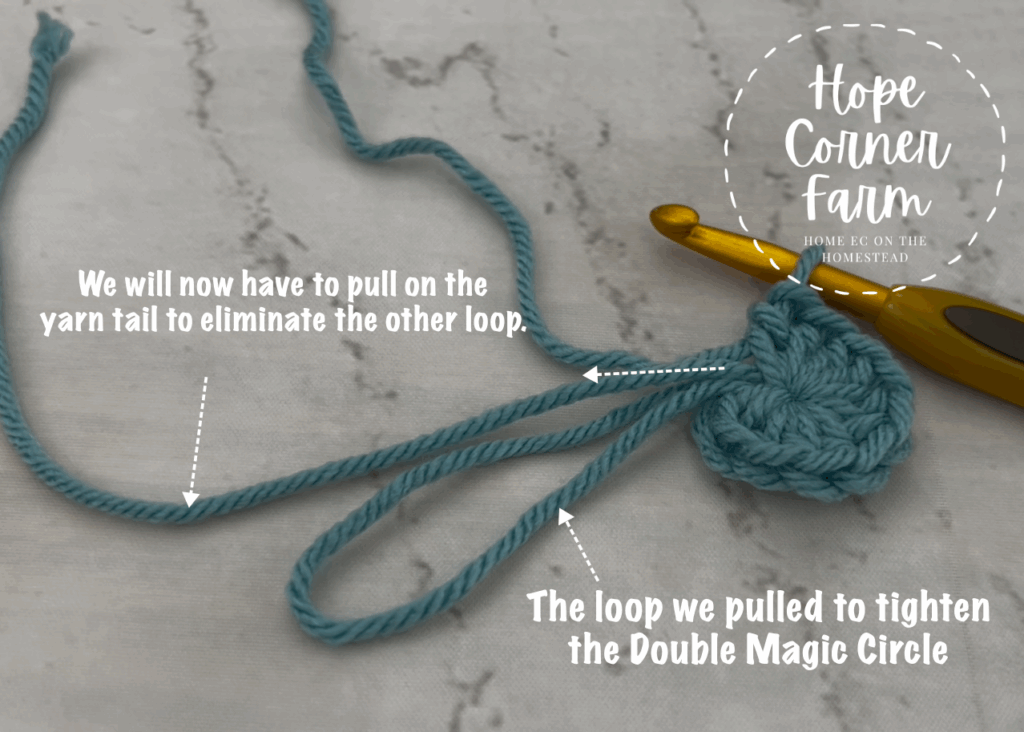
Double Magic Circle Step 18:
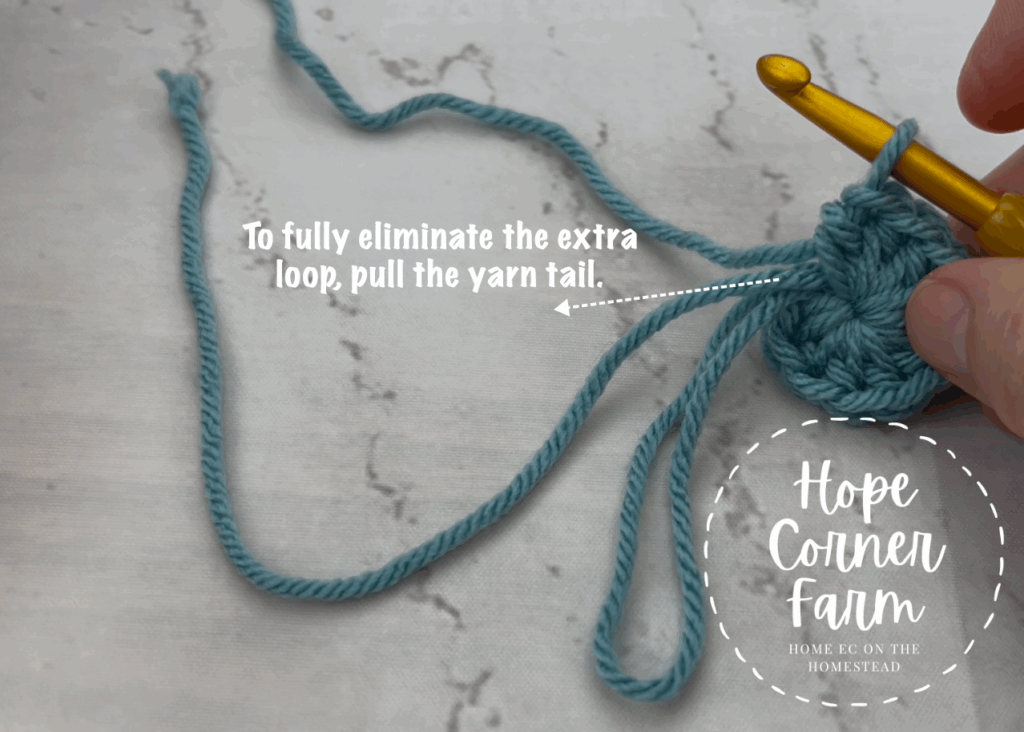
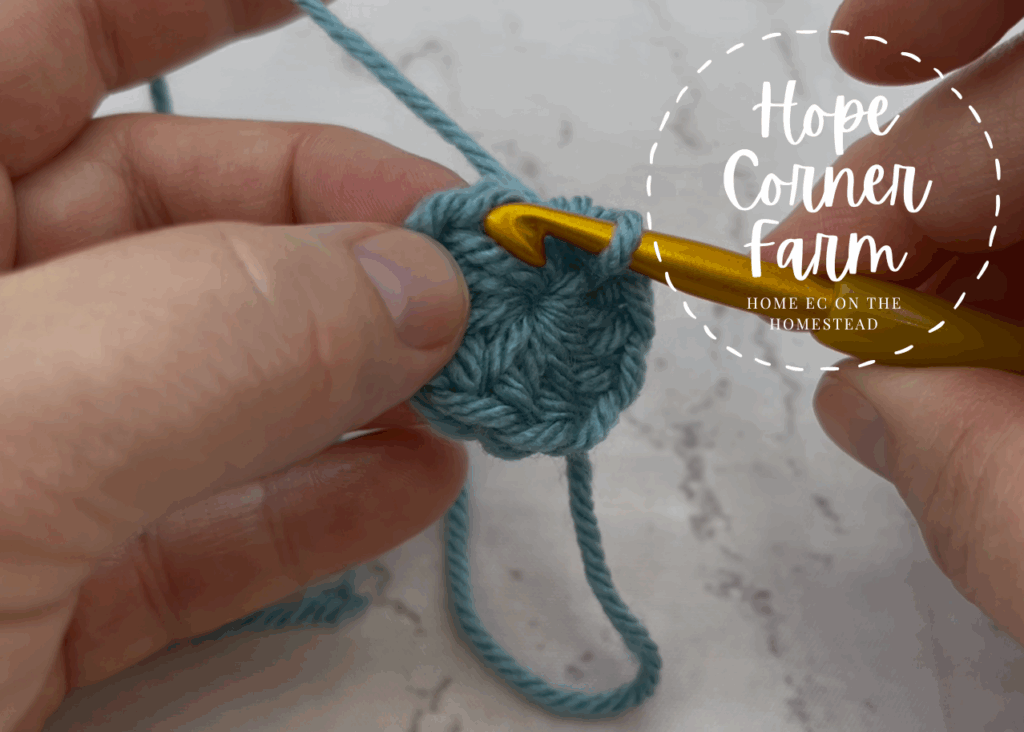
Next after the ring is completely closed we will need to eliminate the extra loop. There is a big loop created by the ring that we pulled to close the circle. To make this ring go away, pull on the yarn tail as you would for a regular magic circle. Pull the on the yarn tail until the loop disappears.


Step 19:
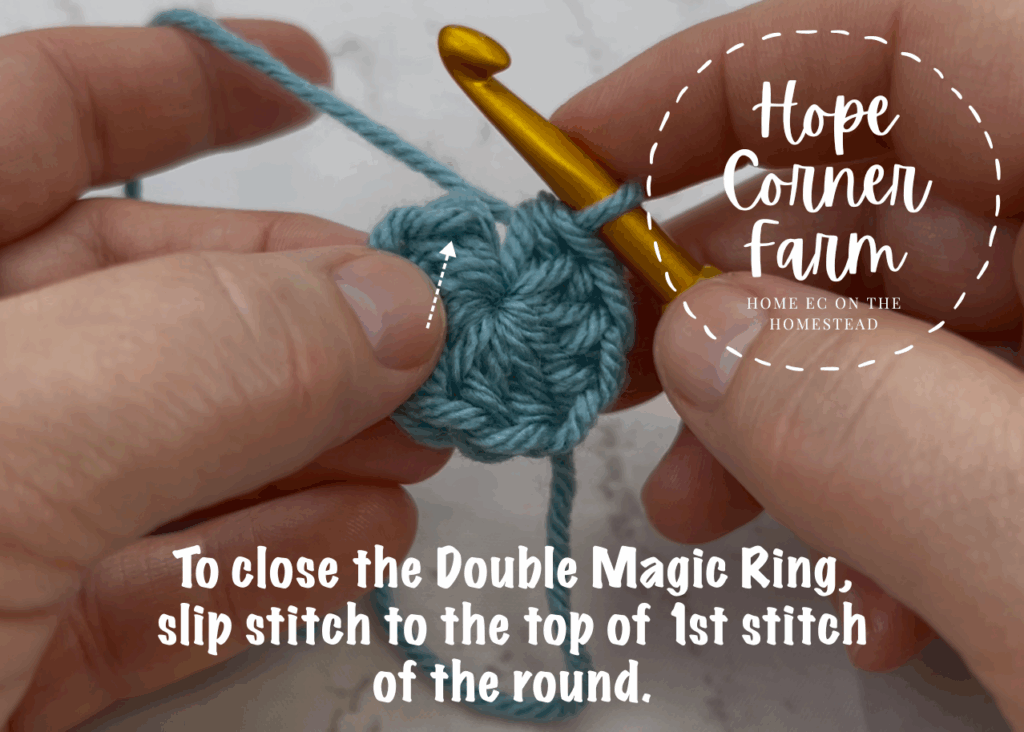
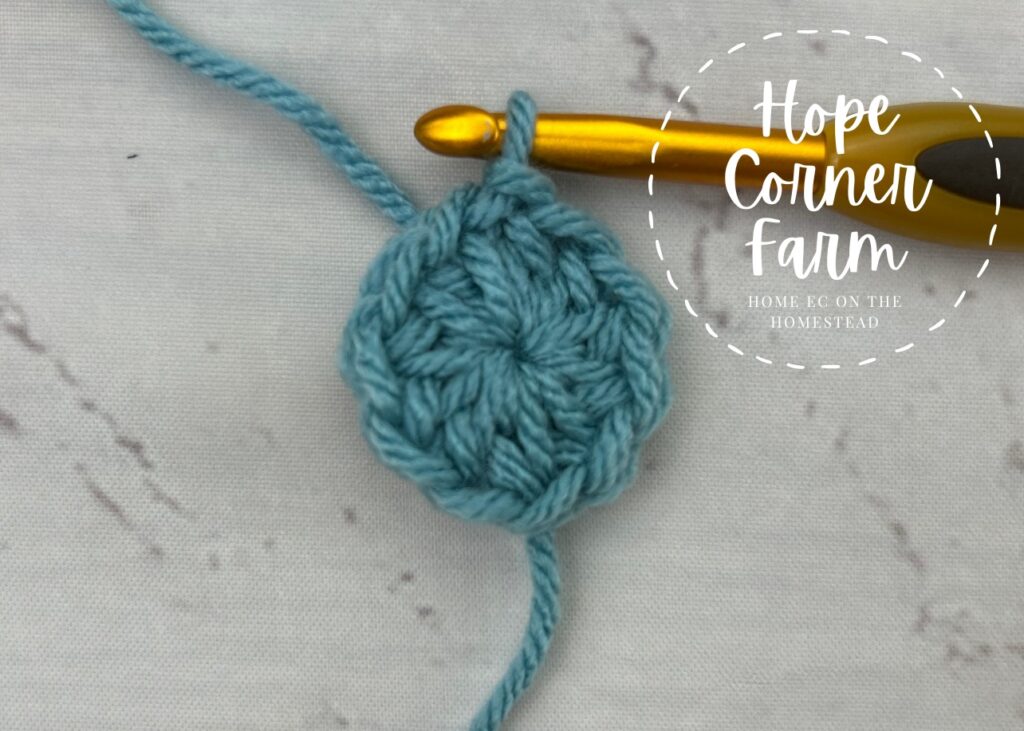
Finally to close the ring completely, slip stitch to the first stitch that was placed into the Double Magic Ring. At this point the ring is fully closed. This would complete a Round 1 for any project.
How to Go To the Next Round of Crochet:
Now to go to another round of crochet after using the Double Magic Ring, begin by chaining the number of chains needed for the type of stitch you will be using.

Finally, you will work your stitches as indicated by your pattern into the stitches around the ring. See the picture below for where to work the stitches.

And that’s how to create the Double Magic Ring in crochet! Once you get the hang of it, you will use it all of the time!

Double Magic Circle Video Tutorial:
Double Magic Ring Written Instructions Only:
Begin by pinching the yarn between the thumb and index finger of your yarn holding hand (leave a yarn tail that is at least 6″ in length). Wrap the yarn up and over the top of 3 of the fingers on that hand.
Step 1
Now wrap the yarn underneath those 3 fingers.
Next at the thumb and index finger cross the yarn to the back of the other wrap of yarn (closer to the knuckles). Wrap across the top of the 3 fingers again. Then wrap the yarn underneath the 3 fingers again.
Double Magic Ring Step 2
Again at the thumb cross the yarn back behind the other 2 loops of yarn (closer to the knuckles). Wrap the yarn across the top of the 3 fingers again (a 3rd wrap). Stop wrapping the yarn at this point.
Step 3
Now hold the yarn in place with your pinky finger. Grab your crochet hook.
Next go underneath 2 of the 3 wraps of yarn on your hand with the crochet hook. Make sure that your hook is FACE DOWN.
Double Magic Circle Step 4
Now with the crochet hook go over the top of the last yarn wrap. Gently pull the 3rd wrap forward (toward the fingernails) and underneath the other 2 wraps. This will form something that kind of looks like an “A” shape.
Step 5
Next rotate the crochet hook so it is face up. This creates a loop on the crochet hook. Take the hook and yarn over using the yarn still held in place by the pinky finger. Pull through the loop created by rotating the crochet hook. This completes a chain 1. At this point you can take the ring off of your hand.
Double Magic Ring Step 6
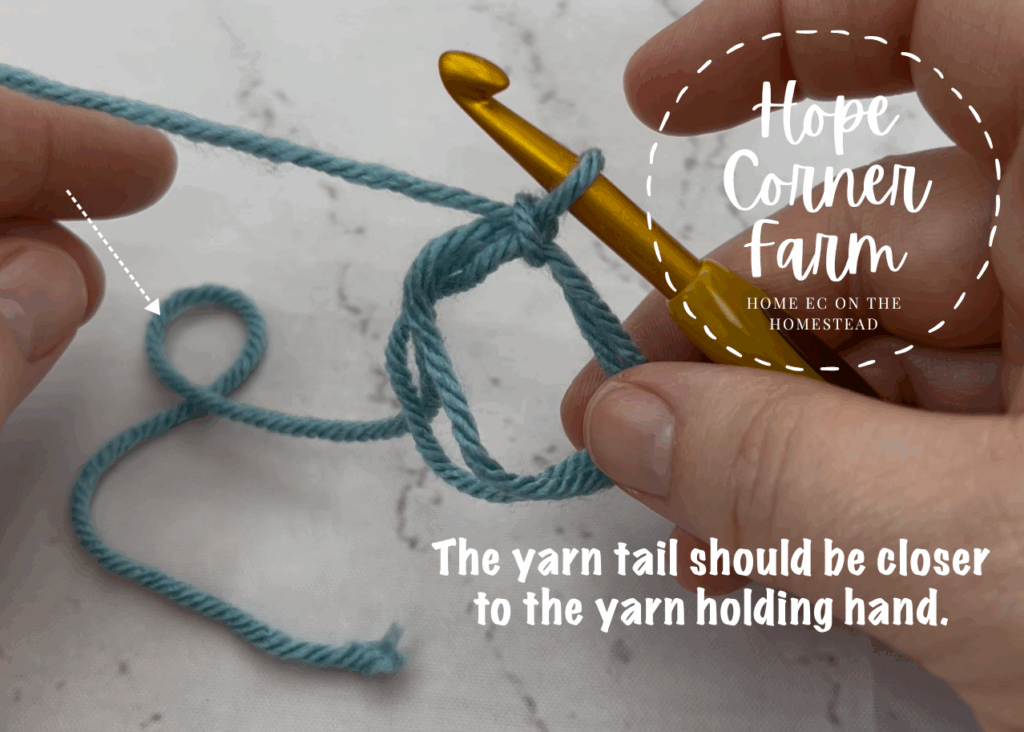
Now slightly turn the ring so that the yarn tail is closer to the yarn holding hand. We are now ready to work our crochet stitches into the Double Magic Ring.
Step 7
Chain as many additional chains as needed for the type of crochet stitch you are placing into the ring (for a SC and HDC you don’t need to chain any more chains. For a DC, 1 more chain. For a TR 2 more chains).
Next place as many stitches into the Double Magic Circle as indicated by the crochet pattern.
Closing the Double Magic Circle
Now once you have the needed number of stitches in the ring you are ready to close the ring. Begin by gently unwinding the yarn tail from the ring until it comes straight out from the double magic ring. Put slight pressure on the last stitch placed into the ring. Start pulling the yarn tail, but pay attention to which loop moves. We actually close the double magic circle by pulling on the loop that moves, not the yarn tail.
To close the double magic ring pull on the loop that moved. Grab on and pull closer to the last crochet stitch placed into the ring. Keep pulling until the double magic circle is completely closed. There will be a large loop outside of the ring, we will get rid of it in the next step.
Eliminating the Extra Loop
Now to get rid of the extra loop, gently pull on the yarn tail until the extra loop disappears into the magic ring.
Closing the Double Magic Ring
Finally to completely close the Double Magic Circle, slip stitch to the top of the first crochet stitch placed into the ring. Chain as many as needed for the crochet stitches you will work for the second round.
Enjoy Learning New Crochet Stitches? Don’t Miss Out on More!
Subscribe below to get free crochet patterns, tutorials, and inspiration delivered straight to your inbox. If you want more crochet fun delivered to your inbox hop on over and join my newsletter!

Join my creative community and keep your crochet queue full of beautiful, fun-to-make projects!
If you loved this tutorial and want more crochet inspiration, come connect with me on social! Subscribe on YouTube (Hope Corner Farm Crochet) for full, step‑by‑step videos, follow along on TikTok and Instagram for quick tips and reels, pin your favorite projects on Pinterest, and join the conversation on Facebook. Don’t forget to tag your makes with #HopeCornerFarmCrochet so I can cheer you on and share your beautiful work!
Happy Crocheting,

Love this crochet stitch? Check out these other crochet tutorials!
Now that you know how to crochet the Double Magic Ring, you can confidently start any project that begins crocheting in the round: From amigurumi and granny squares to crochet hats and baskets. This easy technique is perfect for anyone learning how to crochet for beginners who wants a clean, secure center that won’t unravel. Ready to keep practicing your crochet skills? Explore more of my crochet stitch tutorials: try the textured Herringbone Double Crochet stitch, the warm and durable Thermal Single Crochet stitch, or go back to basics with the Half Double Crochet and Double Crochet Stitch tutorials. Each crochet guide includes step-by-step photos and clear instructions to help you master essential crochet techniques and create beautiful handmade projects with confidence.
Don’t forget to pin this tutorial or share it with a fellow crocheter. Also, subscribe to the blog for more free crochet patterns and beginner friendly tutorials delivered straight to your inbox!
