
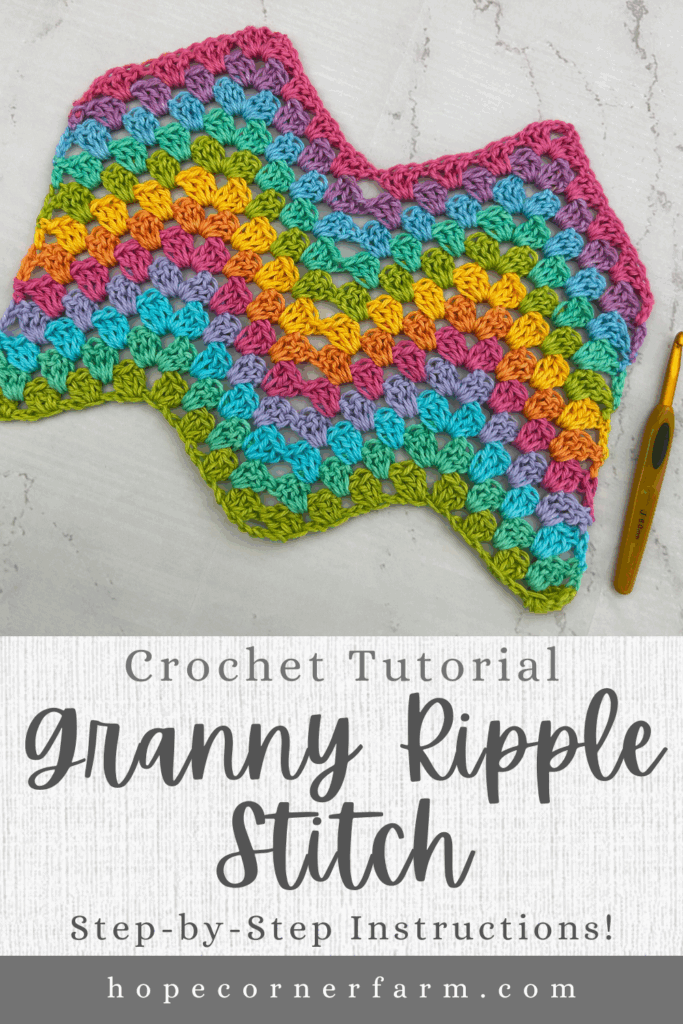
How to Crochet the Granny Ripple Stitch: Step-by-Step Tutorial for Beginners


Looking to add some bold texture and eye-catching movement to your crochet projects? The granny ripple stitch is a beautiful variation of the classic granny stitch that creates a stunning zigzag or chevron pattern—perfect for blankets, scarves, and home décor. Whether you’re a beginner or just looking to expand your stitch library, this step-by-step tutorial will guide you through everything you need to know to master the granny ripple stitch. Grab your hook and yarn, and let’s get started!


First, check out our video tutorial on our You Tube Channel! Subscribe to get the latest crochet fun from Hope Corner Farm Crochet!
Materials Needed:
Any size crochet hook (I used a Size J 6.0mm crochet hook)
Yarn of choice (I used a medium weight size 4 yarn)
Scissors
Yarn Needle
Crochet Terminology Used:
This tutorial is written using US Crochet Terms
Stitch Multiples:
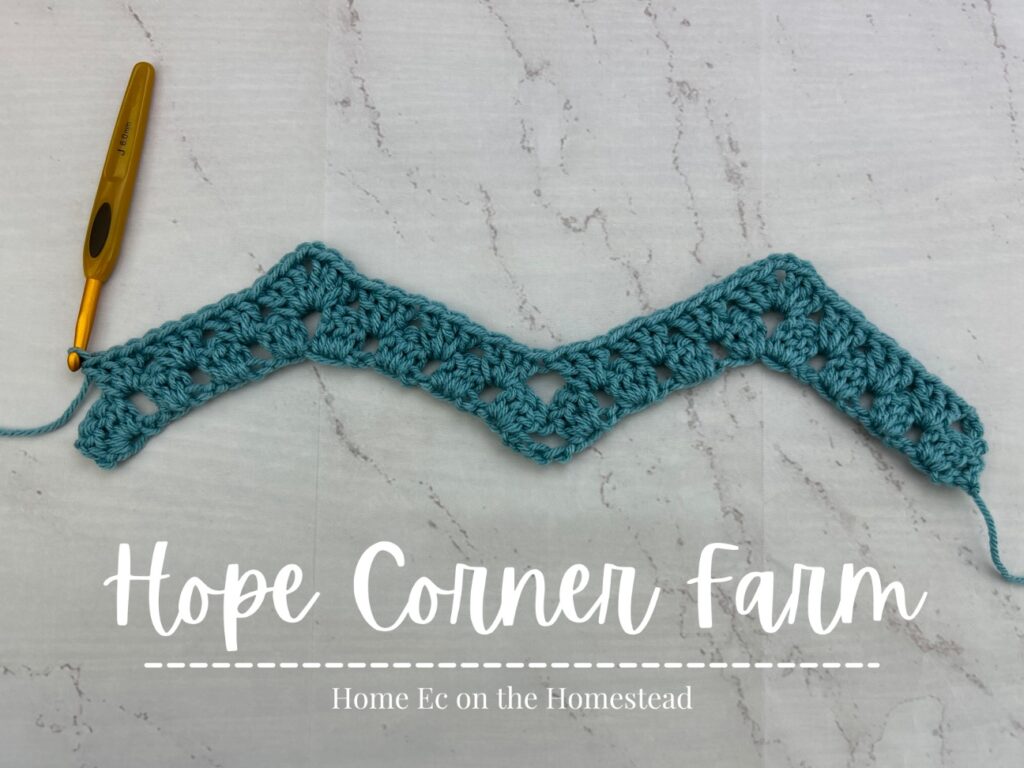
This stitch requires multiples of 25+1. For this example I chained 51 (50 is my multiple of 25, then I added 1 to bring it up to 51).
NOTE: In the photo below I show the stitch placement for this sample.
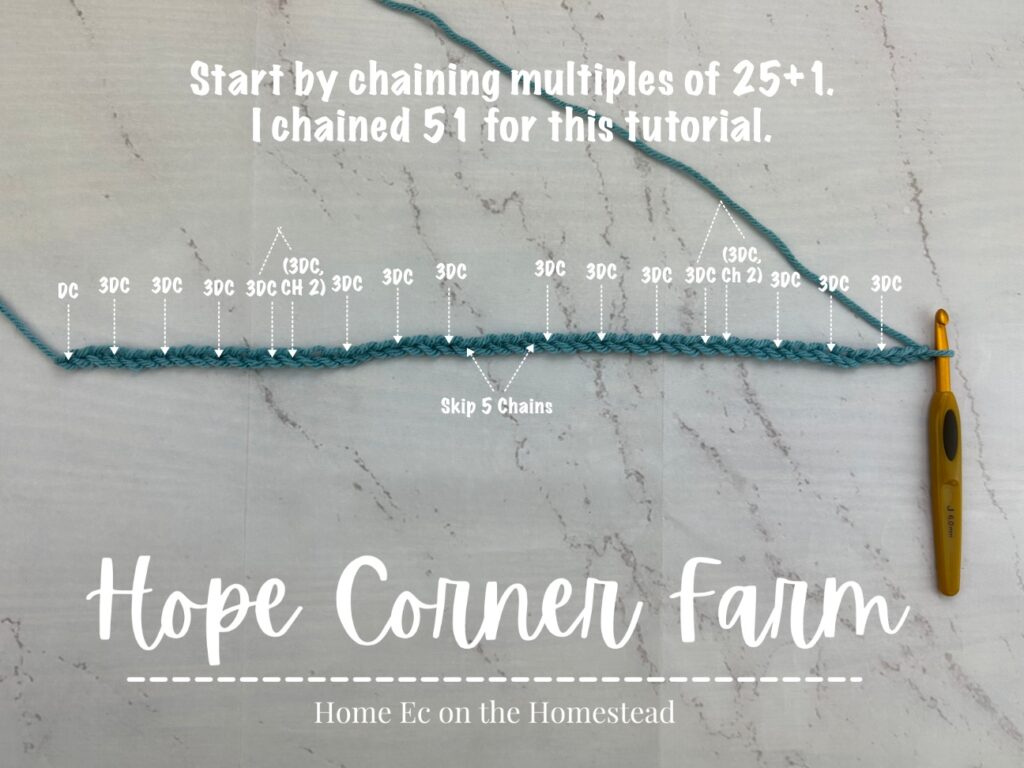
Granny Ripple Stitch – Row 1:
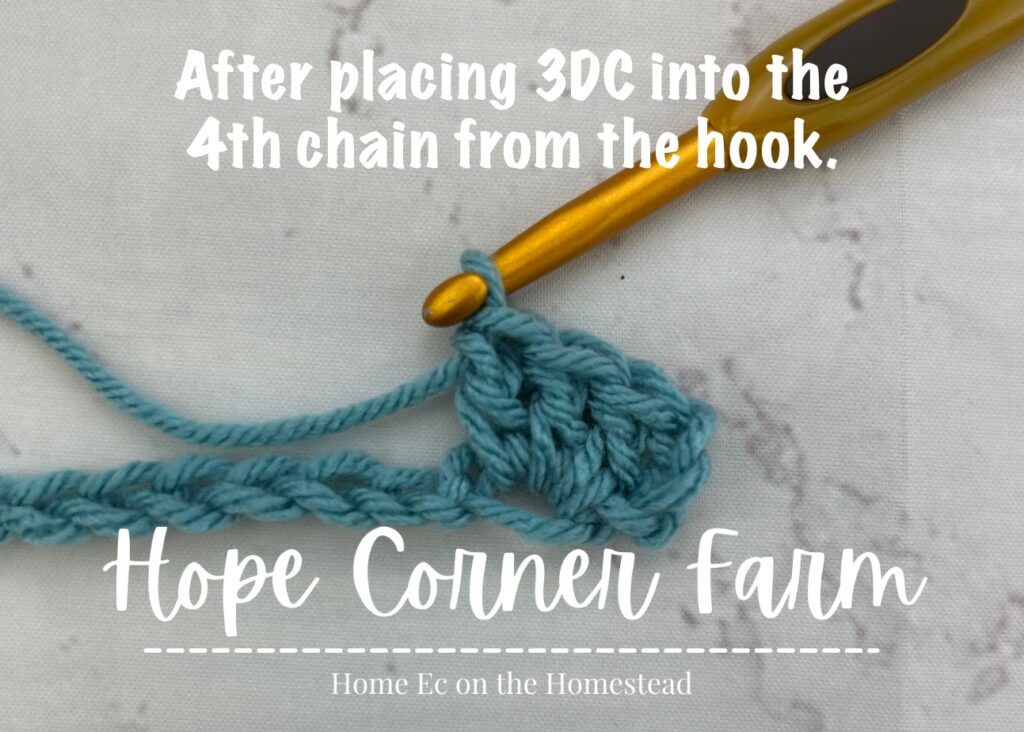
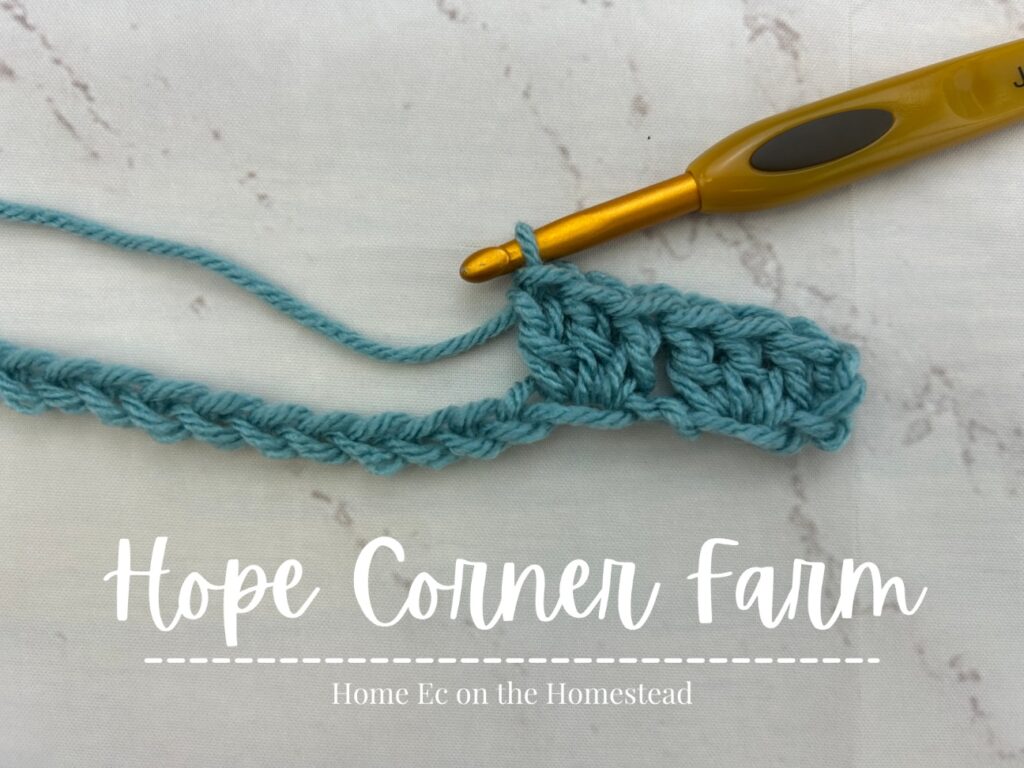
First into the 4th chain from the crochet hook place 3 double crochet stitches.
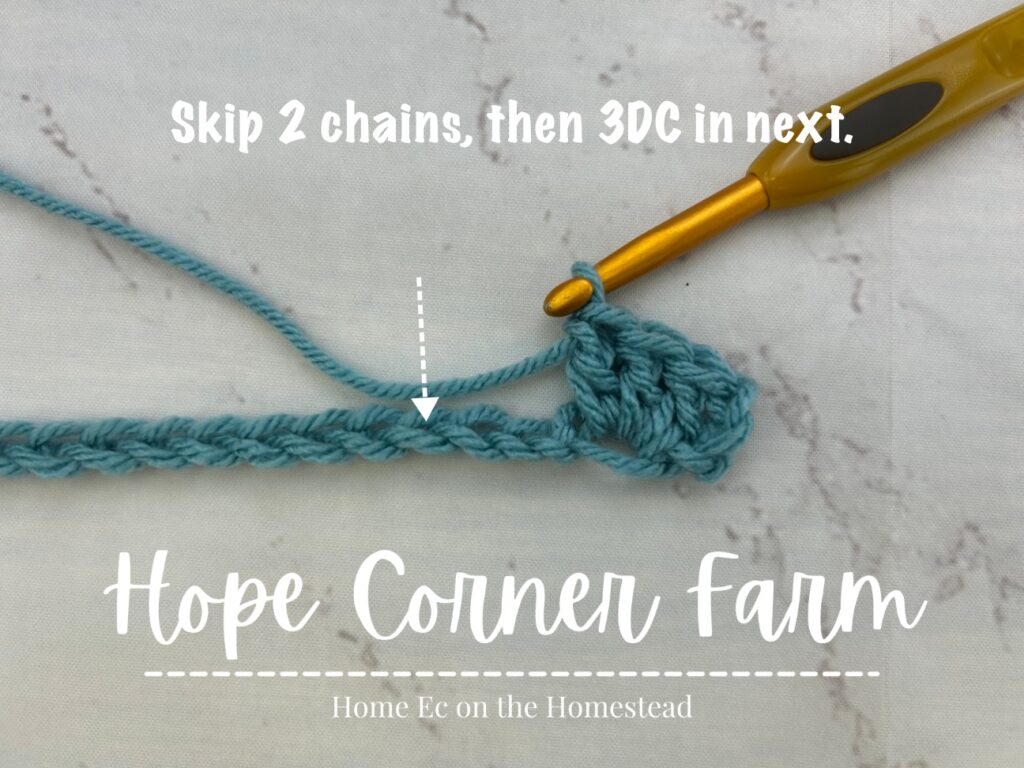
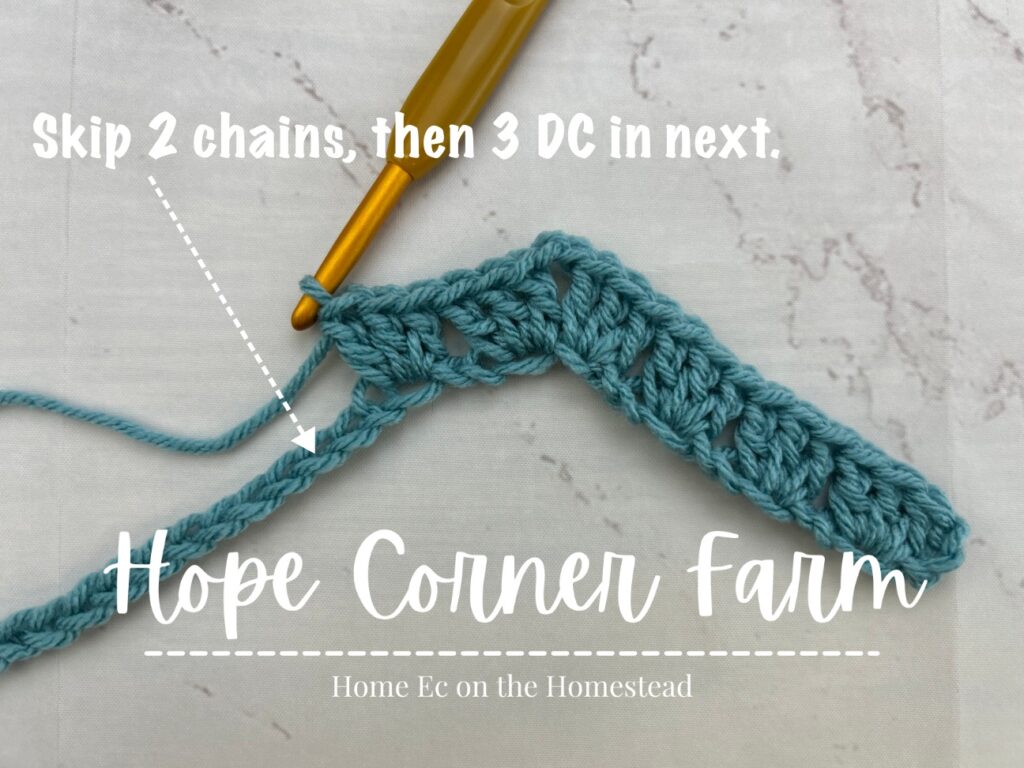
Now repeat (Skip 2 chains. In the next chain place 3 DC) 3xs.

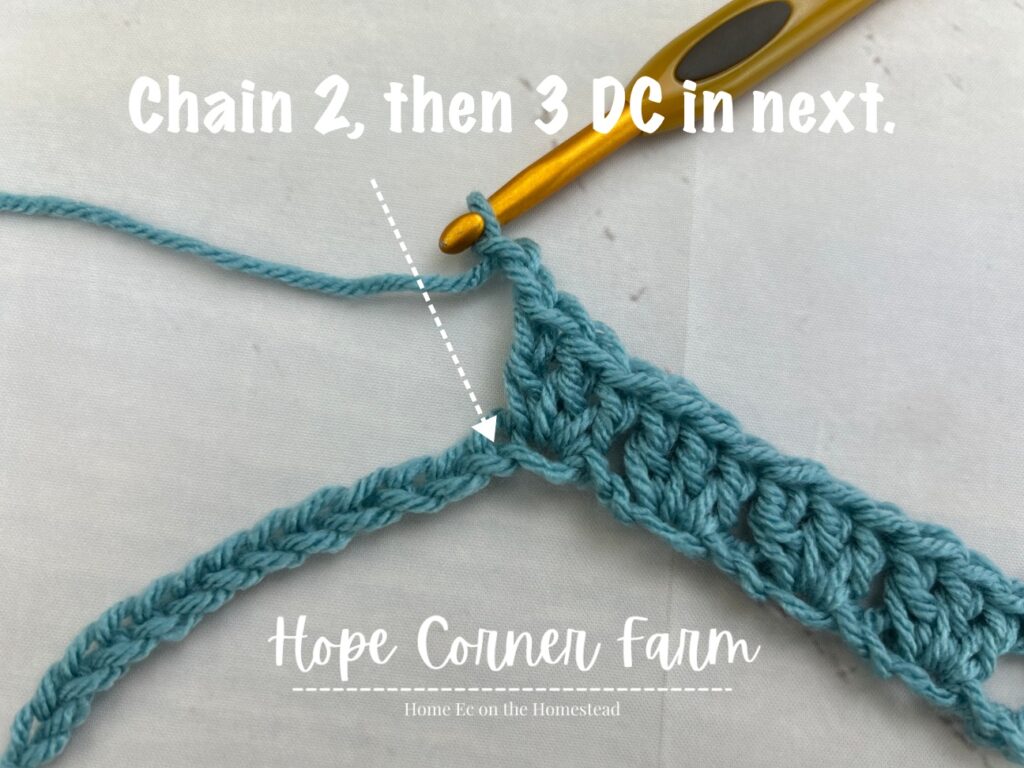
Next chain 2.
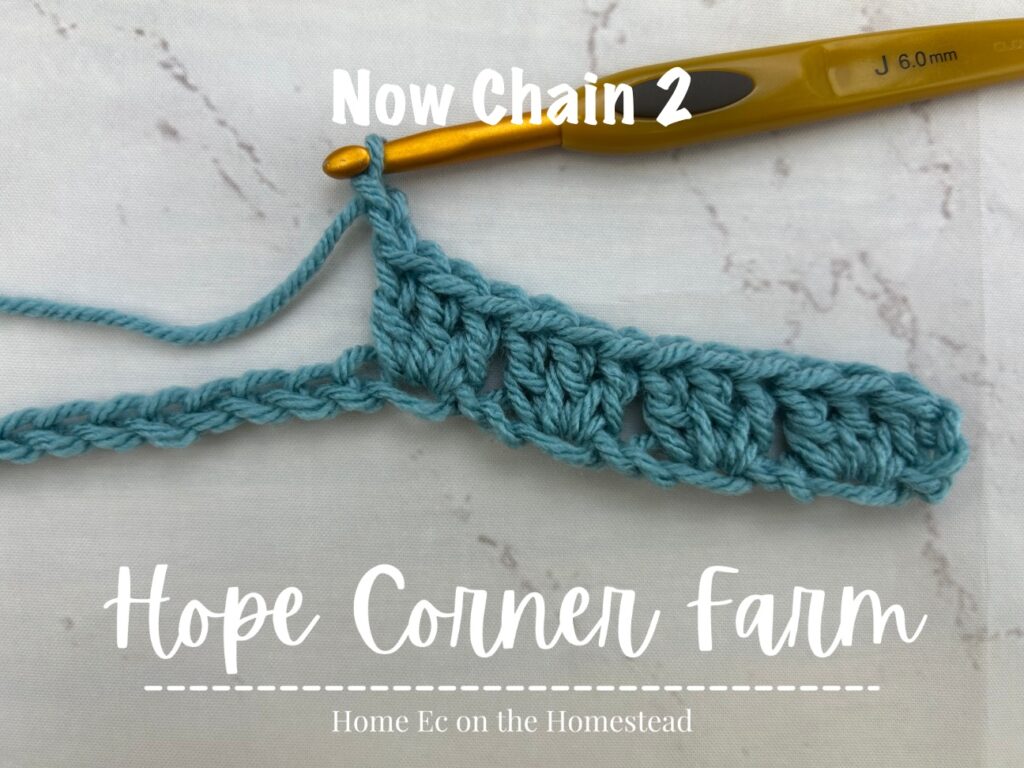
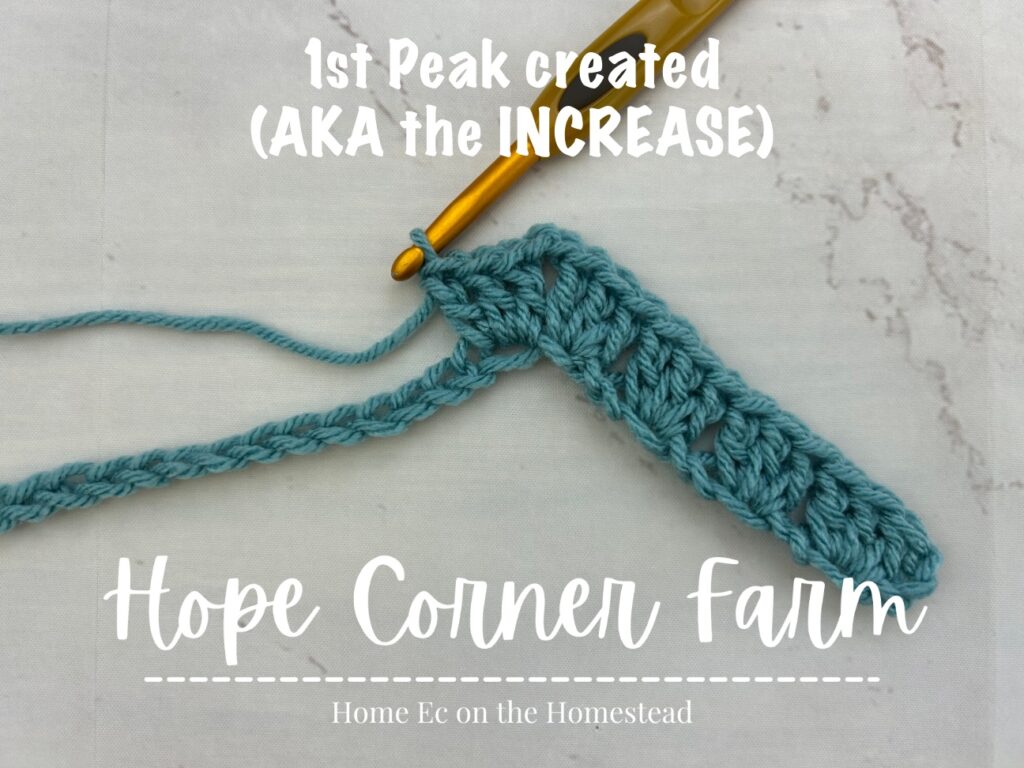
Now place 3 DC in the next chain. This completes the first “peak” of the Granny Ripple Stitch. This peak is also sometimes called the increase.
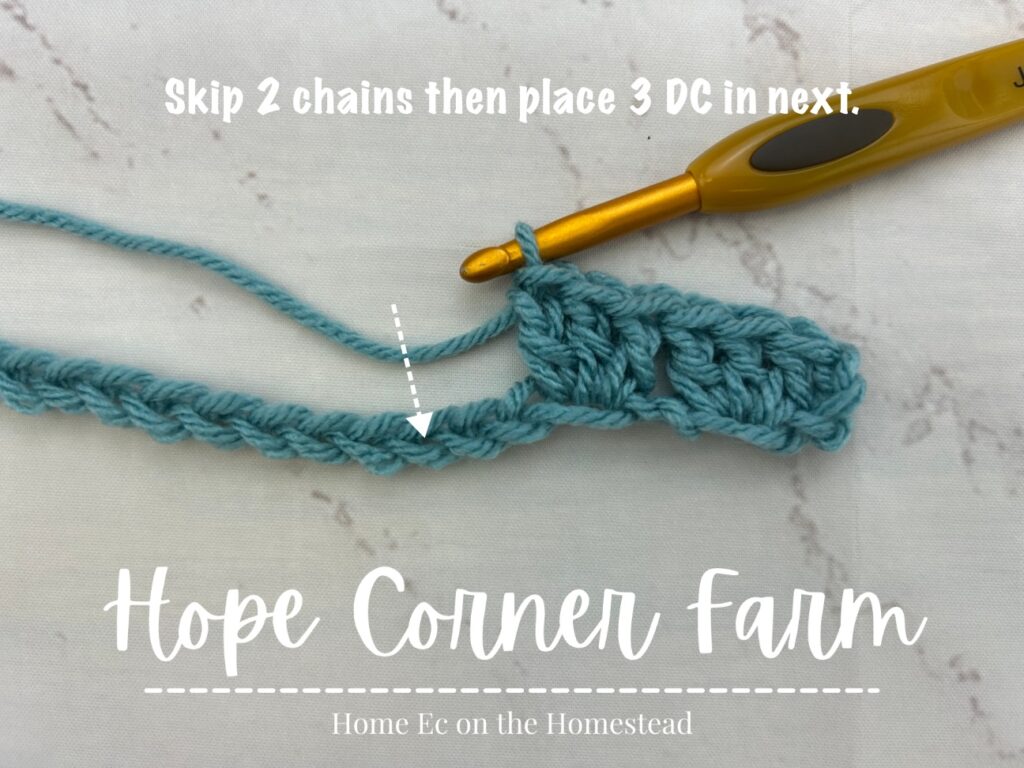
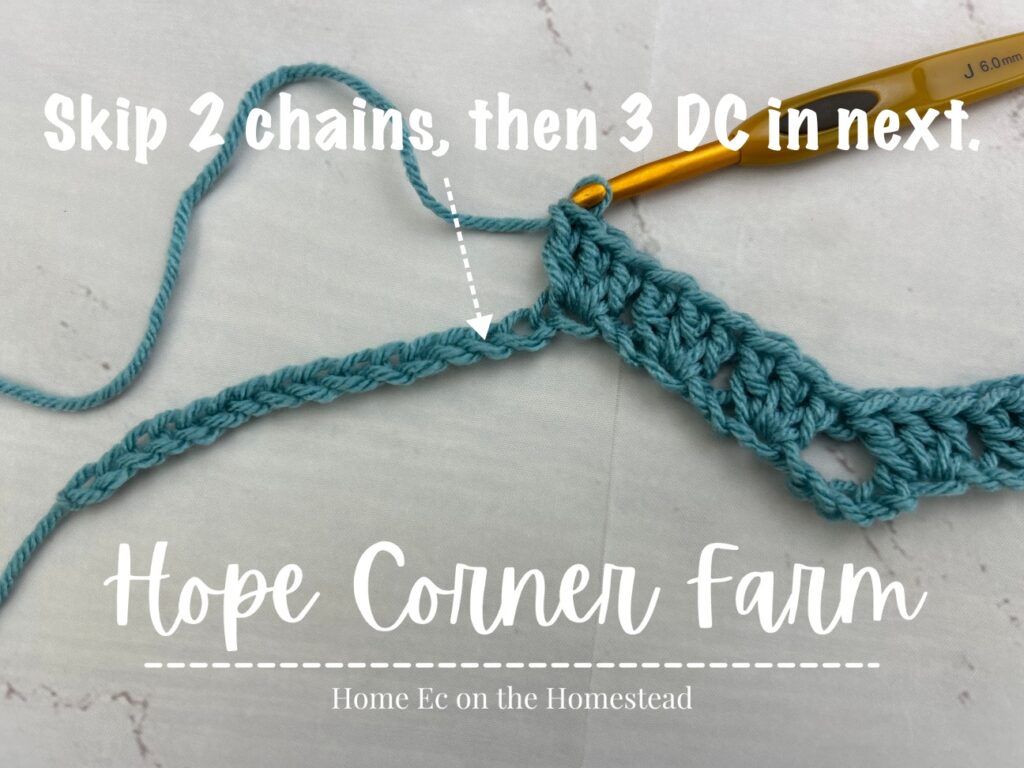
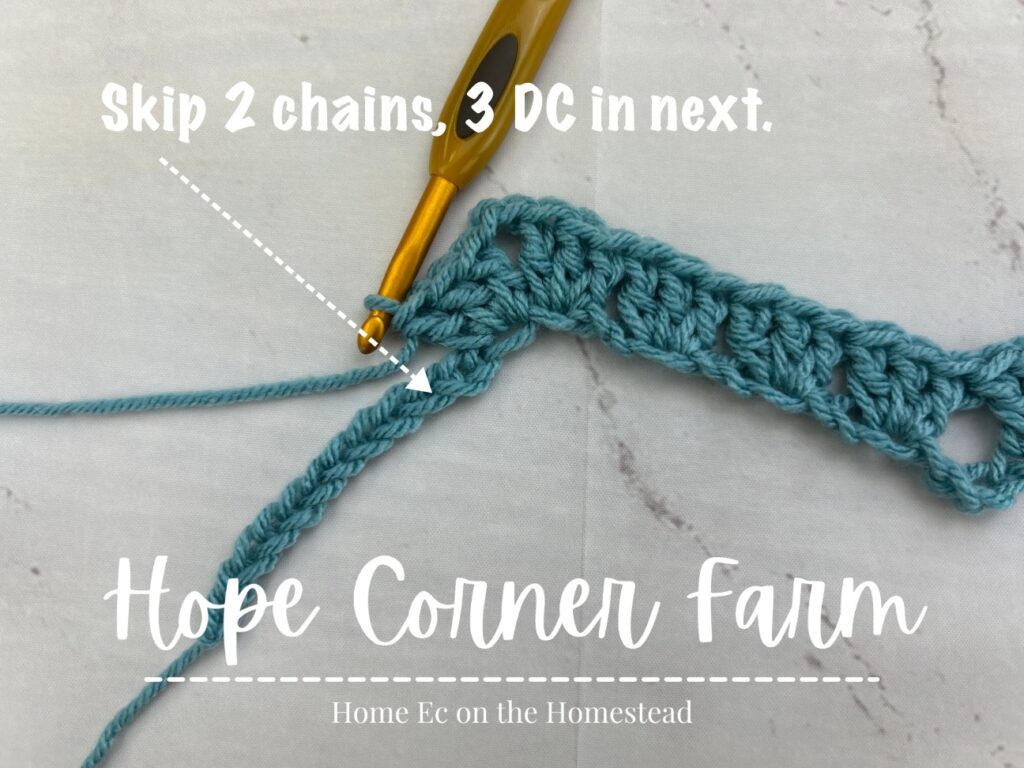
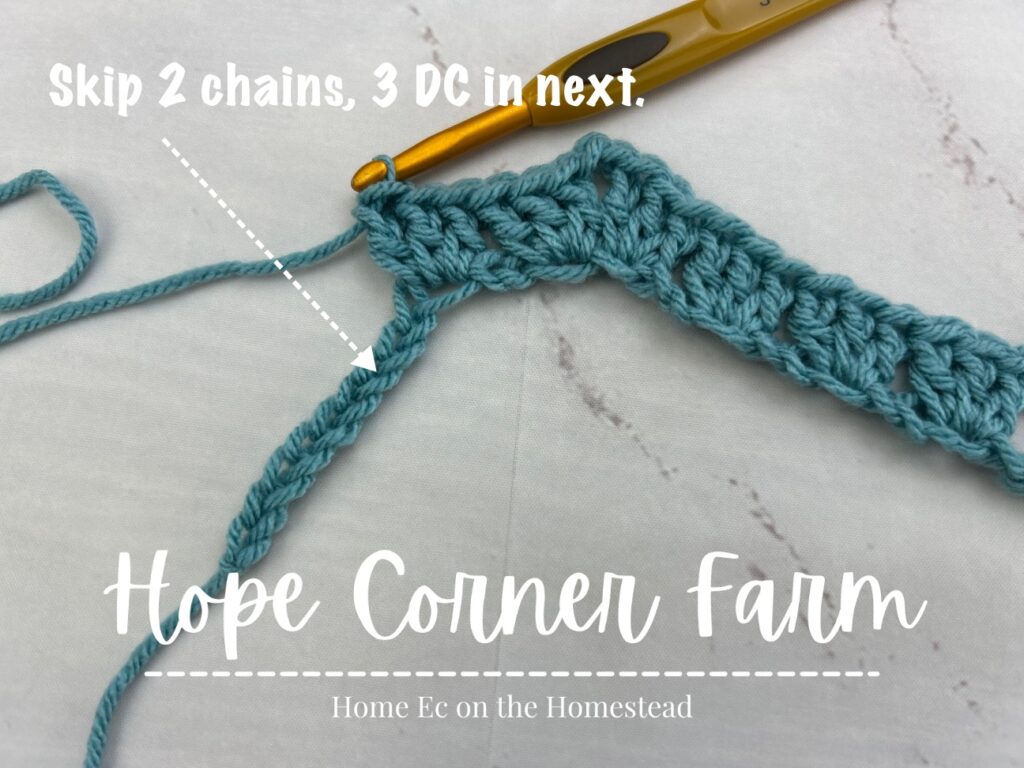
Next repeat (skip 2 chains, 3 DC in next) 3xs.
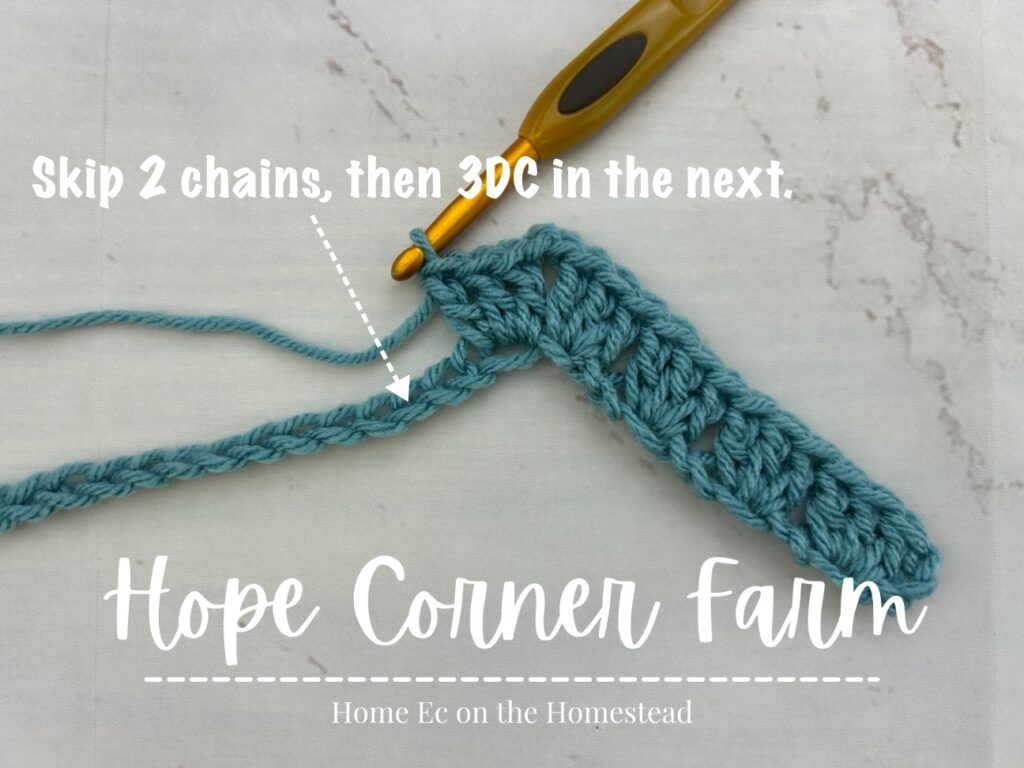
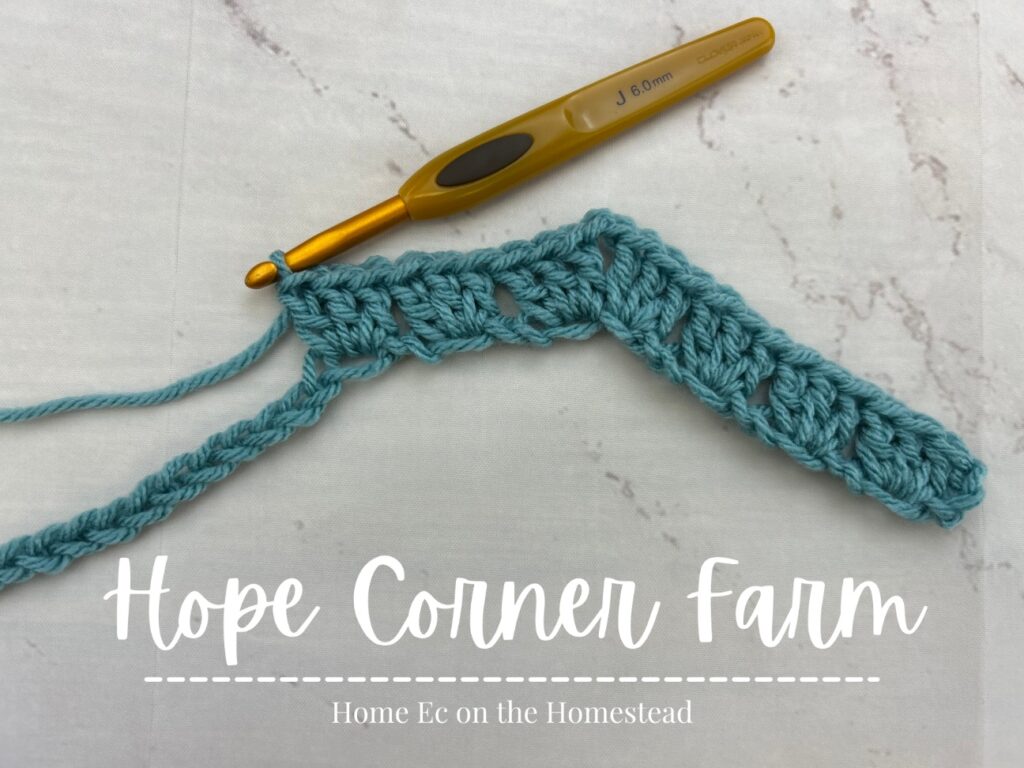

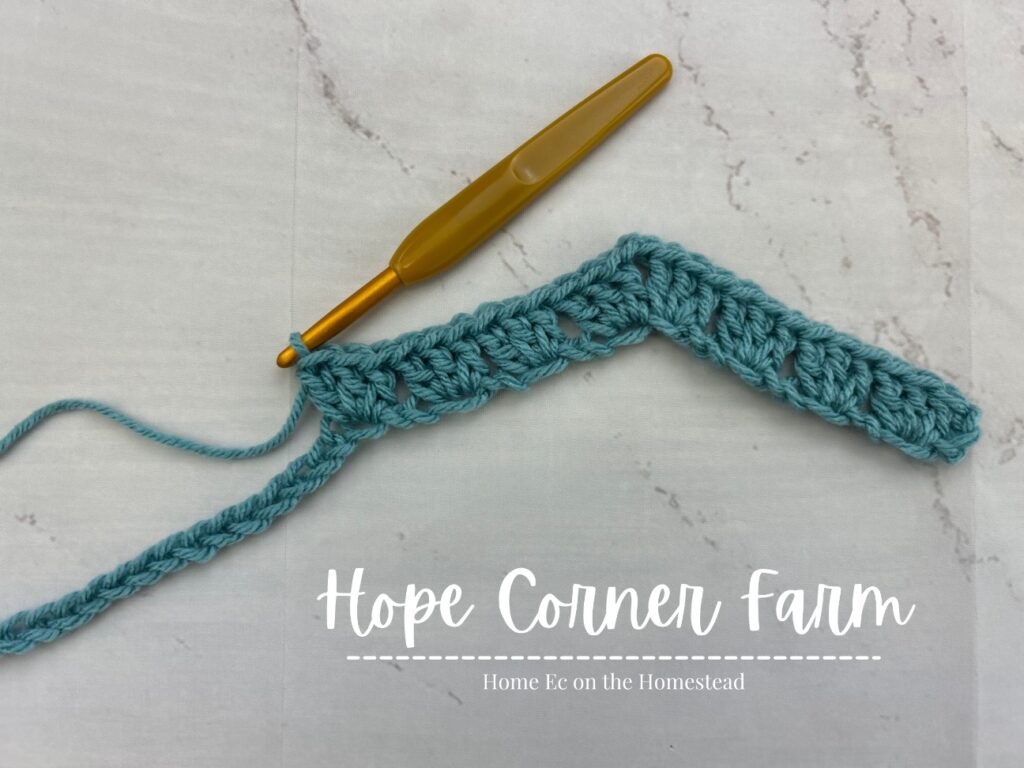
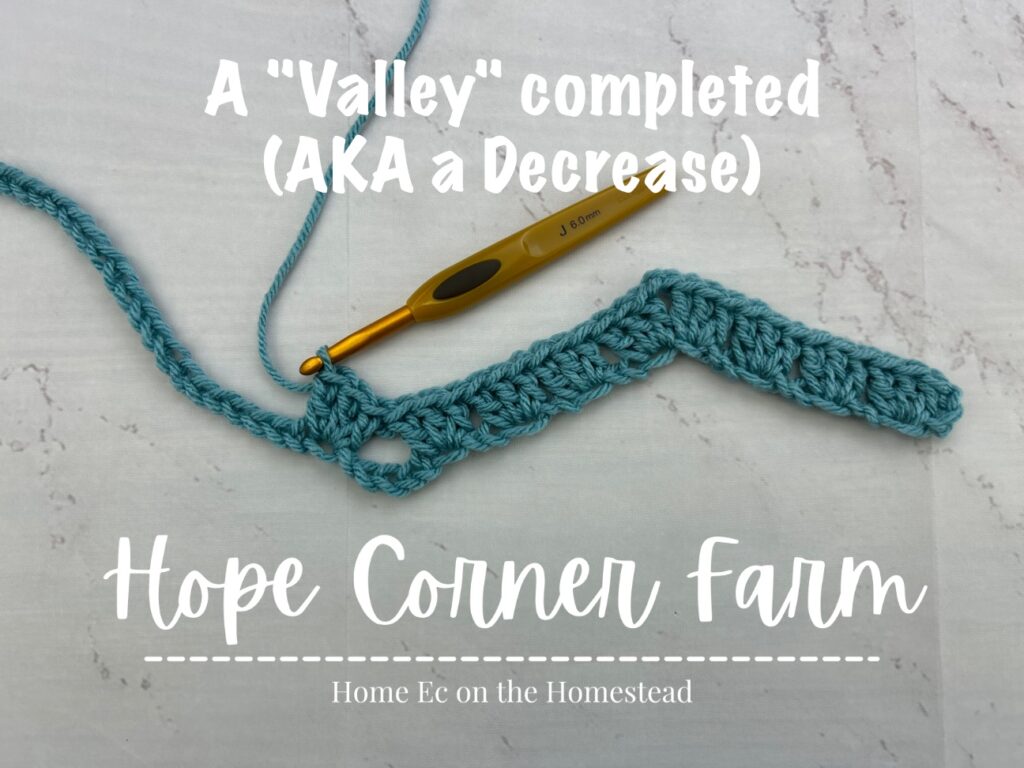
Now skip 5 chains and then place 3DC in the next (6th). This creates a “valley” for the Granny Ripple Stitch. It is also sometimes called the decrease.

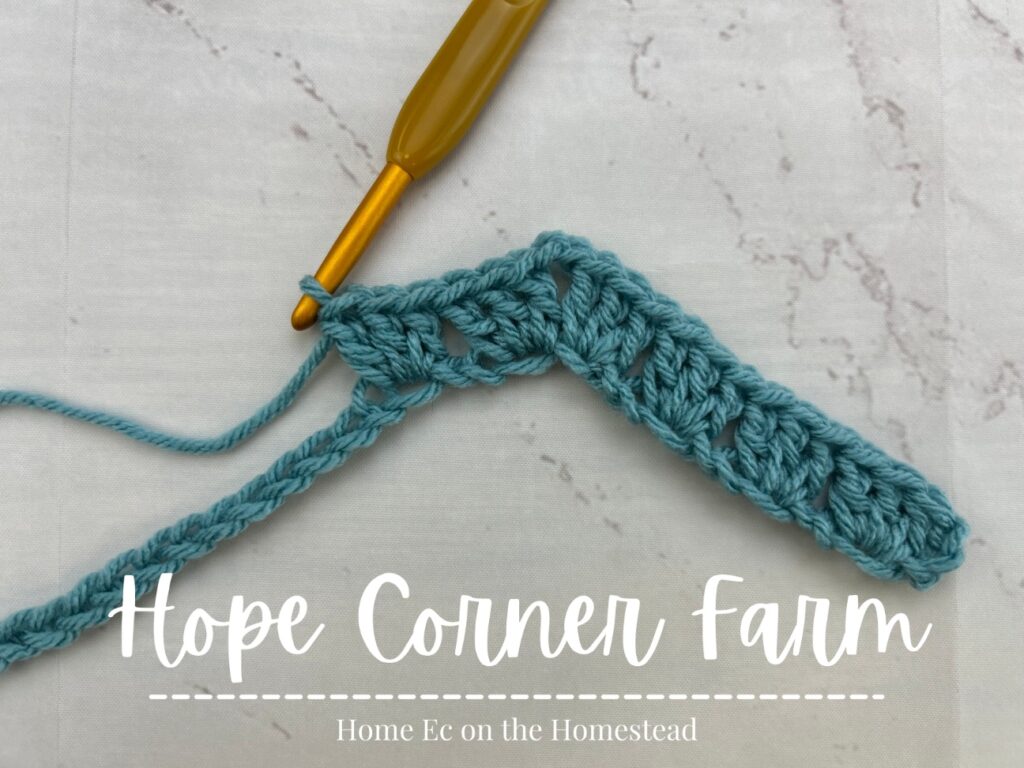
Next repeat (skip 2 chains, 3 DC in next) 3xs.

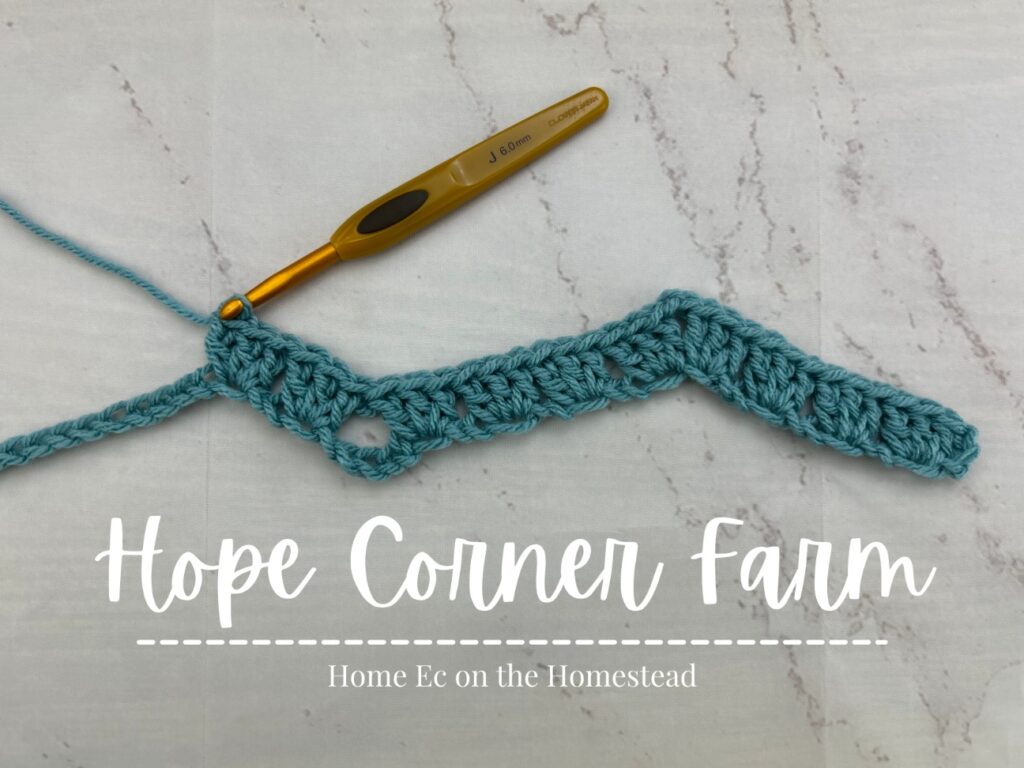

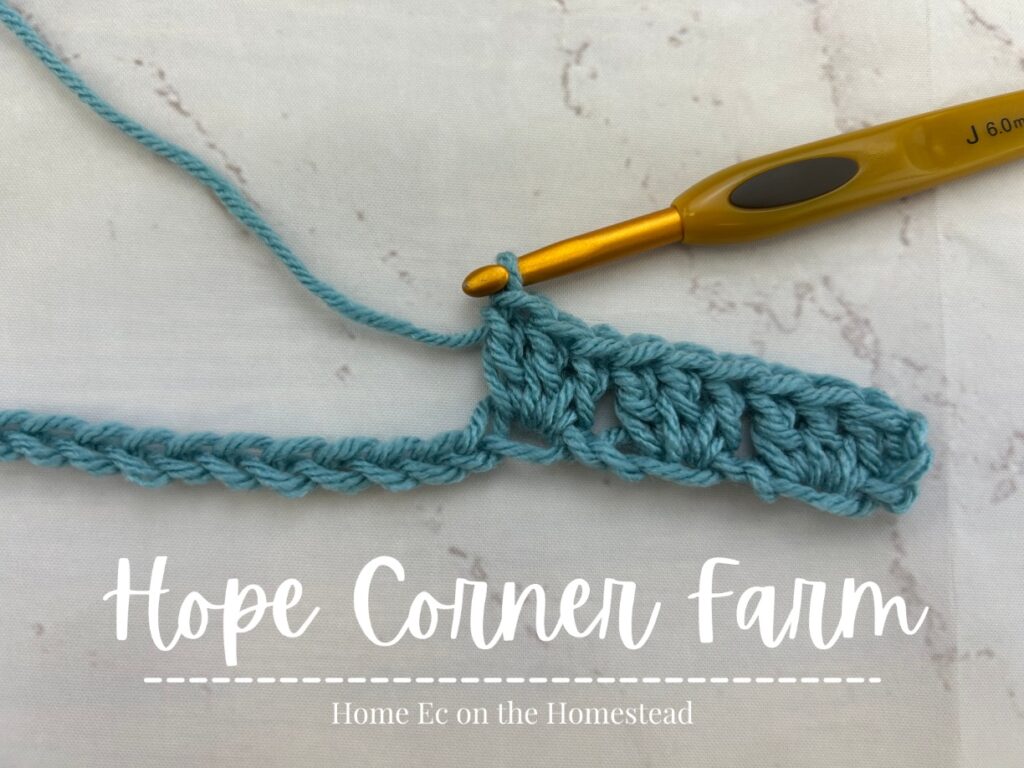
Now chain 2, then place 3 DC in the next chain. This completes another peak.
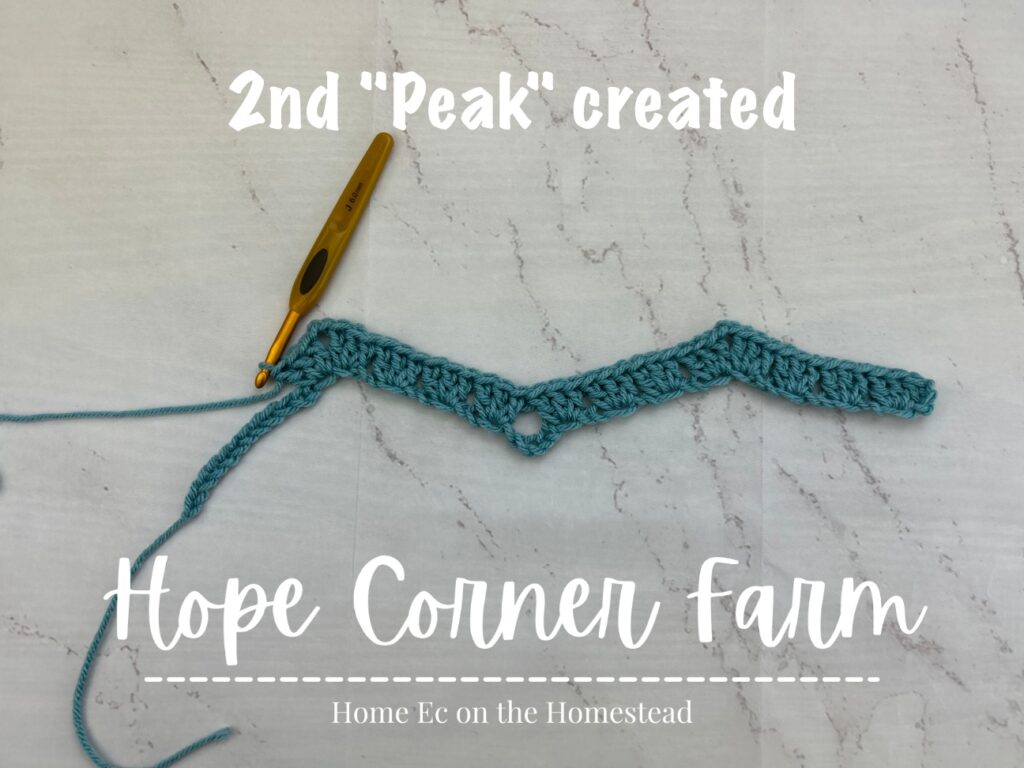
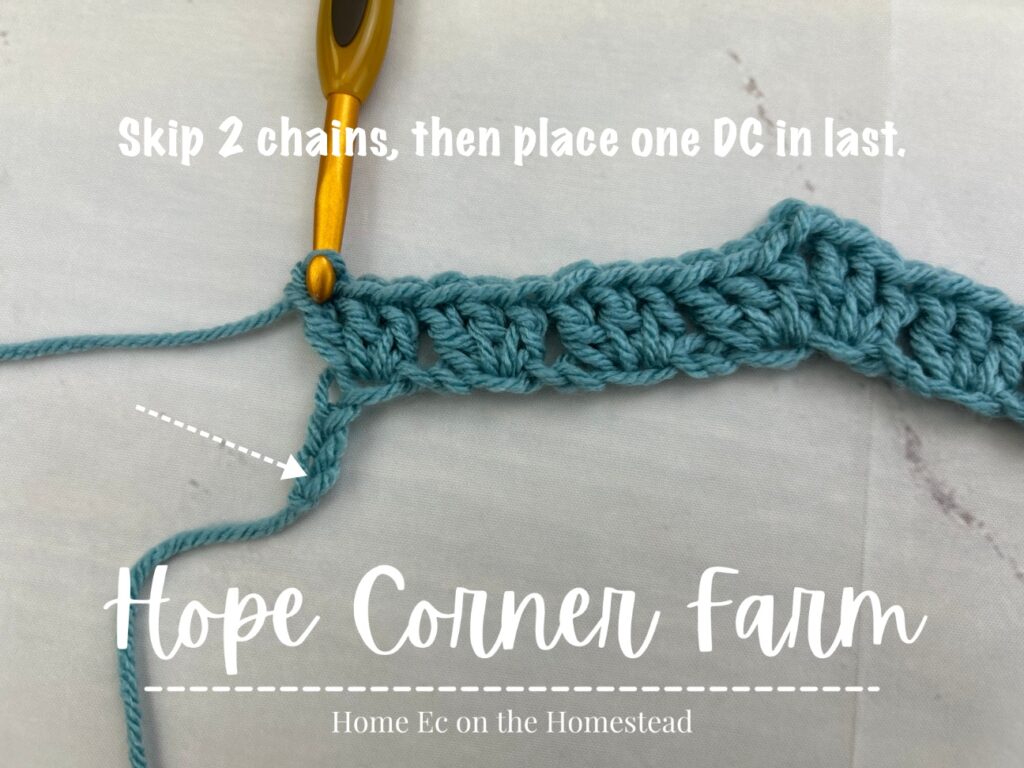
Next repeat (skip 2 chains, place 3 DC in next) 3xs.
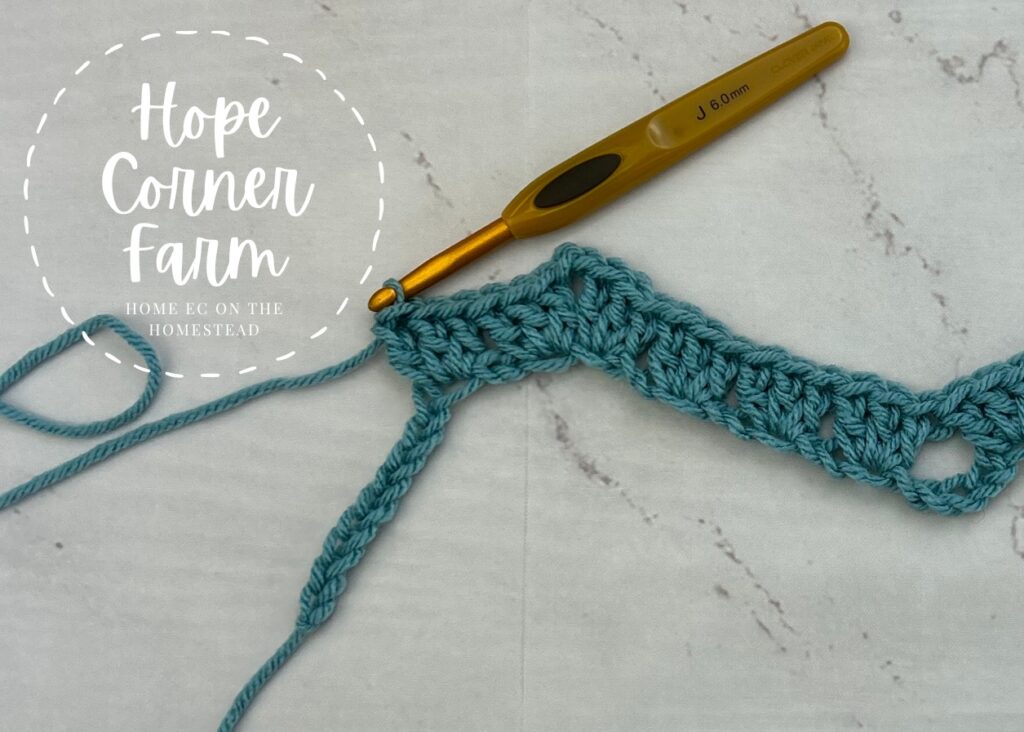
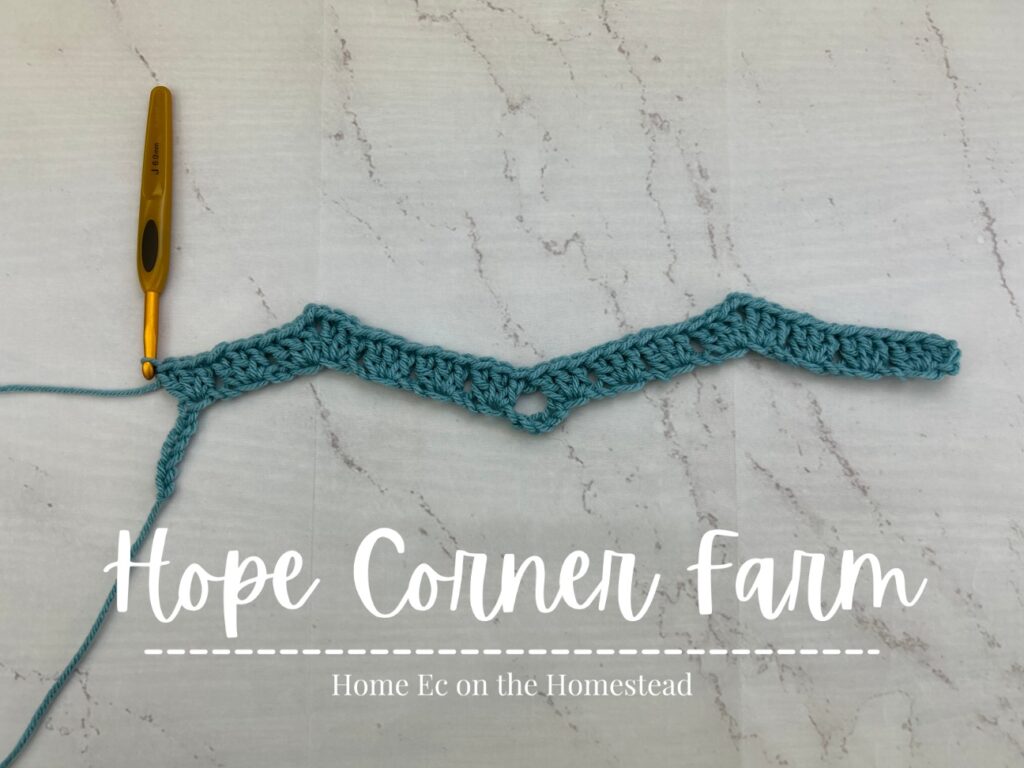
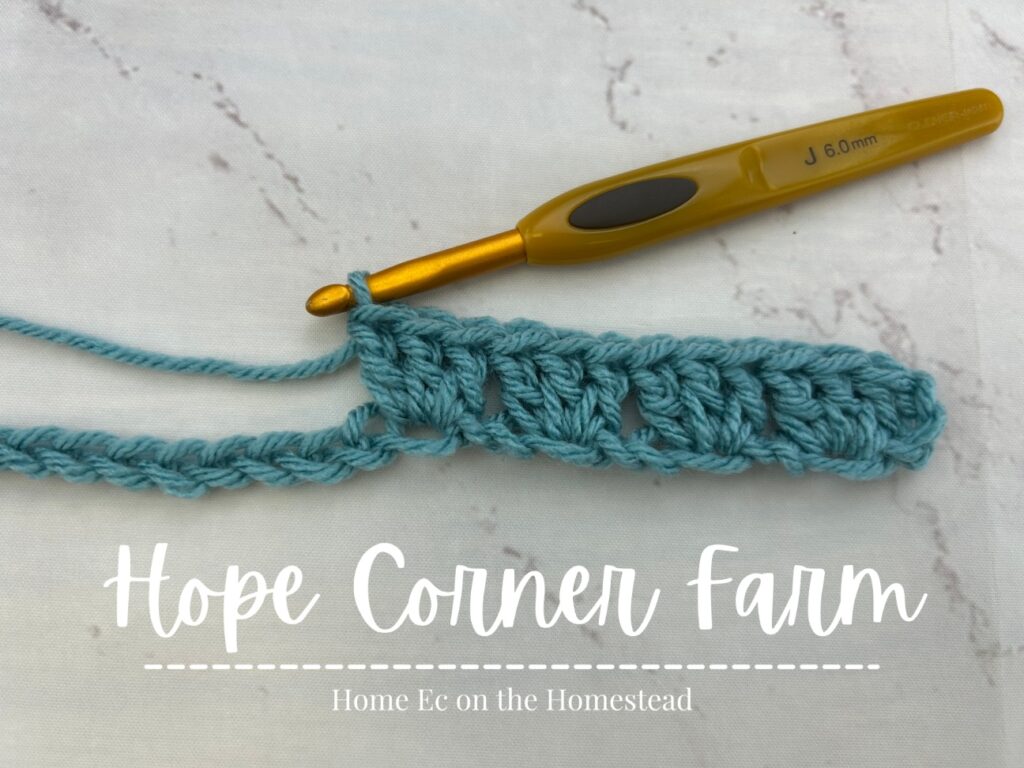
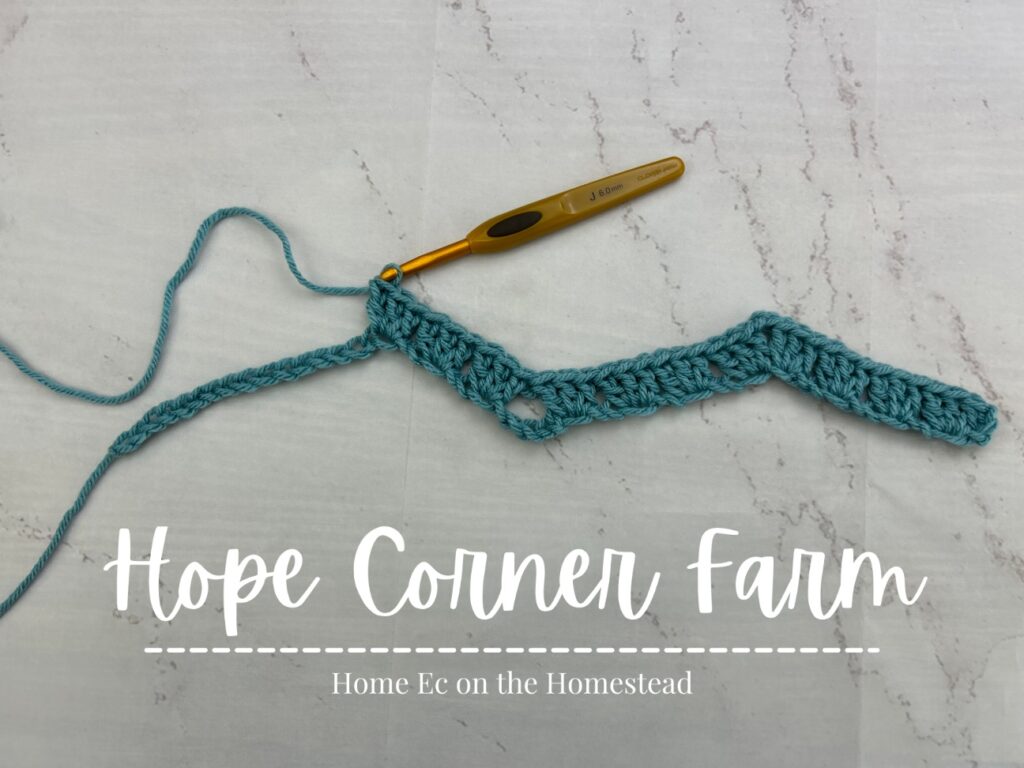
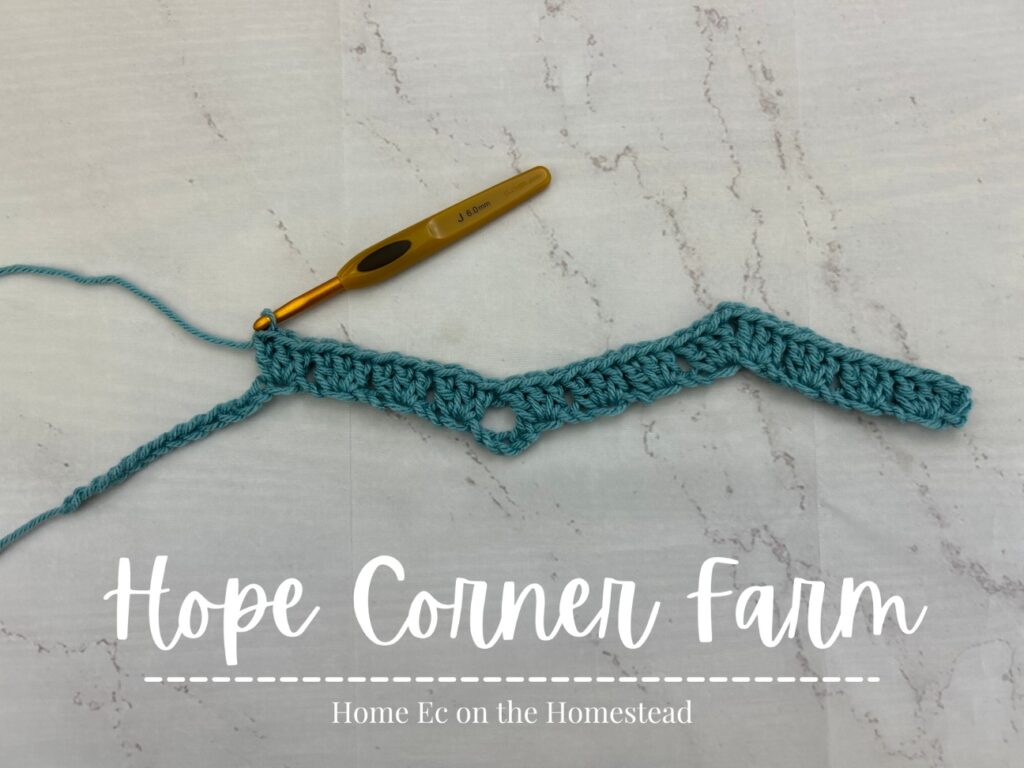
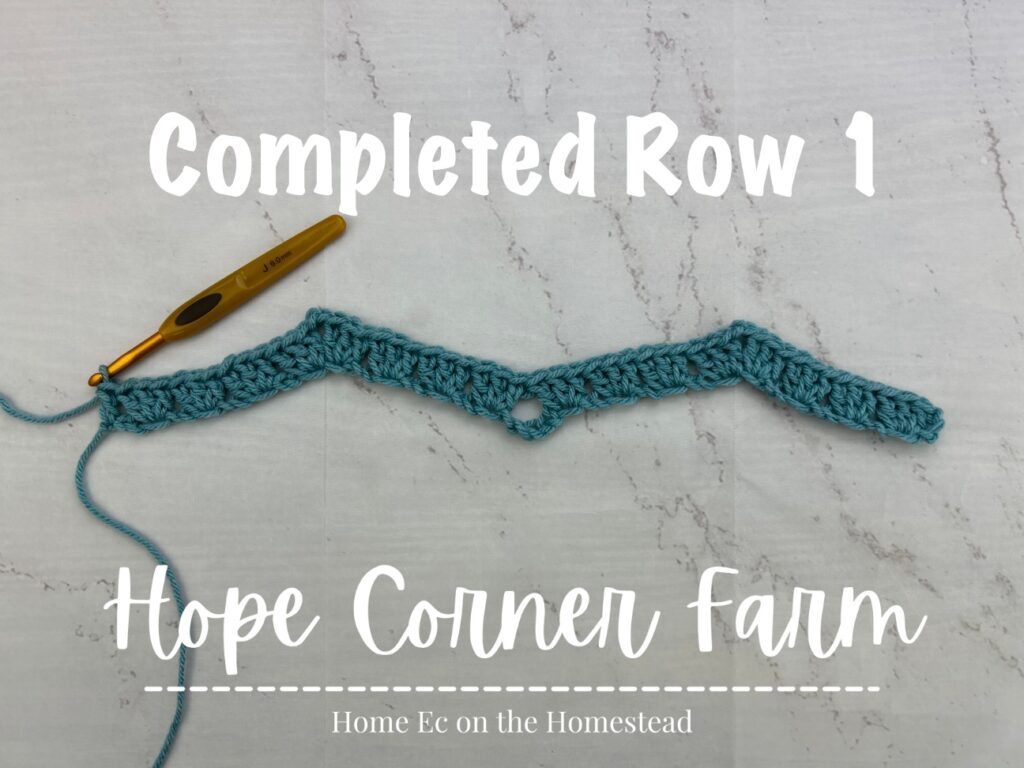
Finally skip 2 chains. Place ONE DC in the final chain. This completes Row 1.
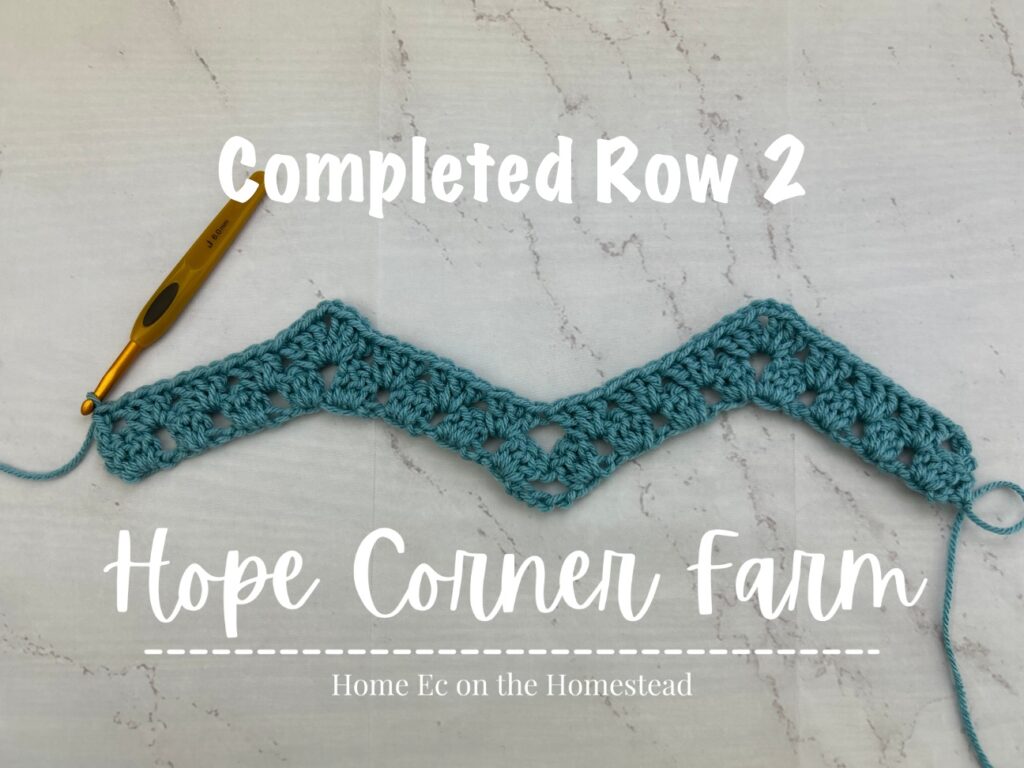
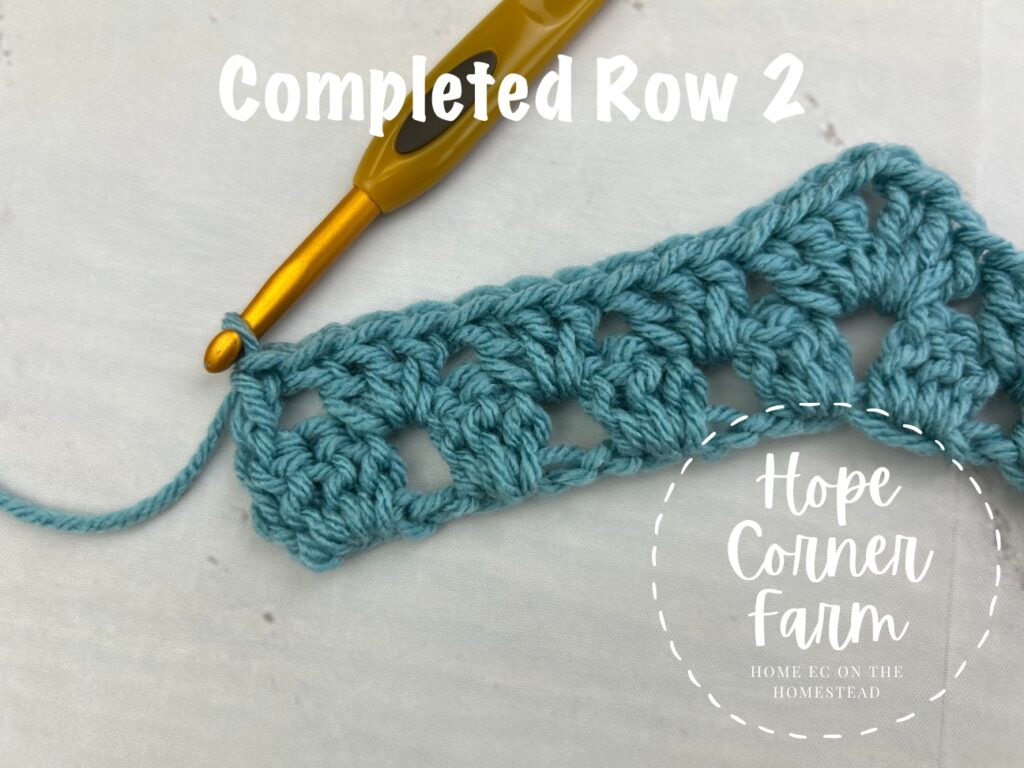
Row 2:
First begin row 2 by chaining 3 and turning the work. Note the crochet stitch placement for Row 2.
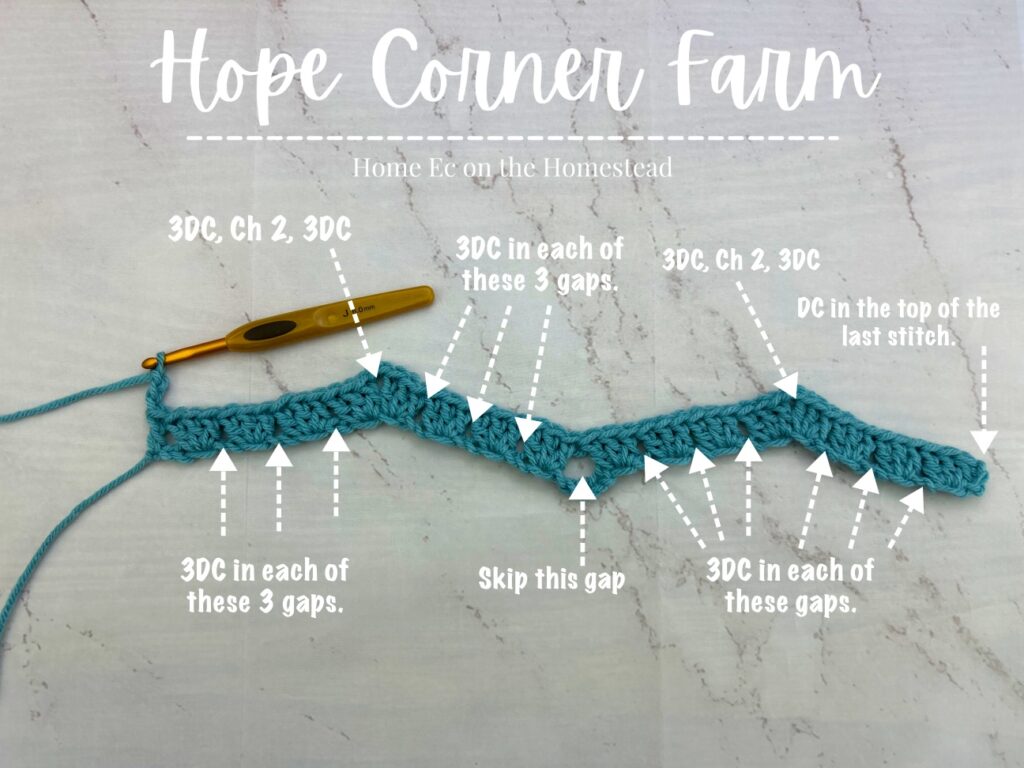
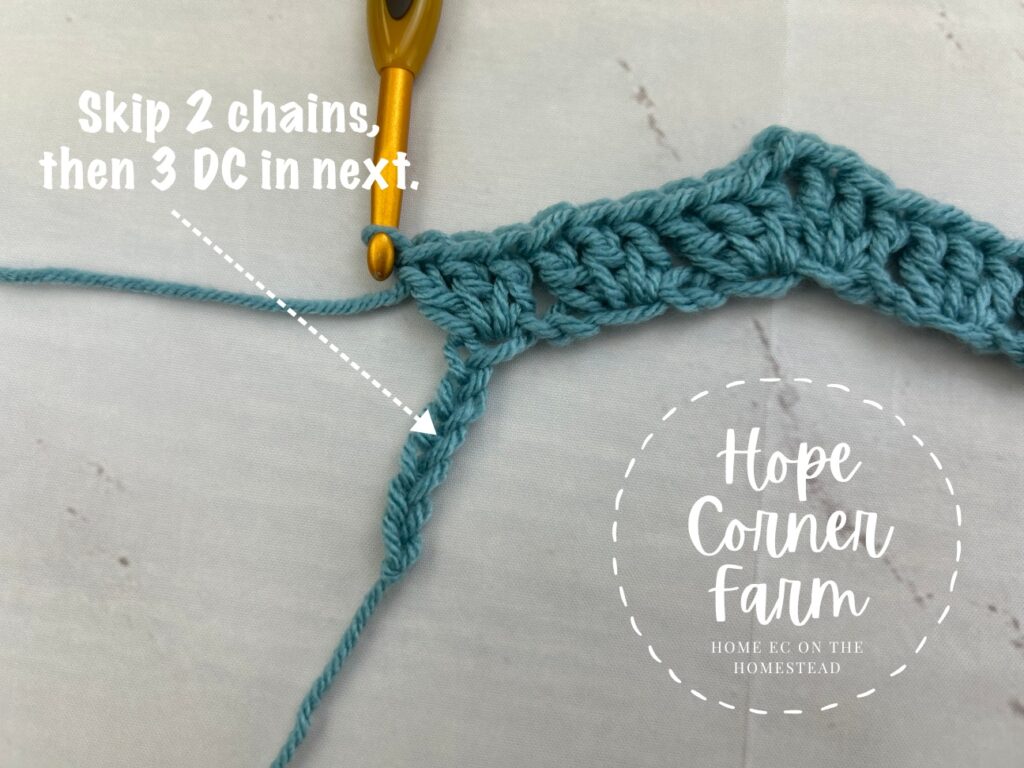
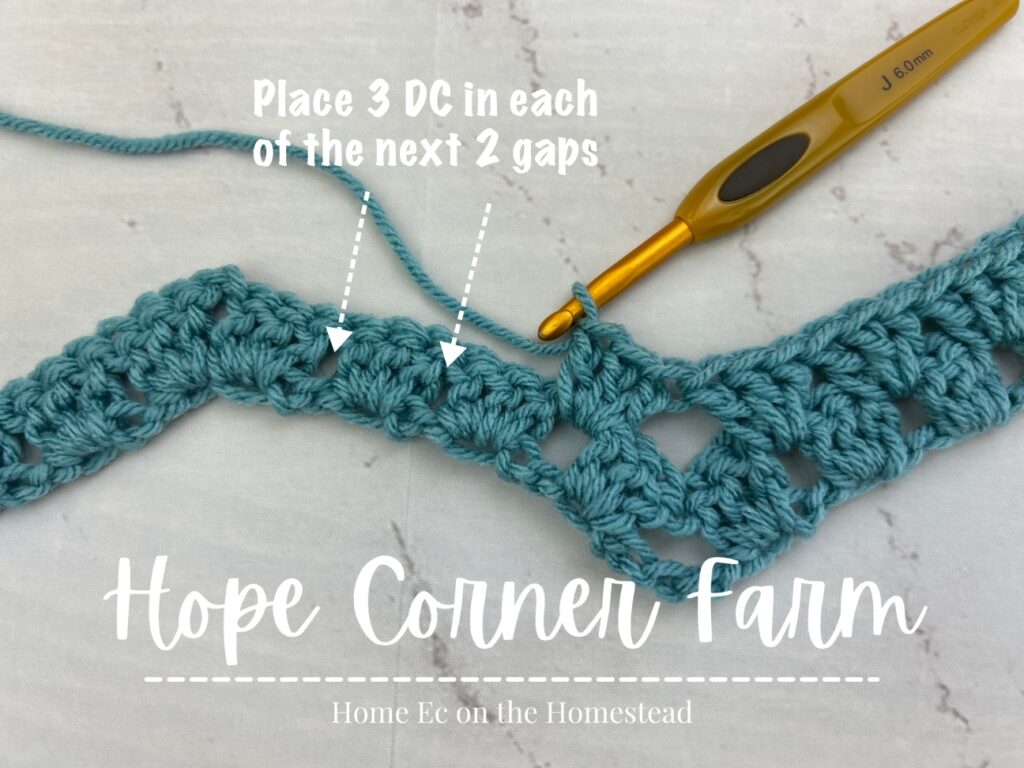
Now skip the first gap (the one directly after the DC in the previous row). Repeat (Place 3 DC in the next gap) 3xs.
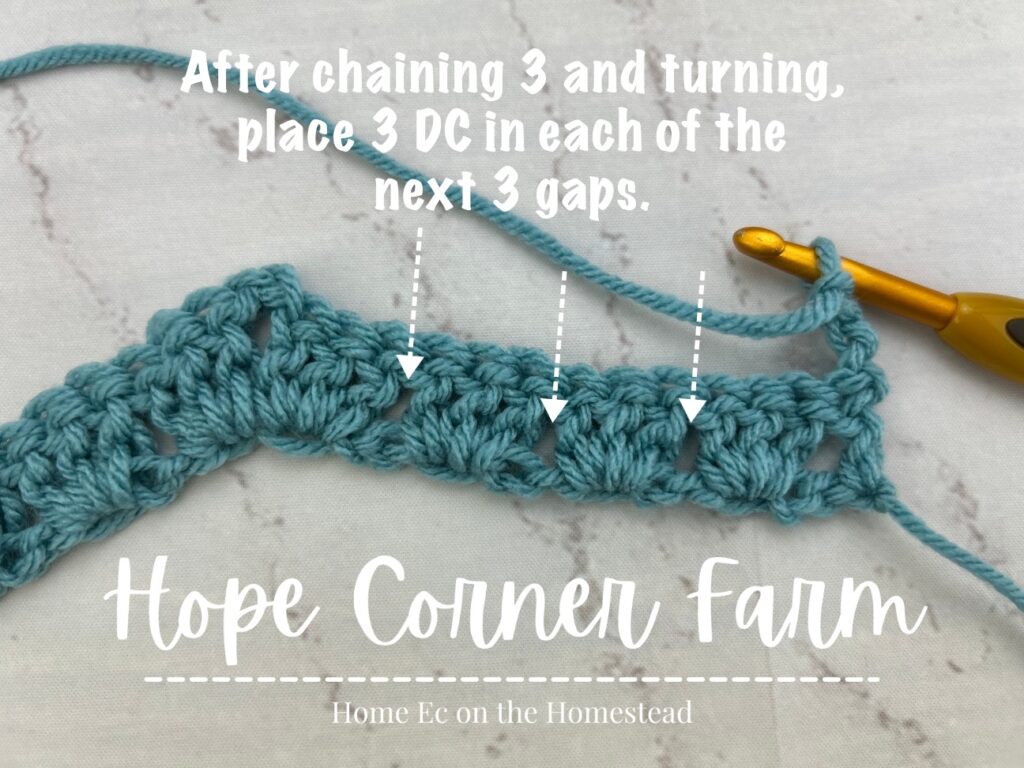
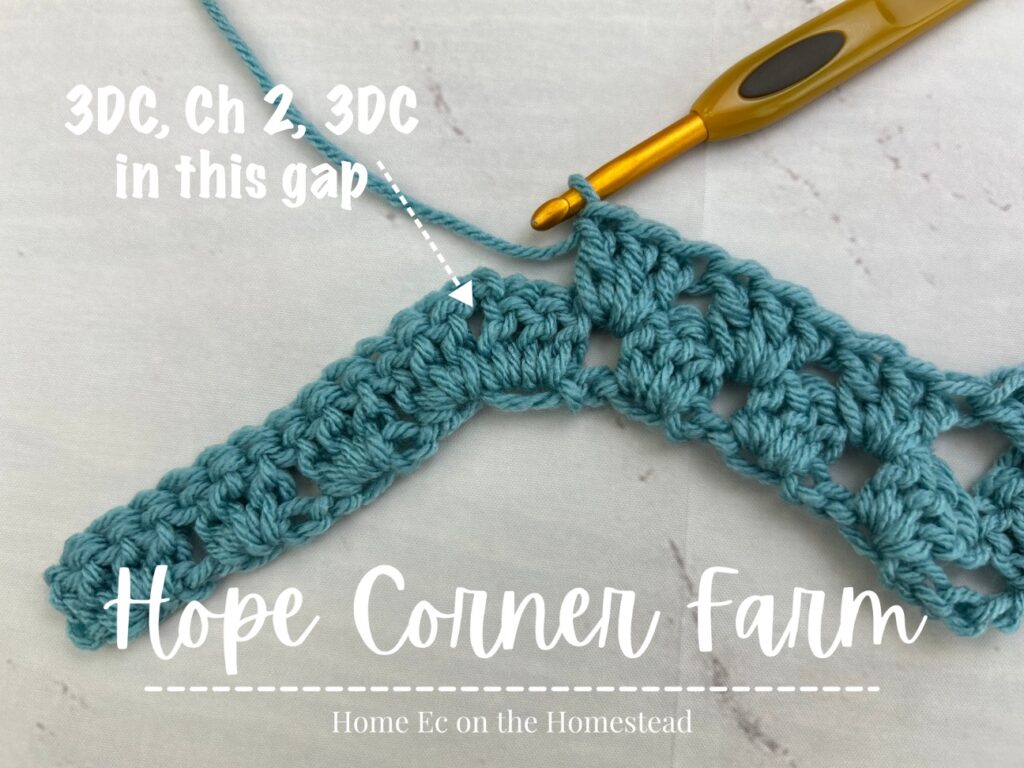
Next place 3DC, Ch 2, 3 DC in the gap at the top of the peak. This creates the first peak for this row.
Now repeat (Place 3DC in the next gap) 3xs.
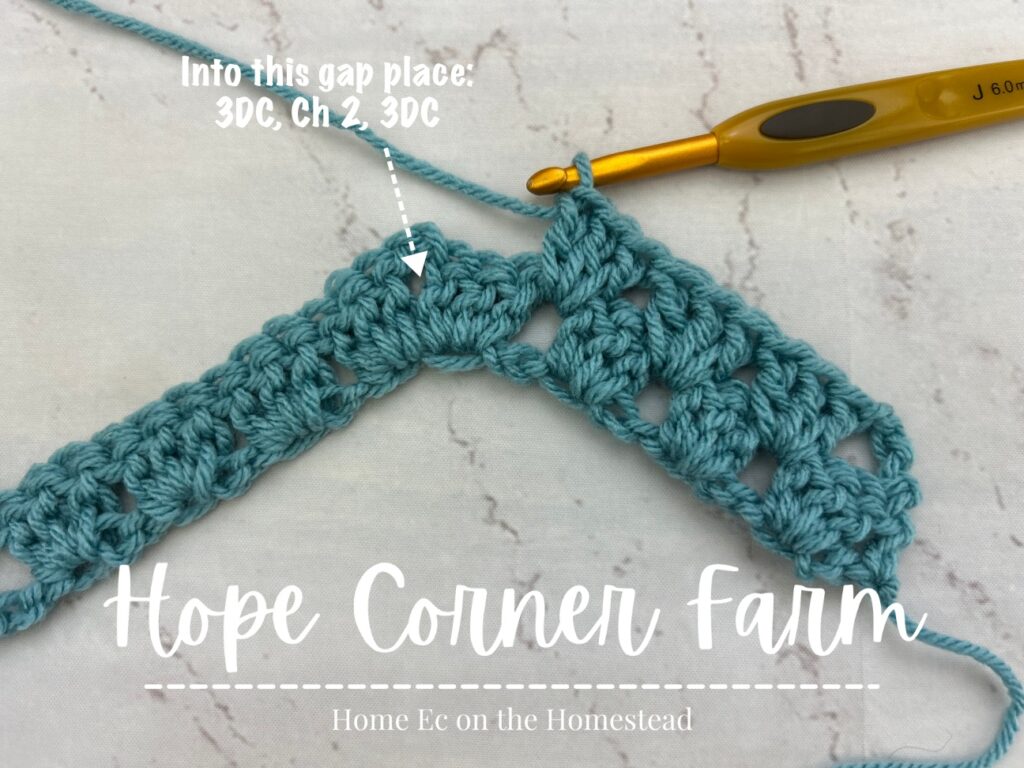
Next skip the gap created by the valley in the previous row of crochet stitches. Place 3DC in the next gap. This repeats the valley in this row of crochet.
Now repeat (place 3 DC in the next gap) 3xs.
Next into the gap created by the peak from the previous row place: 3DC, Ch 2, 3DC. This creates the peak for this row.
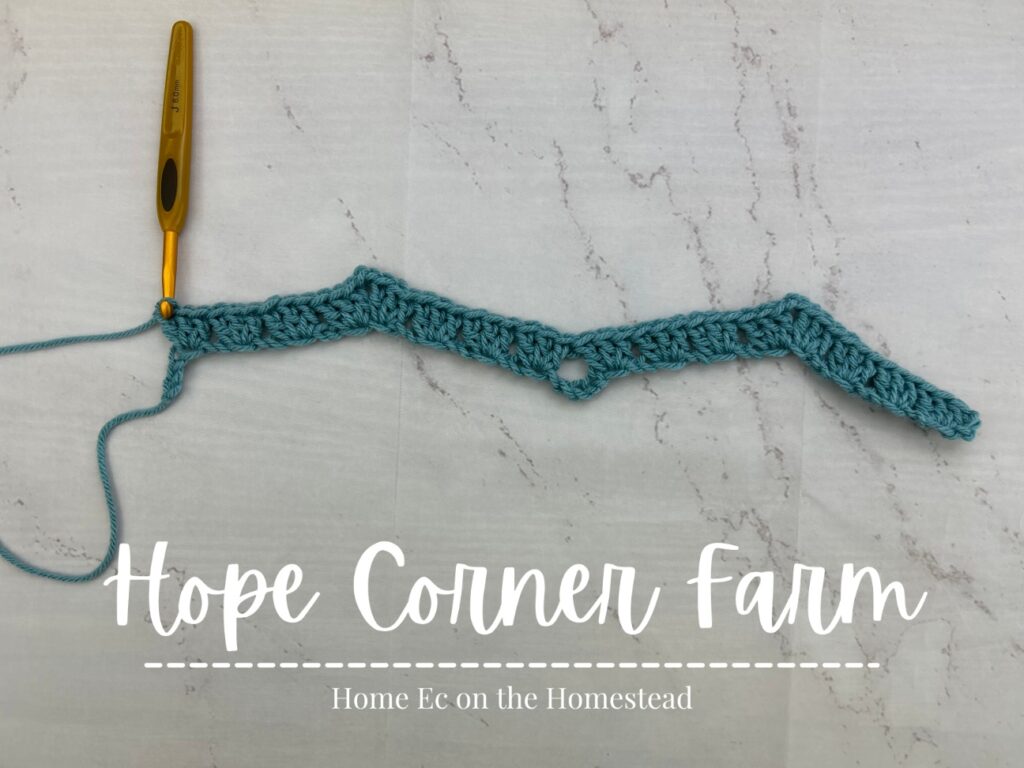
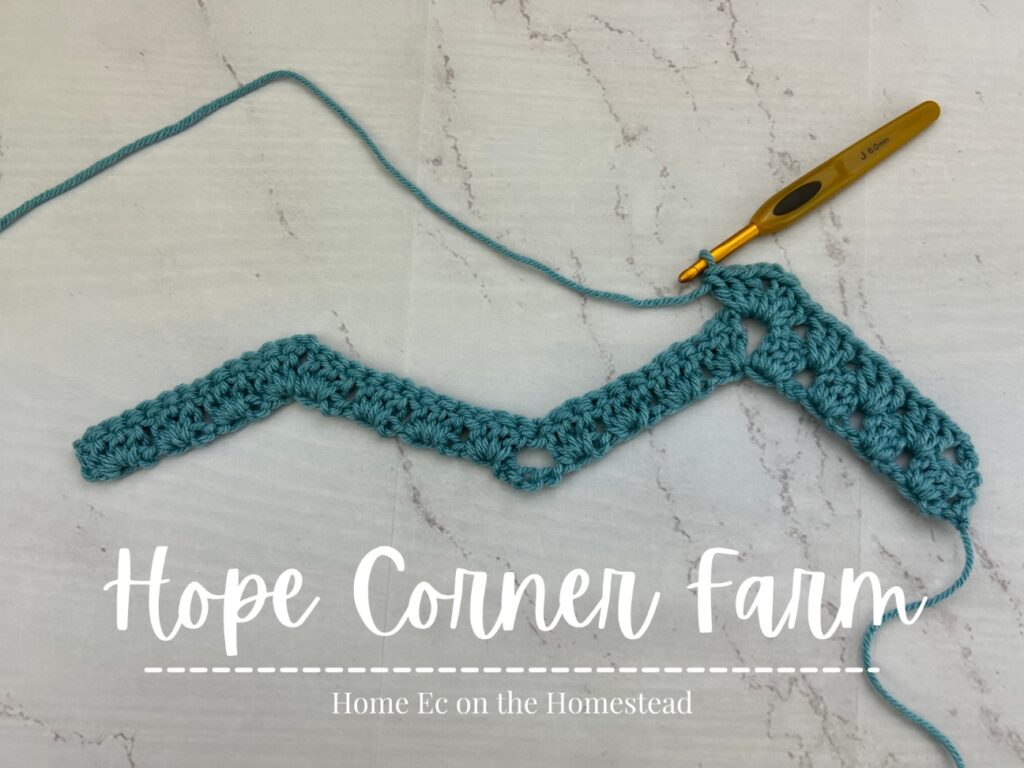
Now repeat (place 3 DC in the next gap) 3xs. Place ONE DC in the top of the chain from the previous row to end.
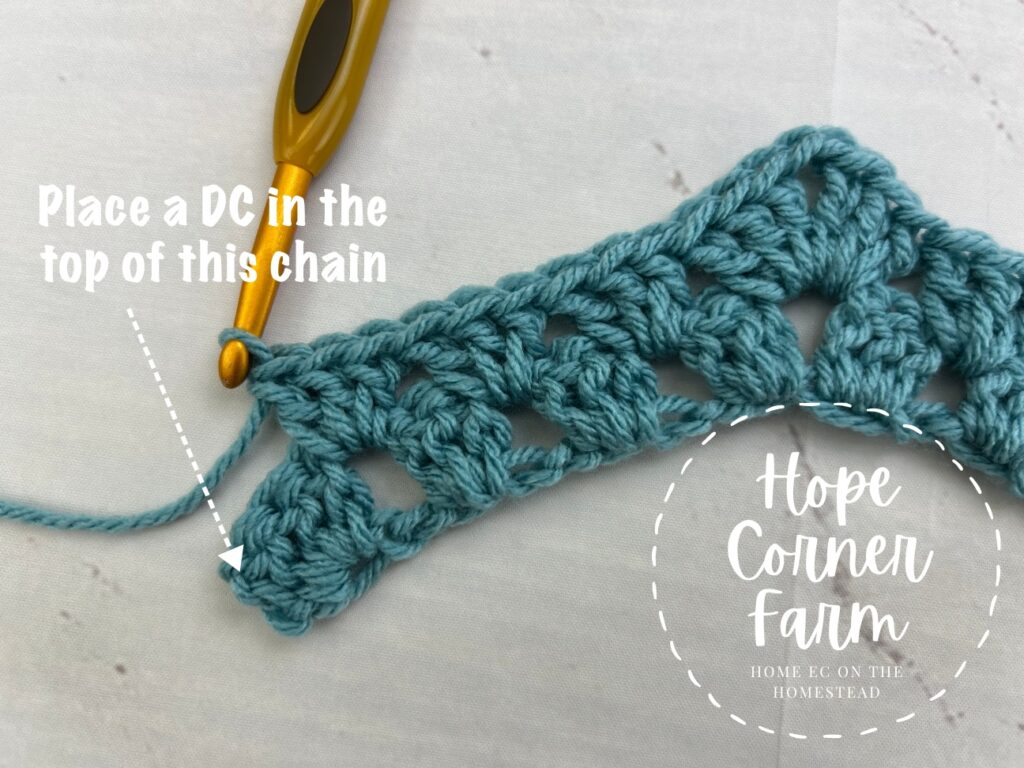
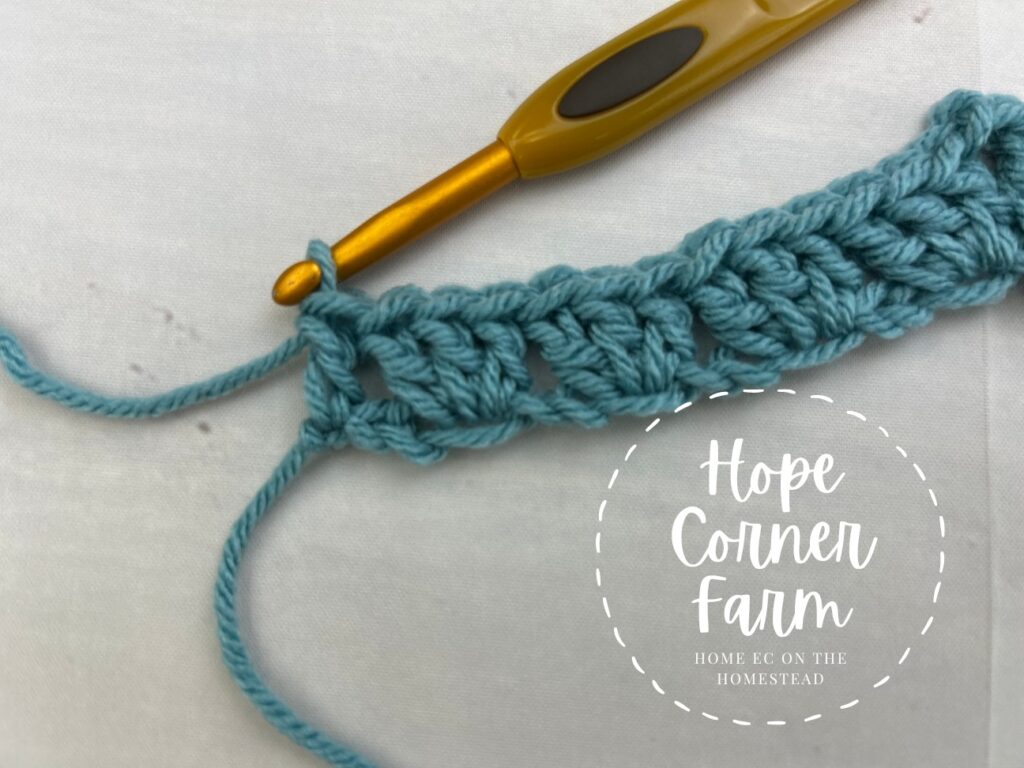
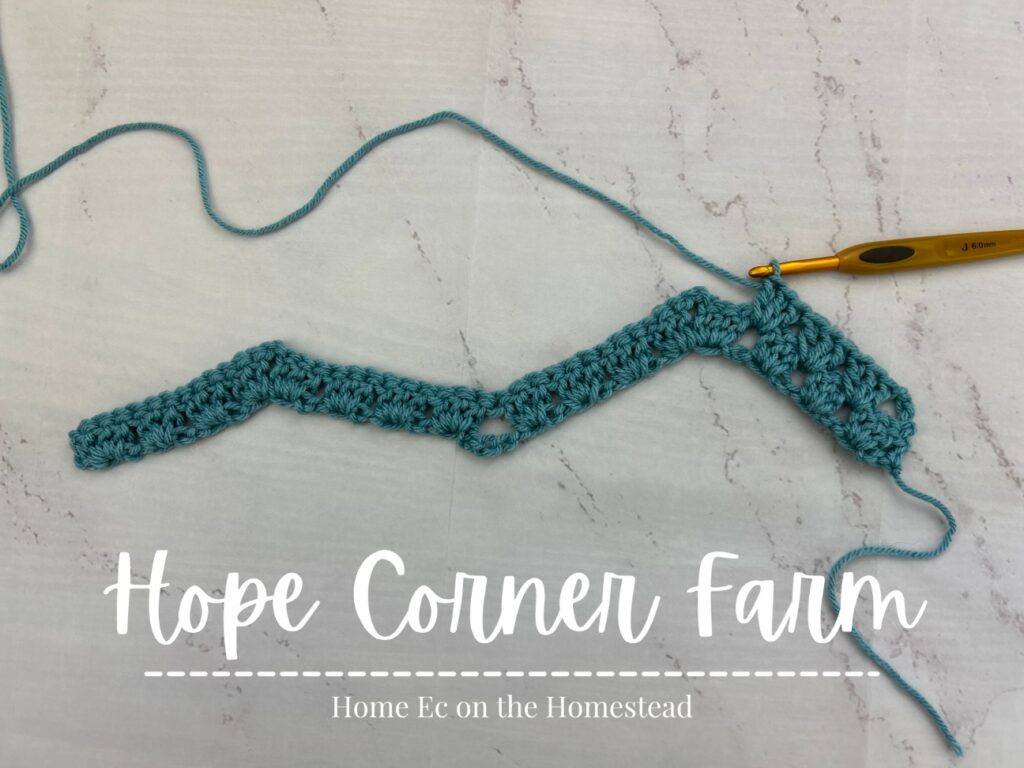
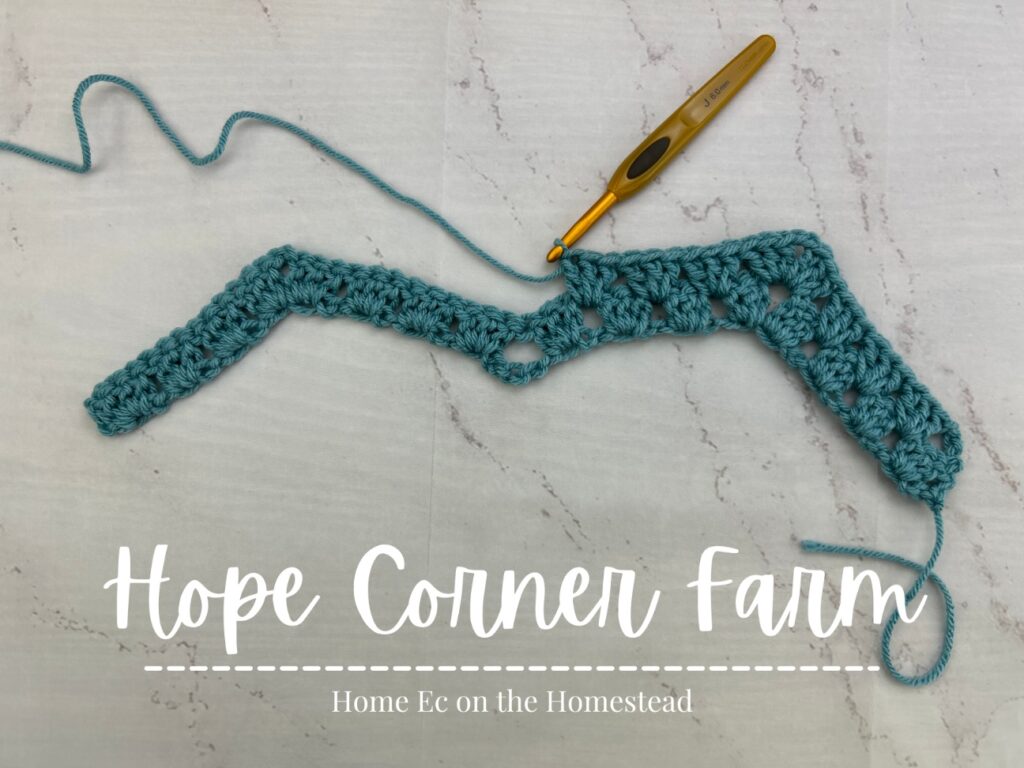
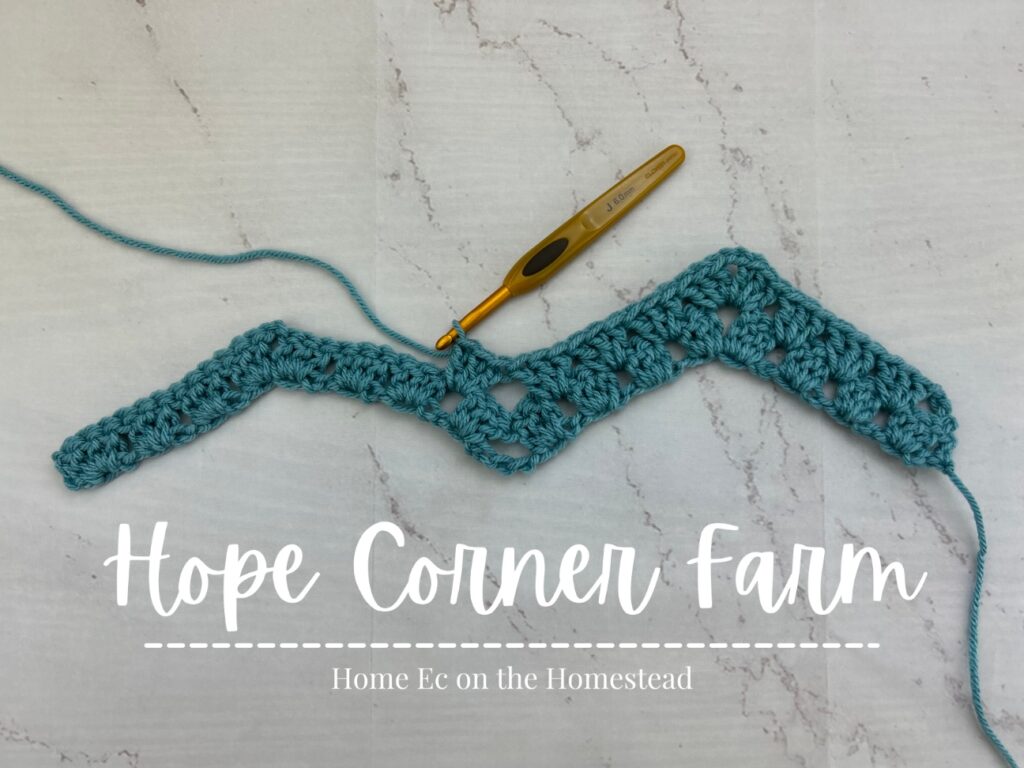
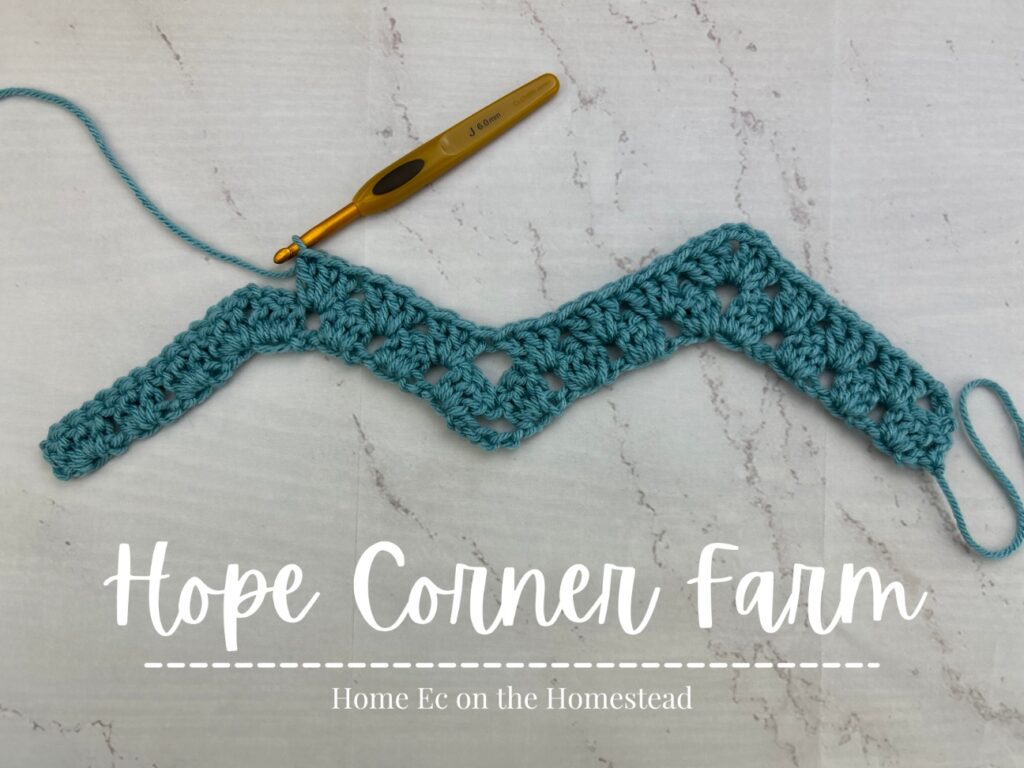
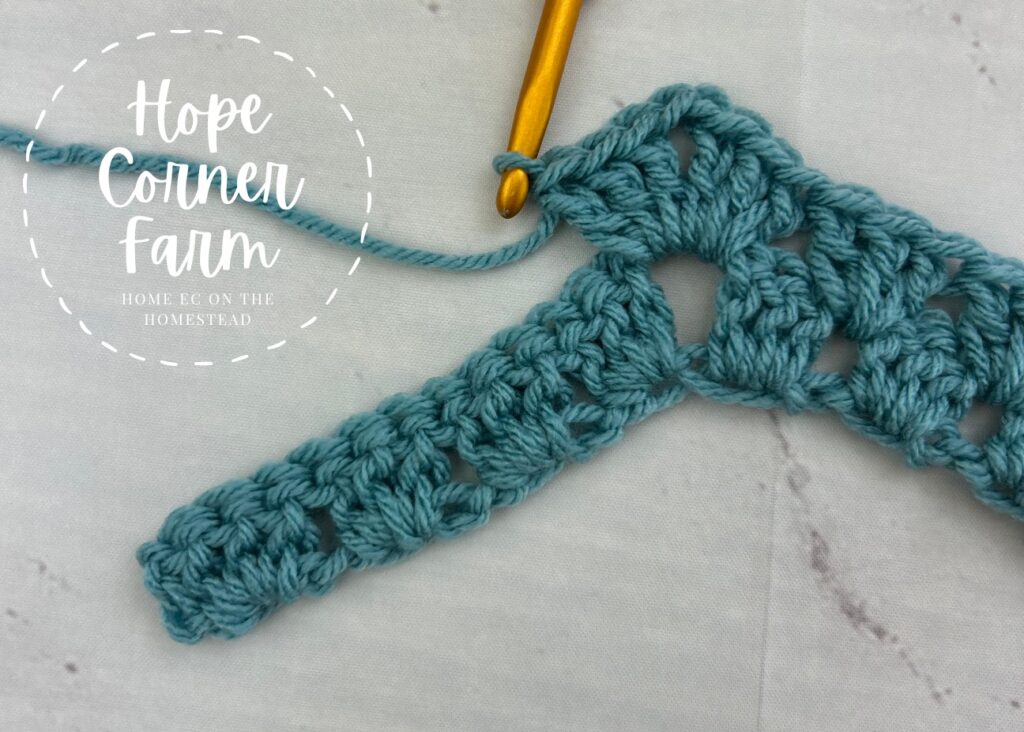
This is a completed Row 2.
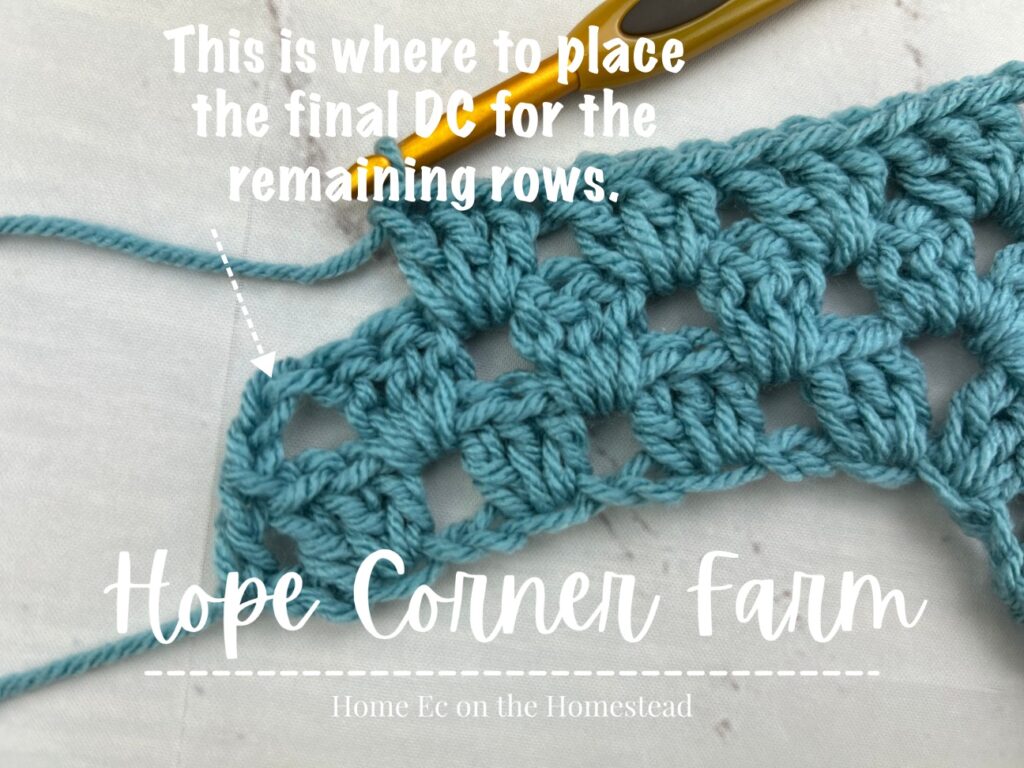
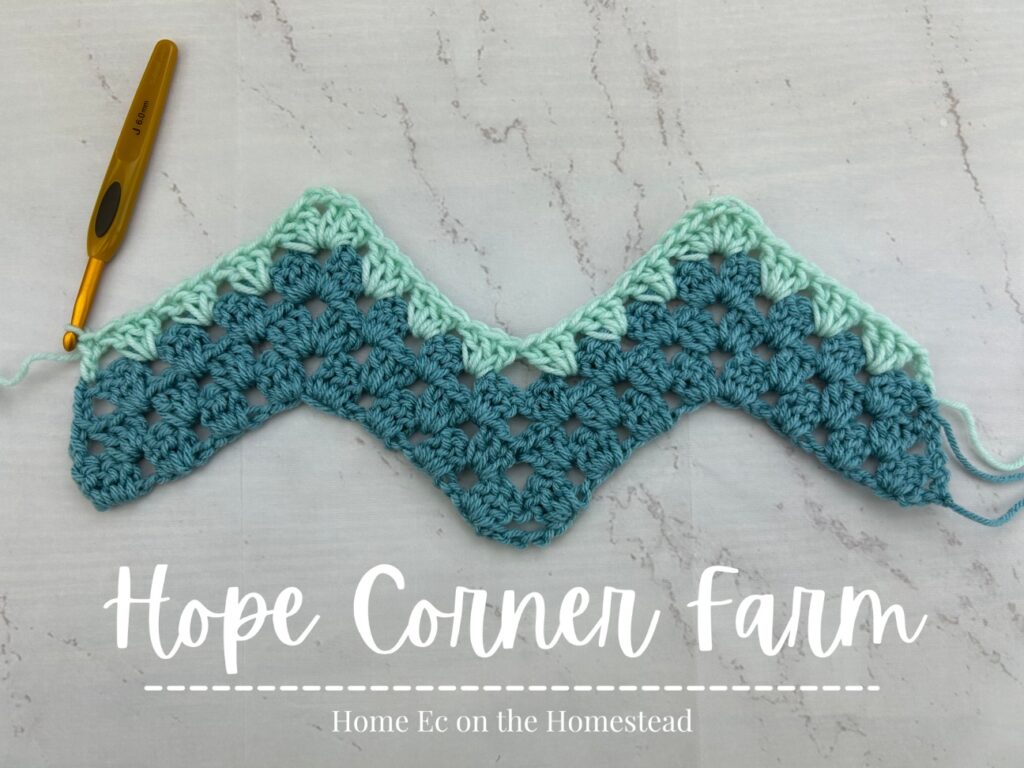
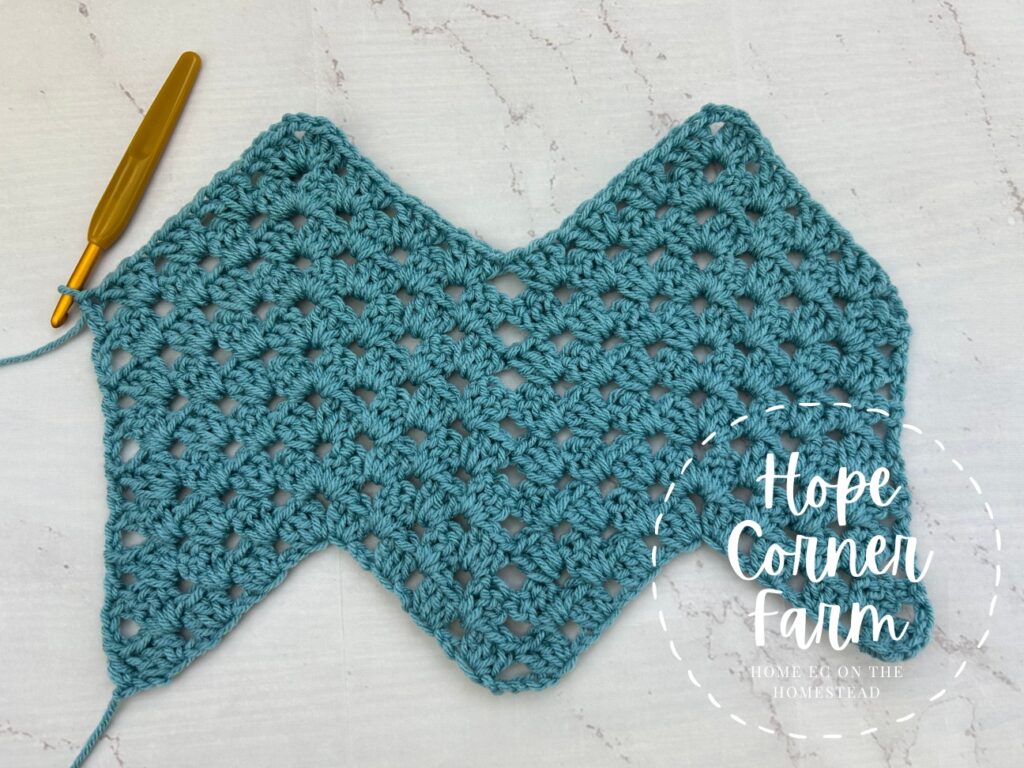
Remaining Rows of Granny Ripple Stitches:
For any remaining rows of Granny Ripple Stitches, repeat Row 2. The placement of the final DC looks a little different for the remaining rows (it is still into the top of the chain from the previous row). Check out the photo below to see what is looks like.
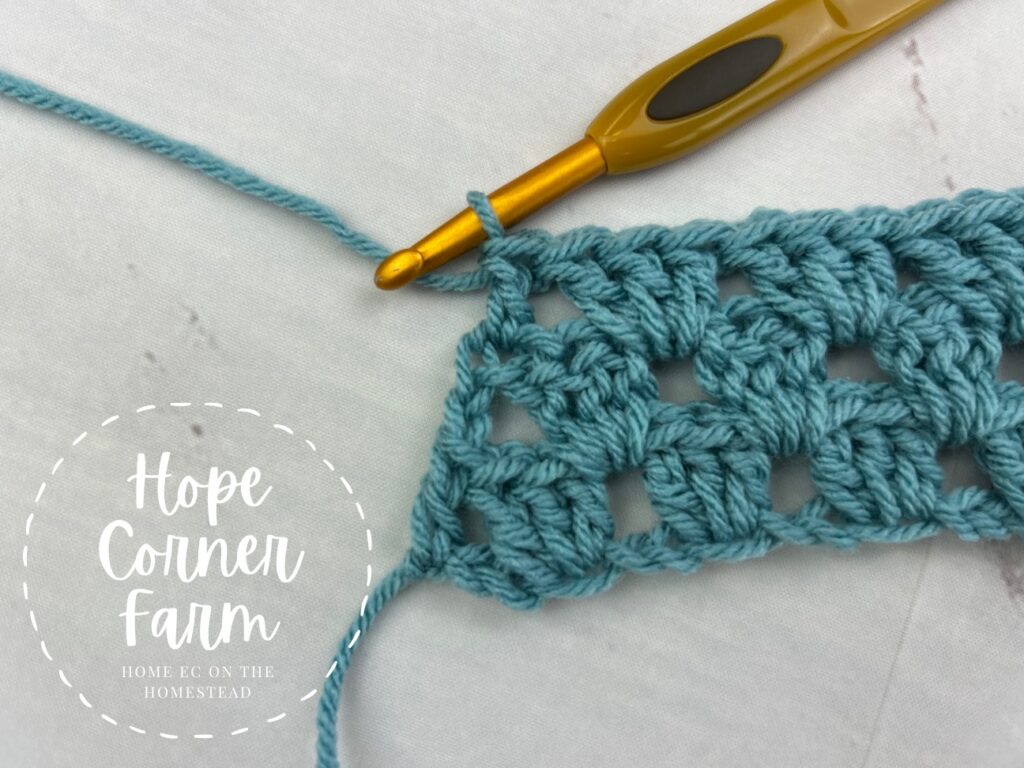
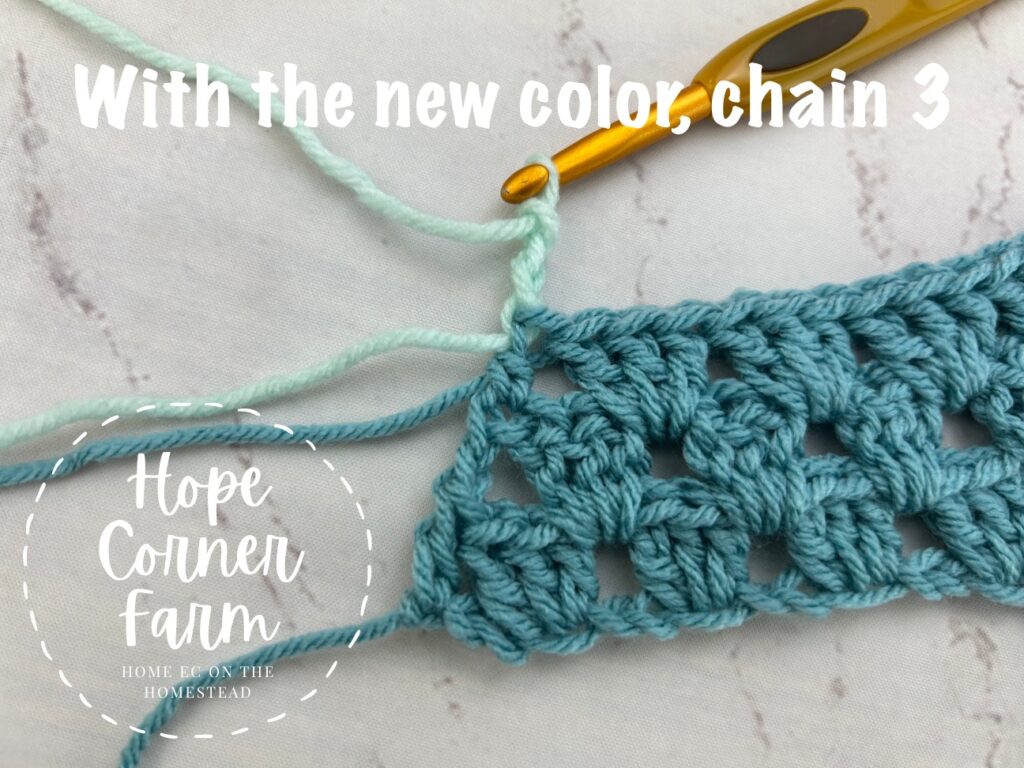
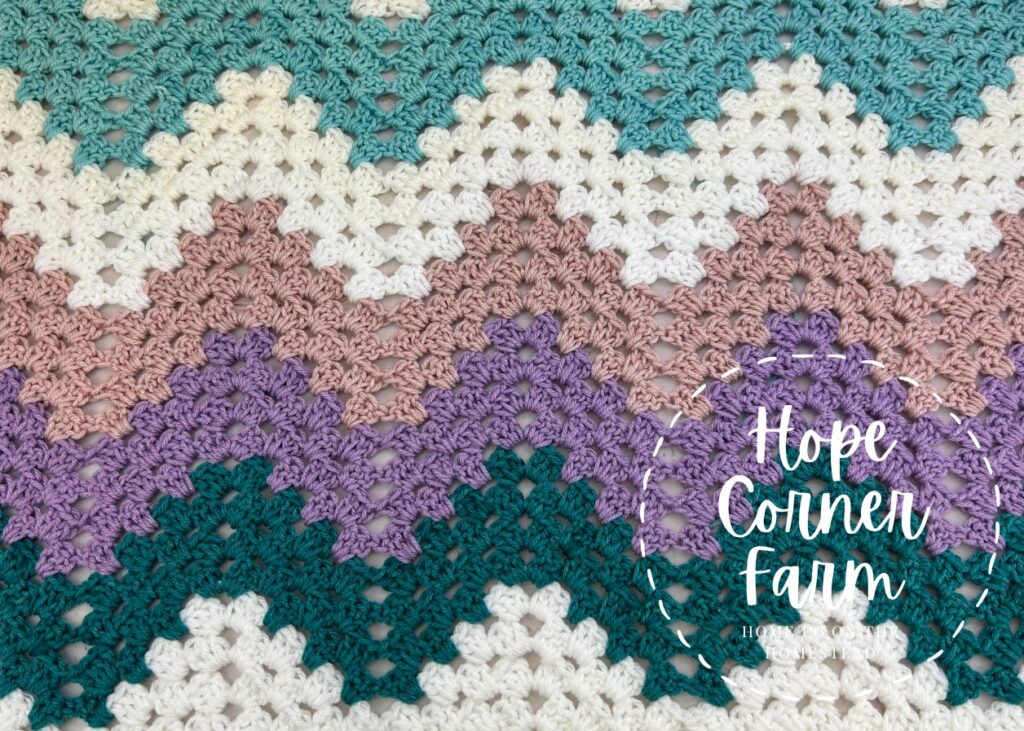
Changing Colors:
Finally, yarn color can be changed at the end of each row. I change colors midway through the final DC of the row. To complete that final DC and change color for the next row I begin by yarning over with the current yarn color. Then insert the hook into the top of the chains from the previous row, YO with current yarn color and pull through the stitch. There will be 3 loops on the hook at this point. YO again with the current color and pull through 2 of the loops of yarn. There will be 2 loops of yarn on the hook at this point.
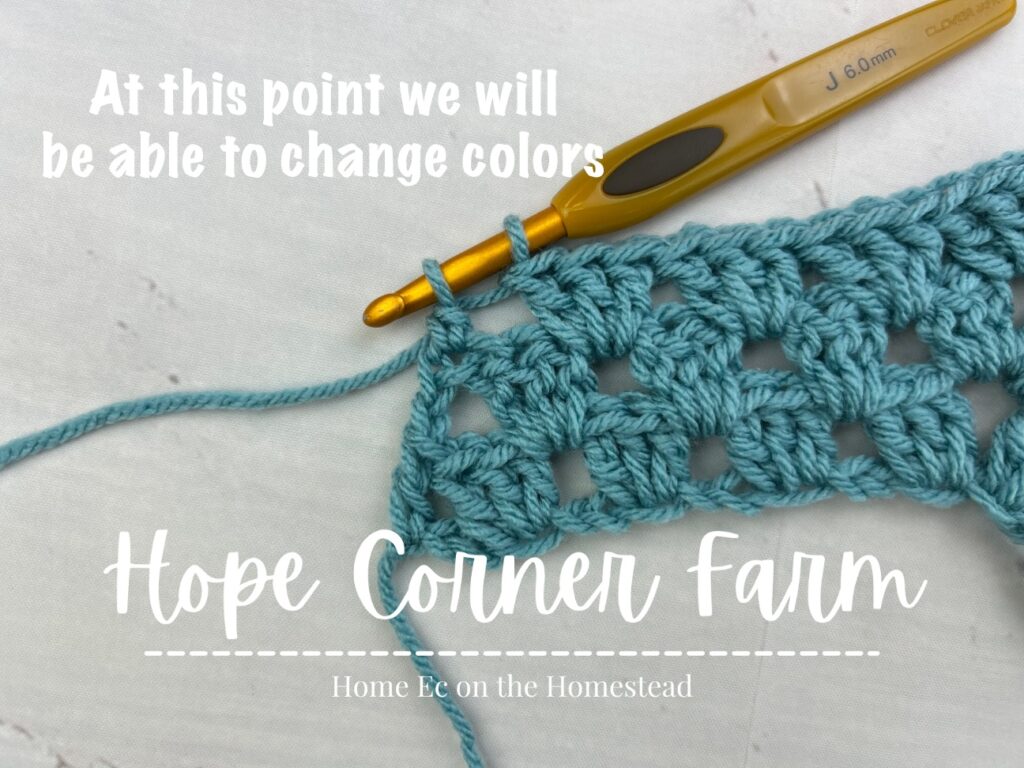
Now bring in the new yarn color. YO with the new yarn color and pull through the 2 loops on the hook to complete that DC. Continue as usual with the new yarn color.


Final Tips:
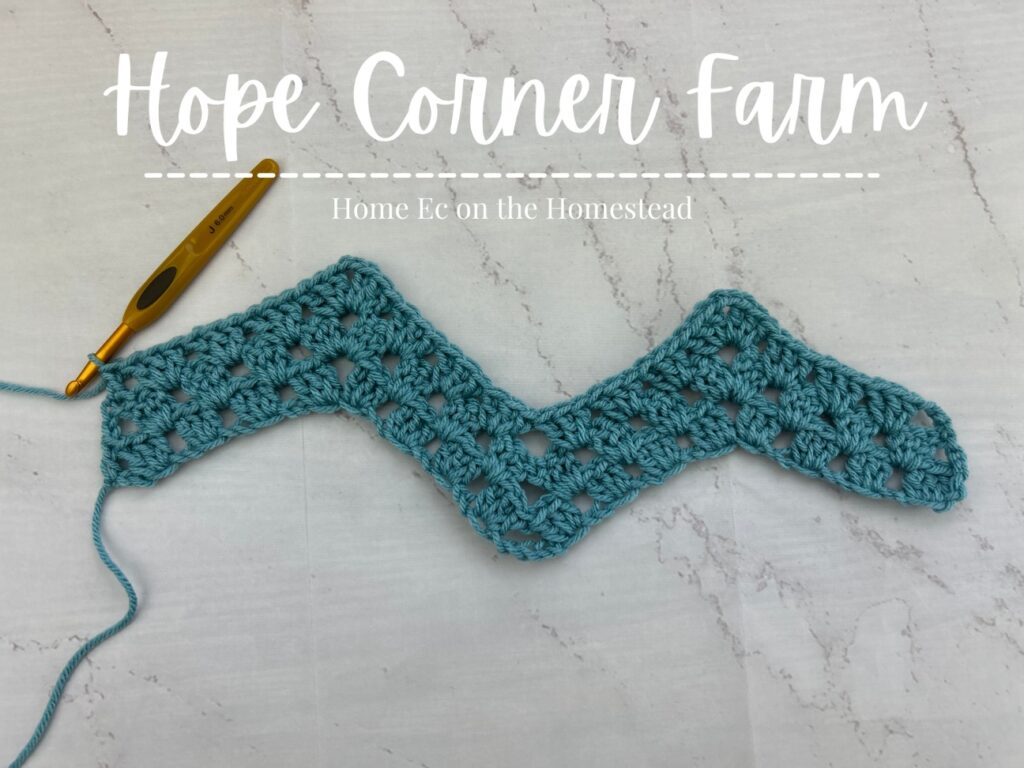
Keep in mind that if your project is bigger than my small sample, just keep alternating creating peaks and valleys until the end of the row. This stitch makes a great crochet blanket!
Granny Ripple Stitch Video Tutorial:
Written Instructions Only:
To Start the Granny Ripple Stitch
THIS CROCHET STITCH REQUIRES MULTIPLES OF 25+1.
Note: The multiple of 25 will only give you one “V” in the ripple. Plan accordingly when planning your project.
For this tutorial I chained 51 (my multiple of 25 is 50+1=51).
Row 1:
Into the 4th chain from the hook place 3DC. (Skip 2 chains. Place 3DC in the next chain)2xs.
Now create the increase or the “peak” of the ripple. To do this, skip 2 chains, then place 3 DC in the next stitch, chain 2, and then place 3DC in the next chain.
Next (Skip 2 chains, place 3 DC in the next) 2xs. Then we create the decrease or the “valley” of the ripple. To do this, skip 2 chains, then place 3 DC in the next stitch, skip 5 chains, then place 3 DC in the next chain.
(Skip next 2 chains, place 3DC in the next)2xs. Then create the next peak. After creating the peak, (skip 2 chains, 3DC in next) 3xs.
There should be 3 chains remaining. Skip 2 chains. Place ONE DC in the last chain.
Granny Ripple Stitch – Row 2:
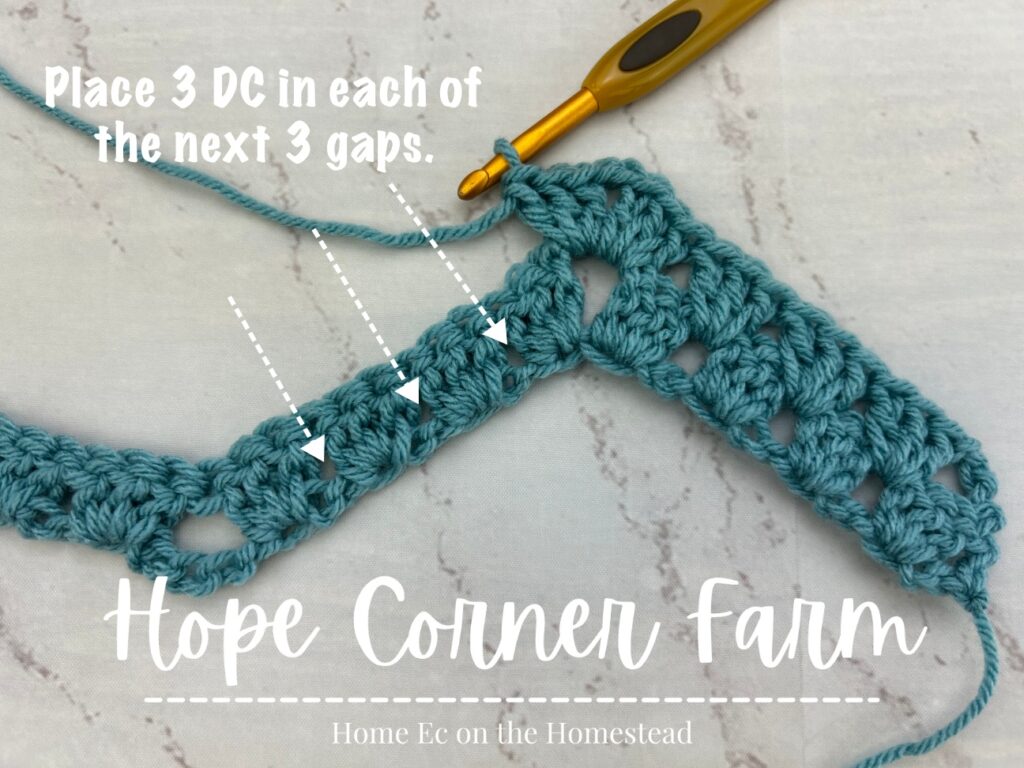
Begin by chaining 3 and turning your work. Skip the first gap. Place 3 DC in each of the next 3 gaps.
Now when you get to the peak, place 3DC, Ch 2, 3DC in the peak gap.
Next working down the other side of the peak, place 3DC in each of the next 3 gaps.
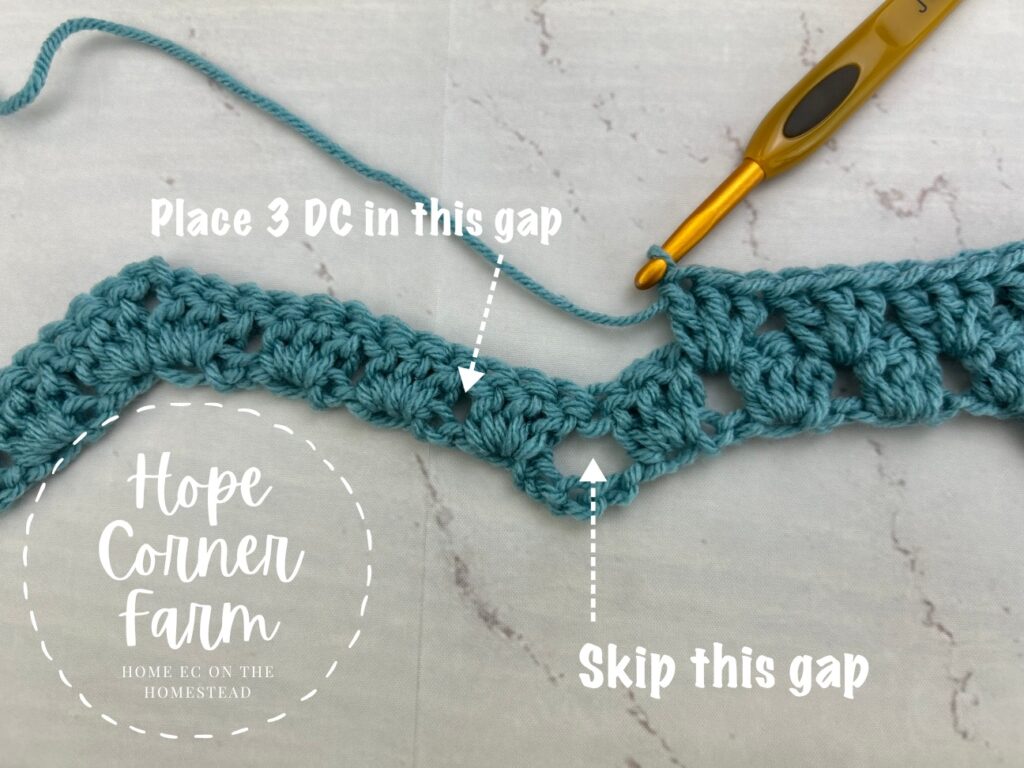
Now when you get to the valley, skip over the gap created by the valley. Instead, place 3 DC in the next gap AFTER the valley.
Next working up the other side of the valley, place 3 DC in each of the next 2 gaps.
Now when you get to the next peak, place 3DC, Ch 2, 3DC in the peak gap.
Next working down the otters side of the peak, place 3 DC in each of the next 3 gaps.
Finally place a DC in the top of the skipped chains from the 1st Row.
Row 3 and Beyond:
Keep repeating Row 2 for the remainder of the project.
Enjoy learning new crochet stitches? Don’t miss out on more!
Subscribe below to get free crochet patterns, tutorials, and inspiration delivered straight to your inbox. If you want more crochet fun delivered to your inbox hope on over and join our newsletter!

Join our creative community and keep your crochet queue full of beautiful, fun-to-make projects!
Many Blessings,

Love this crochet stitch? Check these crochet tutorials out!
If you enjoyed learning how to crochet the granny ripple stitch, be sure to explore even more beautiful and textured stitch tutorials on the blog! Try the crochet floret stitch for a delicate, floral-inspired design, or the crochet even moss stitch for a clean, modern texture. Looking for something with a bit more depth? The crochet cluster stitch and the crochet paired half double crochet stitch offer rich texture and visual interest that are perfect for blankets, scarves, and more. Keep expanding your crochet skills—there’s always a new stitch to discover!