
How to Crochet the Magic Ring: Step-by-Step Photo, Video, and Written Tutorial


Learning how to crochet the Magic Ring (also known as the Magic Circle) is one of the most important skills for anyone working crochet patterns in the round. This technique allows you to start projects like hats, amigurumi, coasters, and mandalas with a tightly closed center. That means no more gaps or holes in the middle of your work. In this step-by-step crochet tutorial, you’ll find clear photo instructions, a detailed video tutorial, and written directions to help you master the Magic Ring quickly and confidently. Whether you’re a beginner crocheter or simply looking to improve your foundation techniques, this guide will show you exactly how to crochet the Magic Ring the easy way.


First, check out my video tutorial my You Tube Channel! Subscribe to get the latest crochet fun from Hope Corner Farm Crochet!
What is the Magic Ring in Crochet?
The Magic Ring (also called the Magic Circle or adjustable loop) is a crochet technique used to start projects that are worked in the round. Instead of chaining and joining to form a loop, the Magic Ring lets you begin your first round of stitches around an adjustable loop of yarn. Once your stitches are complete, you pull the tail to close the center tightly, creating a neat, gap-free starting point. This method is especially useful for crocheting amigurumi, hats, coasters, mandalas, and round motifs where a solid center is desired. Learning how to crochet the Magic Ring gives your projects a cleaner, more professional look and helps prevent holes from forming in the middle of your work.
Materials Needed for the Magic Circle
Yarn of Choice (I used a size 4 medium weight yarn for this tutorial: More specifically Red Heart Soft Yarn in the color Turquoise)
Crochet Hook of Choice (I used a size J 6.0mm crochet hook)
Scissors
Yarn Needle
This crochet tutorial uses US Crochet Terms
What Crochet Terms Will I Need to Know for the Magic Circle?
Crochet Magic Ring Step-by-Step (Photo Instructions)
In this step-by-step photo tutorial, you’ll learn exactly how to crochet the Magic Ring from start to finish. Each photo clearly shows how to hold the yarn, form the loop, and work your first stitches into the ring. Follow along closely and take your time with each step. Once you’ve practiced a few times, making a Magic Ring will feel natural and easy. These photos are designed to help both beginner crocheters and those who prefer a visual guide to master the Magic Ring technique with confidence.
How to Start the Magic Circle
Begin by pinching the yarn between your thumb and index finger of your off hand (yarn holding hand). Make sure you leave a yarn tail that is at least 6″ in length.
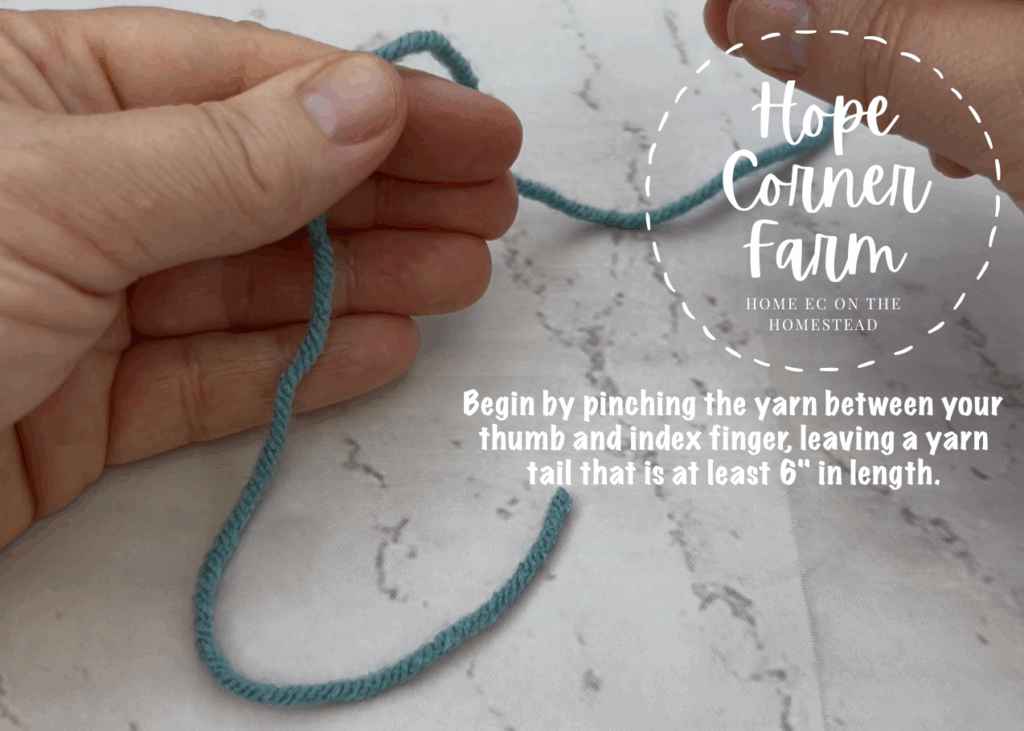
Step 1:
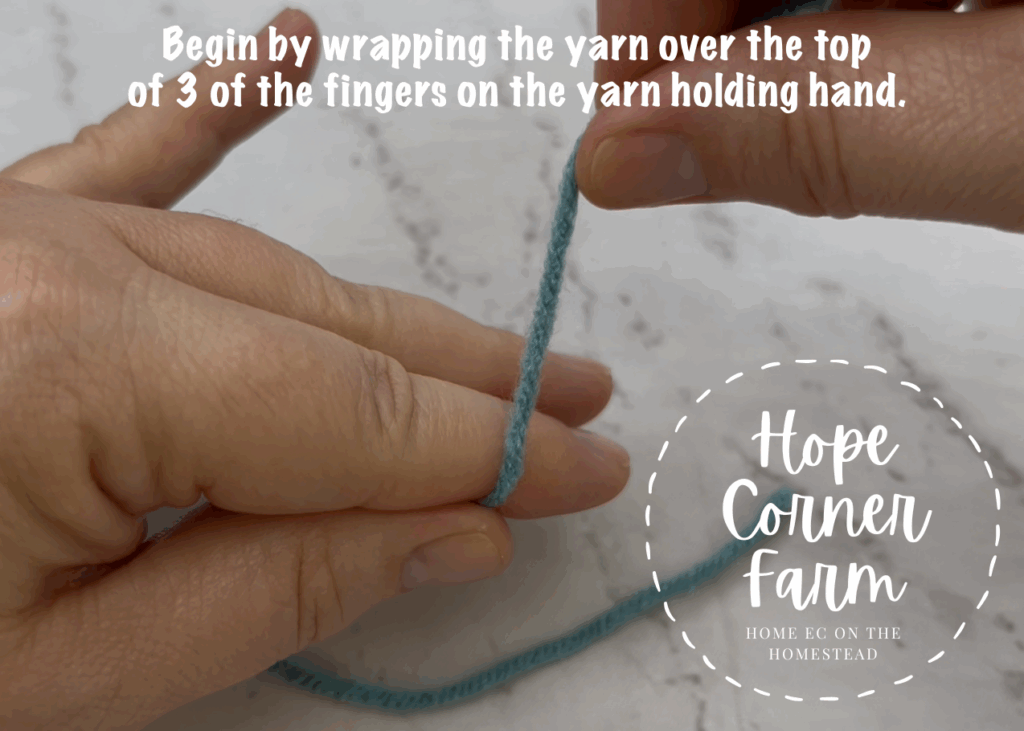
Now wrap the yarn up and over the top of 3 of the fingers on your yarn holding hand.
How to Crochet the Magic Ring – Step 2:
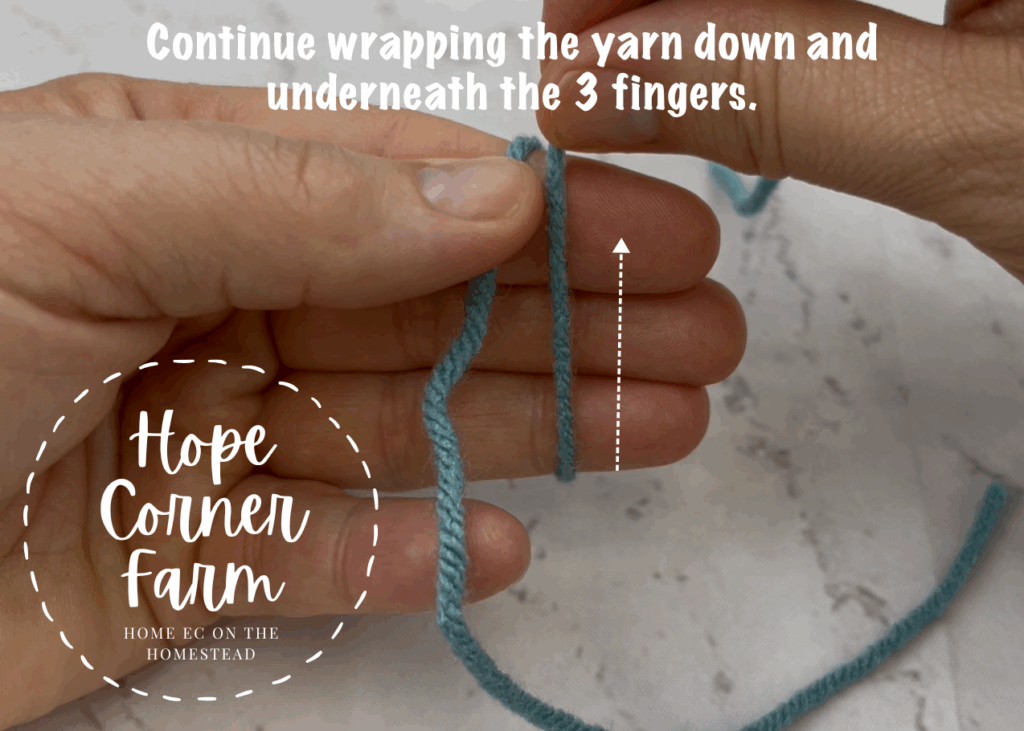
Next continue wrapping the yarn around your yarn holding hand. Wrap underneath the same 3 fingers on that hand.
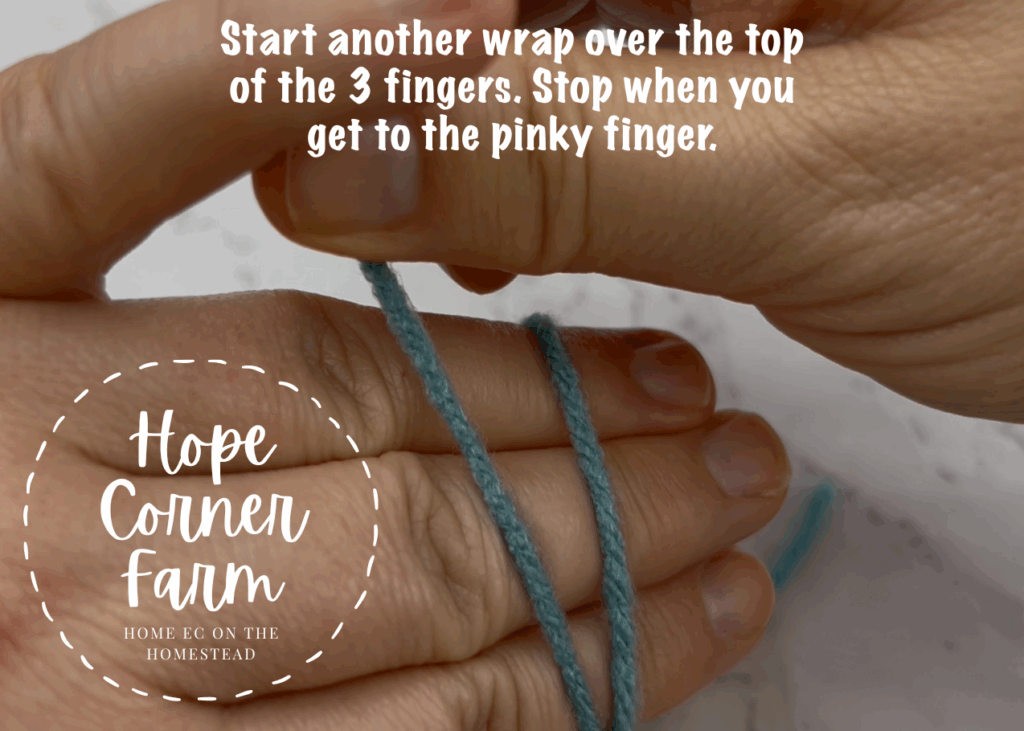
Step 3:
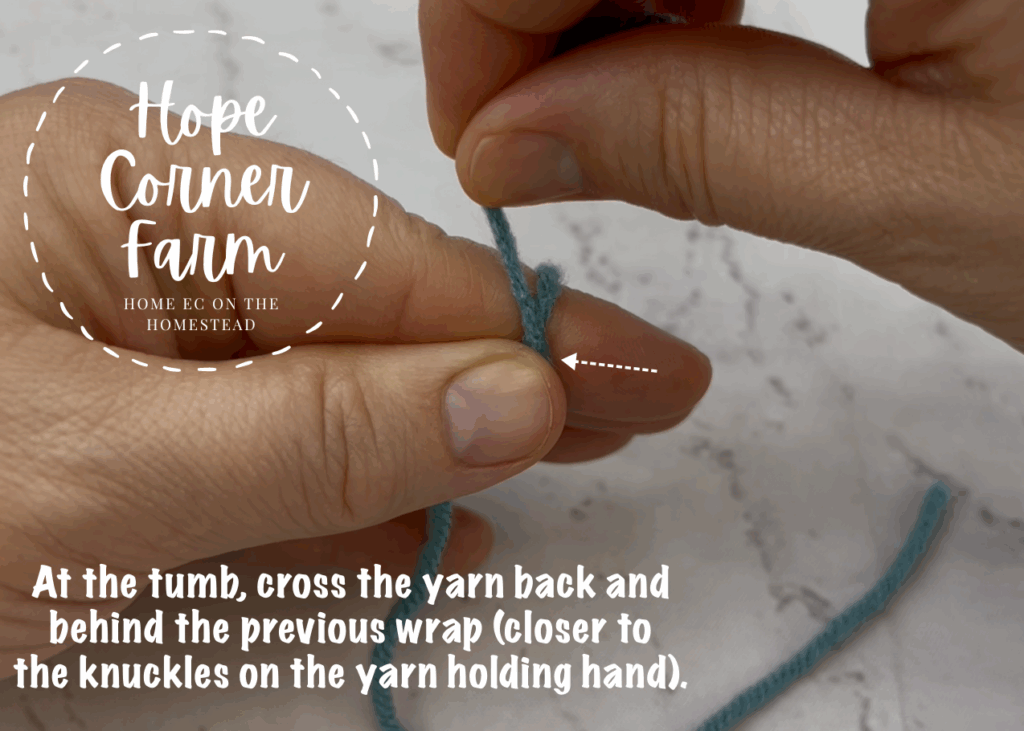
Now begin a second wrap by crossing the yarn back and behind (closer to the knuckles on the yarn holding hand) the first wrap when you get to the thumb and index finger.
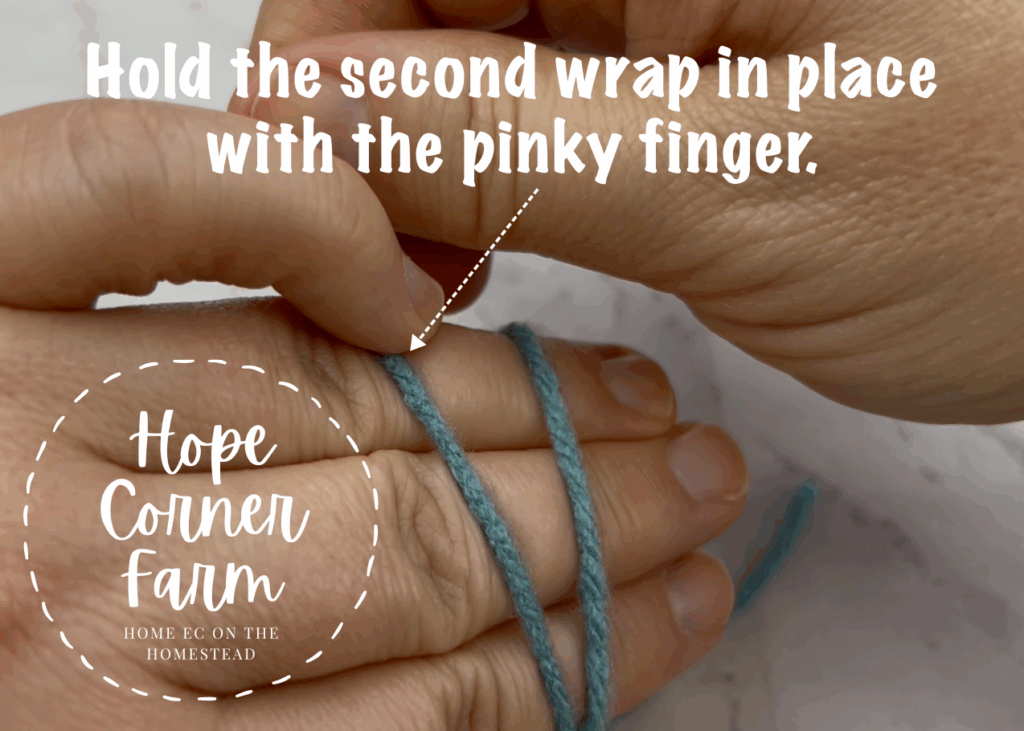
Crochet Magic Circle Step 4:
Next cross the yarn across the top of the 3 fingers again (closer to the knuckles this time), stopping at the pinky finger. Use the pinky finger of your yarn holding hand to pinch and keep the yarn in place.
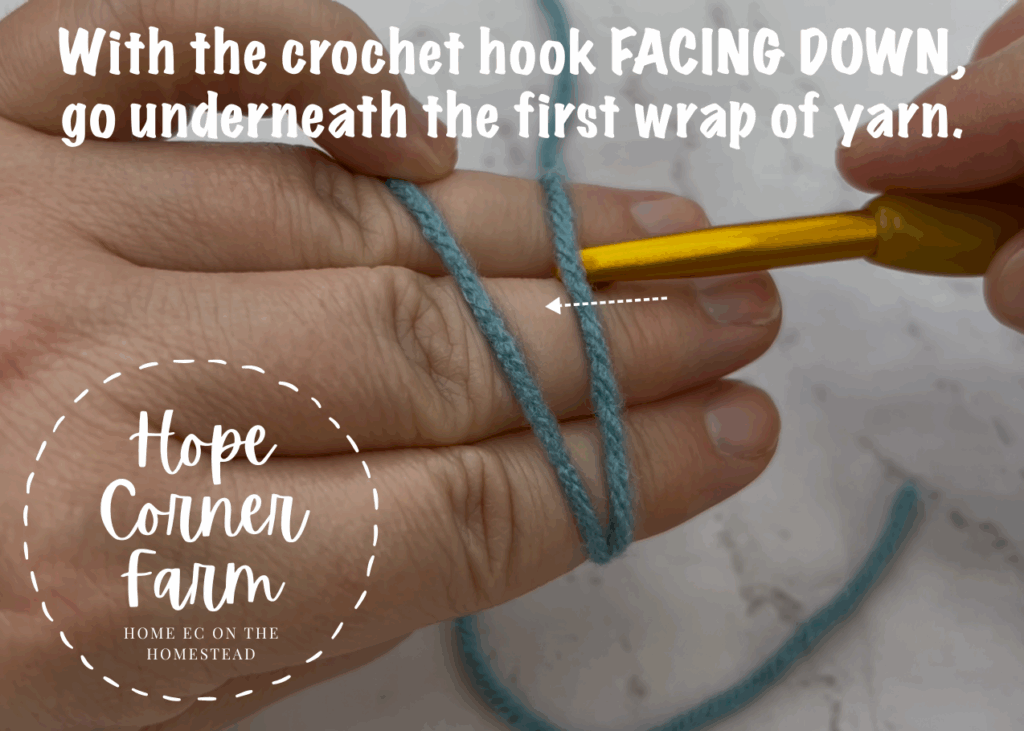
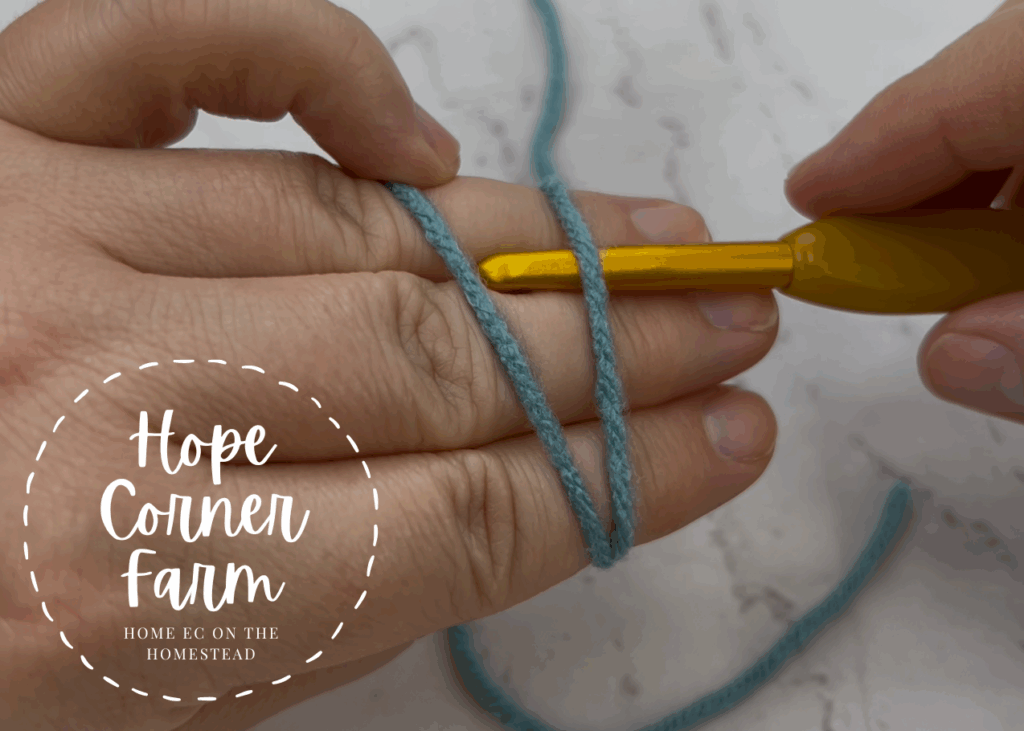
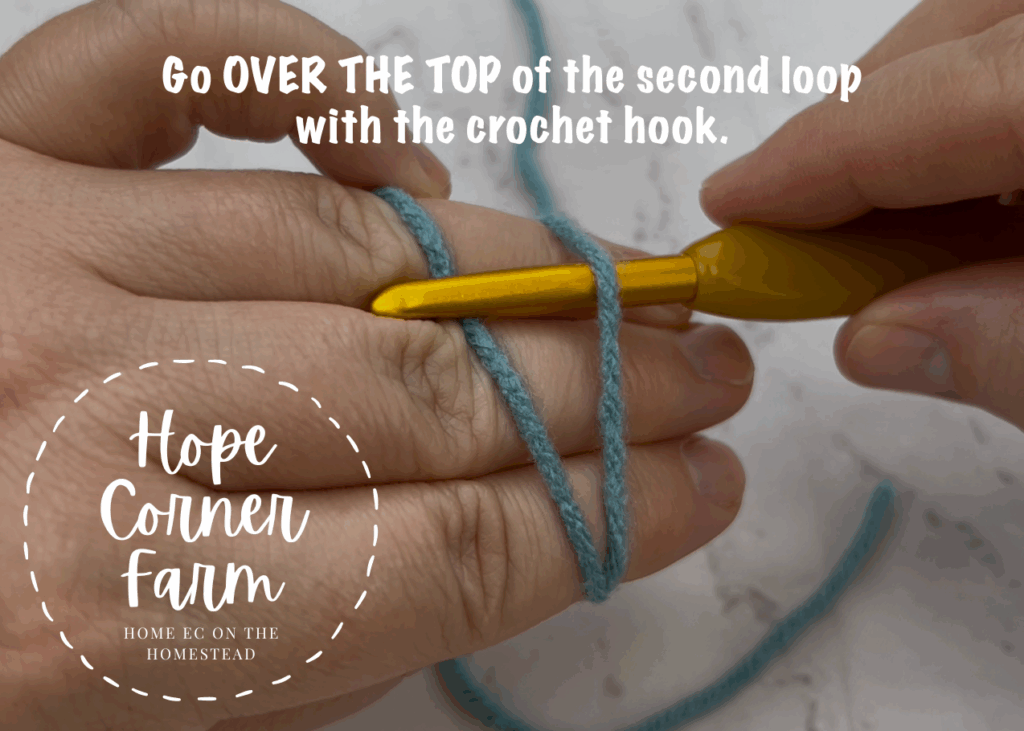
Step 5:
Now grab the crochet hook and face the nook of the hook down towards your yarn holding hand. With the hook go underneath the first wrap of yarn on your hand, and then go over top of the second wrap of yarn (making sure that the second wrap will be caught by the nook of the crochet hook).
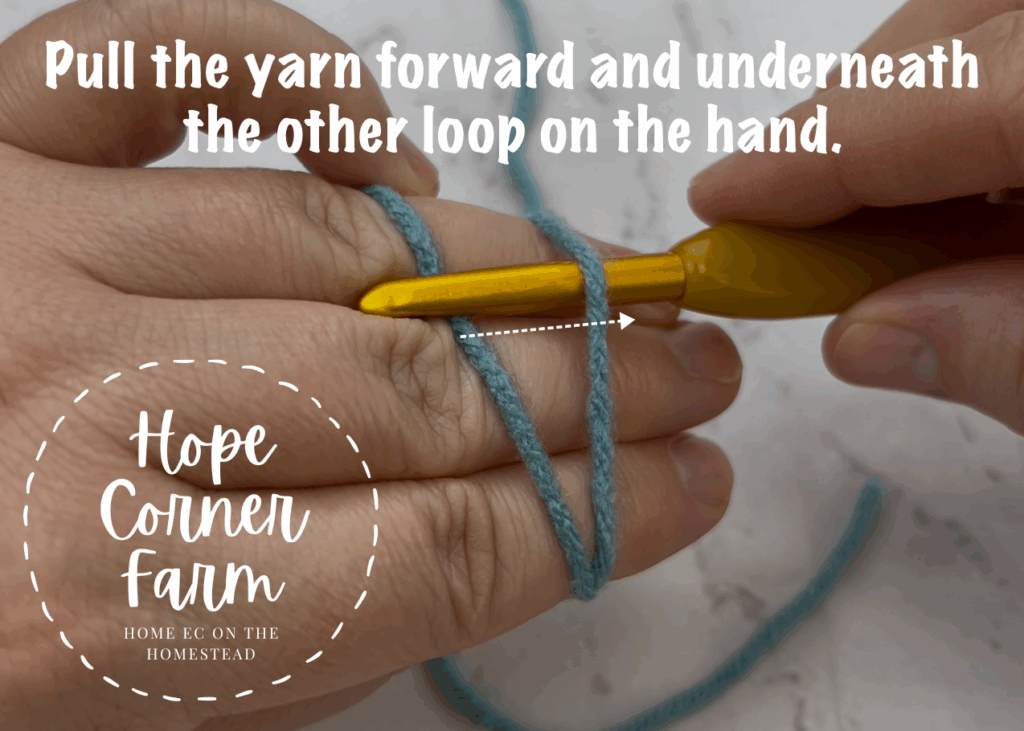
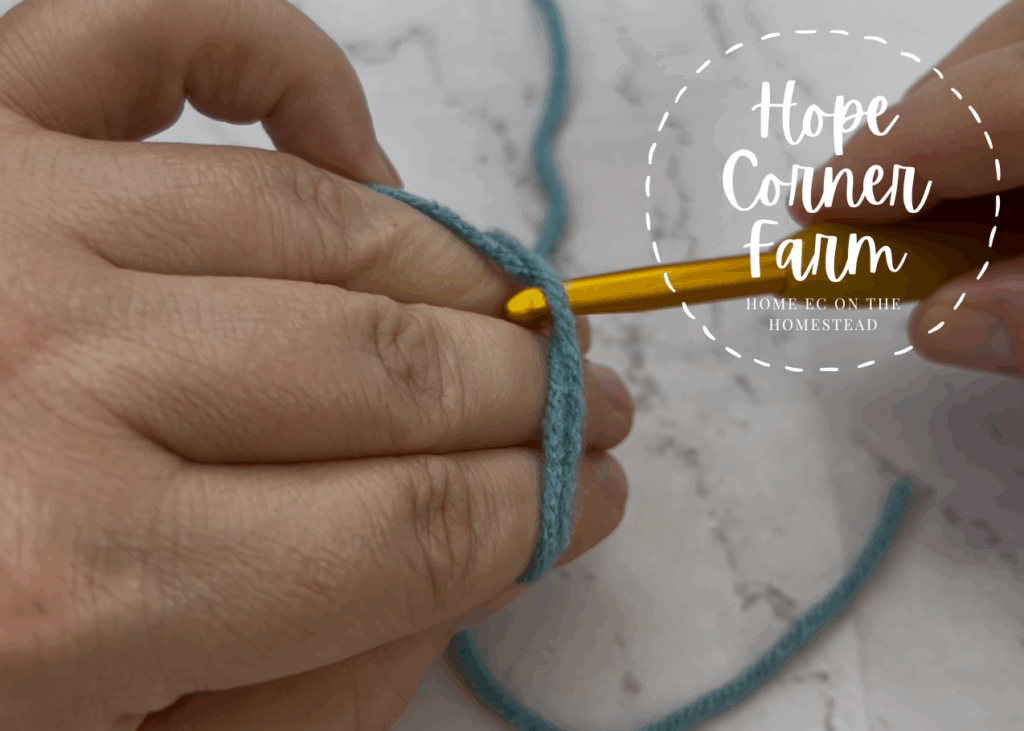
How to Crochet the Magic Ring Step 6:
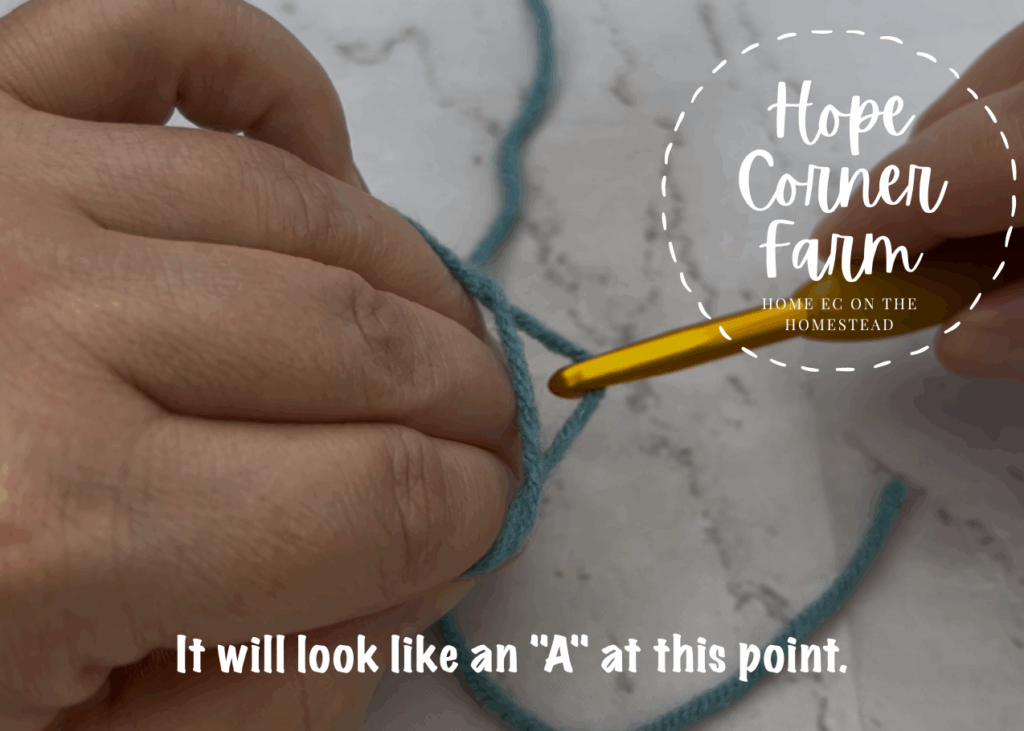
Next with the crochet hook, pull the second wrap of yarn (the one closer to the knuckles) forward and UNDERNEATH the first wrap of yarn (the one closer to the finger tips). Slightly curl your fingers down while doing this. The yarn will make an “A” shape at the end of this step.
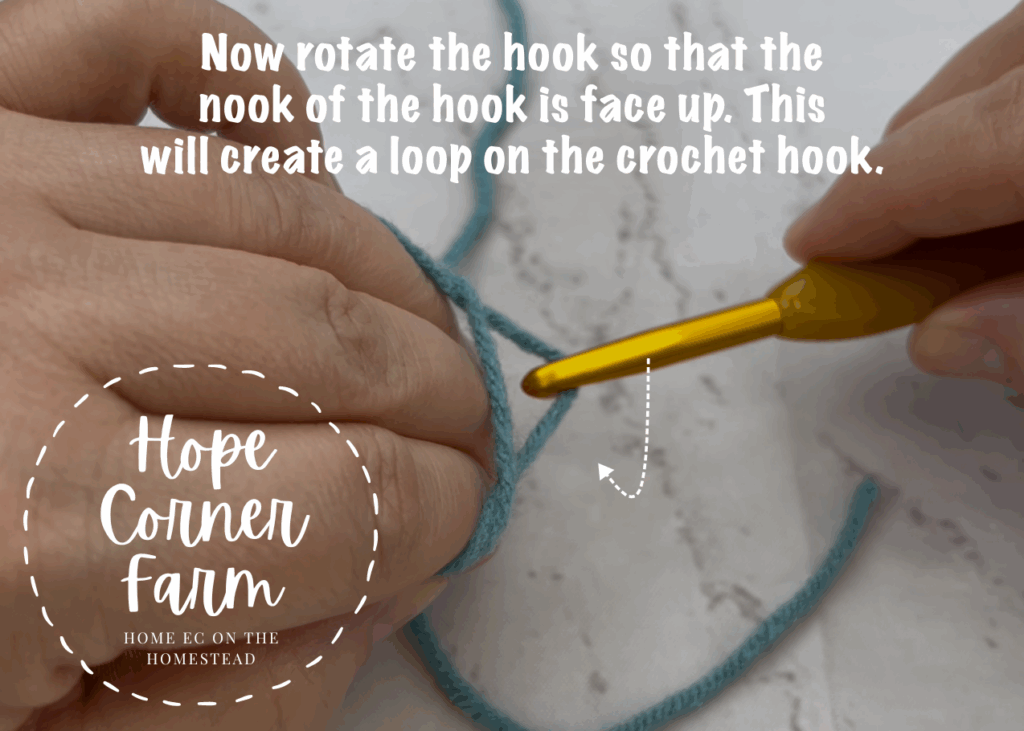
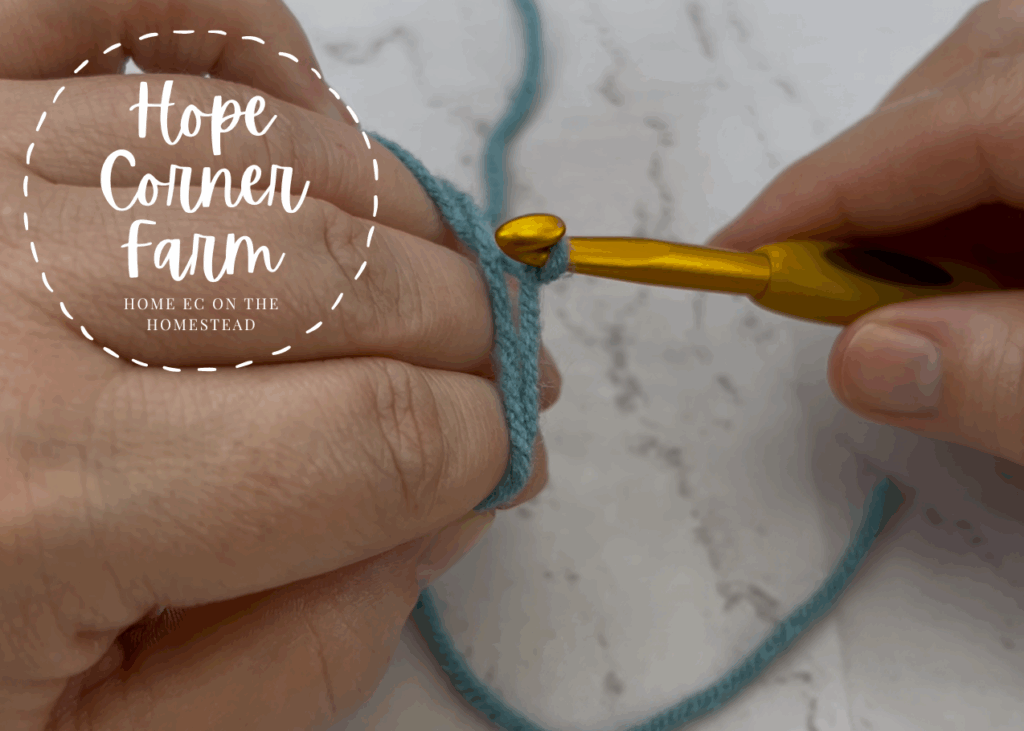
Step 7:
Now gently rotate the crochet hook so that the nook of the hook is facing up (how we normally hold it). This will create a loop on the hook.

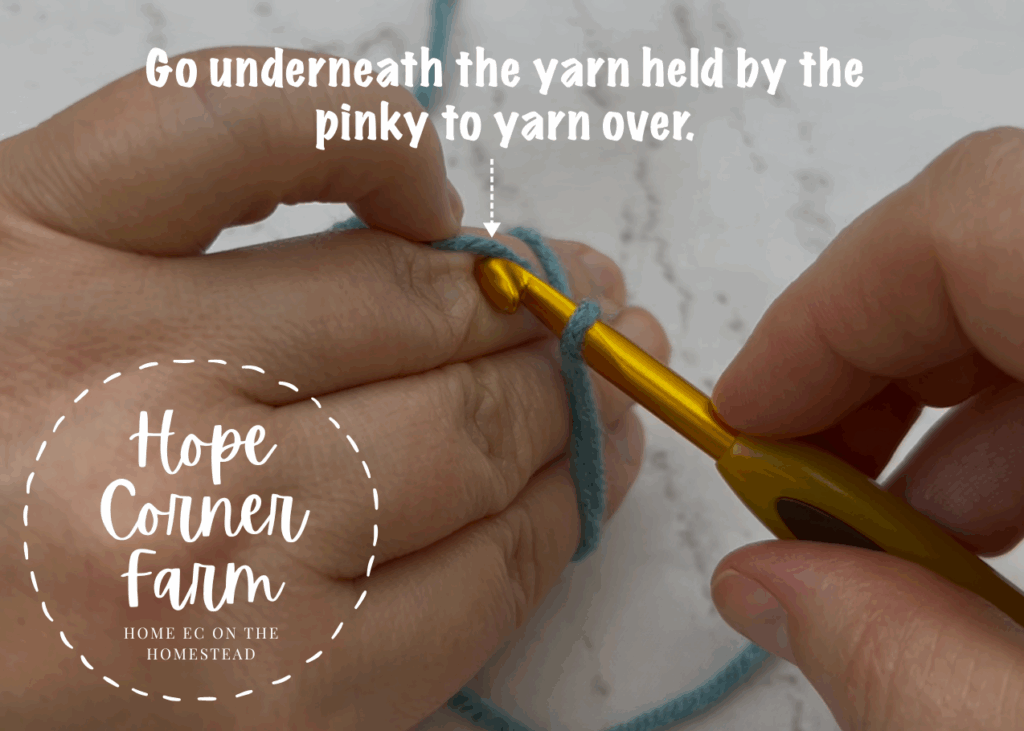
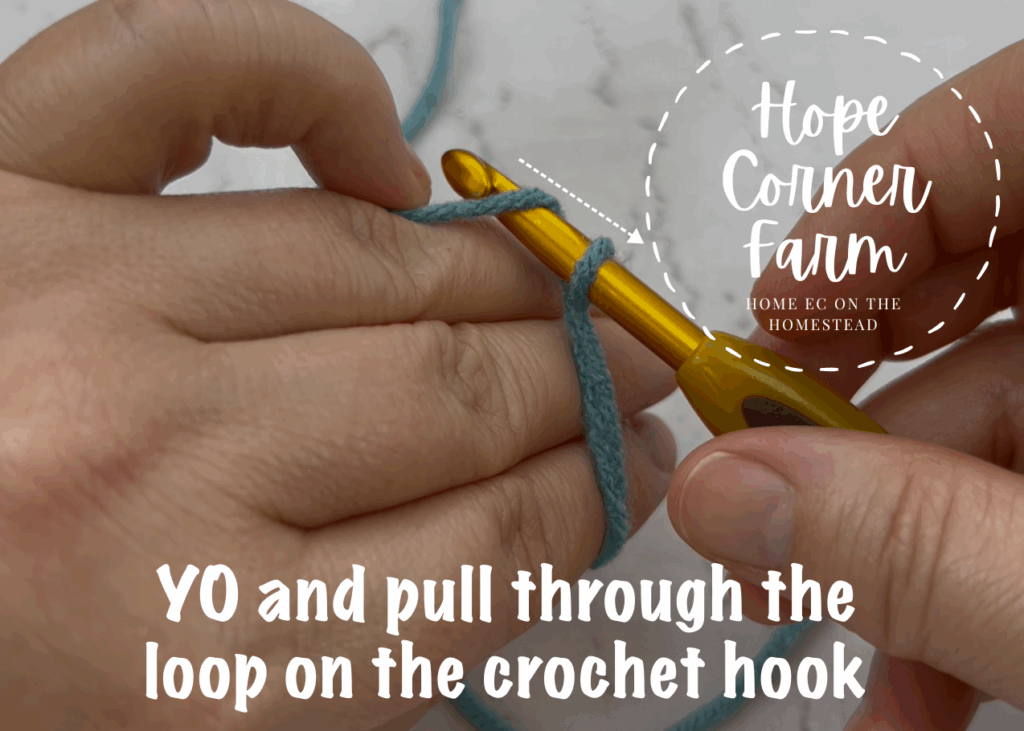
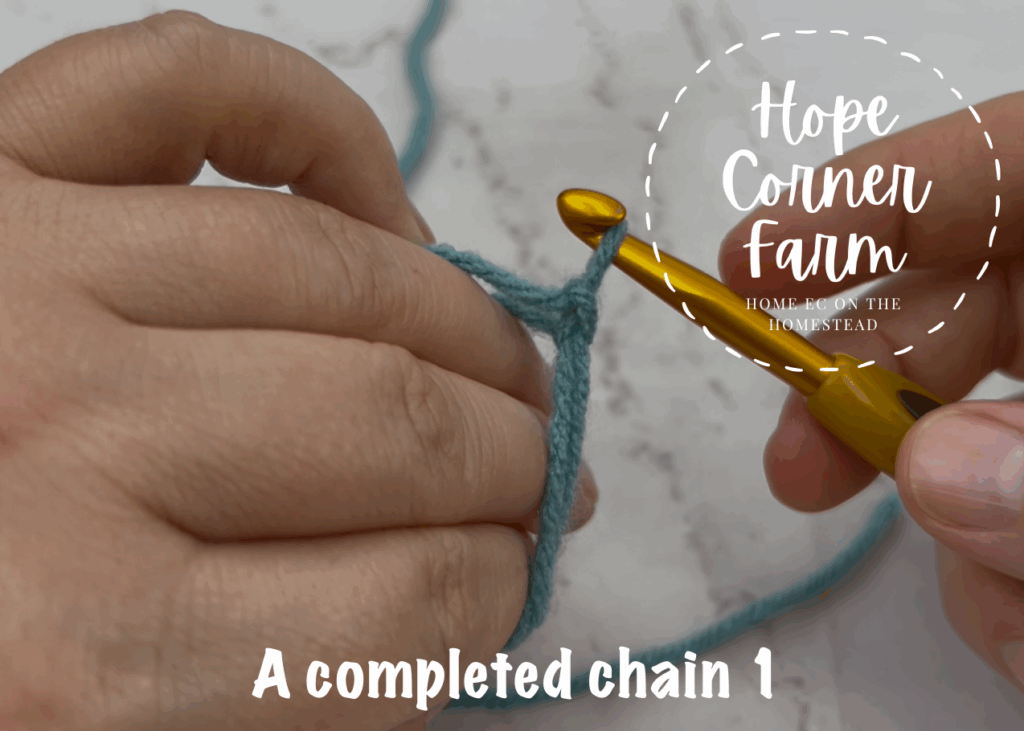
Crochet Magic Circle Step 8:
Next we will chain 1. Do this by inserting the crochet hook underneath the yarn that is still held in place by your pinky finger. Yarn over with this yarn and pull it through the loop on the crochet hook.
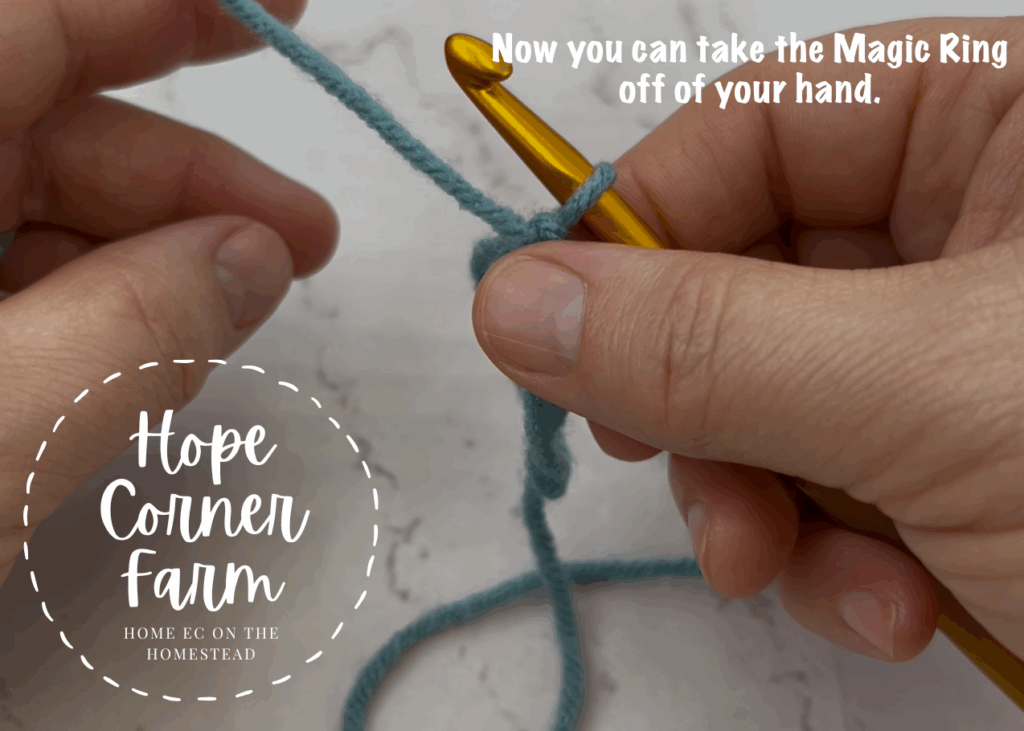
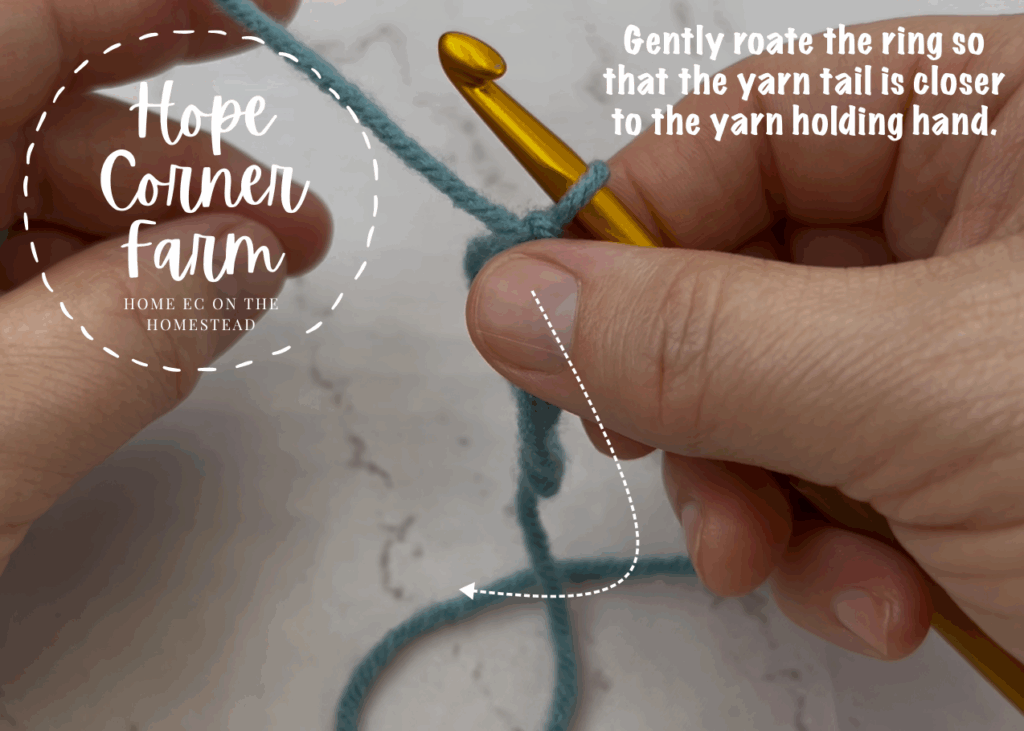
Step 9:
Now at this point you can take the magic ring off of your hand. You will need to slightly rotate the magic circle so that you can work into it. The side with the yarn tail should be in your yarn holding hand and the crochet hook should be positioned perfectly for use with your hook holding hand.
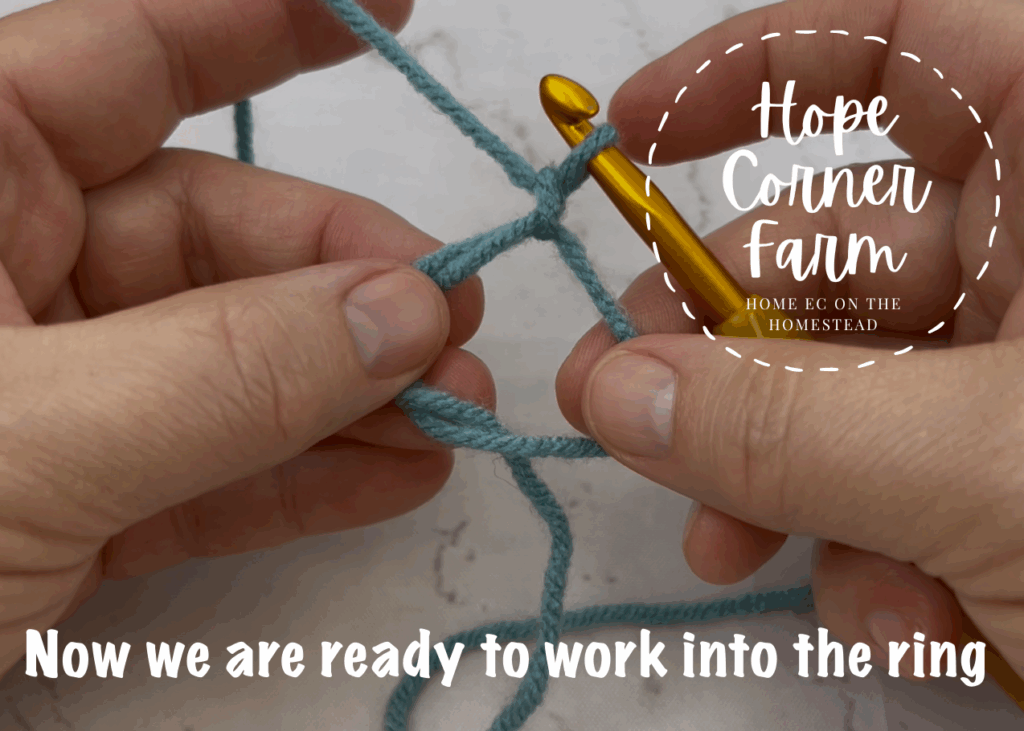
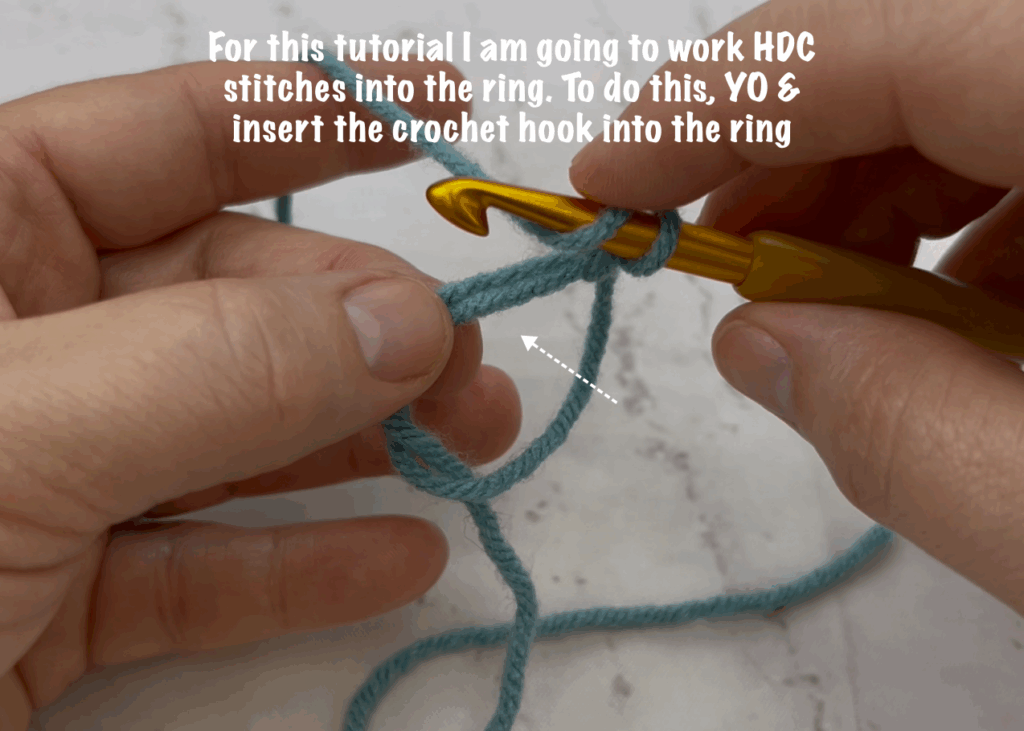
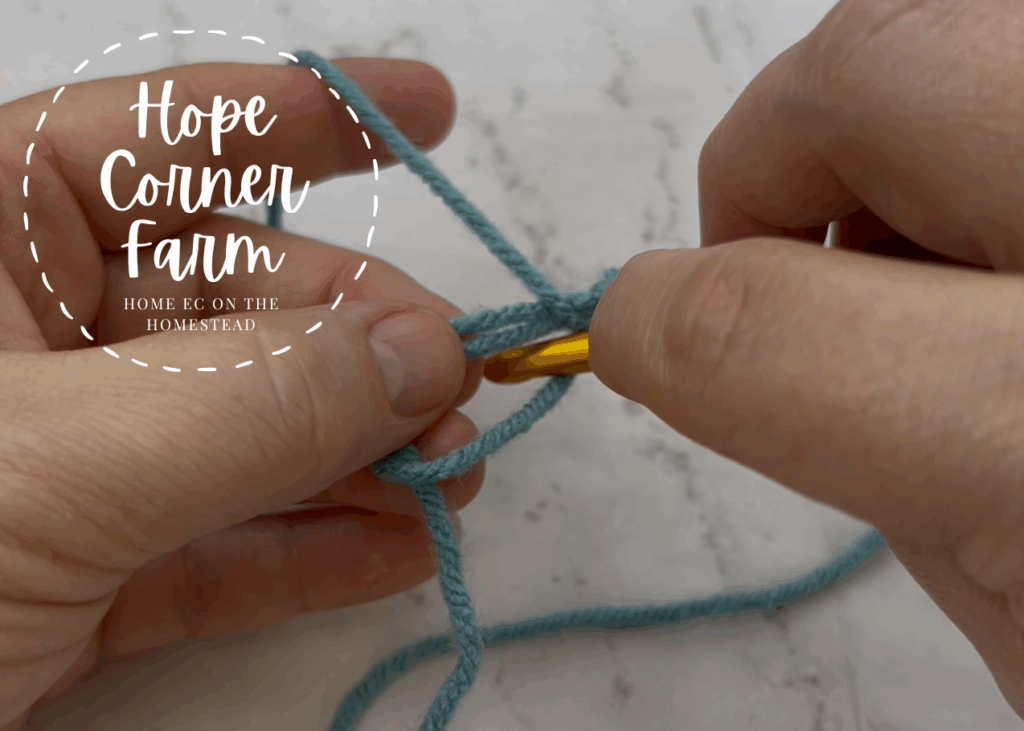
How to Crochet the Magic Ring Step 10:
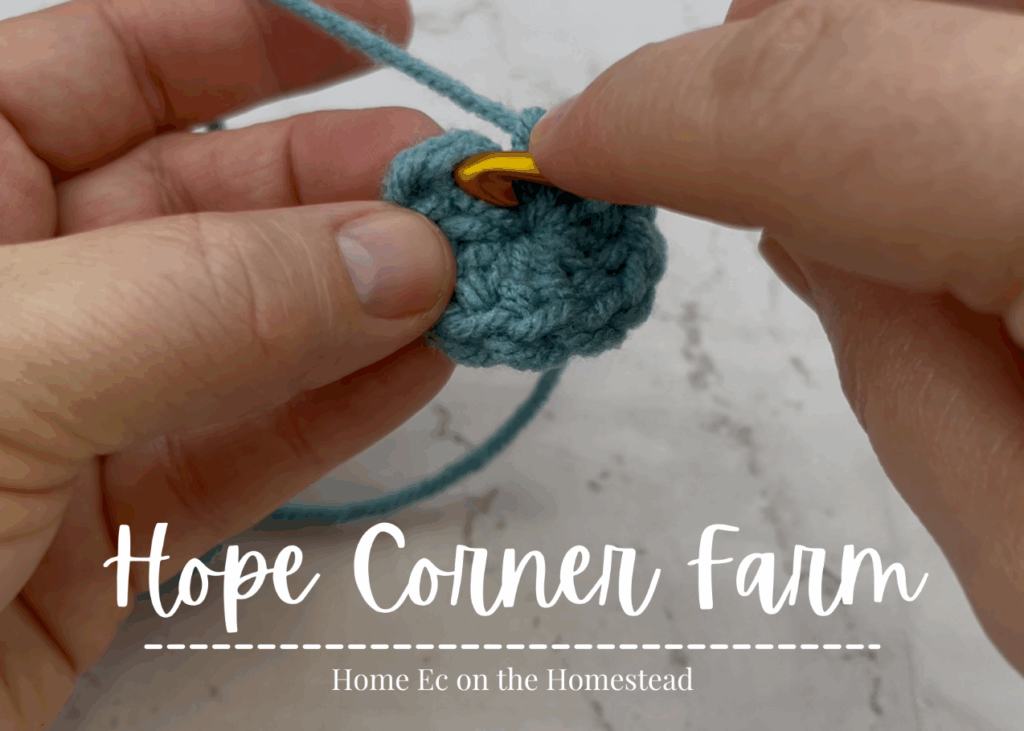
Next you have to decide what type of crochet stitch you want to work into the crochet magic circle. For this crochet tutorial I am placing Half Double Crochet Stitches into the magic ring. To do this, I need to yarn over before inserting the crochet hook into the middle of the magic circle.
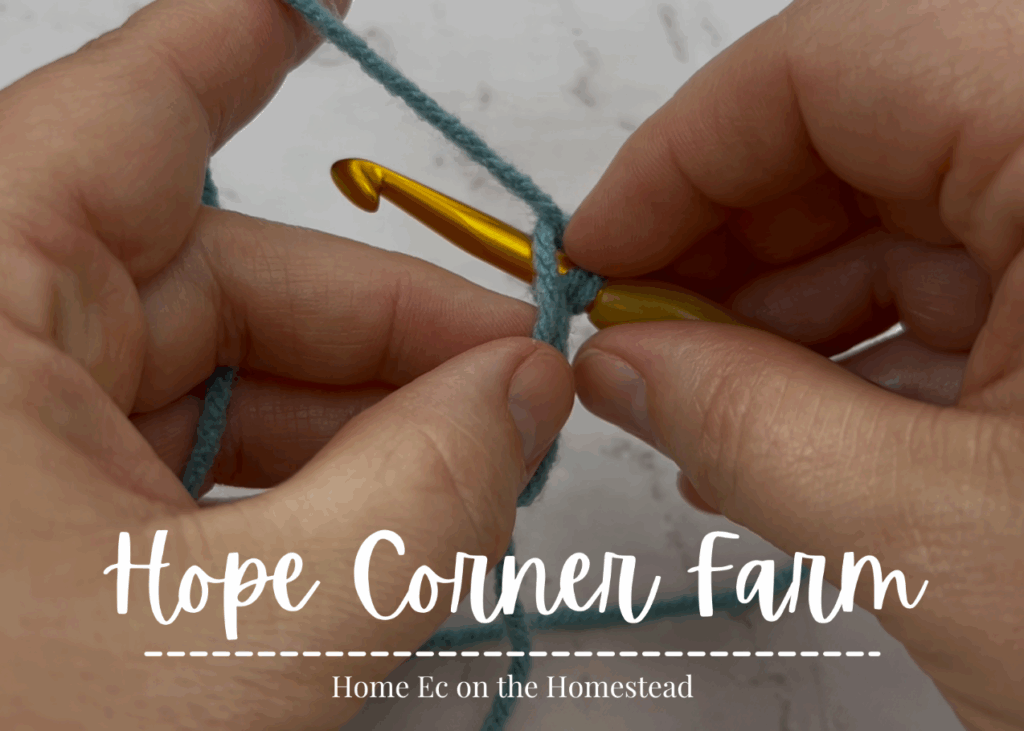
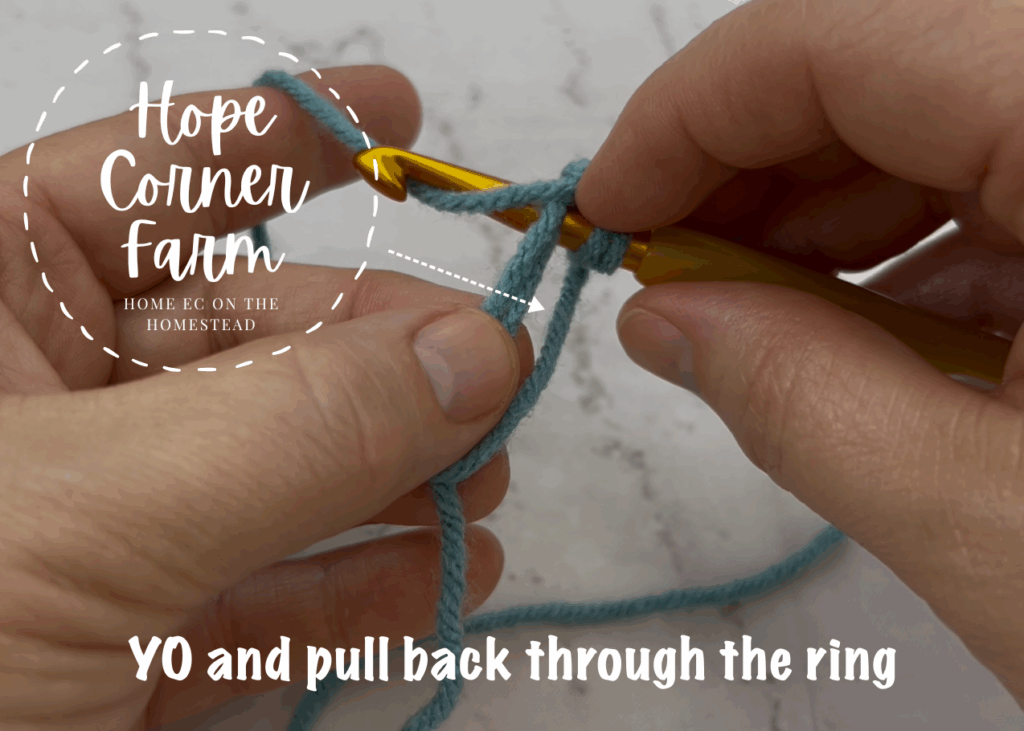
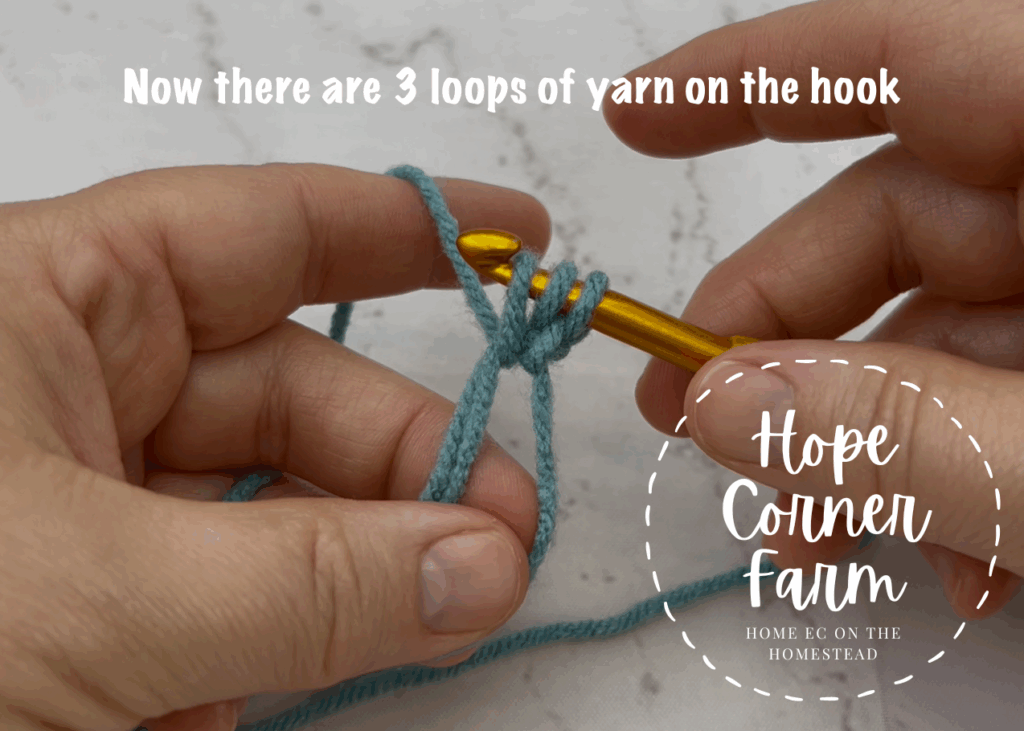
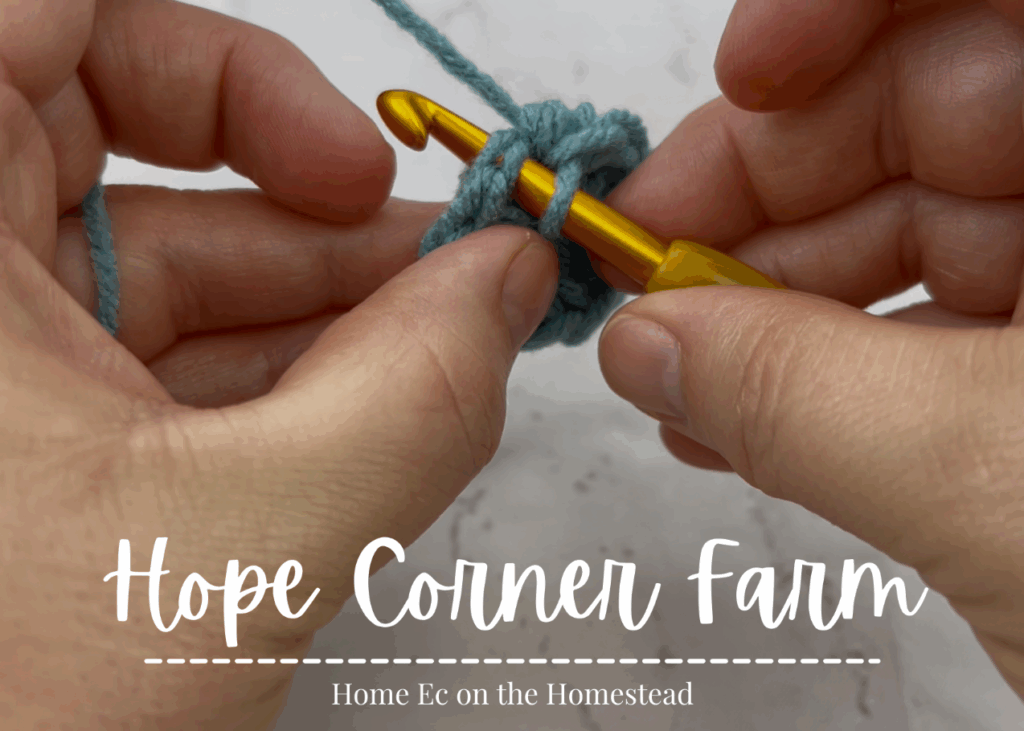
Step 11:
Now yarn over again and pull back through the ring. It is key at this point to make sure that you stitch (the HDC in my example) is worked COMPLETELY around both loops/wraps of the ring. There will be 3 loops of yarn on the hook at this point (for a HDC).
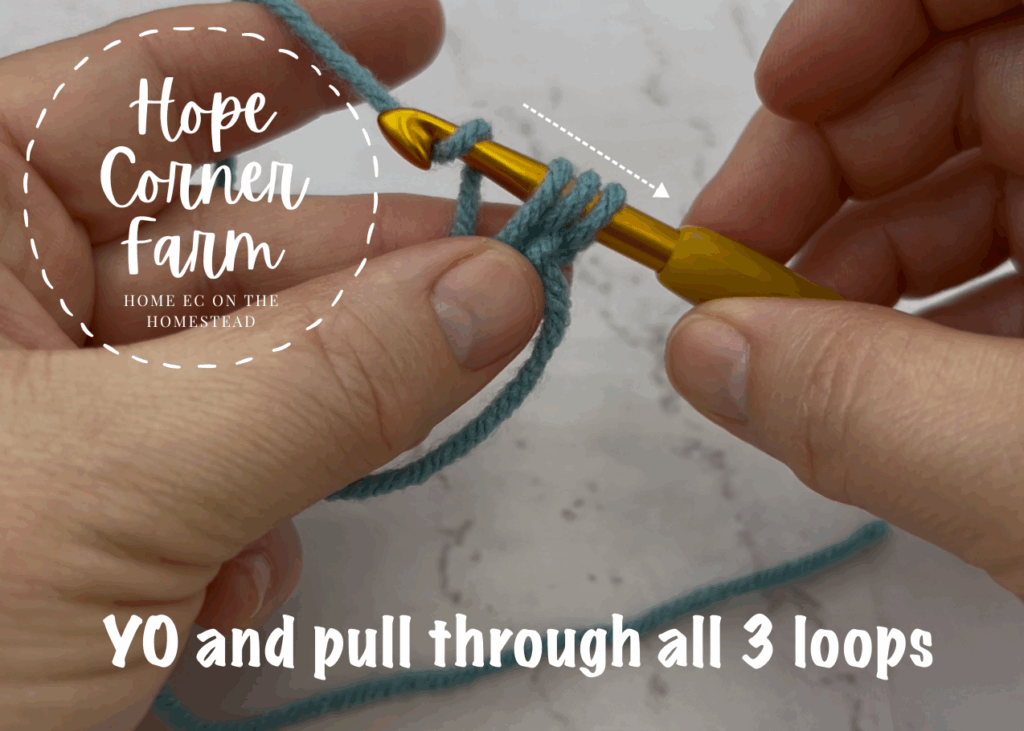
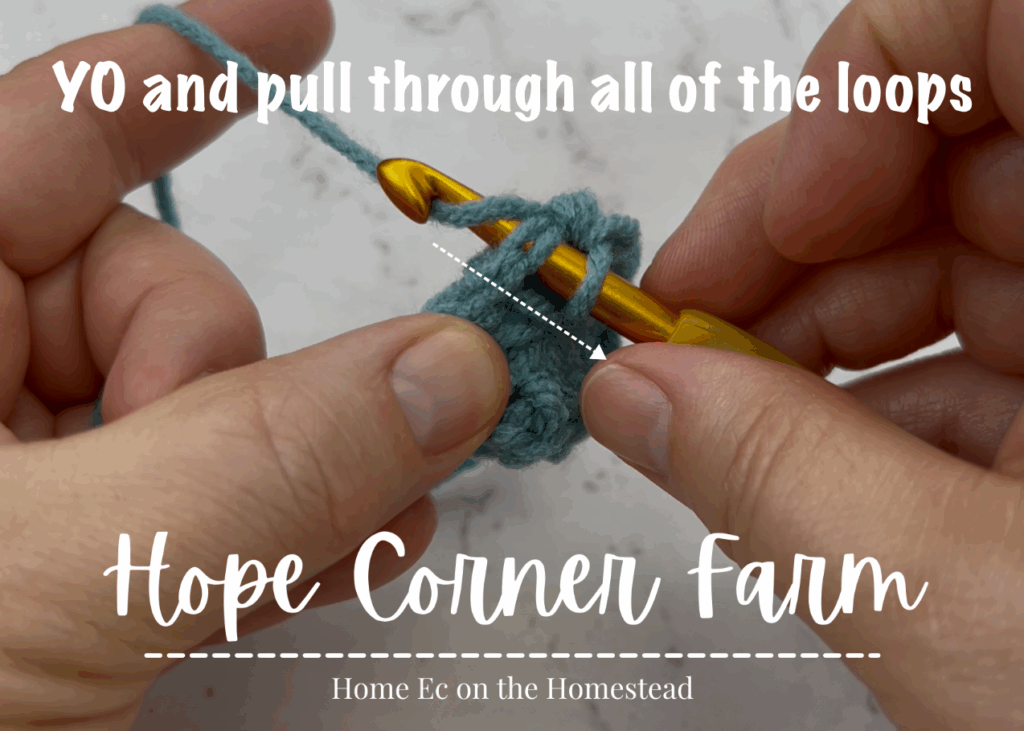
Crochet Magic Circle Step 12:
Next yarn over and pull through all 3 loops on the crochet hook to complete 1 HDC.
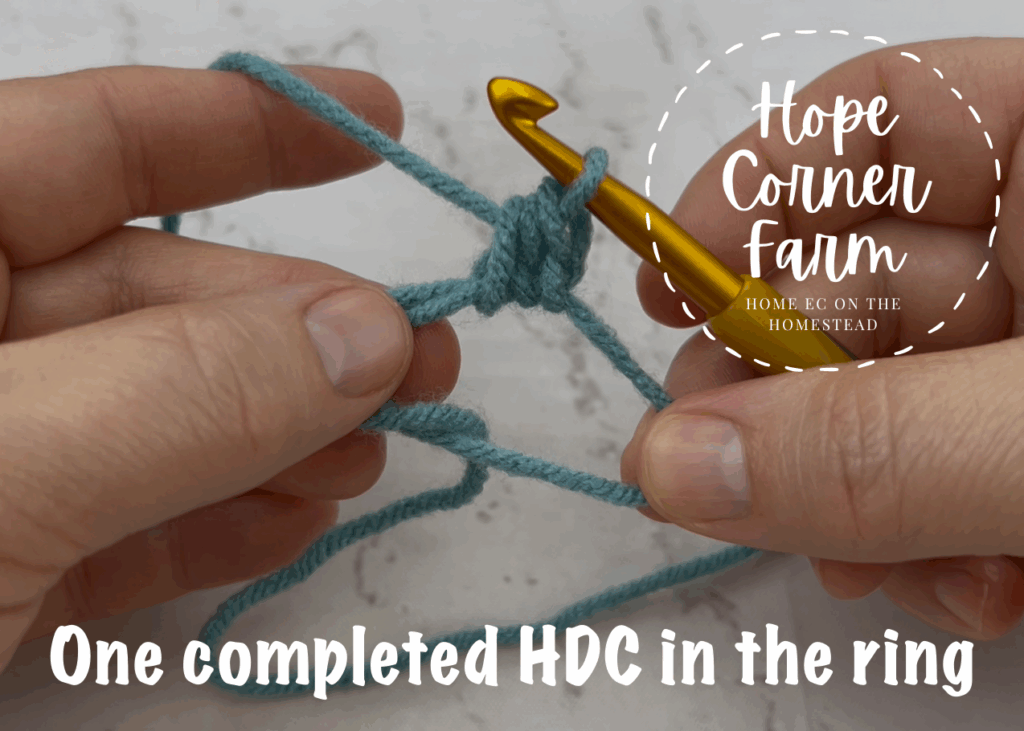
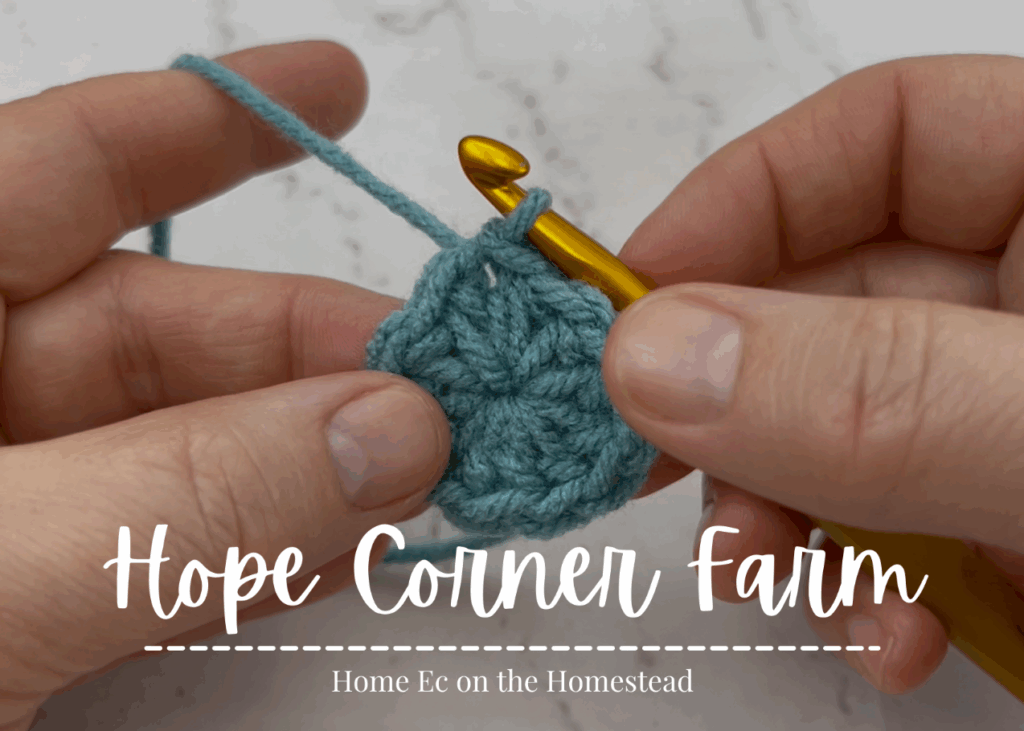
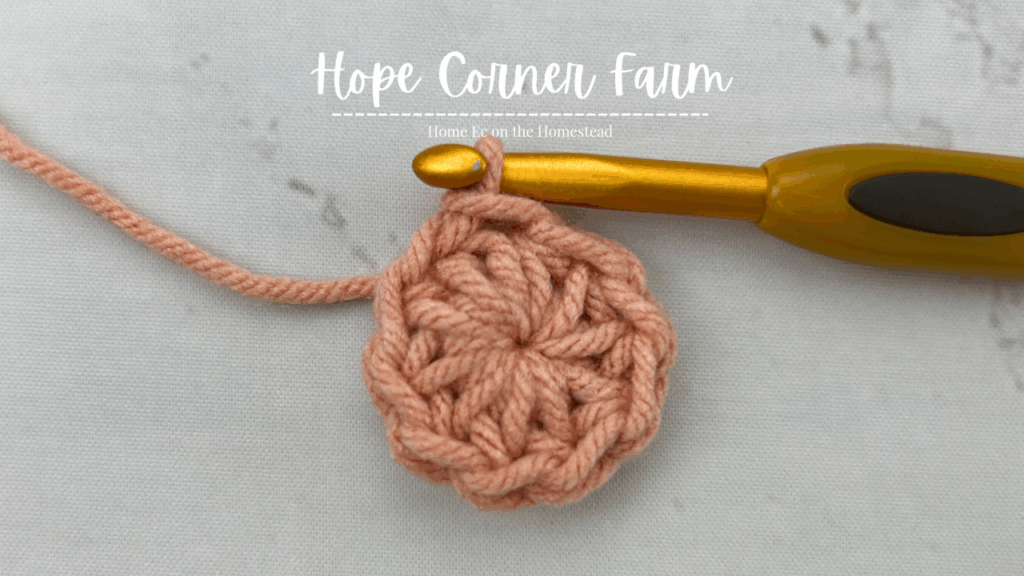
Finally continue placing as many stitches into the ring as needed for your crochet project.

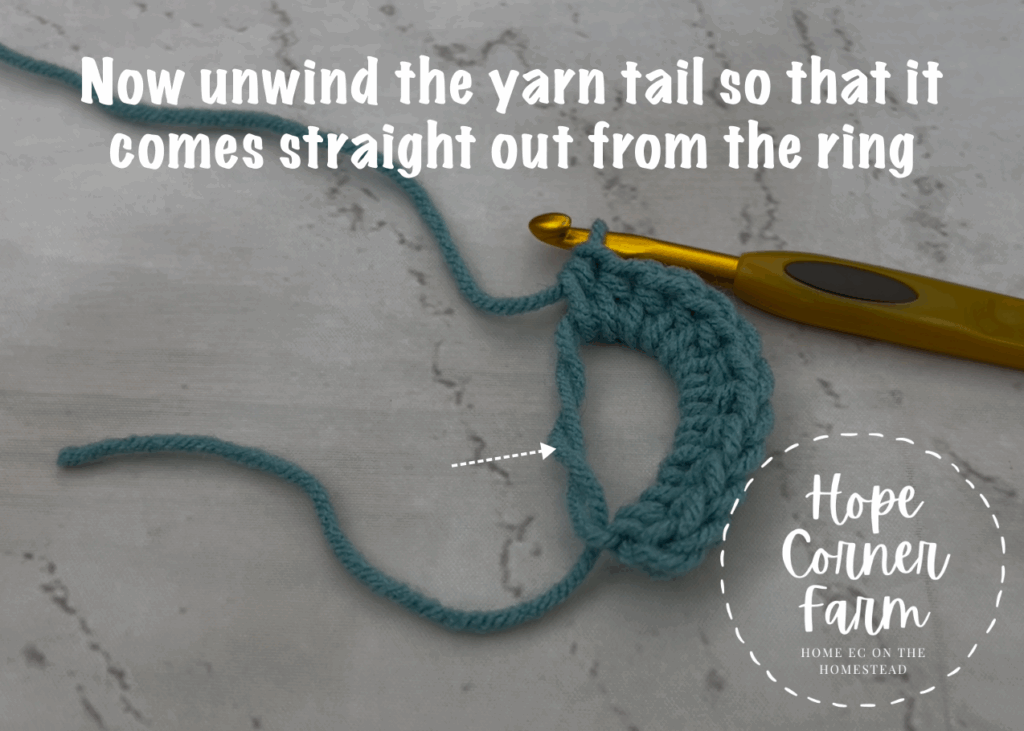
Closing the Crochet Magic Ring Step 1:
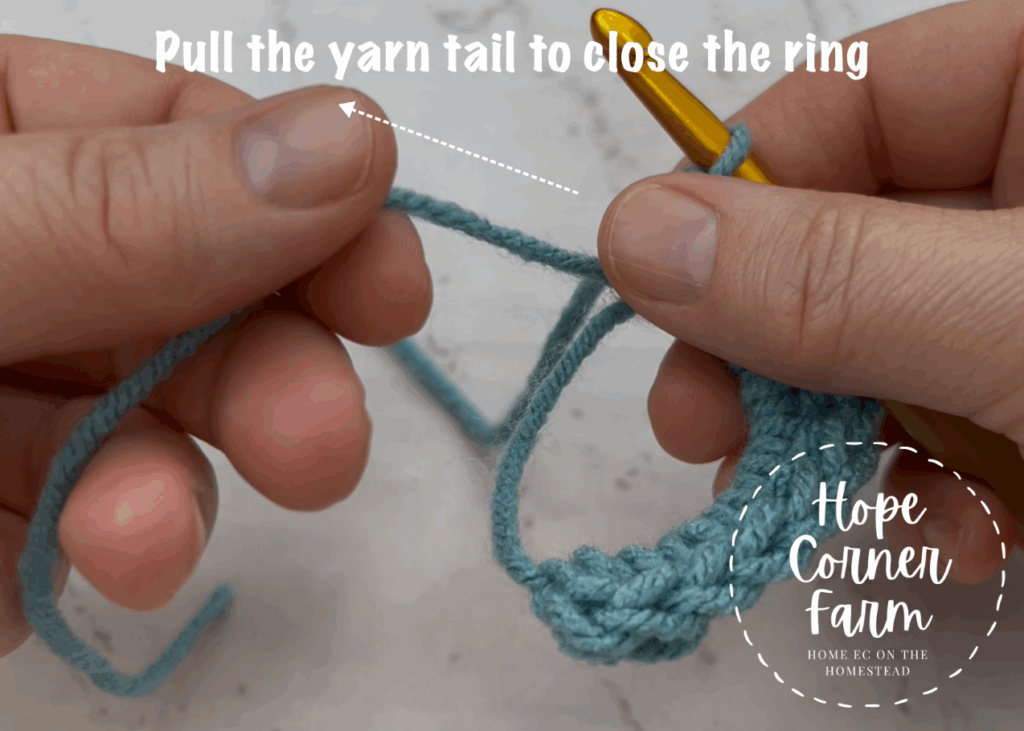
Now to close the crochet magic circle begin by fully unwinding the yarn tail from the ring. Make sure that it comes straight out from the ring.

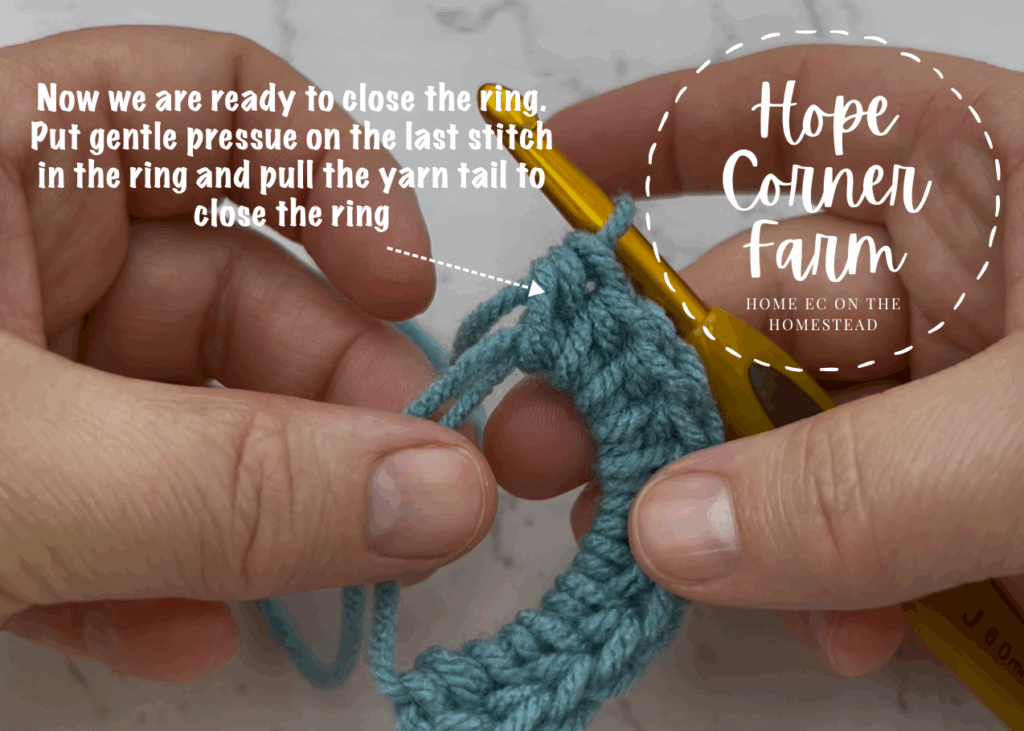
Step 2 of Closing:
Next, place gentle pressure on the last crochet stitch you placed into the magic circle. Gently pull the yarn tail to close the magic ring. Keep pulling until the ring is fully closed (pull it tightly closed).
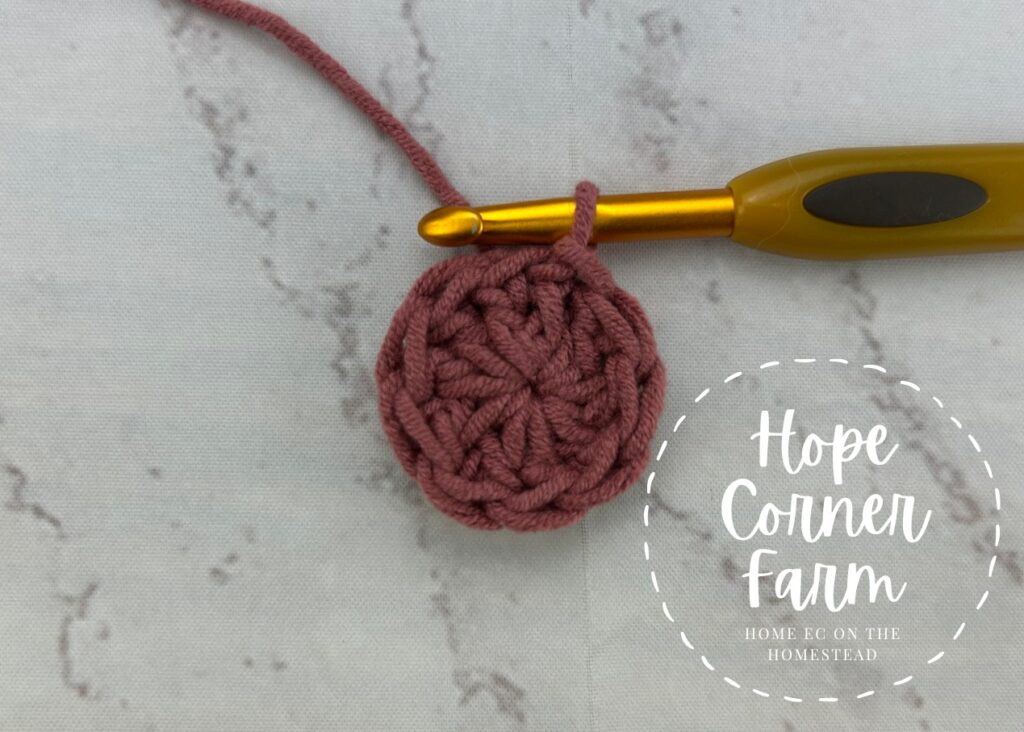
Closing the Crochet Magic Ring Step 3:
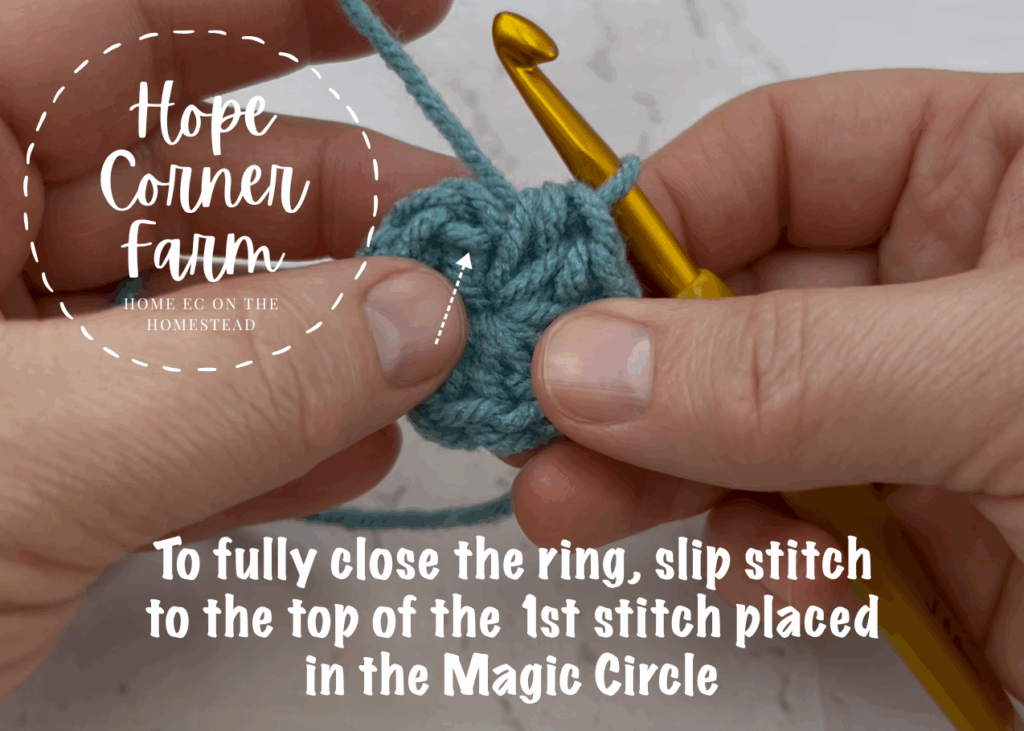
Finally, to fully close the crochet magic circle, slip stitch to the very first crochet stitch you placed into the ring.
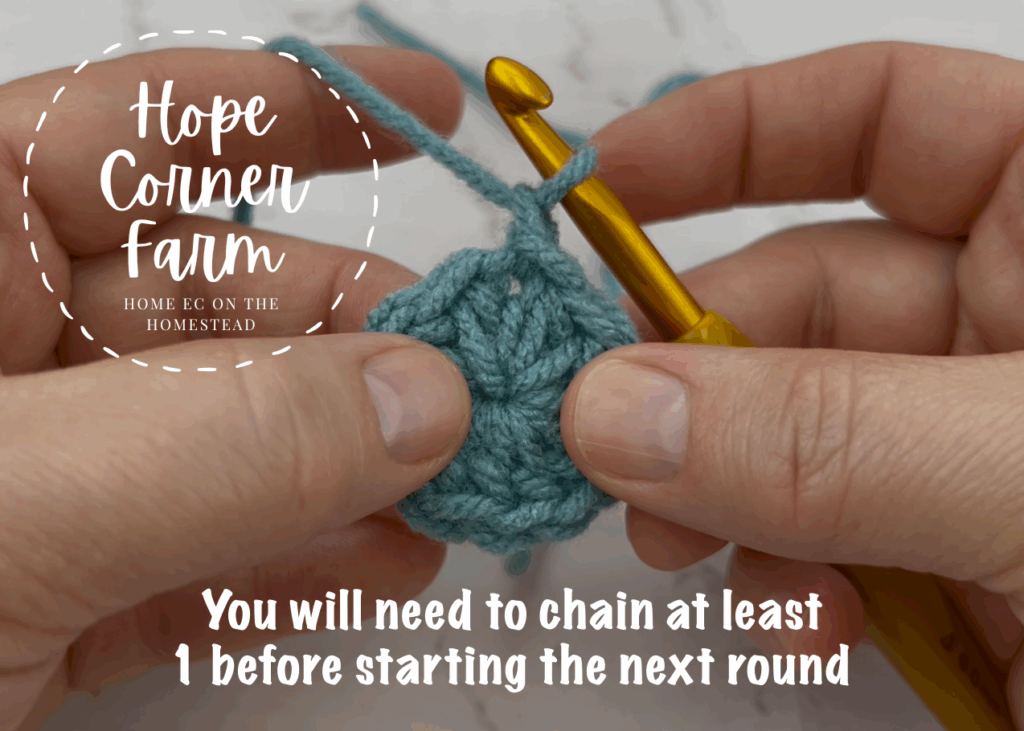
How to Crochet the First Round After Making a Magic Ring:
Now to go to the first round of crochet after making a magic circle begin by chaining however many is necessary for the crochet stitch you are going to use in this round. For my example, I am continuing with Half Double Crochet Stitches, so I would chain 1.
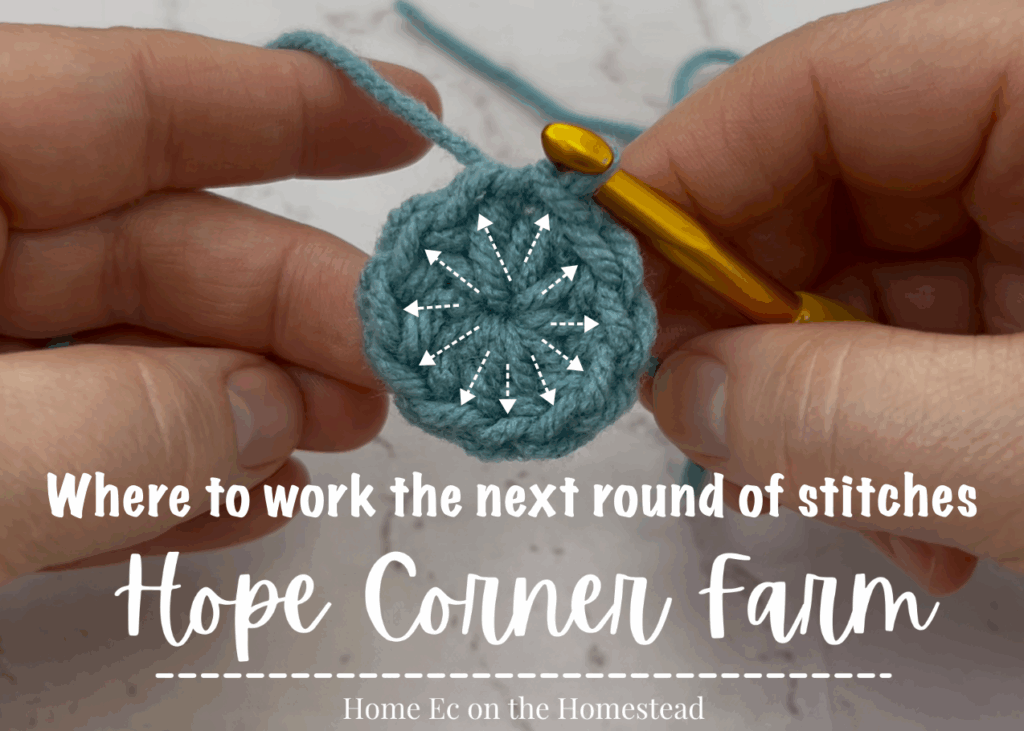
Finally, work into the stitches just like you would regularly work into them. See the picture below for stitch placement.
And there is the Magic Ring in Crochet! I use this crochet technique all of the time when working on my crochet projects!
Crochet Magic Circle Video Tutorials:
Written Instructions Only for the Magic Ring:
Step 1
To begin, pinch the yarn between your thumb and index finger (of your yarn holding hand), leaving at least 6″ of length for a yarn tail. Begin by wrapping the yarn over the top of 3 of the fingers on your yarn holding hand.
Now continue wrapping the yarn underneath of the same 3 fingers. When you reach the thumb and index finger that is holding the yarn in place, cross the yarn back and behind the first wrap (closer to the knuckles of the yarn holding hand). Create another wrap on top of the 3 fingers.
Next when you get to the pinky finger, hold the yarn you just wrapped with in place with that pinky finger. Grab your crochet hook.
Crochet Magic Ring Step 2
Now turn your crochet hook so that the nook of the crochet hook is facing down towards the fingers of the yarn holding hand. With the hook go underneath the first wrap of yarn and then over top of the second wrap.
Next with the crochet hook, gently pull the second wrap (the one closer to the knuckles) FORWARD and UNDERNEATH the first wrap of yarn. At this point you have what looks like an “A” shape.
Now gently turn the crochet hook so that the nook of the hook now faces up (like you would normally hold it). This creates a loop on the crochet hook.
Step 3
Next yarn over by taking the hook and going underneath the yarn still held in place by your pinky finger. Pull through the loop on the crochet hook. This creates a Chain 1. It is now safe to pull the magic circle off of your yarn holding hand. Slightly rotate the magic ring so that the yarn tail side of the ring can be held by your yarn holding hand.
Now work your desired type of crochet stitches (single crochet, half double crochet, double crochet, treble crochet, etc) into the magic circle.
Crochet Magic Circle Step 4
Next when you are ready to close the magic ring, first gently unwind the yarn tail from the circle so that it comes straight out from inside the final crochet stitch you worked into the ring.
Now put gentle pressure on the last stitch you worked into the magic circle. Pull on the yarn tail until the circle completely close in the center. To close the ring fully, slip stitch to the top of the very first crochet stitch you worked into the magic circle.
ENJOY LEARNING NEW CROCHET STITCHES? DON’T MISS OUT ON MORE!
Subscribe below to get free crochet patterns, tutorials, and inspiration delivered straight to your inbox. If you want more crochet fun delivered to your inbox hop on over and join my newsletter!

Join my creative community and keep your crochet queue full of beautiful, fun-to-make projects!
If you loved this tutorial and want more crochet inspiration, come connect with me on social! Subscribe on YouTube (Hope Corner Farm Crochet) for full, step‑by‑step videos, follow along on TikTok and Instagram for quick tips and reels, pin your favorite projects on Pinterest, and join the conversation on Facebook. Don’t forget to tag your makes with #HopeCornerFarmCrochet so I can cheer you on and share your beautiful work!
Happy Crocheting,

LOVE THIS CROCHET STITCH? CHECK OUT THESE OTHER CROCHET TUTORIALS!
Now that you’ve mastered the classic Magic Ring, you’re ready to take your crochet skills even further! Be sure to check out some of my other step-by-step crochet tutorials to expand your technique toolkit. These include stitches like the Double Magic Ring for projects that need a little extra strength, the Foundation Single Crochet Stitch for a stretchier start to your rows, the cozy and textured Thermal Single Crochet Stitch, and the Front Loop Half Double Crochet Stitch for beautiful dimension and drape. Each tutorial includes detailed photos, written instructions, and helpful tips to make your crochet journey easier and more enjoyable!