
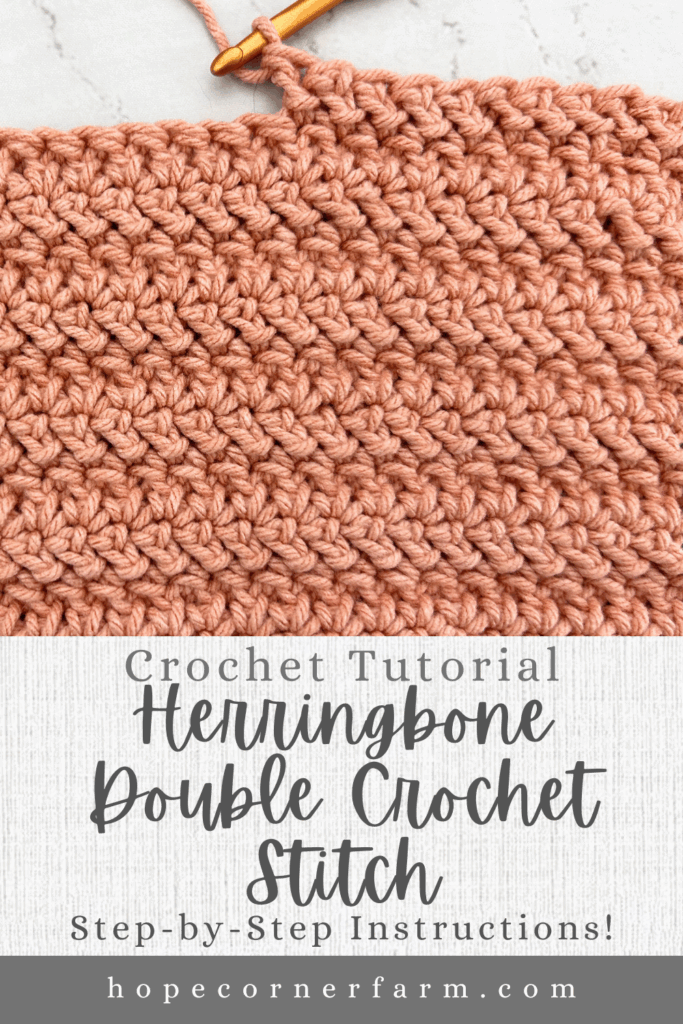
How to Herringbone Double Crochet Stitch a Step-by-Step Crochet Tutorial for Beginners


Looking to add a stylish and textured stitch to your crochet projects? The Herringbone Double Crochet Stitch is a beautiful and modern variation of the classic double crochet that adds a subtle slanted texture, perfect for scarves, blankets, and garments. In this beginner-friendly tutorial, I’ll walk you through exactly how to crochet the herringbone double crochet stitch with clear, step-by-step instructions and helpful tips. Whether you’re a beginner ready to try something new or an experienced crocheter looking to expand your stitch library, this tutorial has you covered. Let’s get started!


First, check out the video tutorial on my You Tube Channel! Subscribe to get the latest crochet fun from Hope Corner Farm Crochet!
Materials Needed:
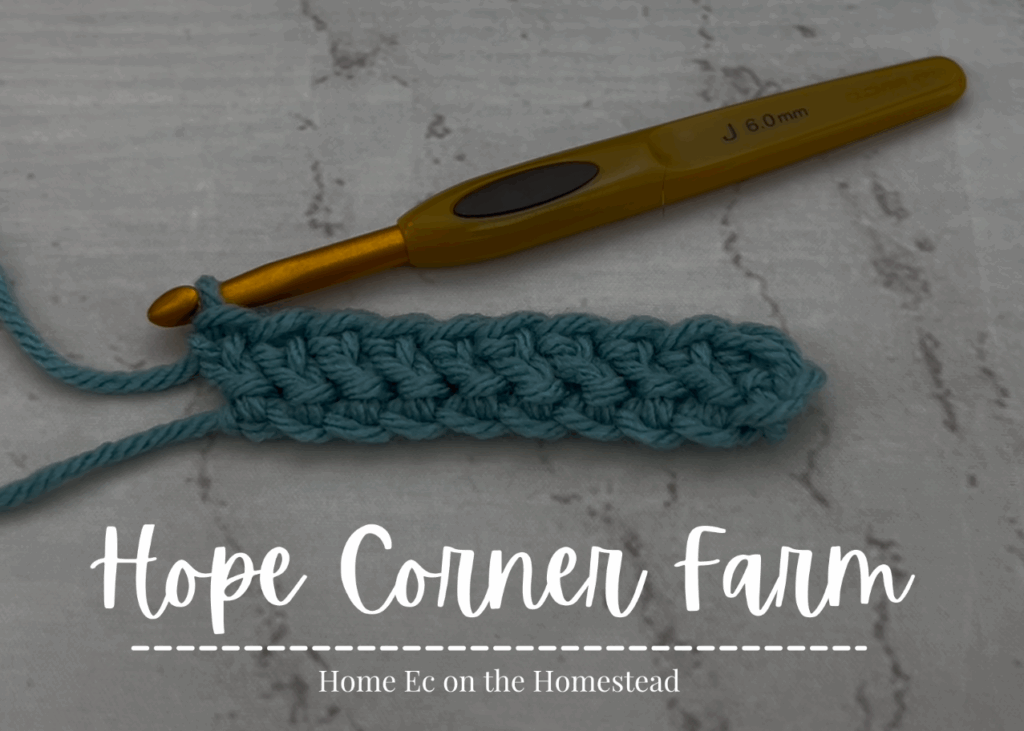
Crochet hook of choice (I used a size J 6.0mm crochet hook for this tutorial)
Yarn of choice (I used a medium weight size 4 yarn for this tutorial)
This crochet tutorial is written using US Crochet Terms
Crochet Terms Used:
Foundation Double Crochet Stitch (FDC)
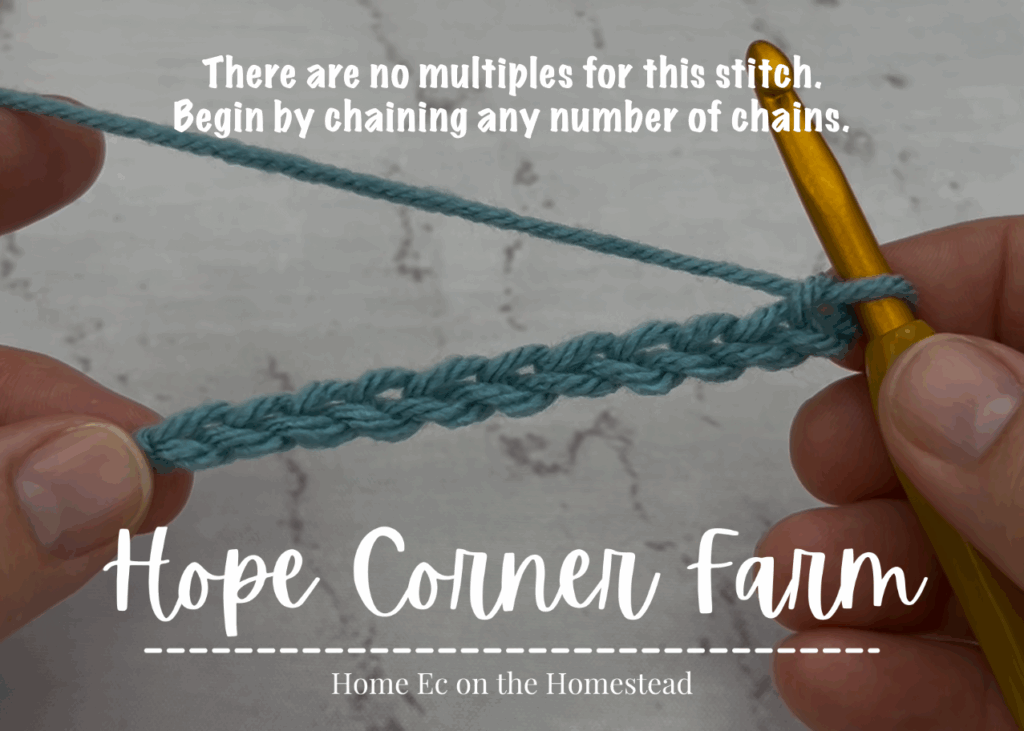
Crochet Stitch Multiples:
There are no multiples for this crochet stitch simply chain as many as you would like (or Foundation Double Crochet as many as you would like).
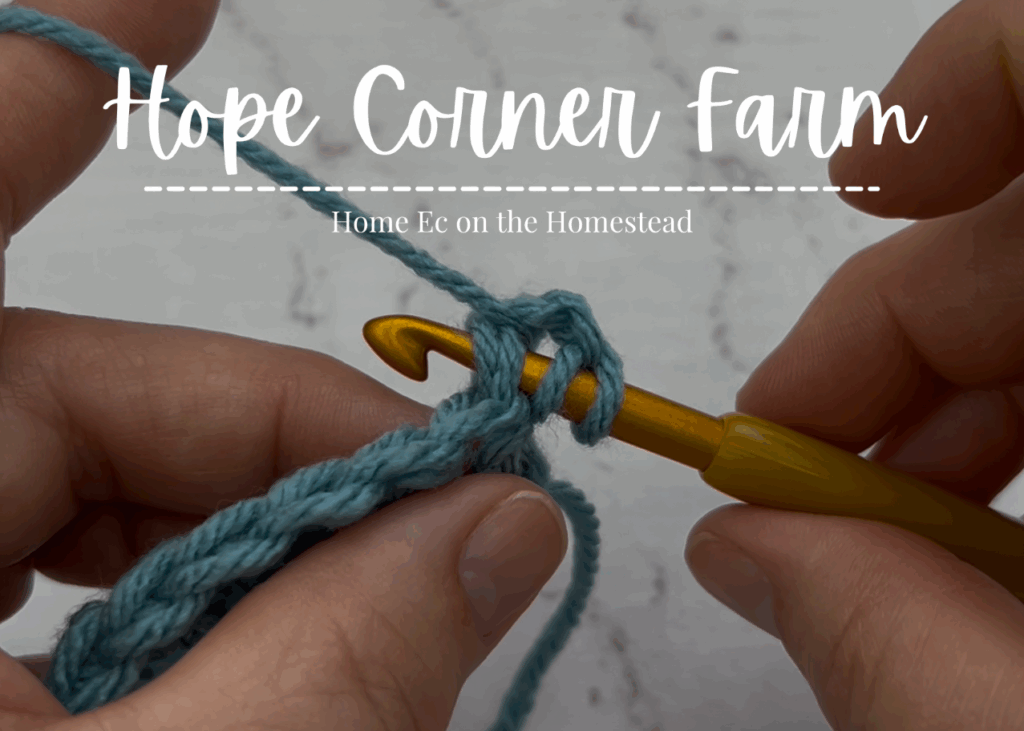
How to Herringbone Double Crochet – Step 1:
Begin by chaining (or Foundation Double Crocheting) any number.
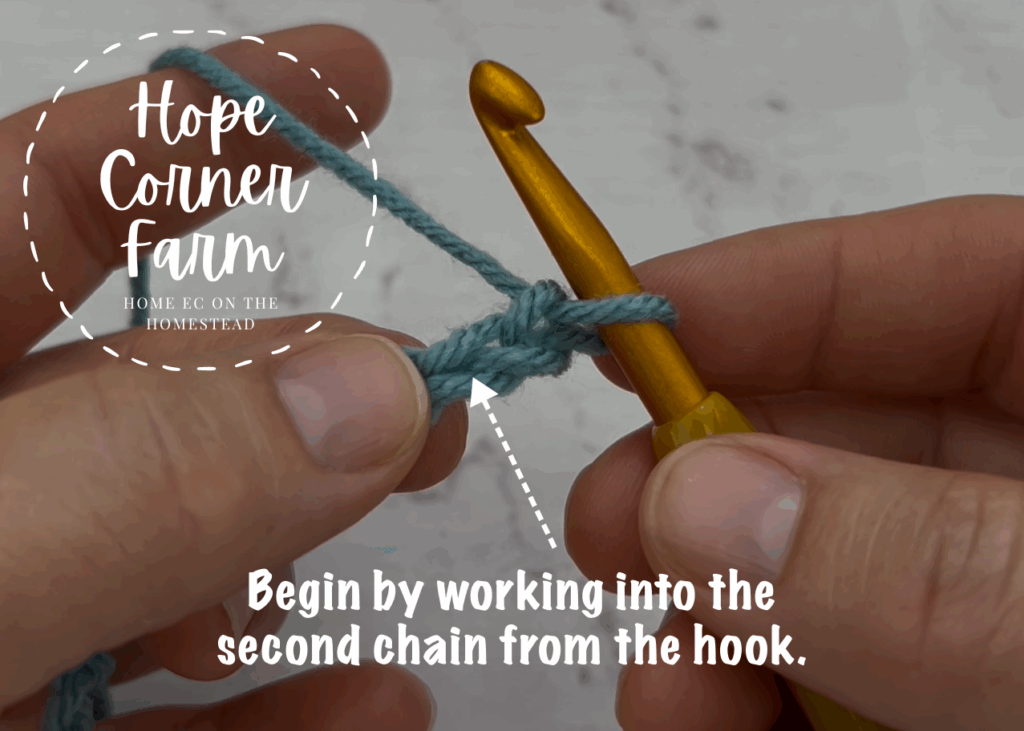
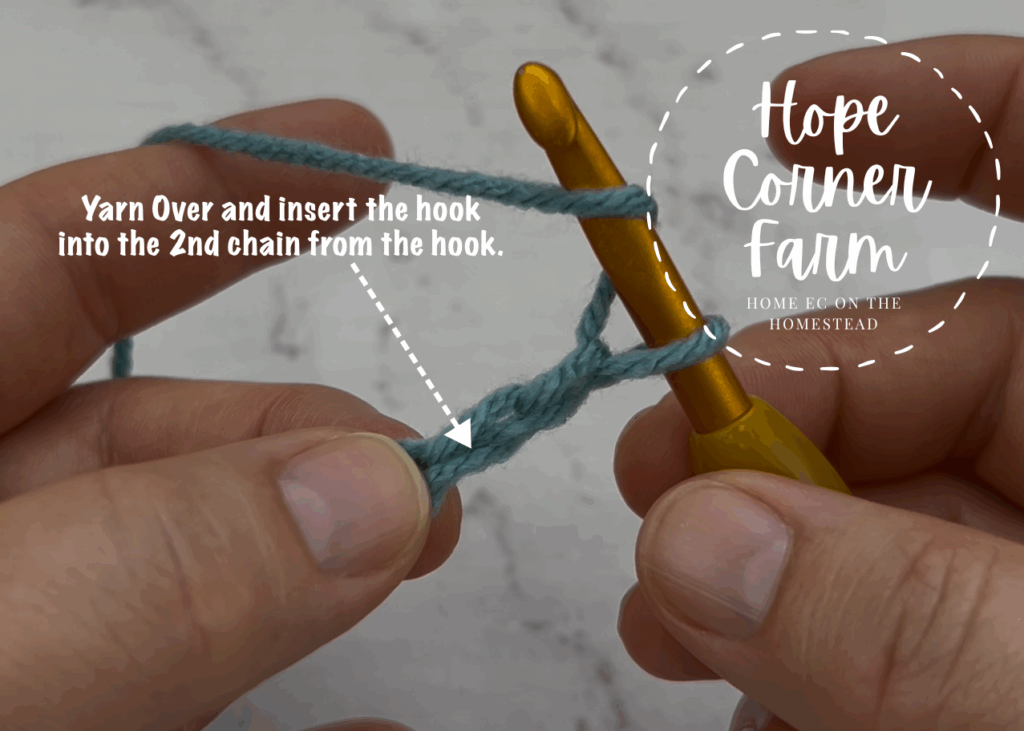
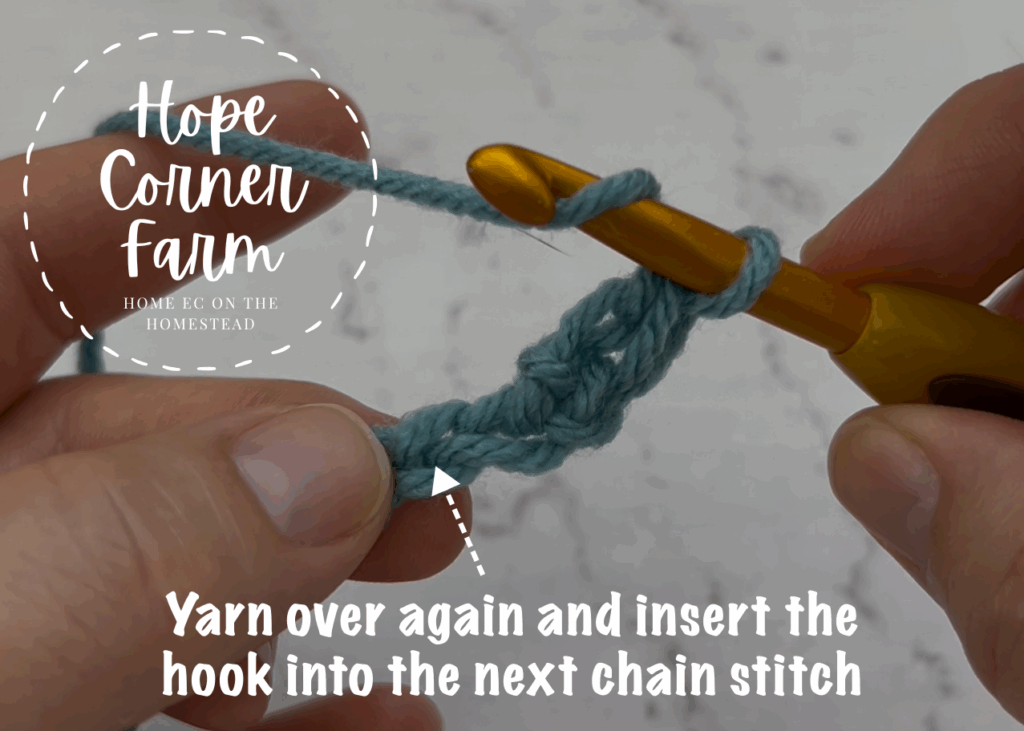
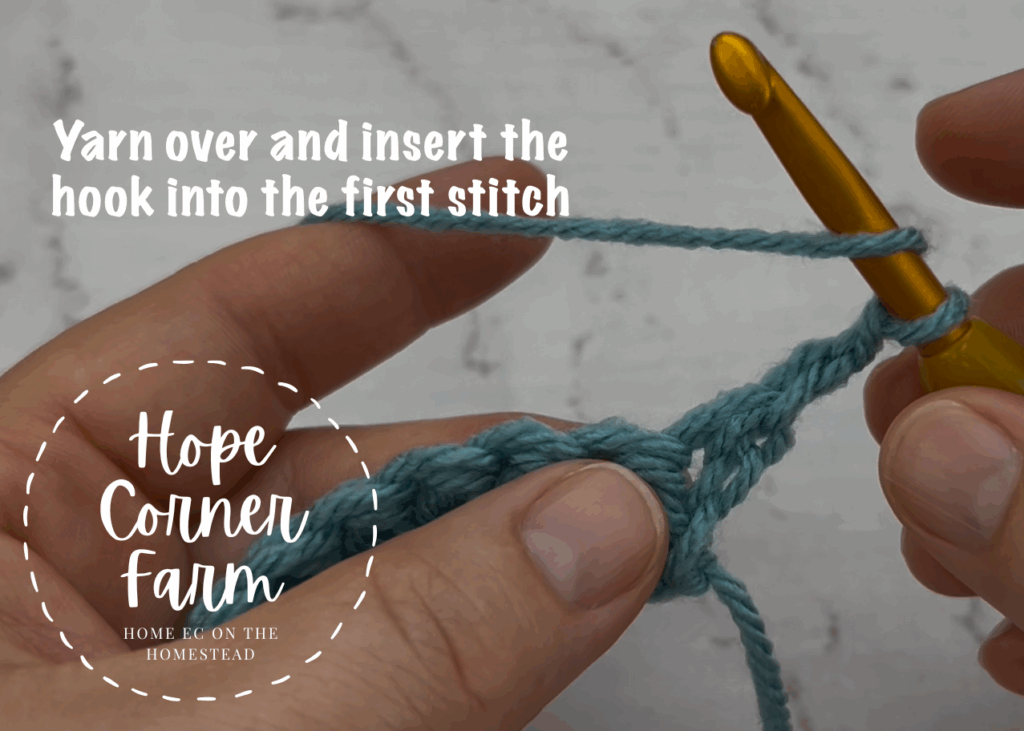
Step 2:
Now we will start by working into the second chain from the crochet hook. Start by Yarning Over and inserting the crochet hook into that 2nd chain.
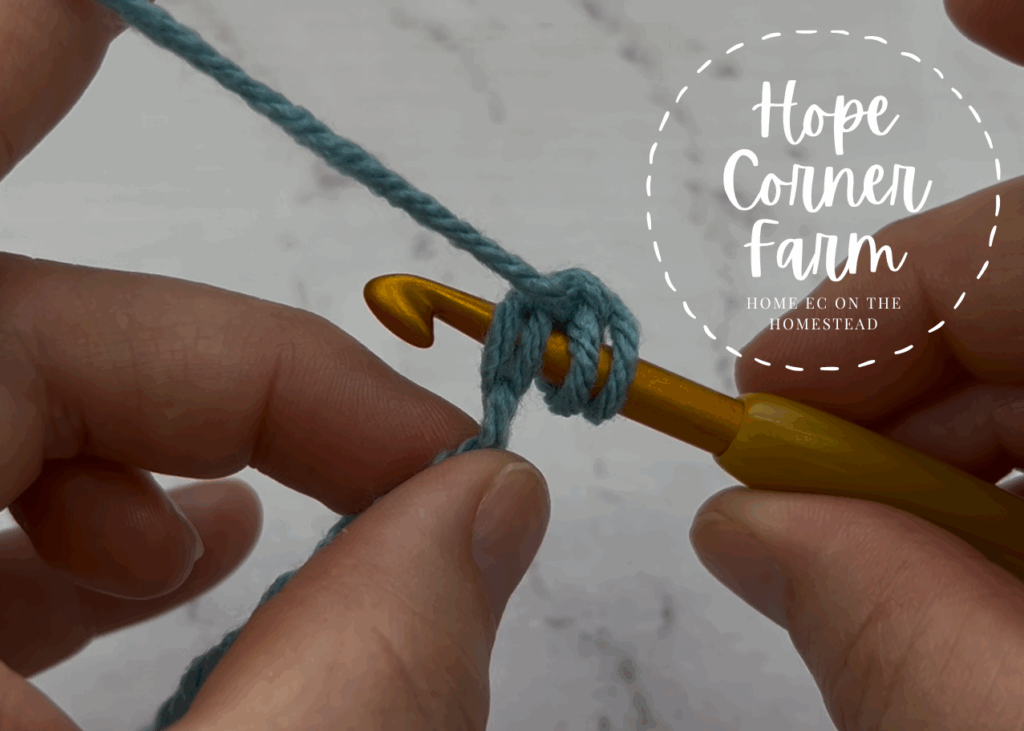
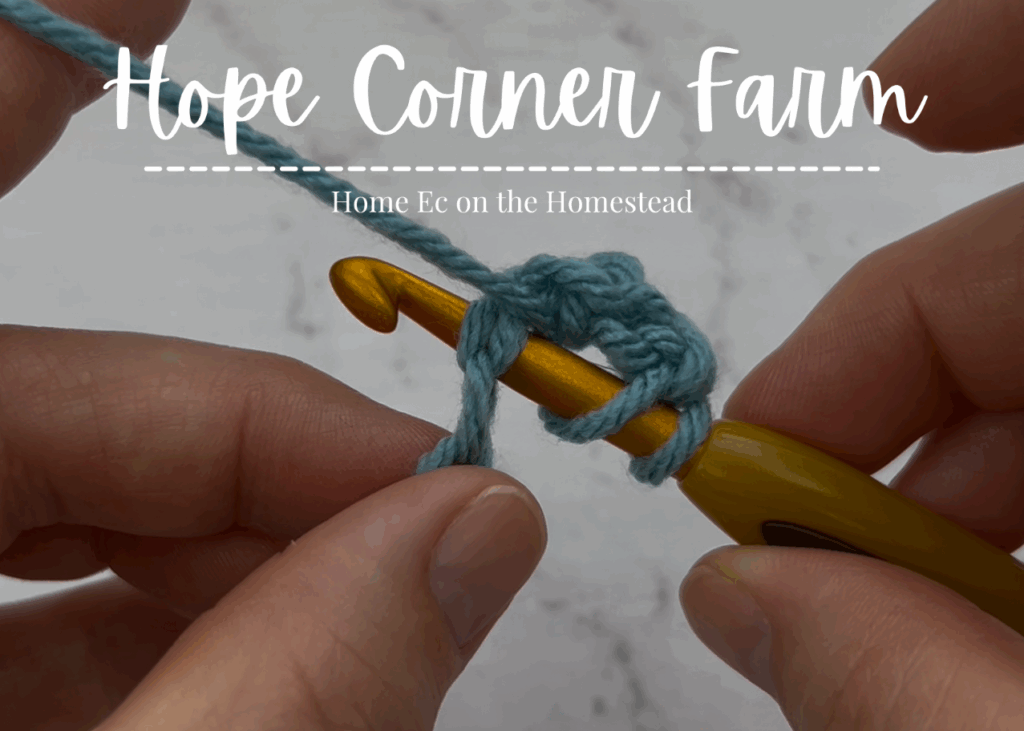
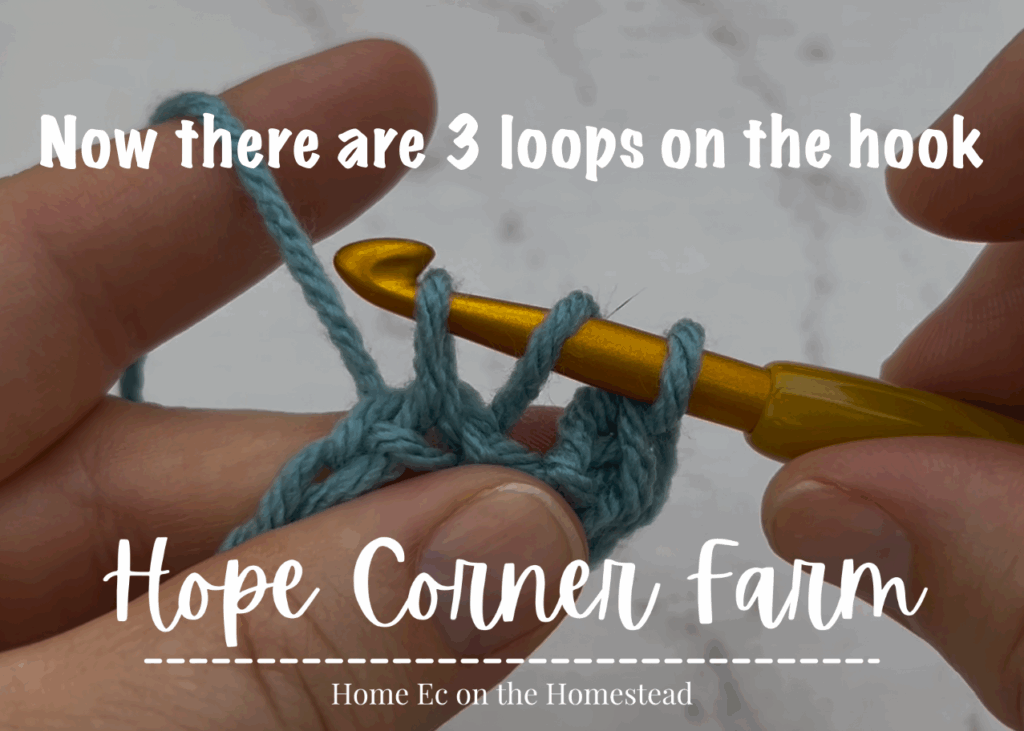
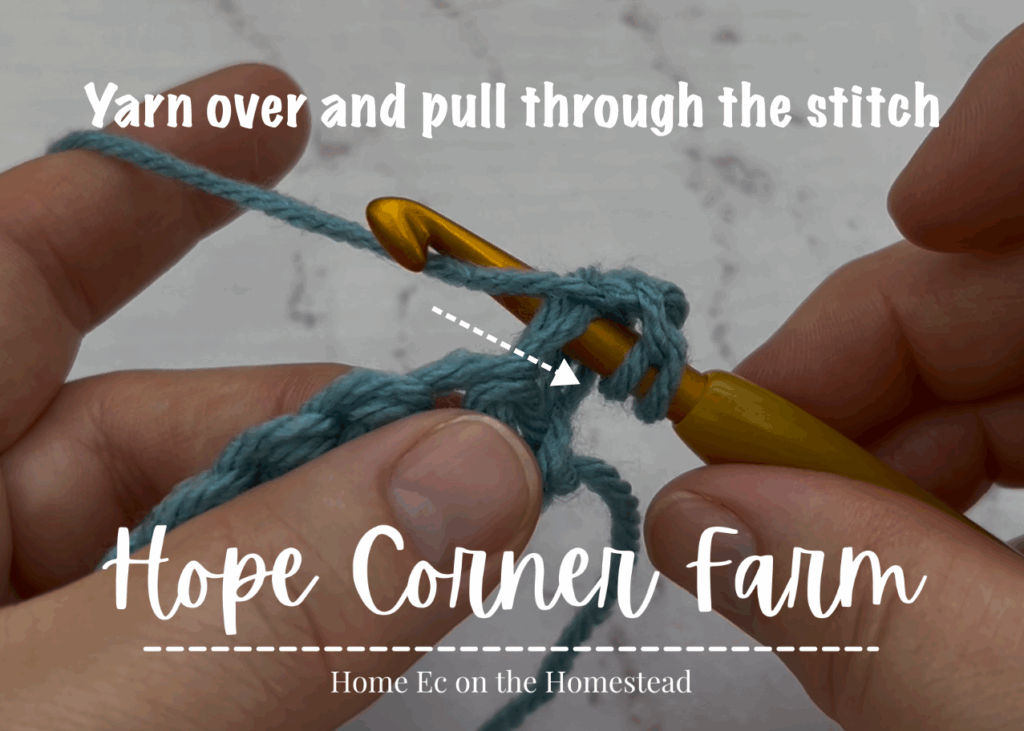
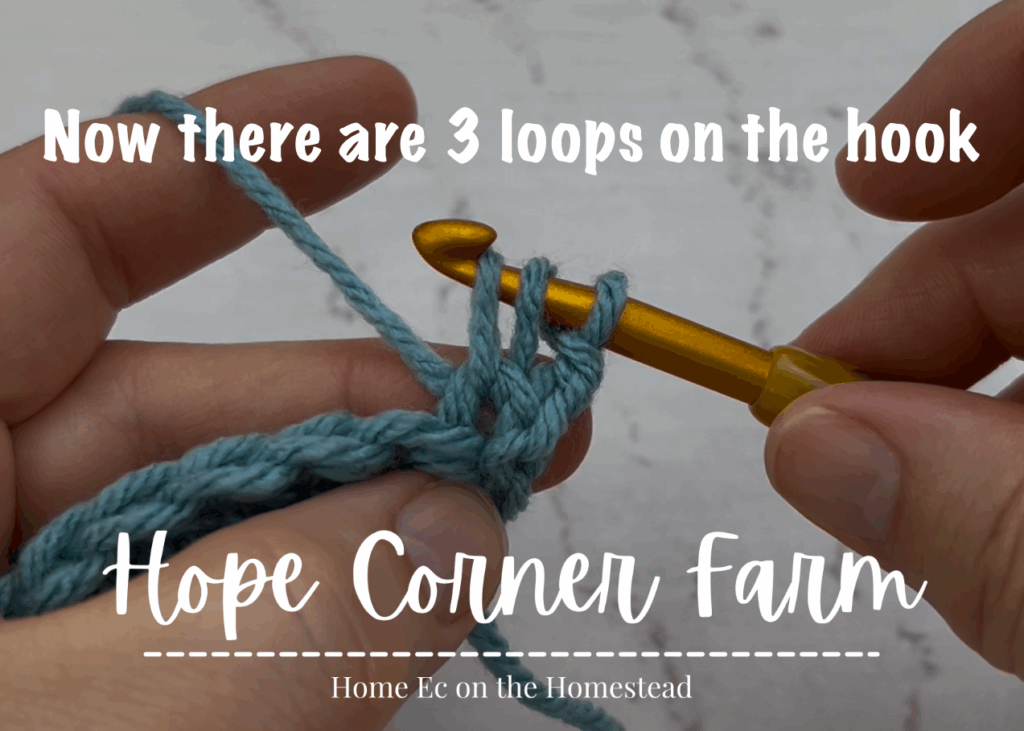
Herringbone Double Crochet – Step 3:
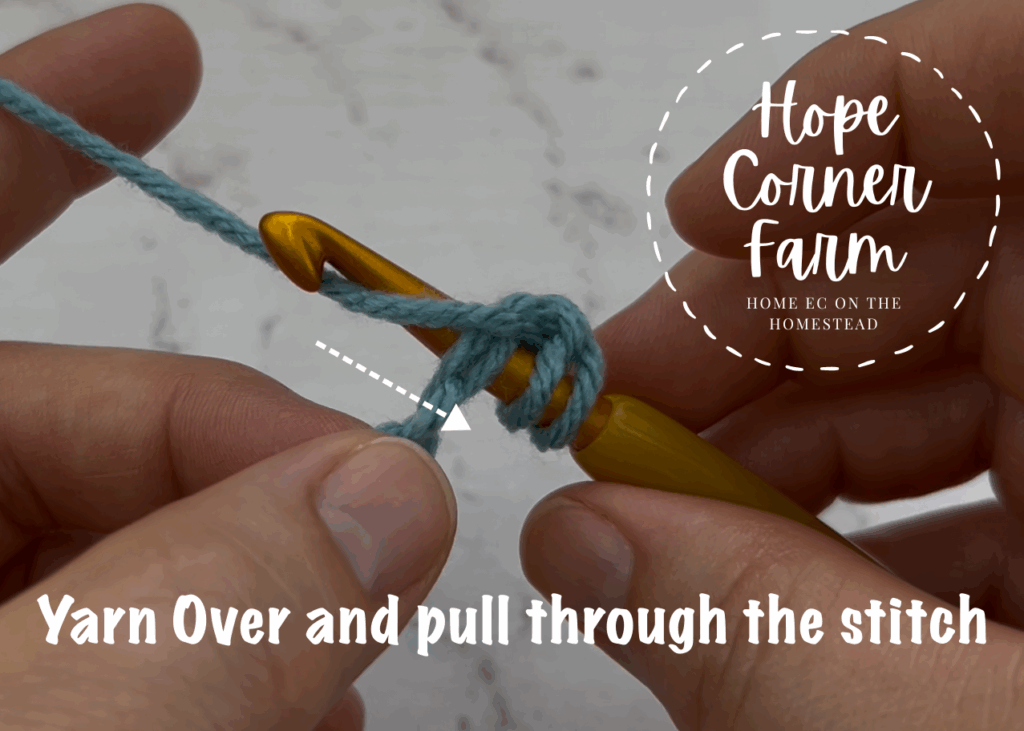
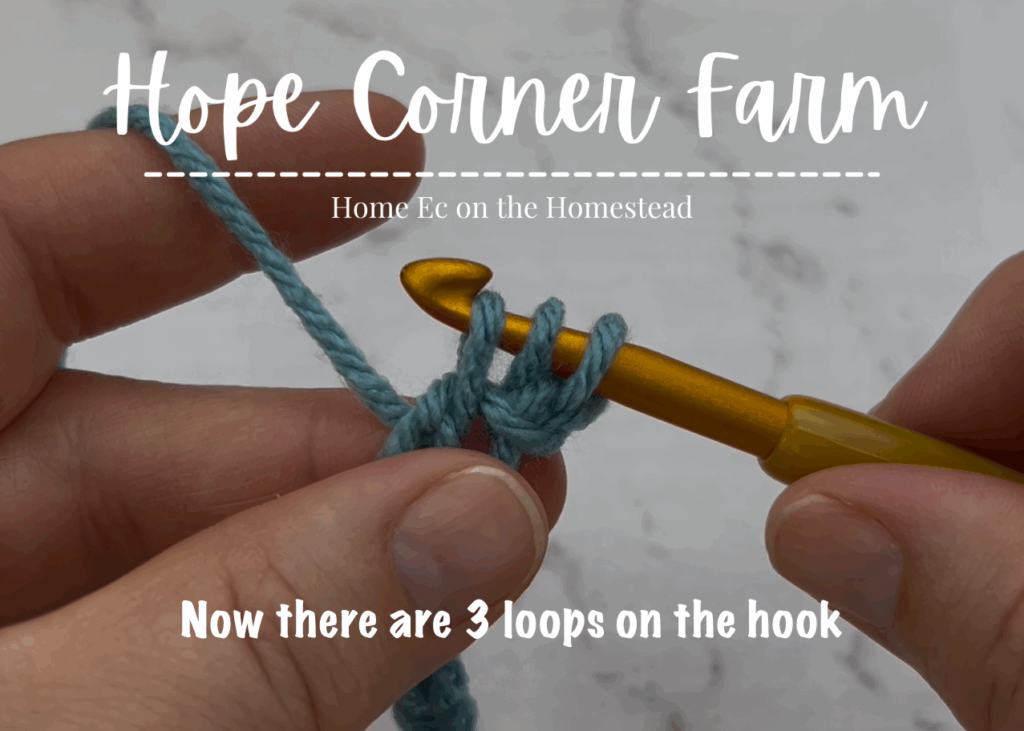
Next yarn over and pull through the stitch. There are 3 loops on the hook now.
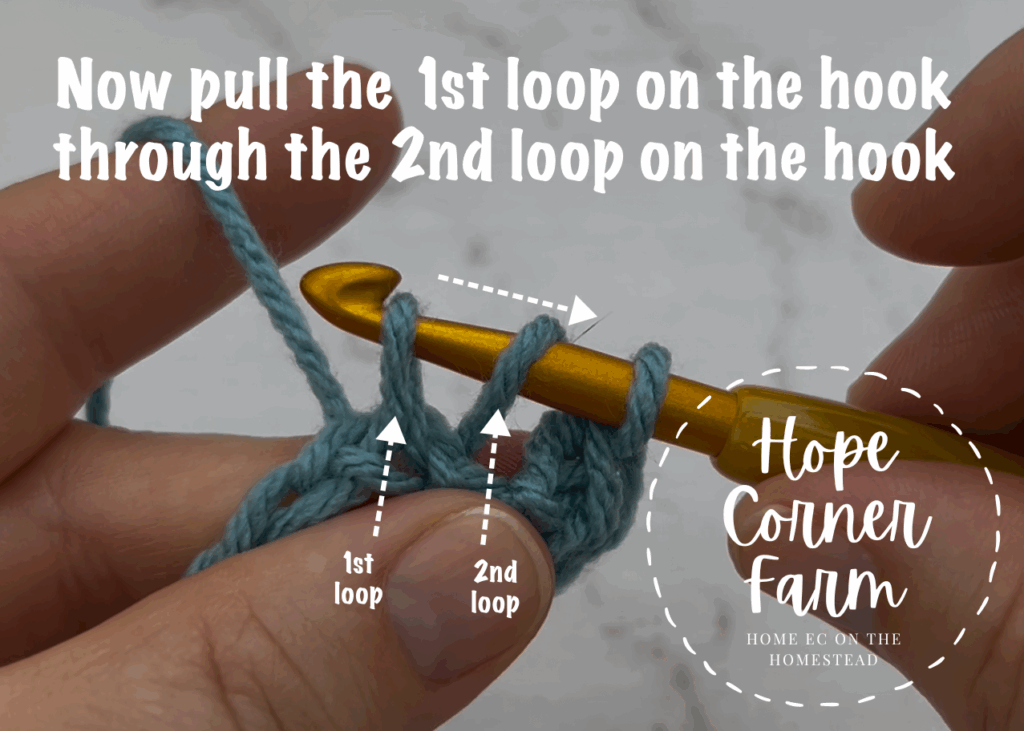
Step 4:
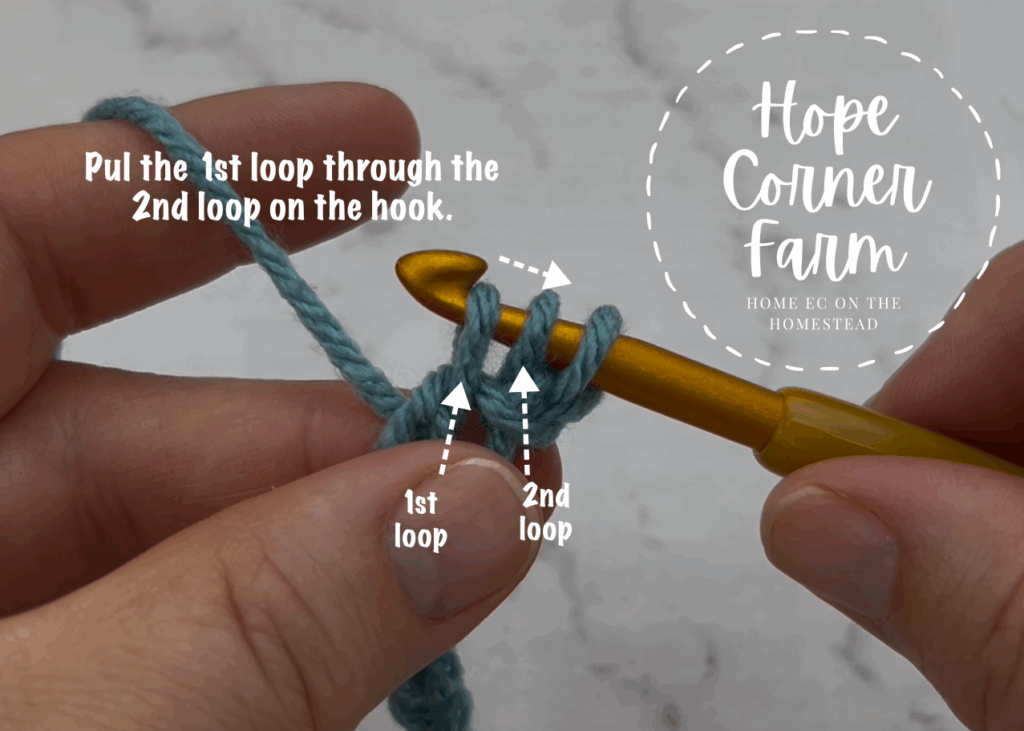
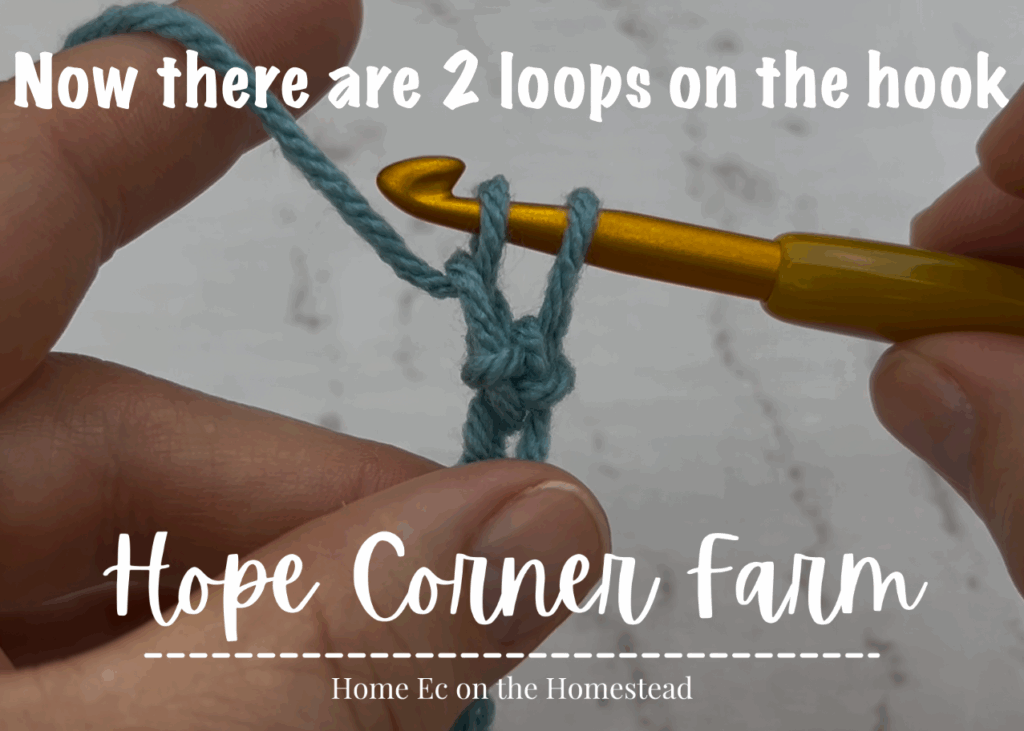
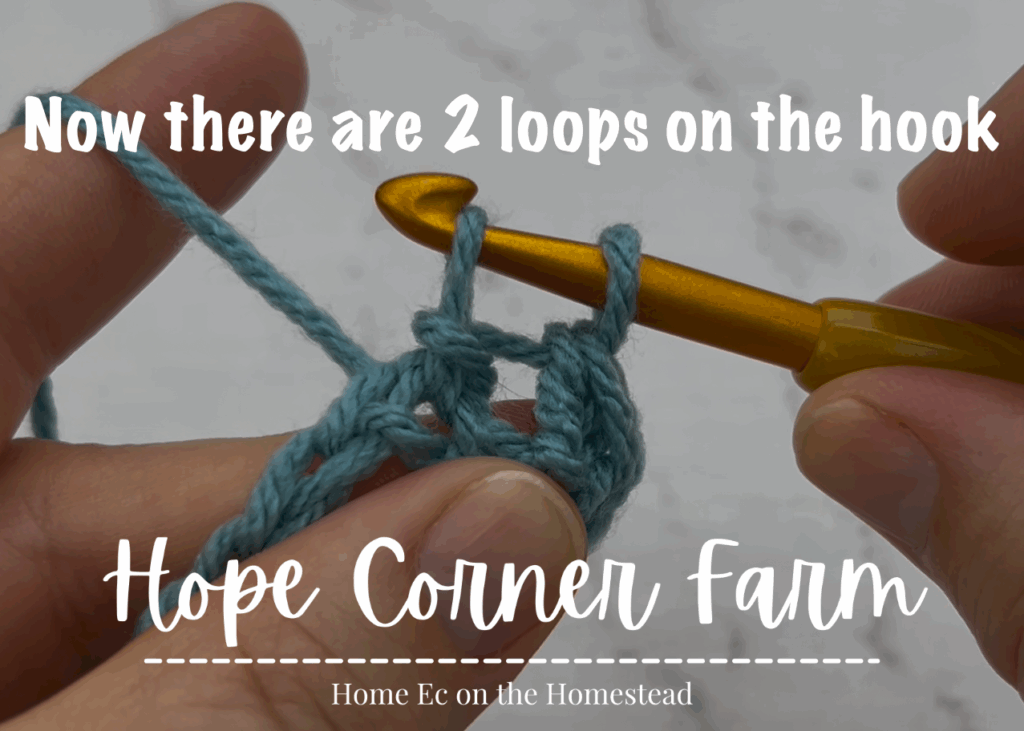
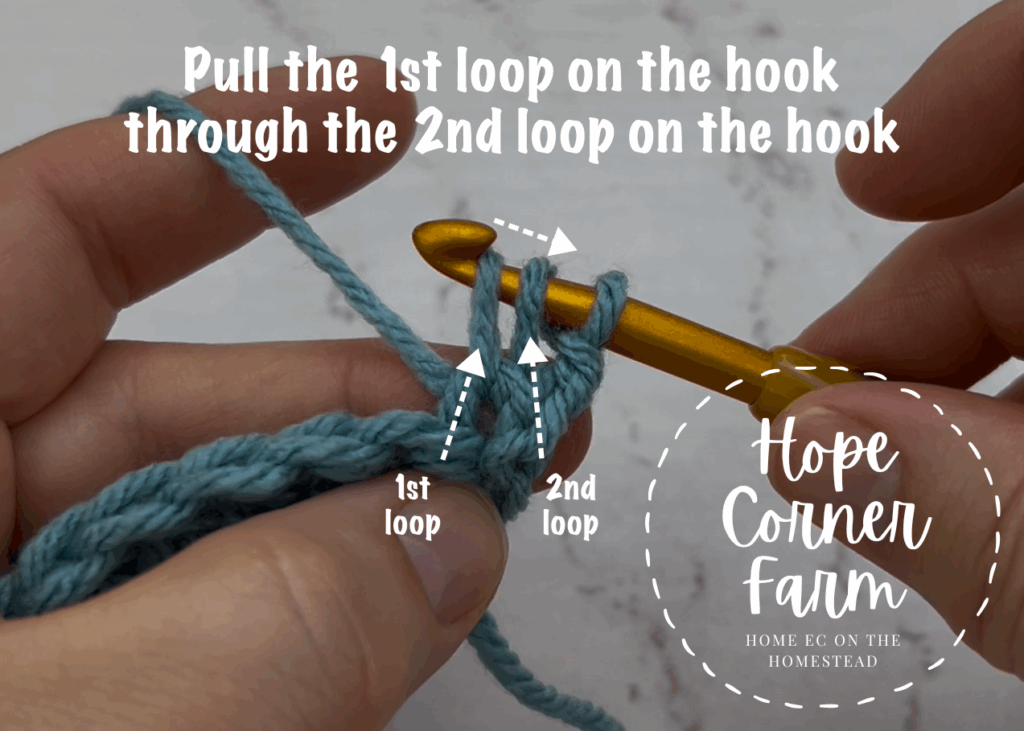
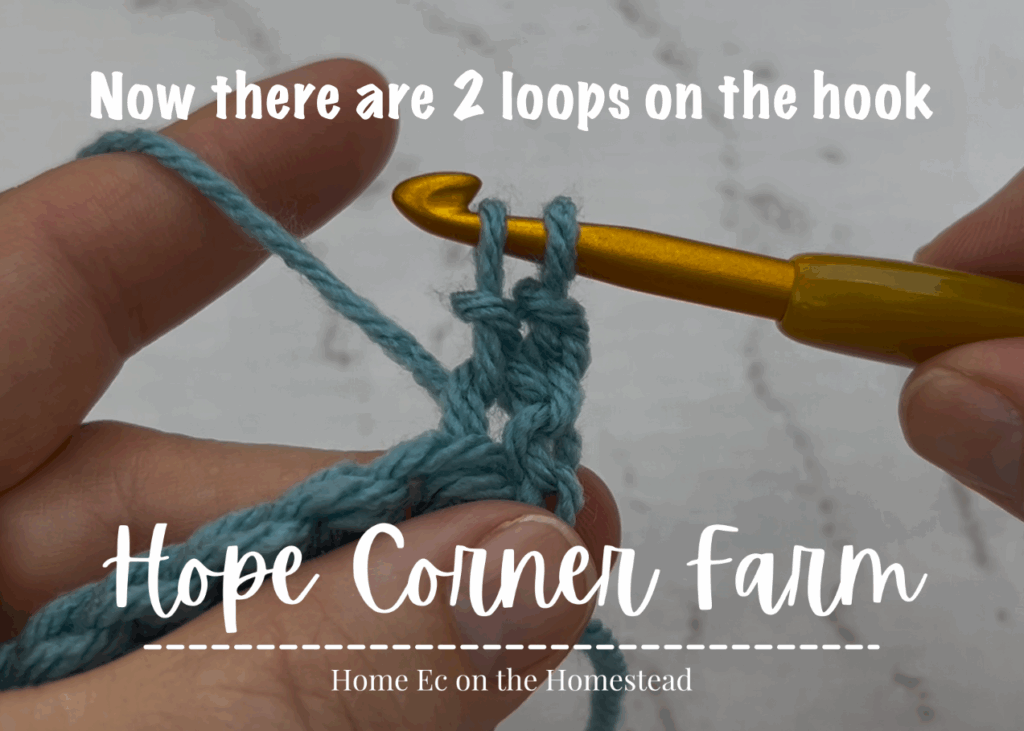
Now pull the first loop on the crochet hook through the second (middle) loop on the crochet hook. There are 2 loops of yarn on the crochet hook at this point.
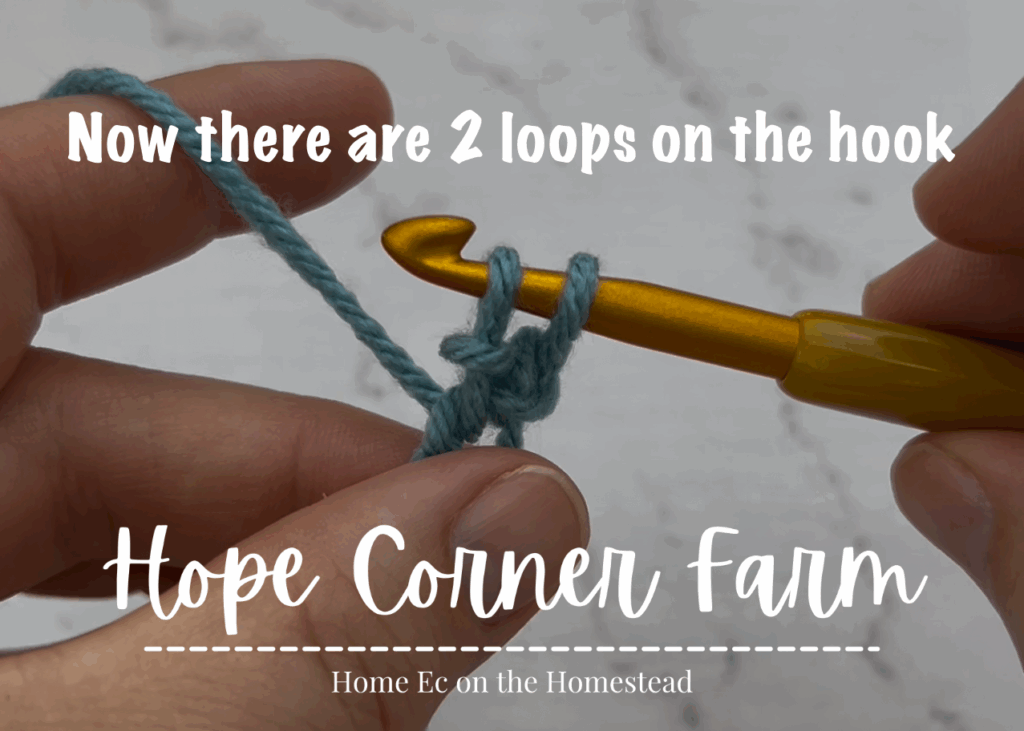
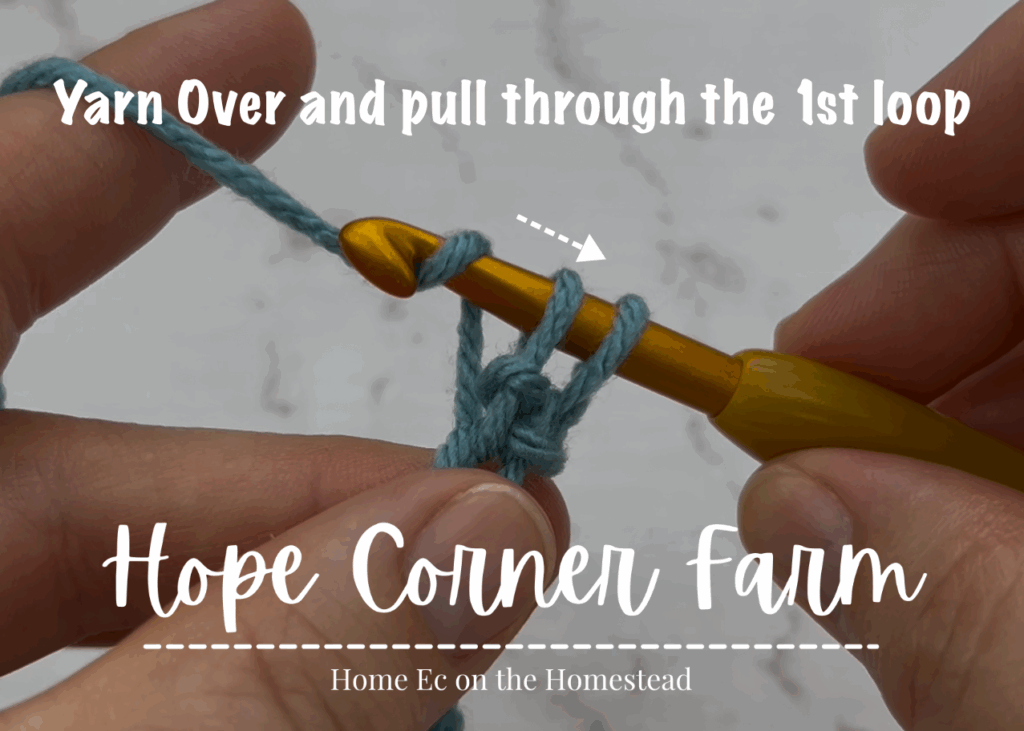
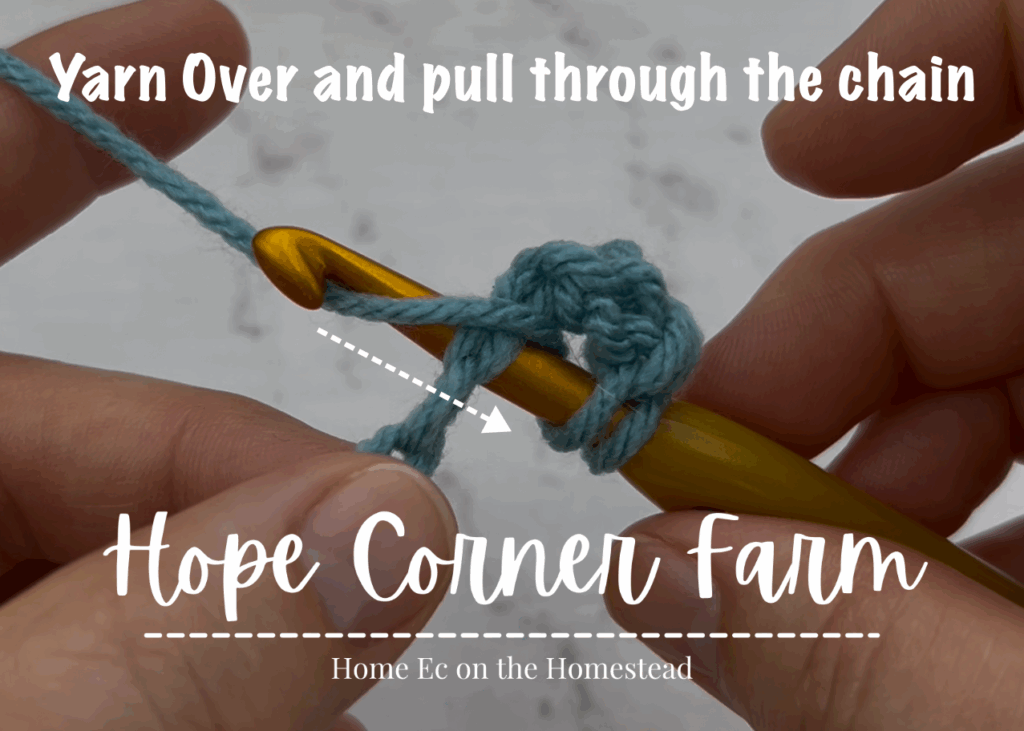
How to Herringbone Double Crochet – Step 5:
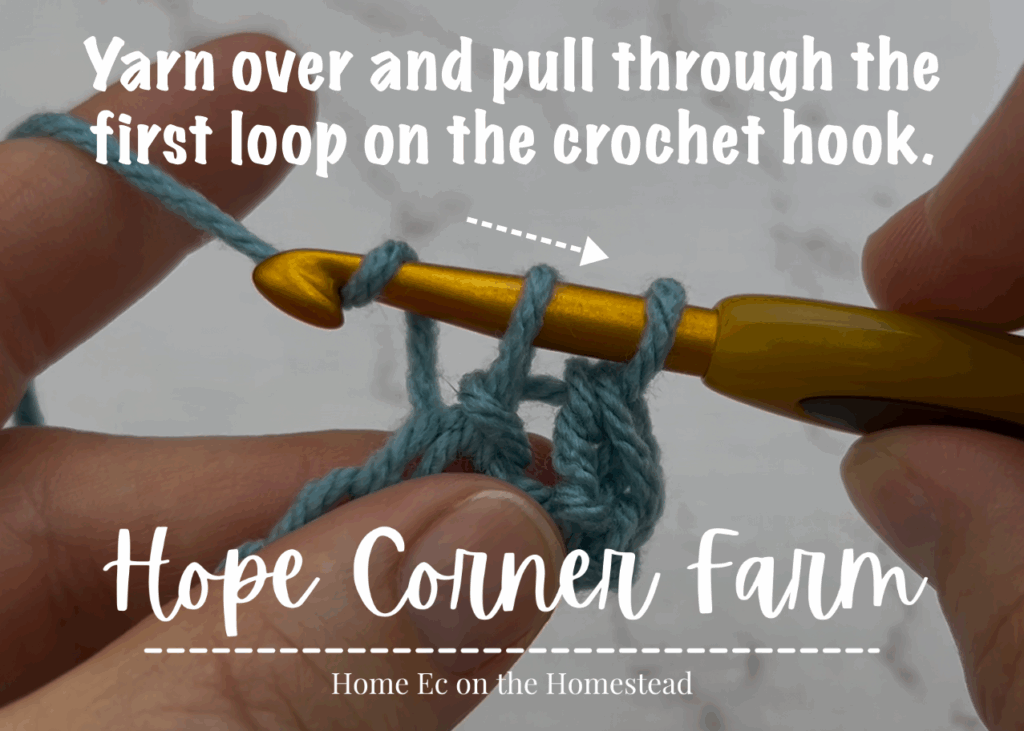
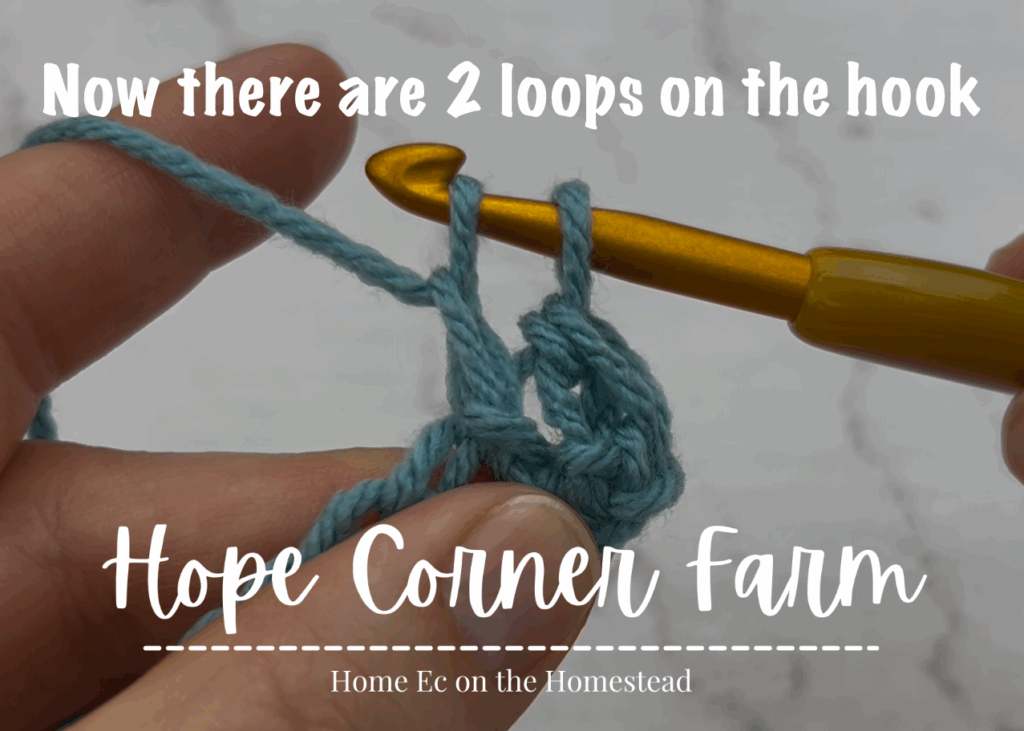
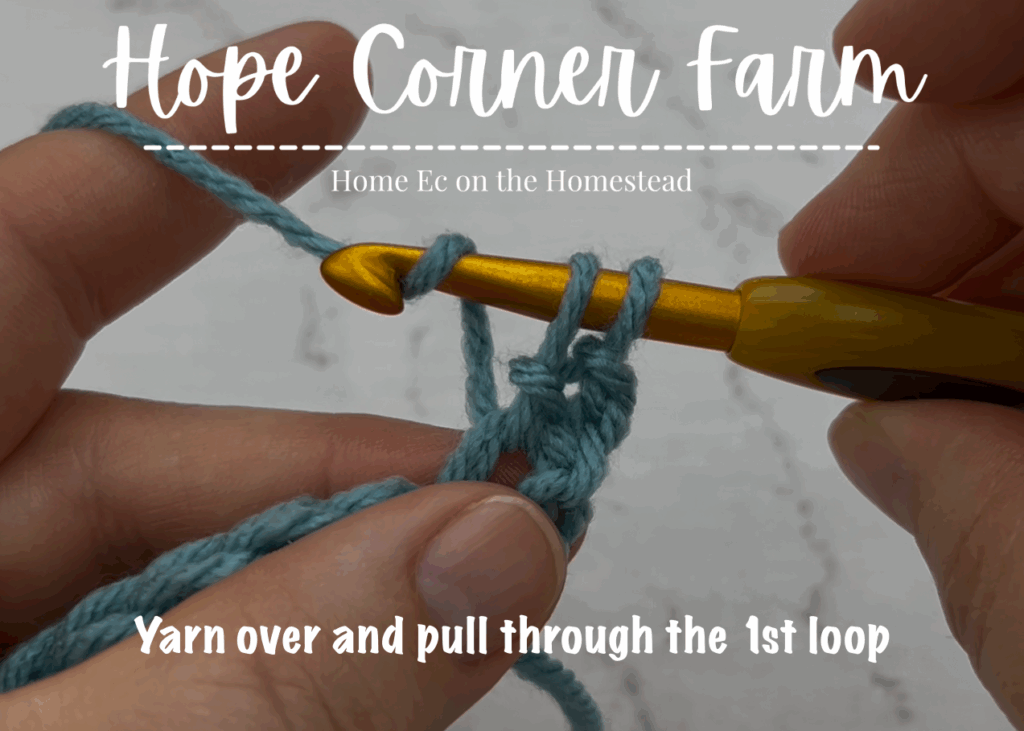
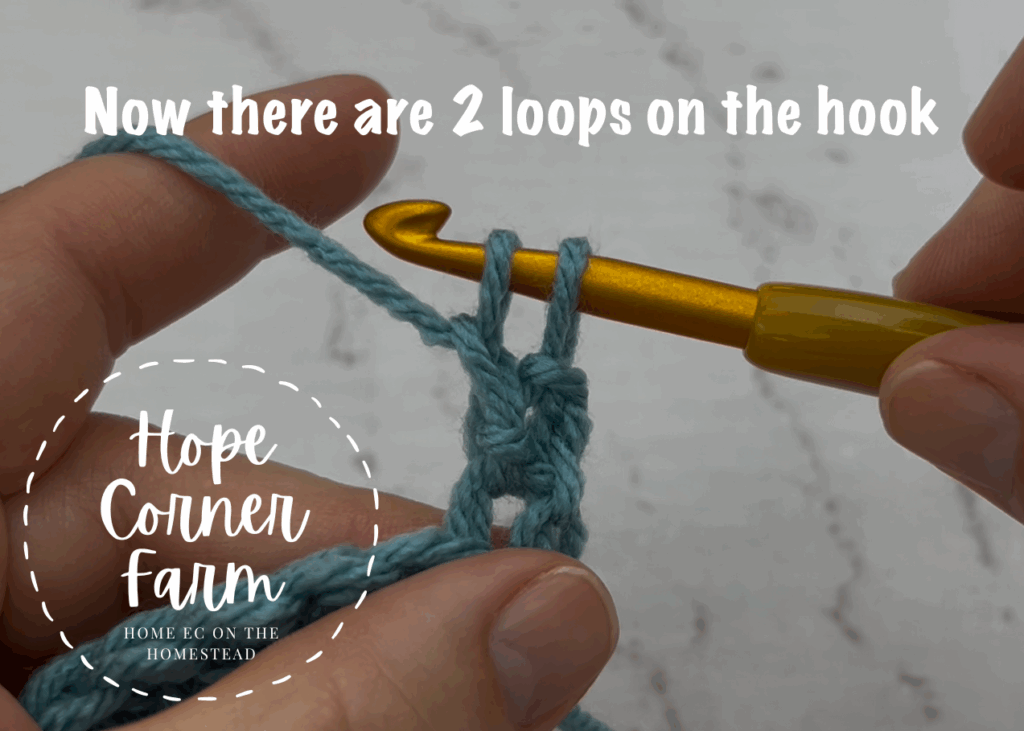
Next yarn over and pull through one loop on the crochet hook. Again there will be 2 loops of yarn on the crochet hook.
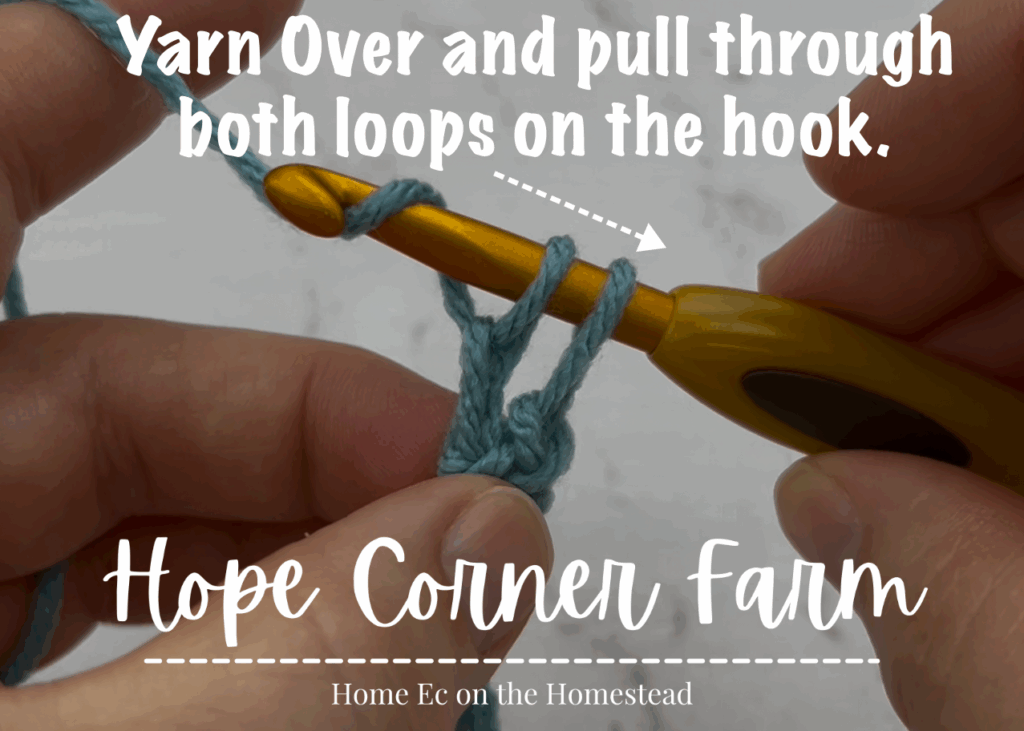
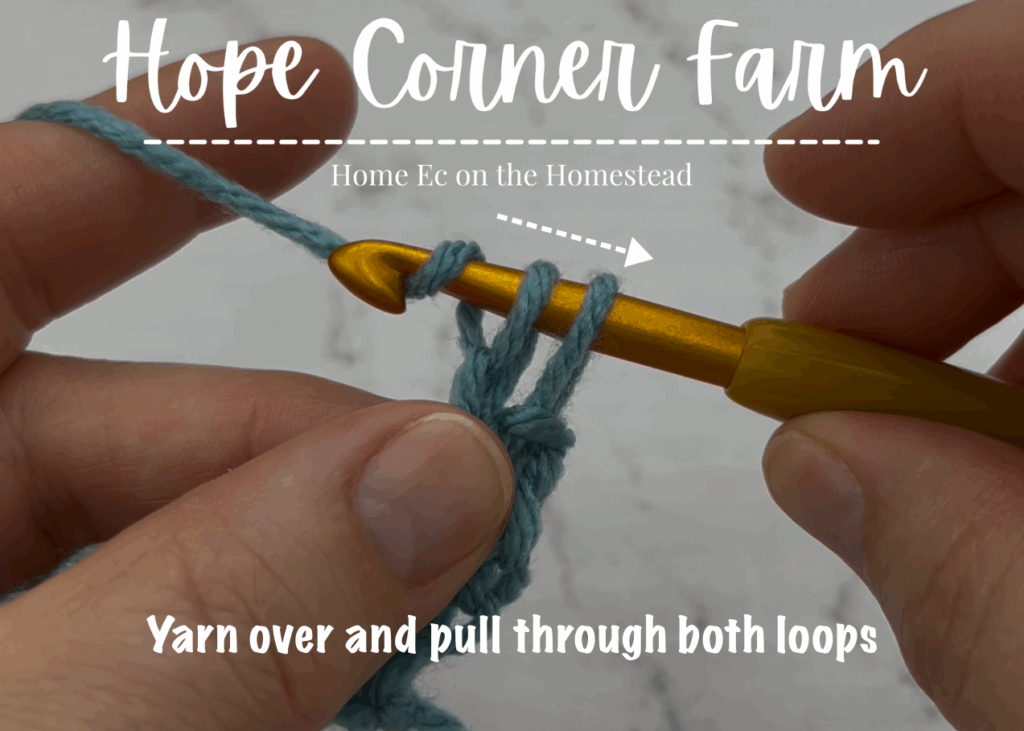
Step 6:
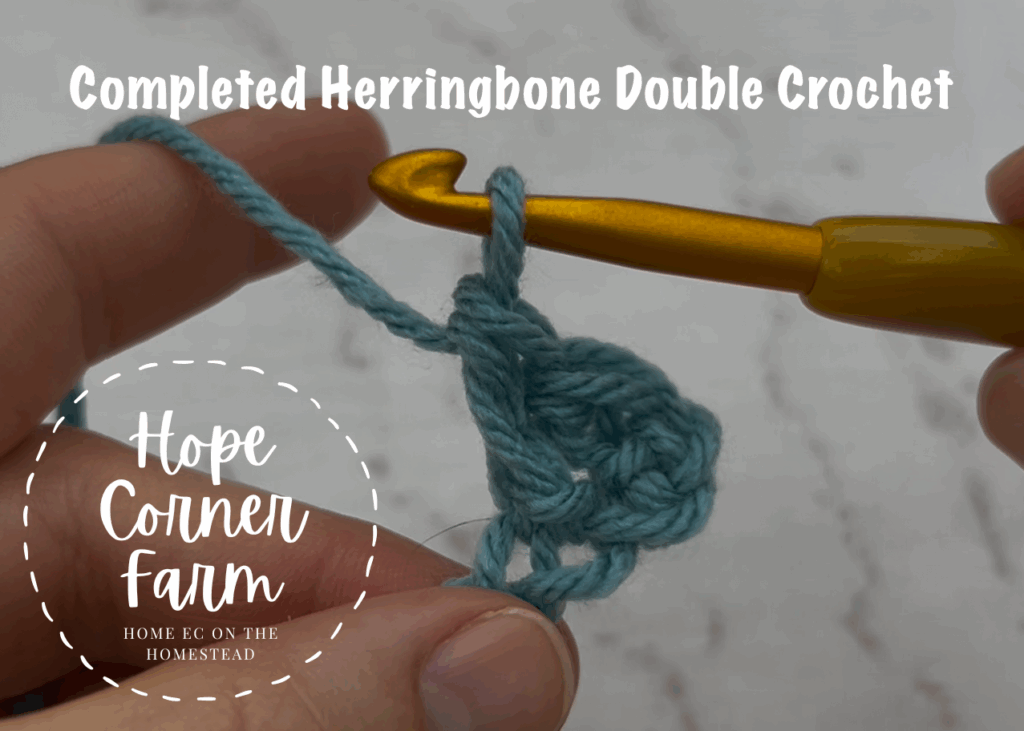
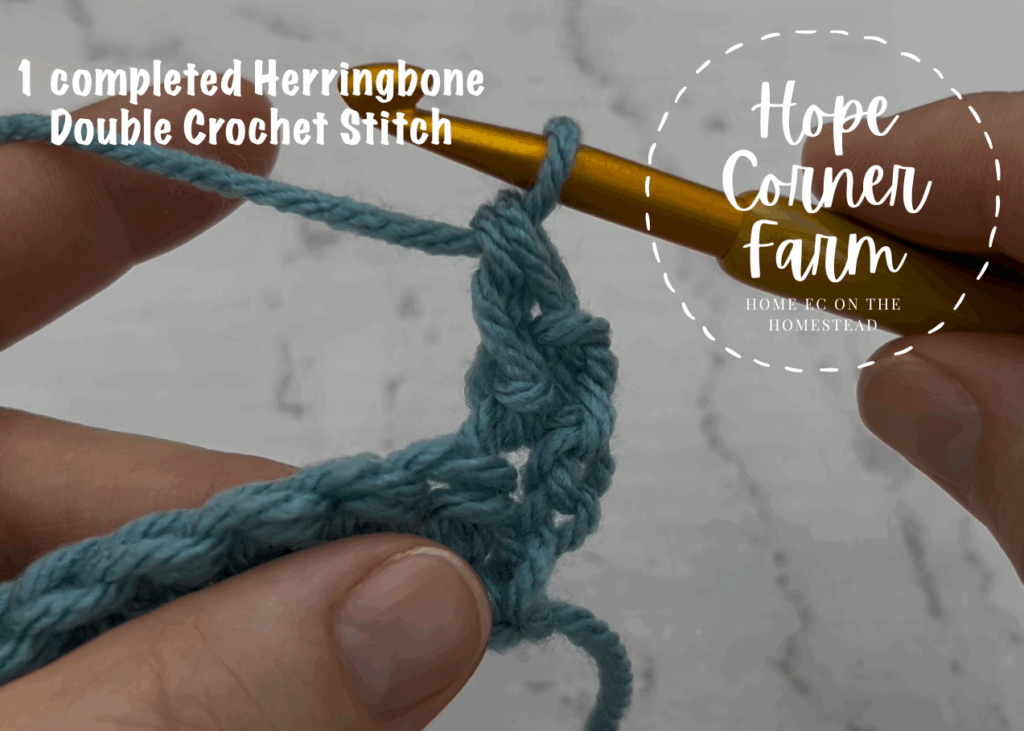
Finally yarn over and pull through both loops on the crochet hook. This completes 1 Herringbone Double Crochet Stitch.
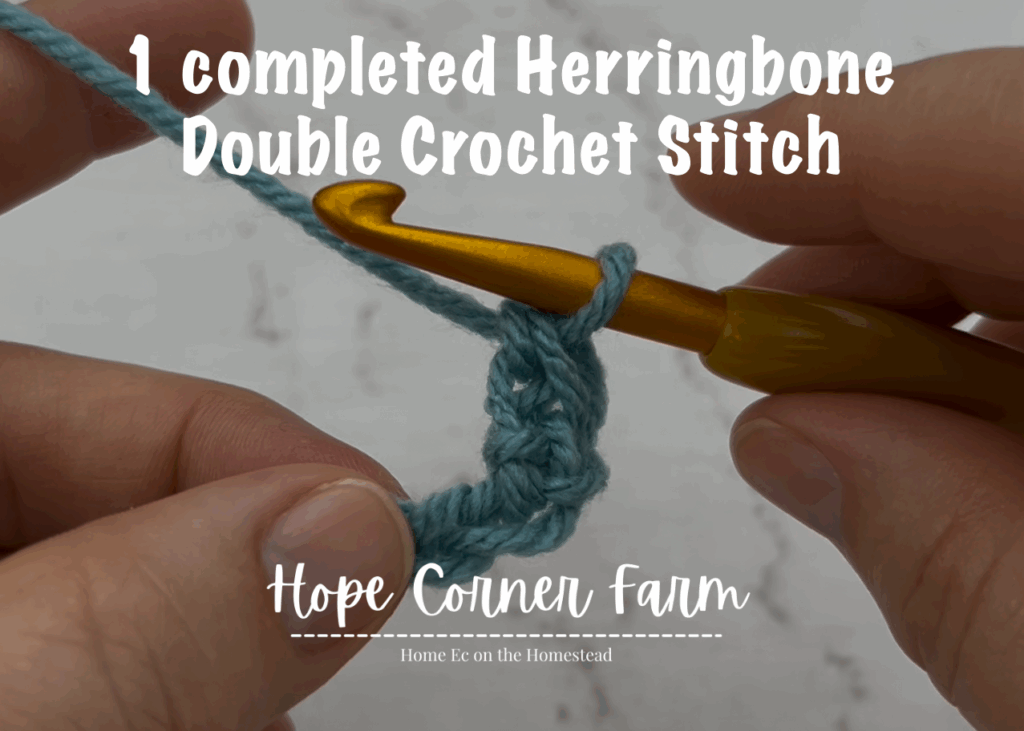
Remaining Herringbone Double Crochet Stitches for Row 1:
Now for the remaining Herringbone Double Crochet Stitches for Row 1 keep repeating Steps 2-6.

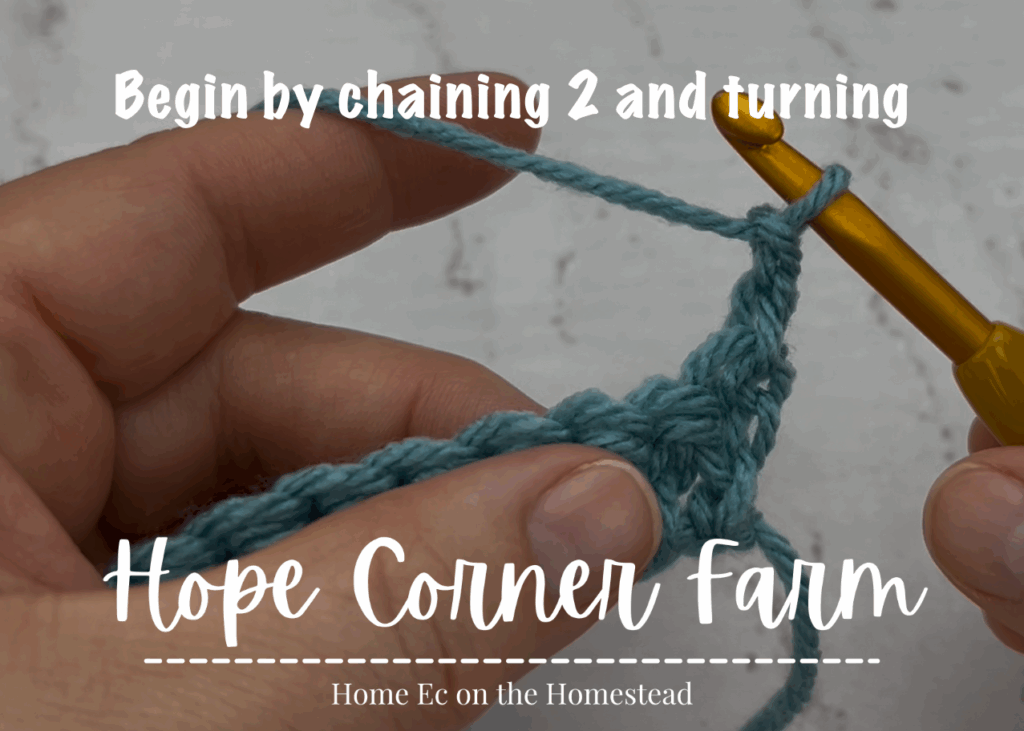
Second Row – Step 1:
Begin by chaining 2 and turning your work. After that yarn over and insert the hook into the first stitch.
Step 2 – Row 2 Herringbone Double Crochet:
Now yarn over and pull through the stitch. There are 3 loops on the hook now.
Row 2 – Step 3:
Next pull the first loop on the hook through the second (middle) loop on the hook. There will be 2 loops on the hook at this point.
Step 4 – Herringbone Double Crochet Row 2:
Now yarn over and pull through the 1st loop on the crochet hook. There will still be 2 loops of yarn on the crochet hook at this point.
Herringbone Double Crochet 2nd Row – Step 5:
Next yarn over and pull through both loops on the hook. This completes a Herringbone Double Crochet Stitch.
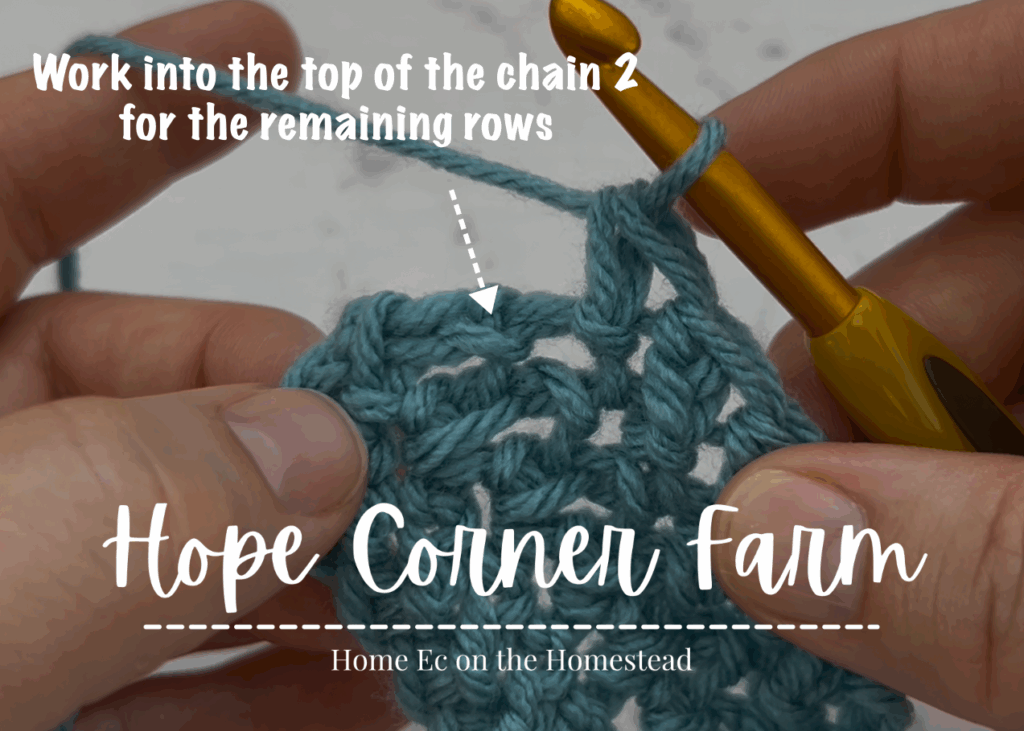
Final Stitch Placement for the Rows:
Now for Row 2, the final Herringbone Double Crochet Stitch is placed in the top of the chain that we skipped over to start (remember the 1st HBDC is worked into the 2nd chain from the hook).
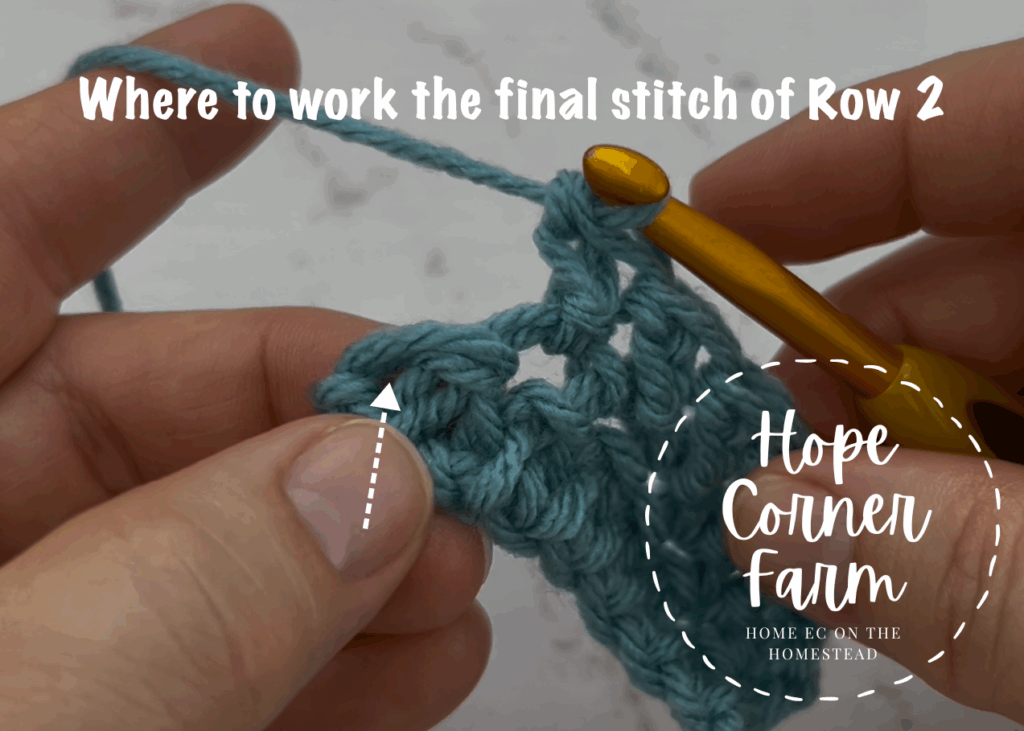
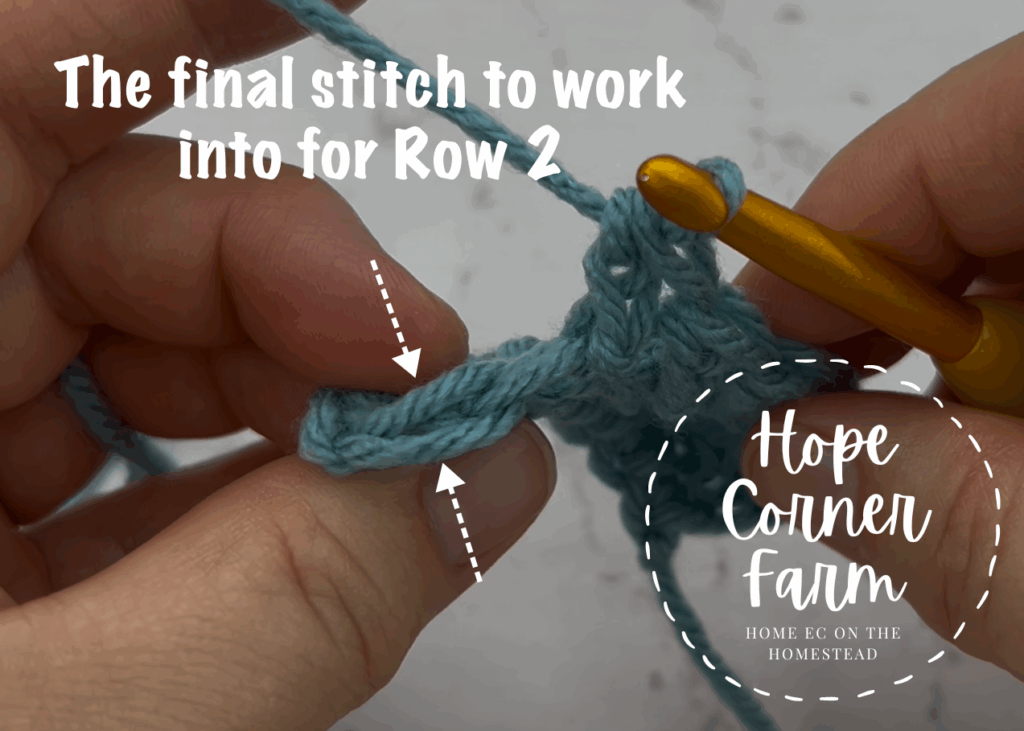
Finally for the remaining rows of Herringbone Double Crochet Stitches the final stitch of the row will be worked into the top of the chain 2 that (from the start of the last row of crochet).
How to Herringbone Double Crochet Stitch Video Tutorial:
Written Instructions Only:
After Row 2, any remaining rows of crochet will be repeats of Row 2.
Row 1:
Begin by chaining any number of chains. Yarn over. Insert the crochet hook into the second chain from the crochet hook. Yarn over, pull through the chain stitch (there are 3 loops on the hook now). Pull the 1st loop through the second (middle) loop. Yarn over again and pull through 1 loop on the hook (there are 2 loops on the hook at this point). Yarn over one more time and pull through both loops on the crochet hook. This completes 1 HBDC. Repeat across the chain.
Herringbone Double Crochet – Row 2:
Begin by chaining 2 and turning your work. Yarn over and insert the hook into the 1st stitch. YO again and pull through the stitch (3 loops on the hook now). Pull the 1st loop on the hook through the middle loop on the hook (2 loops on the hook now). Yarn over and pull through 1 loop (still 2 loops on the hook now). YO and pull through both loops. This completes 1 Herringbone Double Crochet. Repeat to the end of the row. Work the final HBDC into the top of the Chain 2 turning chain.
Enjoy learning new crochet stitches? Don’t miss out on more!
Subscribe below to get free crochet patterns, tutorials, and inspiration delivered straight to your inbox. If you want more crochet fun delivered to your inbox hope on over and join my newsletter!

Join my creative community and keep your crochet queue full of beautiful, fun-to-make projects!
If you loved this tutorial and want more crochet inspiration, come connect with me on social! Subscribe on YouTube (Hope Corner Farm Crochet) for full, step‑by‑step videos, follow along on TikTok and Instagram for quick tips and reels, pin your favorite projects on Pinterest, and join the conversation on Facebook. Don’t forget to tag your makes with #HopeCornerFarmCrochet so I can cheer you on and share your beautiful work!
Happy Crocheting,

Love this crochet stitch? Check these crochet tutorials out?
Now that you’ve mastered the Herringbone Double Crochet Stitch, why not keep building your crochet skills? Be sure to check out some of my other popular stitch tutorials, like the Herringbone Half Double Crochet, the Paired Half Double Crochet, the Cluster Stitch, and the beautifully textured Floret Stitch. Each tutorial is designed to help you grow your stitch library and inspire your next crochet project. Happy stitching!