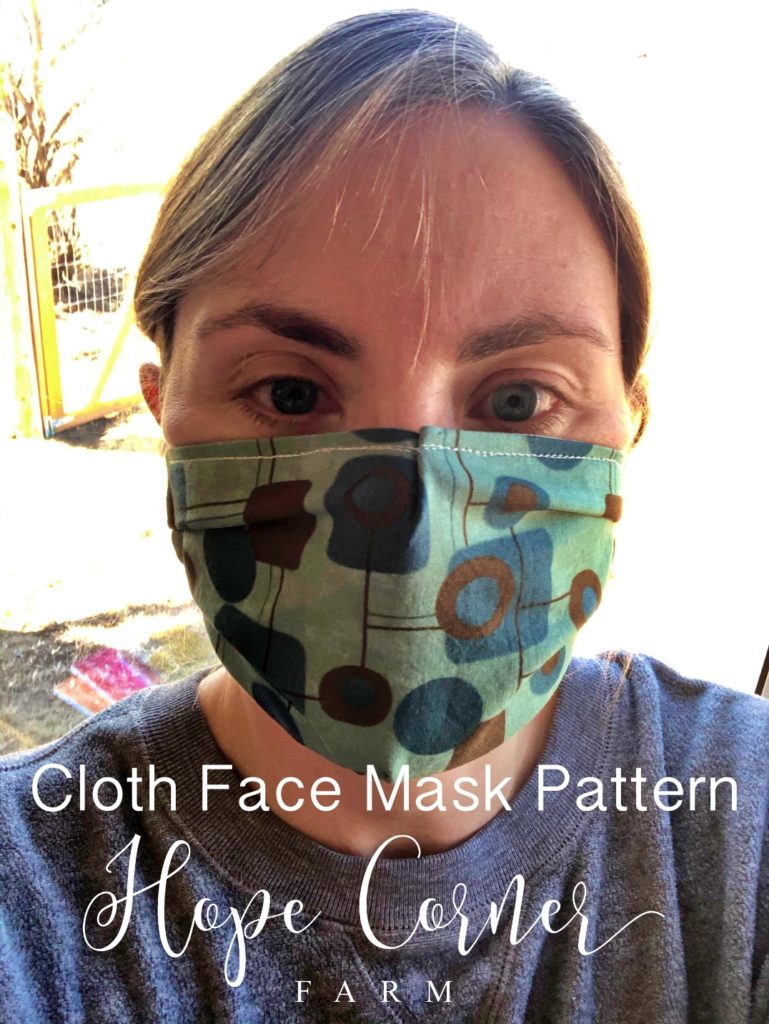
Cloth Face Mask Sewing Pattern


After trying numerous other tutorials on the internet, I found a face mask pattern that I mostly liked. This tutorial is based on my personal modifications to this pattern from The Turban Project (look for the “Face Mask Instructions”: https://turbanproject.com/patterns.
PLEASE KEEP IN MIND THAT THIS CLOTH FACE MASK ON ITS OWN WILL NOT PROTECT YOU FROM VIRUSES AND OTHER PATHOGENS. IT IS MEANT TO BE WORN OVER TOP OF AN APPROVED MASK, OR YOU CAN USE IT AS A REMINDER TO NOT TOUCH YOUR FACE!
I like the ease of this pattern, but I had the following modifications:
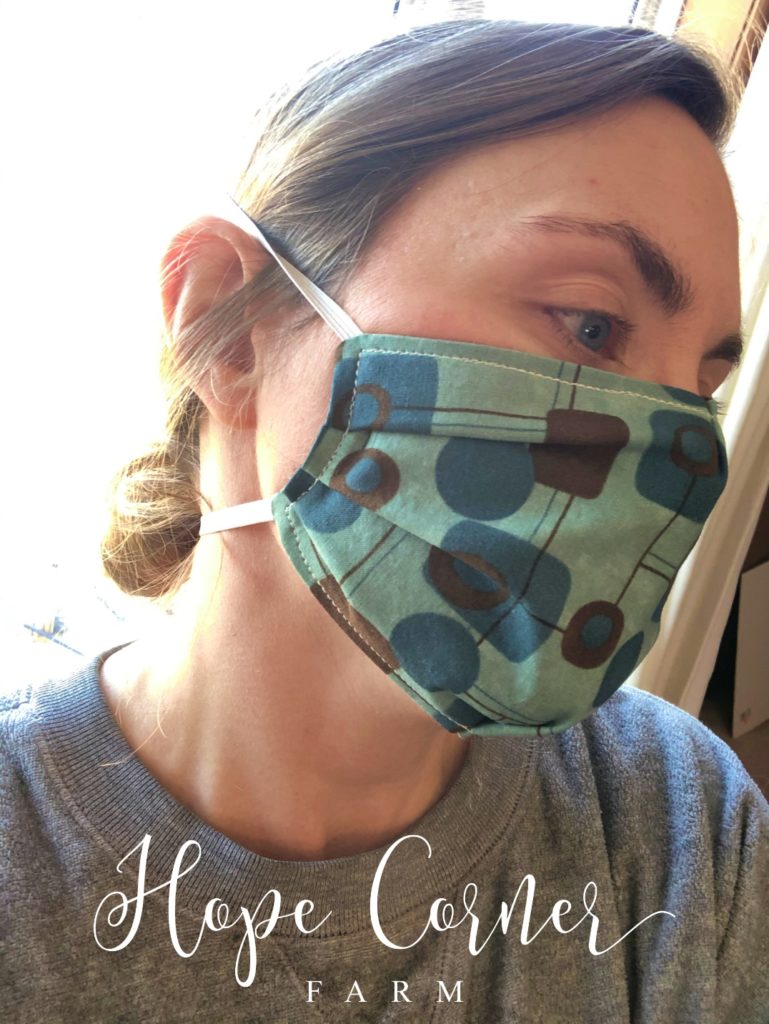
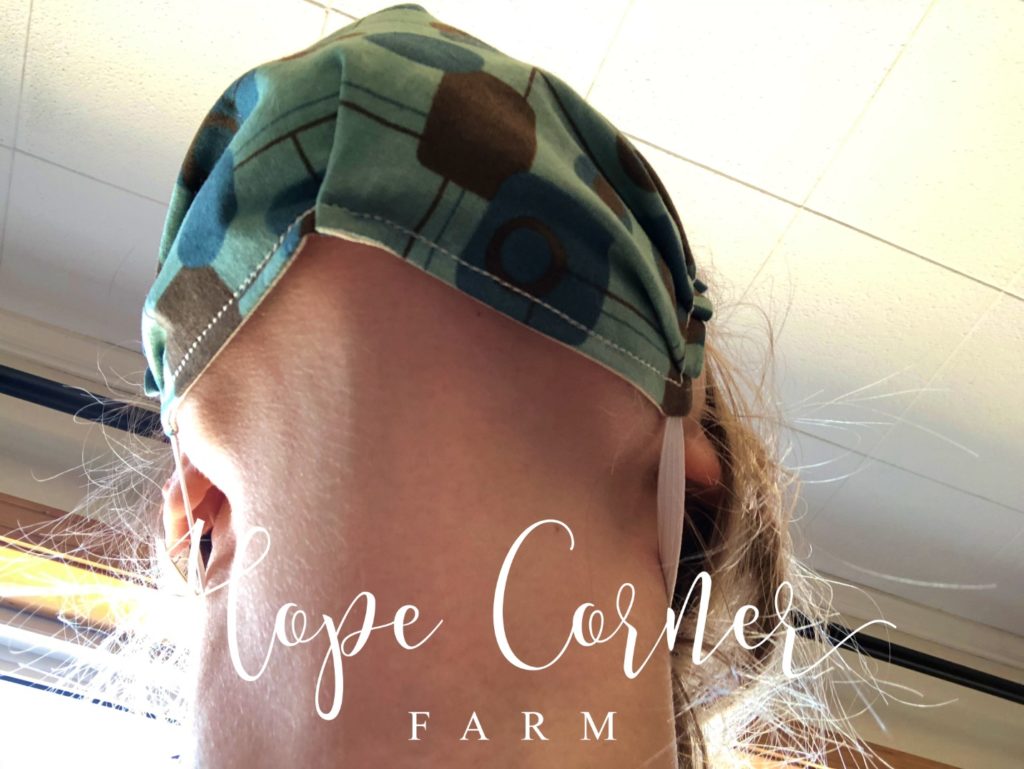
1.) Elastic that went around the head, not the ears (think about the face masks that you buy in the store).
2.) I wanted the mask to fit a little tighter to the face, so I added pleats to achieve this.
3.) I am also adding the option of adding interfacing to hopefully increase filtration. Most of the masks I made did not have this in there, because they are being used over top of a proper N95 face mask.
Materials Needed:
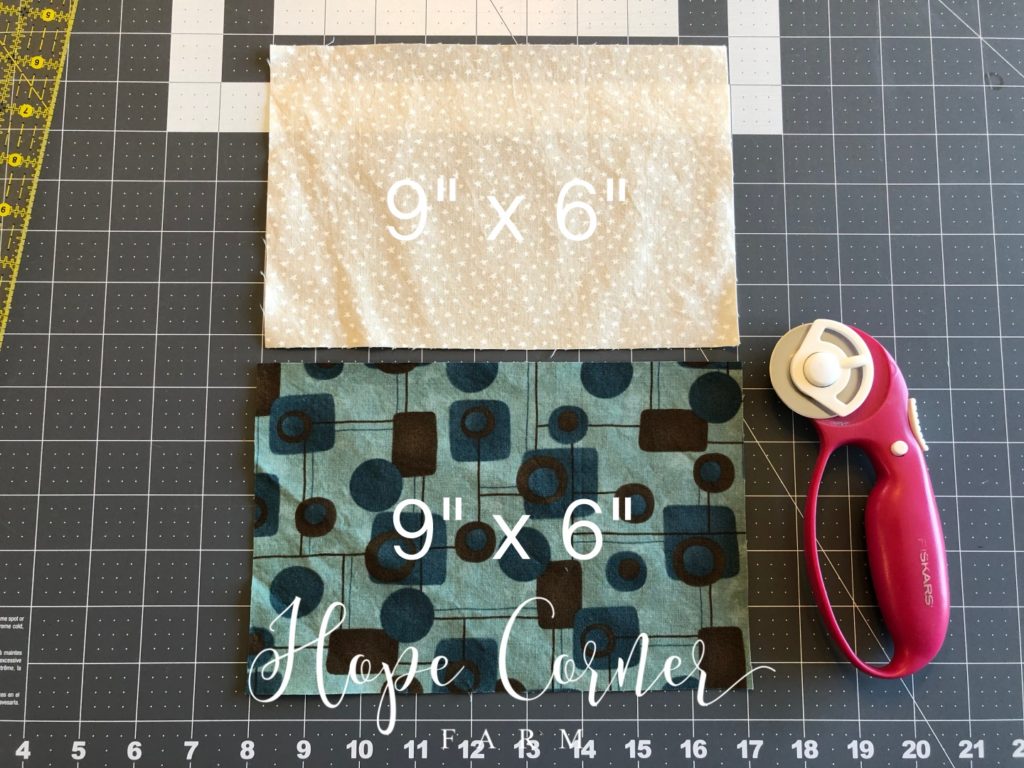
TWO pieces of scrap fabric that is at the very least 9″x 6″ and is 100% cotton (even old bedsheets will work!
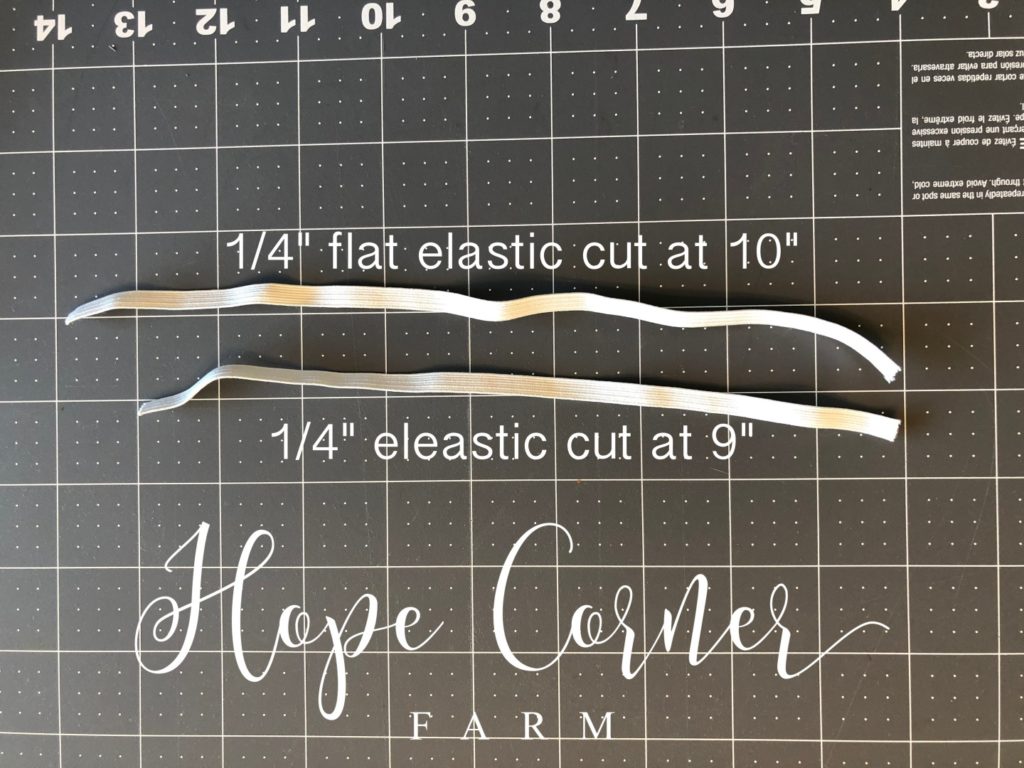
1/4″ flat elastic
Thread
Rotary Cutter
Quilter’s ruler
Cutting mat
Iron
Sewing machine
Turing stick or dull pencil to use for turning
Pins or fabric clips for holding pleats in place
Optional: Fusible interfacing that is at least 8.5″x 5.5″
Cutting Instructions:
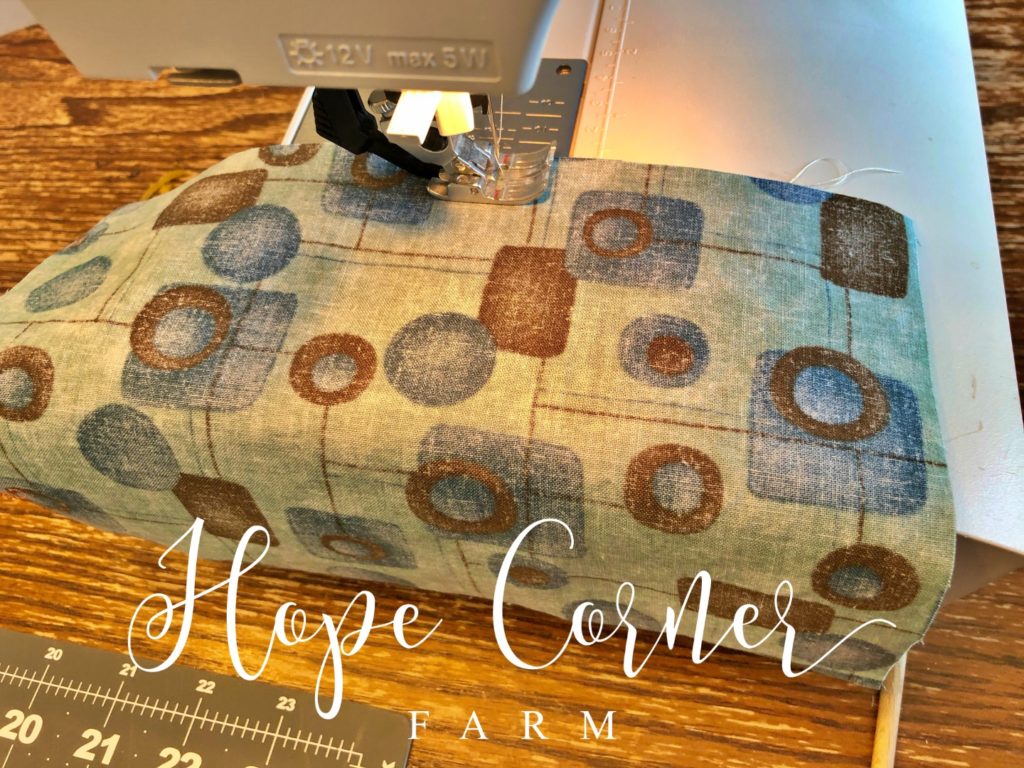
To begin, cut TWO pieces of fabric 9″ x 6″.
After cutting the fabric, cut two pieces of elastic. Cut the top piece of elastic 10″. Cut the bottom piece of elastic 9″.
Sewing to the First Corner:
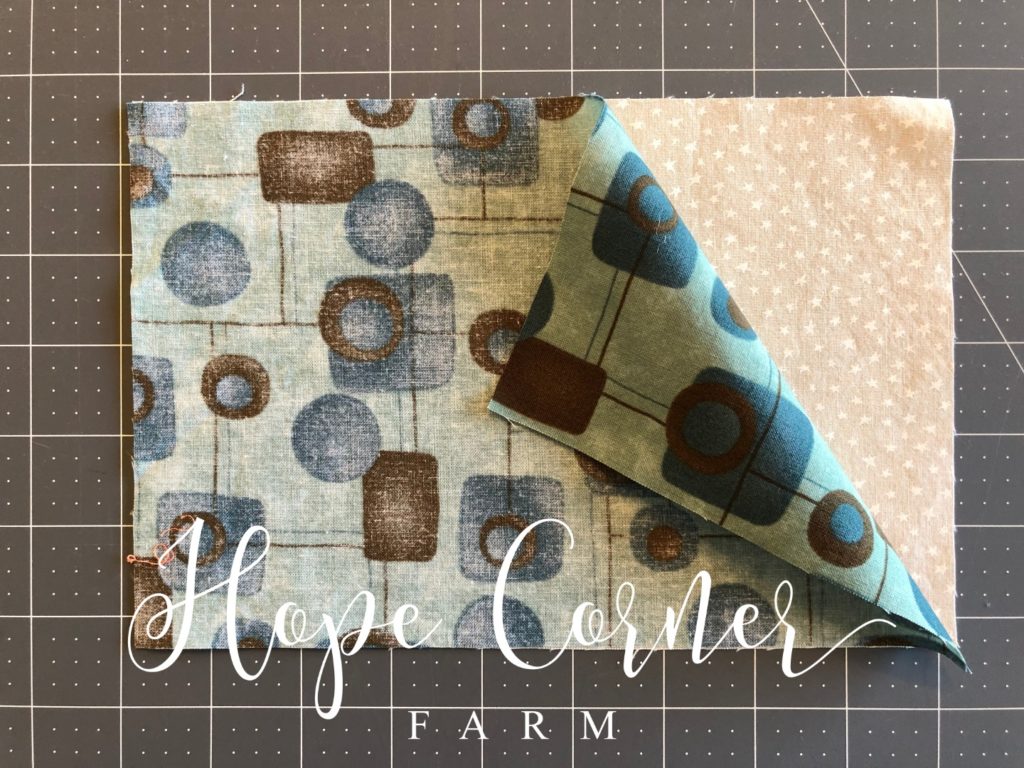
Next, place the one of the fabric rectangles directly on top of the other one. Make sure that the good sides (the nicer looking sides) are facing each other on the inside (don’t worry, we will get the nice sides out in a later step!).
On one of the long (9″ side) sides of the fabric, begin sewing from the middle towards a corner. Use a 3/8″ seam allowance here.
Don’t forget to backstitch when you begin sewing! This will keep your seam from coming undone!
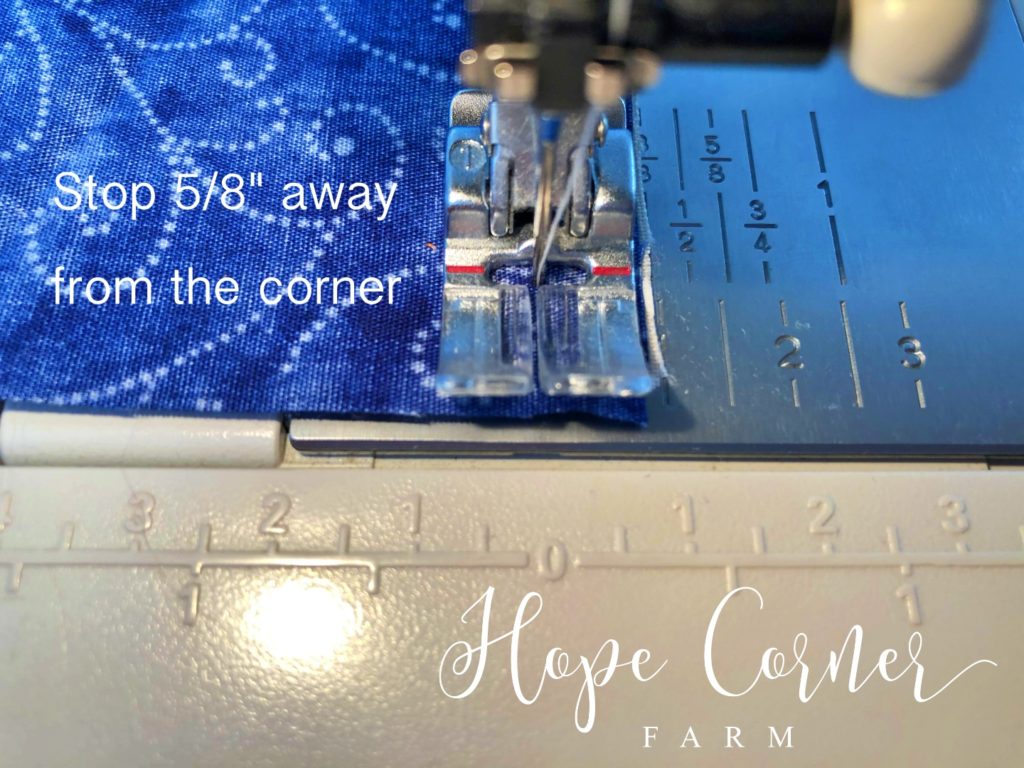
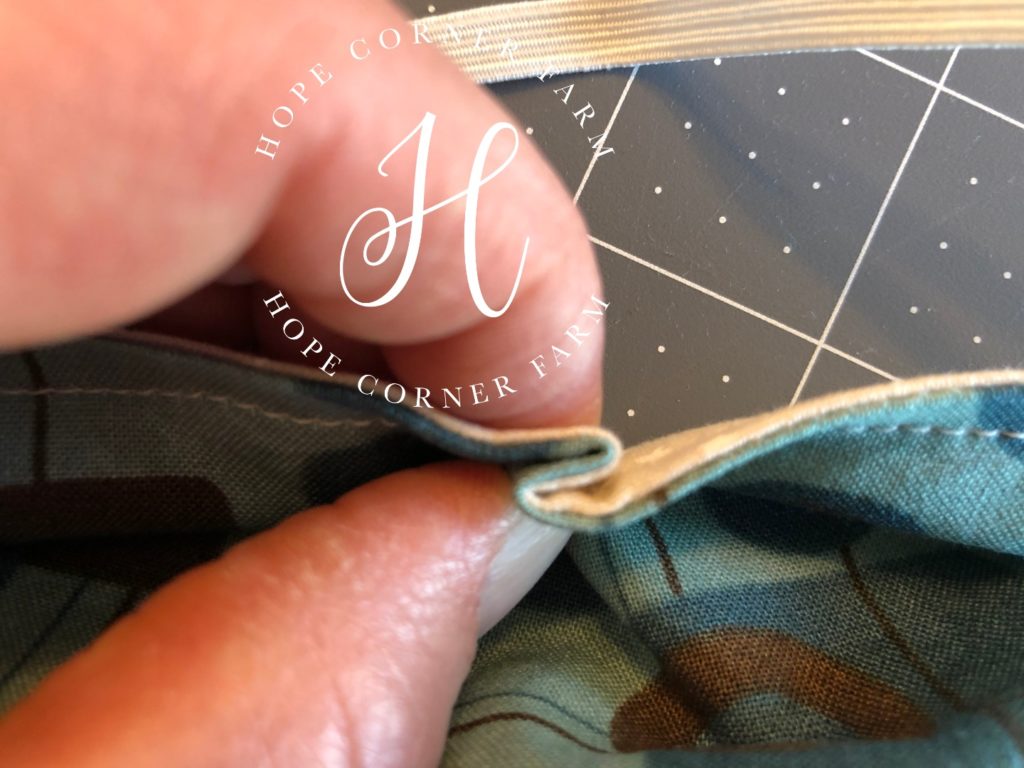
Keep sewing until you are 5/8″ away from the first corner.
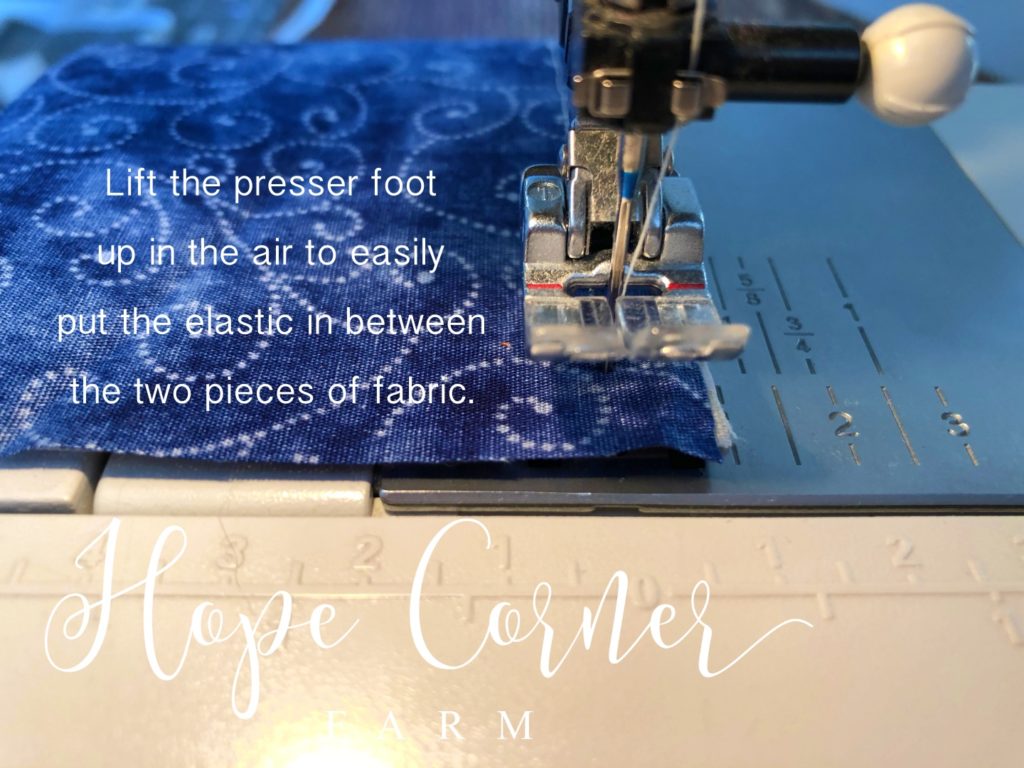
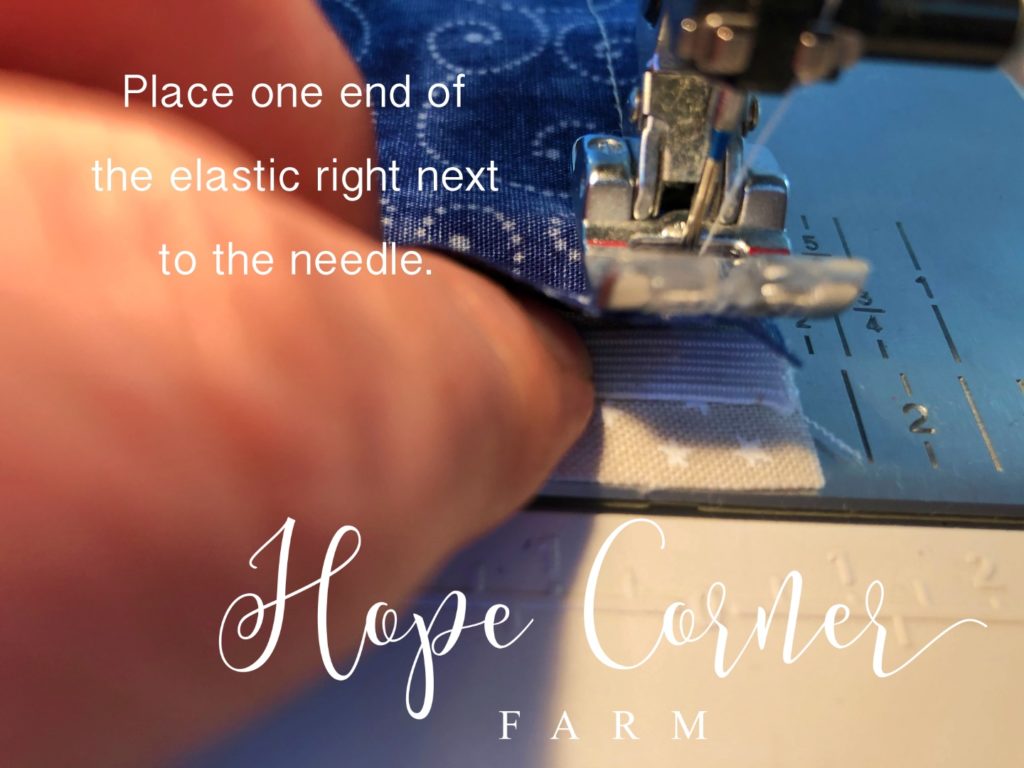
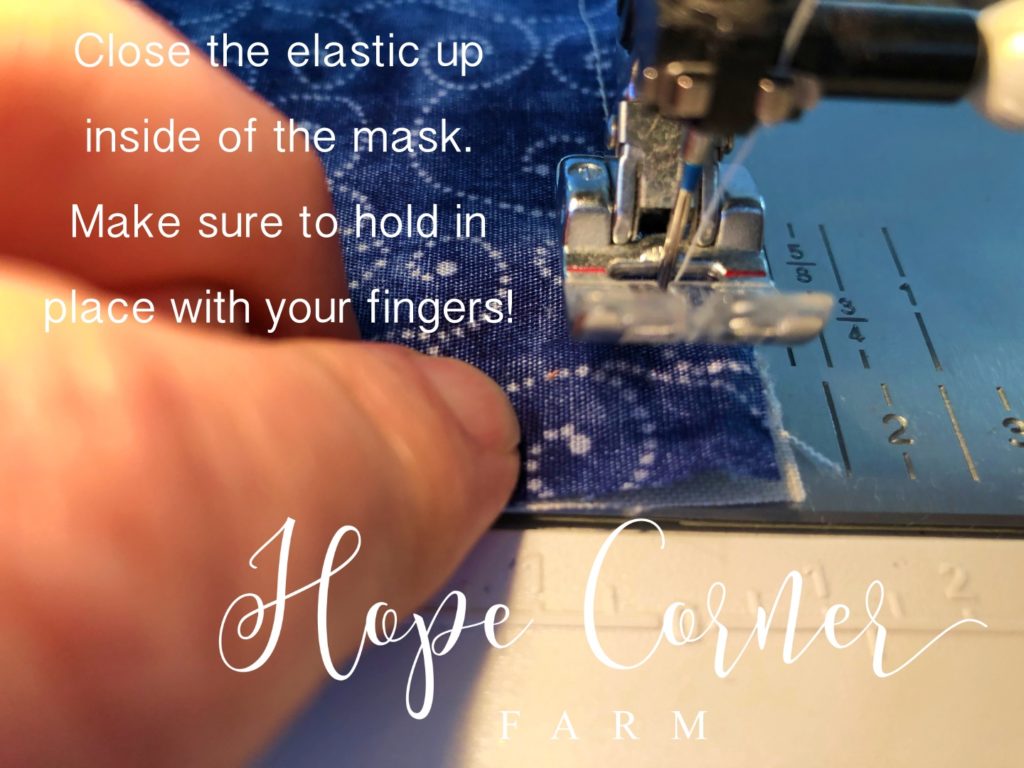
Next, lift up the presser foot and insert one end of the 9″ (bottom) elastic. Make sure that the elastic is nestled right up next to the needle (it is placed in between the two pieces of fabric). Close the elastic in between the two fabrics and hold it in place with your finger, being careful to keep your finger out of the needle’s path!
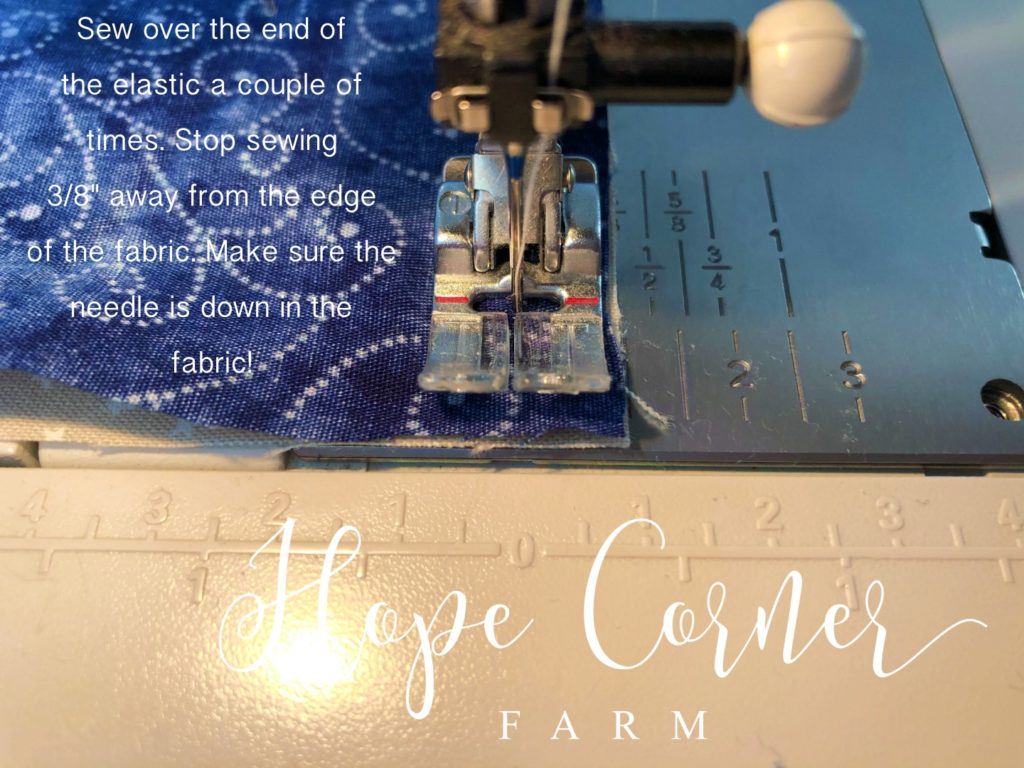
Put the presser foot back down and sew over the elastic. I back stitch a couple of times over this piece of elastic to ensure that it will hold up!
Stop sewing immediately after you are off of the elastic. This stopping point should be 3/8″ away from the edge of the fabric.
Make sure that your needle is down in your fabric when you stop!
Sewing to the Second Corner:
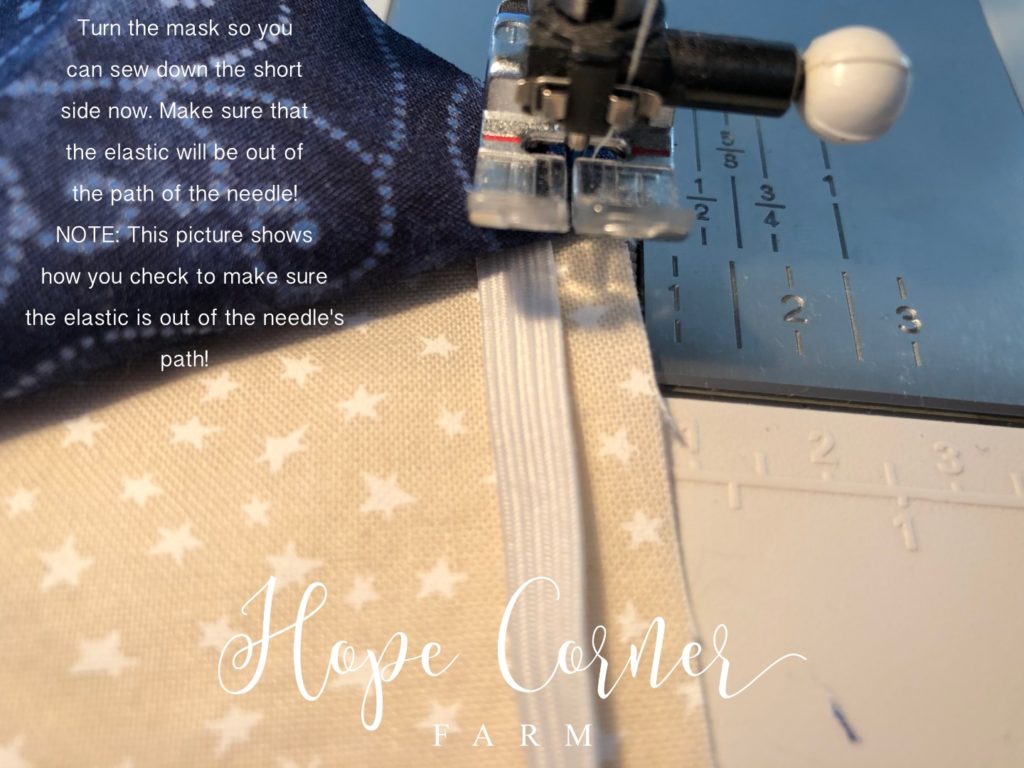
Lift the presser foot, turn the project so you can start sewing down one of the short (6″ side) sides of the mask.
Before you start sewing, check and make sure that the elastic is out of the path of the needle when you are sewing.
Before you start sewing again, make sure the fabric is back down and in place.
Put the presser foot back down too and start sewing. Remember, we are using a 3/8″ seam allowance!

Sew until you reach the next corner. Stop 3/8″ away from the edge of the fabric. Make sure the needle is down in the fabric. Lift the presser foot and turn the project so that when you sew you will be sewing the long (9″) side. Don’t start sewing yet!
Sewing to the Third Corner:
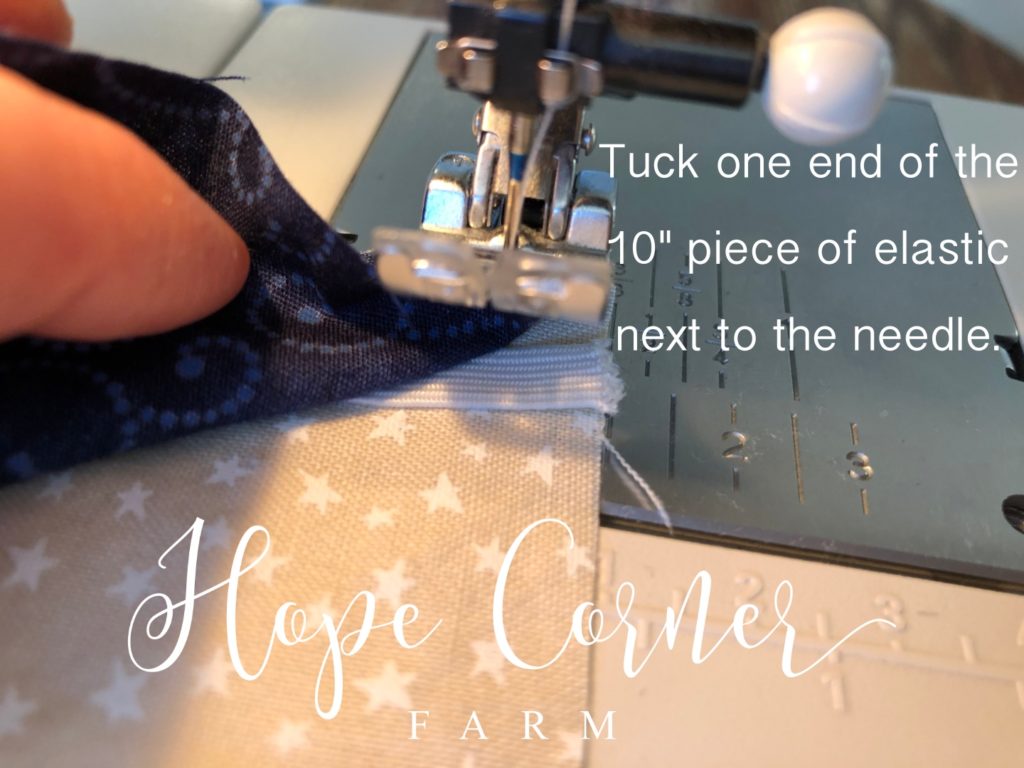
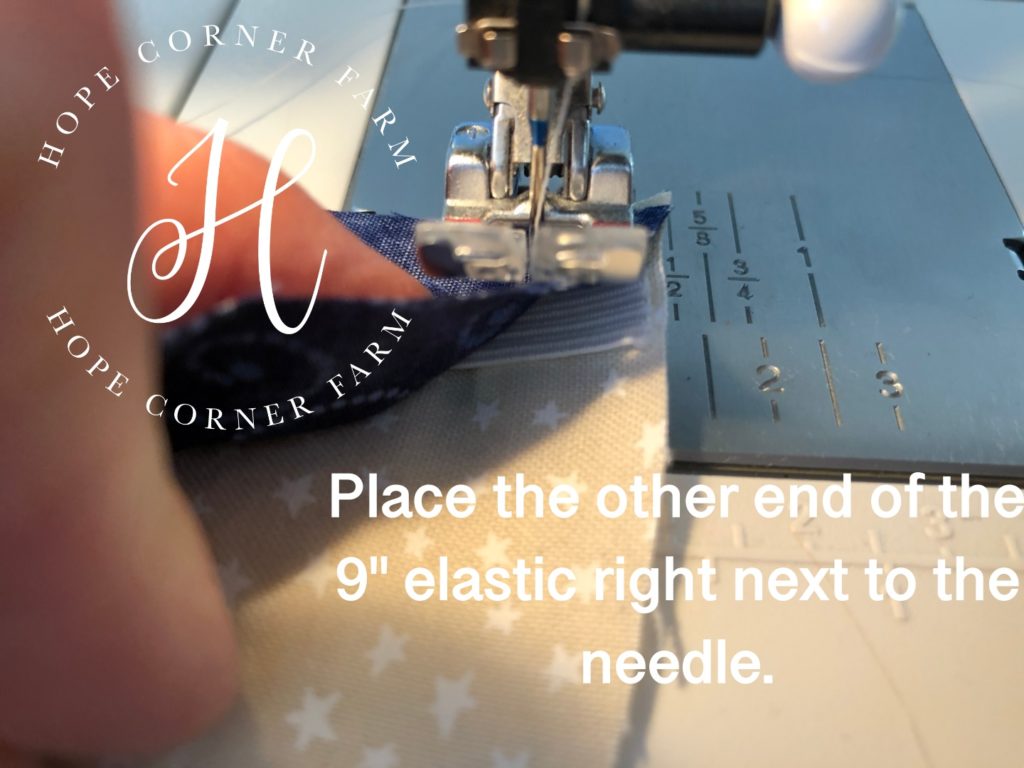
Now, grab the 10″ piece of elastic and tuck one end of it right next to the needle (with the rest of it heading towards the inside/middle of the project).
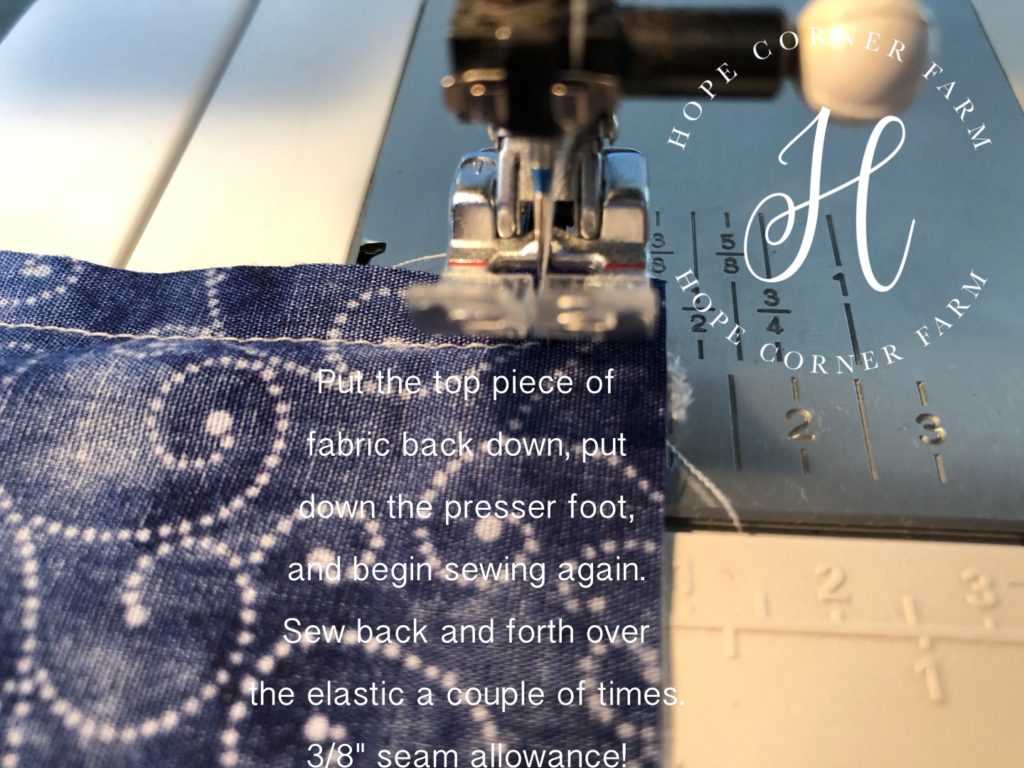
Next, put the top piece of fabric back down, put the presser foot back down, and begin sewing again. Sew back and forth over the elastic end a couple of times. Then continue sewing all of the way across the 9″ side with a 3/8″ seam allowance.
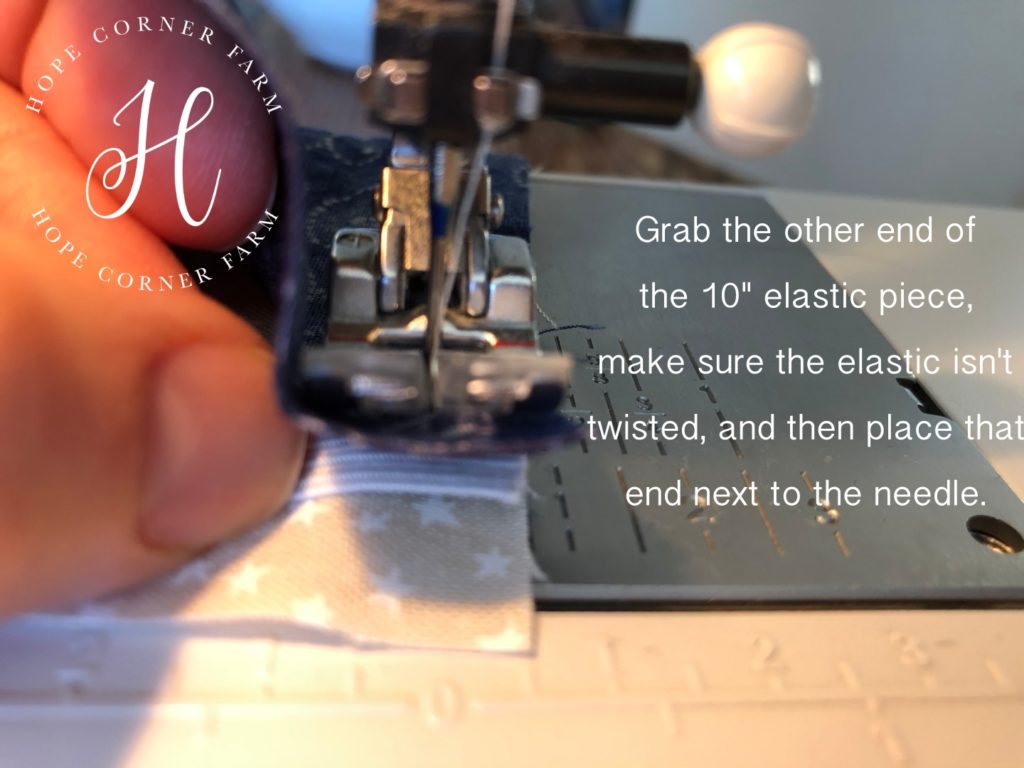
Now, when you get to the next corner, make sure that you stop 5/8″ away from it. Next, lift the presser foot, find the other end of the 10″ elastic, make sure that the elastic isn’t twisted, and place this end of the elastic right next to the needle.
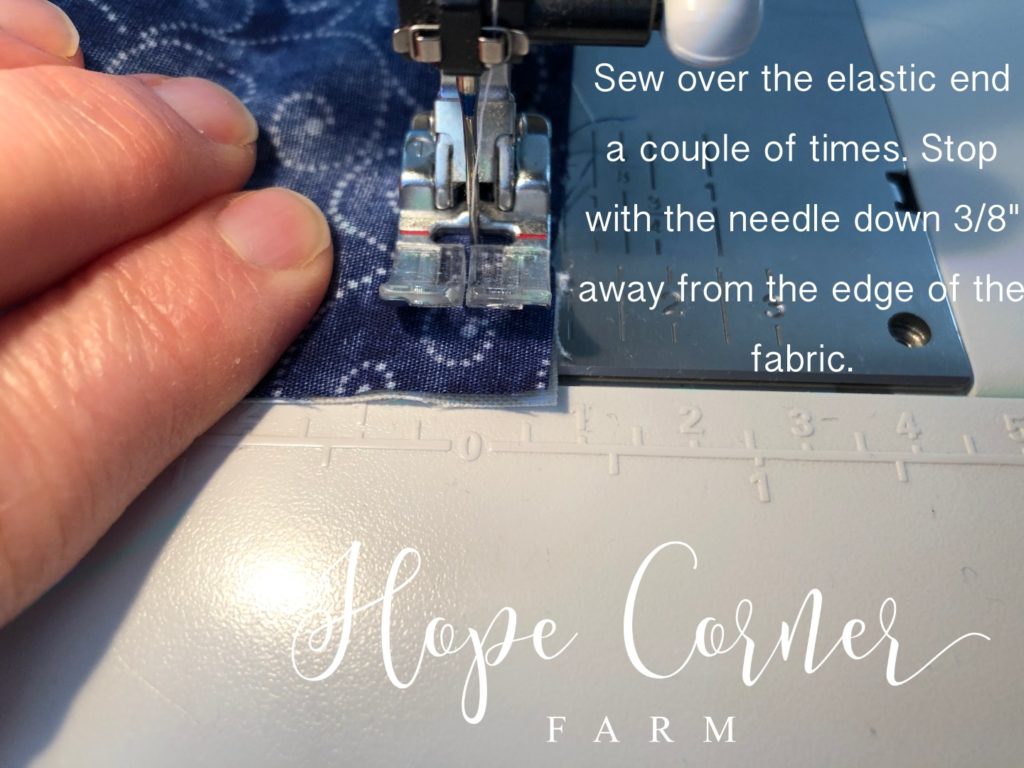
Put the top piece of fabric down again, put the presser foot back down, and sew over the elastic a couple of times. Stop your sewing 3/8″ away from the edge of the fabric.
Make sure that your needle is down in the fabric, lift the presser foot, and turn the project so you will be sewing down the next short (6″) side.
Sewing to the Fourth Corner:
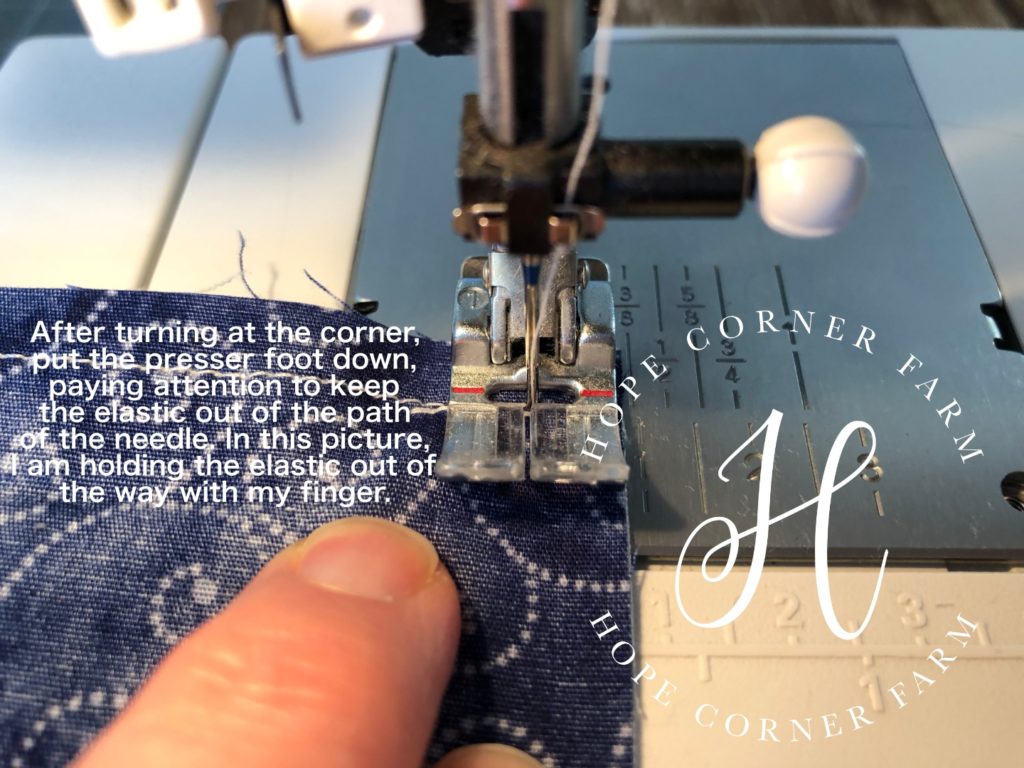
After turning the project, make sure that the elastic is out of the path of the needle, and hold it out of the way when you go to sew. Sew down this short (6″) side with a 3/8″ seam allowance.
As soon as you are within 3/8″ from the edge of the fabric, stop sewing, and make sure that your needle is down in the fabric. Turn your project so you will be sewing the first long (9″) side again.
Finishing the Interior Sewing:
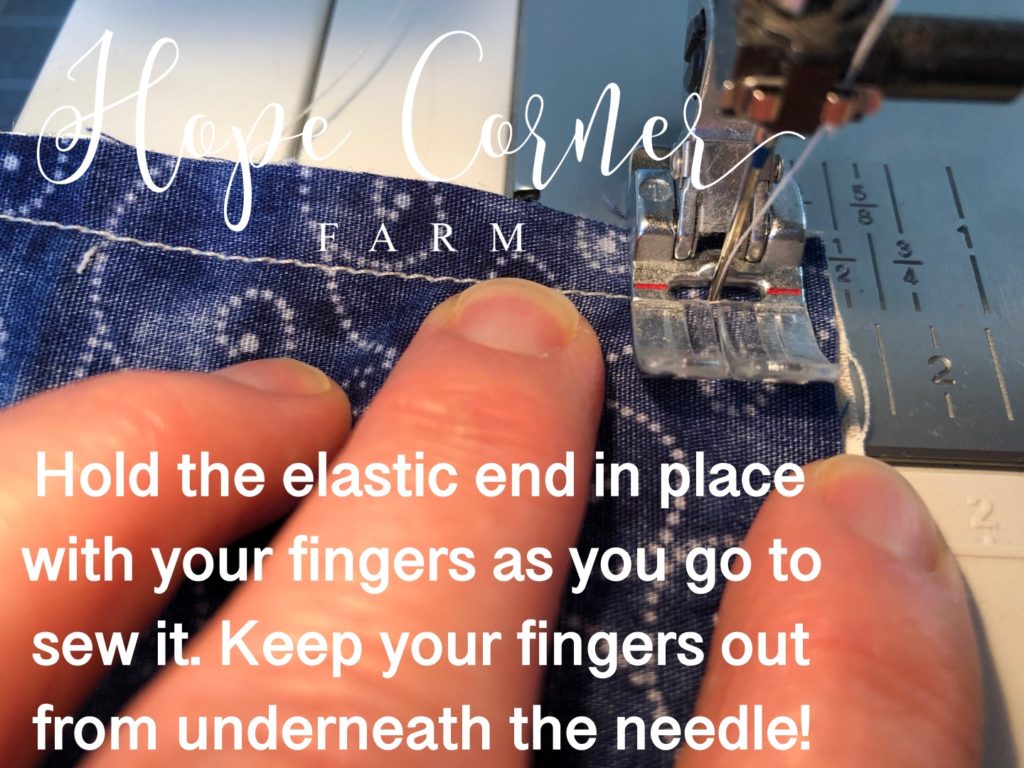
Once your project is turned and you are ready to sew down the long side, reach inside of the project and locate the other end of the 9″ elastic.
Place this end of the elastic right next to the needle. This will probably be the hardest part of sewing this project because the elastic is going to pull from the already sewn end.
Put the top fabric back down on top of the elastic. Hold the elastic end in place with your fingers – making sure that your fingers don’t get underneath the needle! This is important! Sew back and forth across the end of the elastic a couple of times.
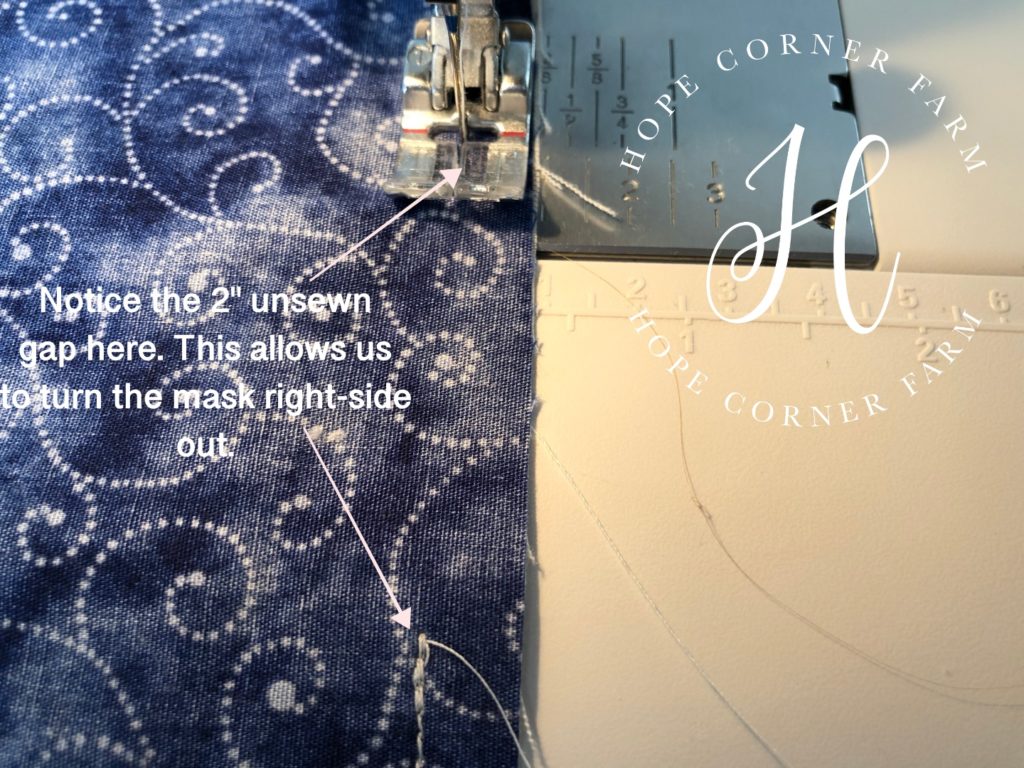
Continue sewing this side until the needle is about 2″ away from the starting point of the sewing. Backstitch here. We are leaving a 2″ opening in order to turn the face mask right-side out!
We are done sewing the inside of the mask!
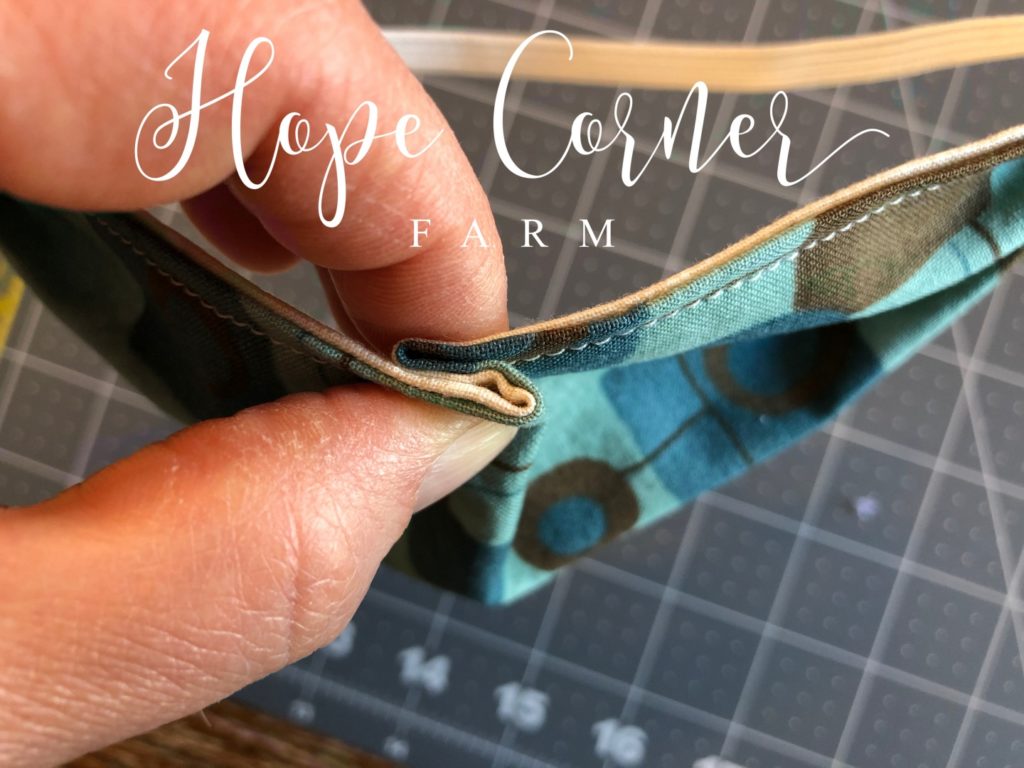
Turning the Mask Right-Side Out:
Now that we have sewn the inside of the mask, we need to turn it right-side out. Using the 2″ un-sewn gap that we left, turn the entire project right-side out.
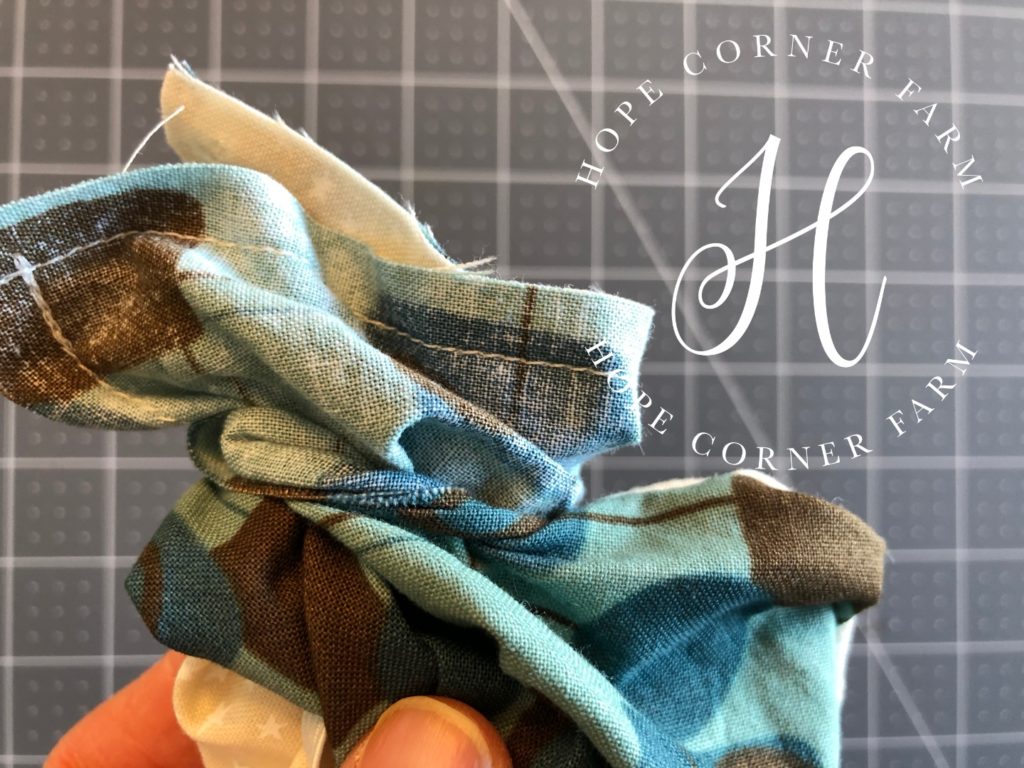
Poke out the corners of the mask with the turning stick or a dull pencil.
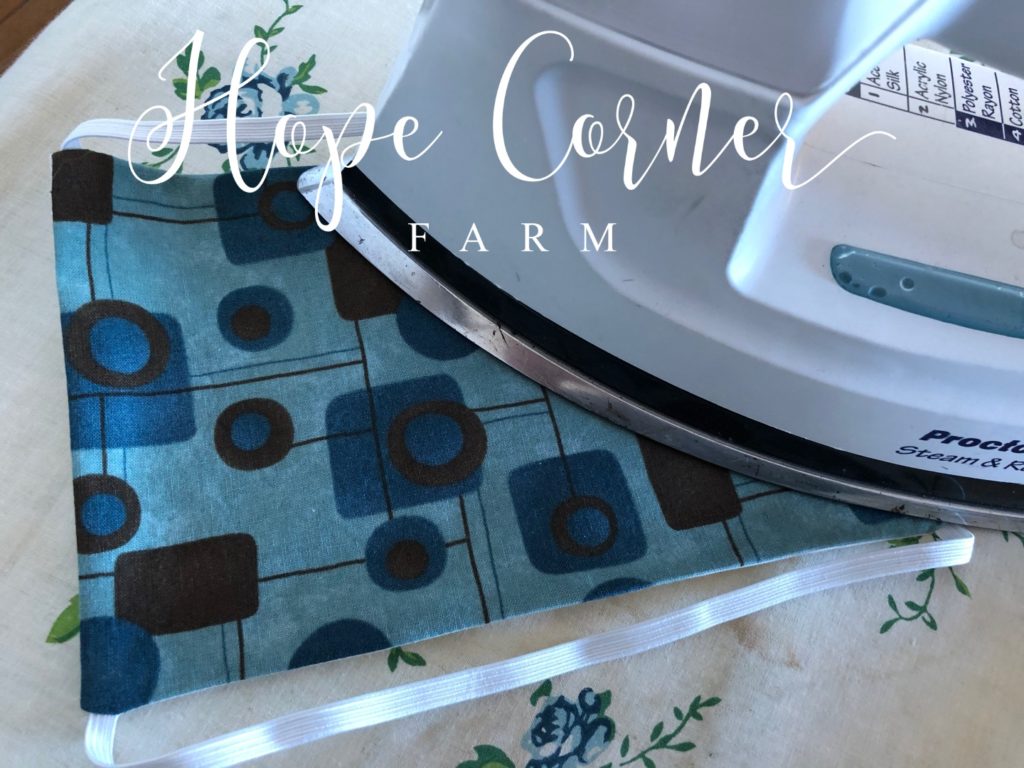
Iron the mask flat.
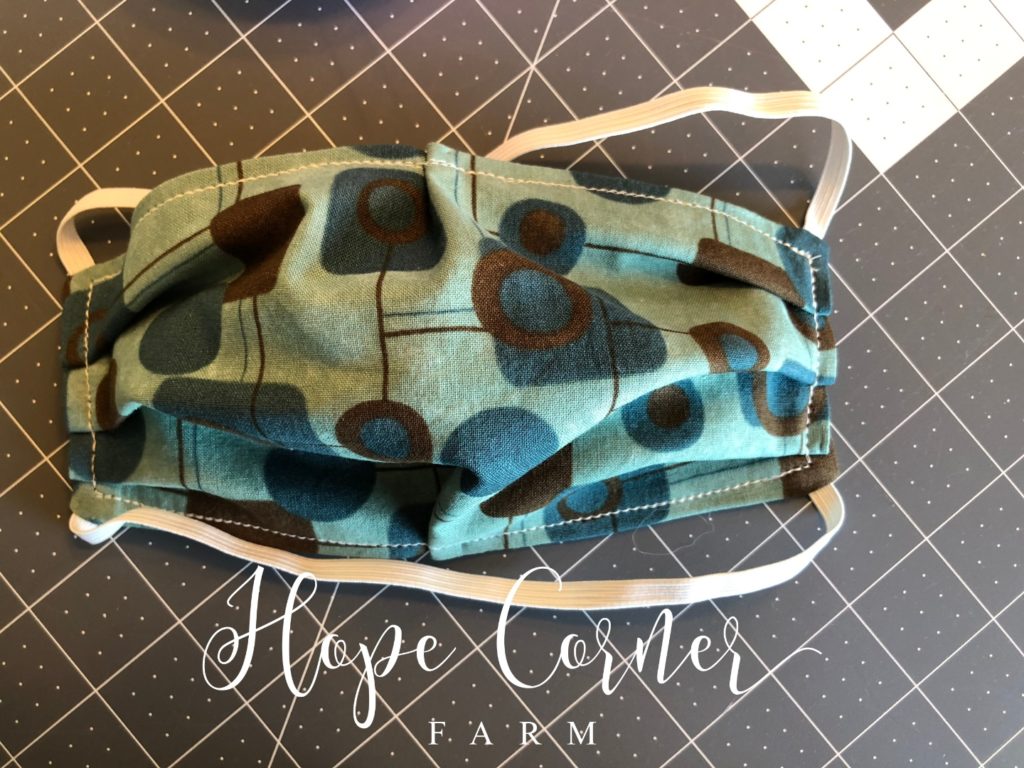
Here is what the mask looks like now:

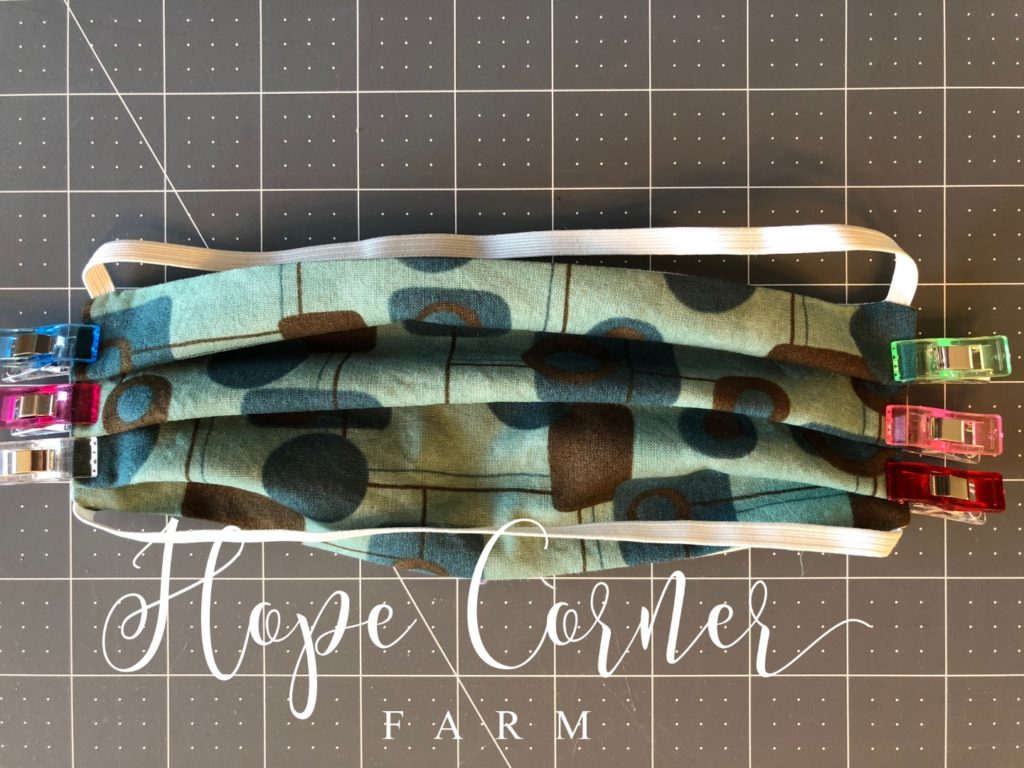
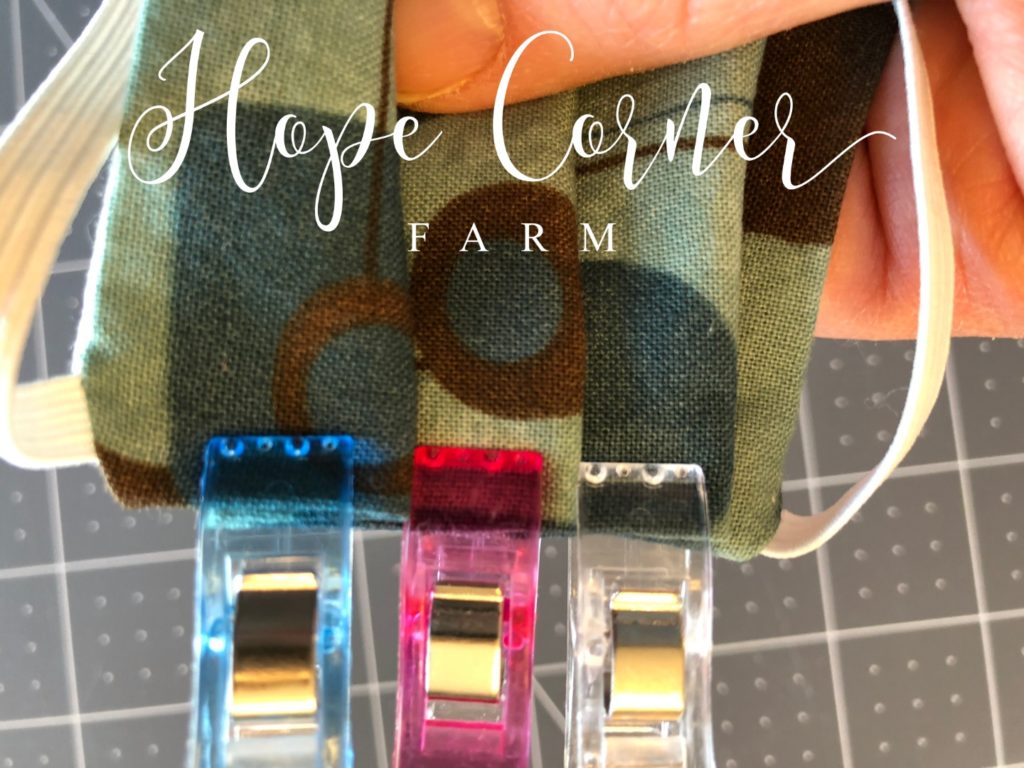
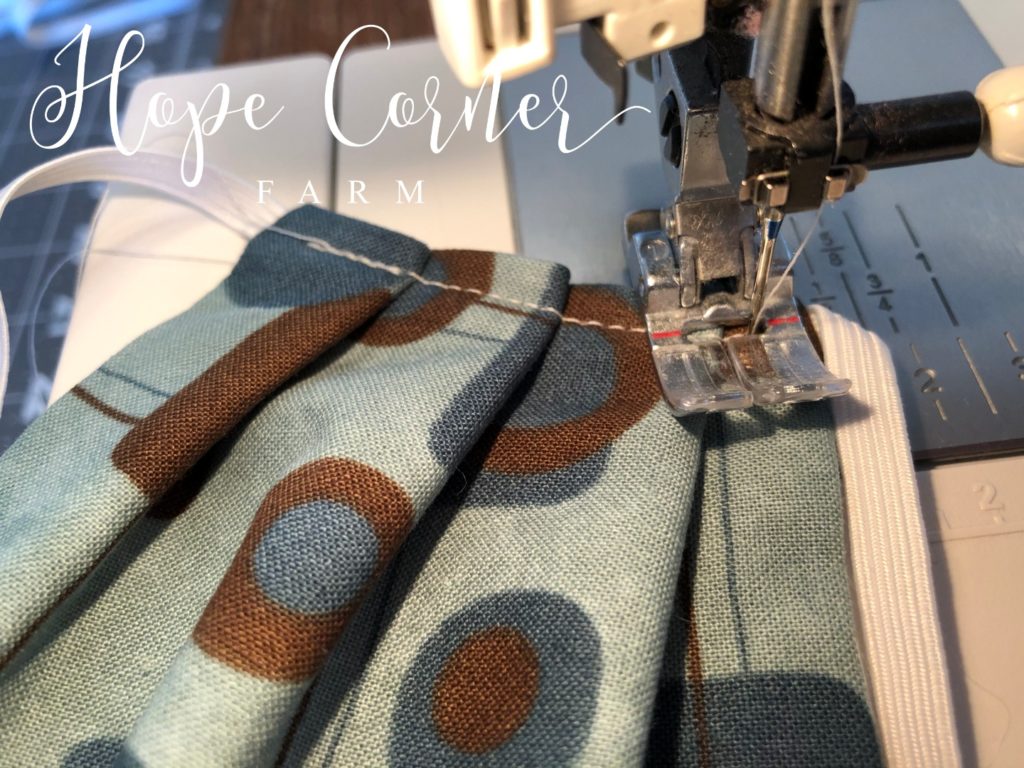
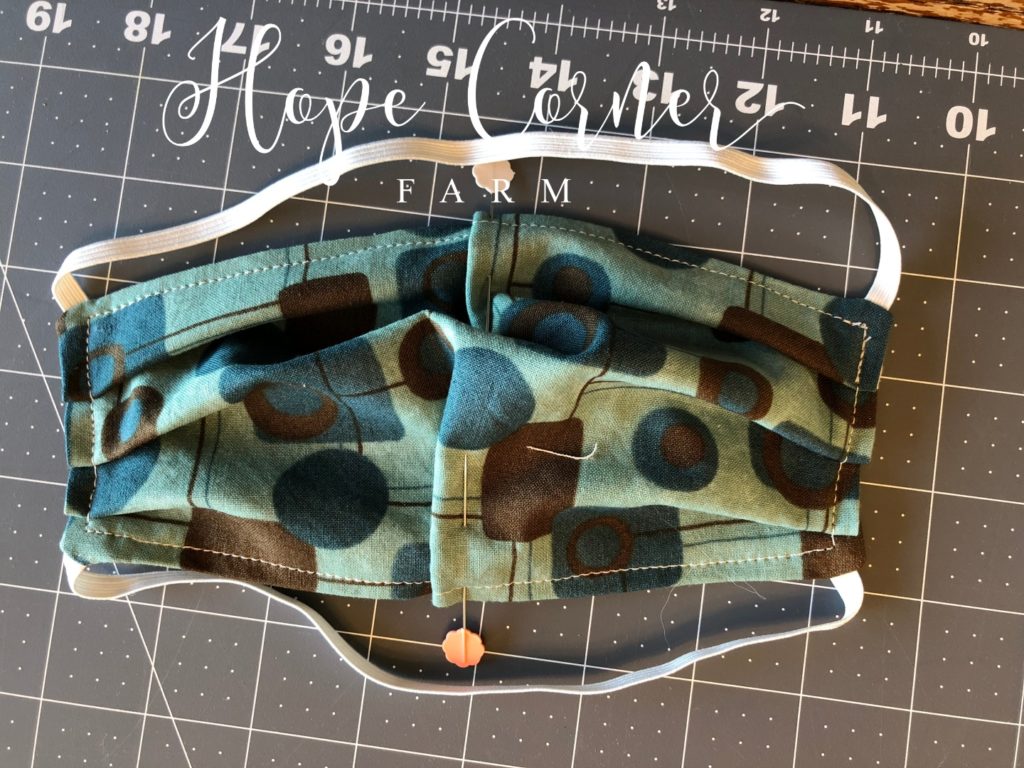
Putting in the Short Side Pleats:
Now, we need to place THREE 3/8″ pleats along EACH side of the mask. Make sure that the pleats on each side are facing in the same direction! Pin these in place with pins, or hold them in place with fabric clips.
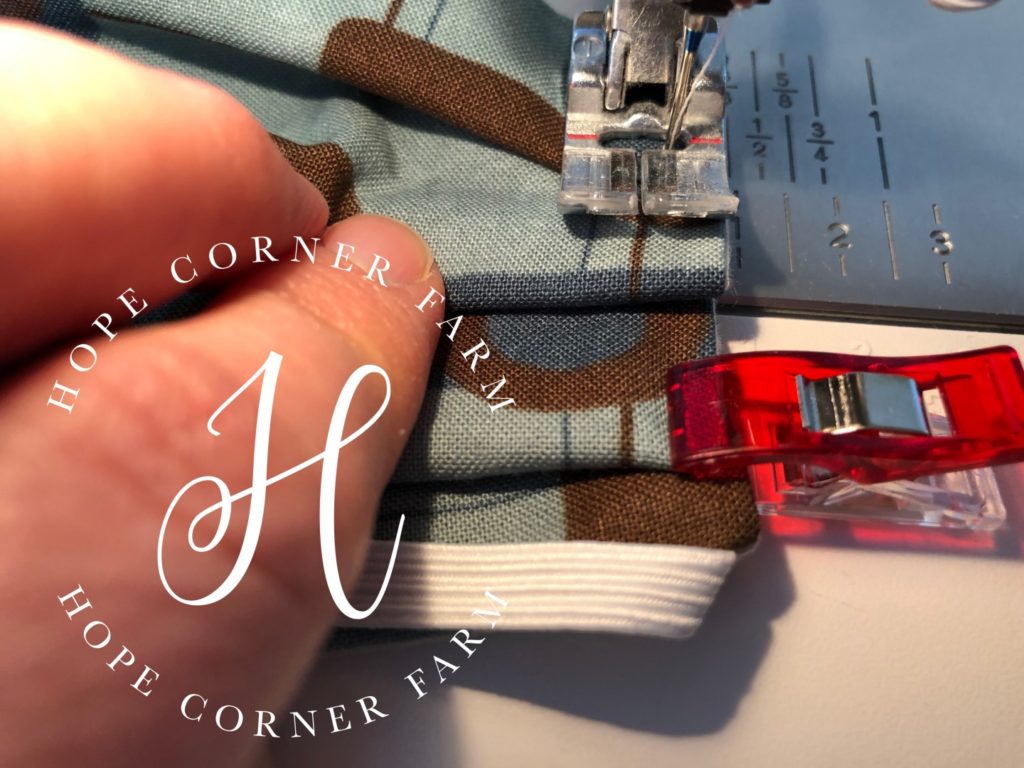
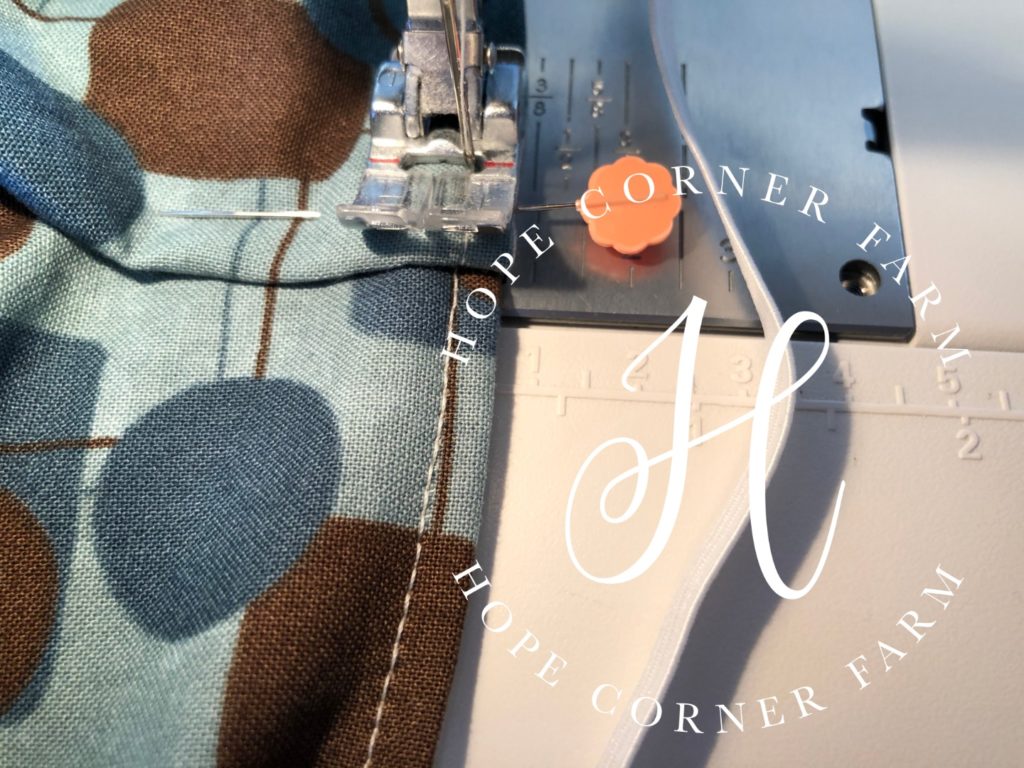
Now, top stitch around the entire mask with a 1/8″ seam allowance. Stitch over top of the pleats to hold them in place.
Remember to back stitch when you start sewing and when you end sewing.
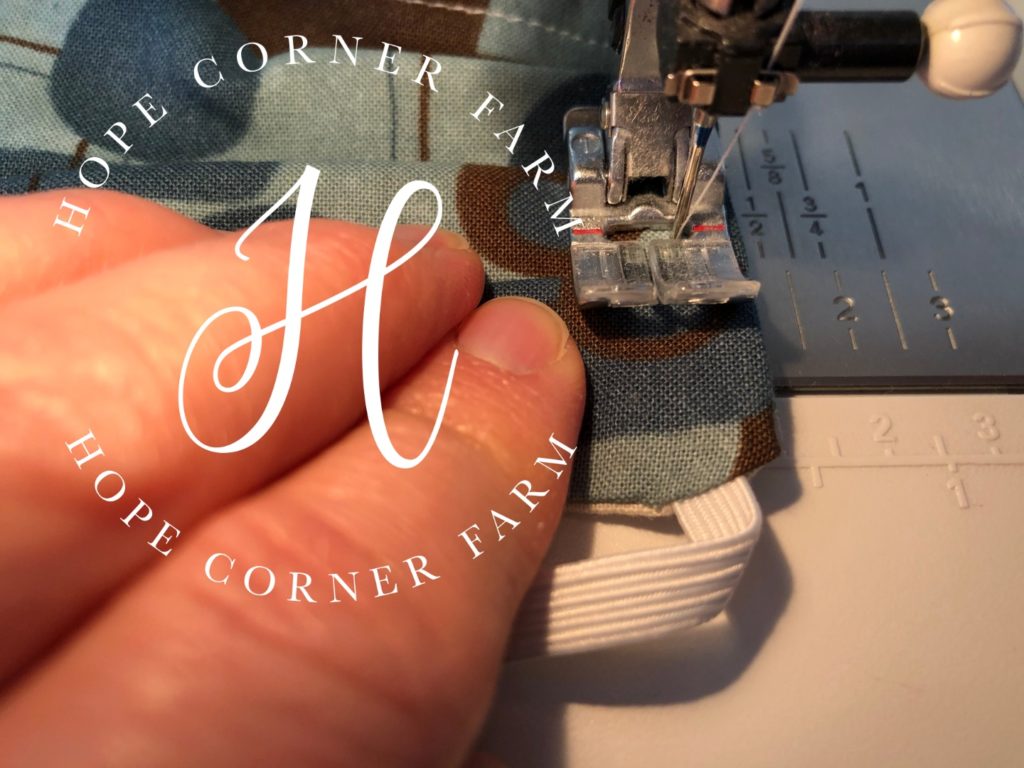
Placing the Nose Pleat & Chin Pleat:
To ensure a tighter fit for this mask, I added a small pleat at the nose and a larger pleat at the chin.
These pleats are placed in the middle of the long sides of the mask.
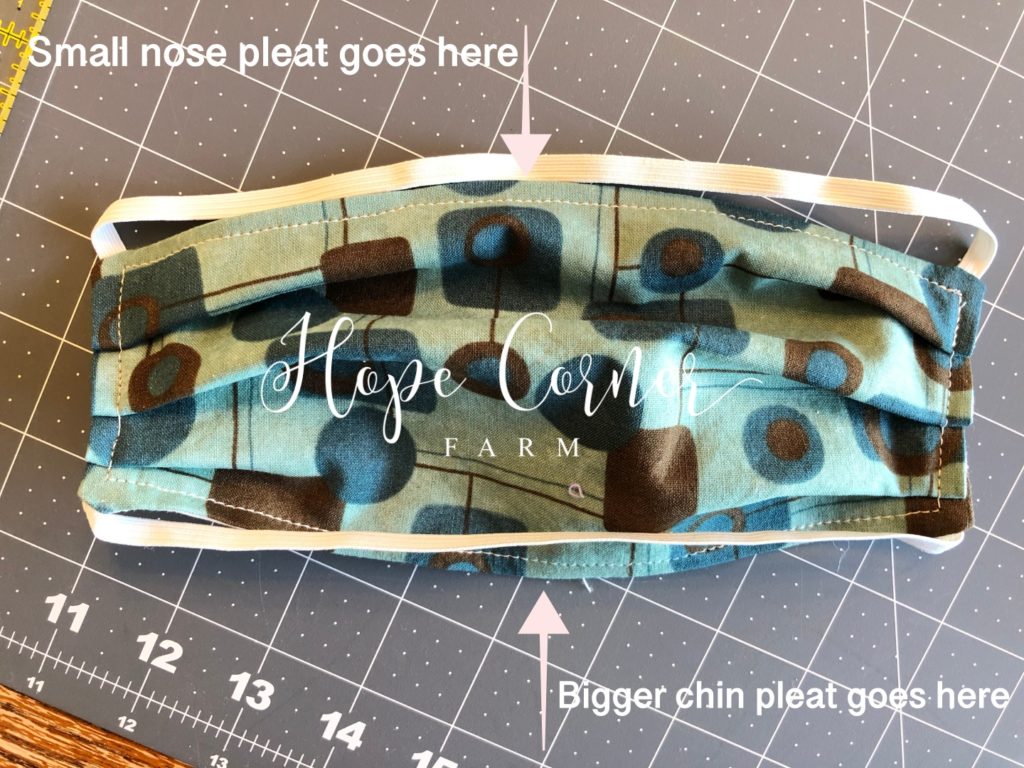
Place the small pleat in the middle of the top long (9″) edge. Pin or clip in place.
Place the larger pleat on the bottom long (9″) side. Pin or clip in place.
Top stitch around the entire face mask again. I just stitched right over the previous stop stitching. This will hold these new pleats in place.
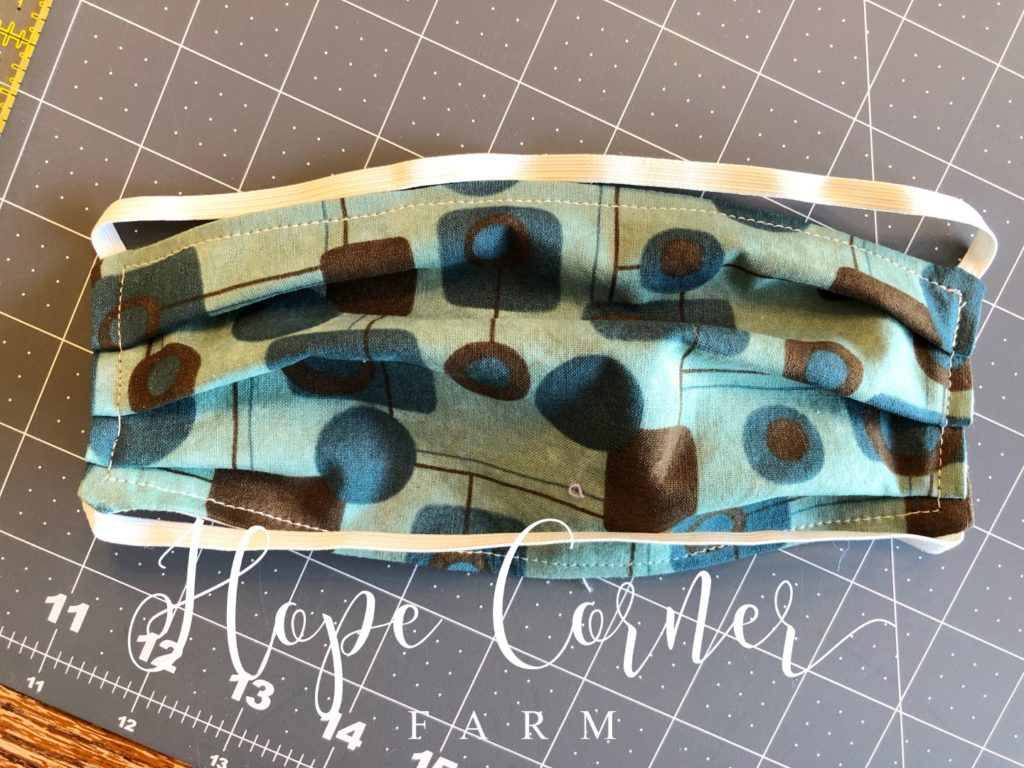
Here is the finished project!
Many Blessings,