
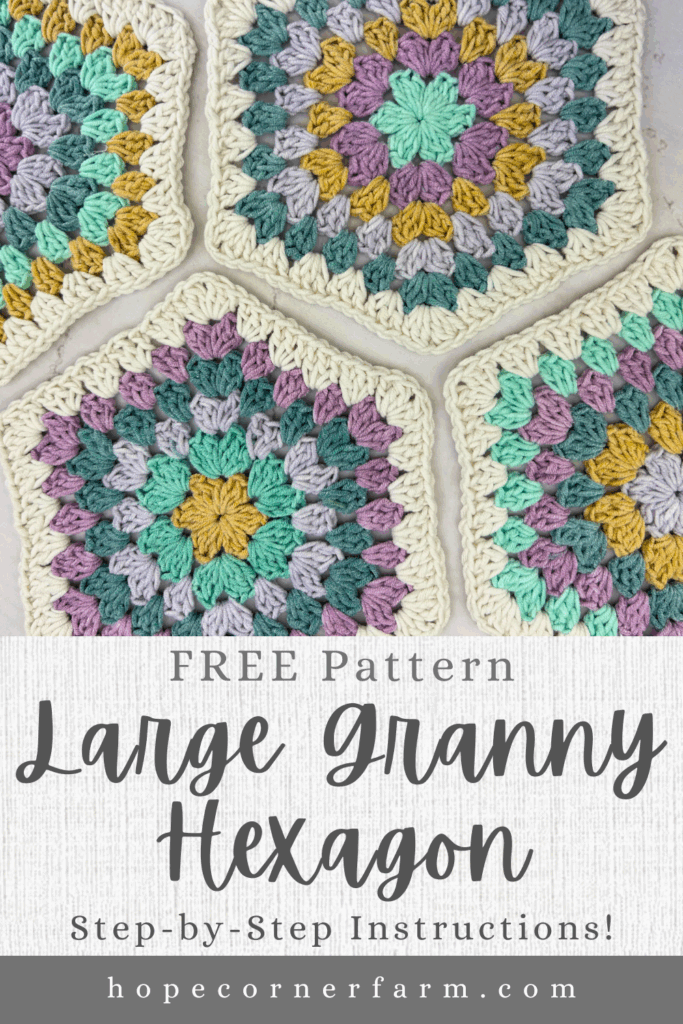
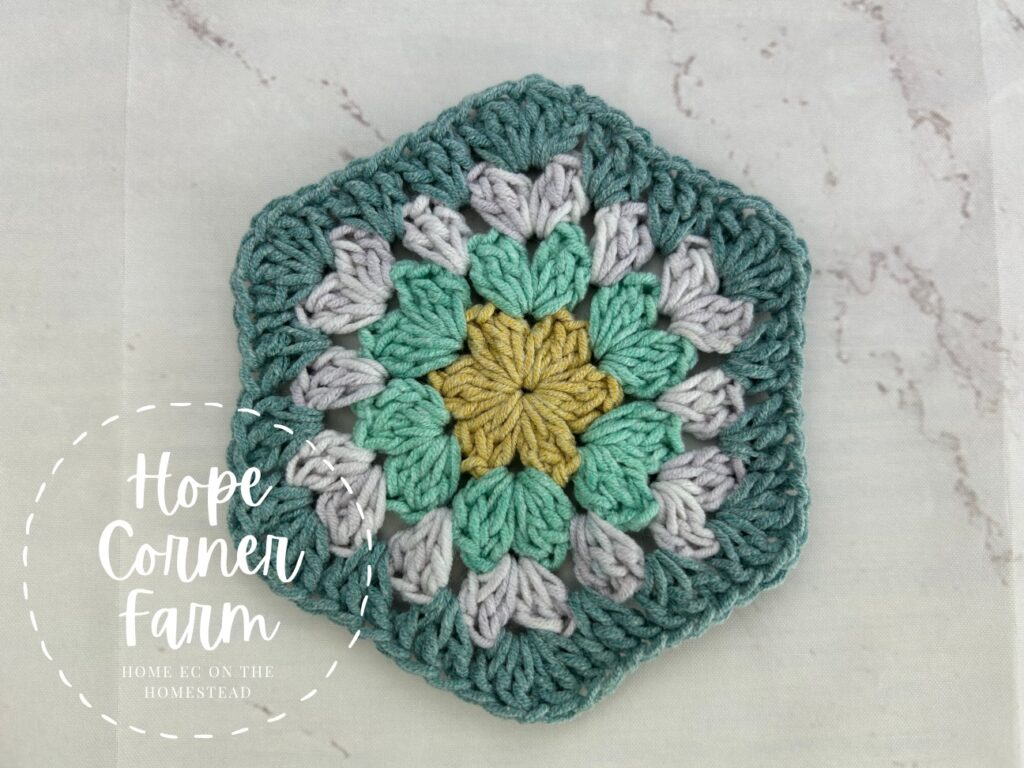
Crochet a Big Granny Hexagon – Beginner-Friendly Pattern + Photos
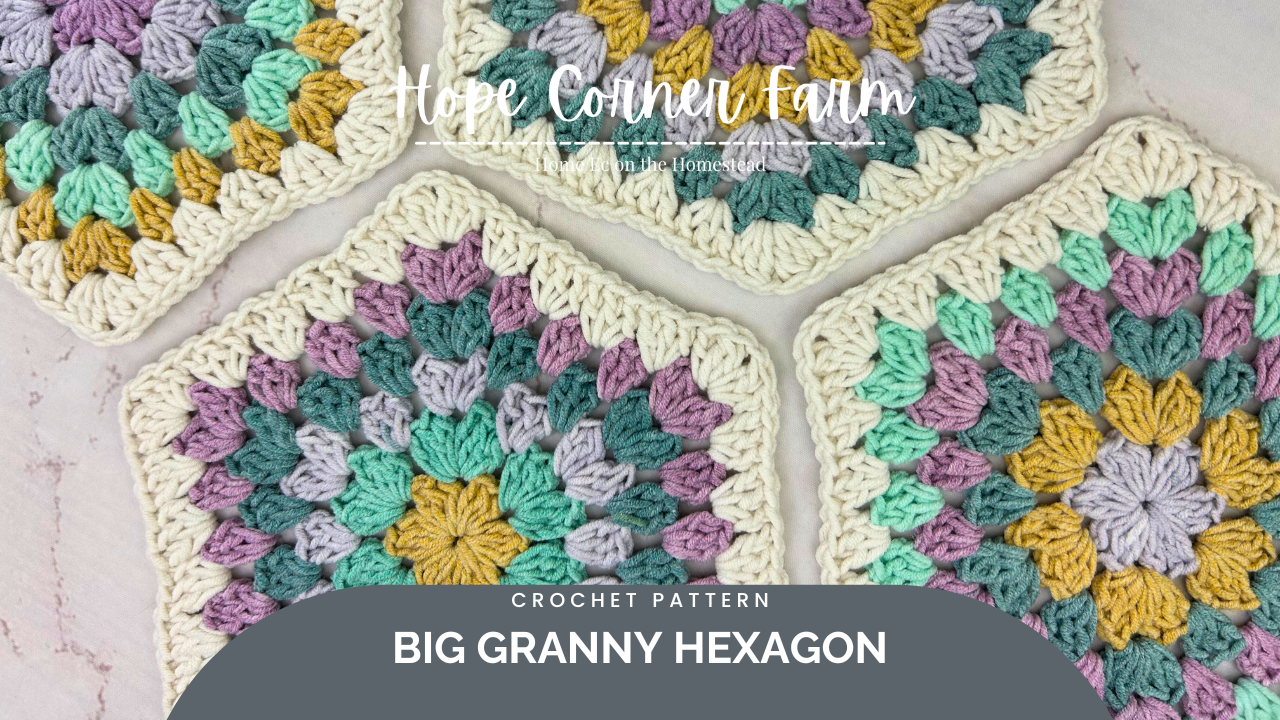

Looking for a fun and versatile crochet project? This large granny hexagon crochet pattern is perfect for adding a modern twist to a classic design. Whether you’re making a cozy blanket, a stylish shawl, or a unique wall hanging, this easy-to-follow pattern is ideal for beginners and seasoned crocheters alike. In this step-by-step tutorial, you’ll learn how to crochet a large granny hexagon using basic stitches, with tips for customizing the size and colors. Get your hook ready—this granny hexagon pattern is a must-try for any crochet lover!


First, check out our video tutorial on our You Tube Channel! Subscribe to get the latest crochet fun from Hope Corner Farm Crochet!
Materials Needed:
Medium weight size 4 yarn in 6 different colors (I used a Caron Cotton Painterly Cake in Turquoise Thrill as well as a Lion Brand Tom Daley Made with Love The Cottony One in Lychee White)
Size G (4.0mm) Crochet Hook
Scissors
Yarn Needle
Blocking Board (Optional)
This crochet tutorial is written using US Crochet Terms
Crochet Stitches Used:
Double Crochet 2 Together (DC2Tog)
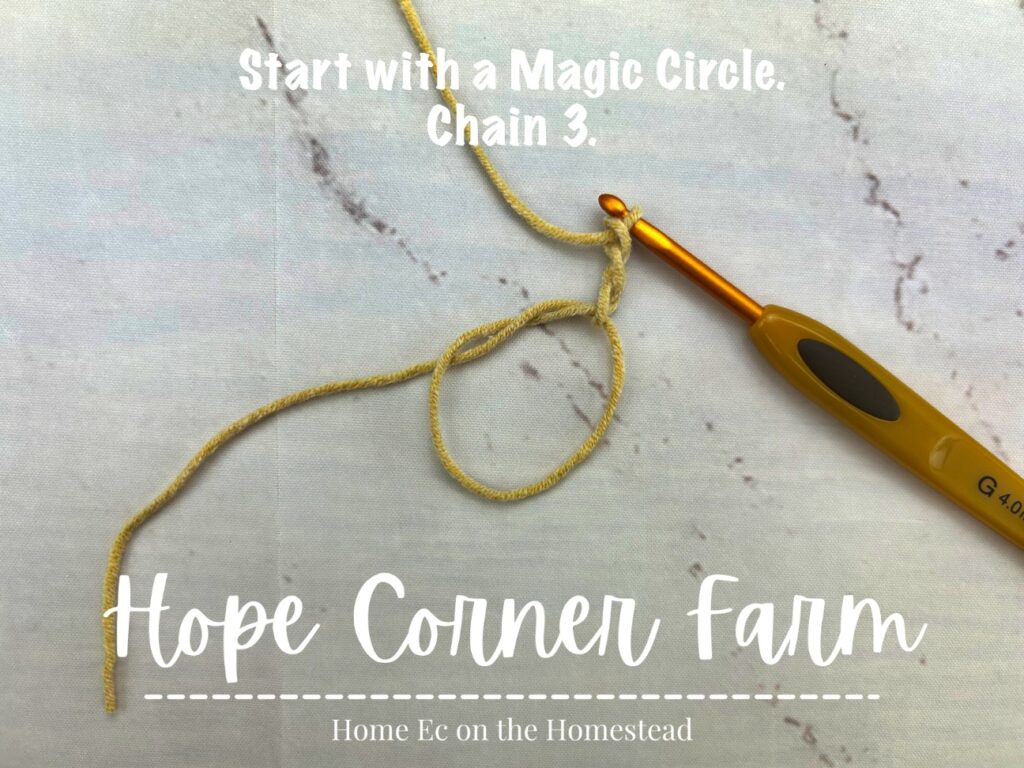
Round 1:
Begin with a Magic Circle. Chain 3 (this counts as a DC and it is counted in the stitch count for this round).
Now, into the MC place: DC2Tog, DC, Ch 1.
Next, place the following into the Magic Circle: (DC, DC2Tog, DC, Ch 1, DC, DC2Tog, DC, Ch 1) 5xs. There will be 6 “sections” in the MC at this point. These 6 sections become the 6 corners of the hexagon.
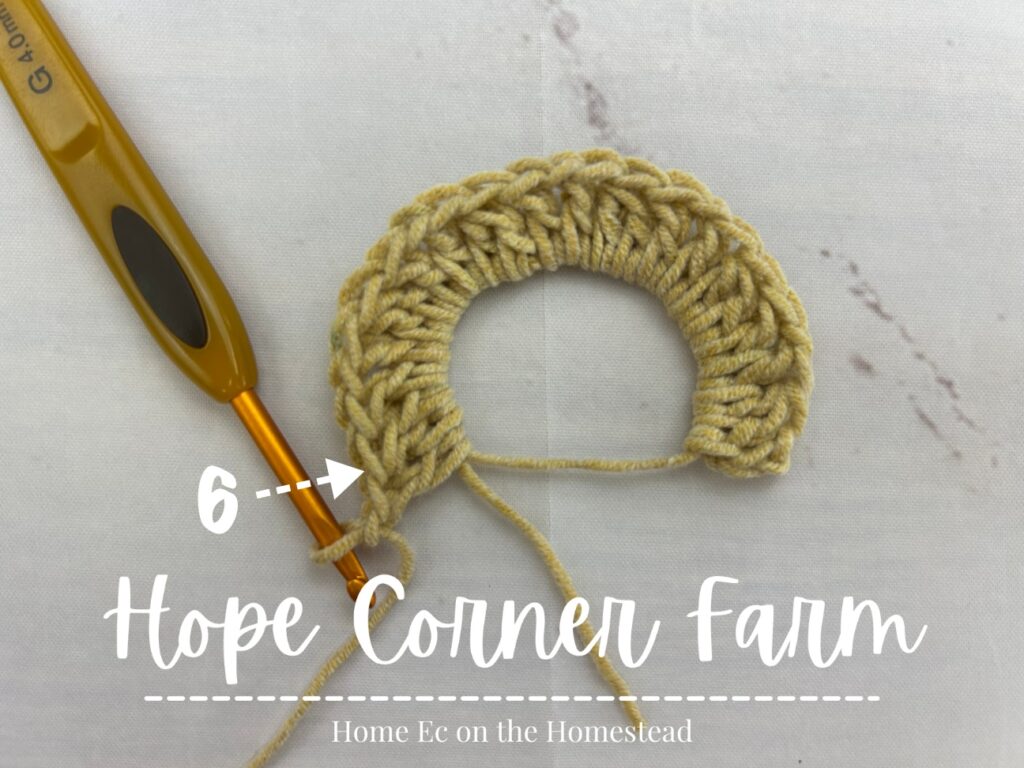
Finally, tighten the magic circle. Then, join with a Slip Stitch to the top of the Chain 3.
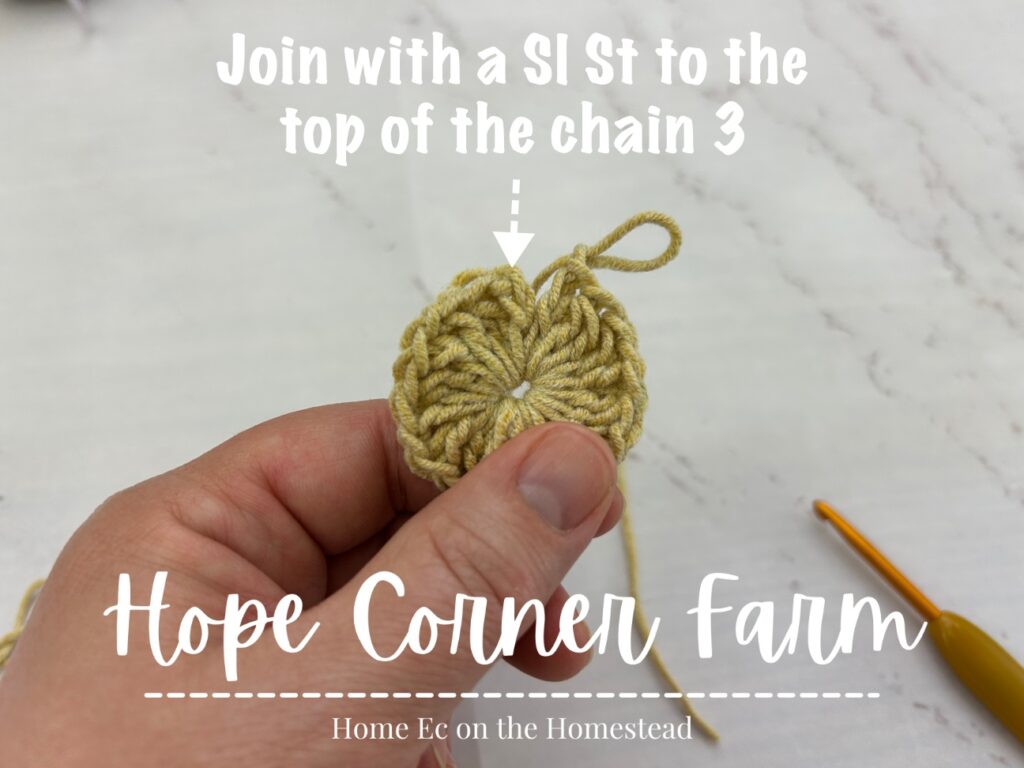
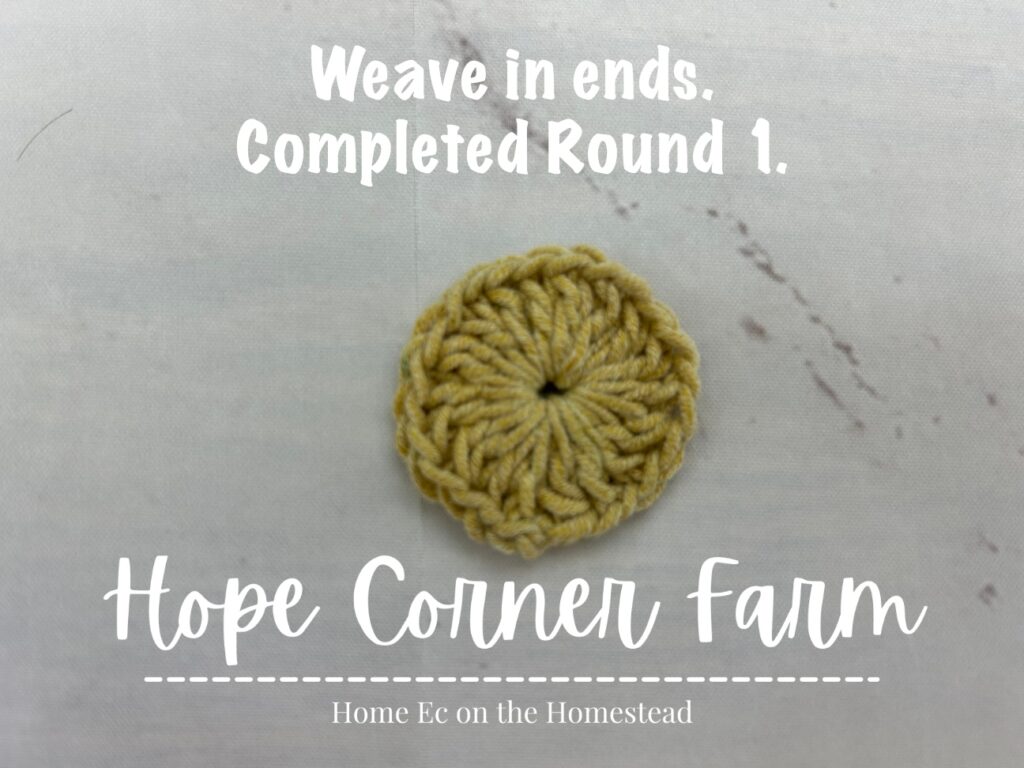
Now cut the yarn free, fasten off, weave in ends. Round 1 complete. (24)
Large Granny Hexagon – Round 2:
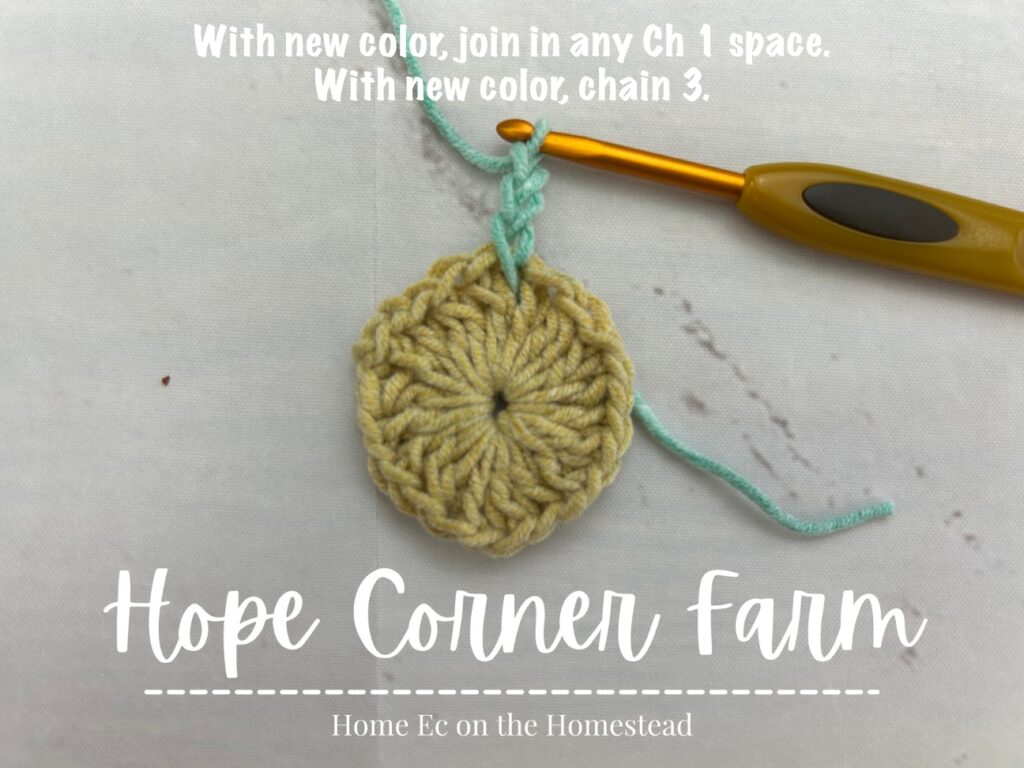
Next into any chain 1 space Slip Stitch with the new yarn color. Chain 3.
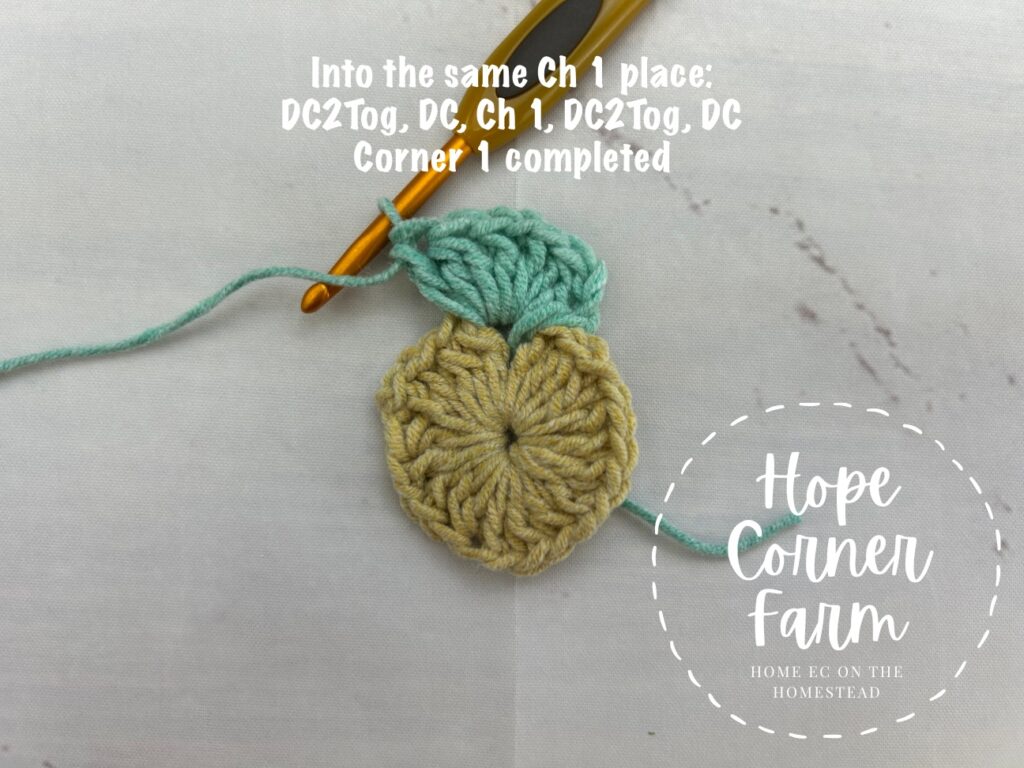
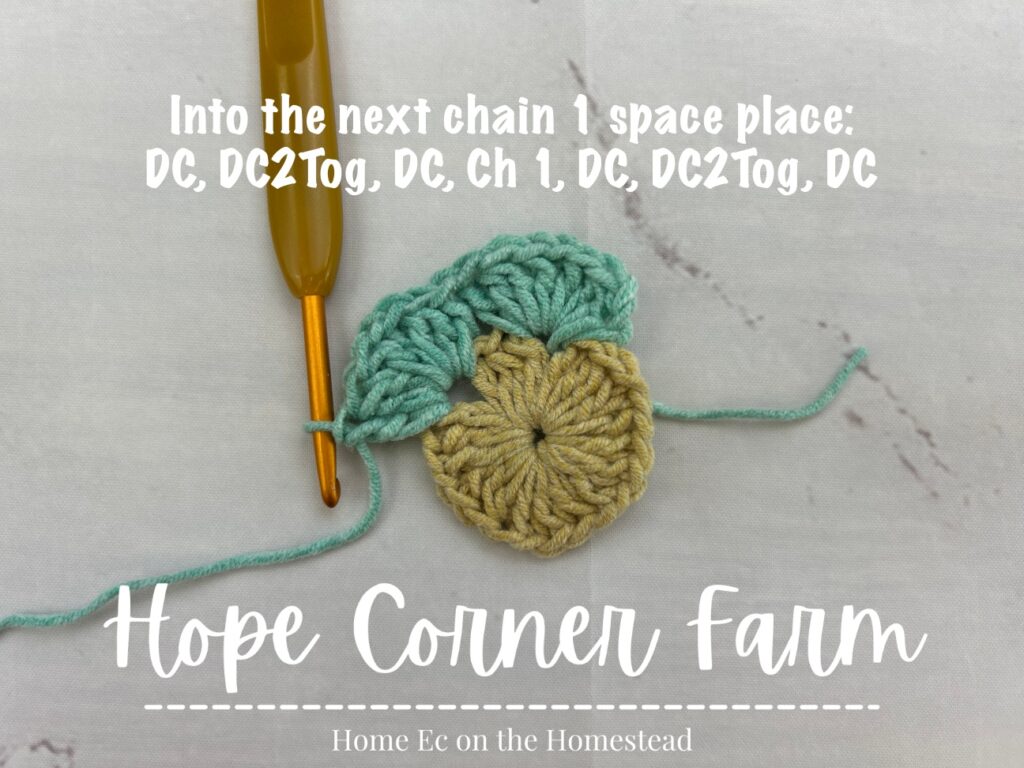
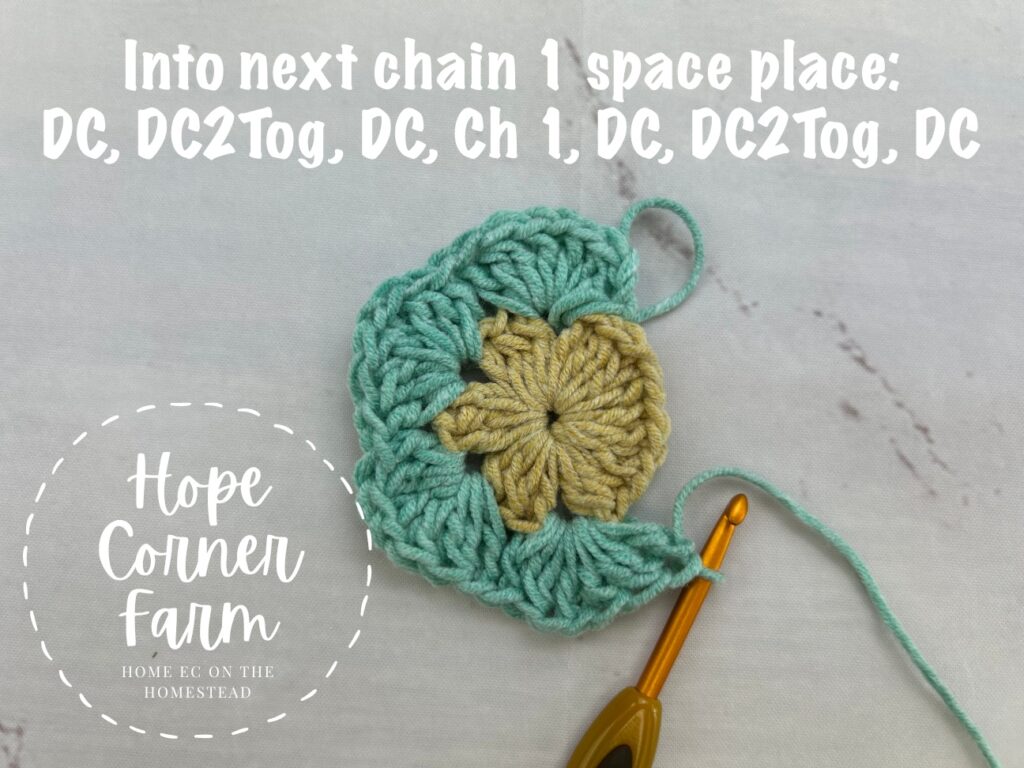
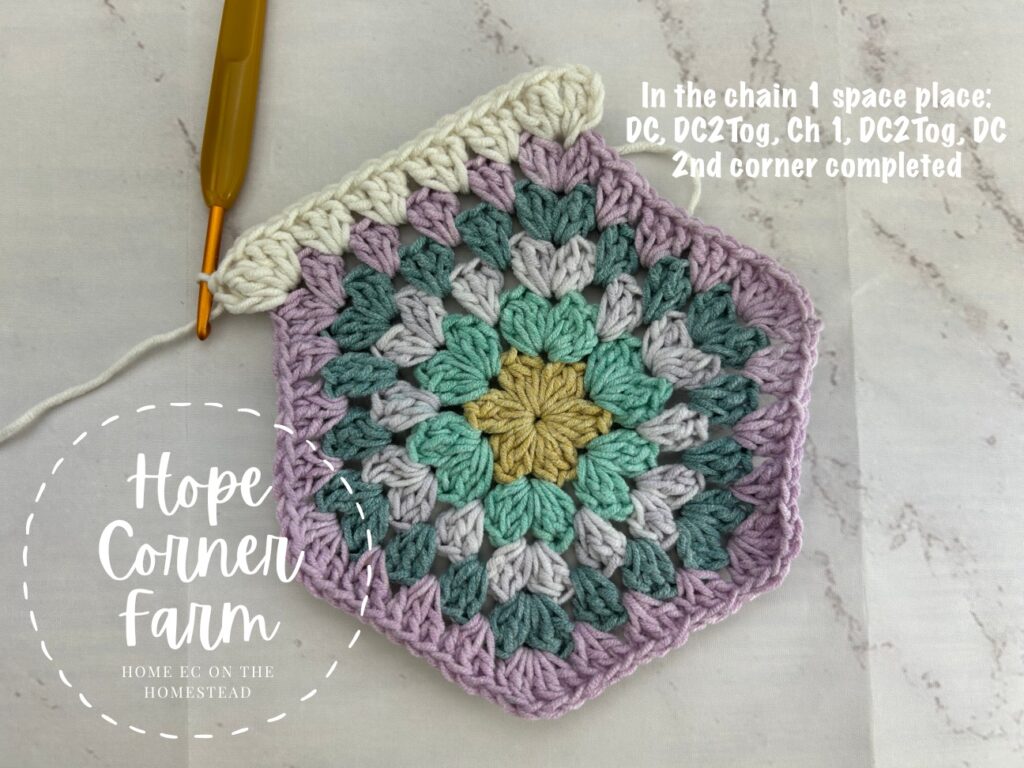
Now working into the SAME Chain 1 space place: DC2Tog, DC, Ch 1, DC, DC2Tog, DC. This completes the 1st corner of the hexagon.
Next in each of the 5 remaining Ch 1 spaces place the following: DC, DC2Tog, DC, Ch 1, DC, DC2Tog, DC. There will be 6 corners TOTAL completed.

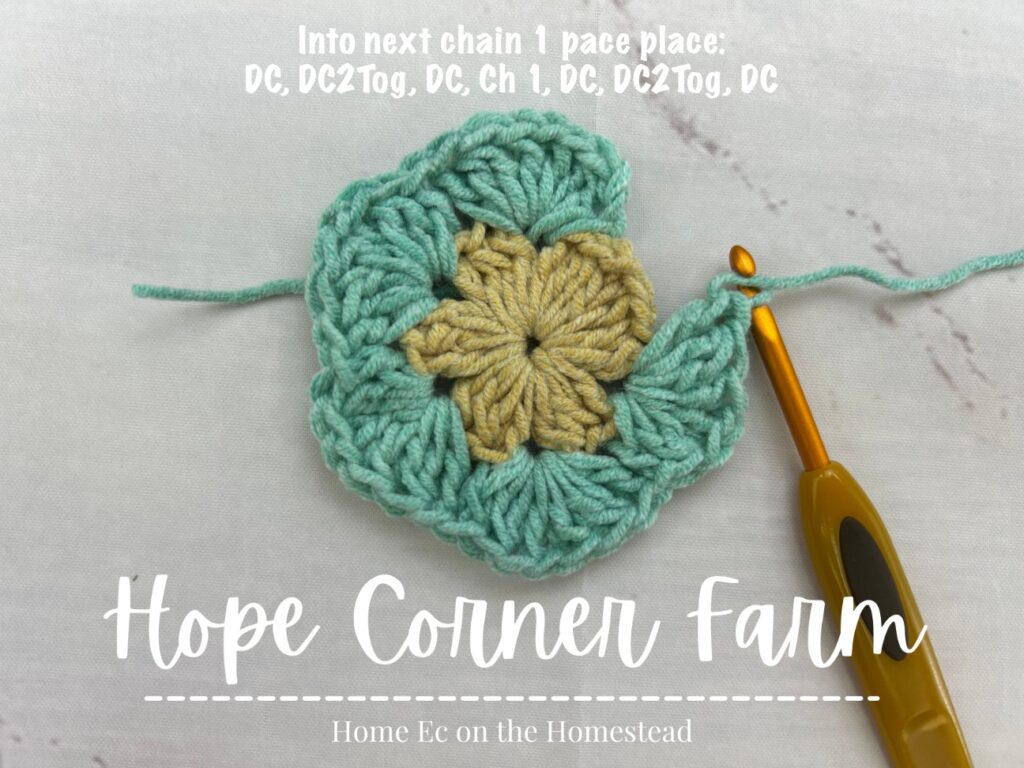

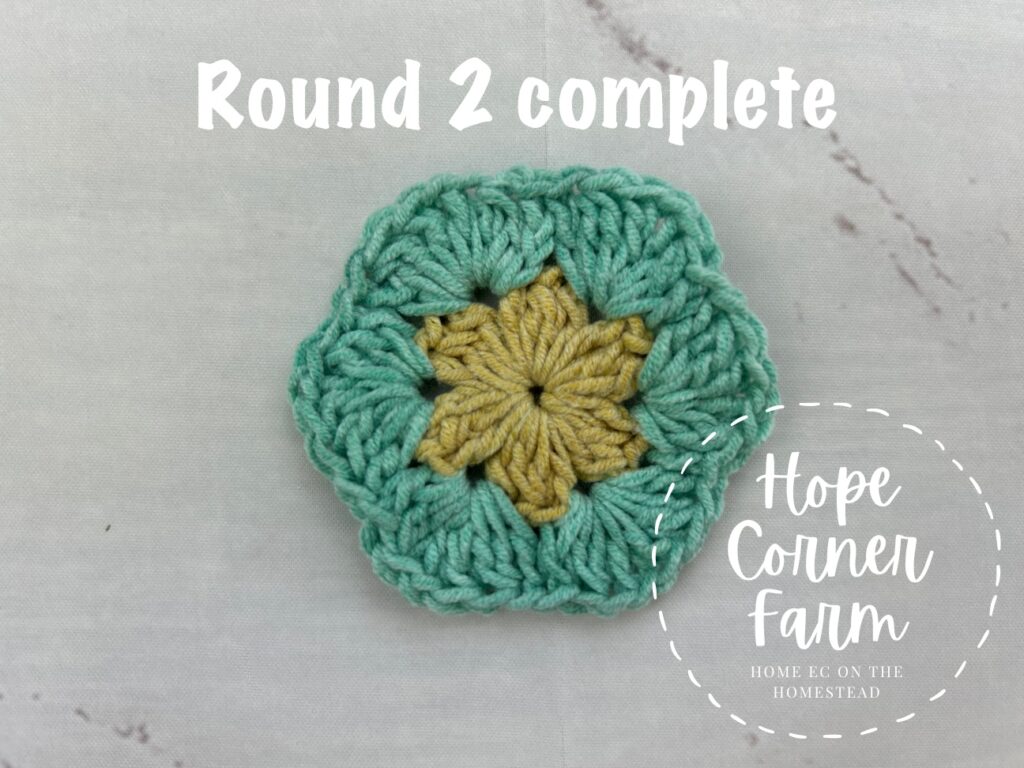
Finally to finish the round, join with a Slip Stitch to the top of the Chain 3. Cut yarn free. Fasten off. Weave in ends. (42)
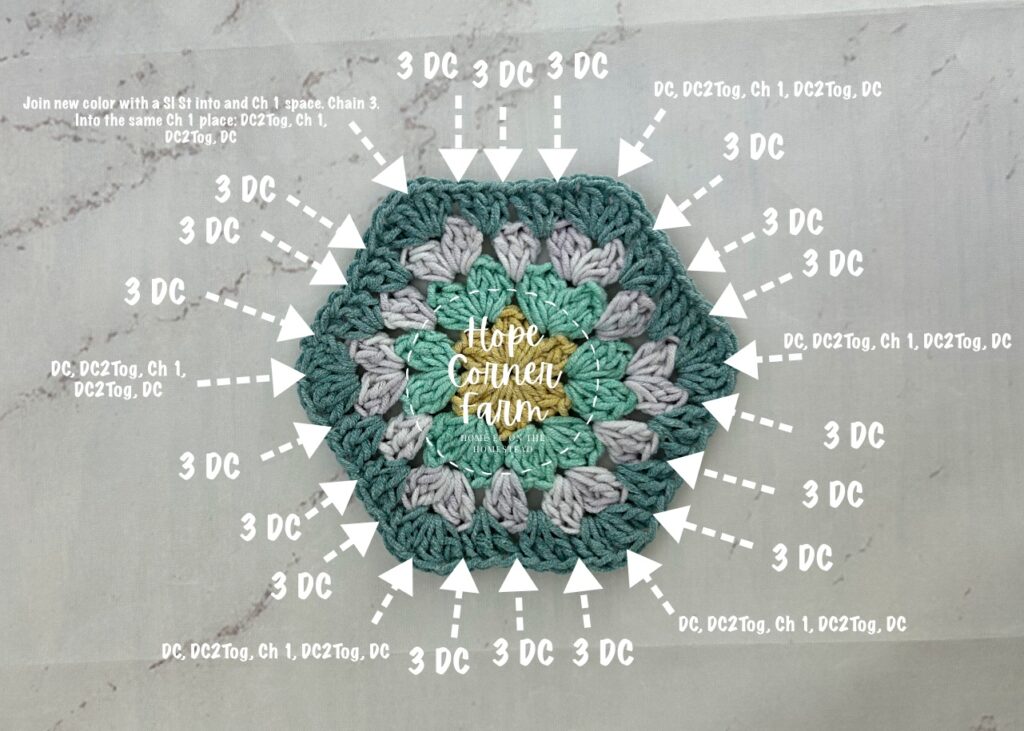
Round 3:
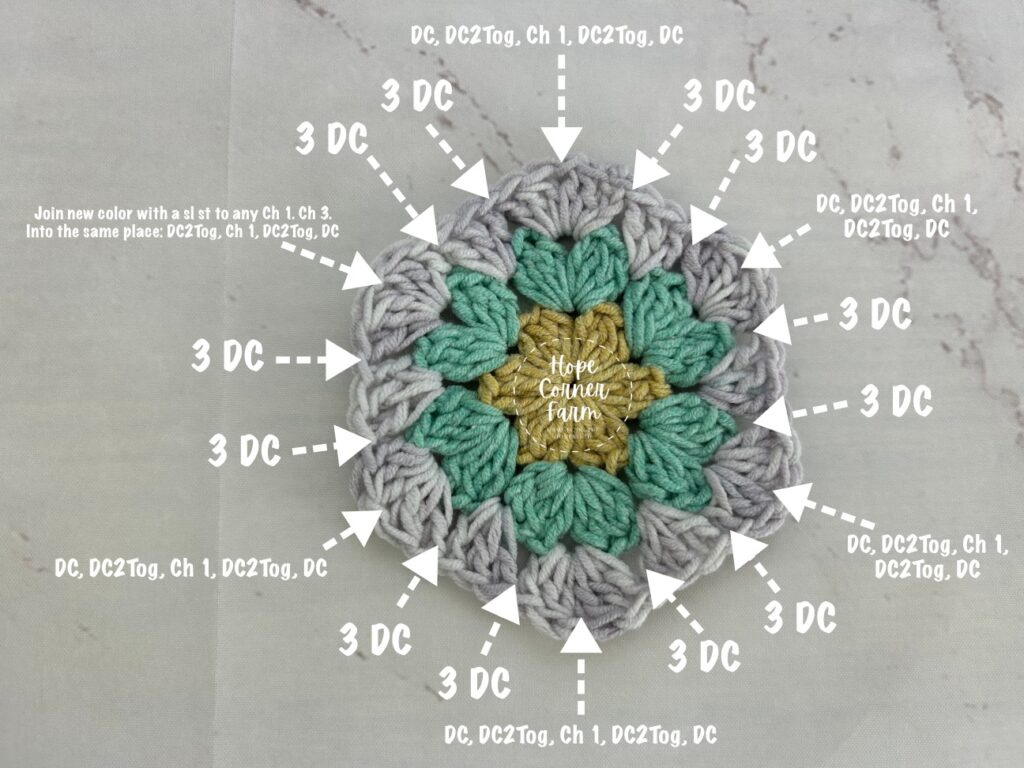
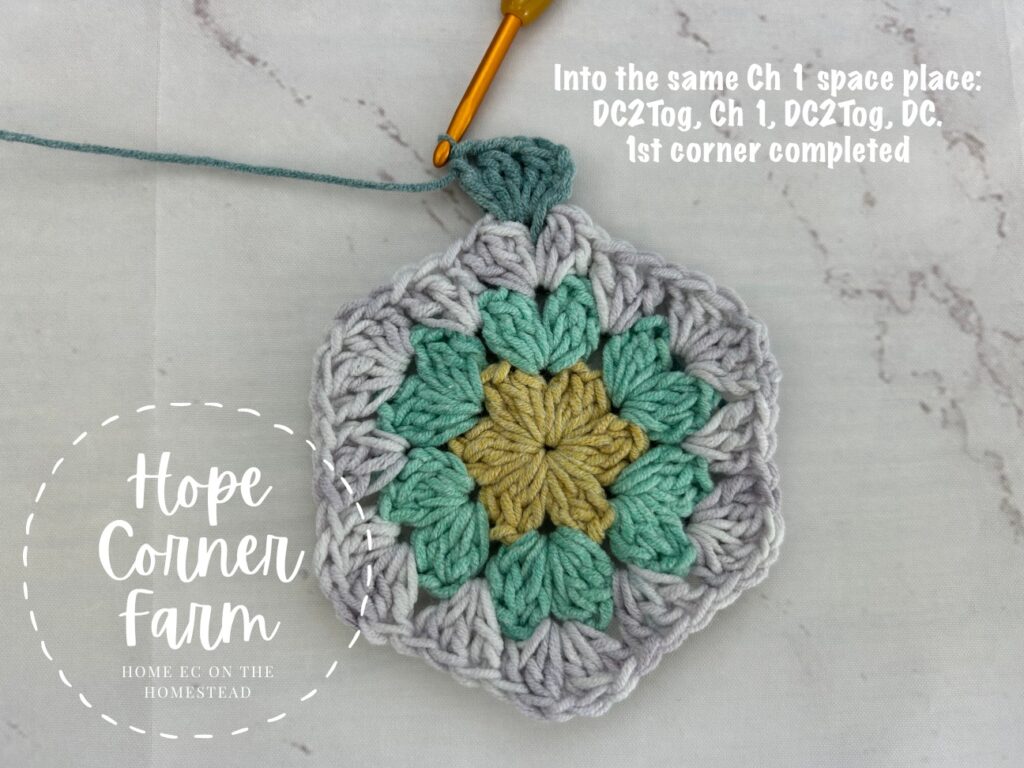
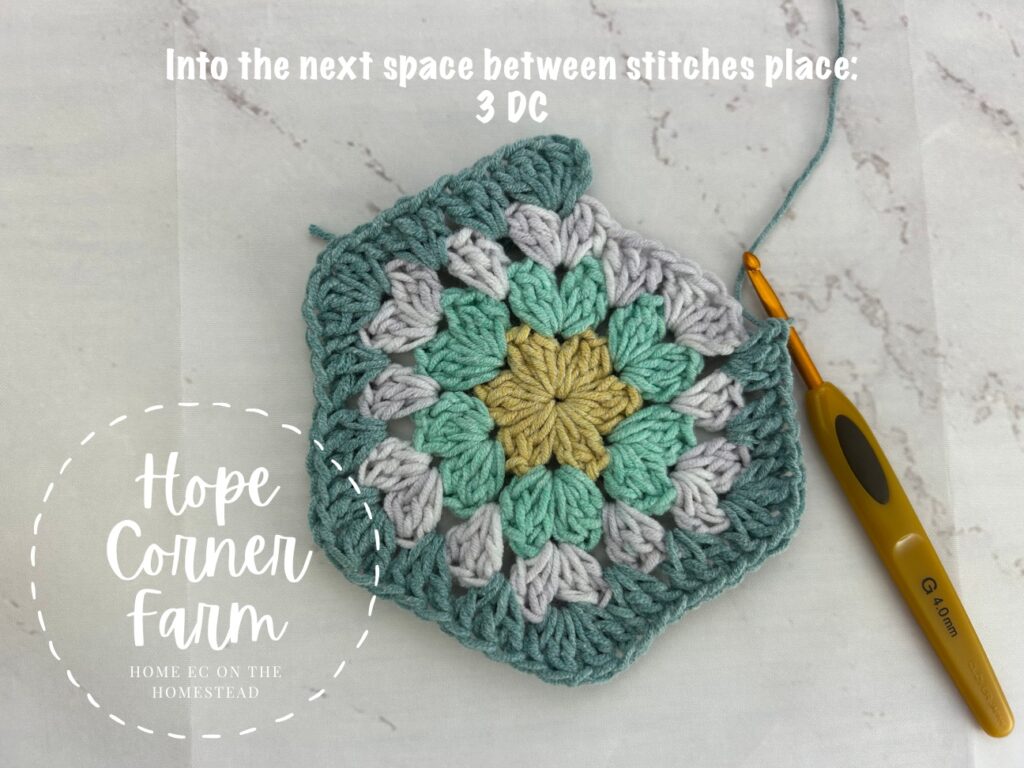
First look at the picture below for stitch placement for Round 3.
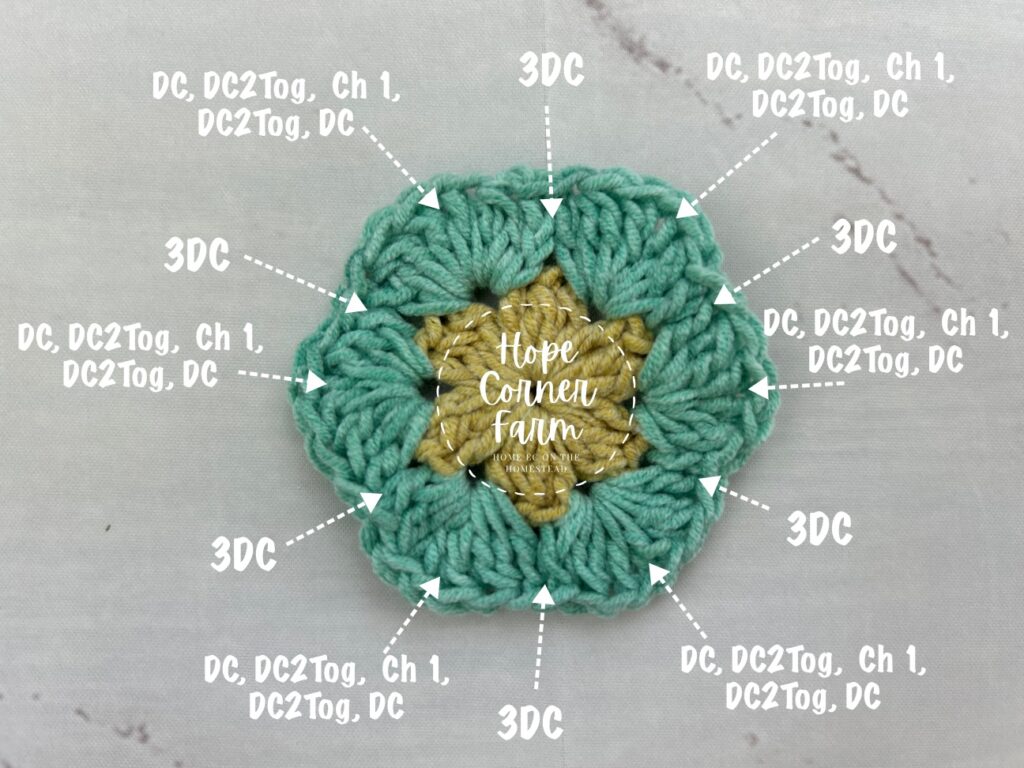
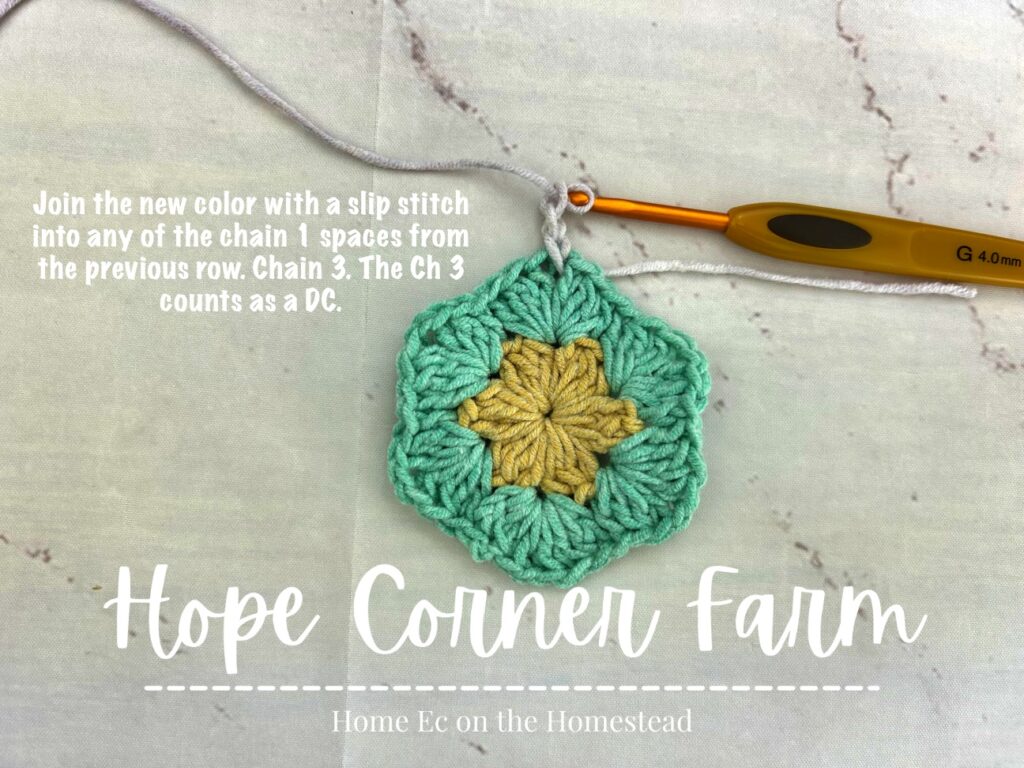
Begin Round 3 by Slip Stitching with Color #3 into any of the Chain 1 spaces from the previous round. Chain 3 (again this counts as a DC and is counted in the stitch count.
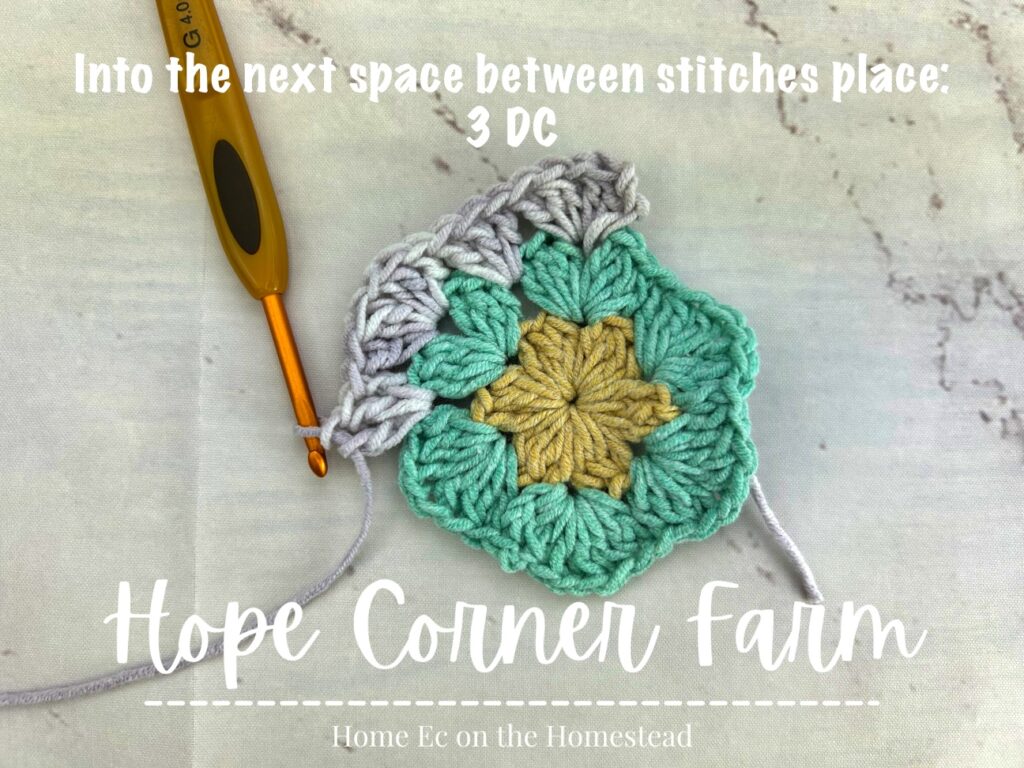
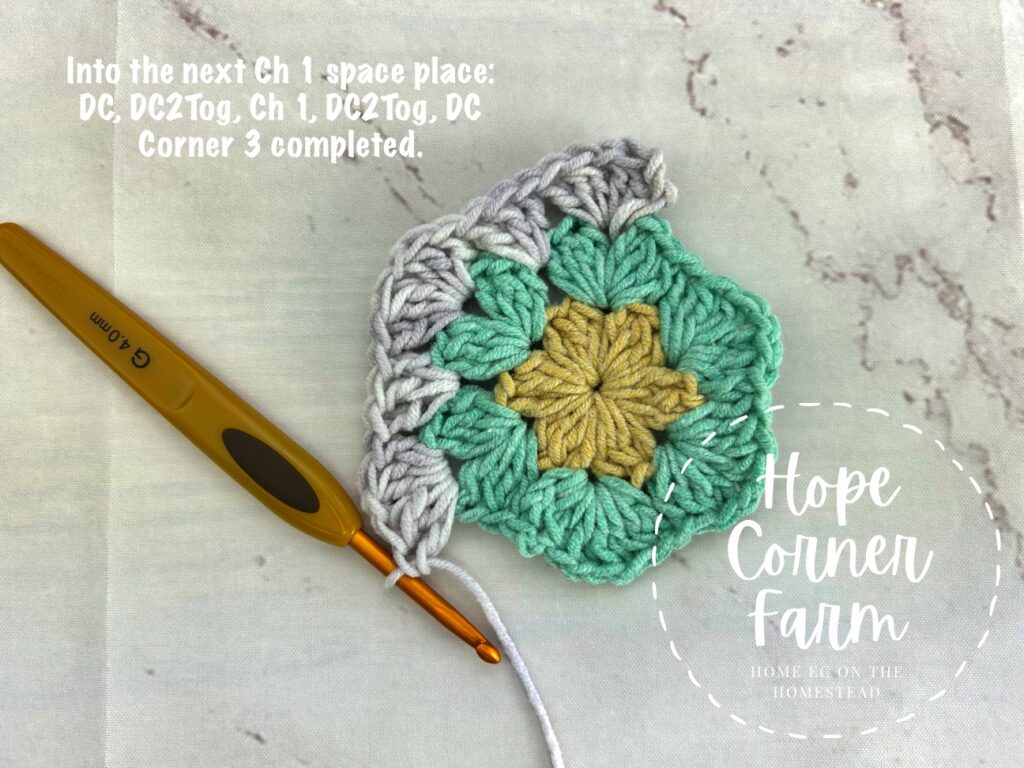
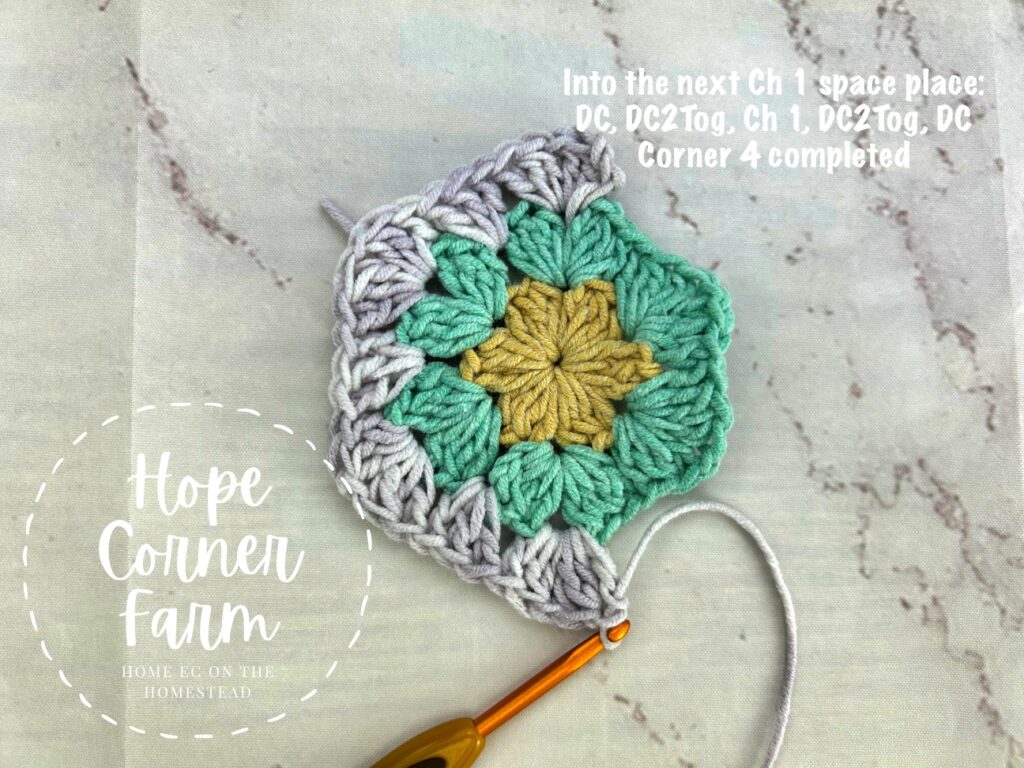
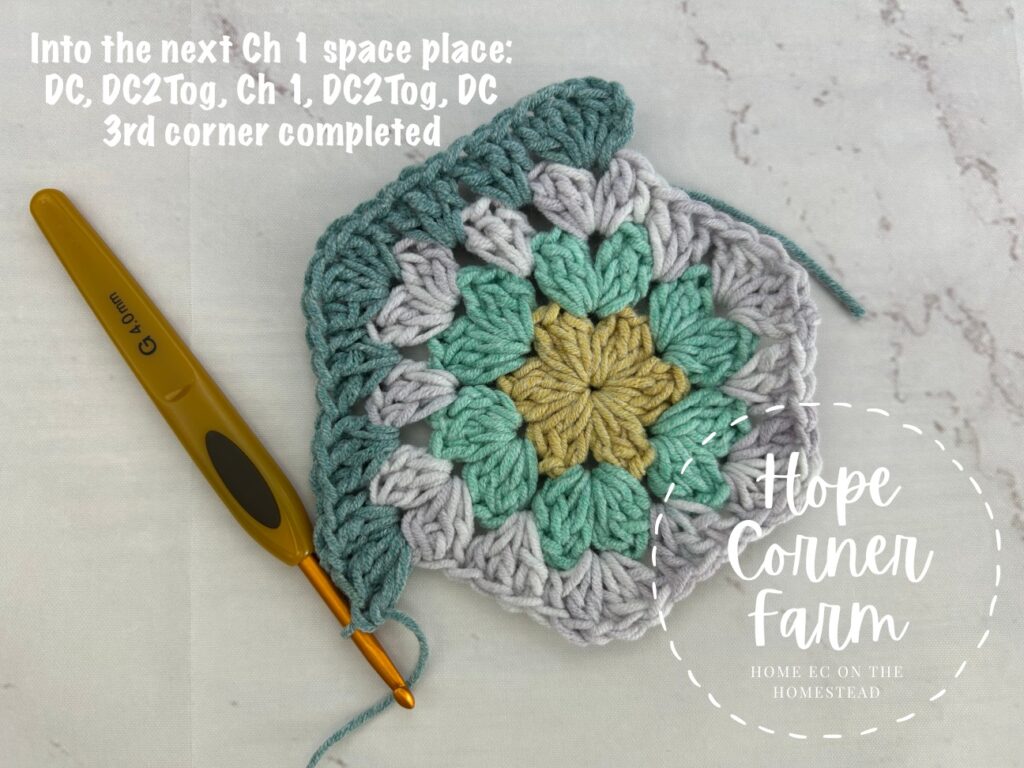
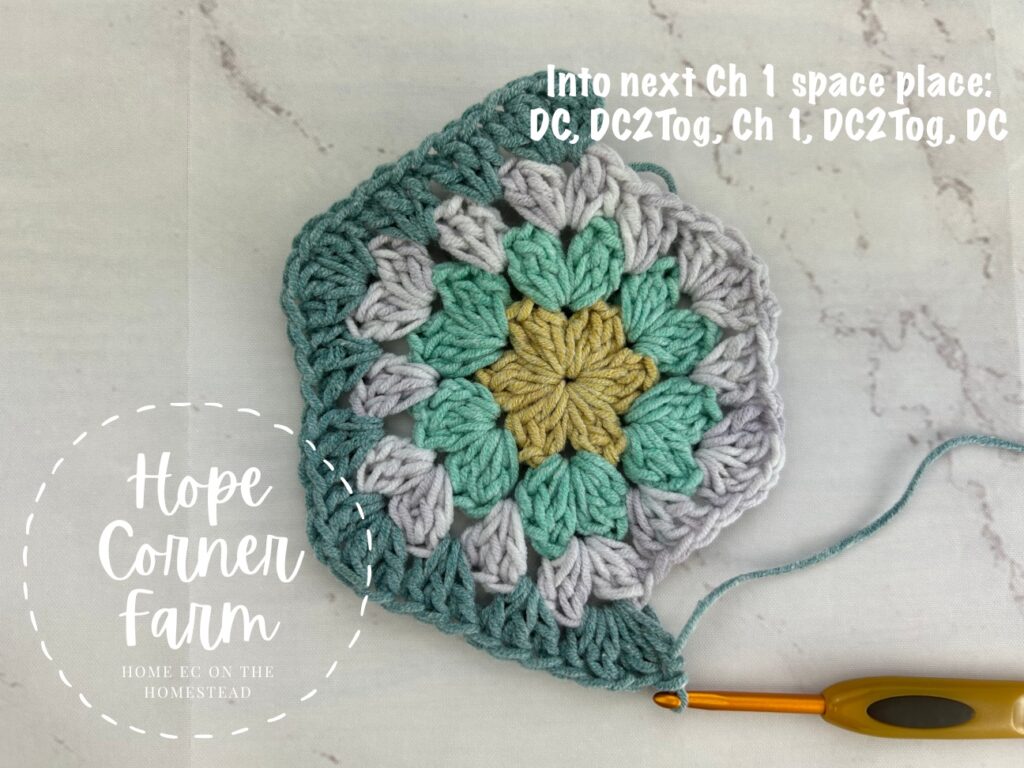
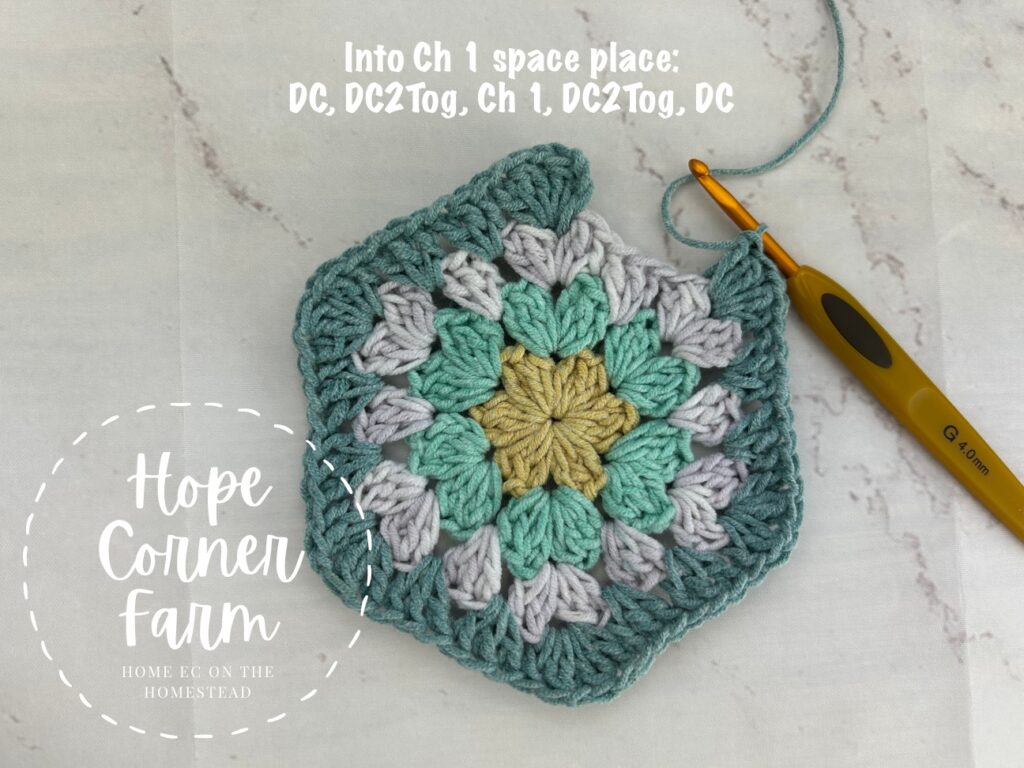
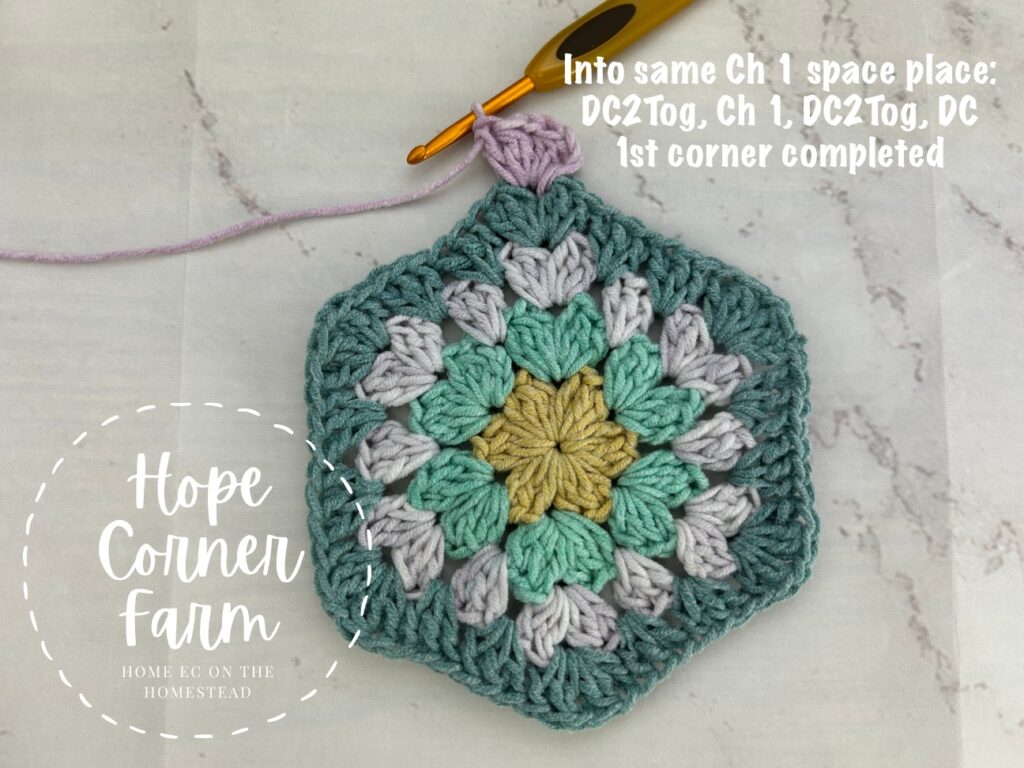
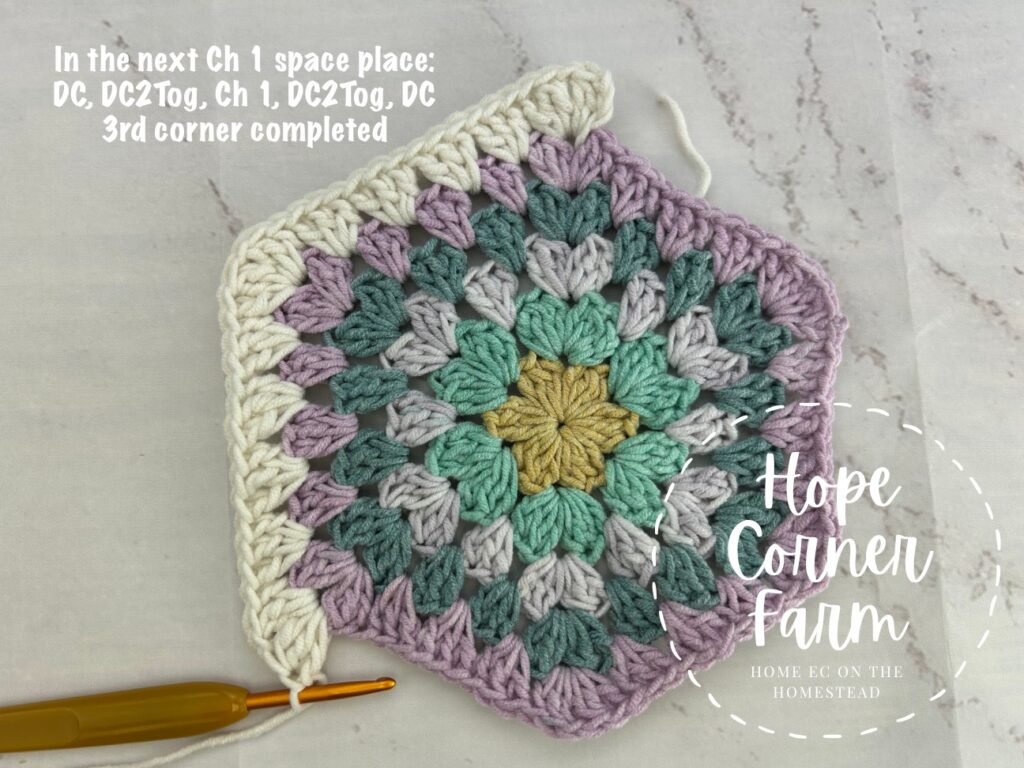
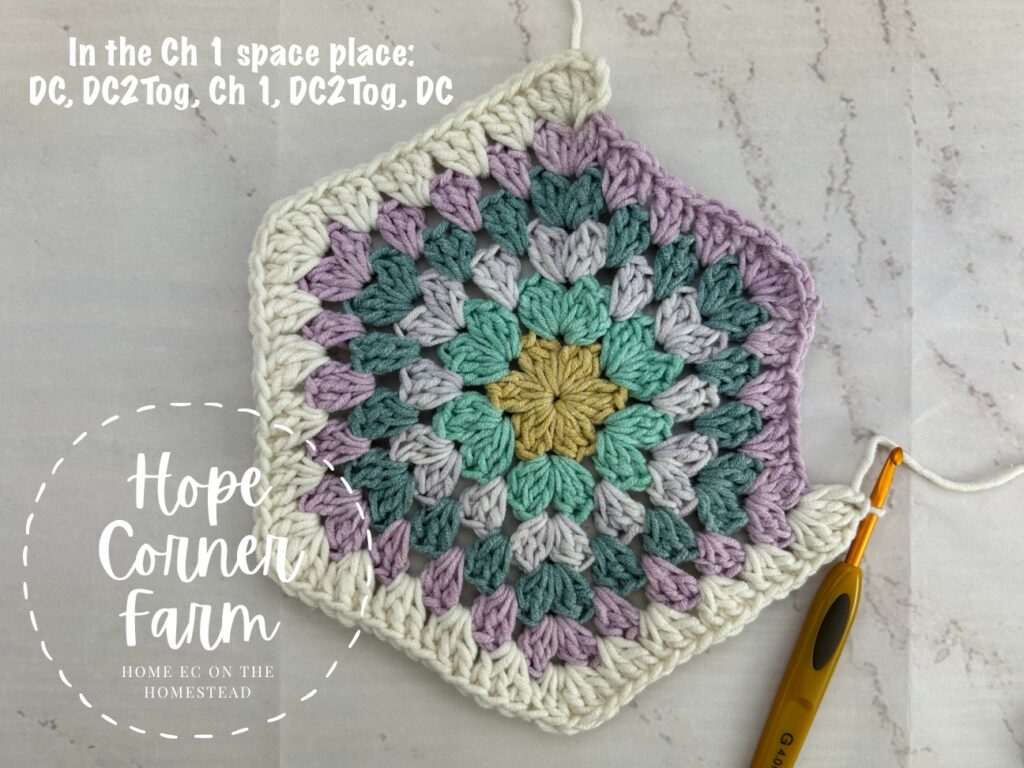
Now into the same Chain 1 space place: DC2Tog, Ch 1, DC2Tog, DC. This completes the first corner of the Hexagon.

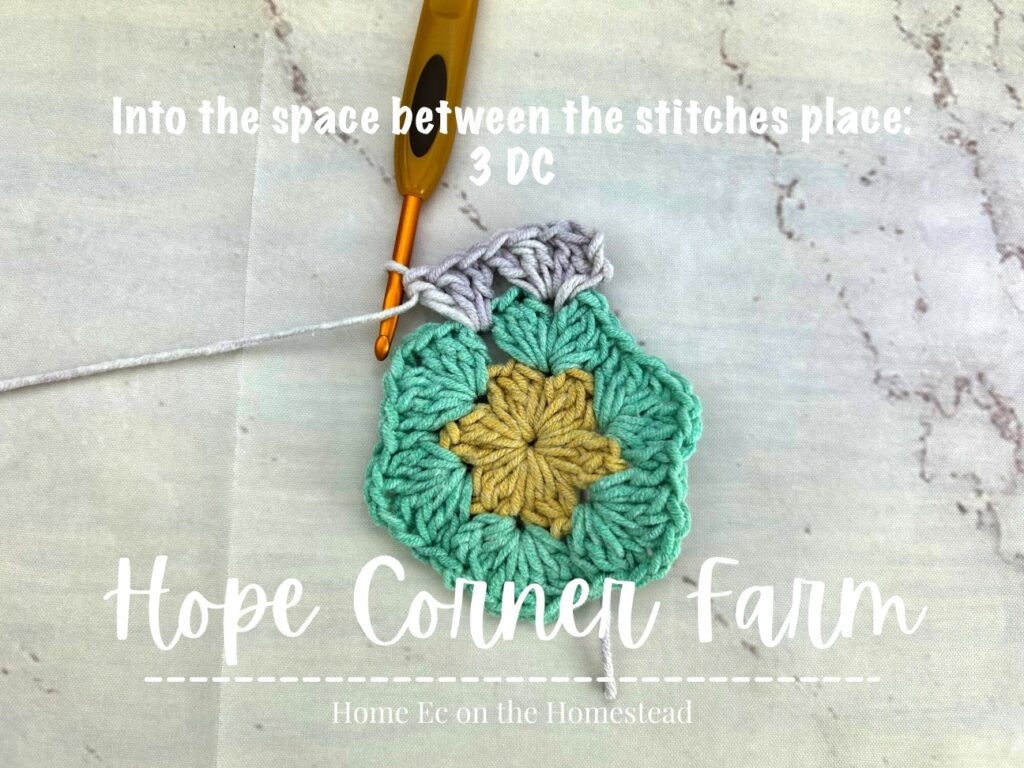
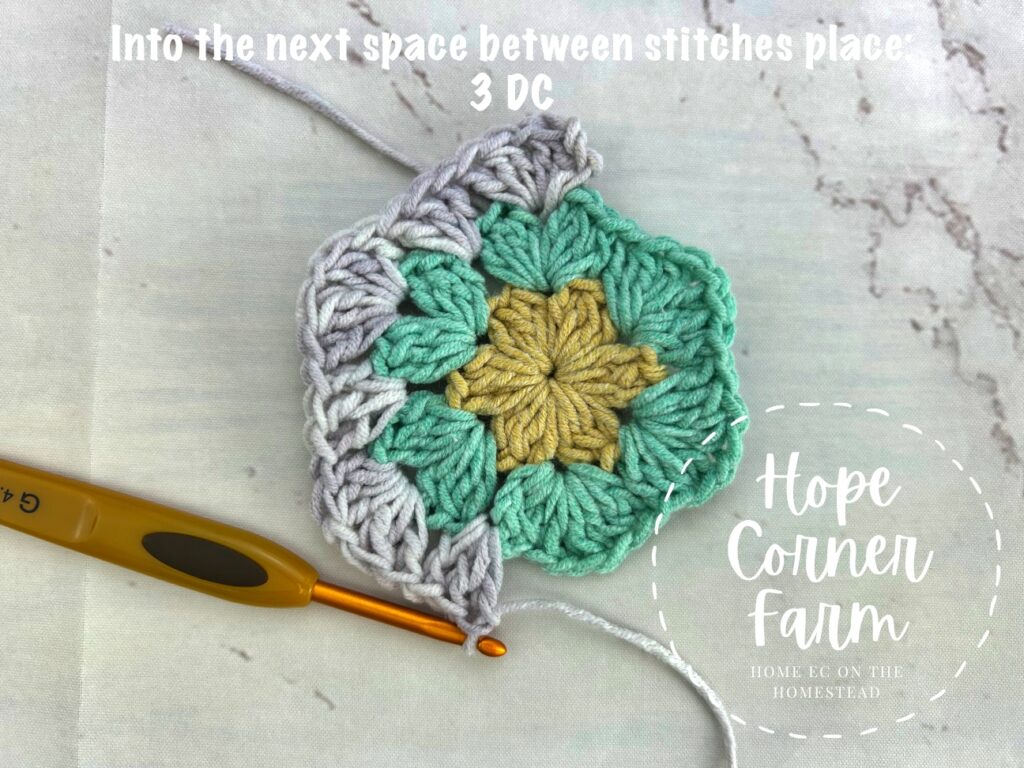
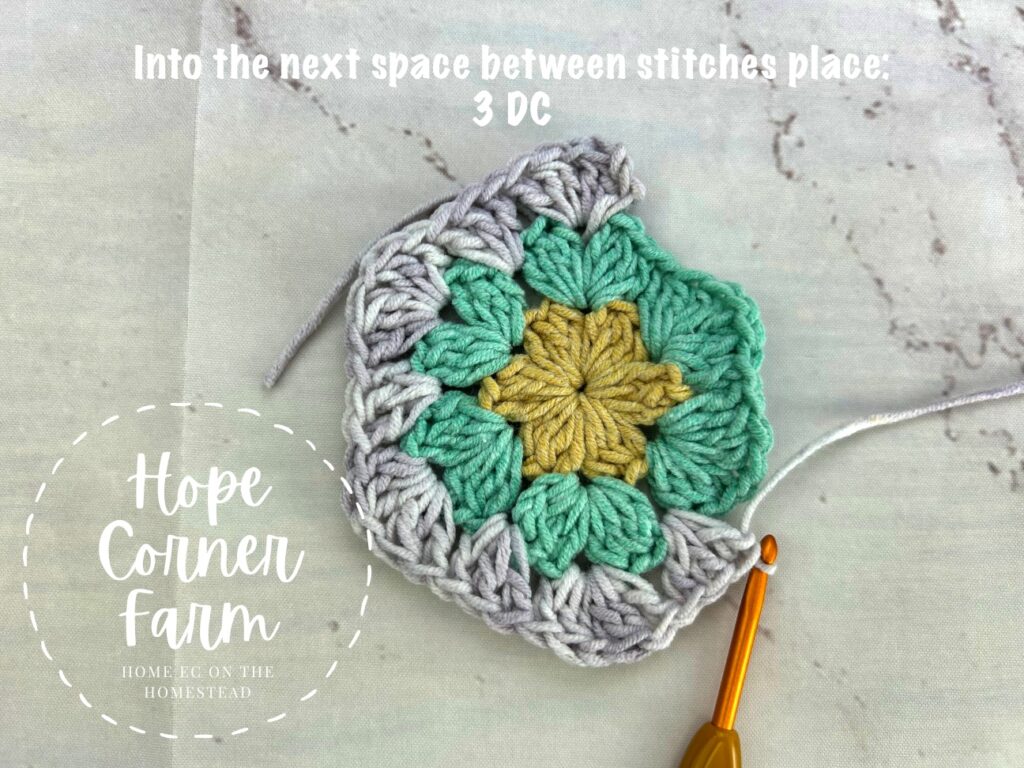
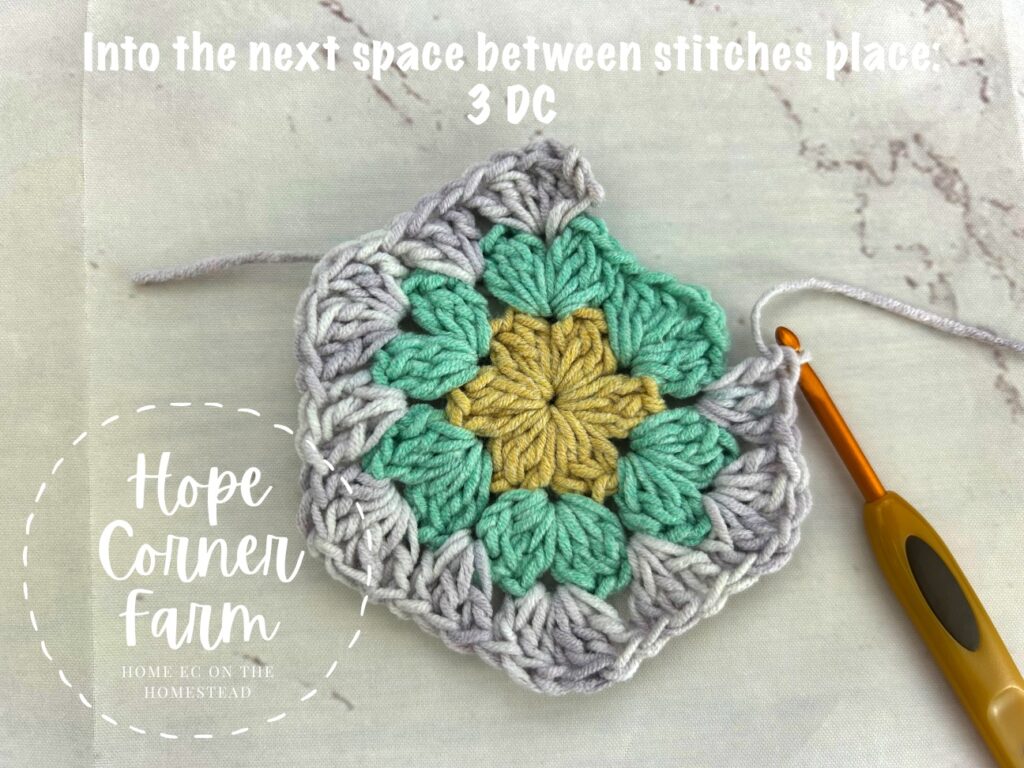
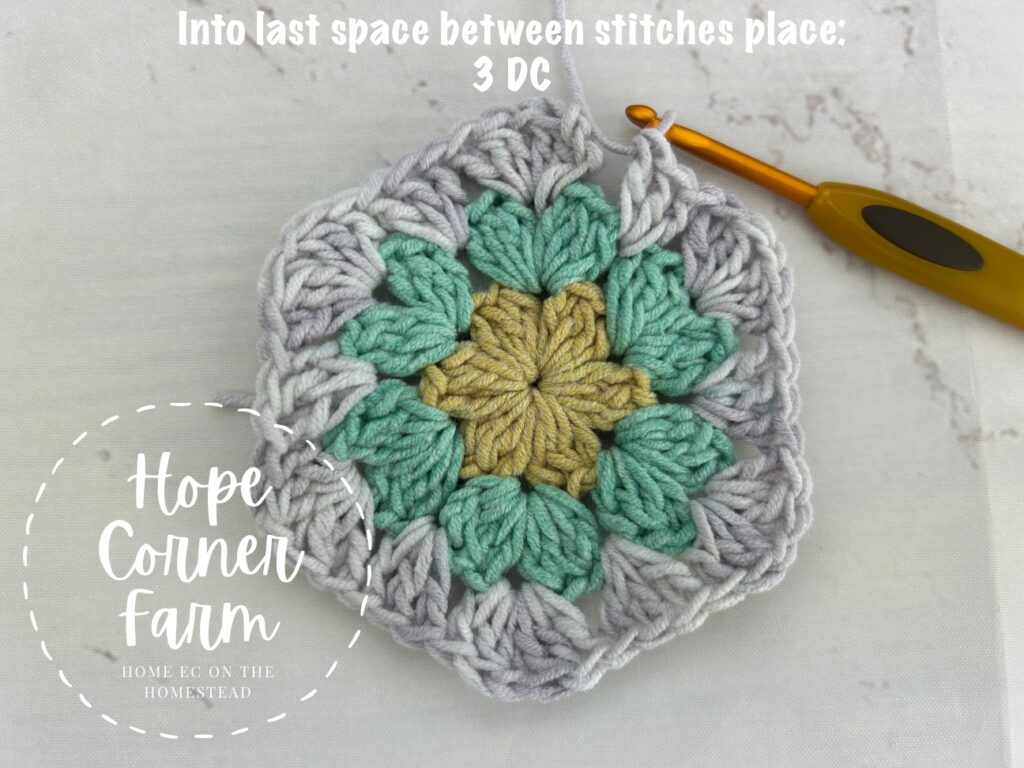
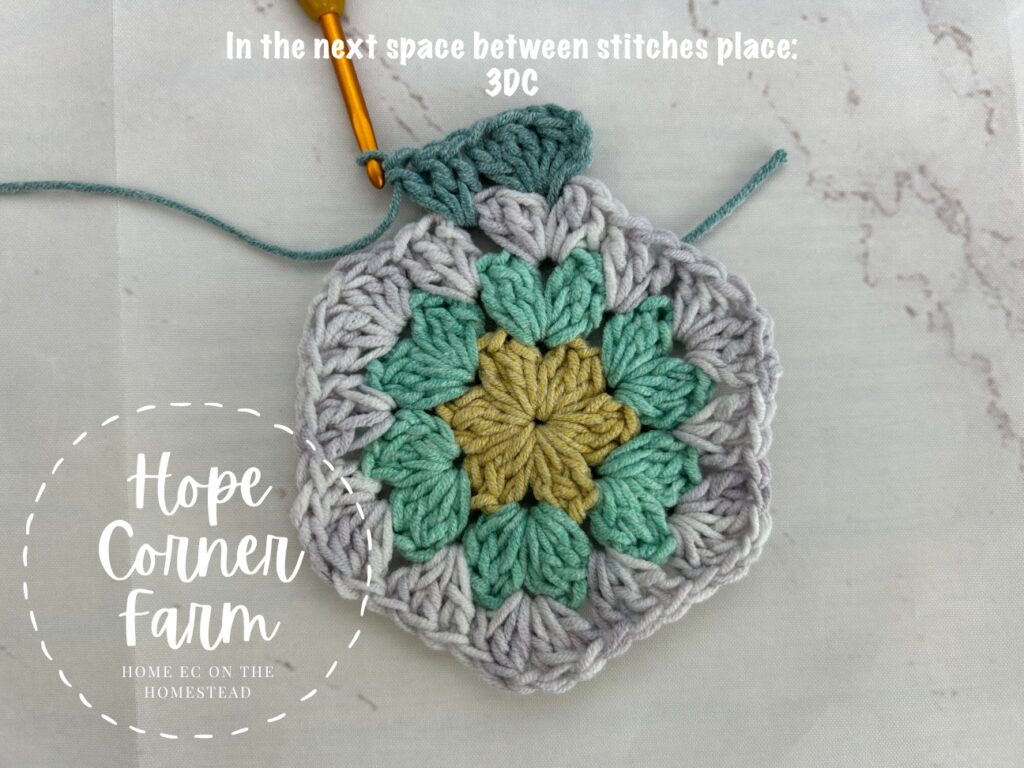
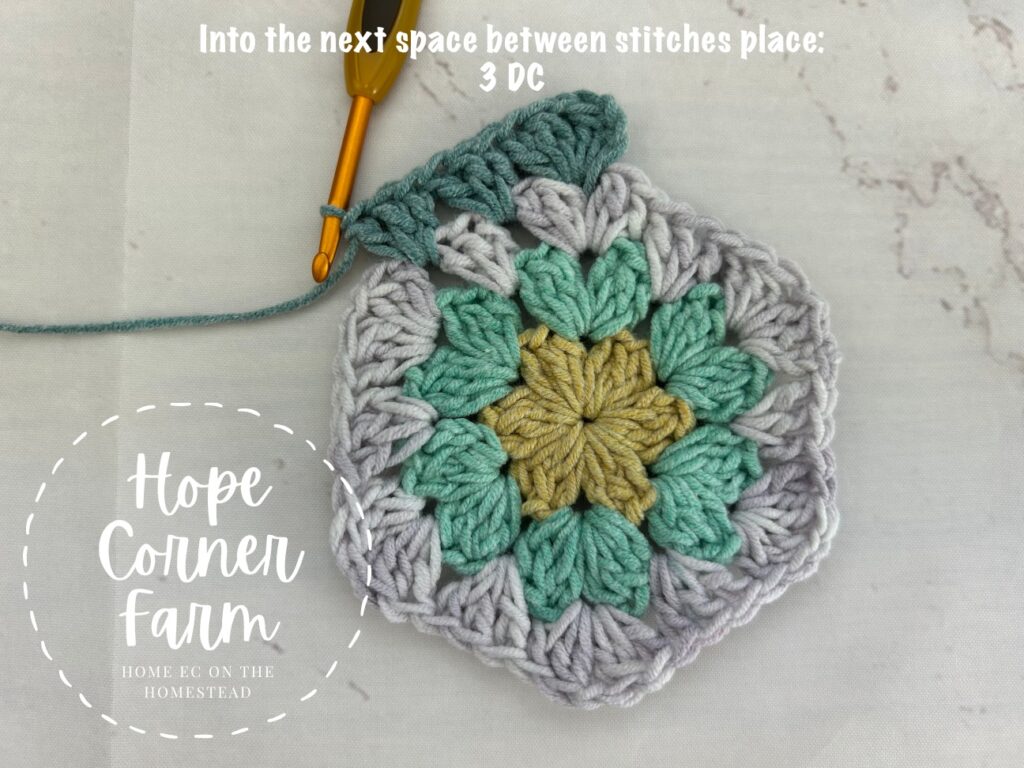
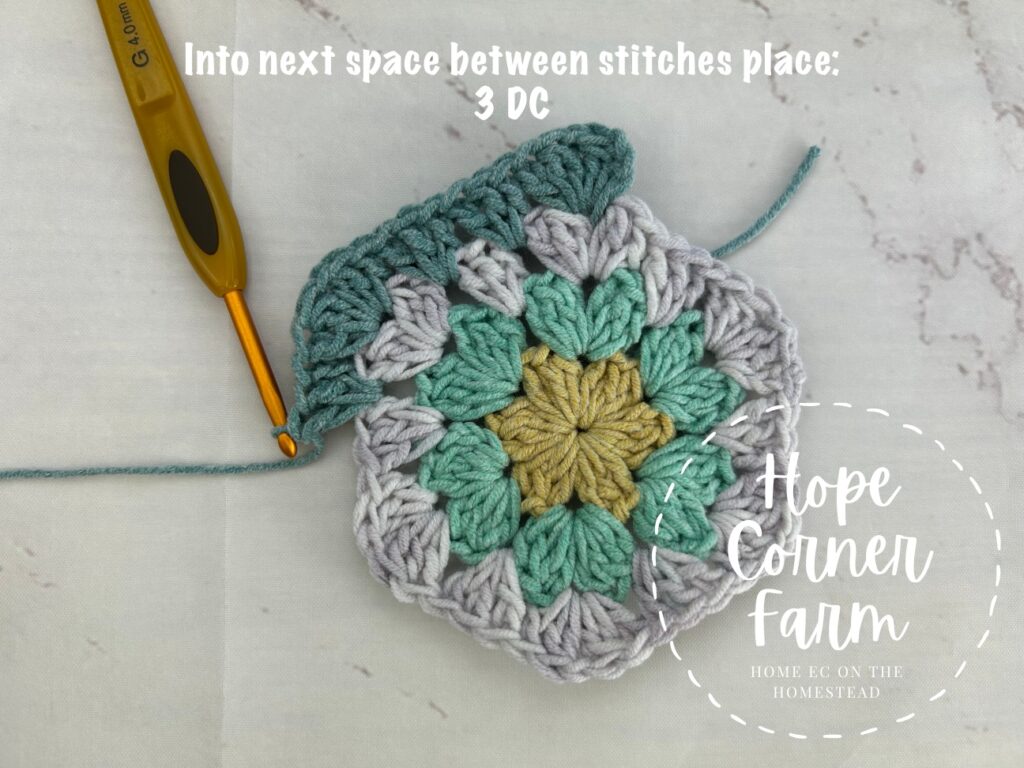
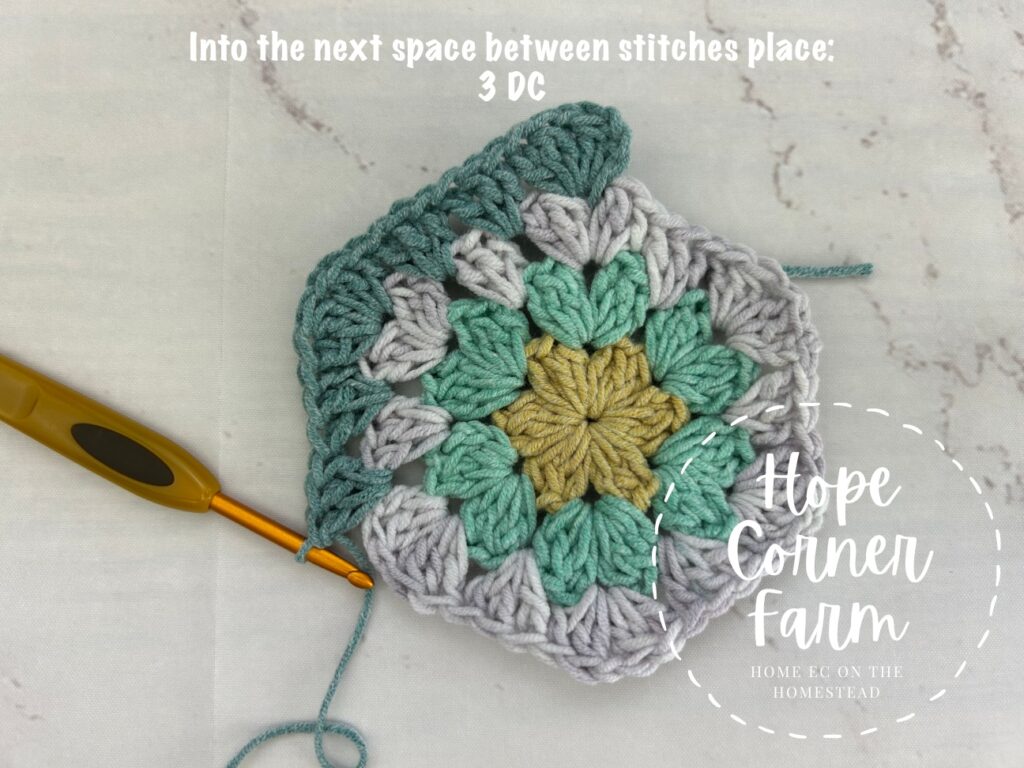
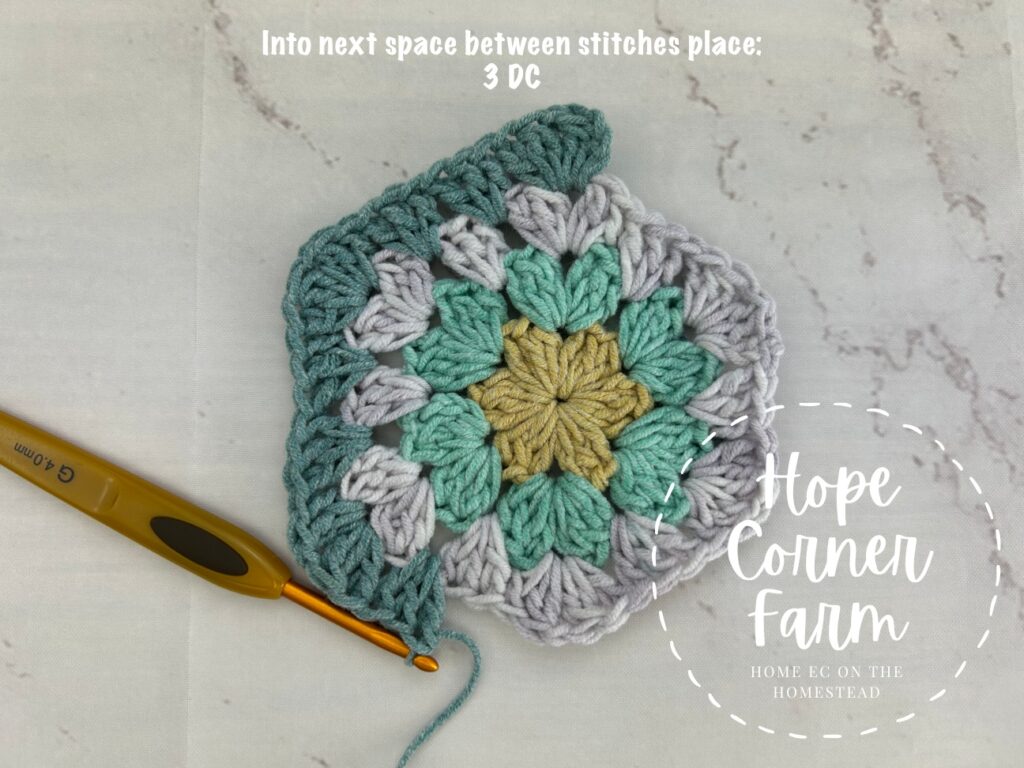
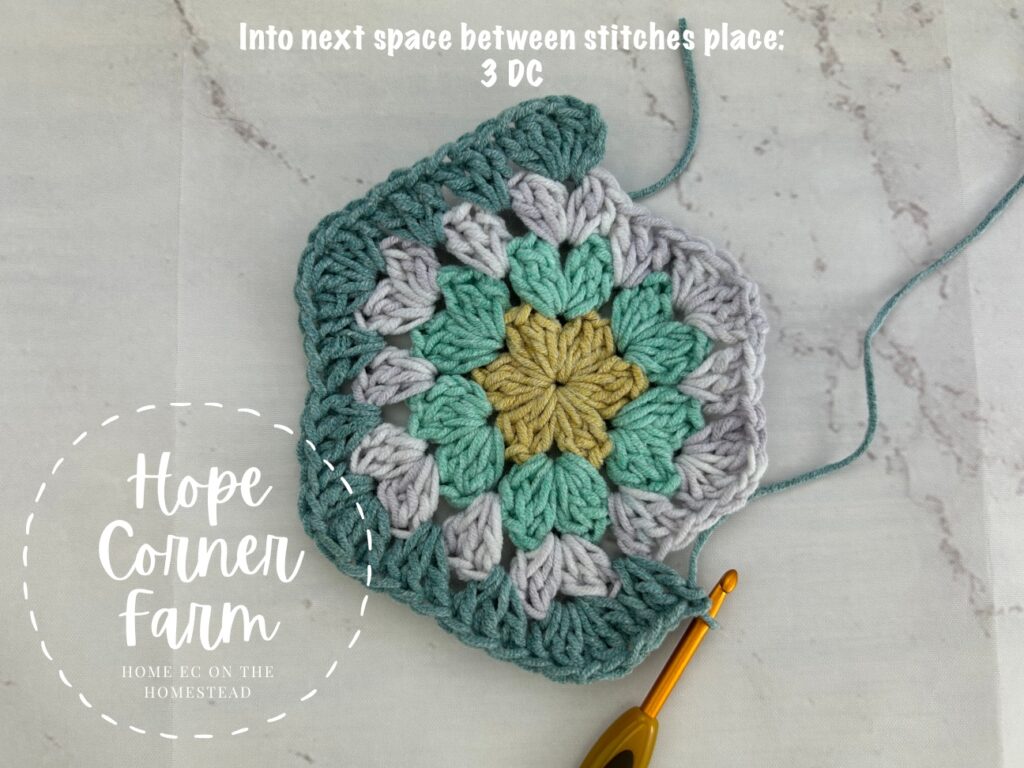
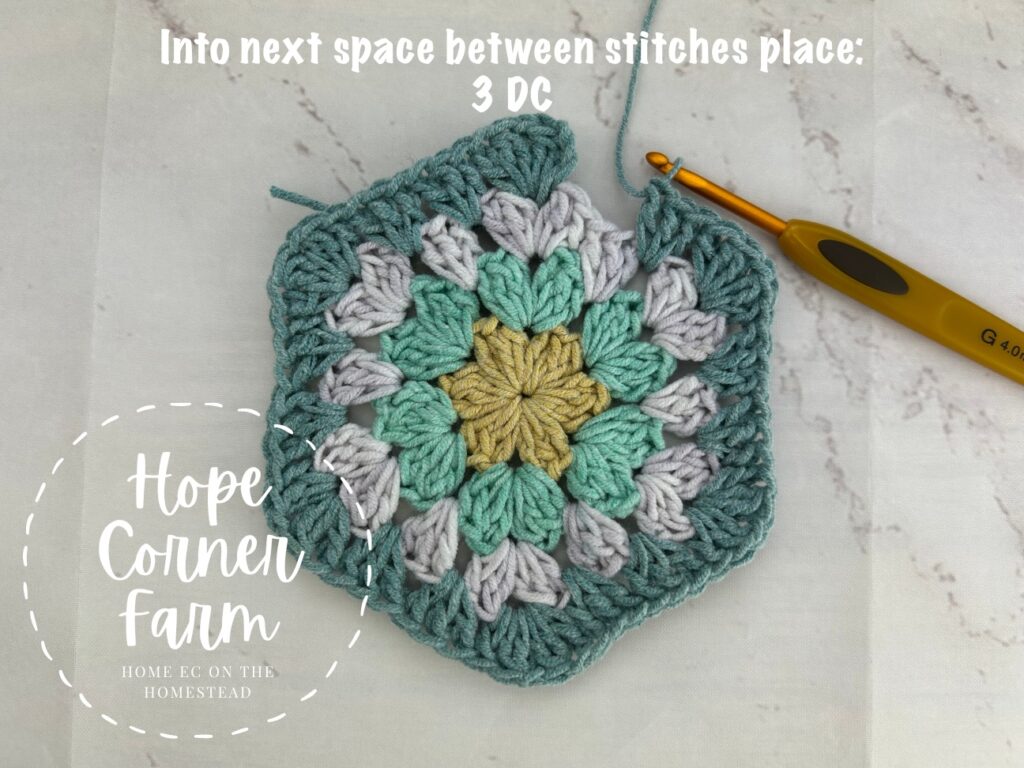
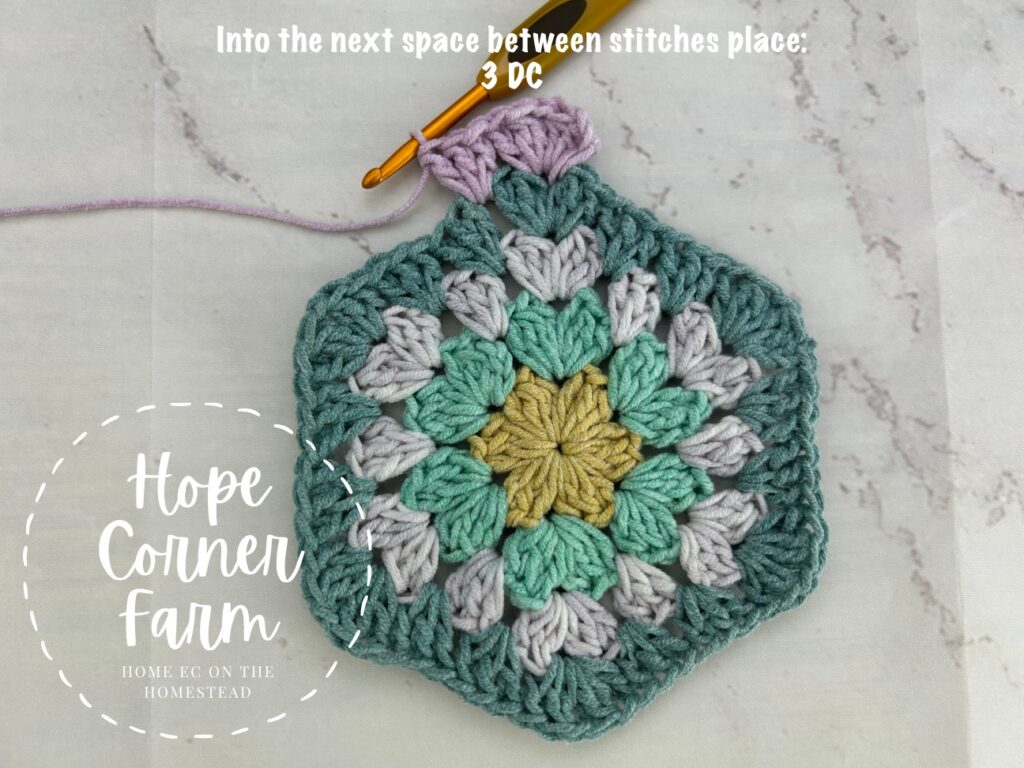
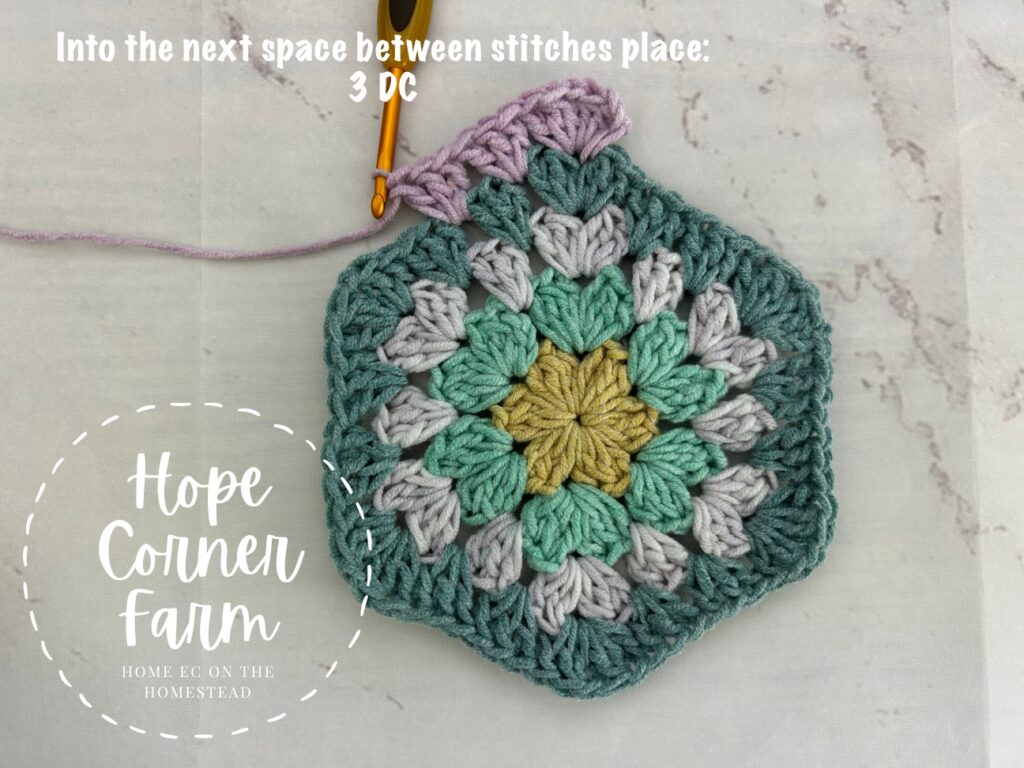
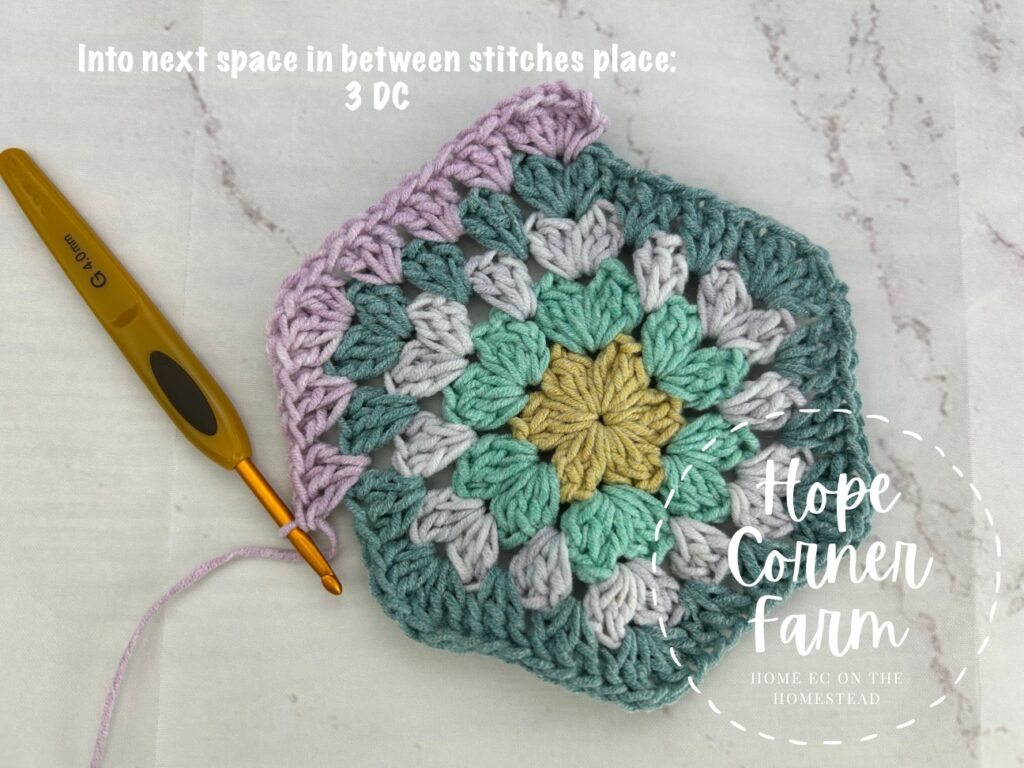
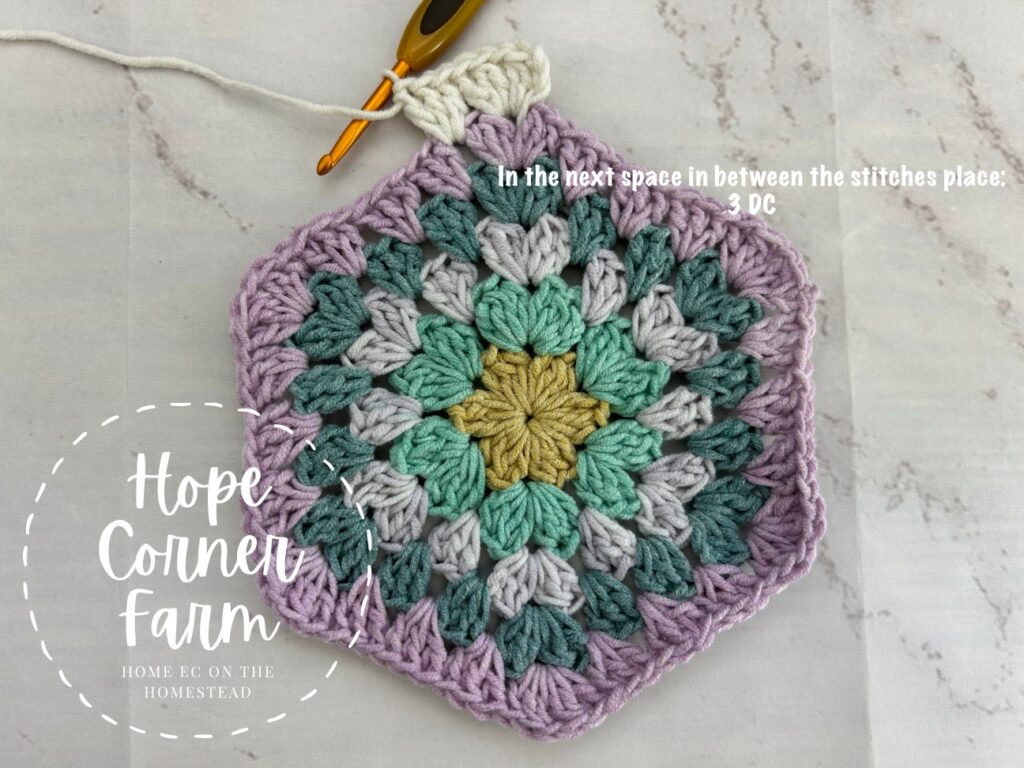
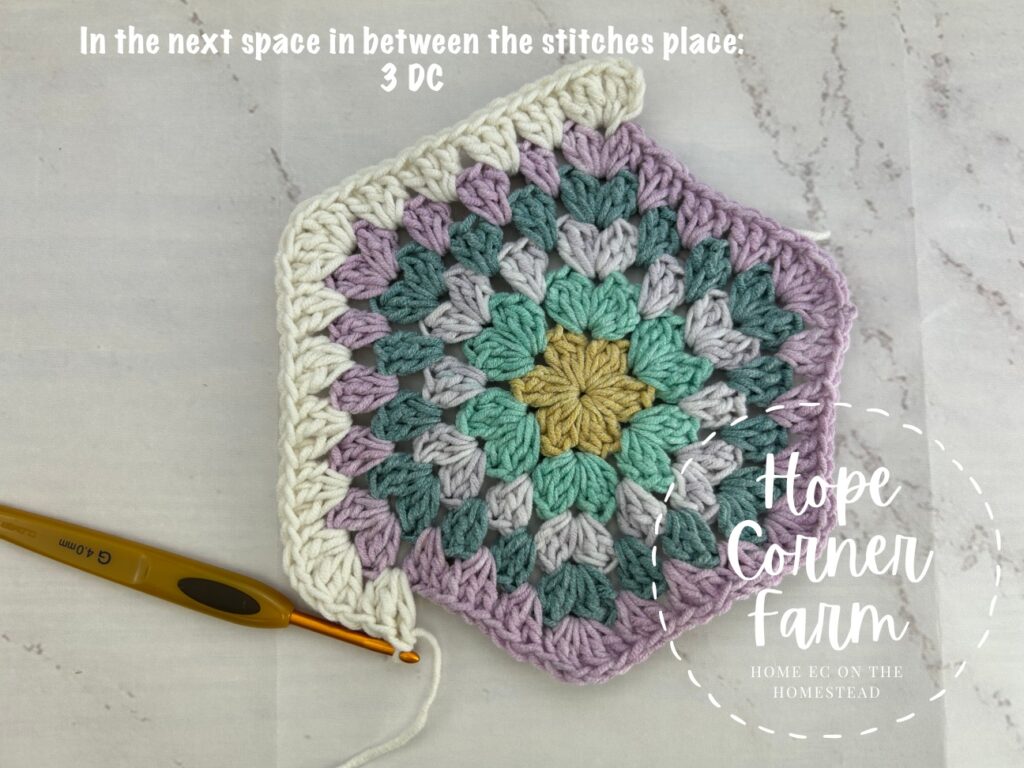
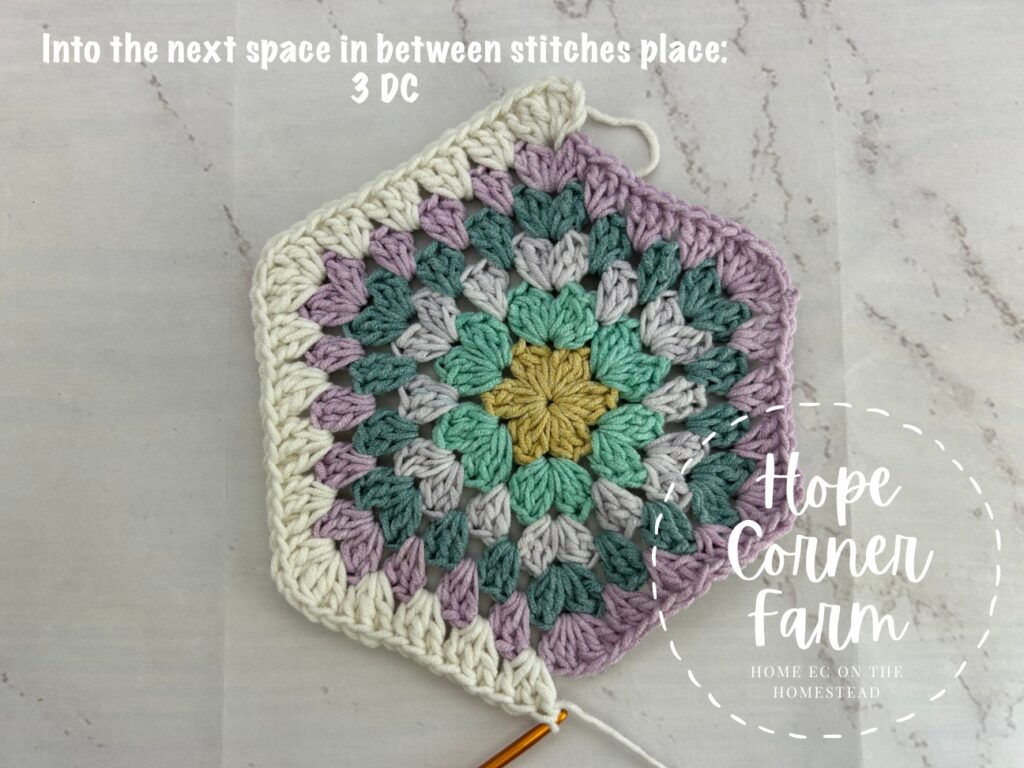
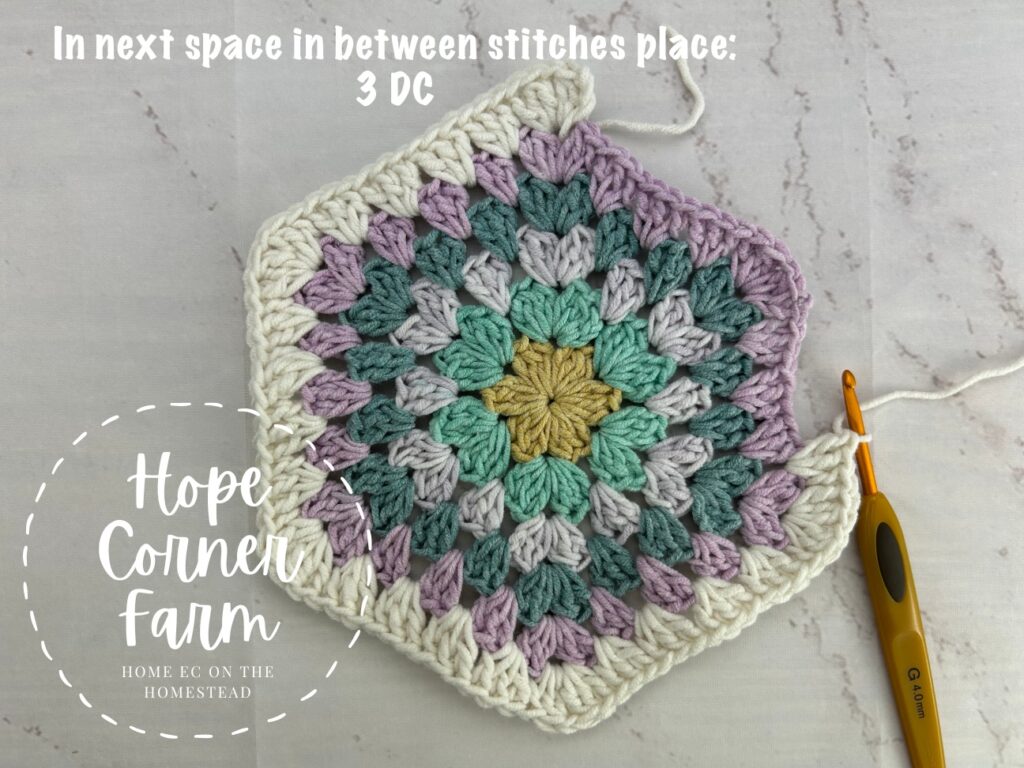
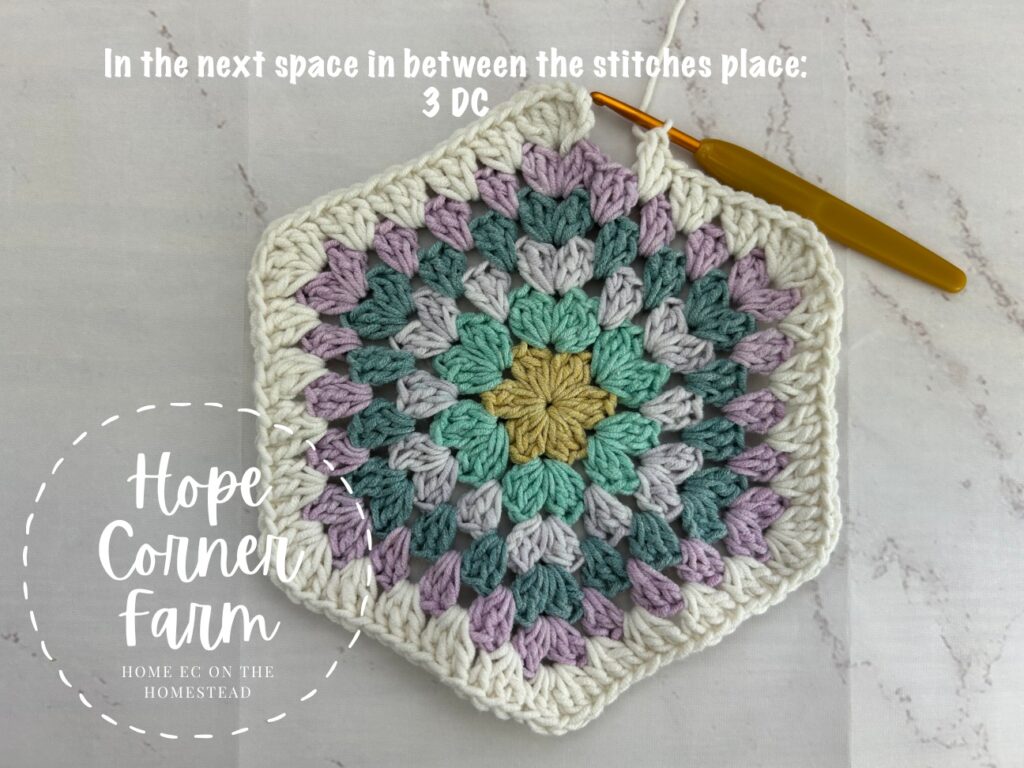
Next in the space in between the corners from the previous round place 3 DC.
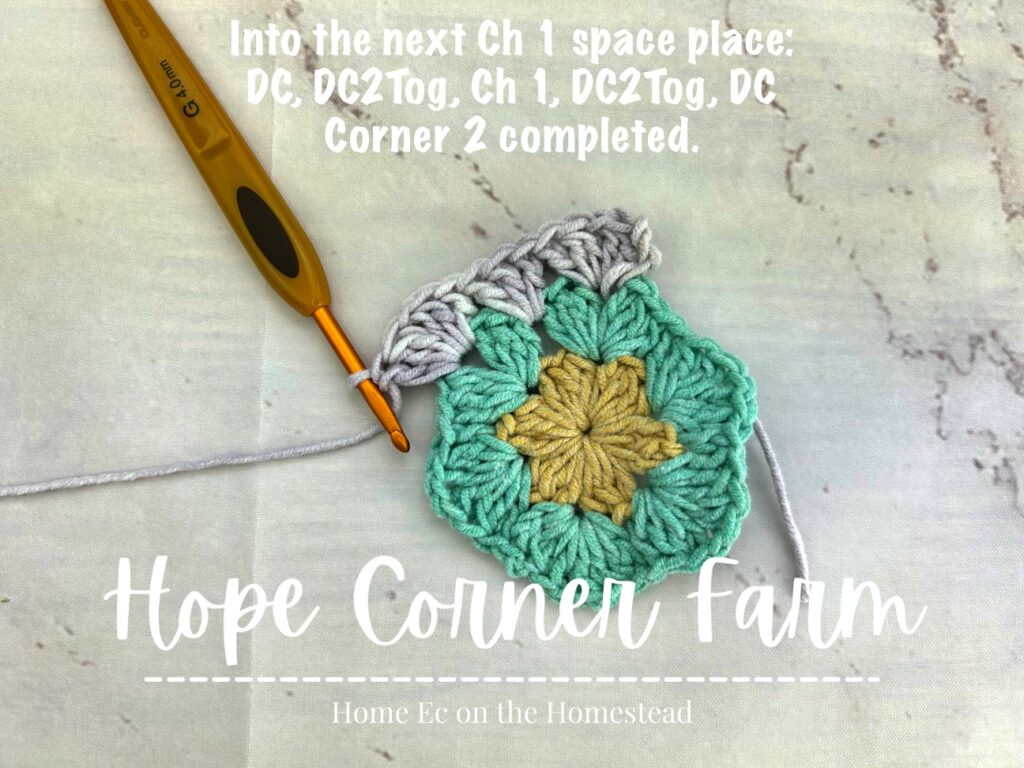
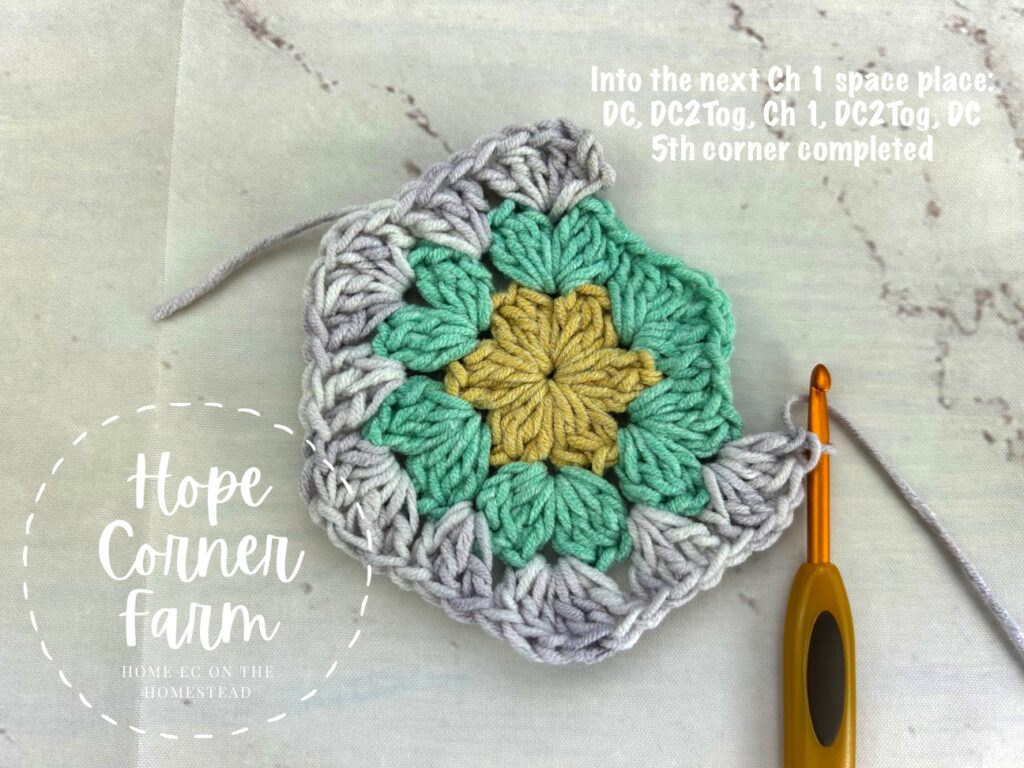
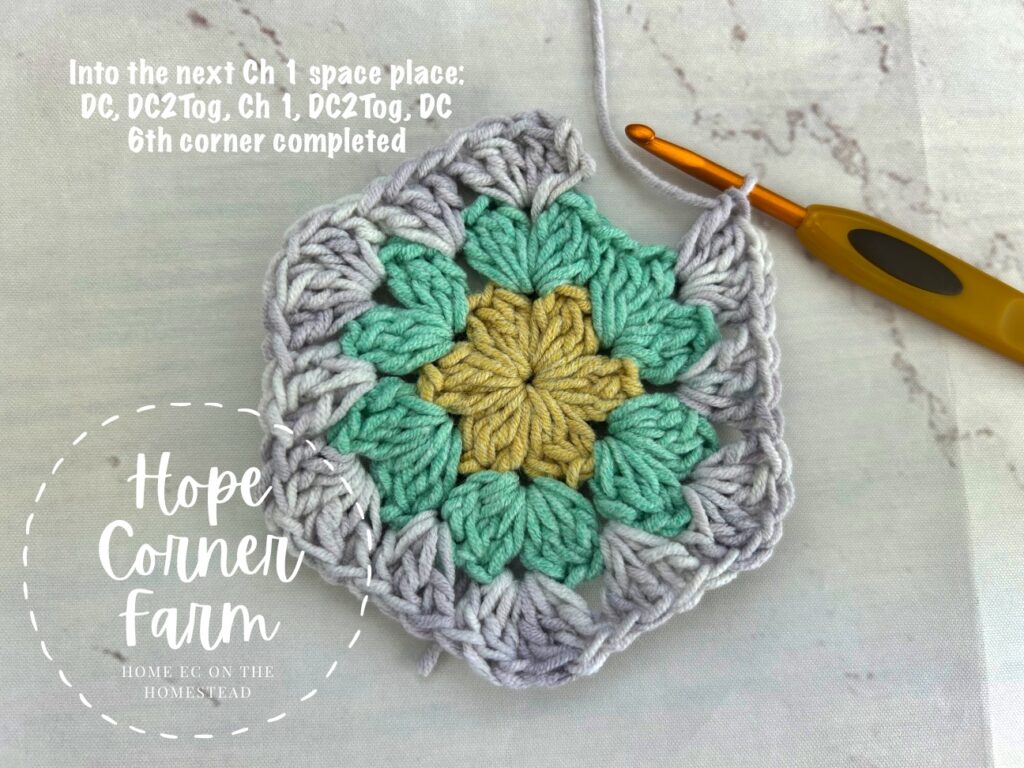
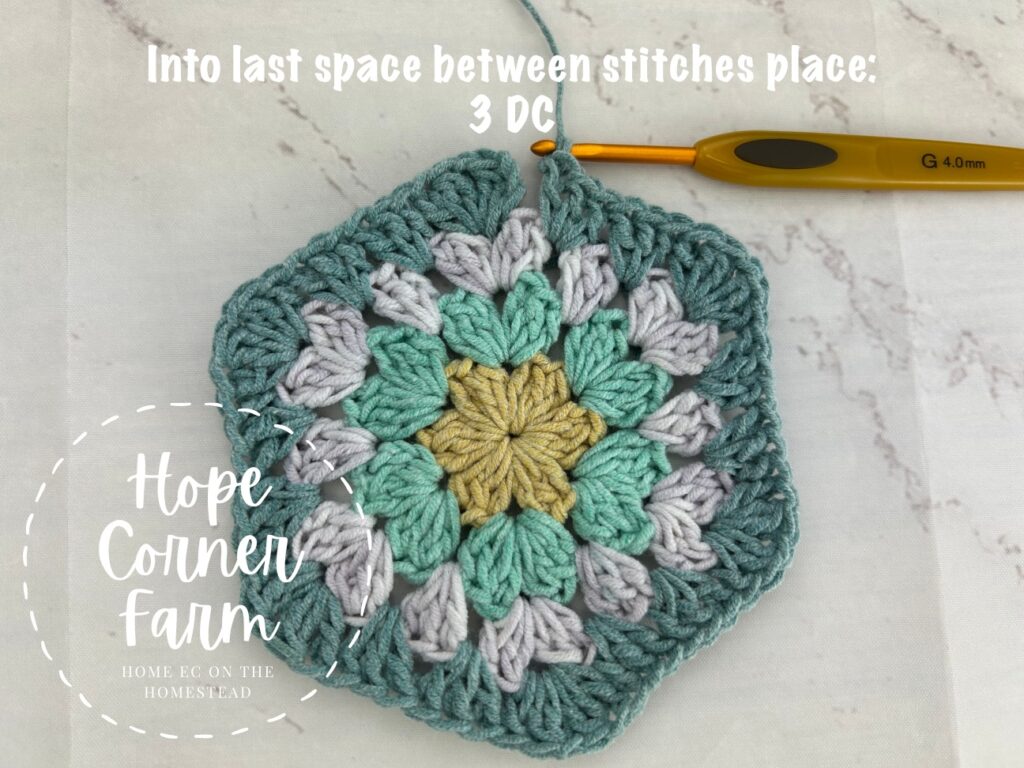
Now around the hexagon place: (In the next Ch 1 space DC, DC2Tog, Ch 1, DC2Tog, DC. Place 3 DC in the space between corners from the previous round) 5xs. There will be a total of 6 corners and 6 sets of 3DC for this round.

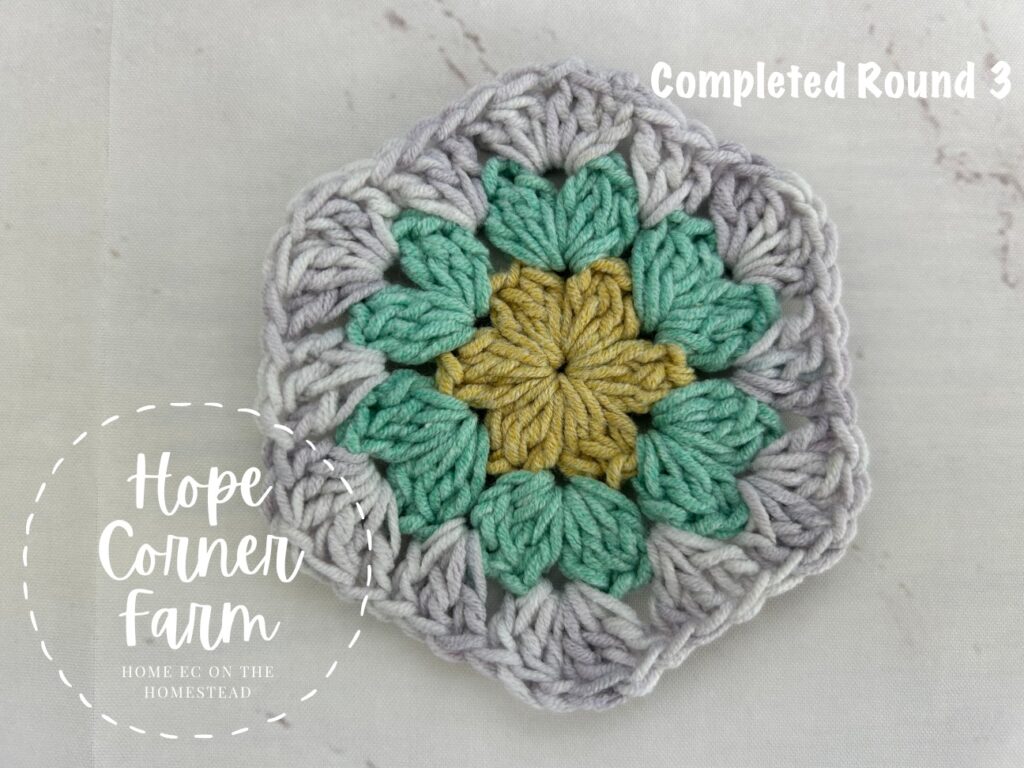
Finally to finish this round, join with a slip stitch to the top of the chain 3. Cut yarn. Fasten off. Weave in ends. Round 3 complete. (48)
Granny Hexagon – Round 4:
First see the picture below for stitch placement for this round.
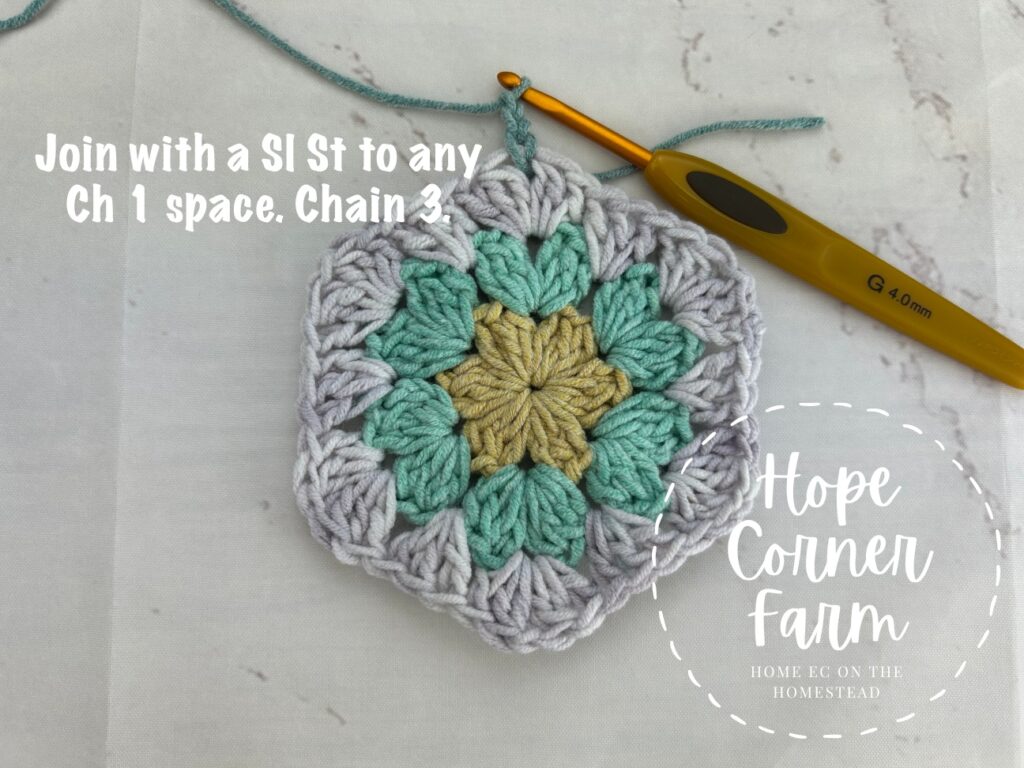
Begin this round by joining the new yarn with a Slip Stitch into any of the Chain 1 spaces from the previous round. Chain 3 (this counts as a DC and it is part of the stitch count for this row.
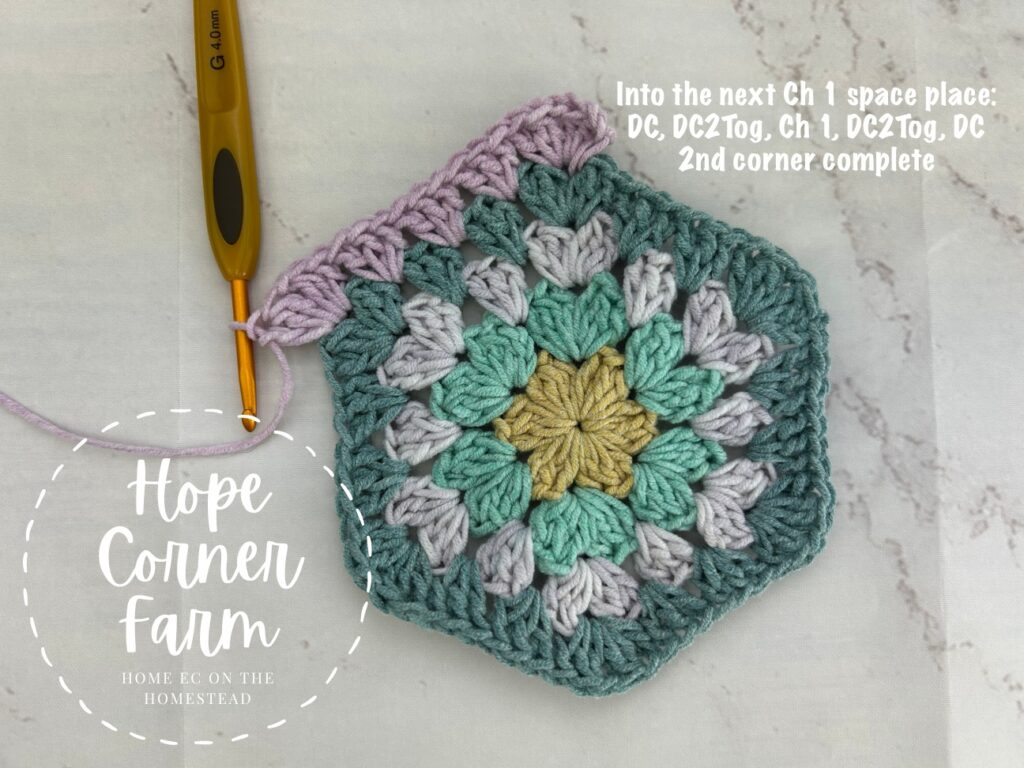
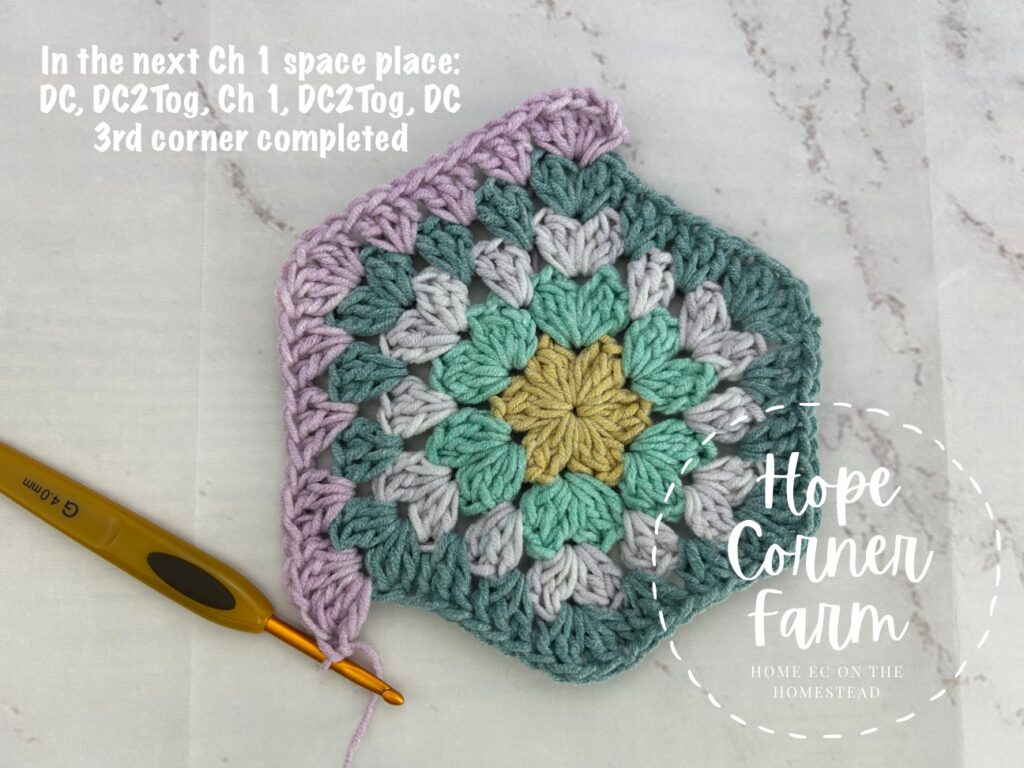
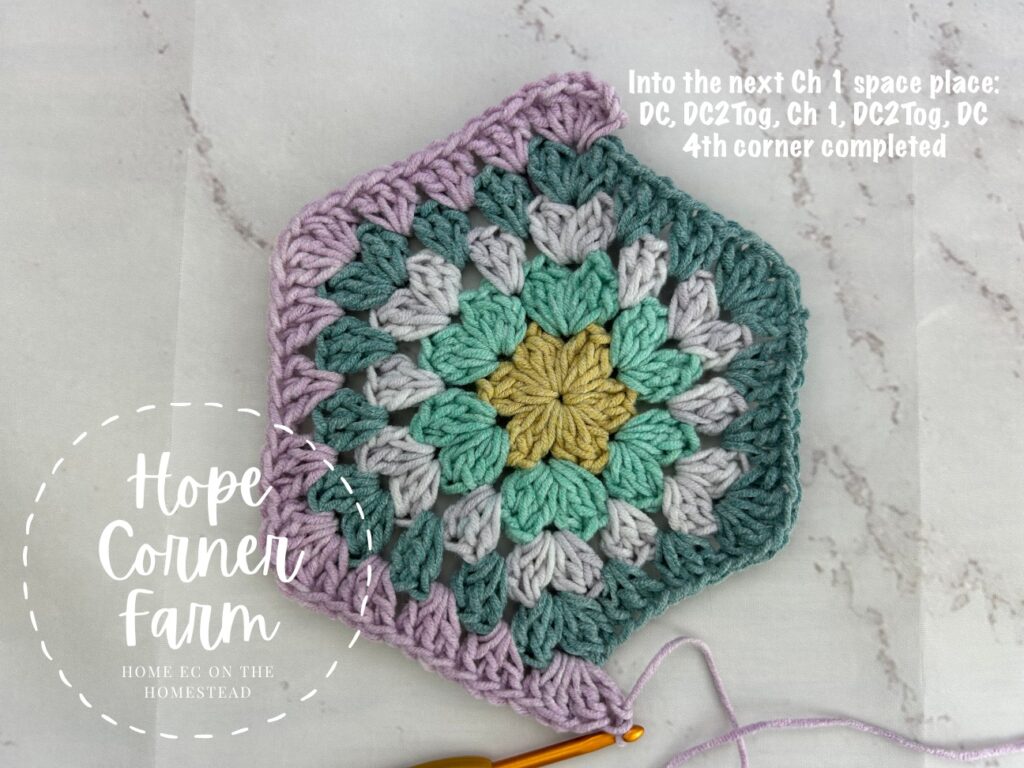
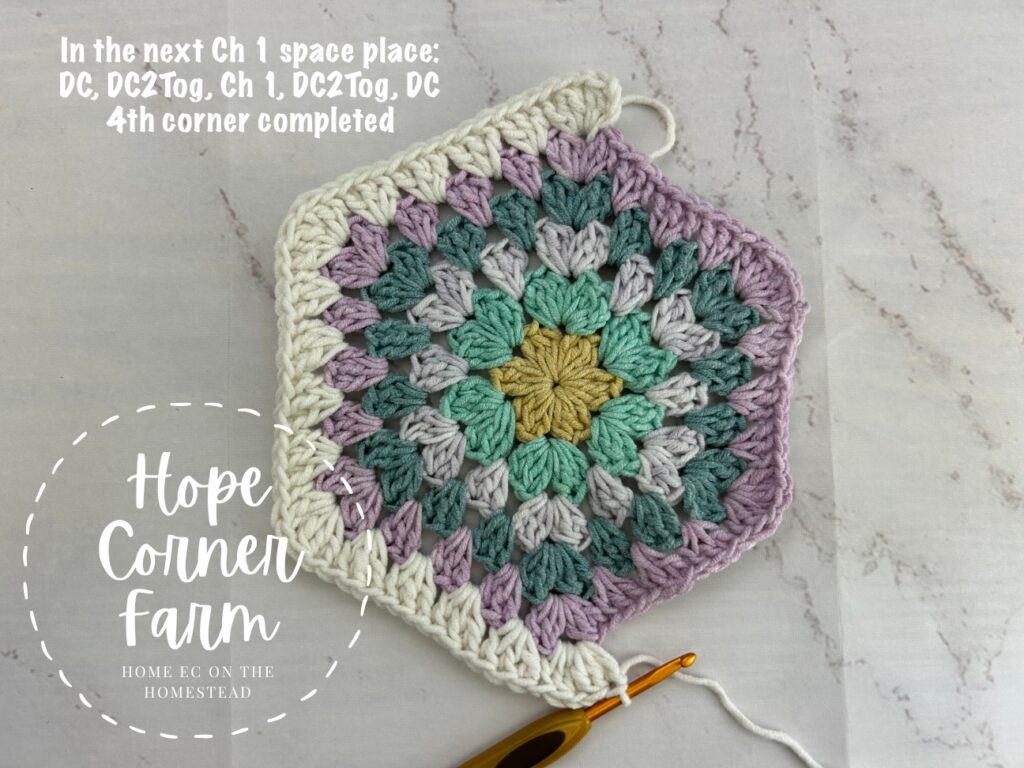
Now into the same Ch 1 space place: DC2Tog, Ch 1, DC2Tog, DC. This forms the 1st corner for this round of crochet.
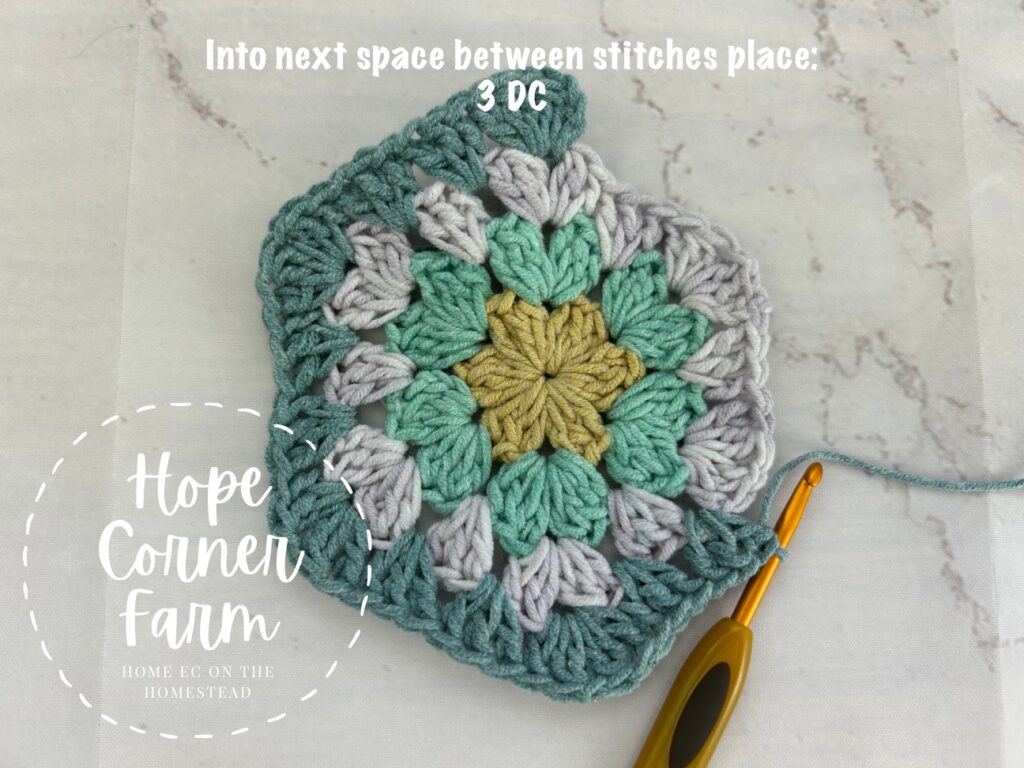
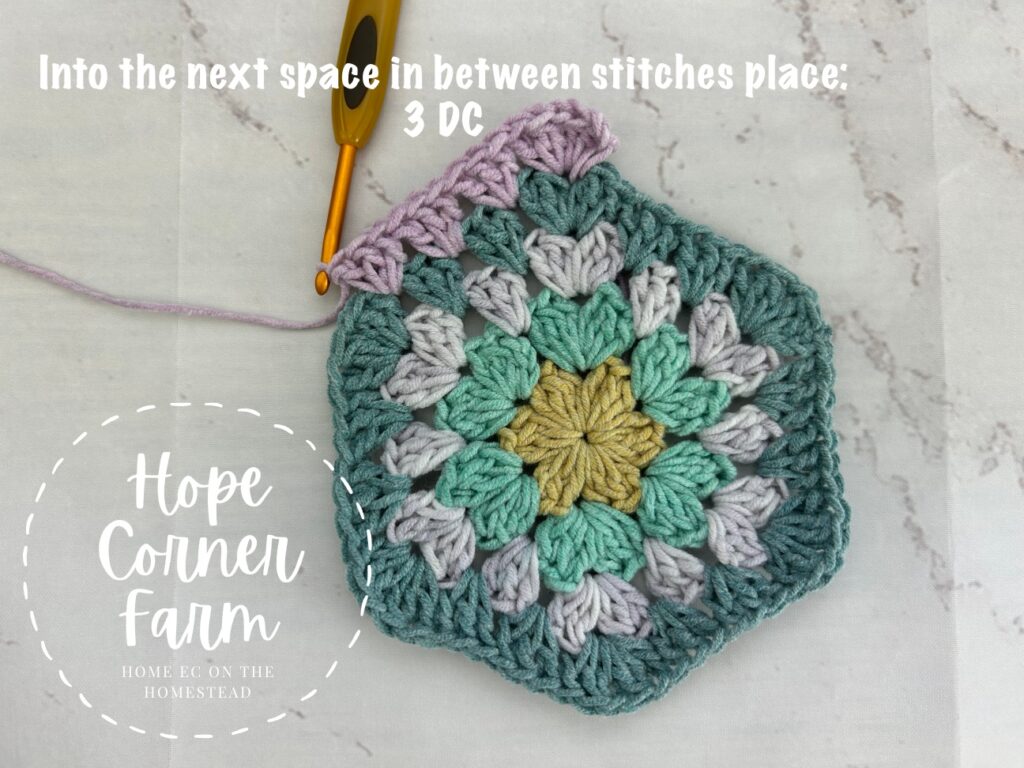
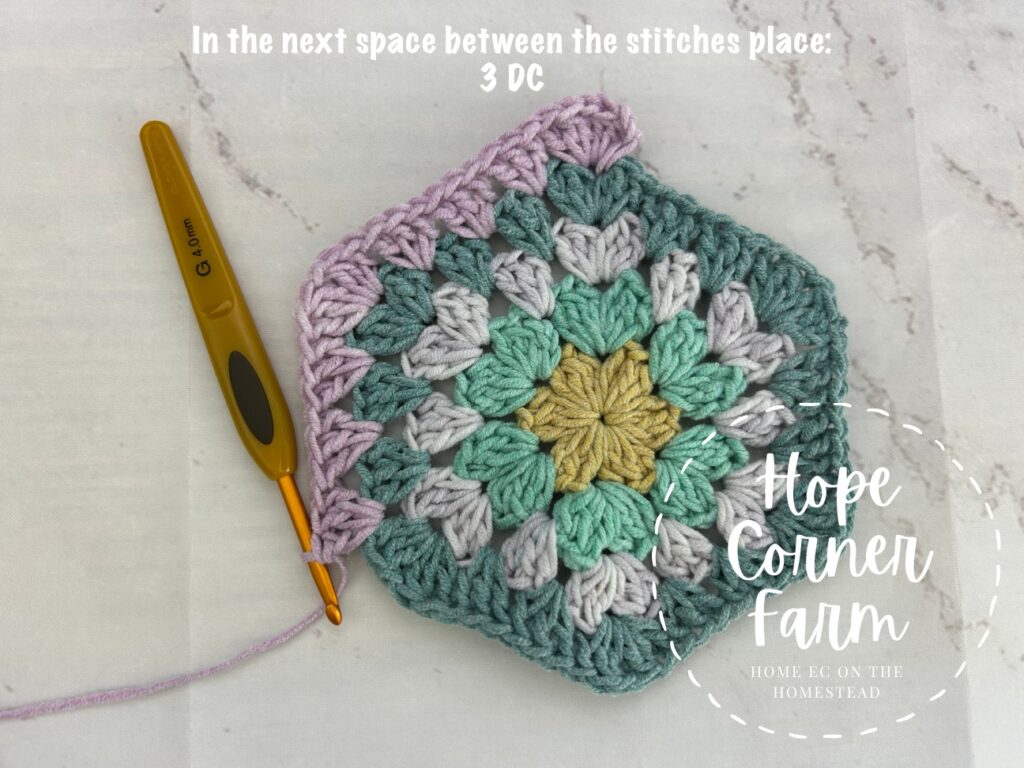
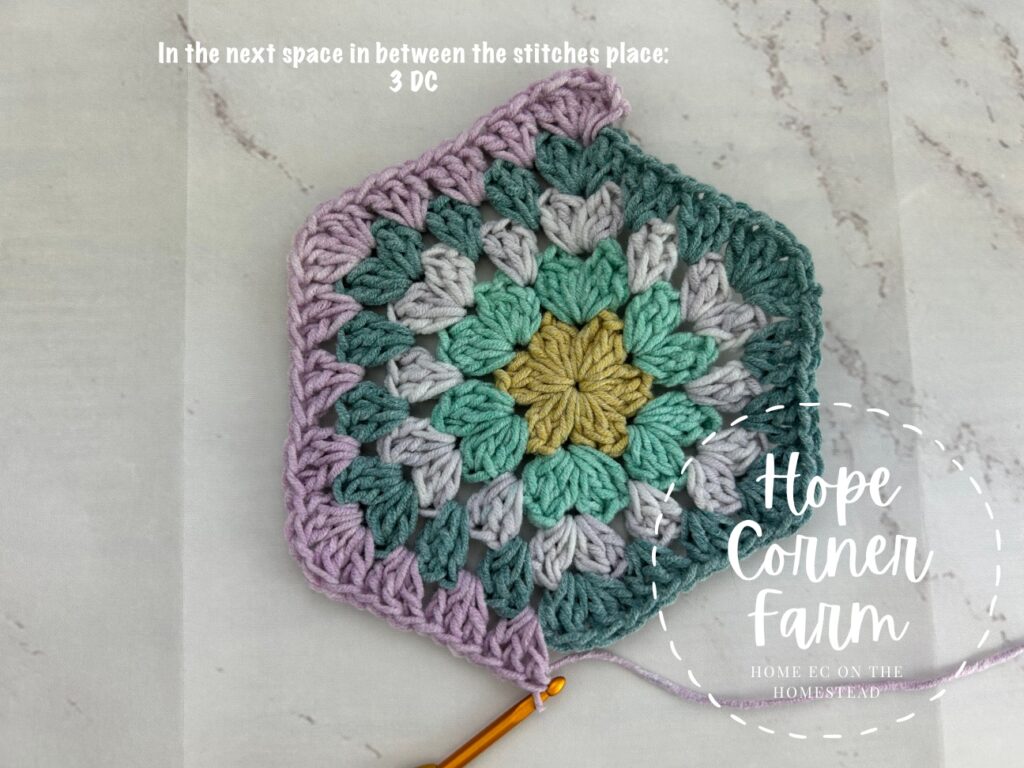
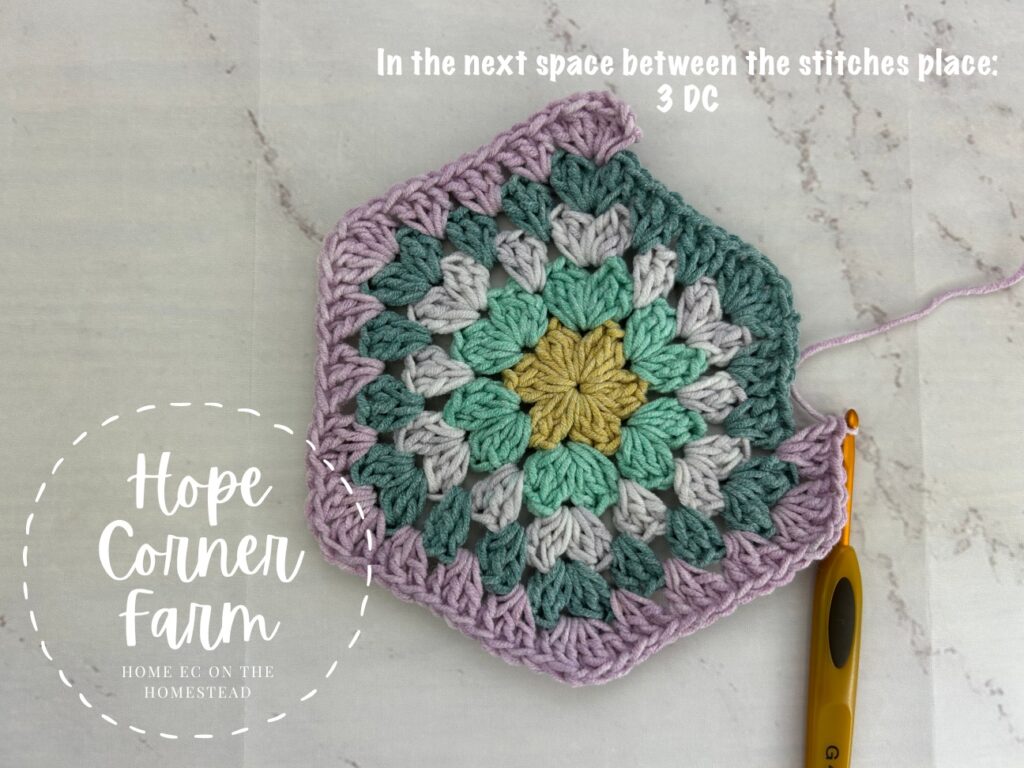
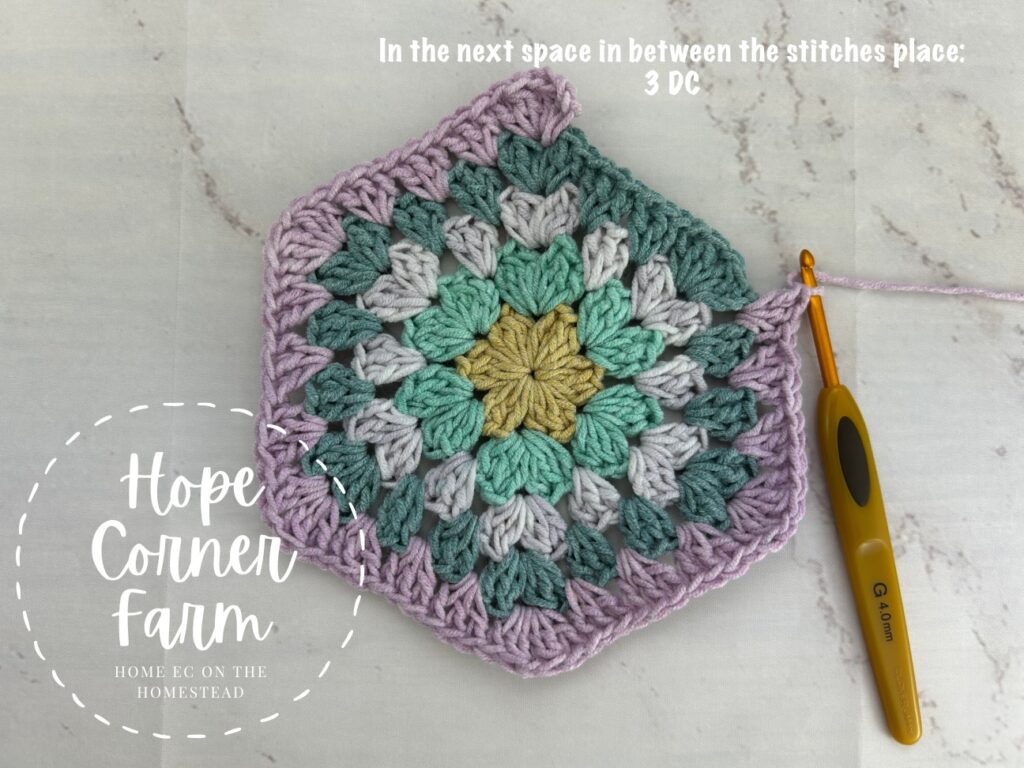
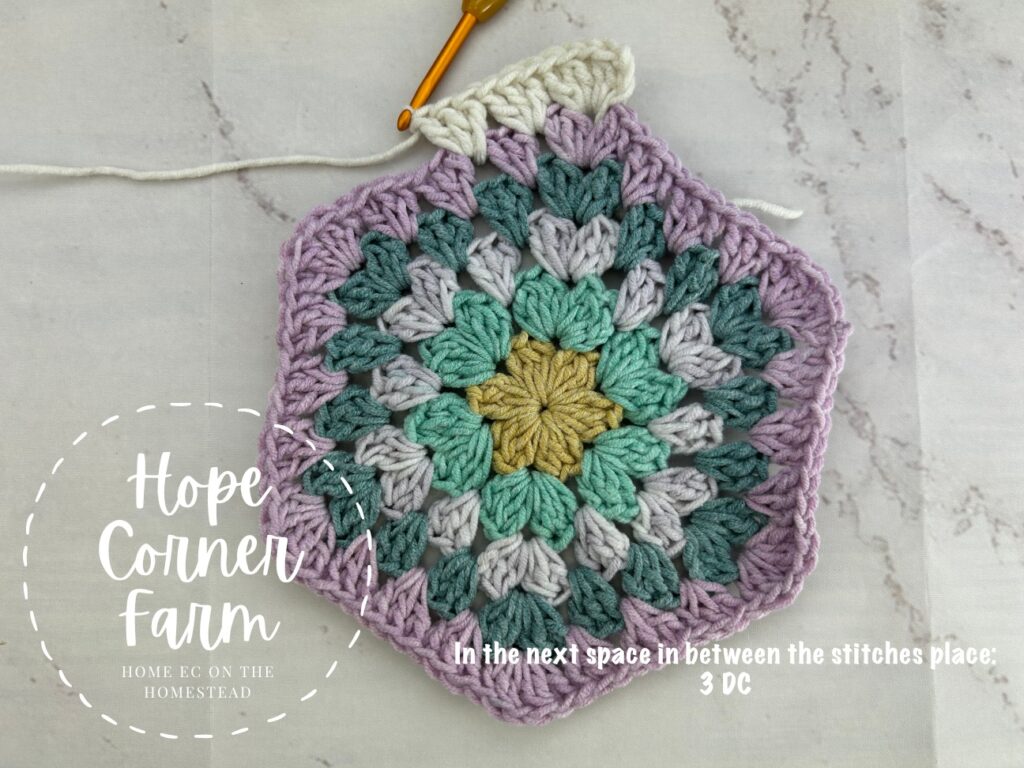
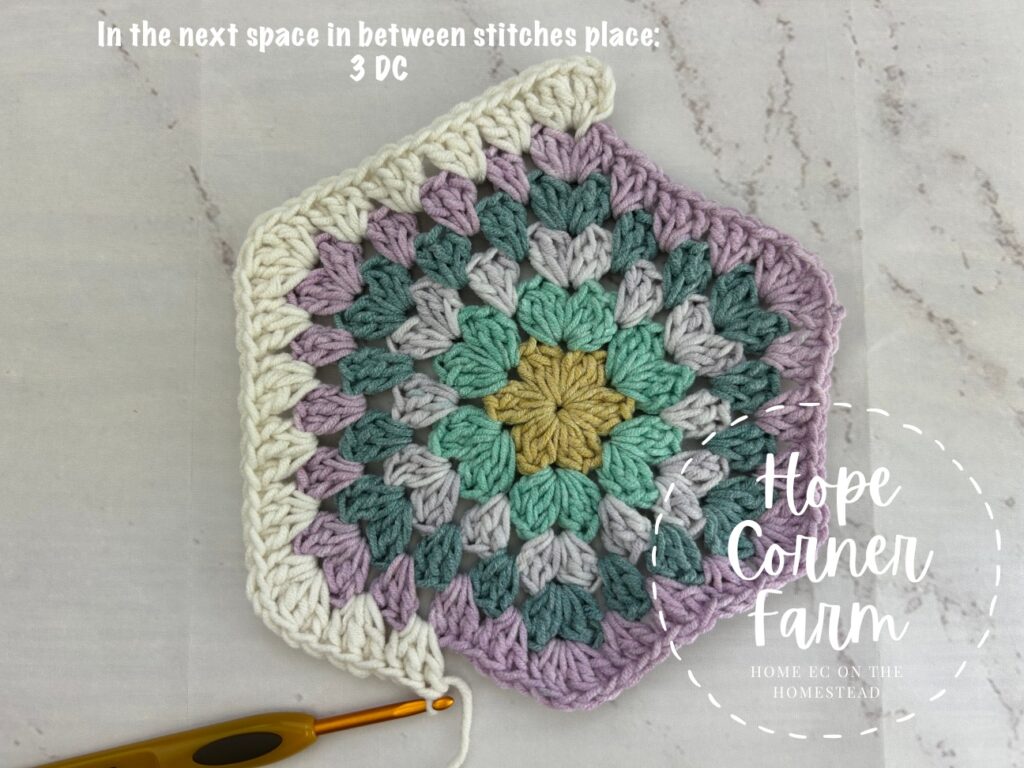
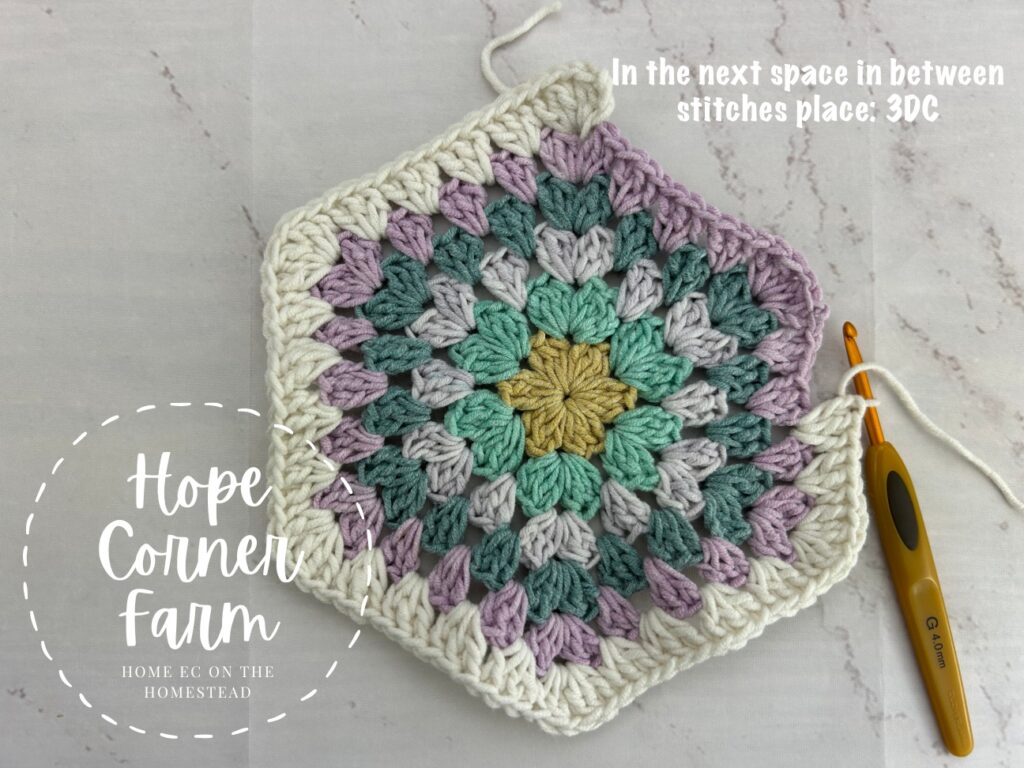
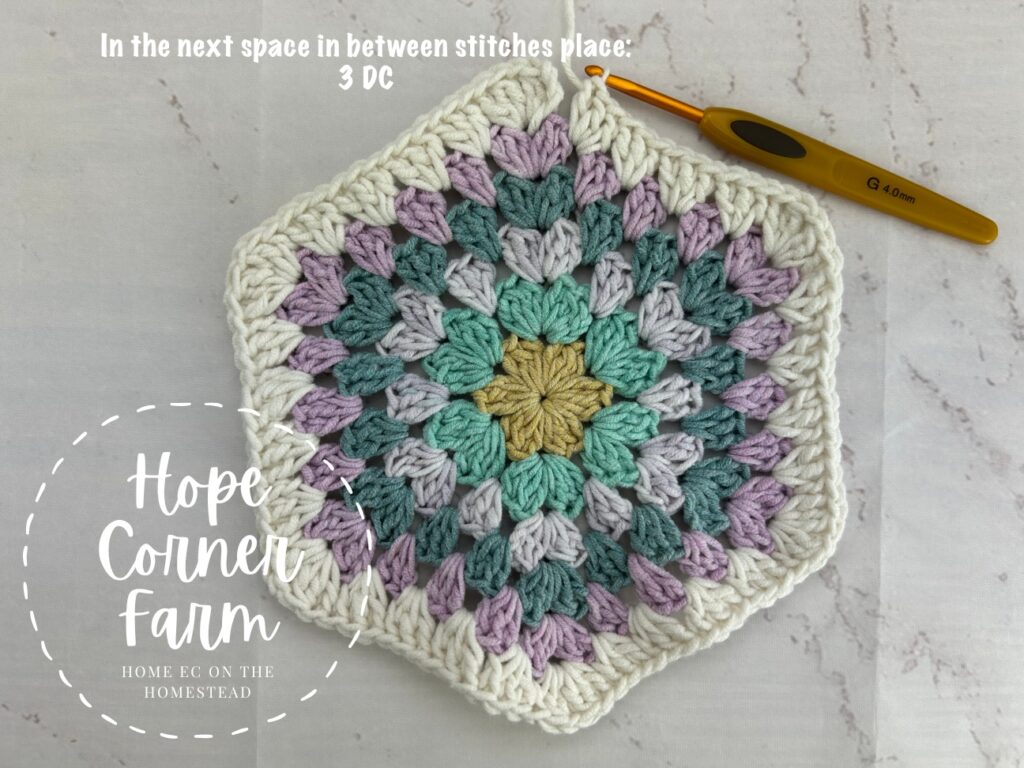
Next into the next TWO spaces between stitch clusters place 3 DC in each.
Now for the remainder of the round, place the following crochet stitches: (Into the next Chain 1 space place DC, DC2Tog, Ch 1, DC2Tog, DC. Into each of the next 2 spaces in between stitch clusters place 3 DC in each space.) 5xs. There will be a total of 6 corners and 12 sets of 3 DC around the hexagon. (66)


Finally to finish the round join with a Slip Stitch to the top of the chain 3. Cut yarn free. Fasten off. Weave in ends. Round 4 complete.
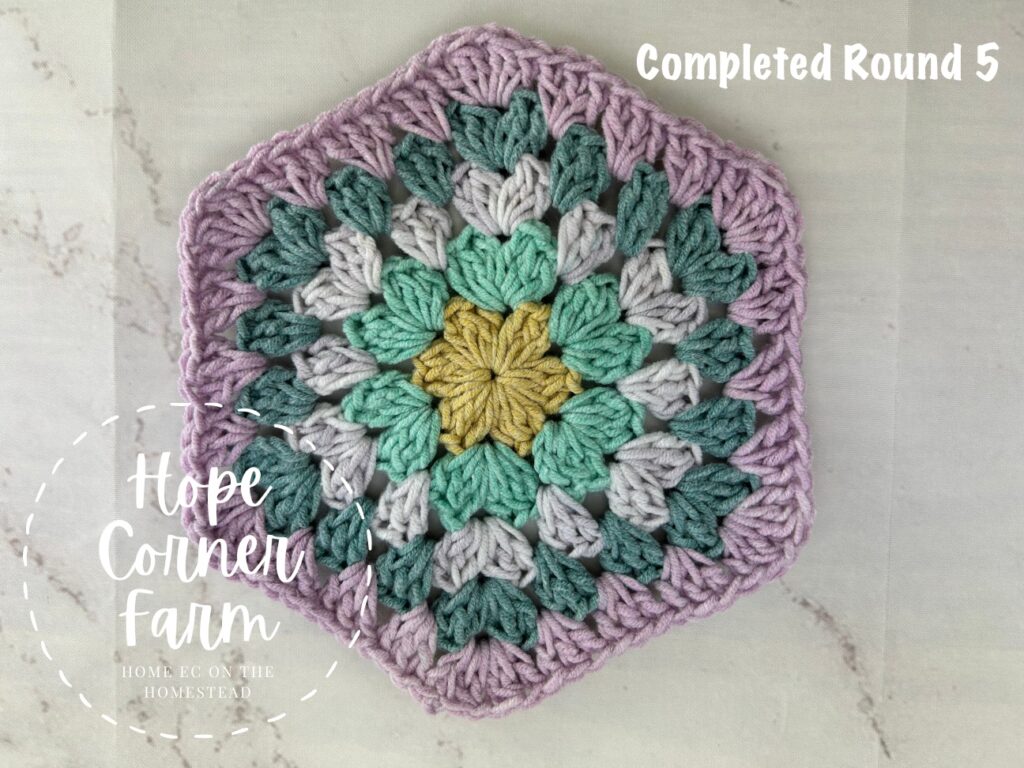
Round 5:
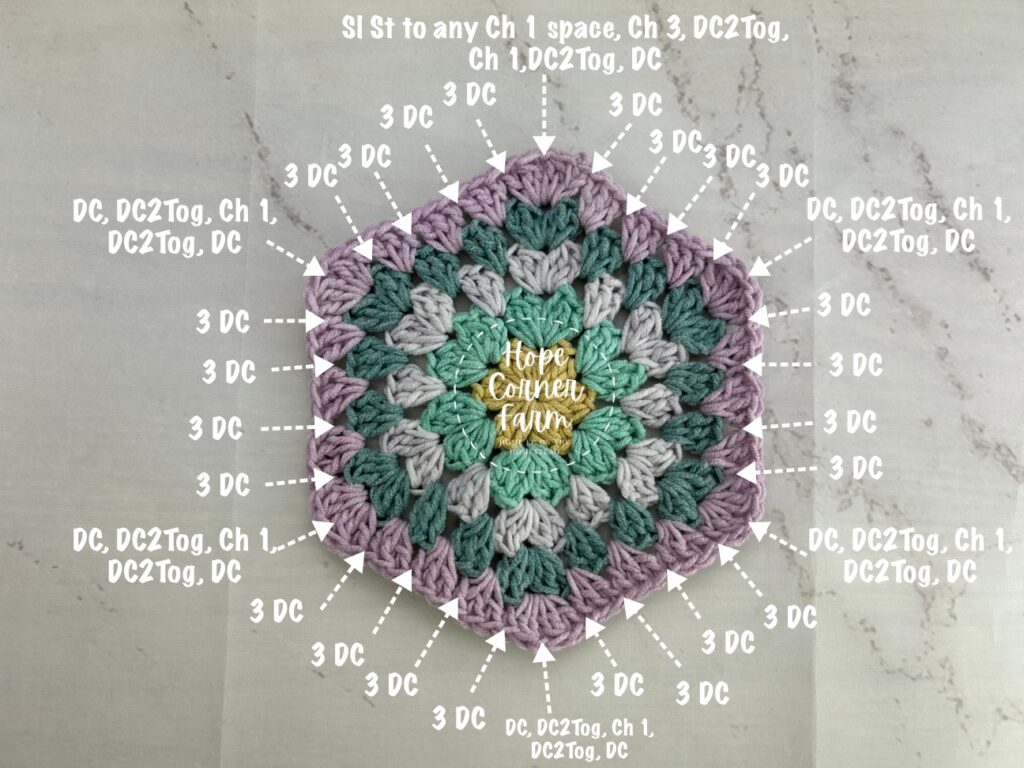
First see the picture below for crochet stitch placement for this round.
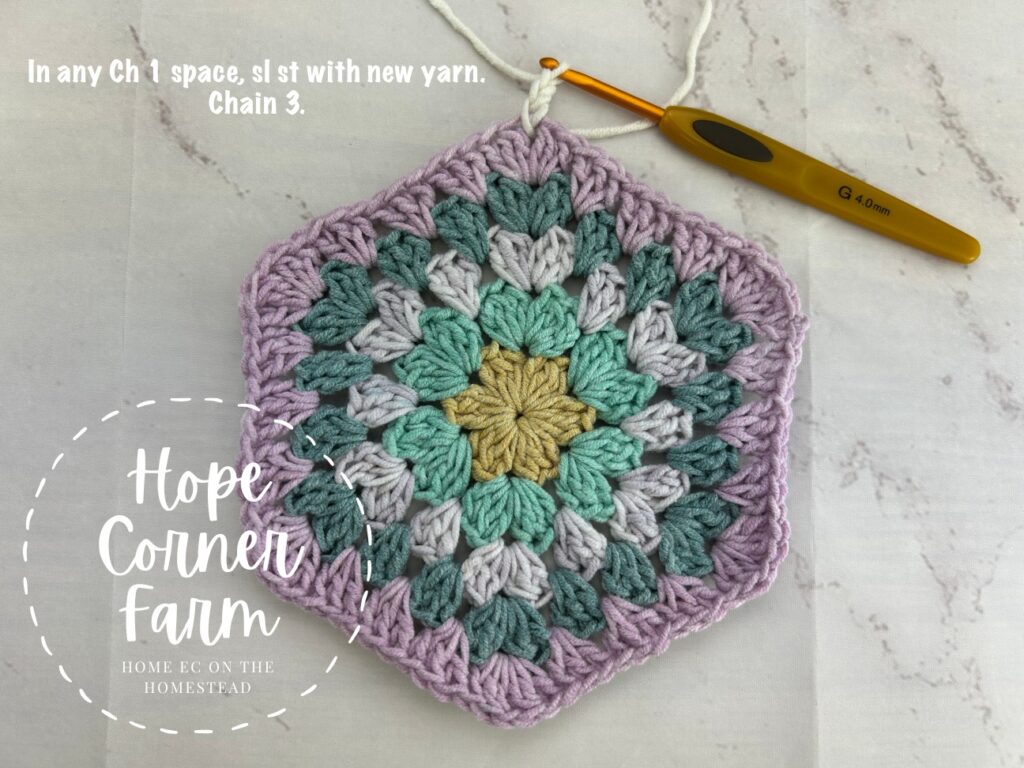
Begin this round by joining the new yarn with a Slip Stitch to any of the Chain 1 spaces from the previous round. Chain 3 (again this counts as a DC).

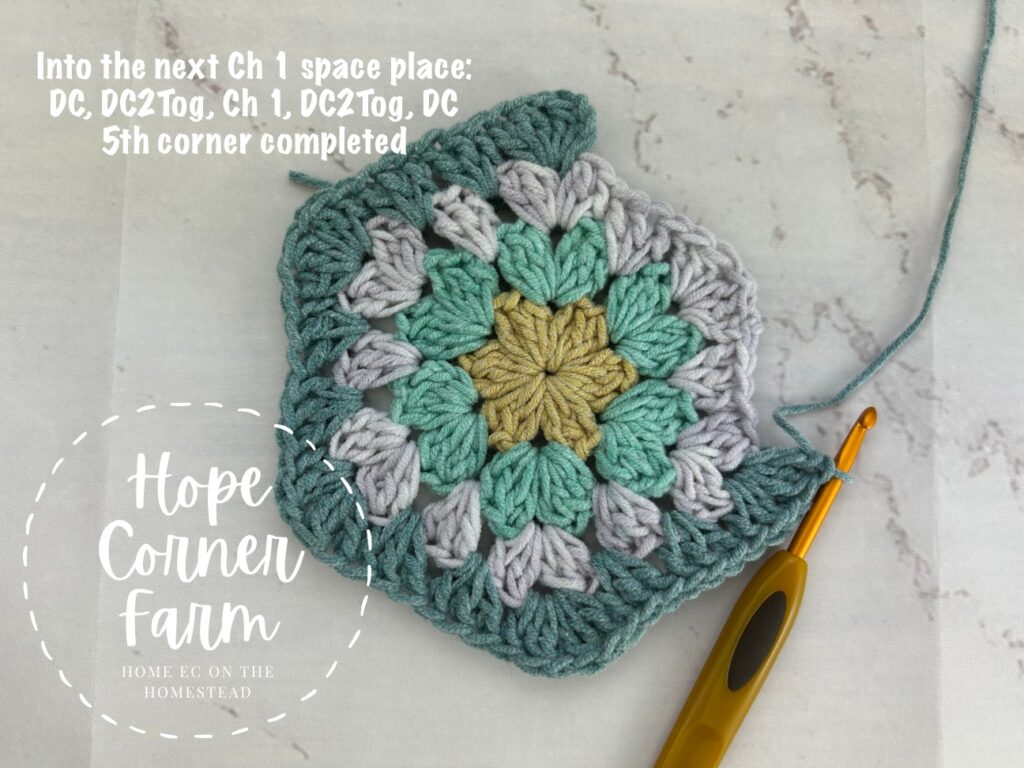
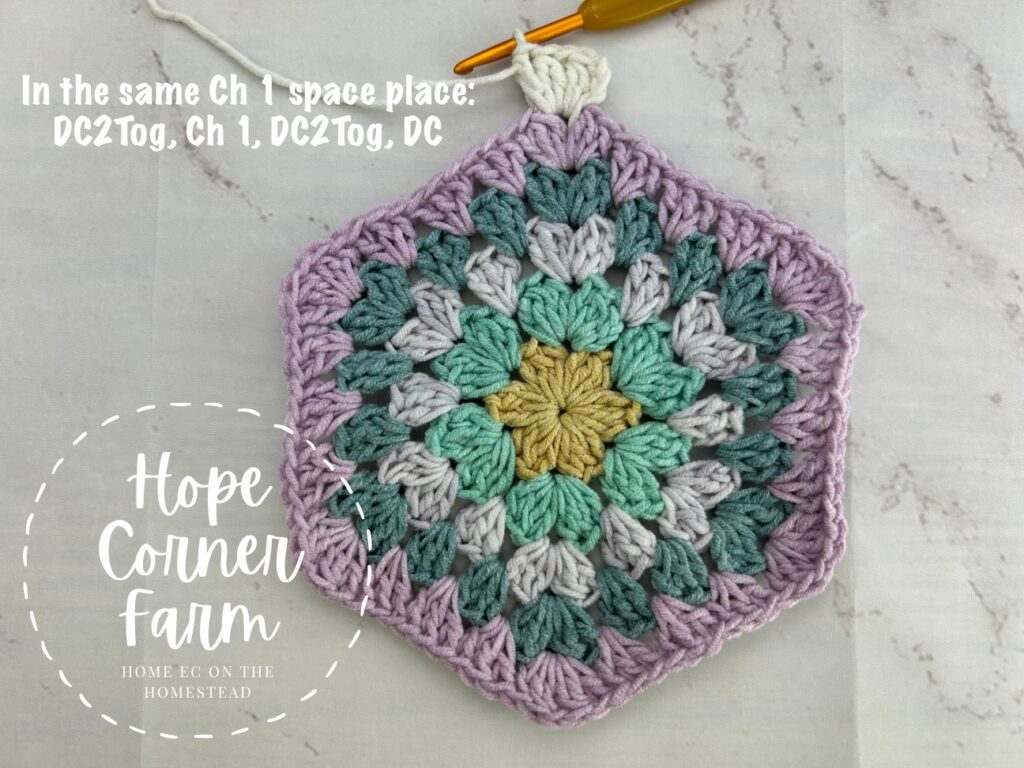
Now into this same Ch 1 space place: DC2Tog, Ch 1, DC2Tog, DC. This completes the 1st corner.
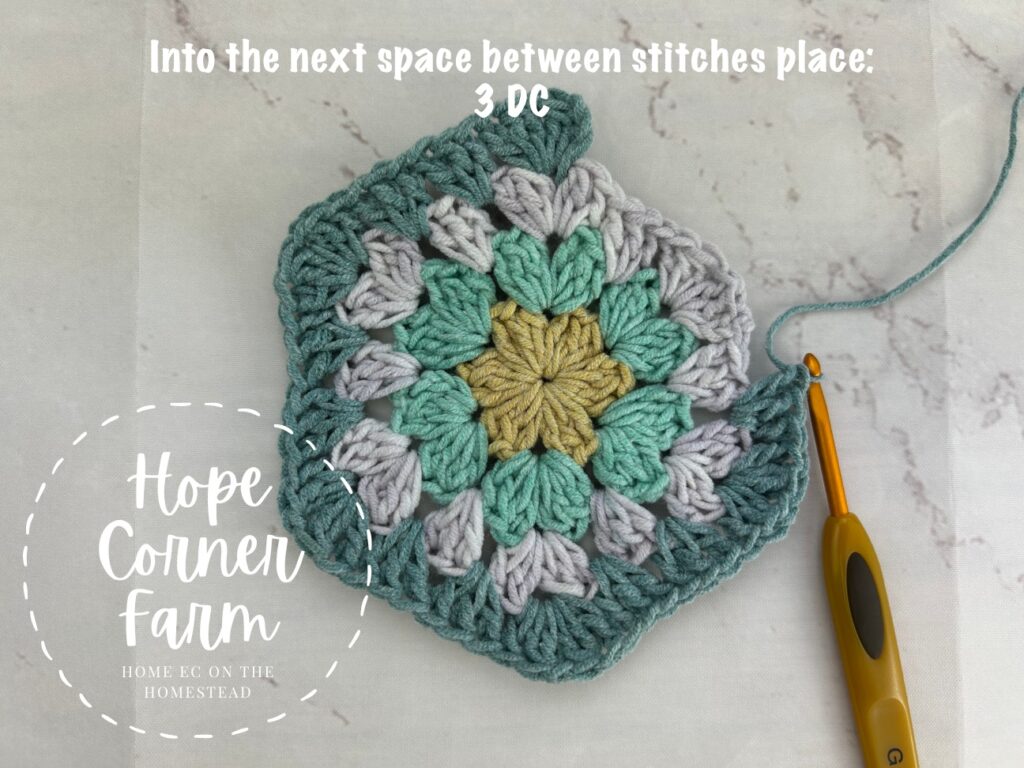
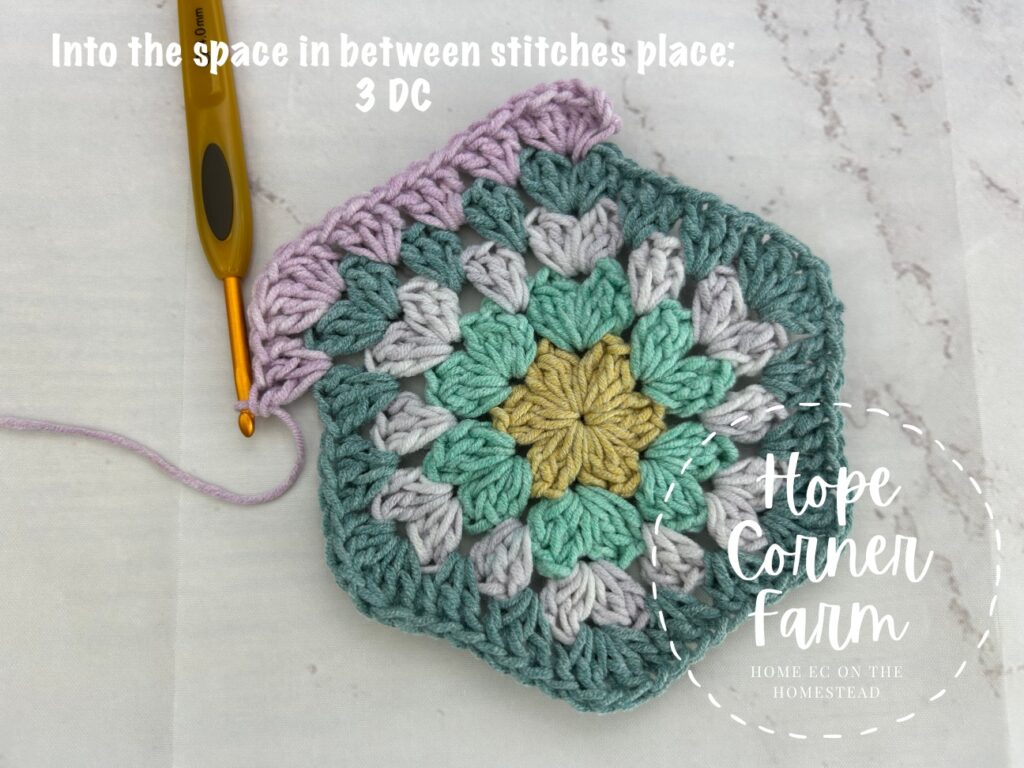
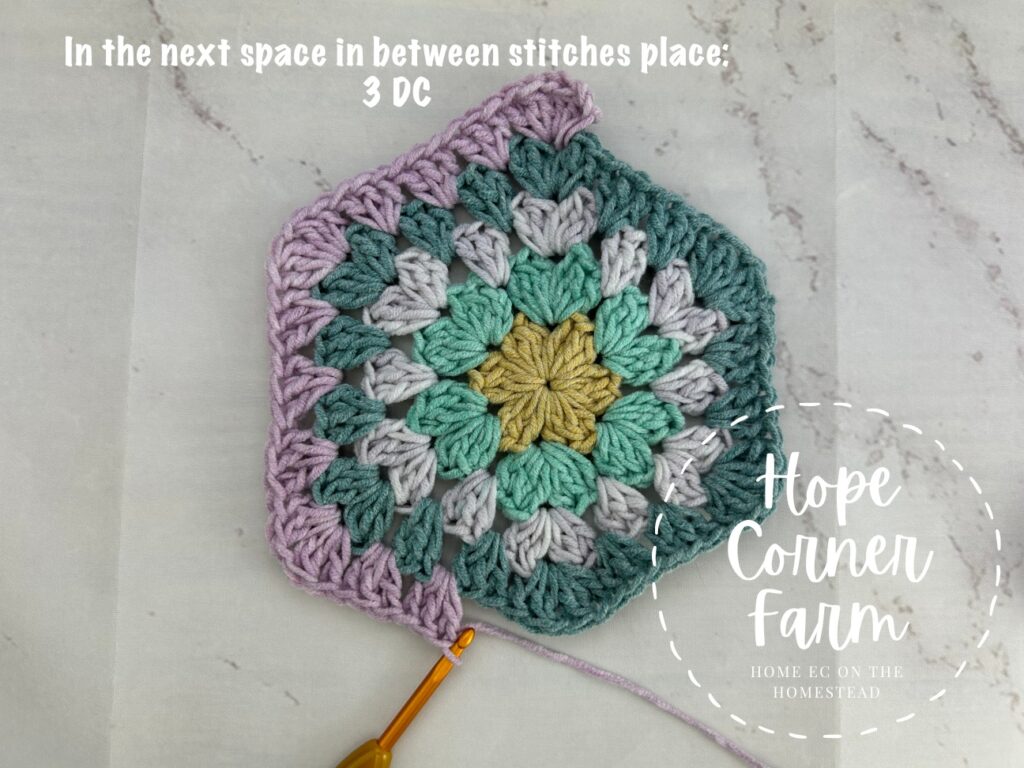
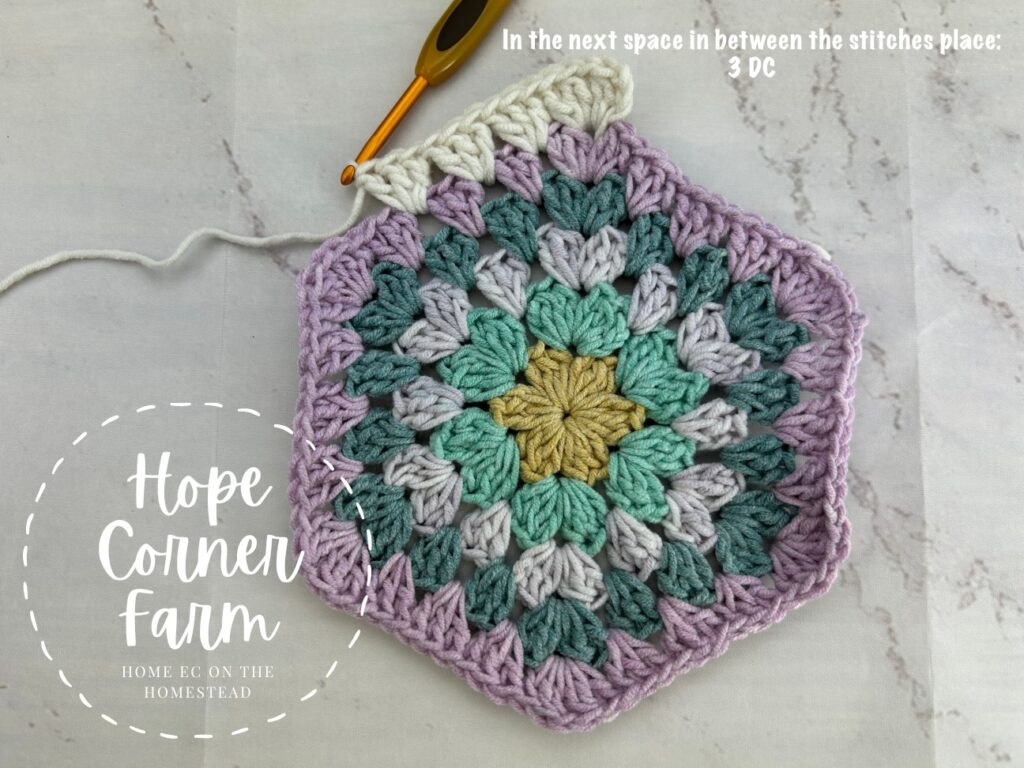
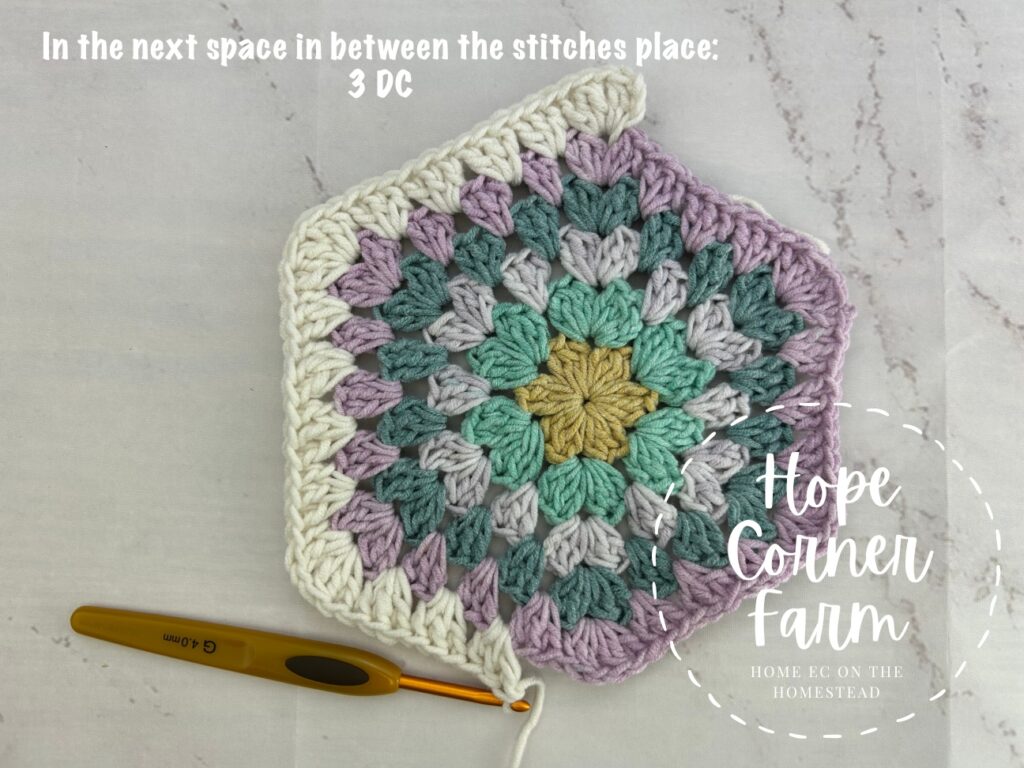
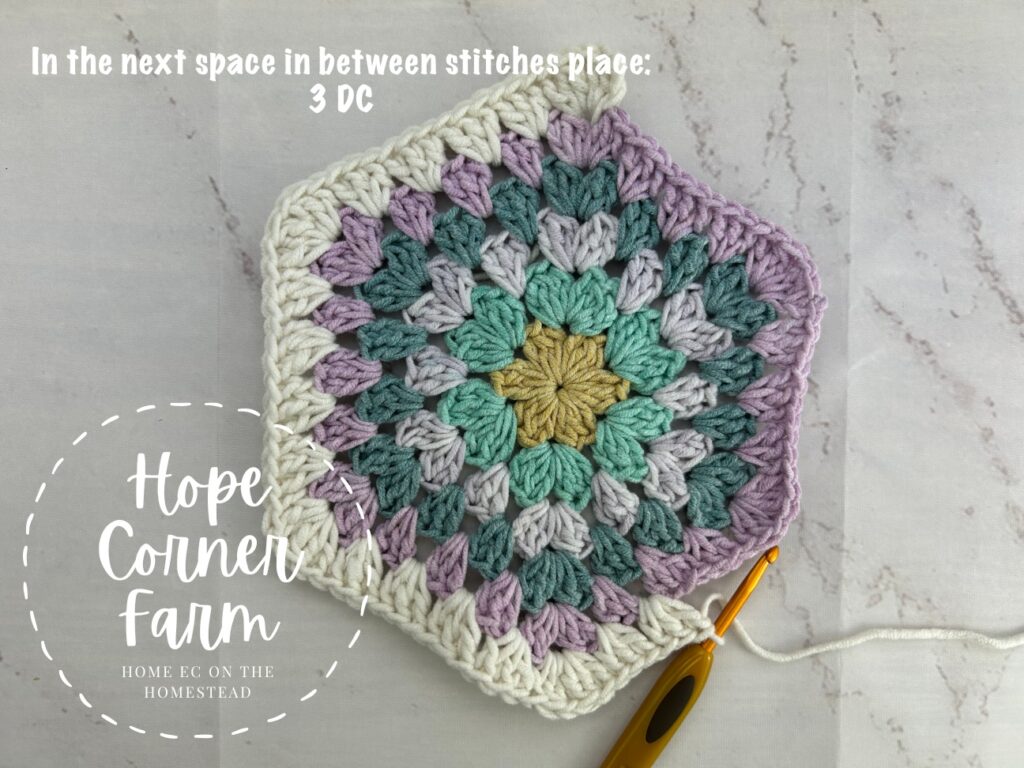
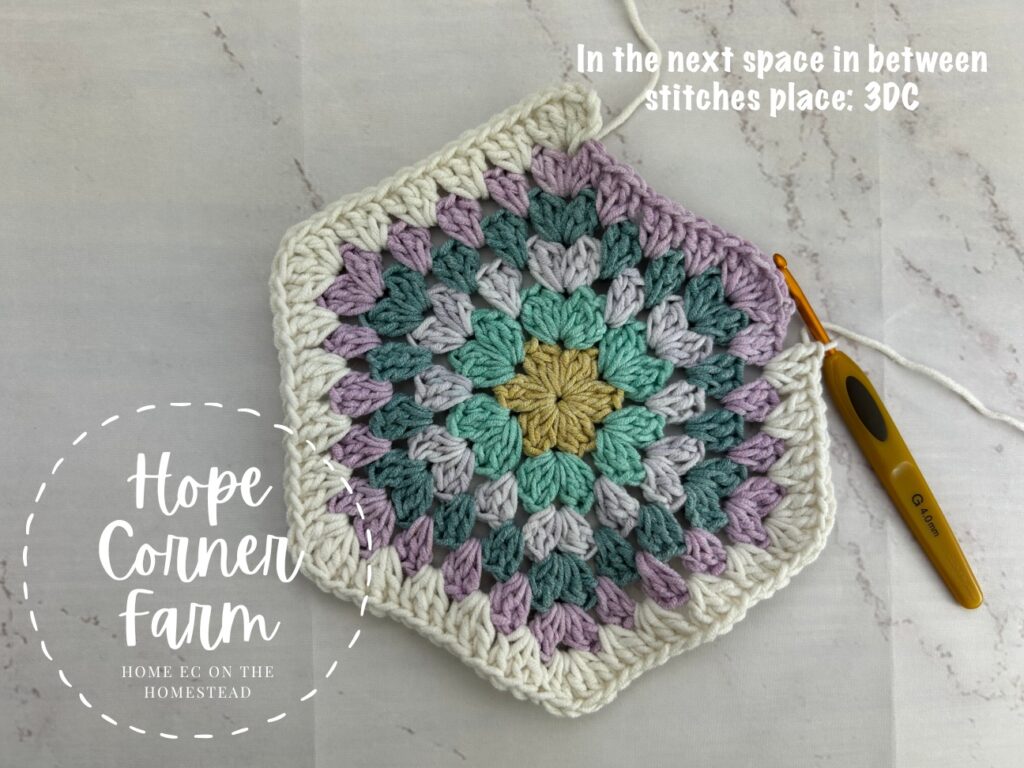
Next place 3 DC in each of the next THREE spaces in between stitch clusters from the previous round of crochet.
Now for the remainder of the round place the following stitches: (Into the next chain 1 space place DC, DC2Tog, Ch 1, DC2Tog, DC. Place 3 DC in each of the next 3 spaces in between stitch clusters from the previous round) 5xs. There will be 6 total corners and 18 sets of 3 DC.


Finally to finish the round join with a Slip Stitch to the top of the Chain 3. Cut yarn free. Fasten off. Weave in ends. Round 5 completed. (84)
Granny Hexagon – Round 6:
First look at the picture below to see crochet stitch placement for this round.
To start join with a Slip Stitch to any of the Chain 1 spaces from the previous round. Chain 3 (this counts as a DC).
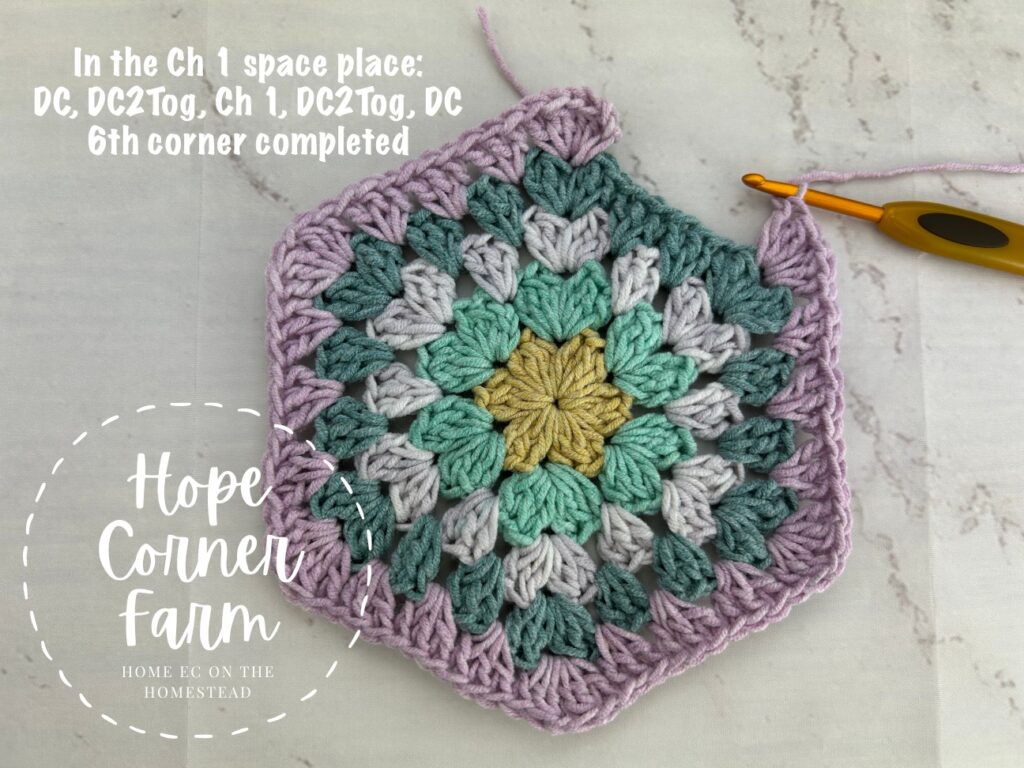
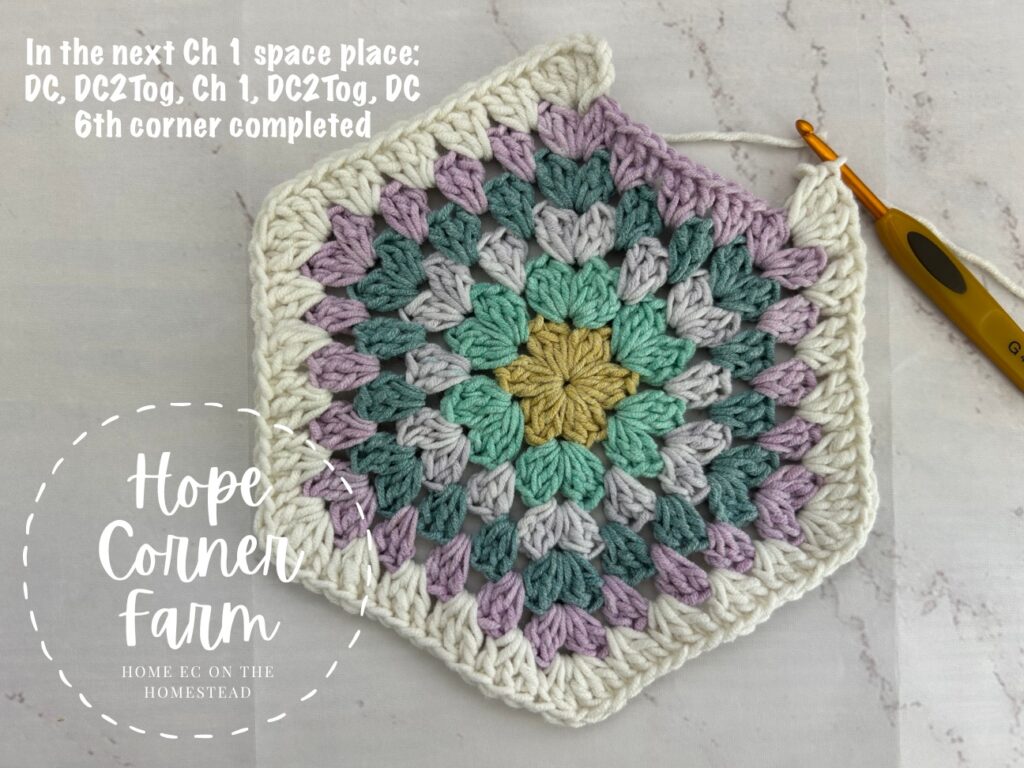
Now into the same Chain 1 space place: DC2Tog, Ch 1, DC2Tog, DC. This forms the first corner.
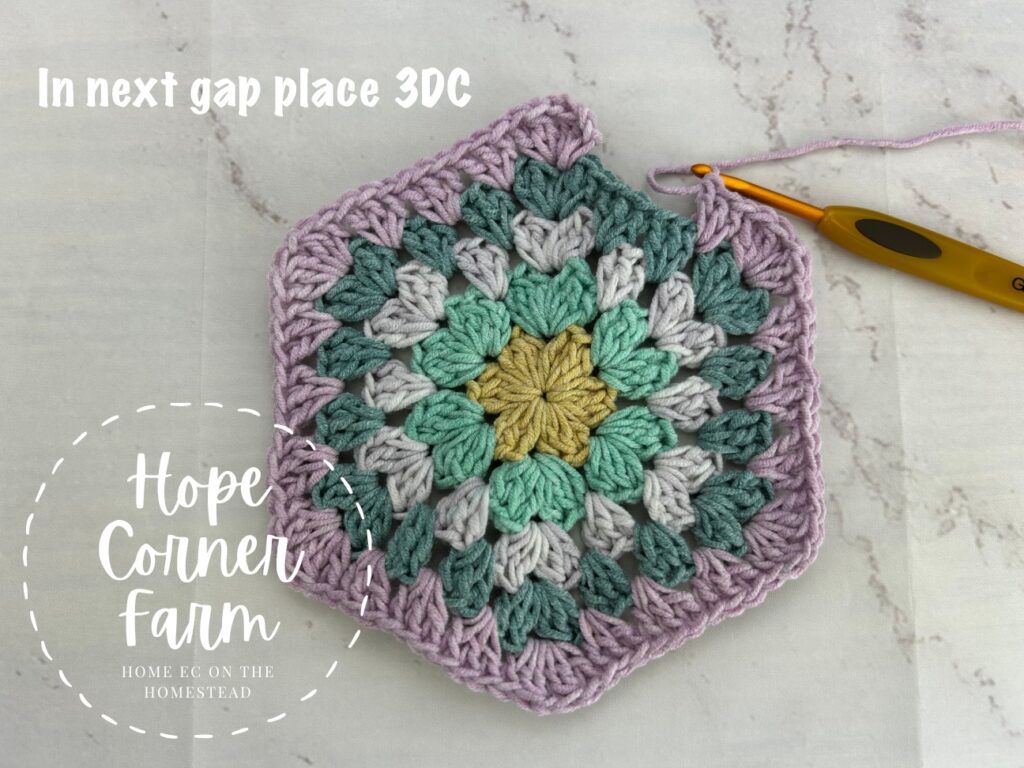
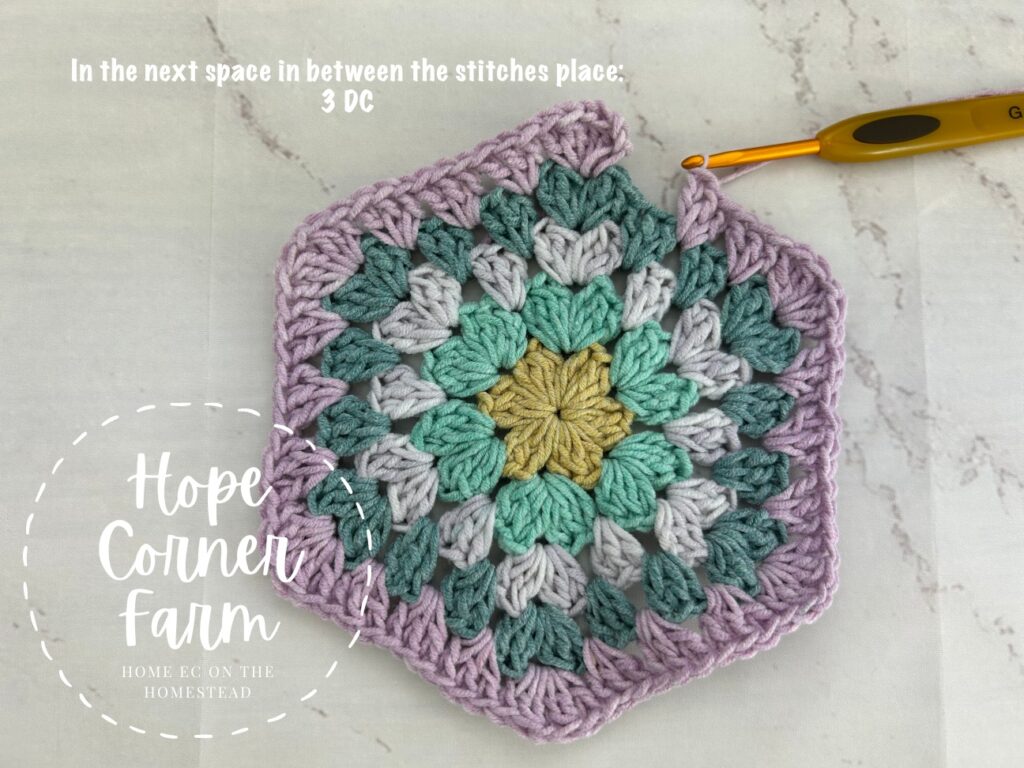
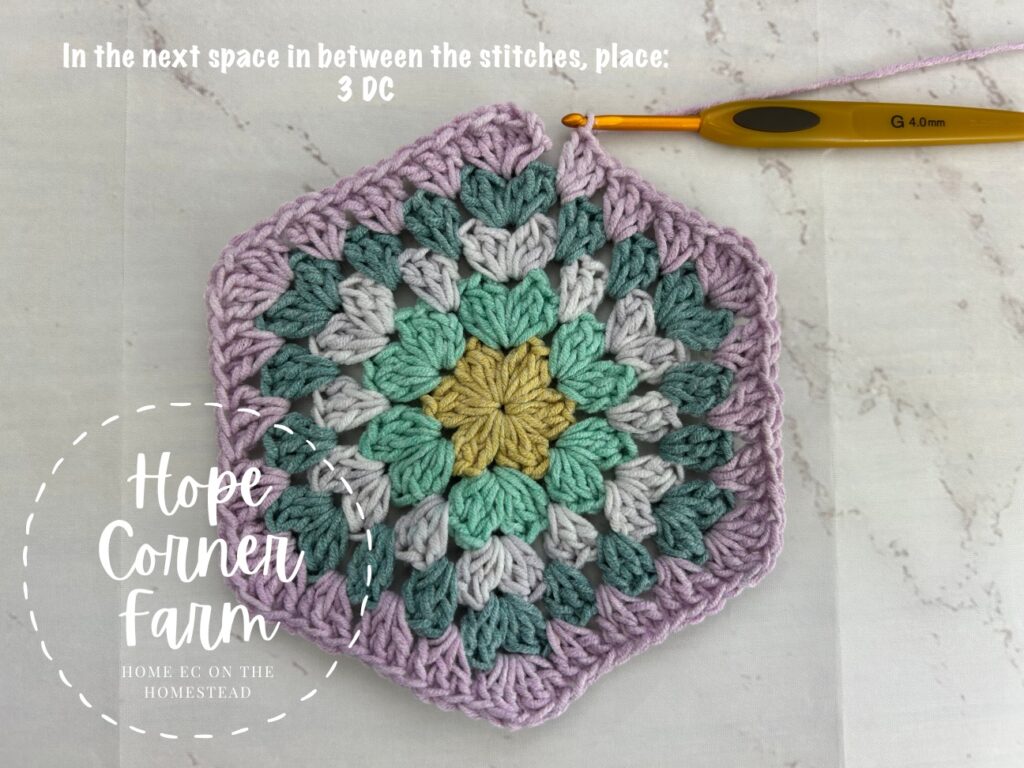
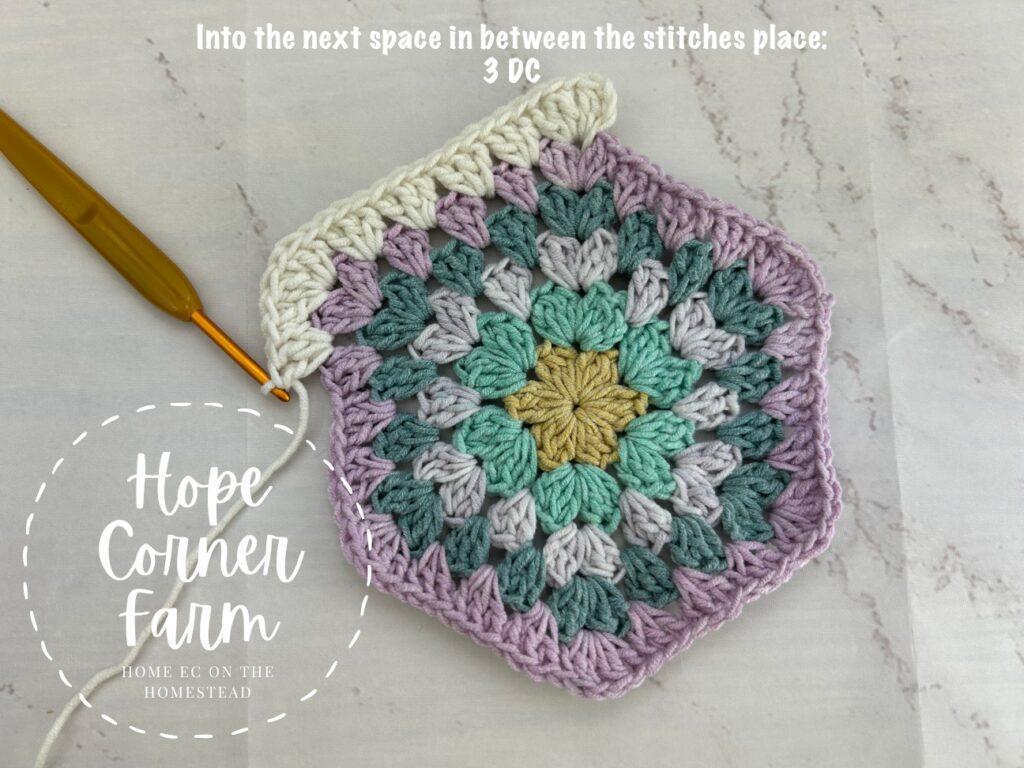
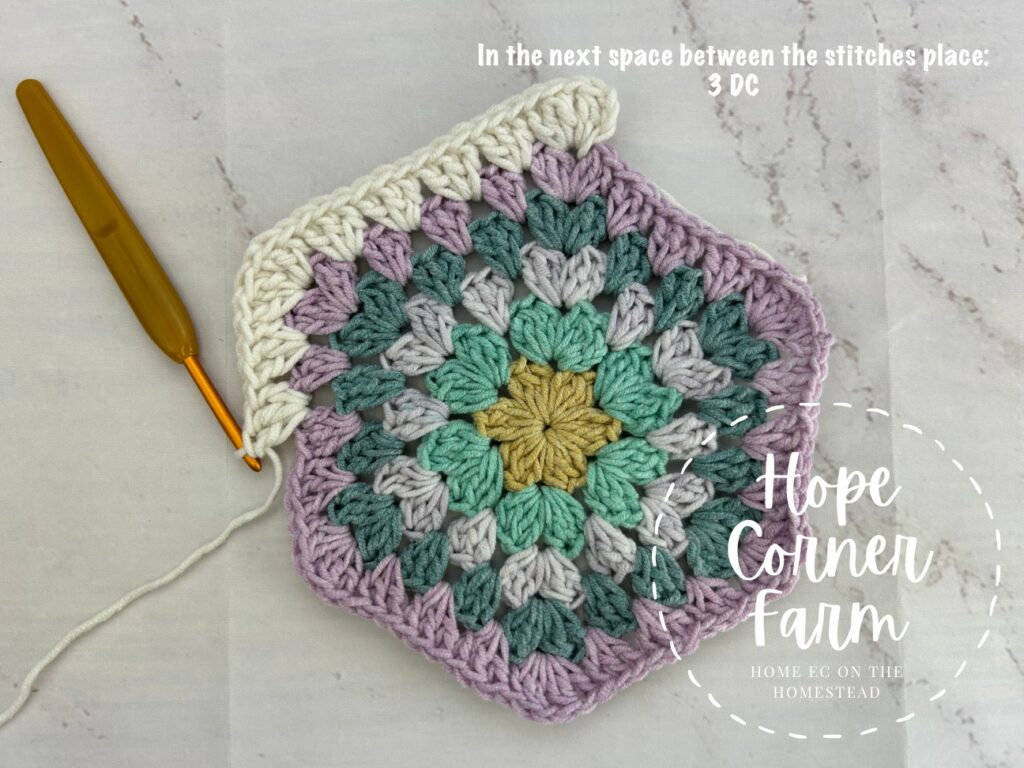
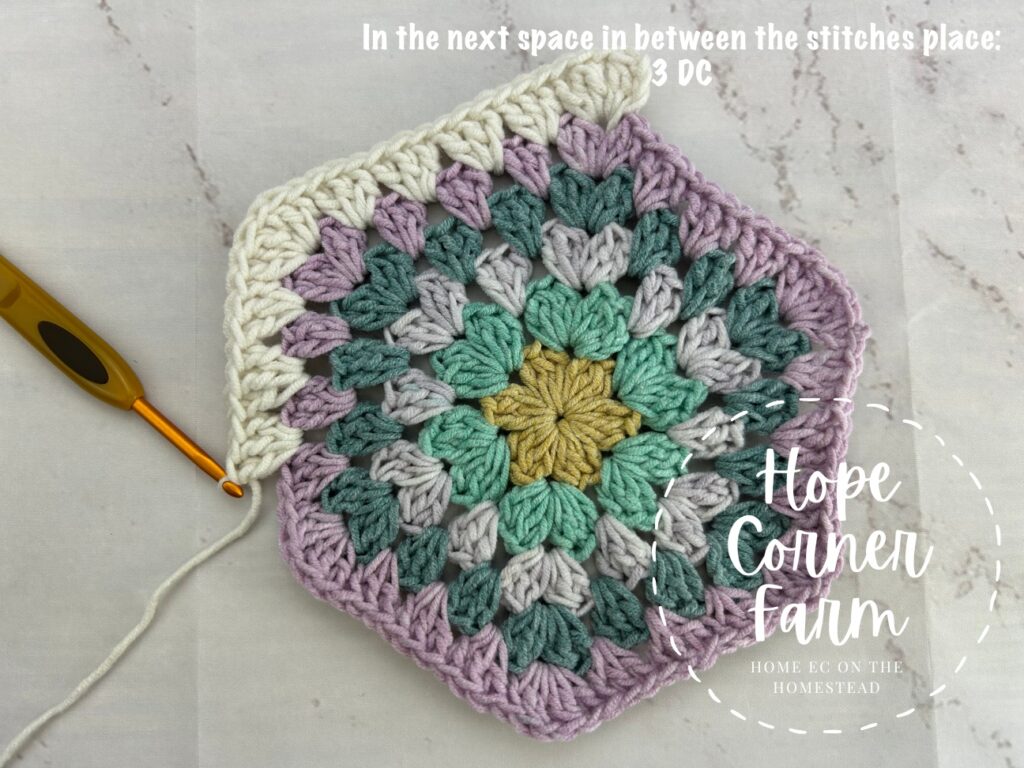
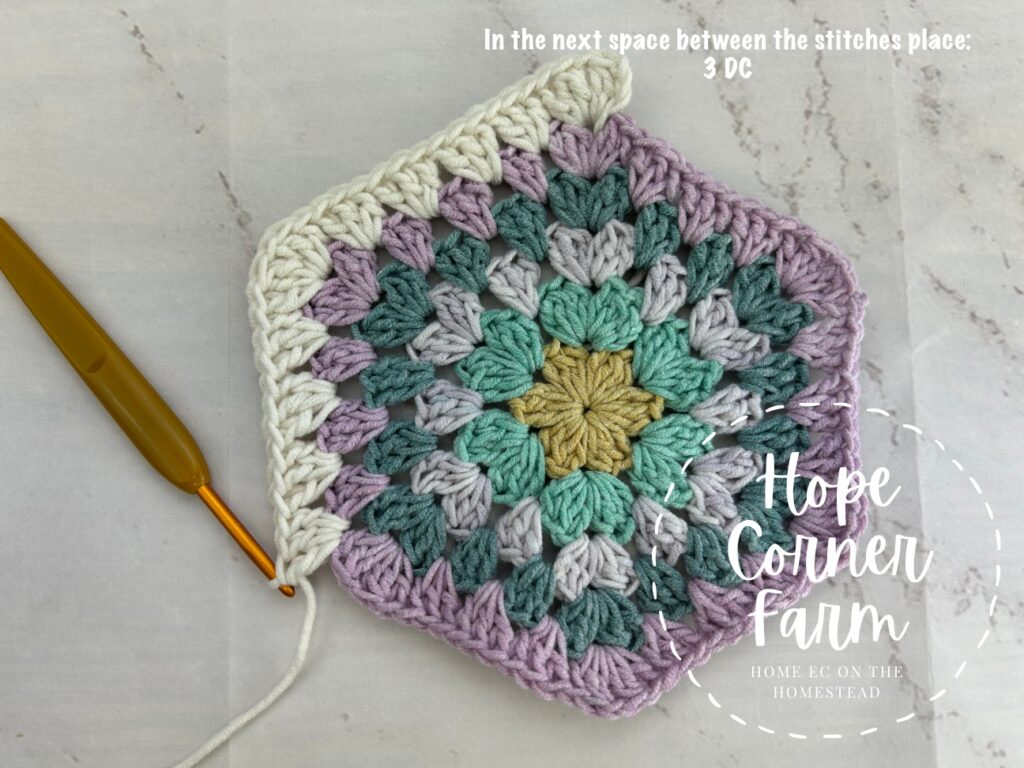
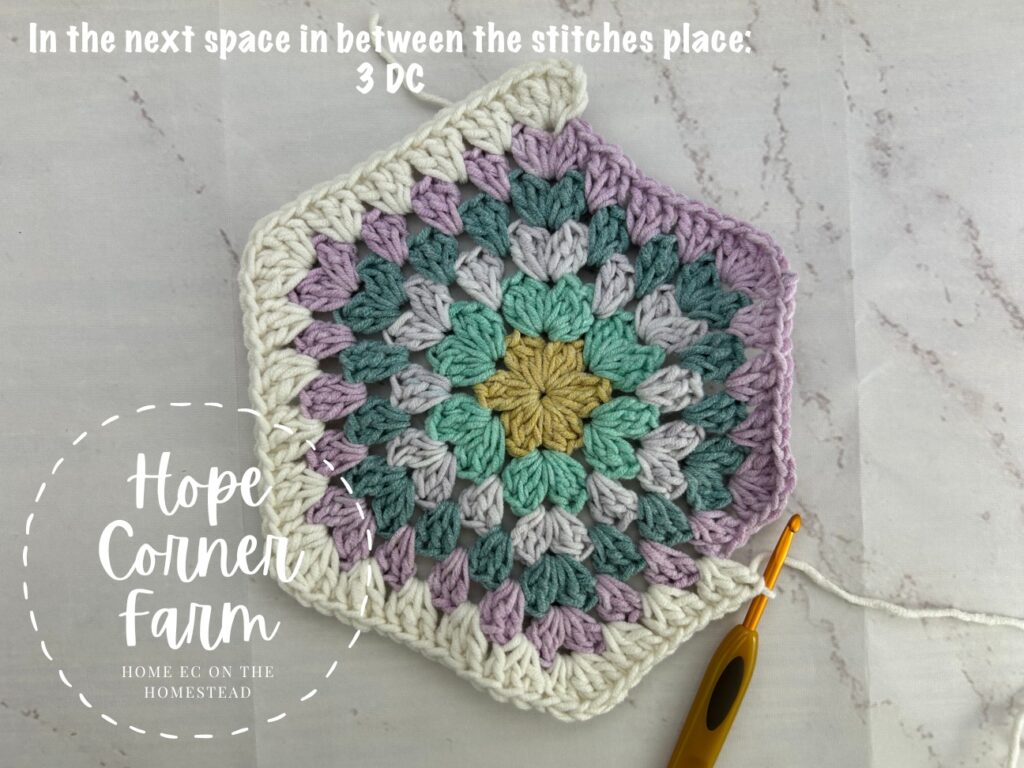
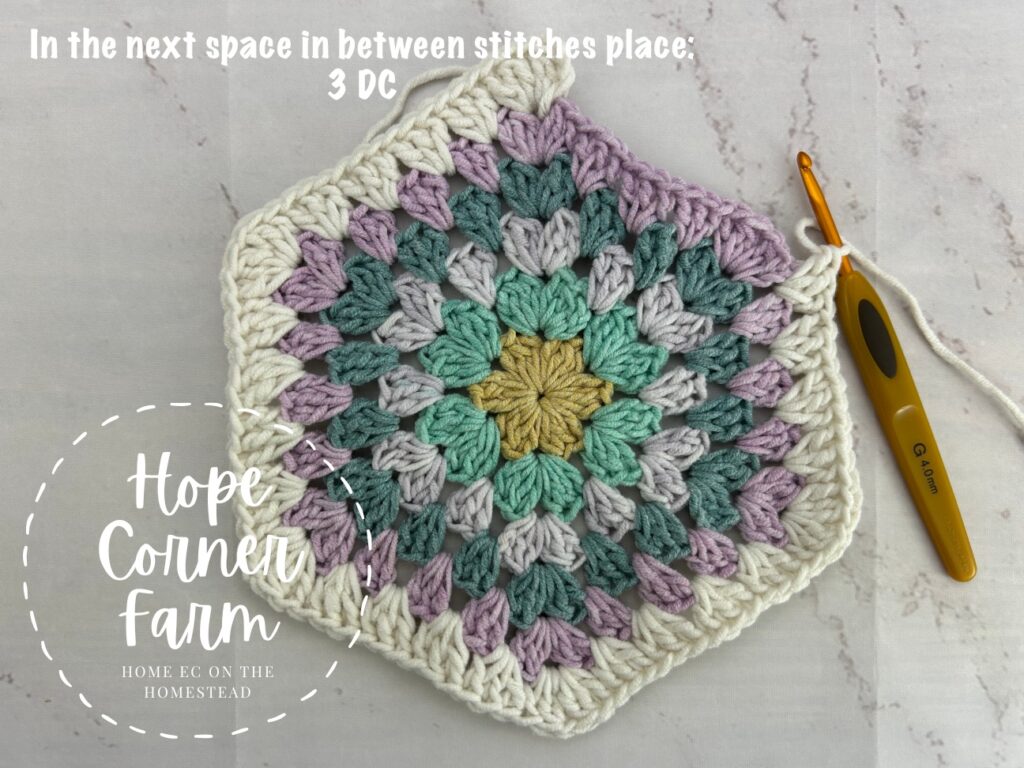
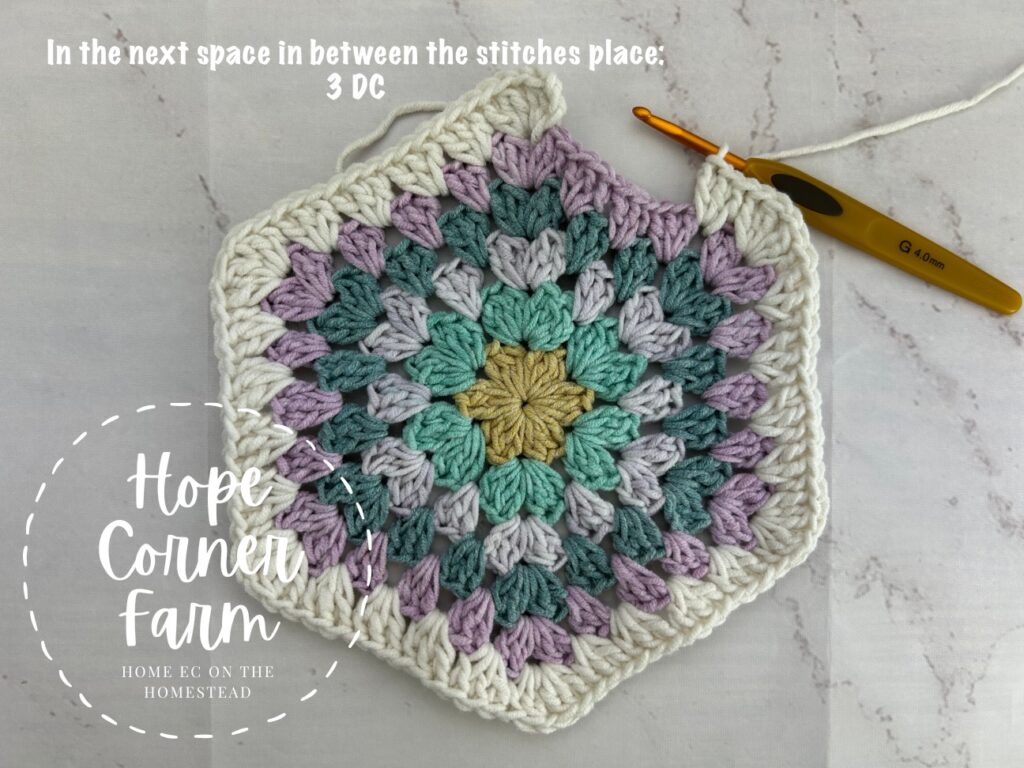
Next, in each of the next FOUR spaces in between stitch clusters place: 3 DC in each space.

Now around the rest of the hexagon place: (In the next Ch 1 space place: DC, DC2Tog, Ch 1, DC2Tog, DC. In each of the next FOUR spaces in between stitches place: 3 DC in each.) 5xs. (102)


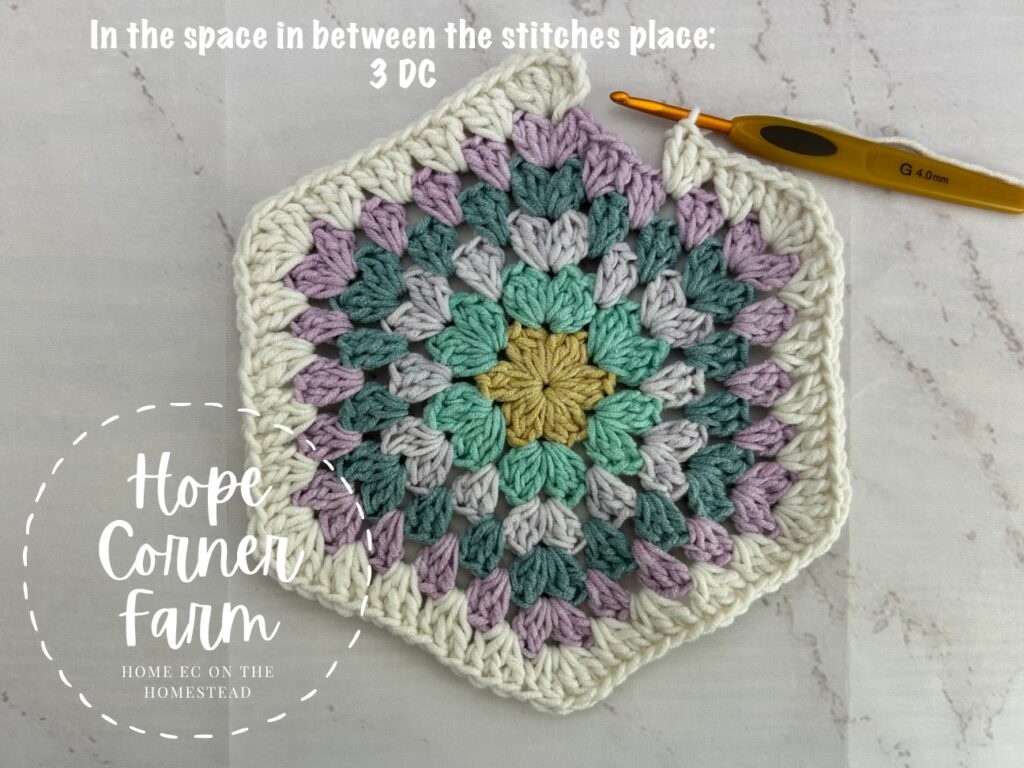
Finally, join with a slip stitch to the top of the chain 3. Cut yarn free. Fasten off. Weave in ends.

Wrapping Up the Big Granny Hexagon Pattern:
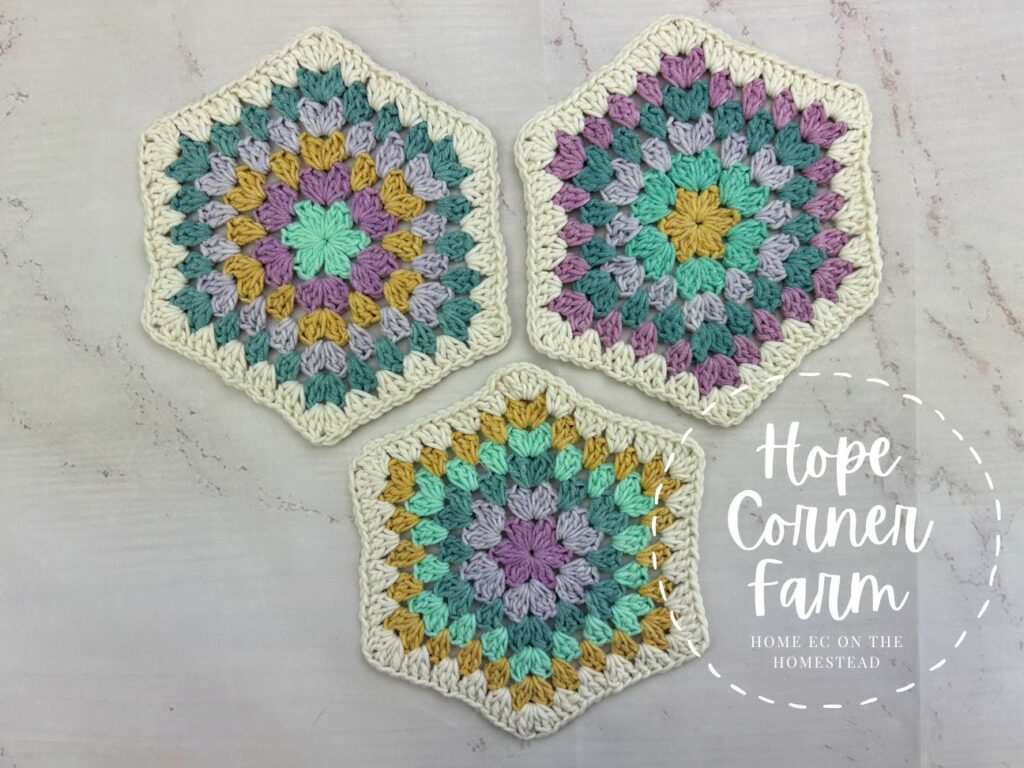
Congratulations on completing your big crochet granny hexagon! Whether you’re using it as a statement piece, combining multiple hexagons for a blanket, or creating a unique project of your own, this classic yet bold design adds warmth and texture to any creation. Don’t forget to weave in your ends and block your hexagon if needed to ensure a clean, polished finish. I hope this pattern brought you joy and inspiration—happy hooking!
Big Crochet Granny Hexagon Video Tutorial:
Written Pattern Only – Big Granny Hexagon:
Round 1:
Begin with a magic circle (or you could chain 4, join with a sl st to the 1st chain to create a circle).
Chain 3 (this counts as a DC). Into the circle place DC2Tog, DC, Ch 1. Repeat (DC, DC2Tog, DC, Ch 1) 5 more times. (24)
Tighten the MC. Join with a sl st to the top of the chain 3 to close the round. Cut yarn. Fasten off. Weave in ends.
Round 2:
With new color, join in any of the chain 1 spaces. Chain 3 (this counts as a DC).
Into the same Ch 1 space place: DC2Tog, DC, Ch 1, DC, DC2Tog, DC.
In each of the 5 remaining Ch 1 spaces place the following: DC, DC2Tog, DC, Ch 1, DC, DC2Tog, DC. There will be 6 corners total.
Join with a Sl St to the top of the Ch 3. Cut yarn. Fasten Off. weave in ends. (42)
Round 3:
With new color, join in any of the chain 1 spaces. Chain 3 (this counts as a DC).
Into the same Ch 1 space place: DC2Tog, Ch 1, DC2Tog, DC.
Place 3 DC in the next space. (In next ch 1 space place [DC, DC2Tog, Ch 1, DC2Tog, DC]. 3DC in next space) 5xs. (6 corners total).
Join with a Sl St to the top of the Ch 3. Cut yarn. Fasten off. Weave in ends. (48)
Round 4:
With new color, join in any of the chain 1 spaces. Chain 3 (this counts as a DC).
Into the same Ch 1 space place: DC2Tog, Ch 1, DC2Tog, DC.
Place 3 DC in each of the next 2 spaces. (In next ch 1 space place [DC, DC2Tog, Ch 1, DC2Tog, DC]. 3DC in each of the next 2 spaces) 5xs. (6 corners total).
Join with a Sl St to the top of the Ch 3. Cut yarn. Fasten off. Weave in ends. (66)
Round 5:
With new color, join in any of the chain 1 spaces. Chain 3 (this counts as a DC).
Into the same Ch 1 space place: DC2Tog, Ch 1, DC2Tog, DC.
Place 3 DC in each of the next 3 spaces. (In next ch 1 space place [DC, DC2Tog, Ch 1, DC2Tog, DC]. 3DC in each of the next 3 spaces) 5xs. (6 corners total).
Join with a Sl St to the top of the Ch 3. Cut yarn. Fasten off. Weave in ends. (84)
Round 6:
With new color, join in any of the chain 1 spaces. Chain 3 (this counts as a DC).
Into the same Ch 1 space place: DC2Tog, Ch 1, DC2Tog, DC.
Place 3 DC in each of the next 4 spaces. (In next ch 1 space place [DC, DC2Tog, Ch 1, DC2Tog, DC]. 3DC in each of the next 4 spaces) 5xs. (6 corners total).
Join with a Sl St to the top of the Ch 3. Cut yarn. Fasten off. Weave in ends. (102)
Finishing Up the Big Granny Hexagon:
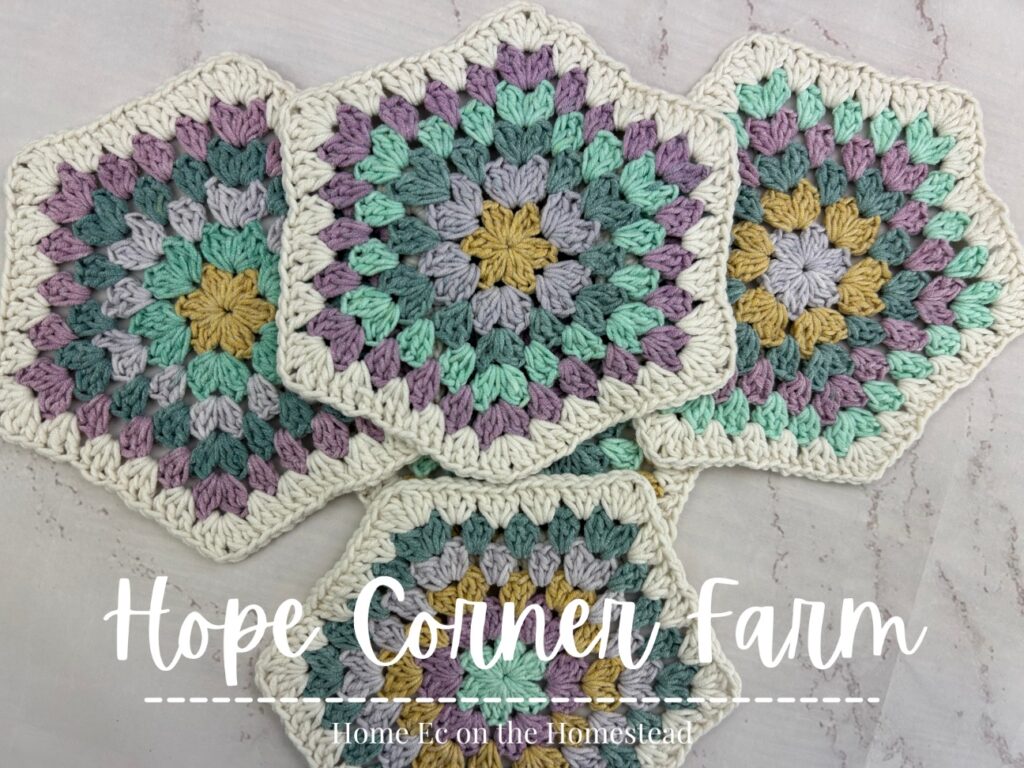
After weaving in ends, this hexagon looks better when blocked. There are numerous tutorials for how to block on both You Tube as well as Google.
I find that the yarn I used that had cotton in it (60/40 blend) needed blocking more than the Hexagons I made with 100% acrylic yarn.
And that’s the Crochet Flower Headband! I hope you found this tutorial helpful! Finally if you want more crochet fun delivered to your inbox hope on over and join our newsletter!

Many Blessings,

Looking for more crochet fun? Check these patterns out!
Crochet Puff Stitch Granny Square from Hope Corner Farm
Crochet Sunflower Granny Square from Hope Corner Farm
Simple Flower Granny Square from Hope Corner Farm