
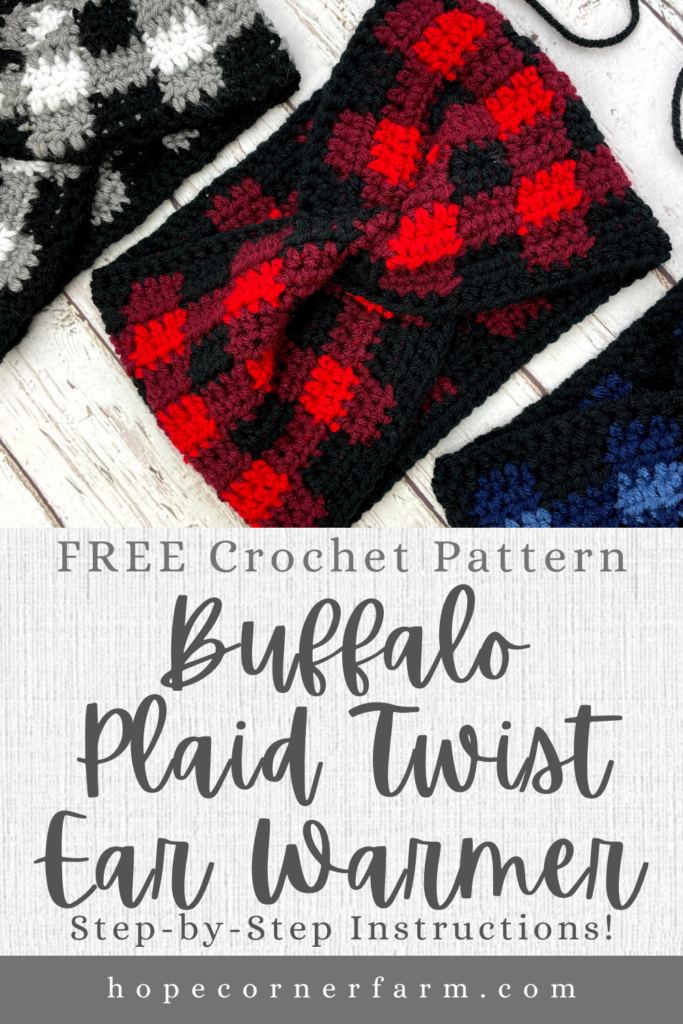
Crochet Buffalo Plaid Twist Headband – Free Pattern
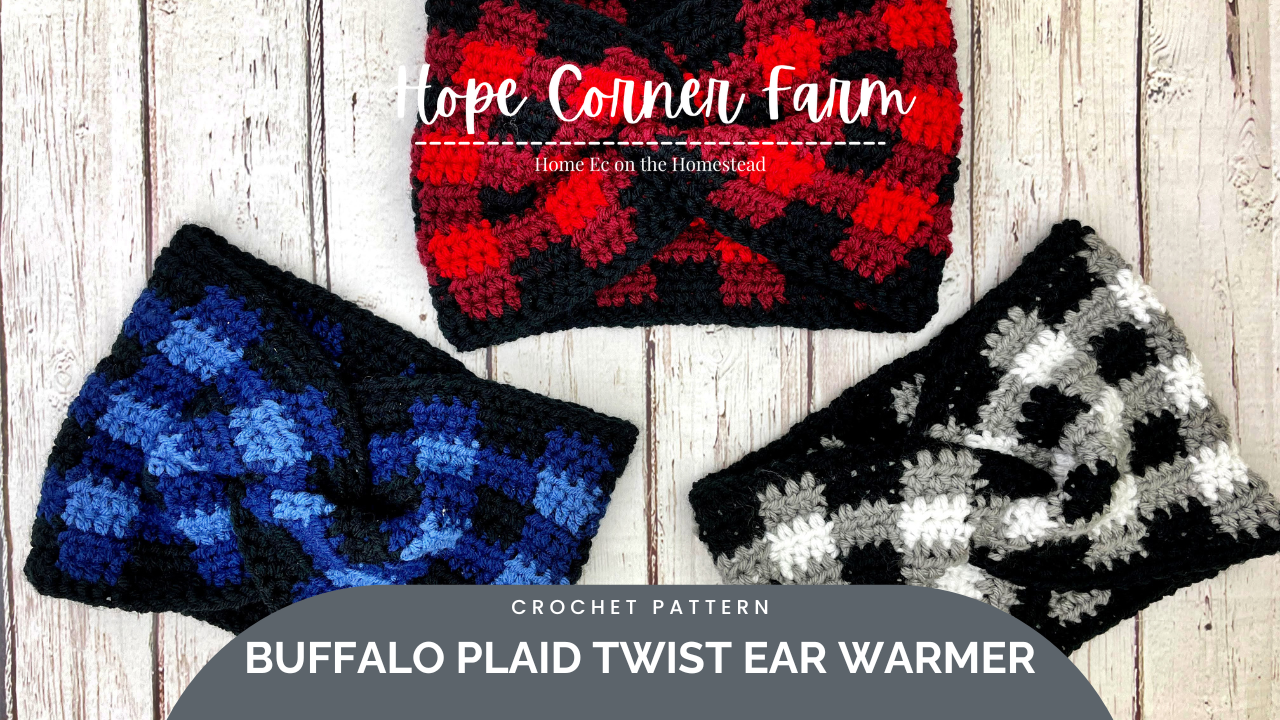

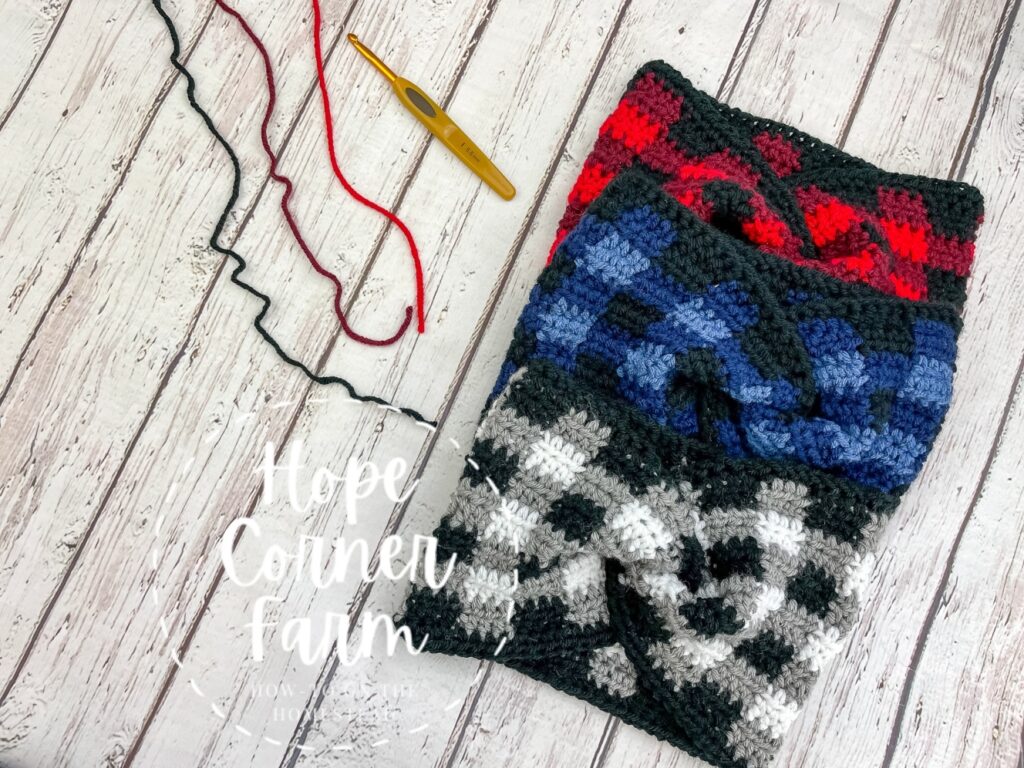
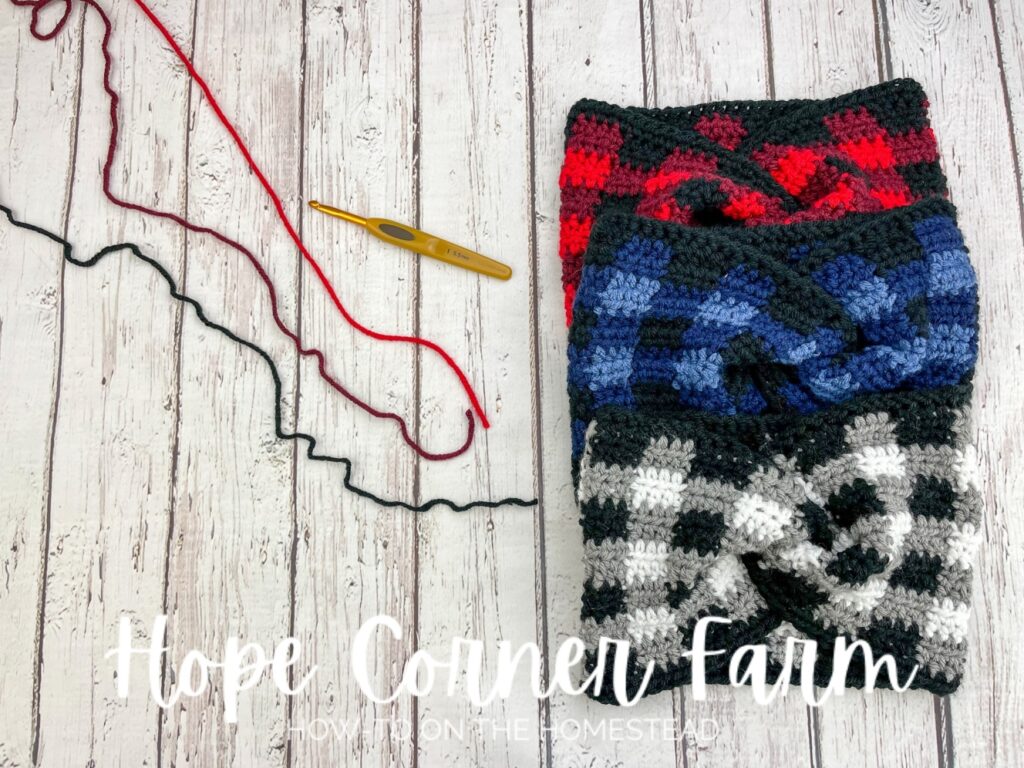
Winter is knocking on the door here in Montana, so it seems like a good time to crochet some warm headgear! My Buffalo Plaid Twist Headband Crochet Pattern is the perfect cold-weather head accessory! Buffalo Plaid is quite popular, as well as twist headbands, so I decided to merge the two to create this pattern. Not only will you keep your head warm and toasty, you will also look super-cute and stylish too! It’s a win-win. Let’s get crocheting our Buffalo Plaid Twist Headband!


First, check out our video tutorial on our You Tube Channel! Subscribe to get the latest crochet fun from Hope Corner Farm Crochet!
Additional Sizes:
Looking for this headband in additional sizes? Those are available in PDF form in our Etsy store! Click the link below:
Hope Corner Crochet Store on Etsy
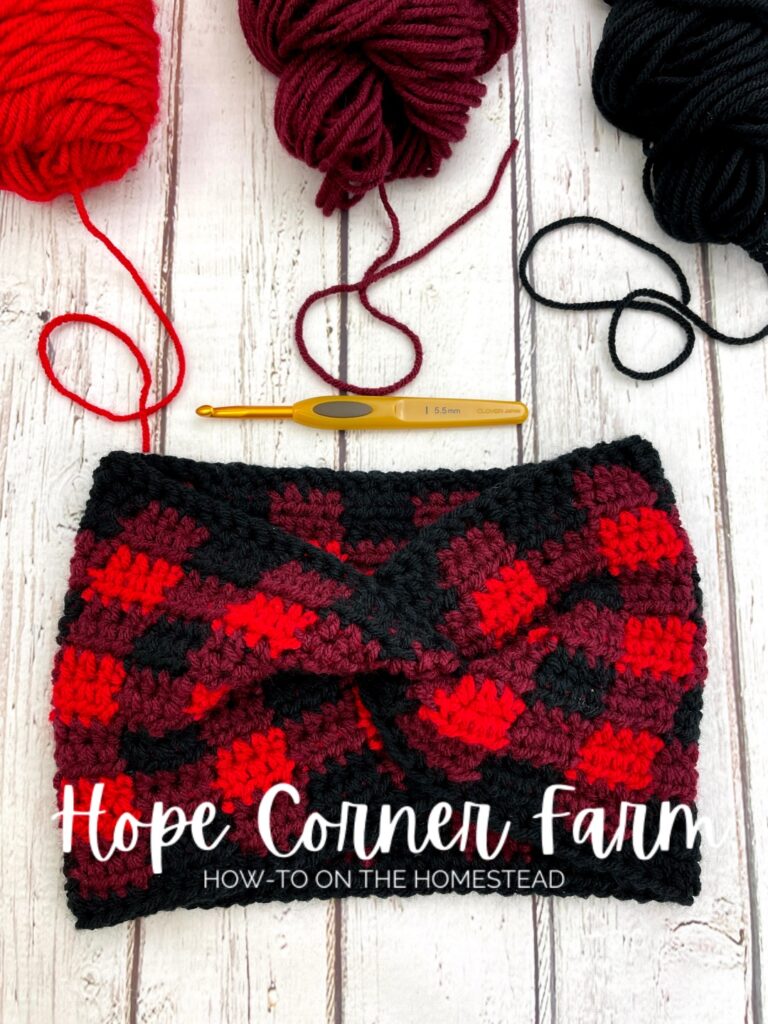
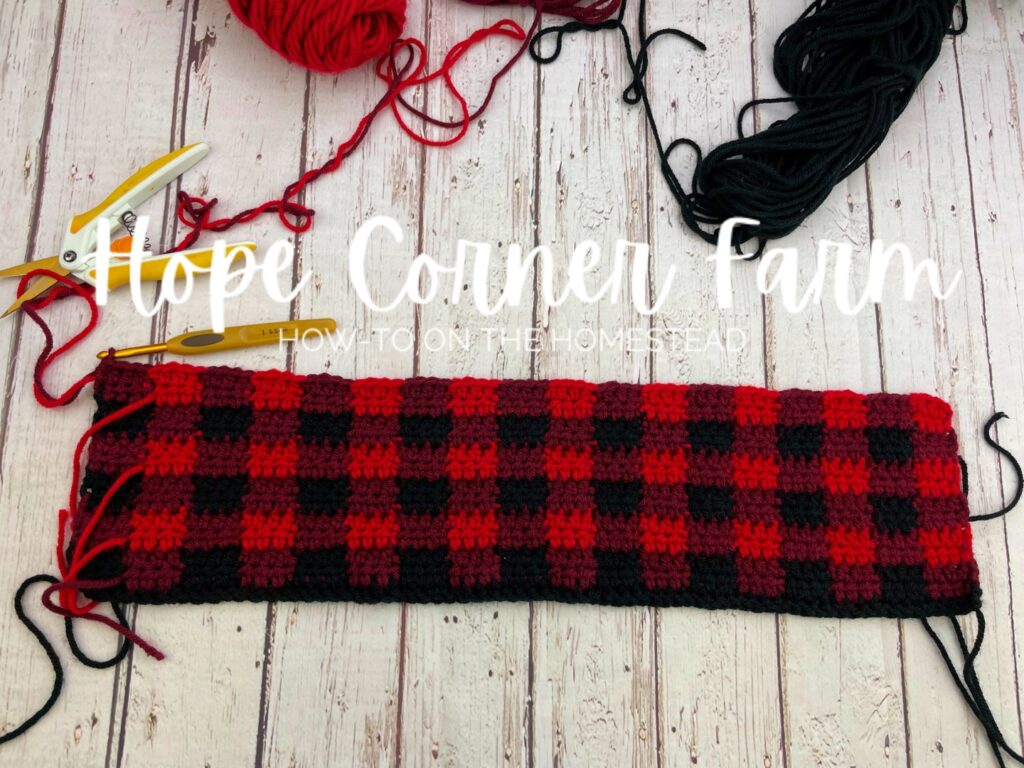
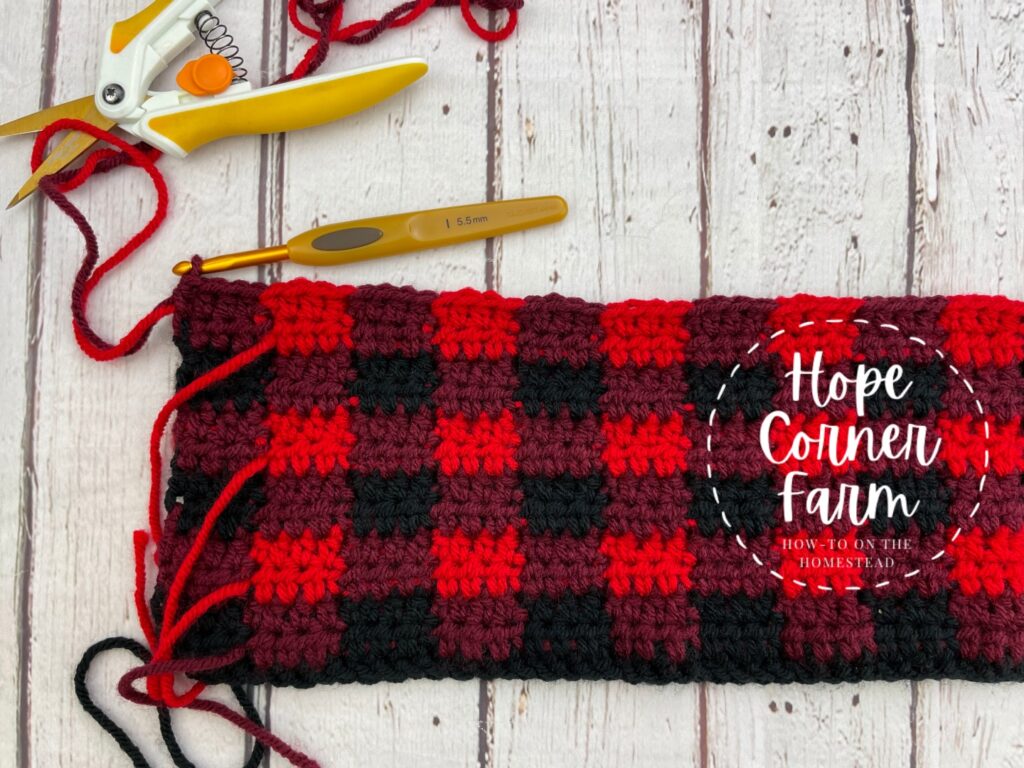
Buffalo Plaid Twist Headband Crochet Pattern Materials:
I hook (5.5mm)
Light hue medium weight (size 4) yarn (RED in my example)
Medium hue medium weight (size 4) yarn (MAROON in my example)
Dark hue medium weight (size 4) yarn (BLACK in my example)
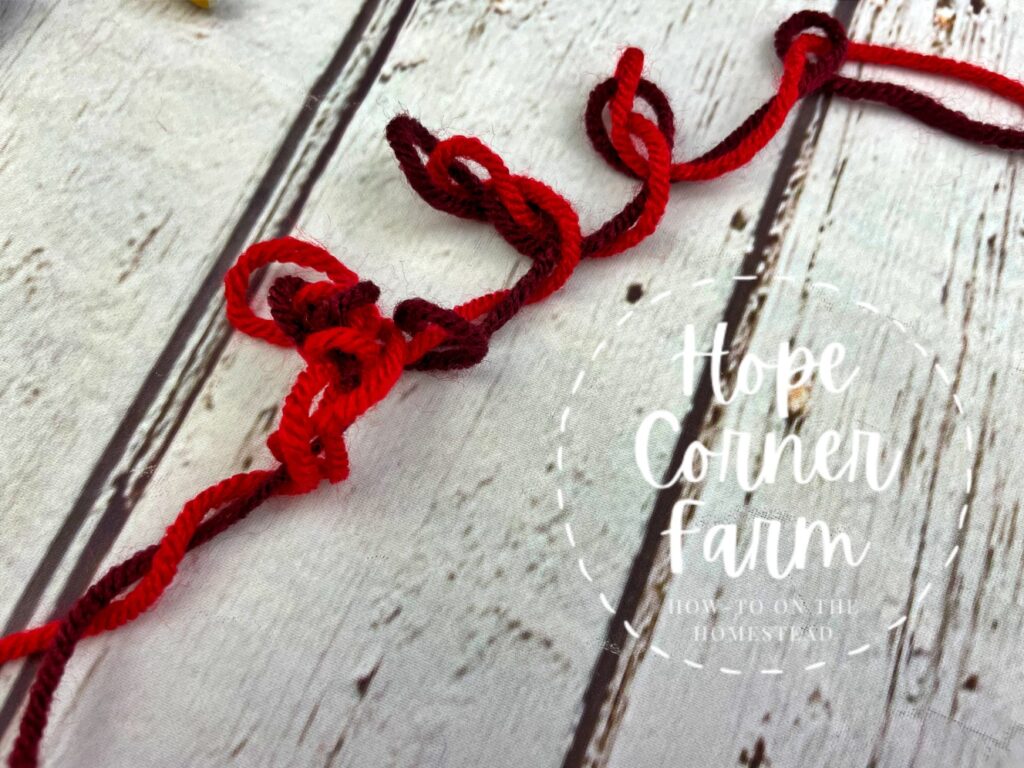
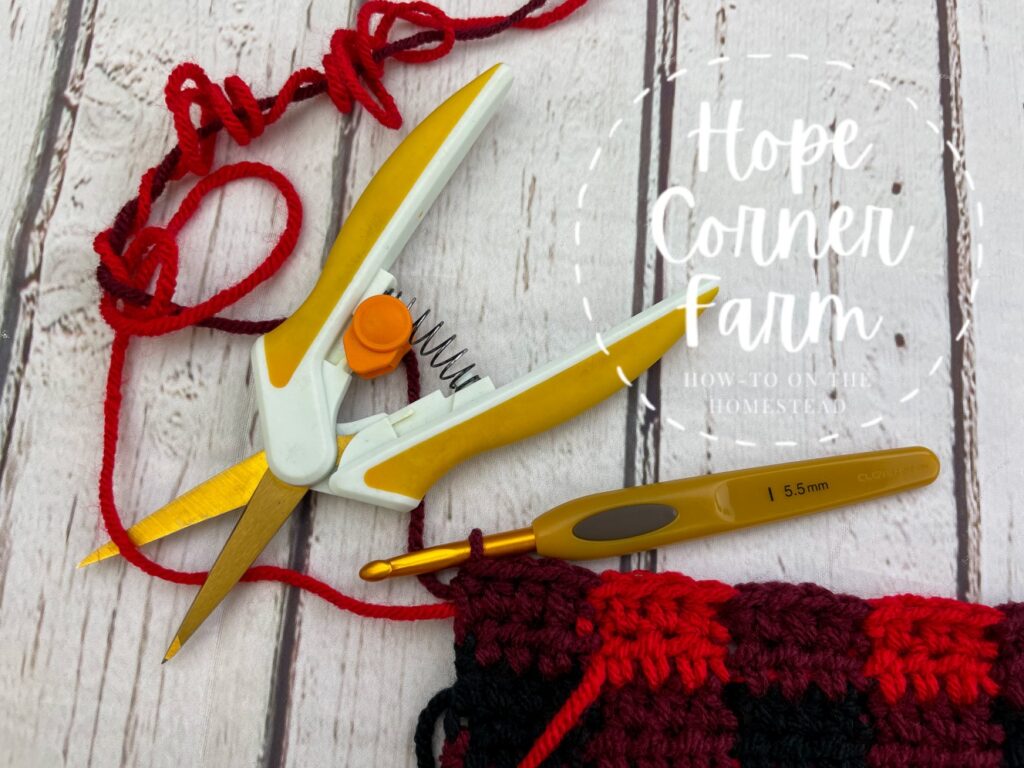
Scissors
Tapestry needle
Crochet Terms Used:
Foundation Single Crochet (FSC)
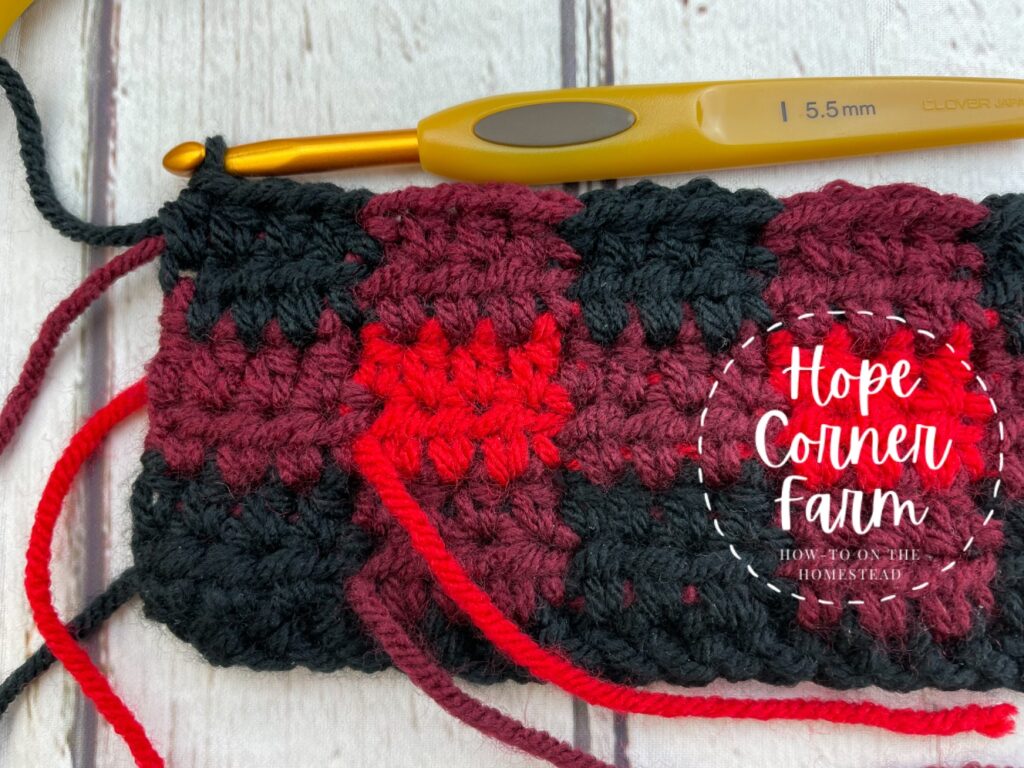
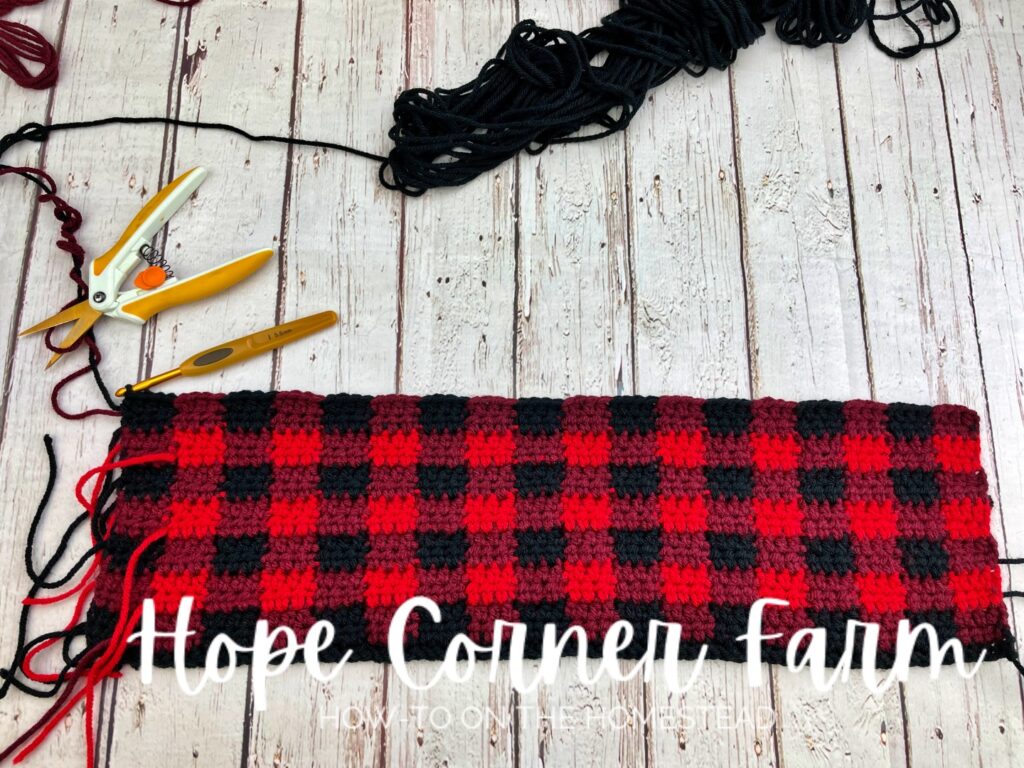
How to Work the Buffalo Plaid Stitch:
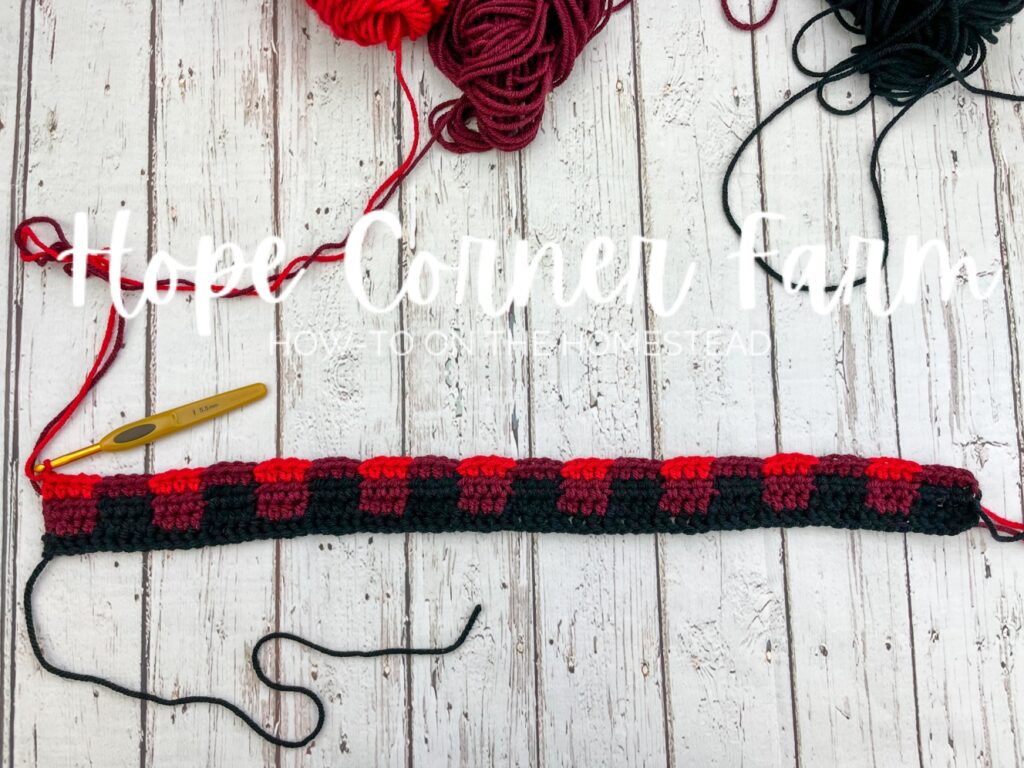
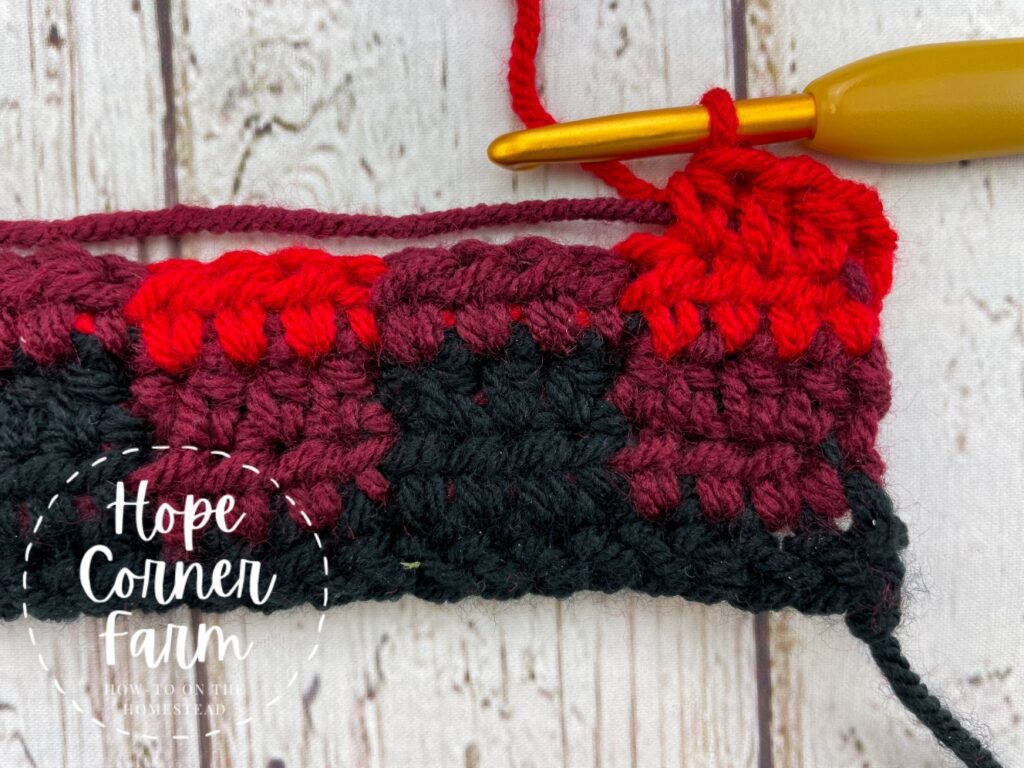
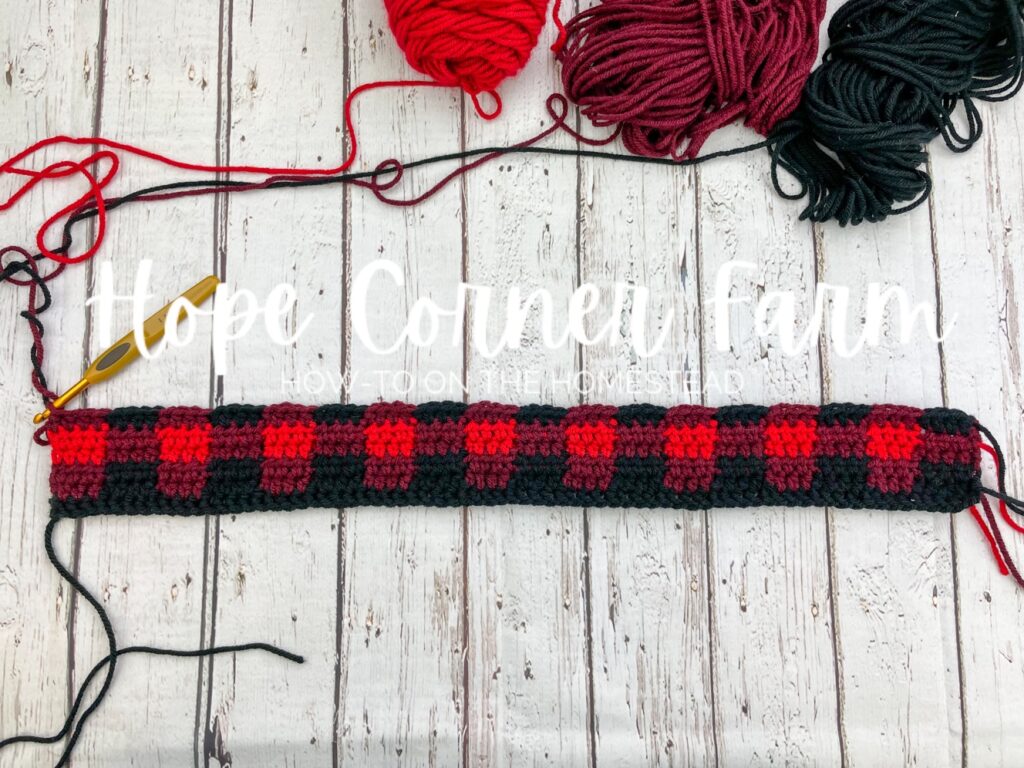
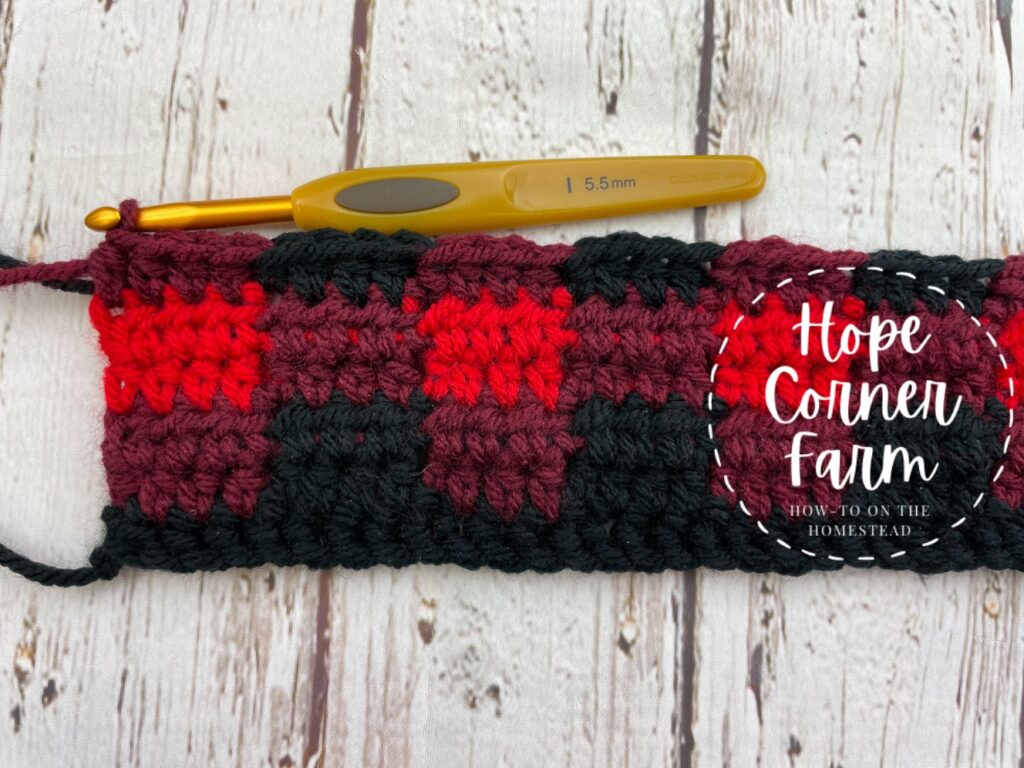
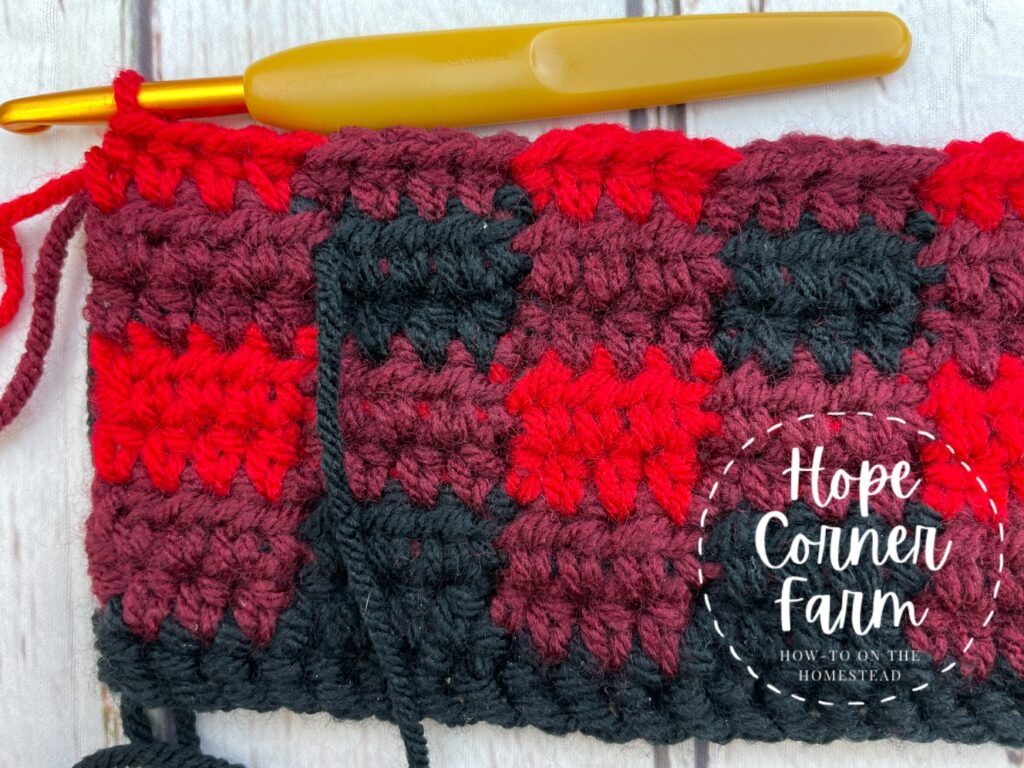
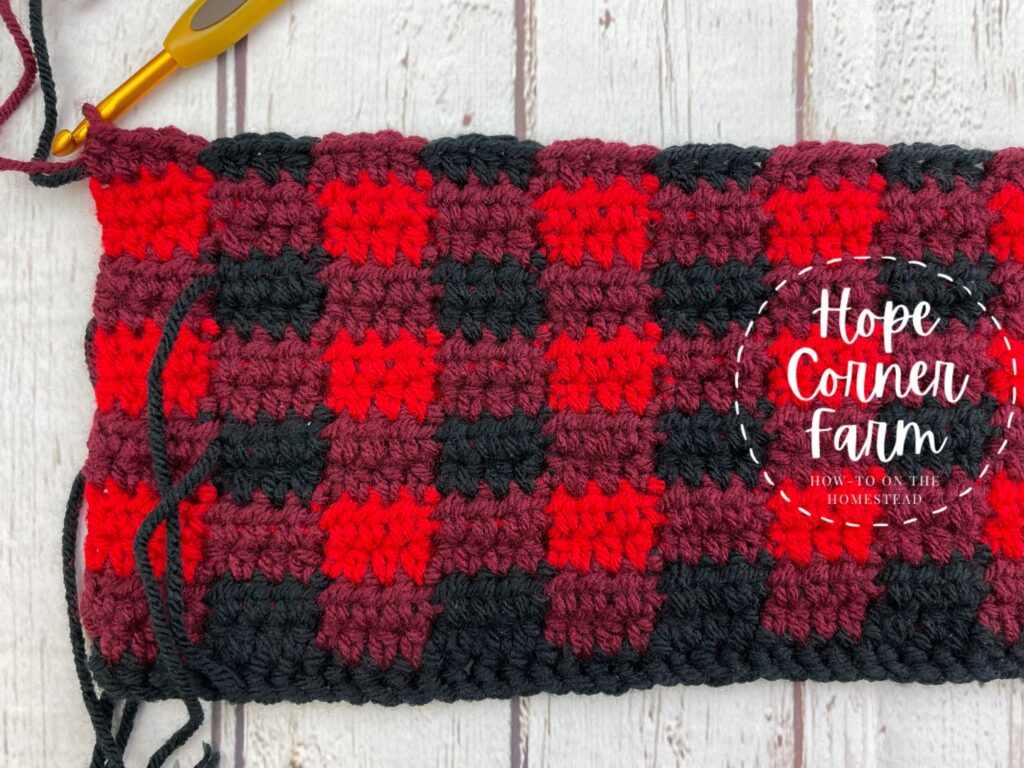
The Buffalo Plaid Stitch is worked using HALF DOUBLE CROCHET stitches. Each block has 2 rows of stitches with the same color stacked on top of itself. Each block has four HDCs in it.
Now in the first 3 stitches, place ONE HDC in each stitch.
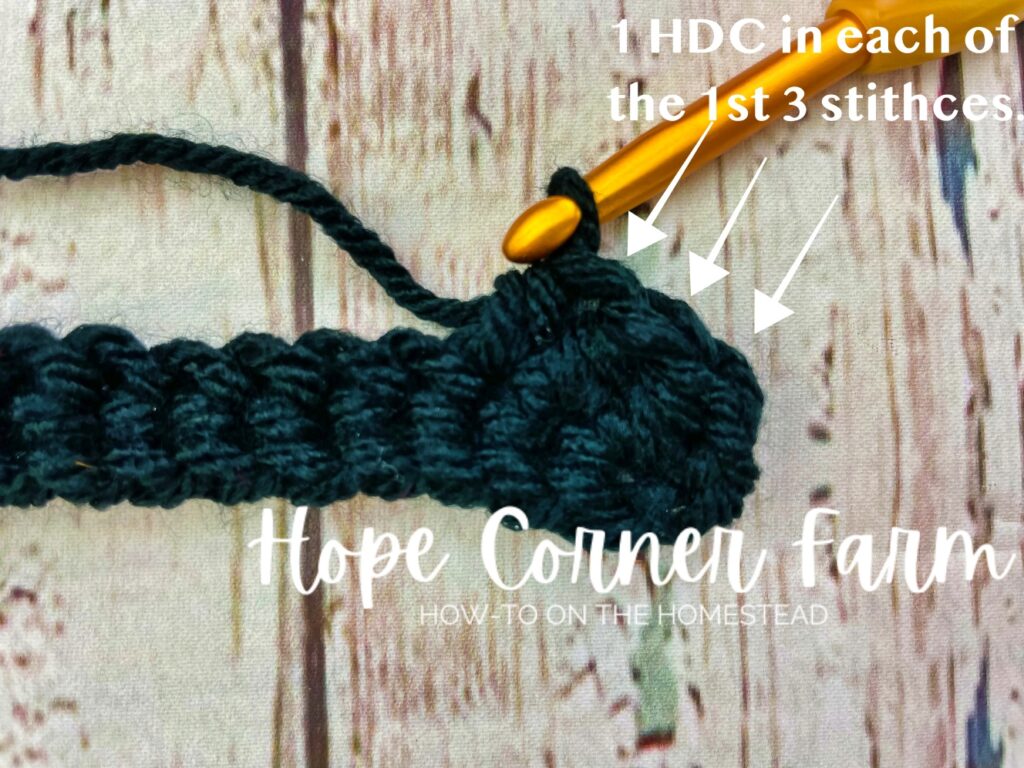
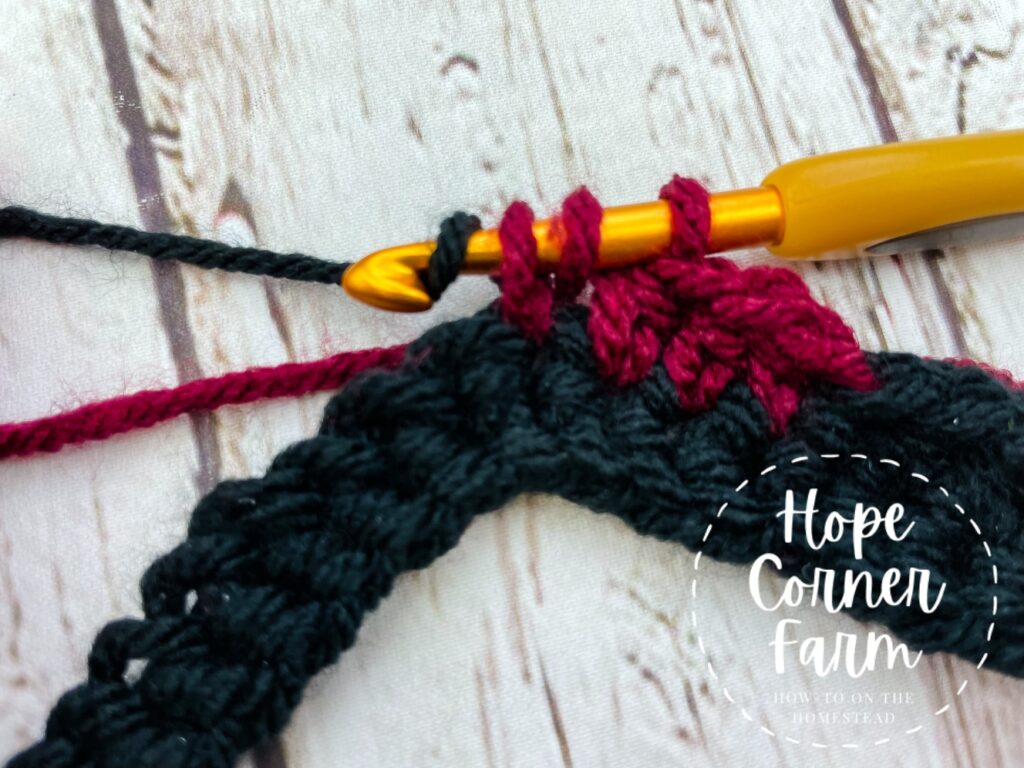
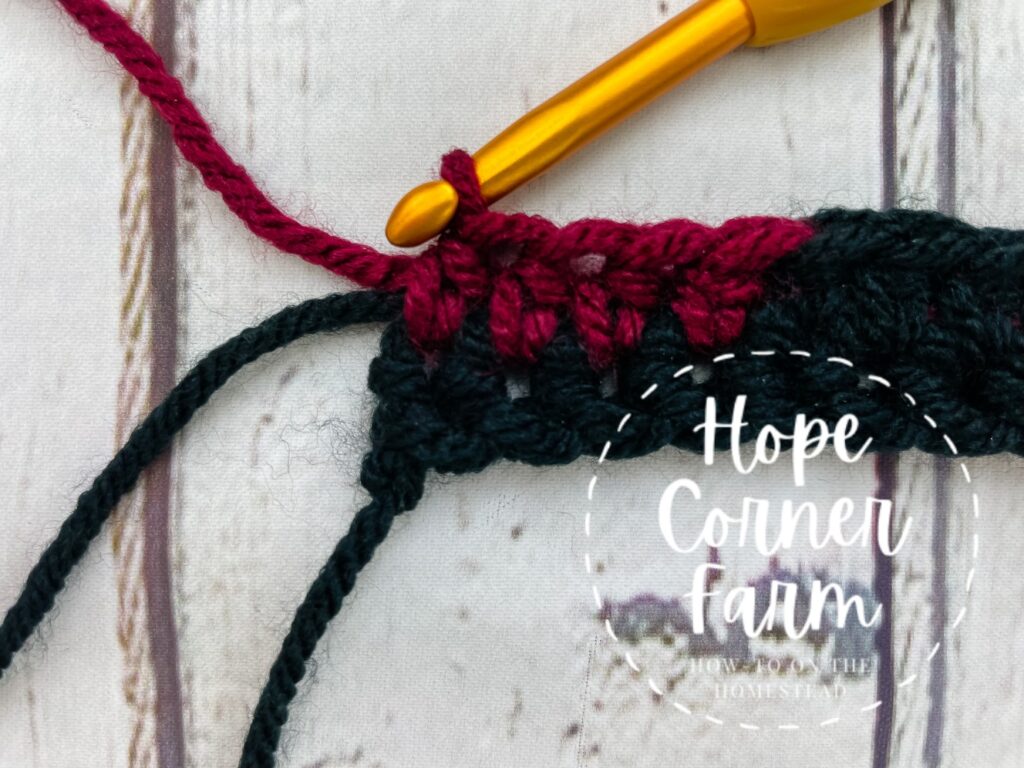
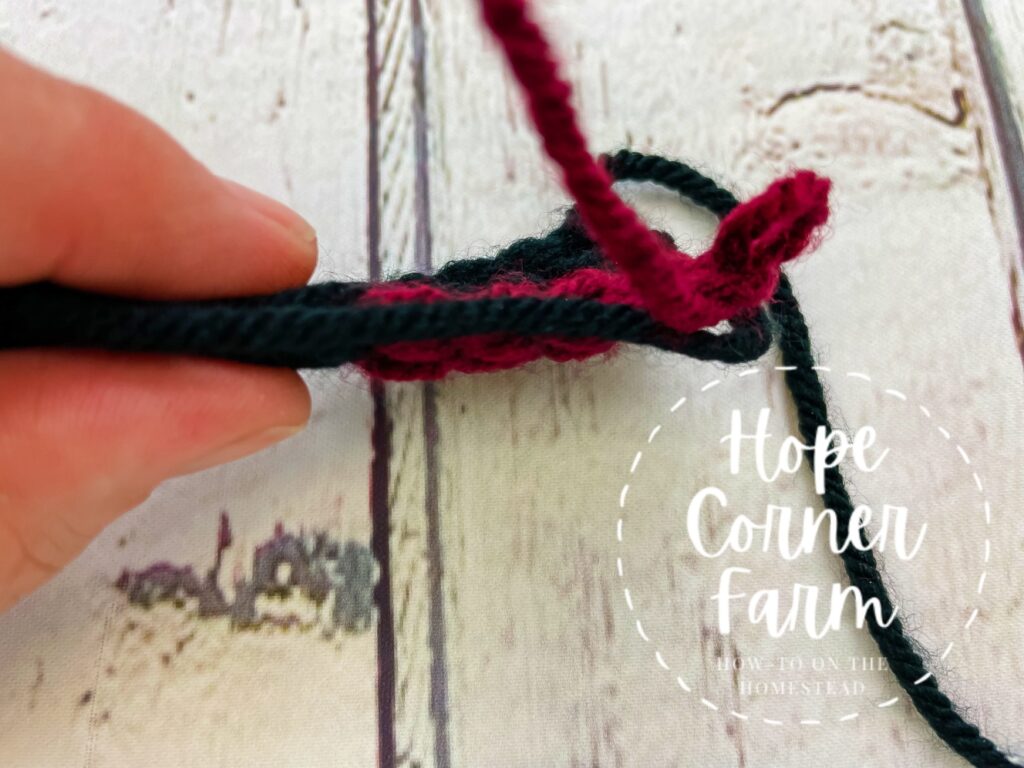
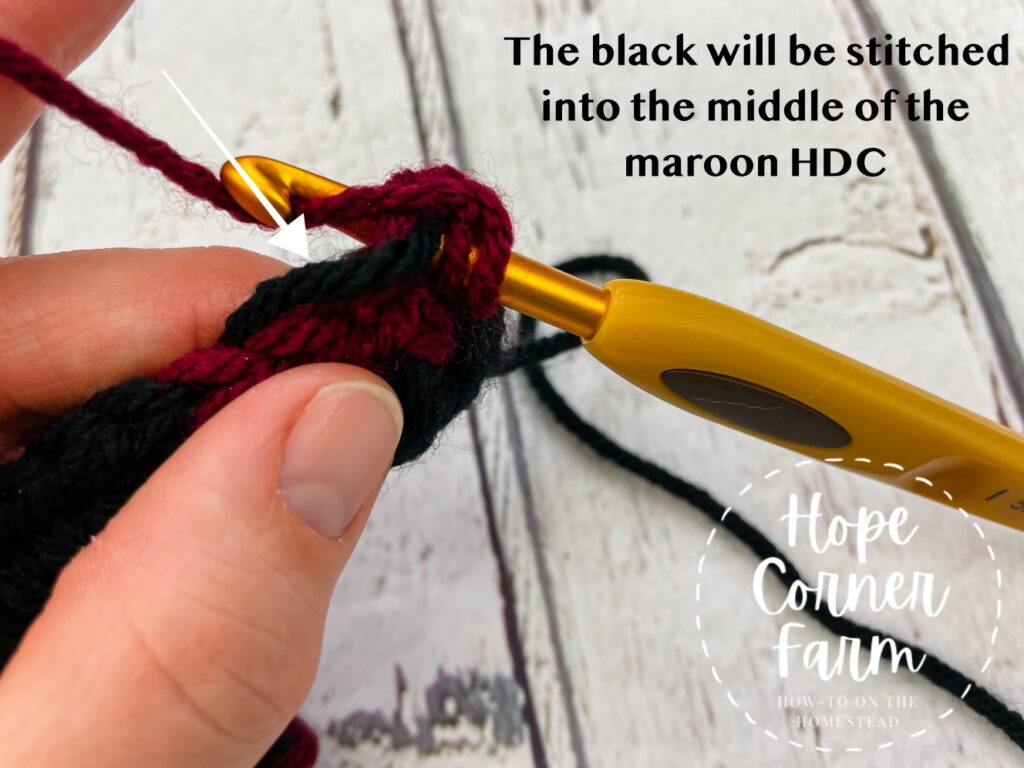
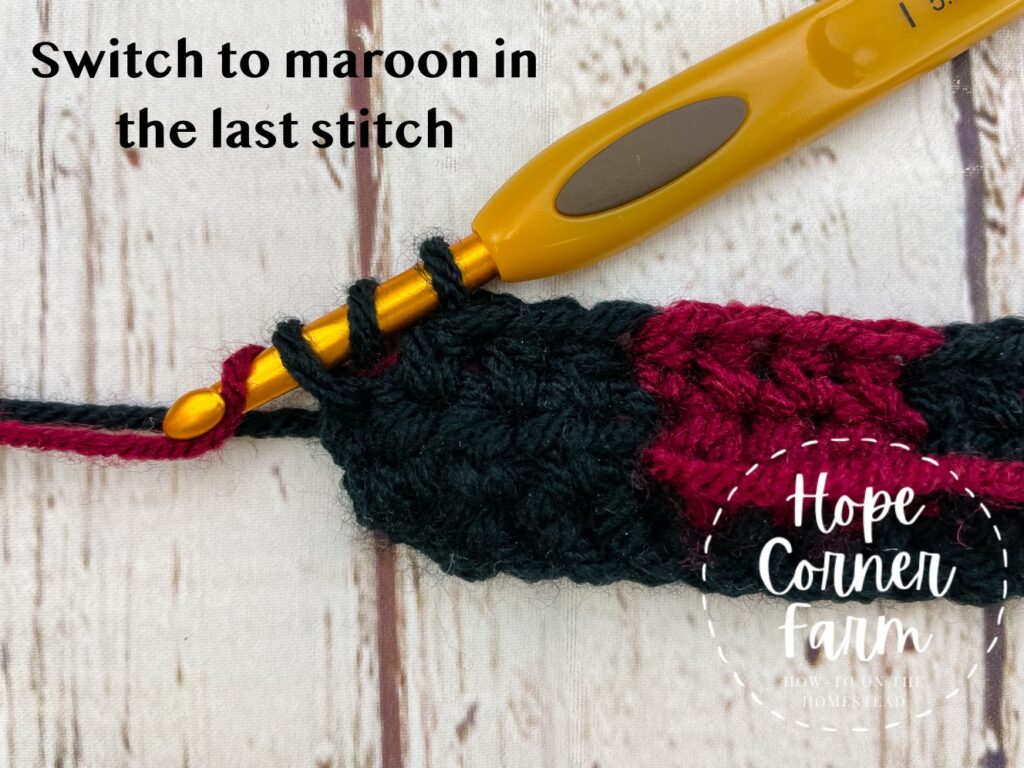
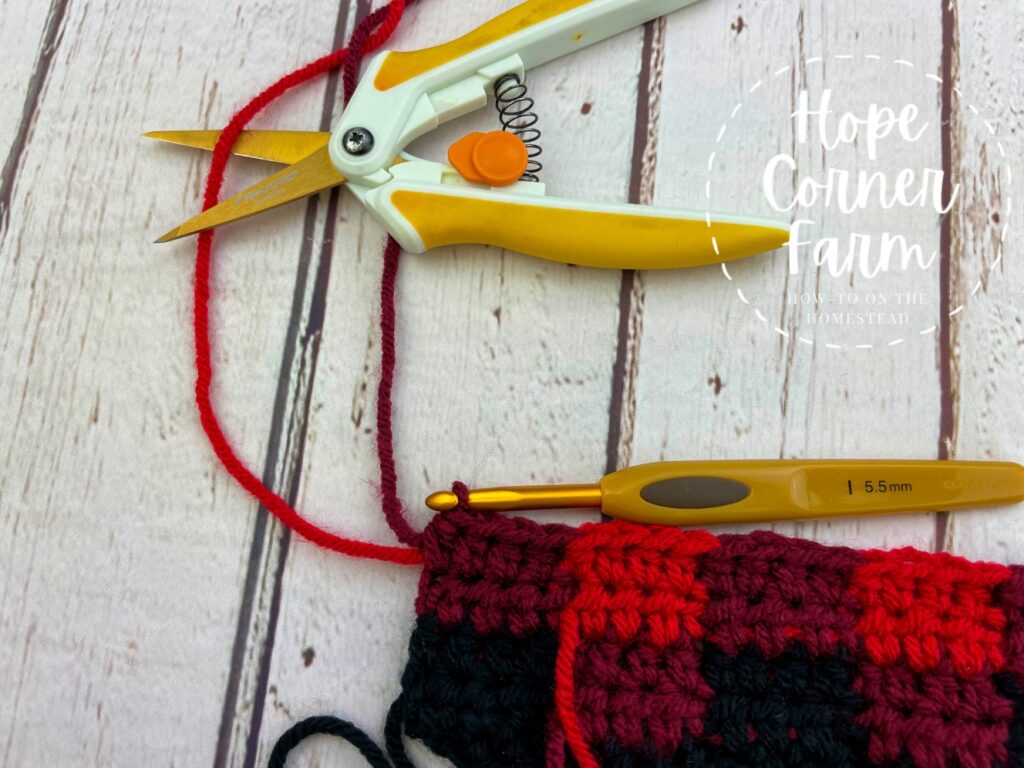
Next in the fourth stitch, yarn over with the current color. Place the hook into the fourth stitch. Yarn over and pull the hook through the stitch. There will now be three loops on the hook. Drop the current color and yarn over with the new color.
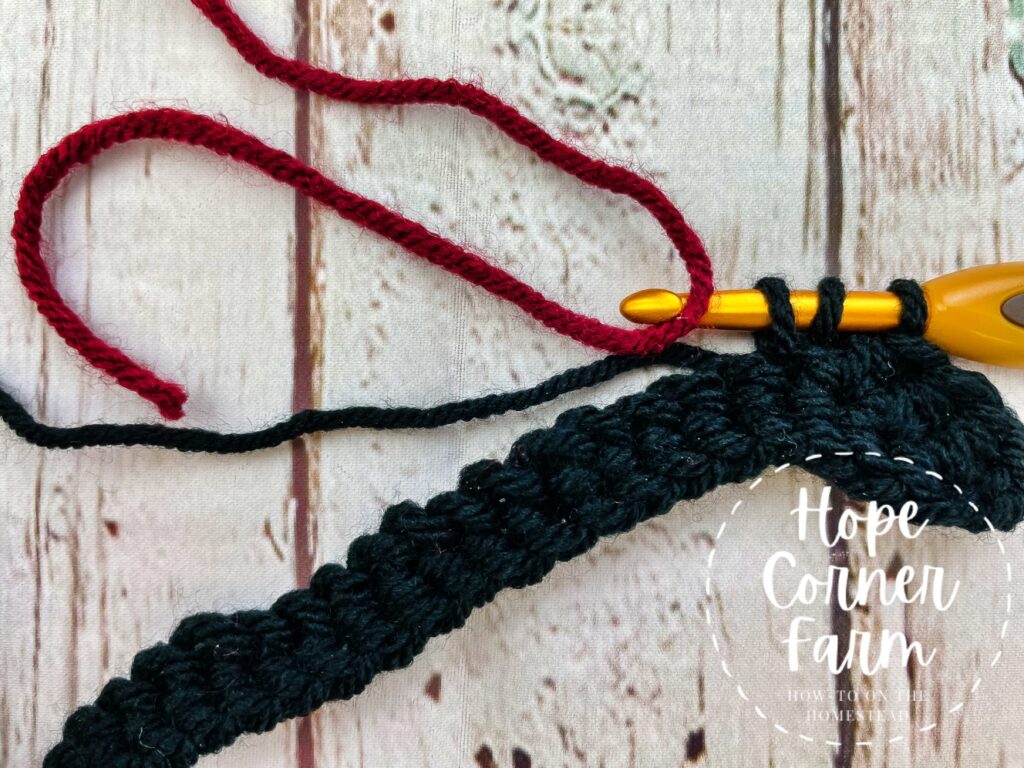
Now pull the new color yarn through all 3 loops.
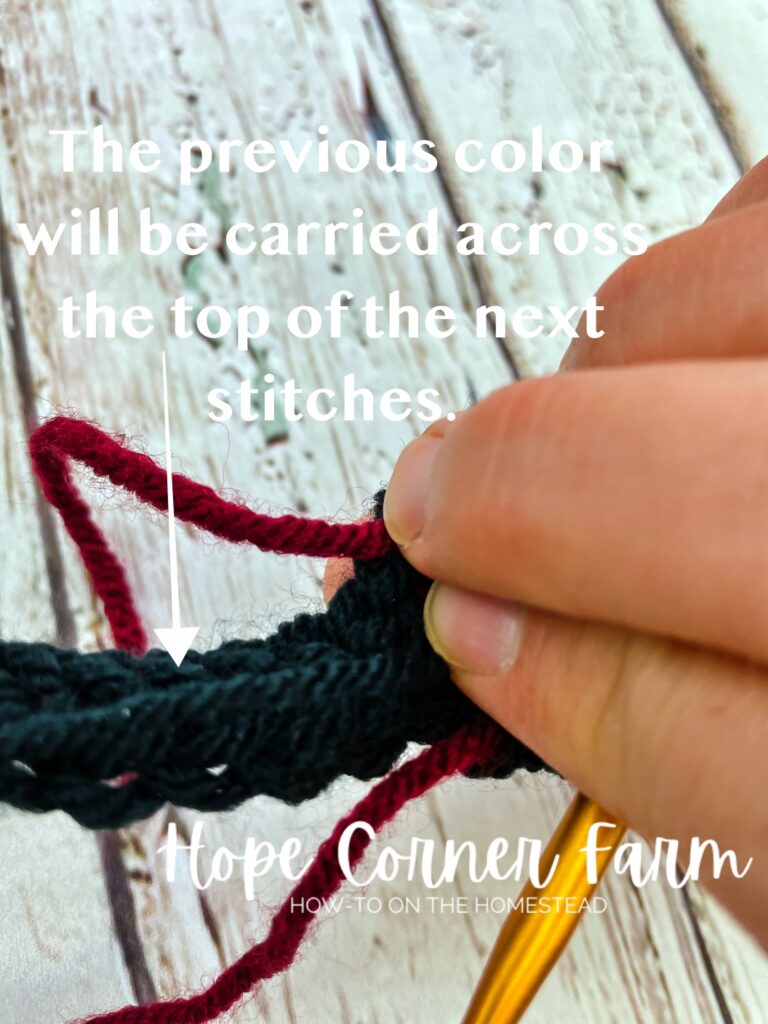
Do not cut the previous color. Carry it inside of the next stitches, right on top of those stitches.
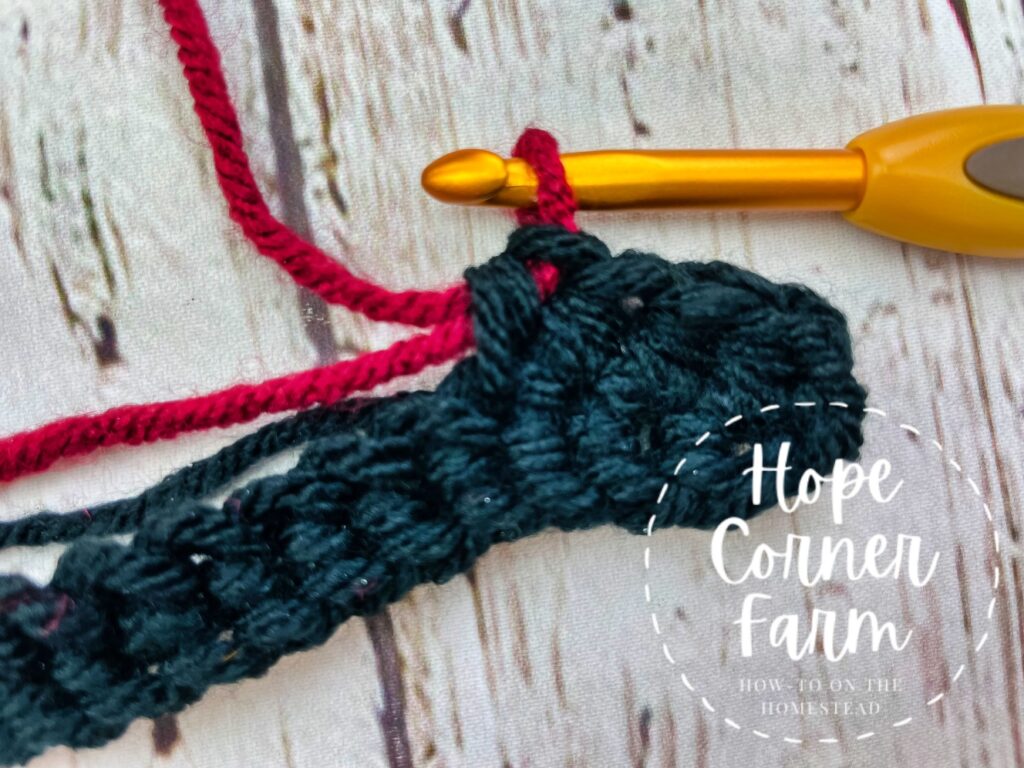
Next continue with the new color, placing one HDC in each of the next 3 stitches. In the 4th stitch, complete the HDC part way, and then finish with the first color.
Finally continue repeating as indicated in the pattern.
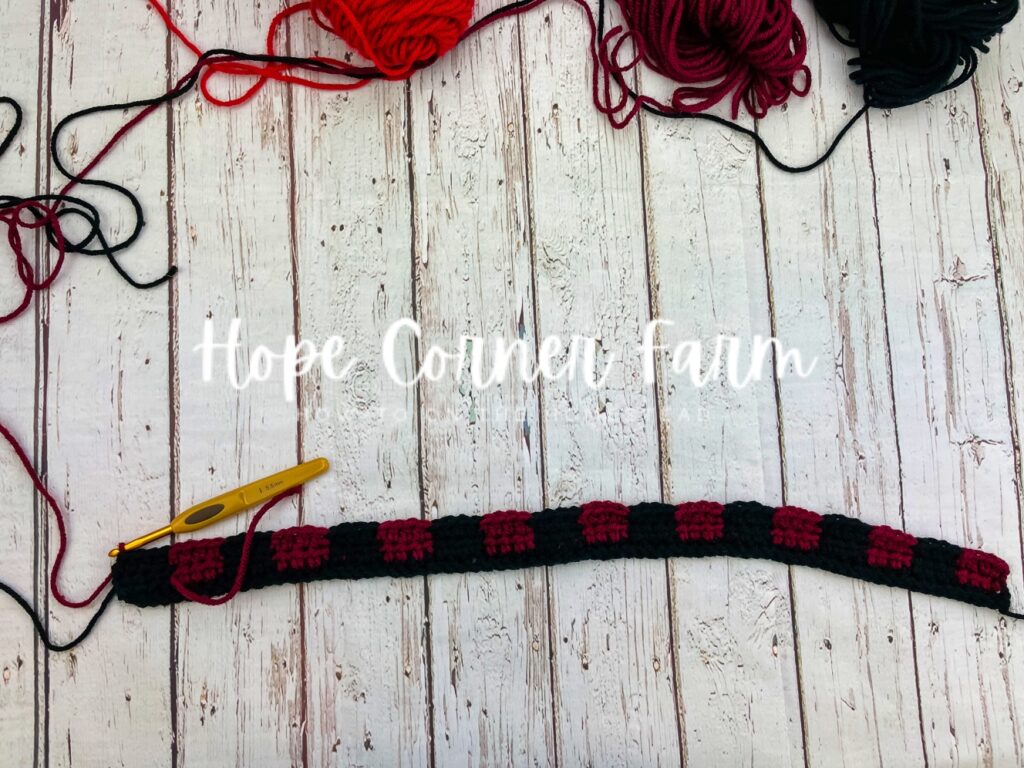
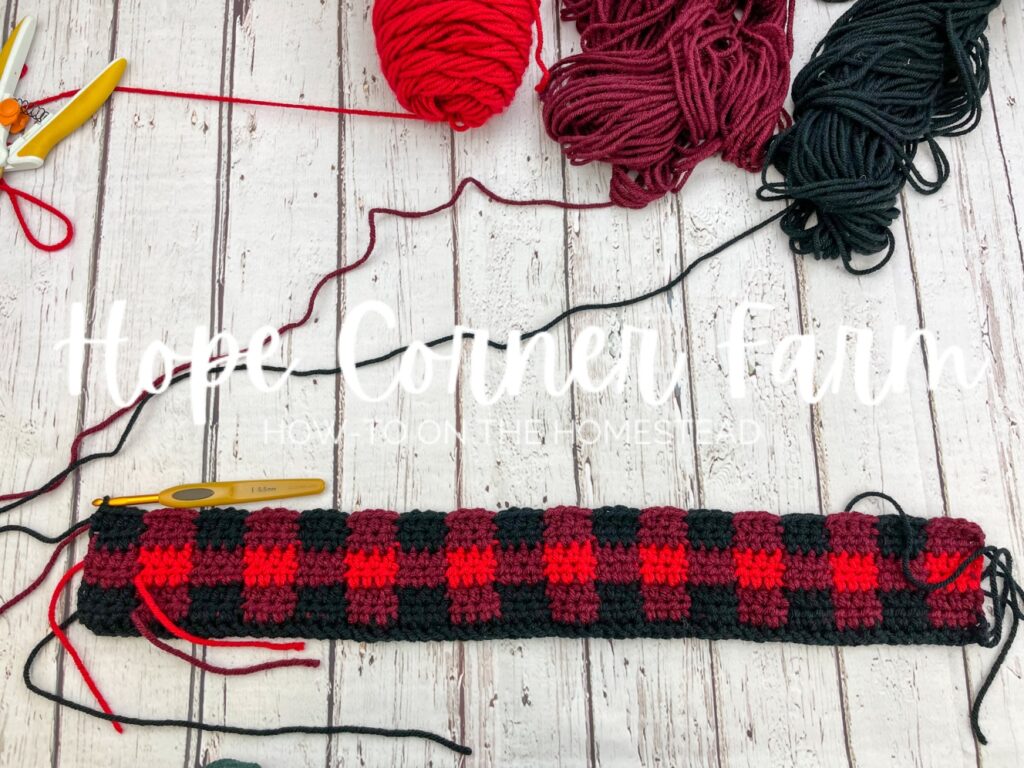
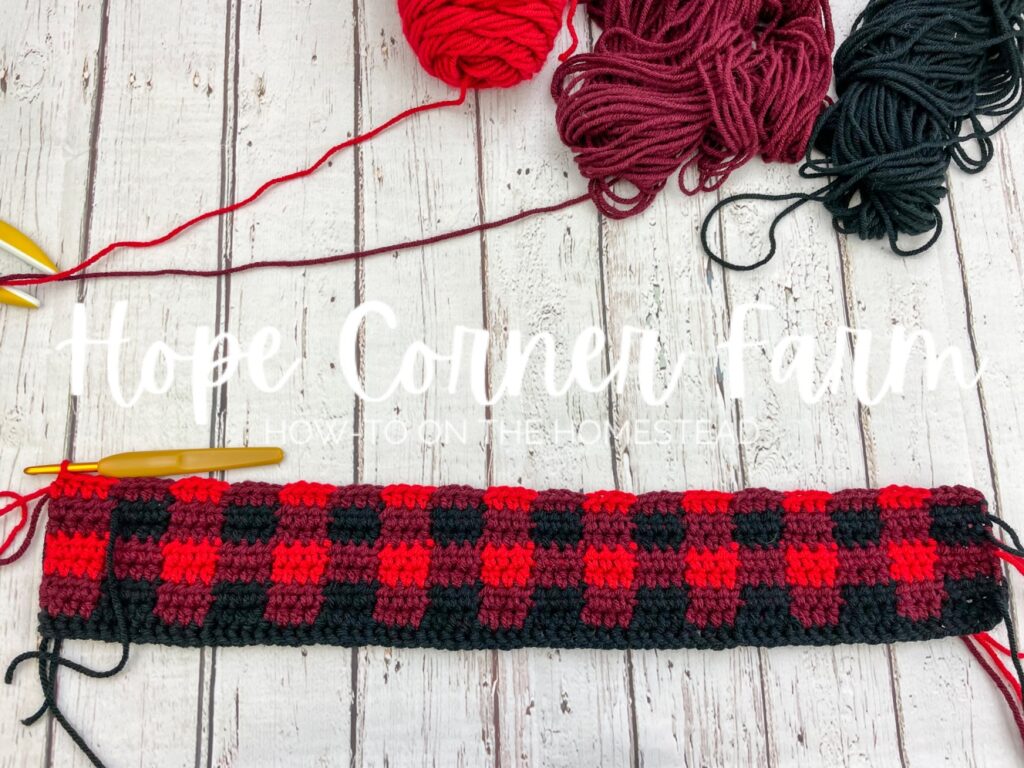
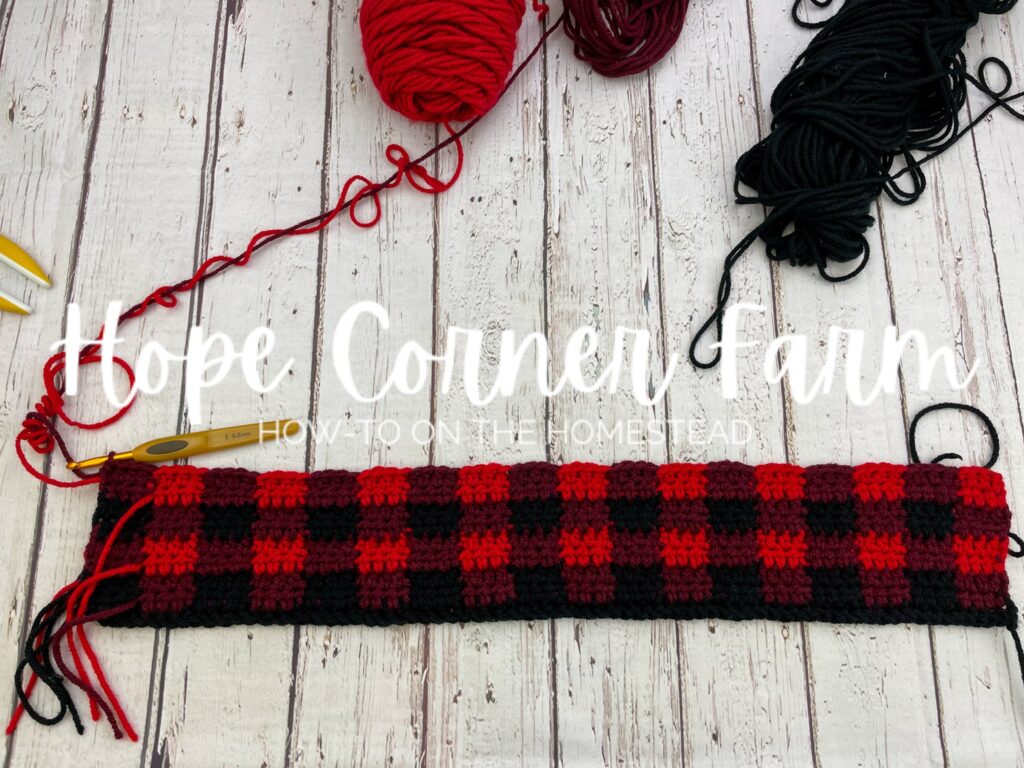
To Start the Buffalo Plaid Twist Headband Crochet Pattern:
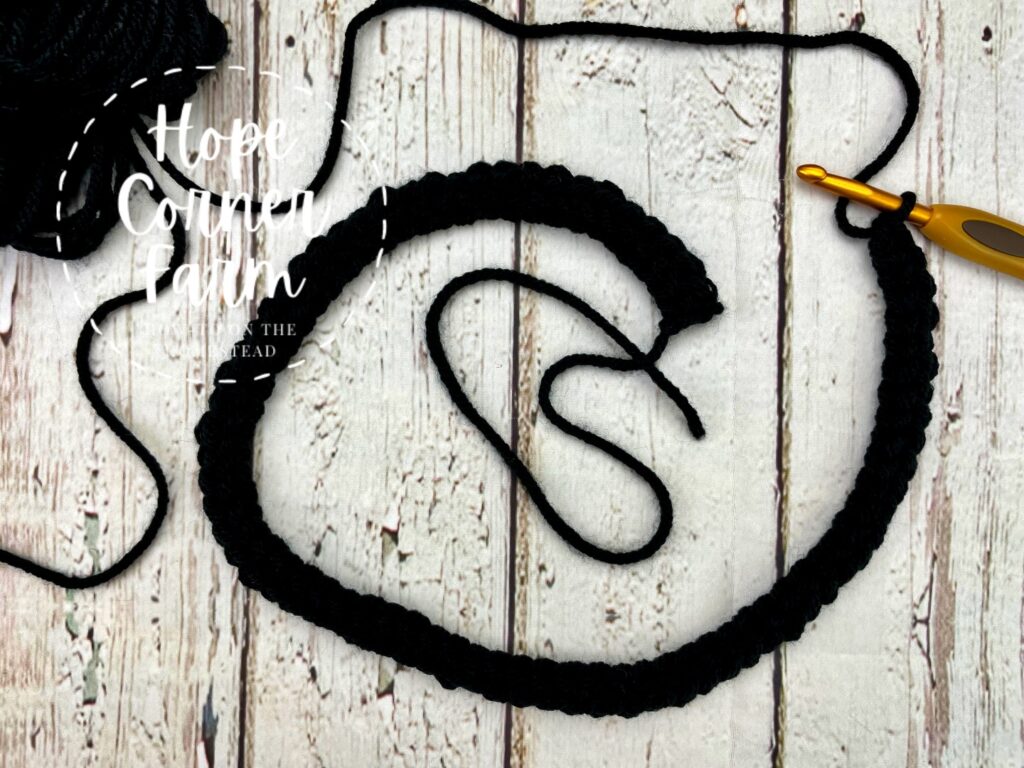
Begin by Foundation Single Crocheting 72 times.
Row 1:
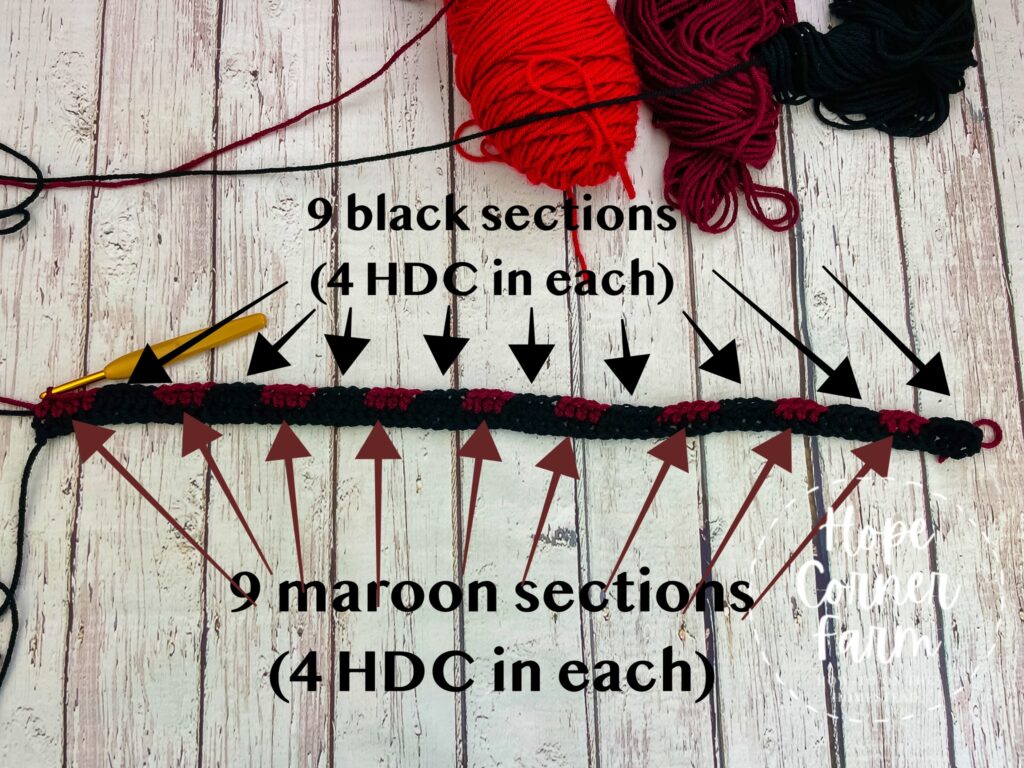
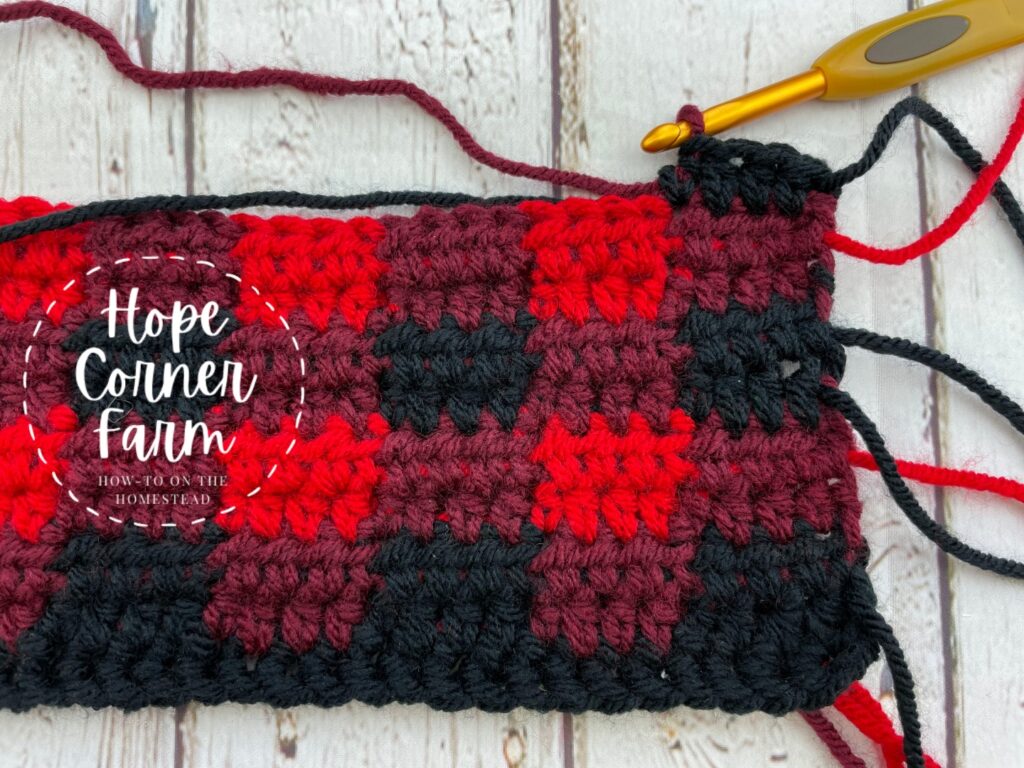
First with BLACK, ch 1, turn, place one HDC in each of the first FOUR stitches, SWITCH TO MAROON (see the “How to Work the Buffalo Plaid Stitch” section for the best way to switch and carry colors).
Now with MAROON place one HDC in each of the next FOUR stitches.
Next SWITCH back to BLACK for FOUR more stitches.
Now continue alternating between the black and the maroon every four stitches (HDC) across the headband. THIS ROW WILL END WITH MAROON.
Finally this row will have 9 black sections and 9 maroon sections (72).
Buffalo Plaid Twist Headband – Row 2:
First with MAROON, ch 1, turn. At this time, bring the black yarn up to the top of the maroon stitches from the previous row. The black will be carried across the maroon until we are ready to use it.
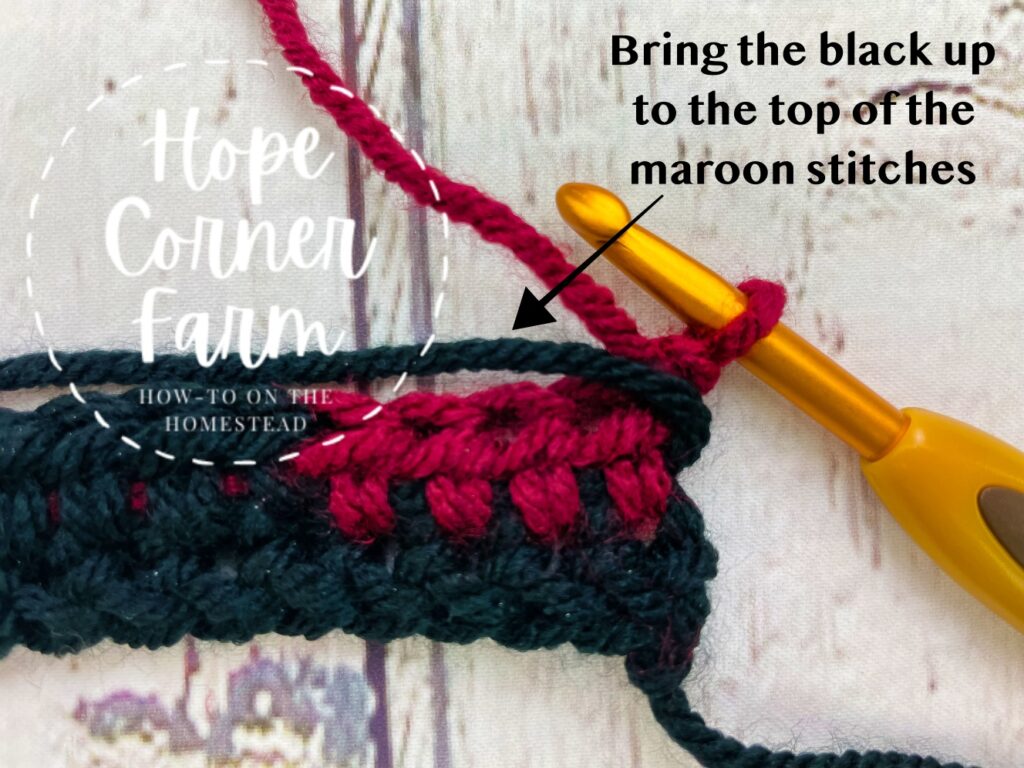
Now HDC in the next FOUR stitches (these should line up and sit directly above the four maroon stitches from the previous row).
Next CHANGE TO BLACK. HDC in the next four stitches.
Now continue alternating between the maroon and the black every four stitches (HDC) across the headband.
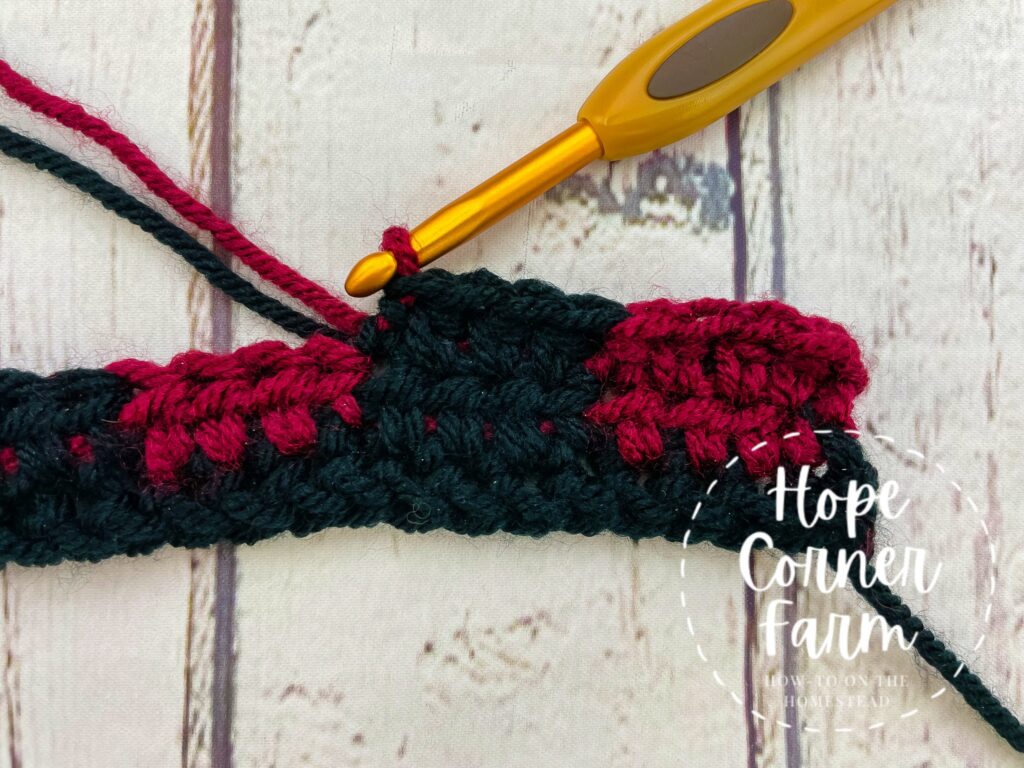
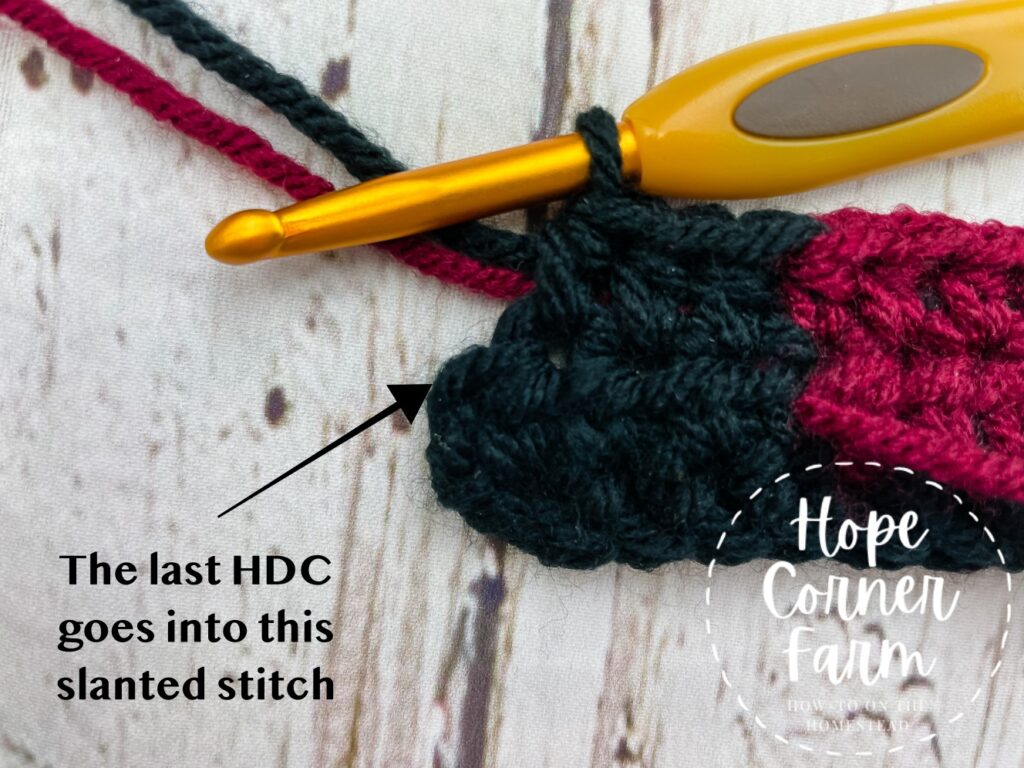
Finally THIS ROW WILL END WITH BLACK. The very last stitch goes into a slanted stitch from the previous row.
Now when completing the final HDC, switch to maroon.
Note that each color should line up perfectly with the same color from the previous row. There will be 9 black sections and 9 maroon sections in this row (72).
Buffalo Plaid Twist – Row 3:
First with MAROON, ch 1, turn, HDC in the first four stitches (these stitches will be placed directly above the black section from the previous two rows). Change to RED.
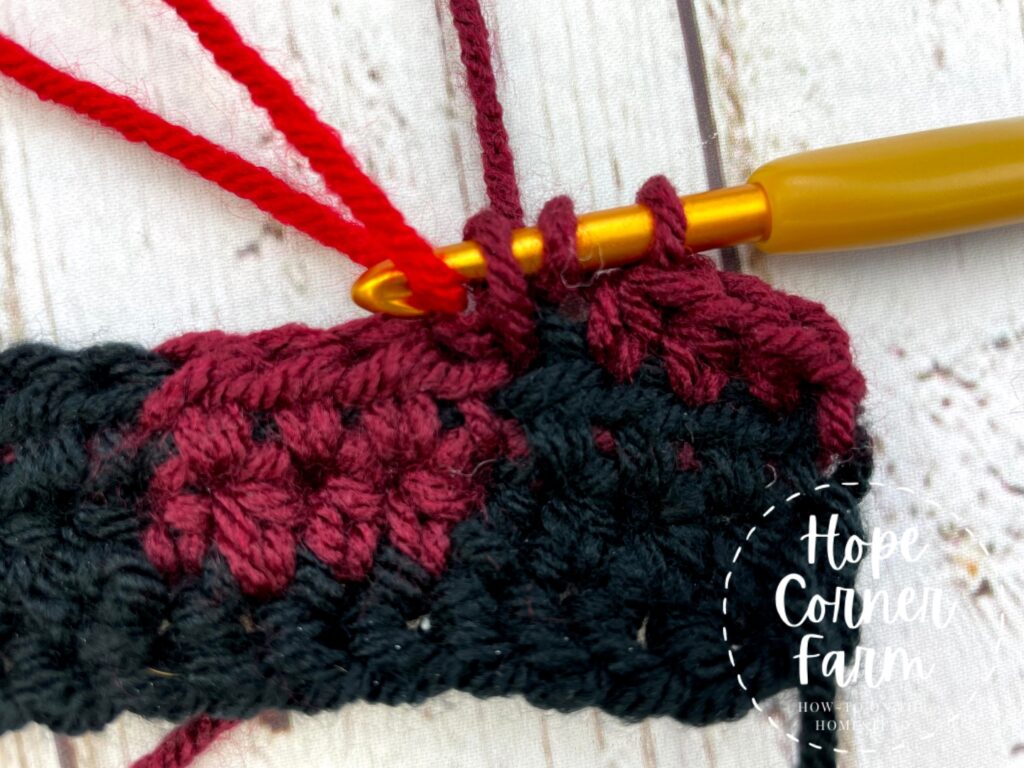
Now HDC in the next four stitches. Continue alternating between the maroon and the red every four stitches (HDC) across the headband. THIS ROW WILL END WITH RED. There will be 9 maroon sections and 9 red sections (72).
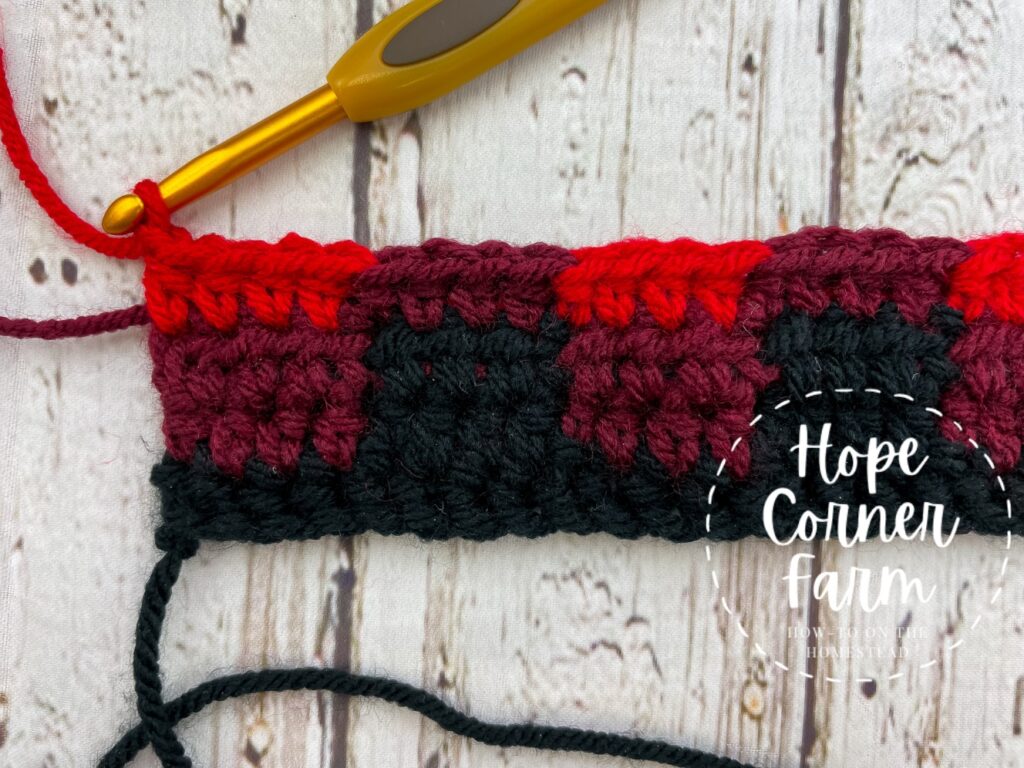
Row 4:
First with RED, ch 1, turn. HDC in the first four (3 1/2 if you are switching colors mid stitch for a neater look – check out the “How to Work the Buffalo Plaid Stitch” section for this tip) stitches (these stitches will be placed directly above the red section from the previous row).
Now change to MAROON. HDC in the next four stitches.
Next continue alternating between the red and the maroon every four stitches (HDC) across the headband.
Finally this row will end with MAROON. There will be 9 maroon sections and 9 red sections (72).
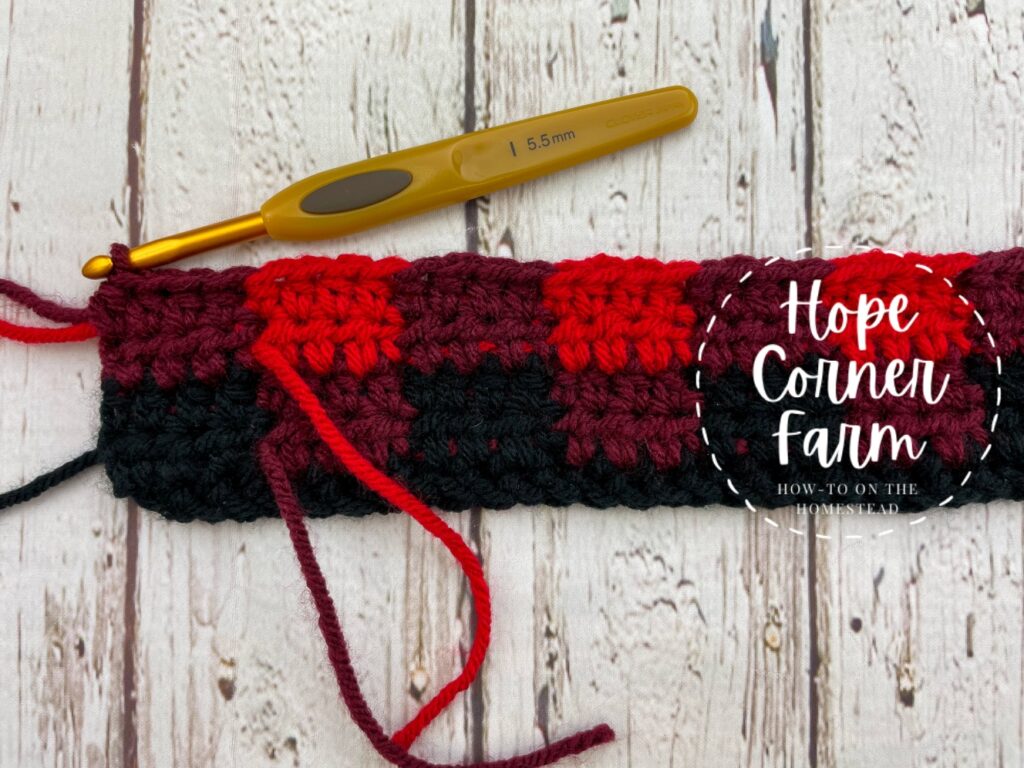
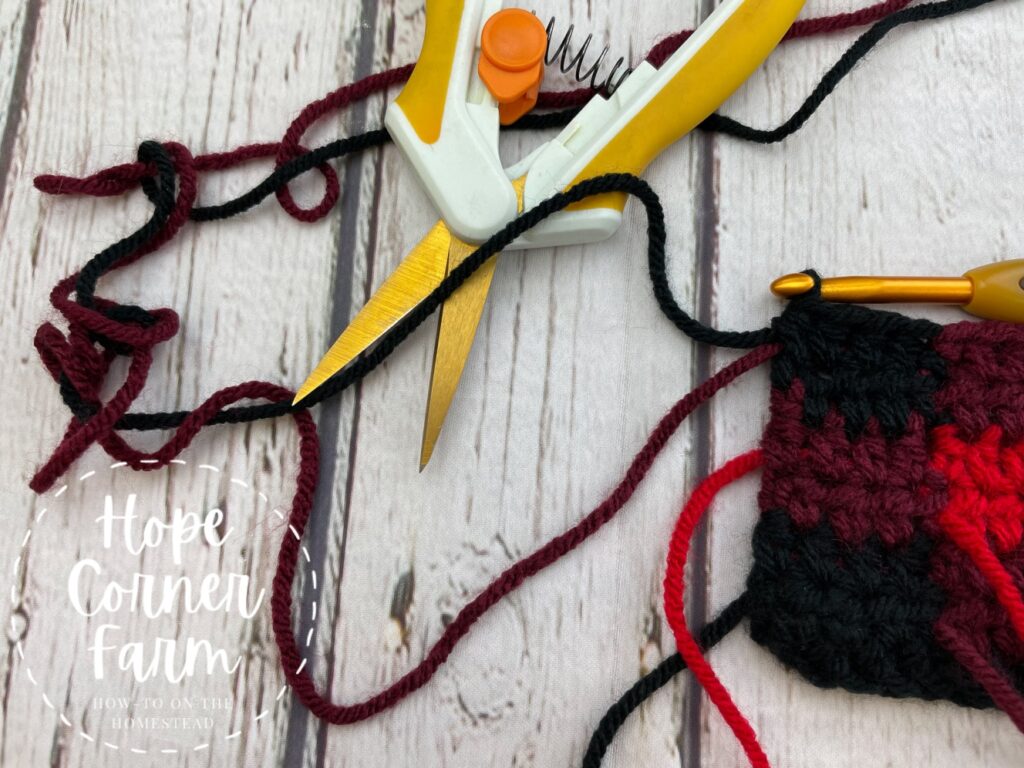
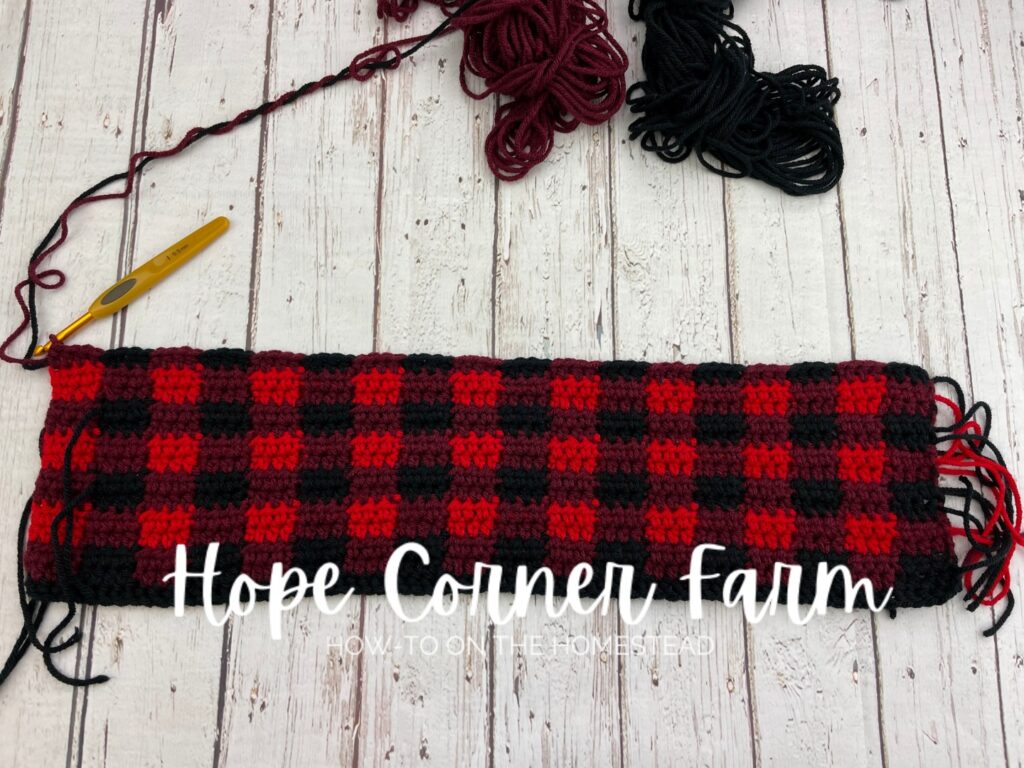
Note: I choose to cut off the color that I won’t use for the next two rows. Yes, this means that I will have more ends to weave in, but the yarn gets so tangled up that I find it more difficult to work the Buffalo Plaid Stitch if I don’t cut off the color I am not going to use in the next two rows.
Row 5:
Now repeat Row 1 (72).
Buffalo Plaid Twist Headband – Row 6:
Next repeat Row 2. (72)
Note: I cut the black yarn at this point…again since it tends to get really tangled.
Row 7:
Now repeat Row 3. (72)
Row 8:
Next repeat Row 4. (72)
Buffalo Plaid Twist Headband – Row 9:
Now repeat Row 1. (72)
Row 10:
Next repeat Row 2. (72)
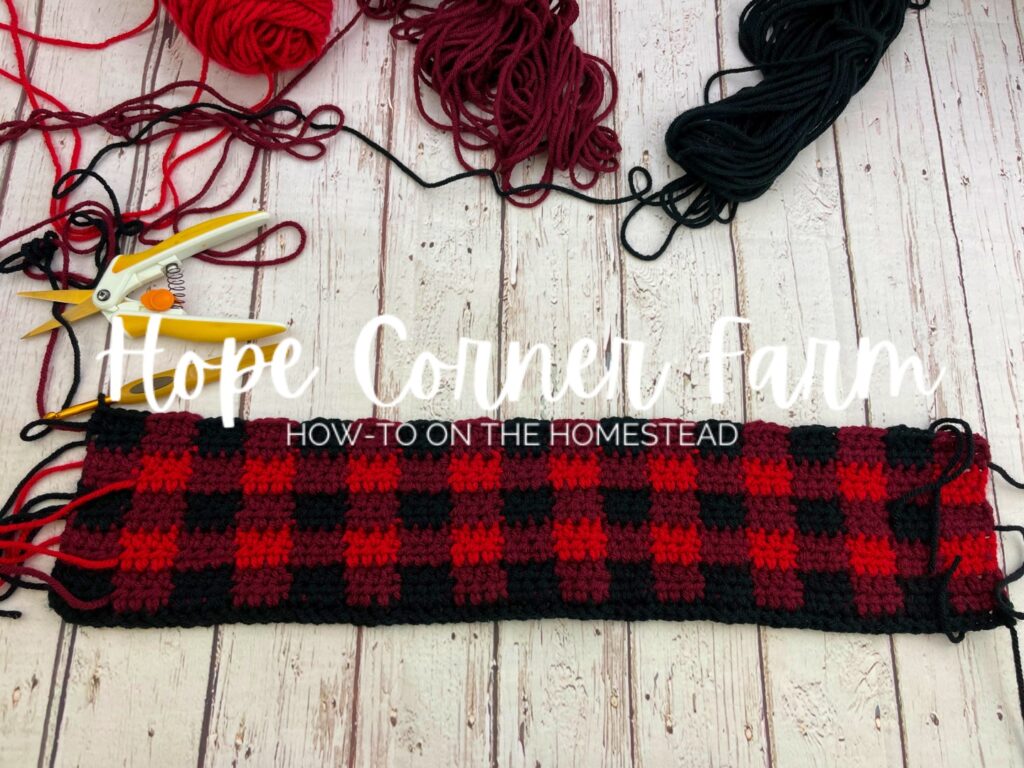
Note: I choose to cut the black yarn off of the headband at this point.
Headband – Row 11:
Now repeat Row 3. (72)

Row 12:
Next repeat Row 4. (72)
Note: I cut the red (light hue) yarn free from the headband at this point. We will not use the red (light hue) again in this project.
Buffalo Plaid Twist Headband. – Row 13:
Next repeat Row 1. (72)
Row 14:
Now repeat Row 2. (72)

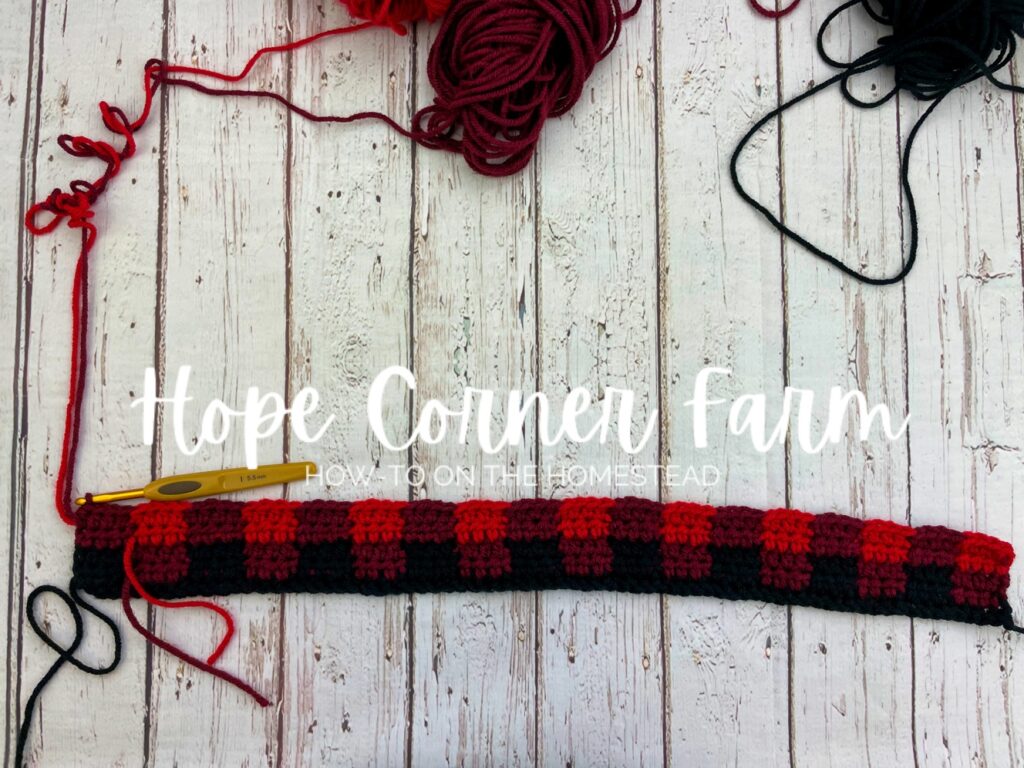
Buffalo Plaid Headband – Final Row (15):
Now with the dark hue yarn (black in my example), chain 1. Turn. Place ONE HDC in each stitch across the headband. (72)
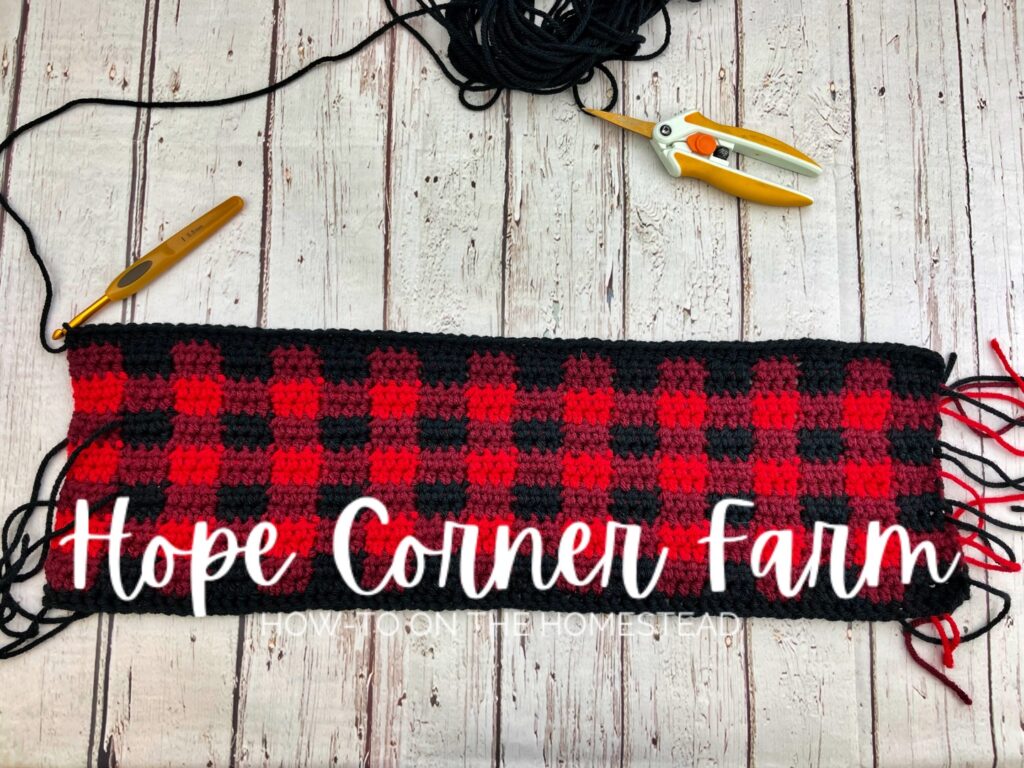
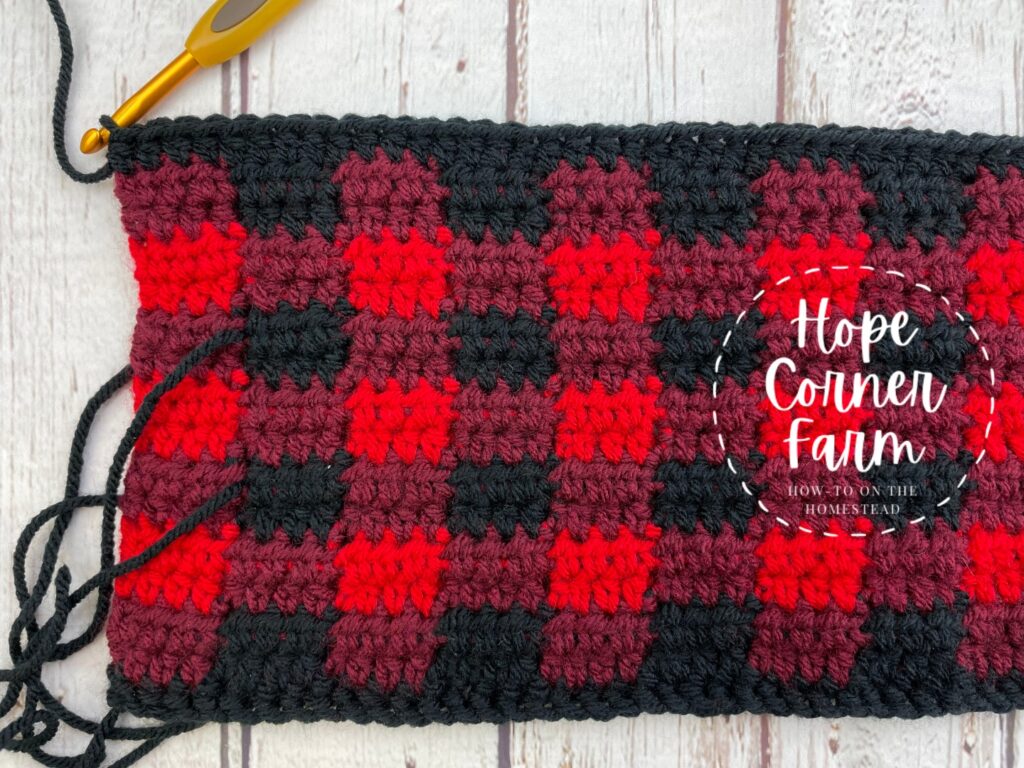
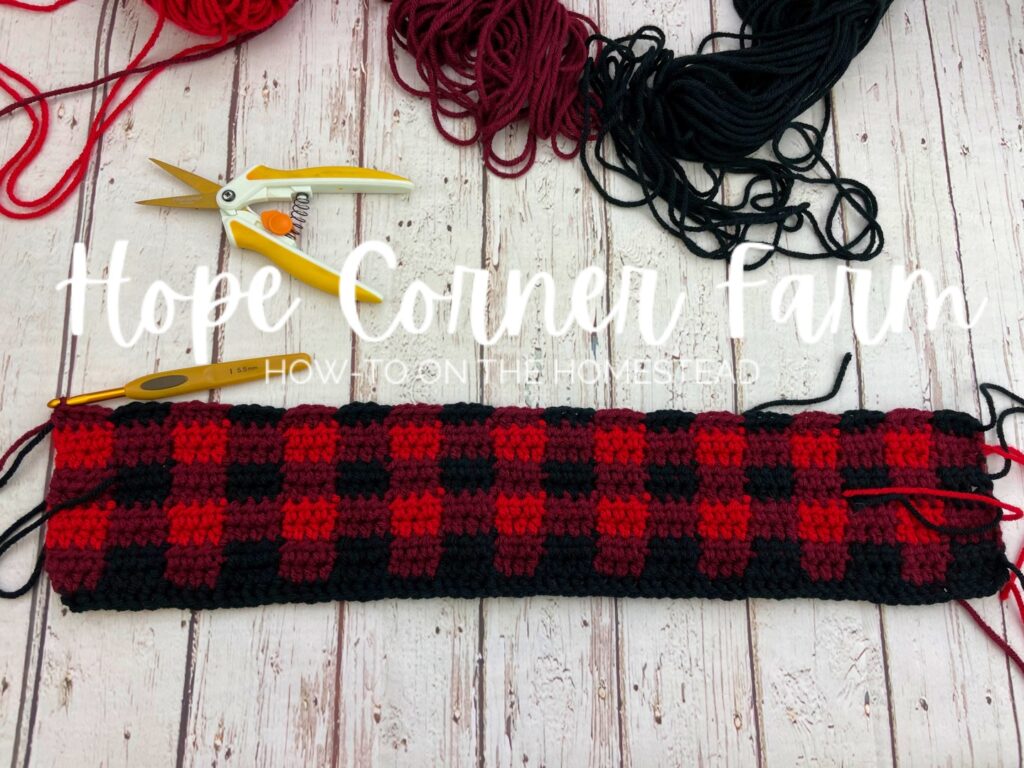
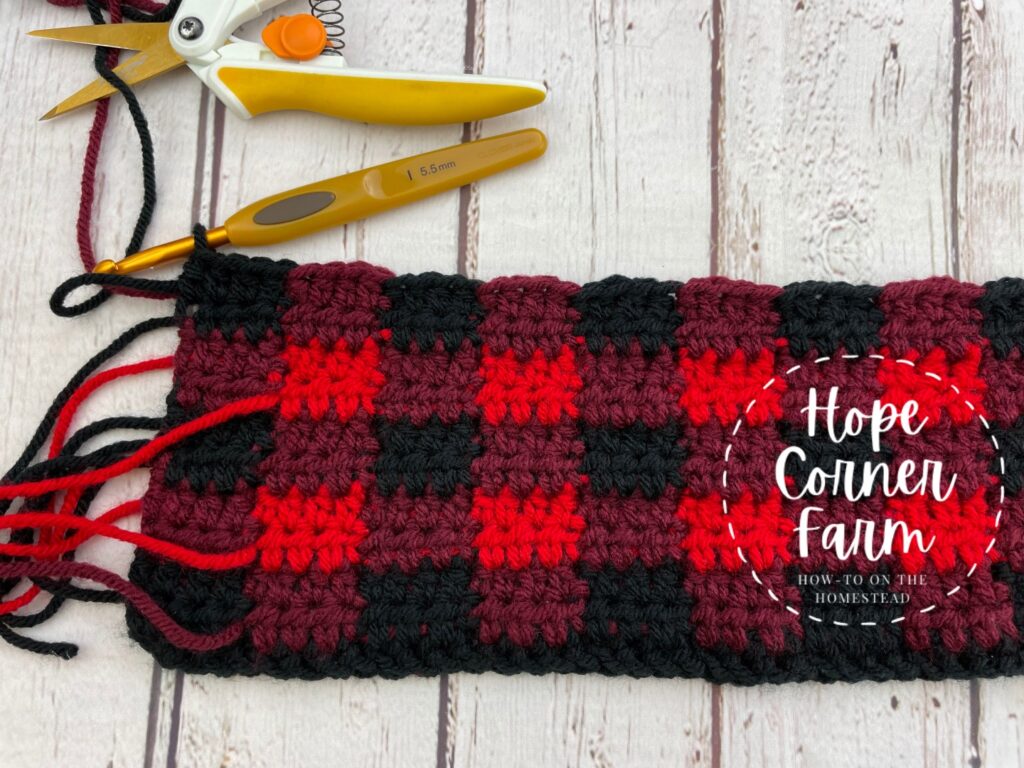
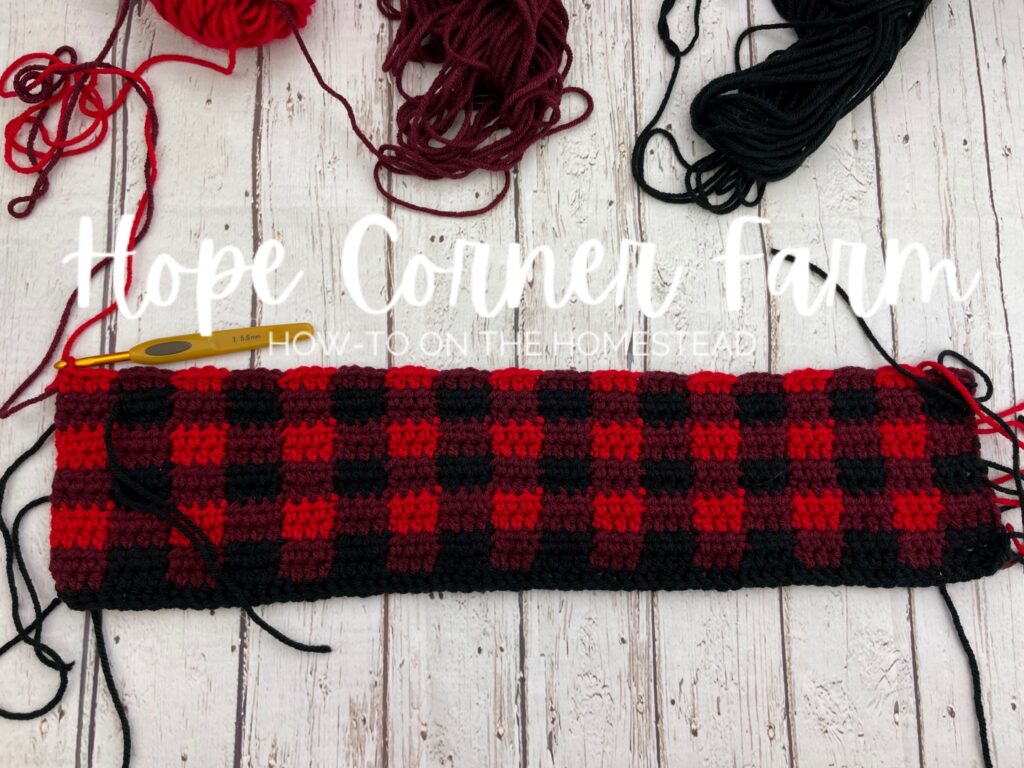
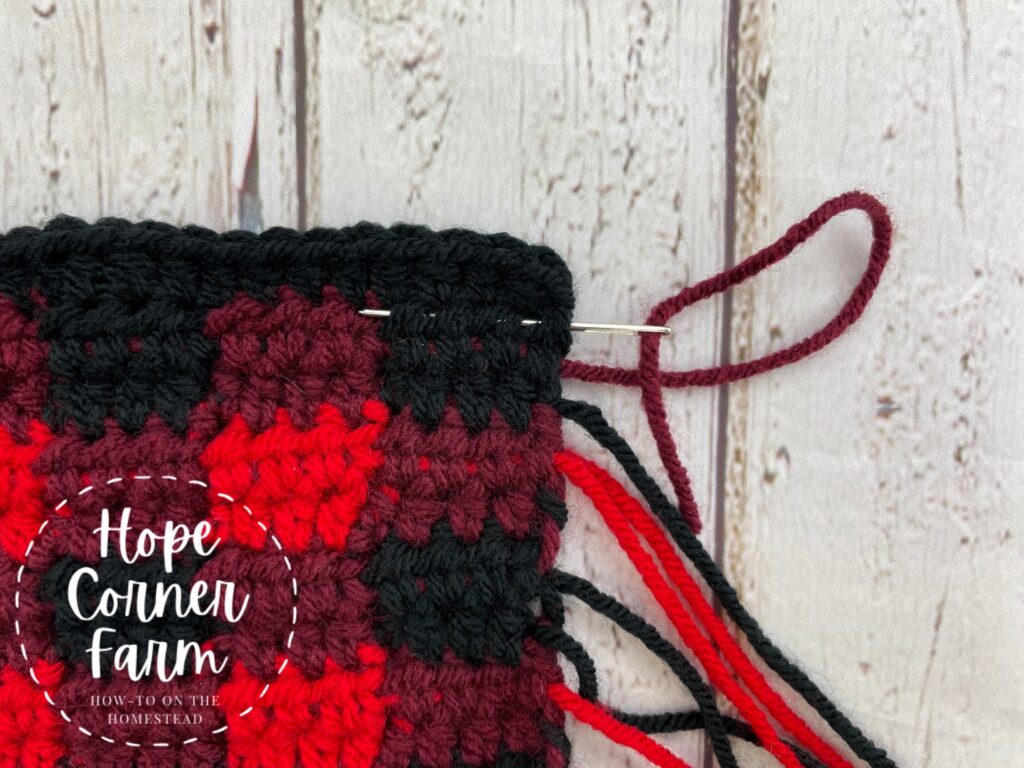
Preparing to Sew the Buffalo Plaid Twist Headband:
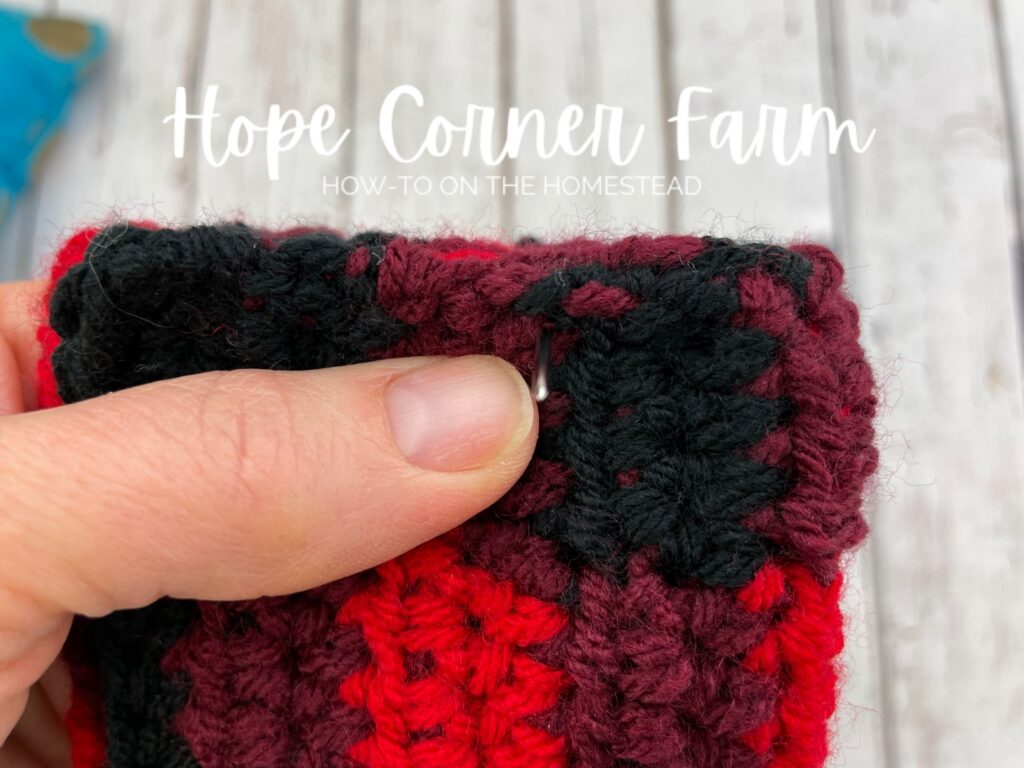
Next fasten off yarn. Clip the yarn free from the Buffalo Plaid Twist Headband, leaving a tail that is at least 10″ in length.
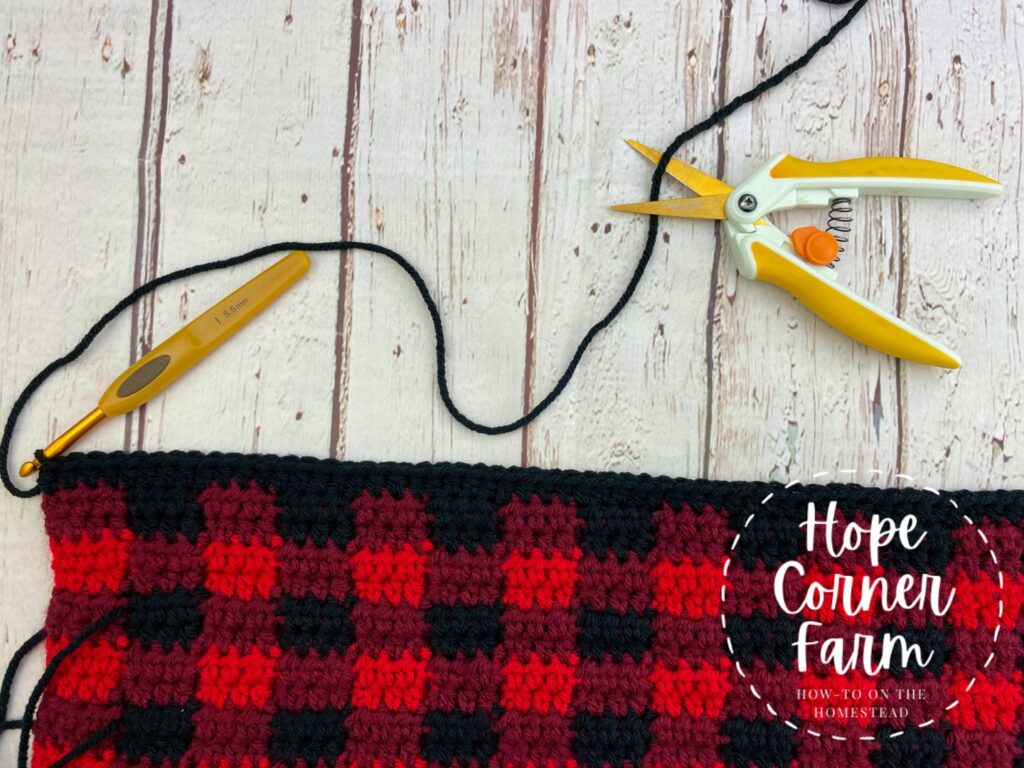
Finally weave in all of the ends, except for the two long tails that started and stopped the headband.
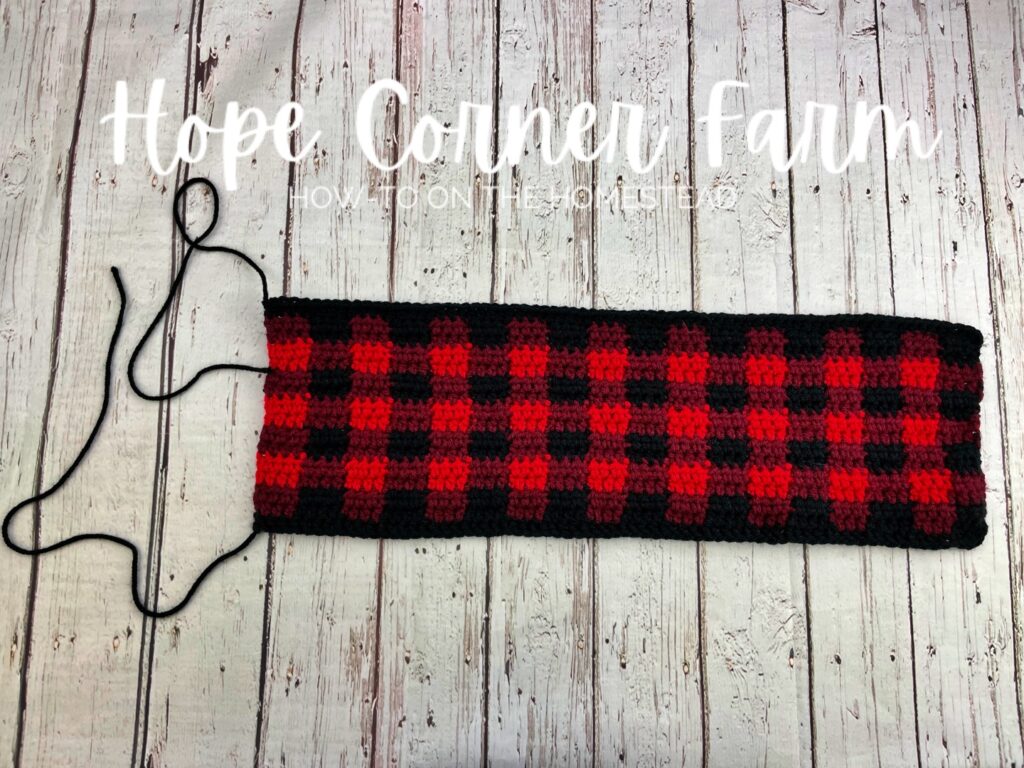
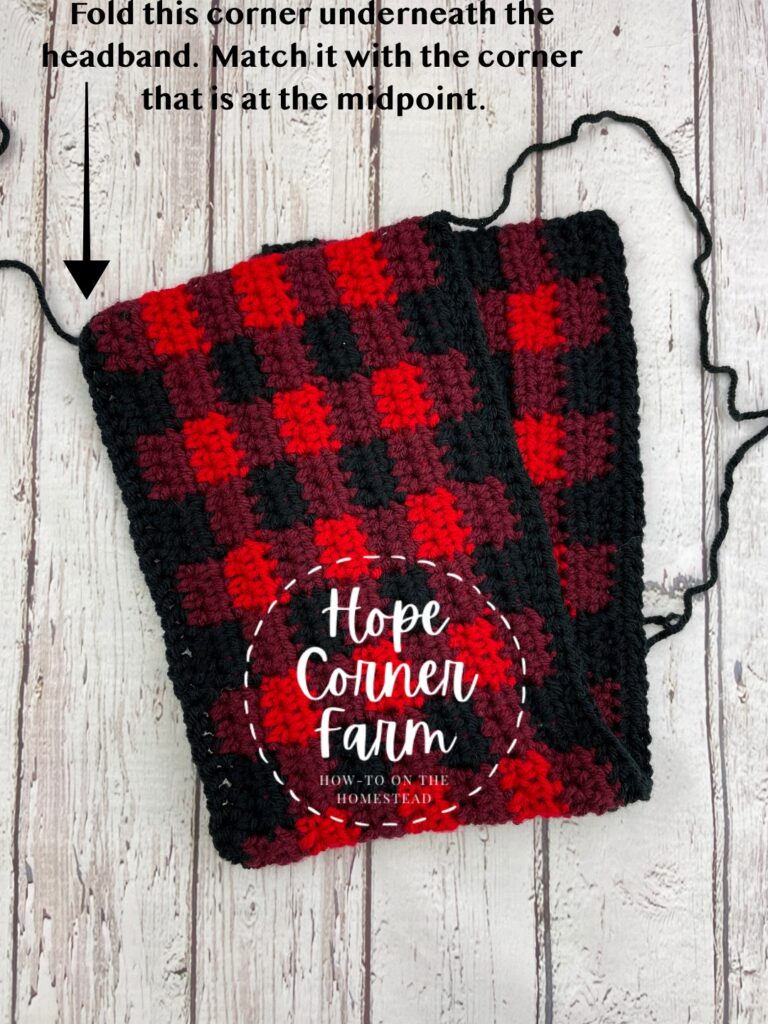
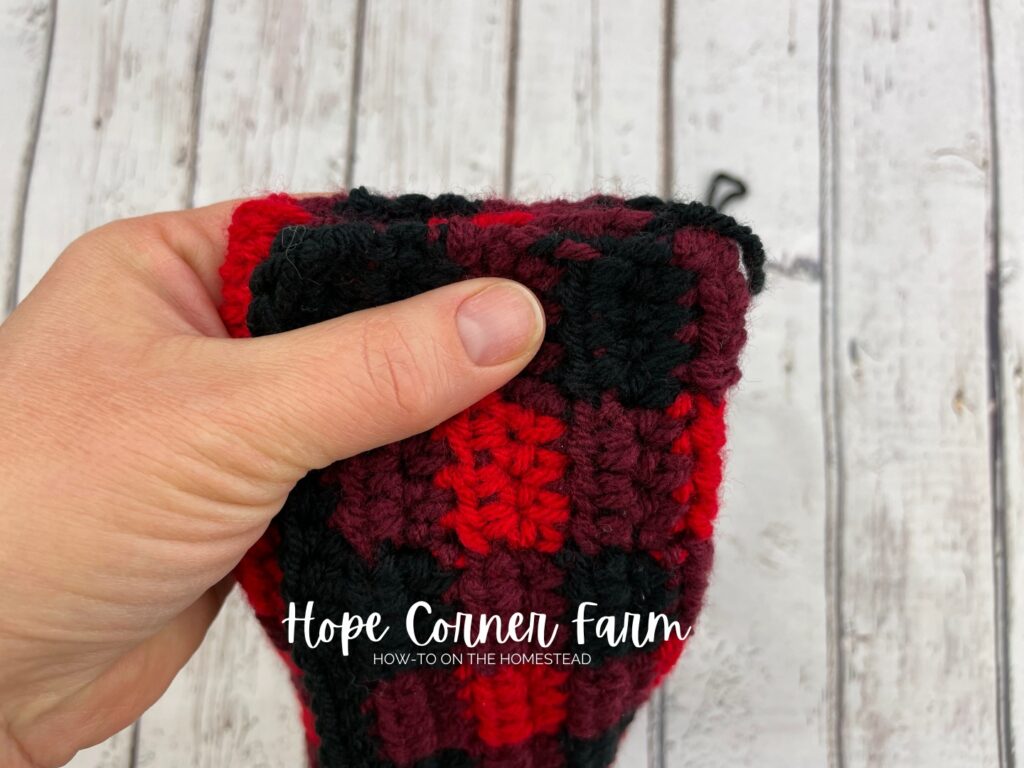
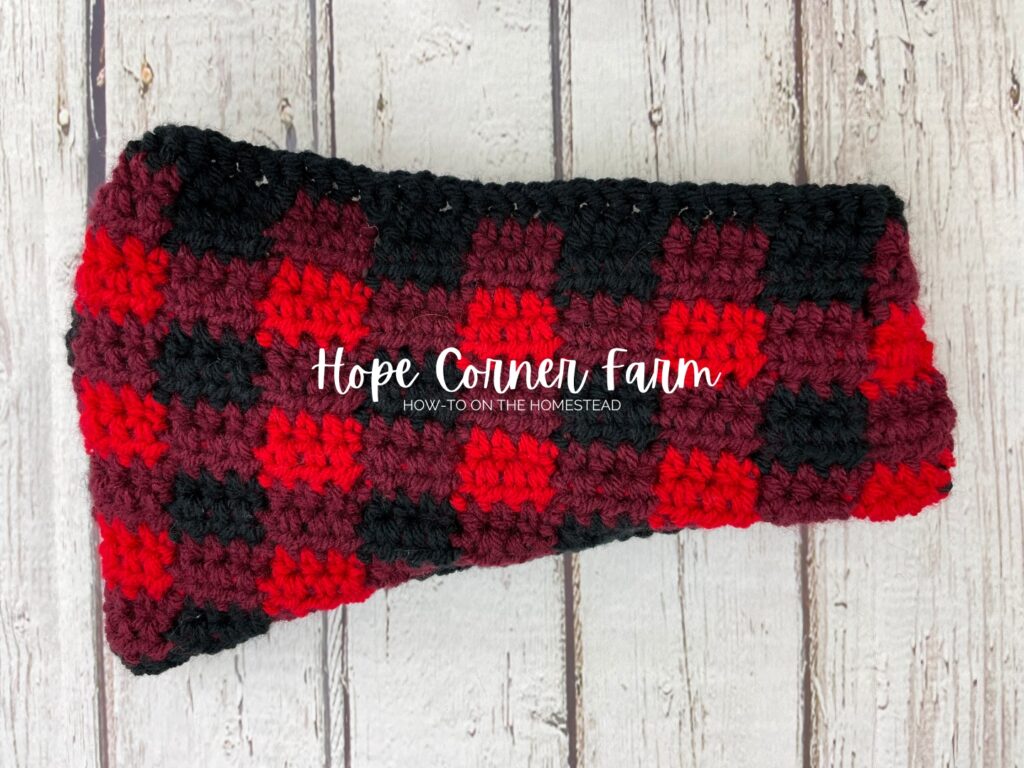
Folding the Buffalo Plaid Twist Headband:
Now place the headband on a flat surface.
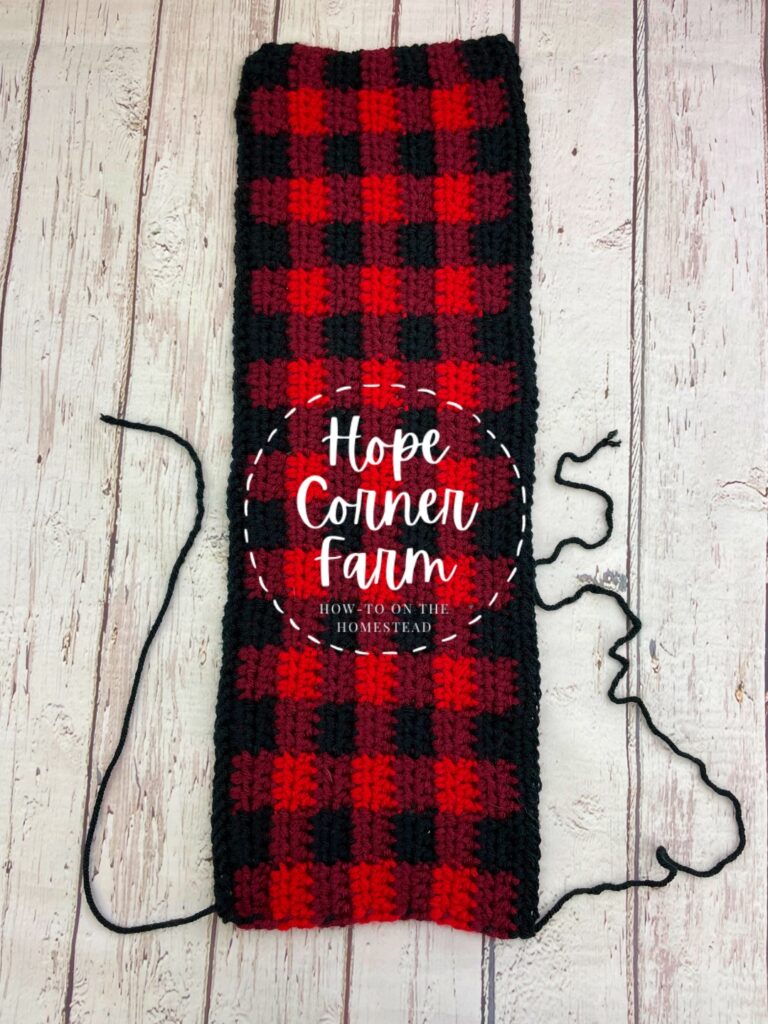
Next fold the headband in half, matching the corner/edge of one side to the midpoint of the other side (see picture below).
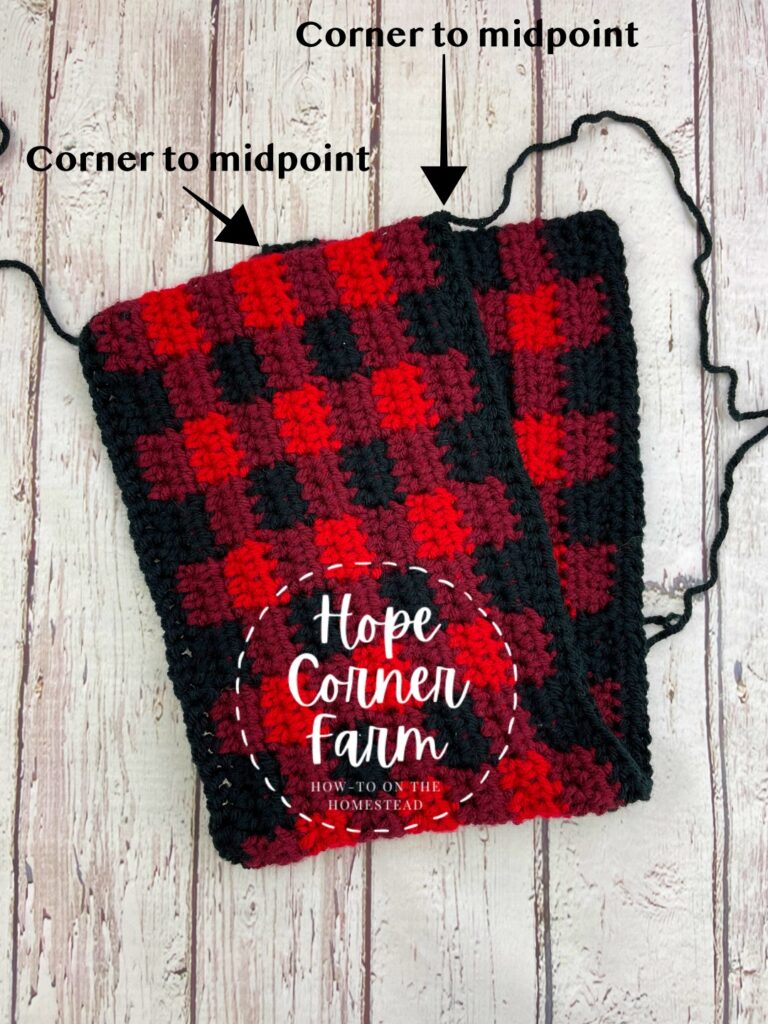
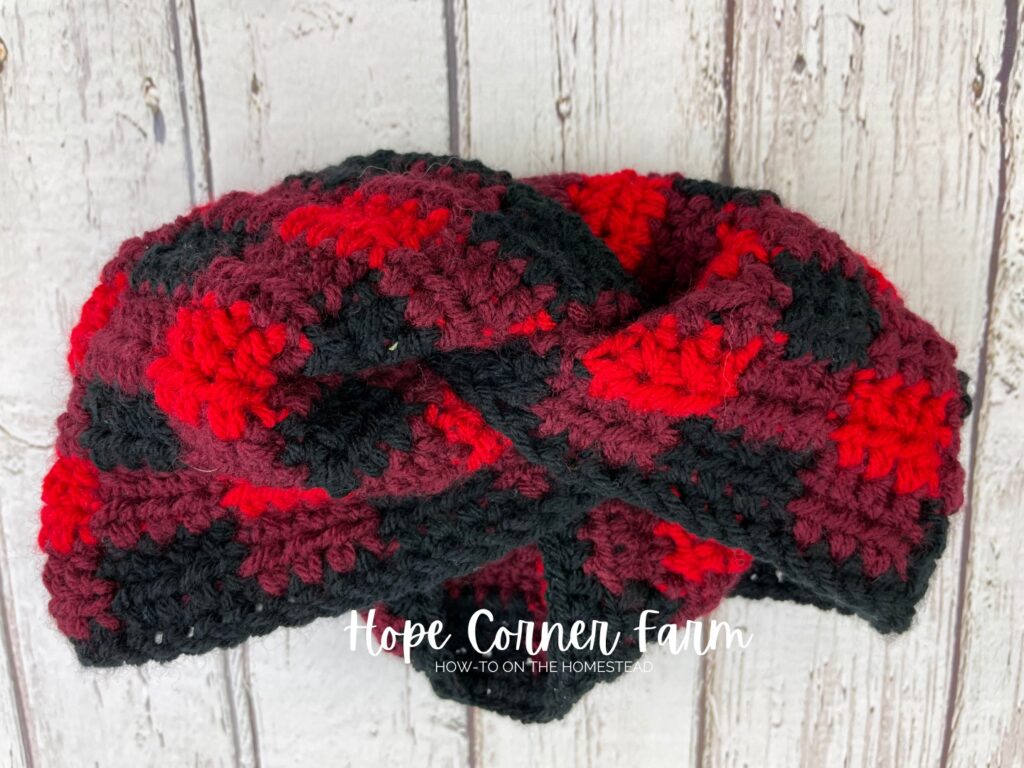
Now take the left corner of the headband side that is on top and fold it underneath the headband. Make sure to match the two corners up at the midpoint.
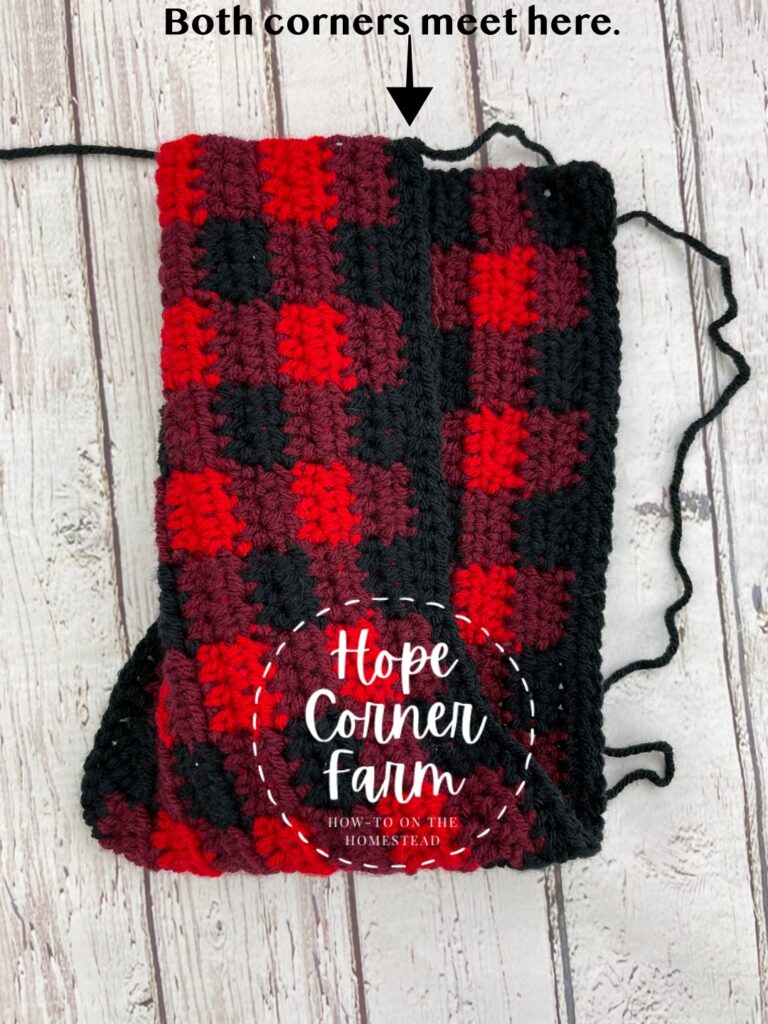
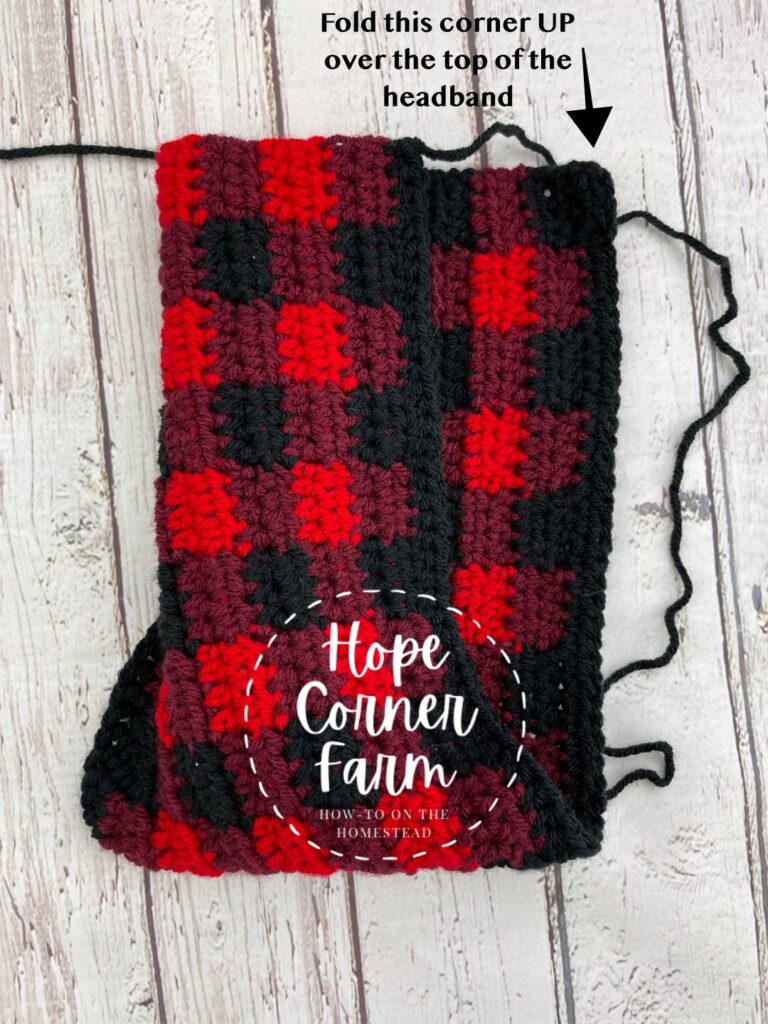
Next take the right side corner and fold it UP over the top of the headband. Make sure the corner you just folded over the top is even with the underside corner.
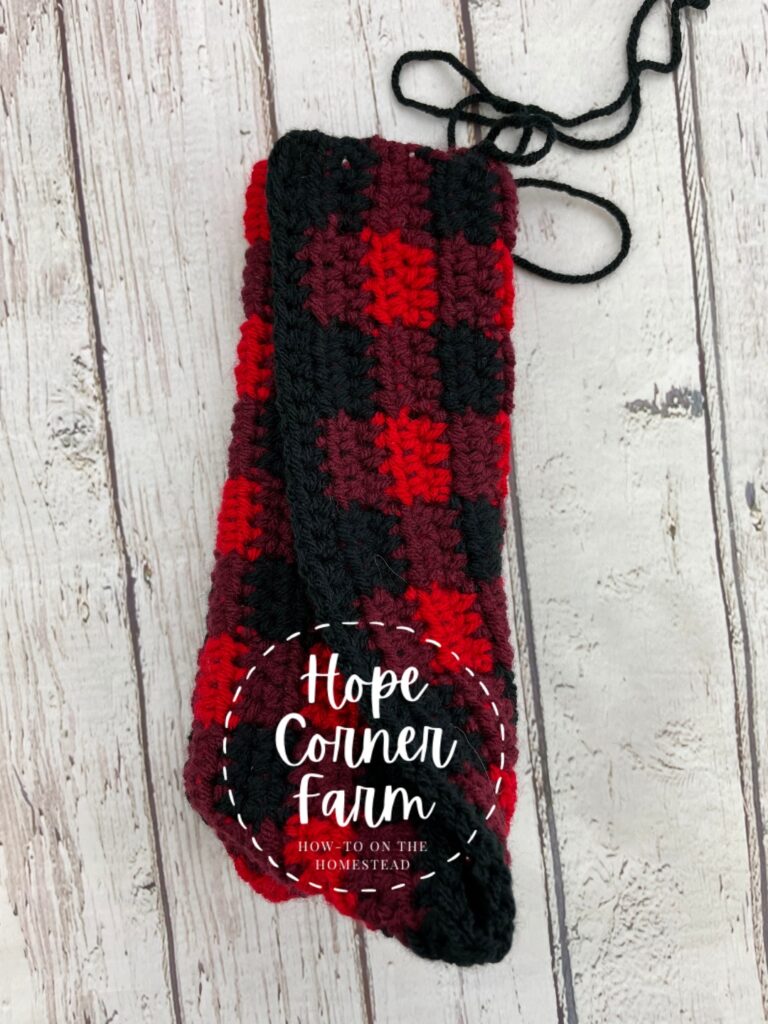
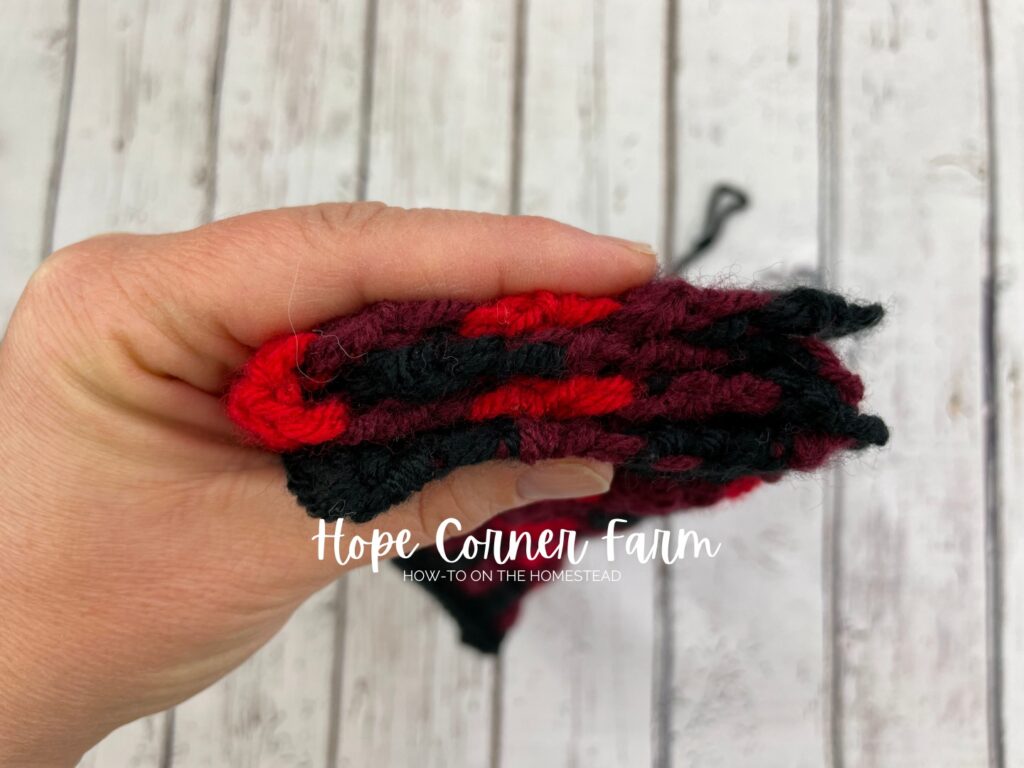
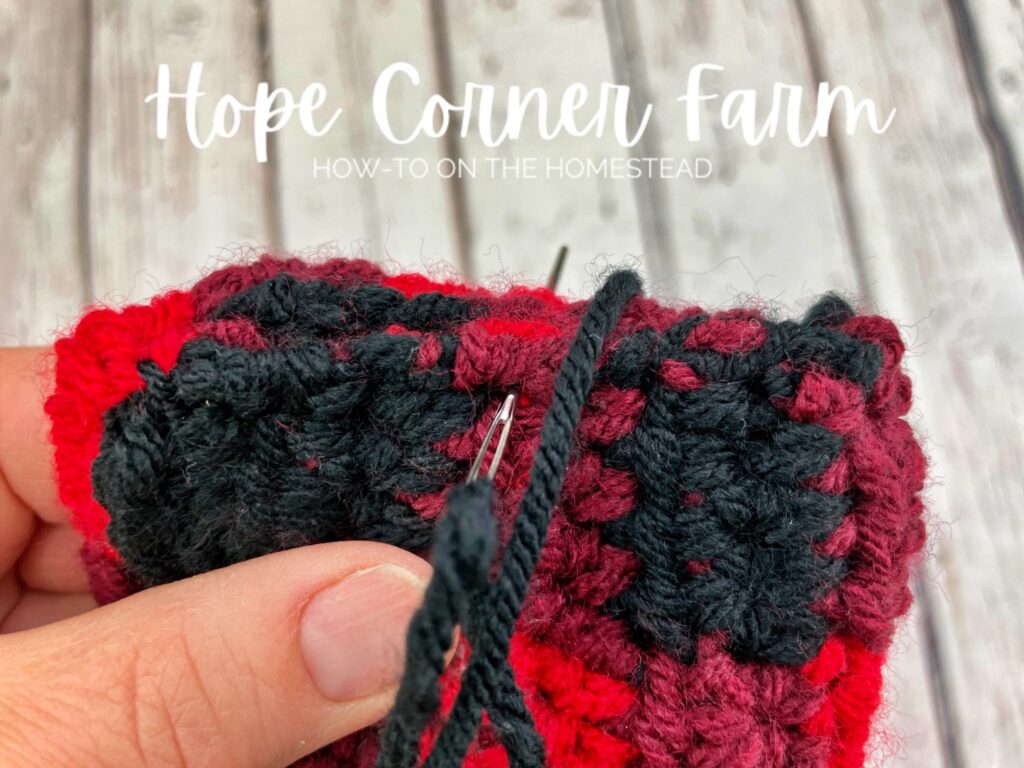
Sewing the Buffalo Plaid Twist Headband:
First thread one of the long yarn tails onto the yarn needle.
Next sew across the folds using a running stitch. Make sure to catch all four pieces of the fold as you sew across. Fasten off yarn when arriving at the opposite side and weave in the ends.
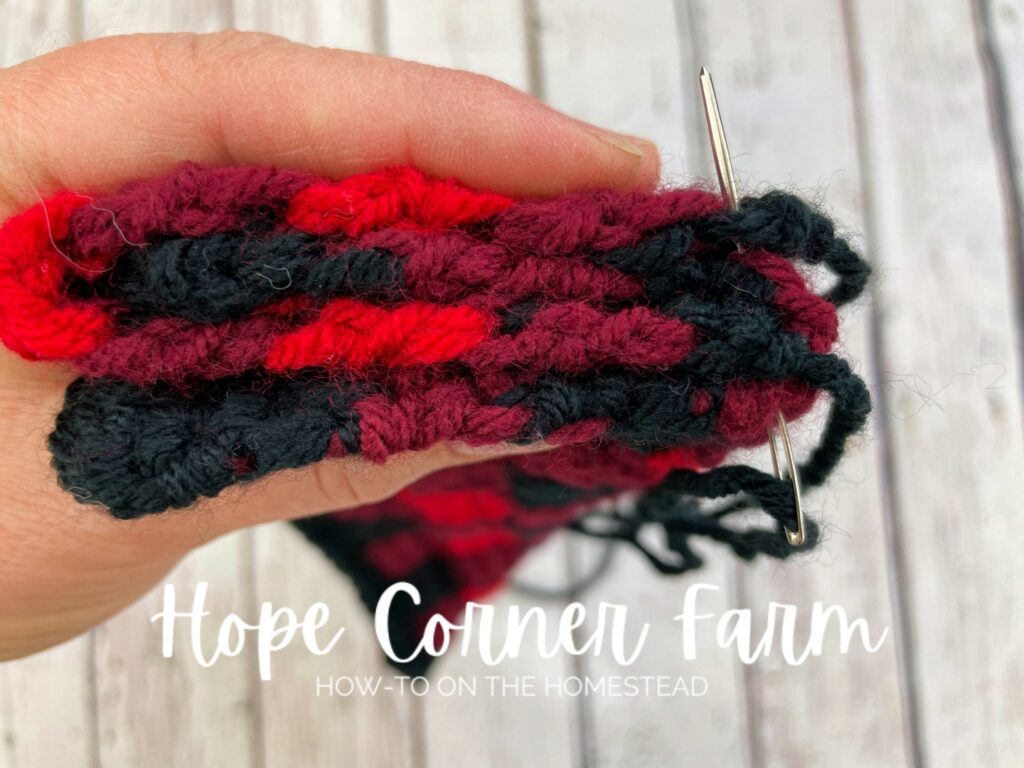
Now thread the other yarn tail onto the needle. Sew across the folds using an overcast whip stitch. Fasten off yarn and weave in end.

Finishing the Buffalo Plaid Twist Headband:
After sewing, the headband is still inside out. It will need to be turned right side out.
Now once the headband is turned right-side out, it will need to be straightened some to achieve the right look. Keep messing with it!
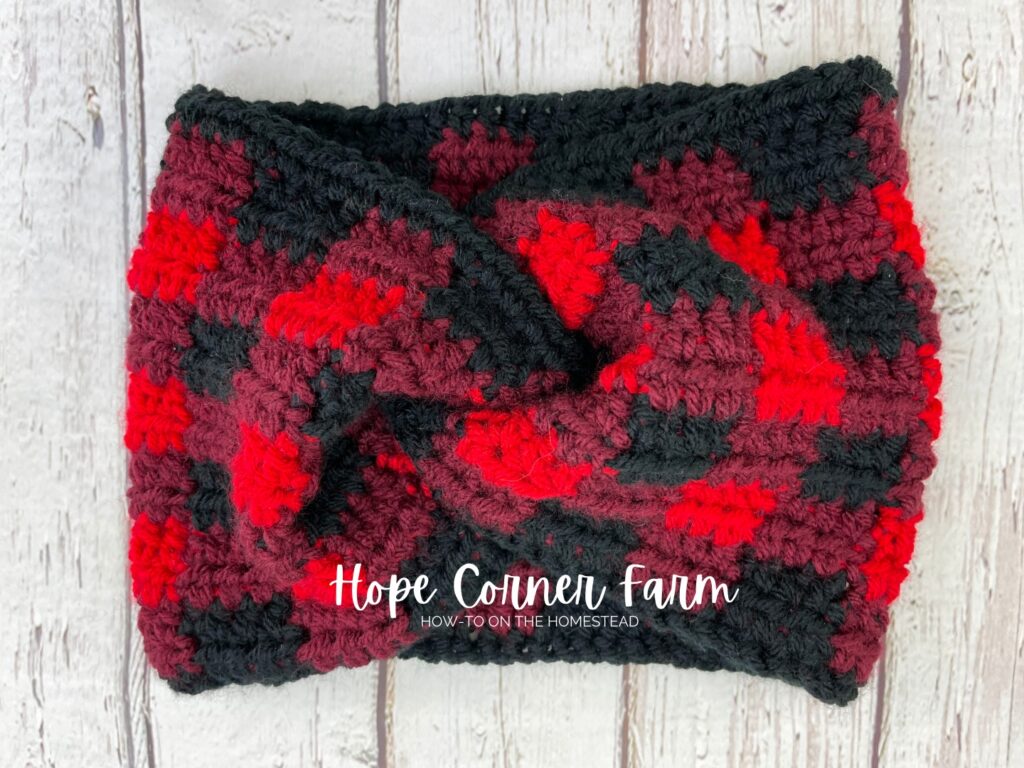

Enjoy and stay warm!
Buffalo Plaid Twist Headband Video Tutorial:

Many Blessings,
