
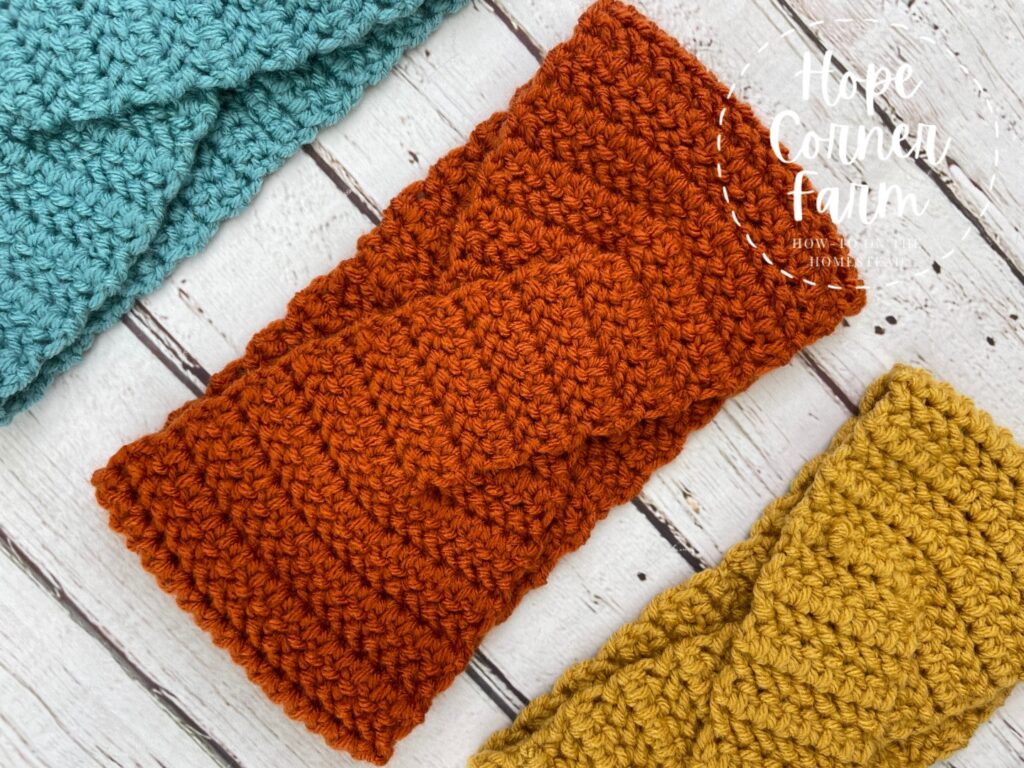
Half Herringbone Twist Crochet Headband
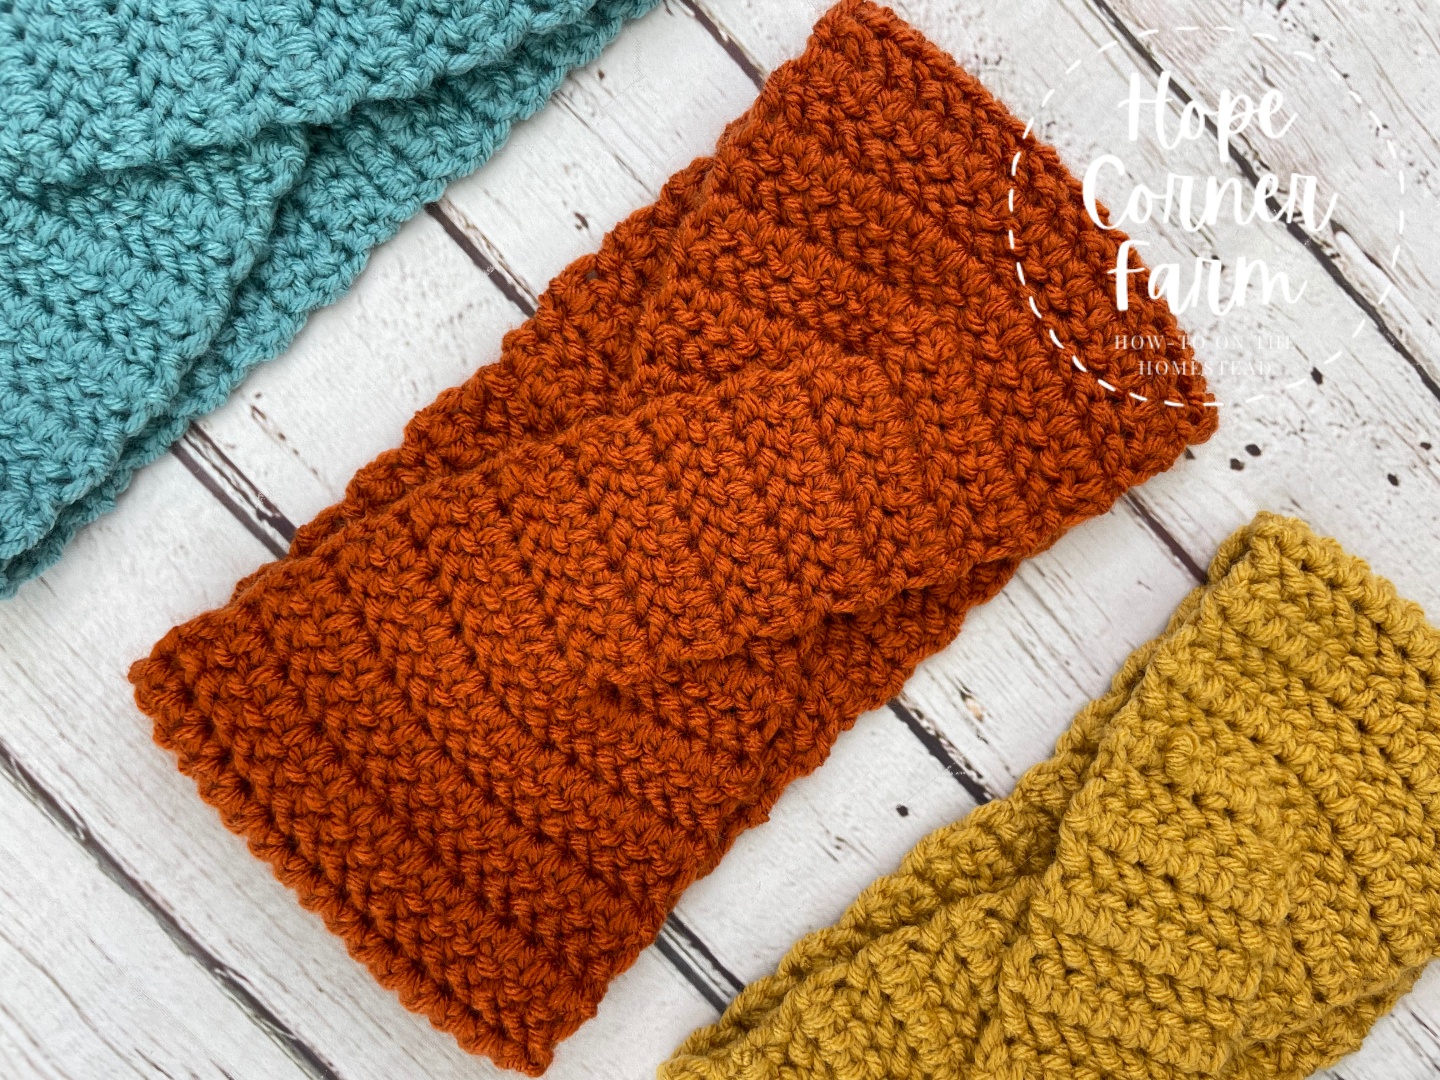

Crochet headbands are my favorite thing to make in the winter. I love the different looks one can achieve with them, plus they are fun, quick and easy to crochet! My newest crochet pattern release is the Half Herringbone Twist Crochet Headband. It uses a different technique to create a flatter twist for crochet ear warmers, and the herringbone half double crochet stitch gives this headband a fun textured look. Ready to create this ear warmer for yourself? Let’s get crocheting!

Materials Needed for the Half Herringbone Twist Headband:
-Size 4 (medium weight) yarn of choice
-H (5.5 mm) crochet hook
-Scissors
-Yarn/tapestry needle
Crochet Stitches Used:
-Chain (Ch)
-Herringbone Half Double Crochet (HHDC)
Need to see how to complete these stitches? Check out the videos below!
Crochet Stitch Videos:
To Start the Half Herringbone Twist Crochet Headband:
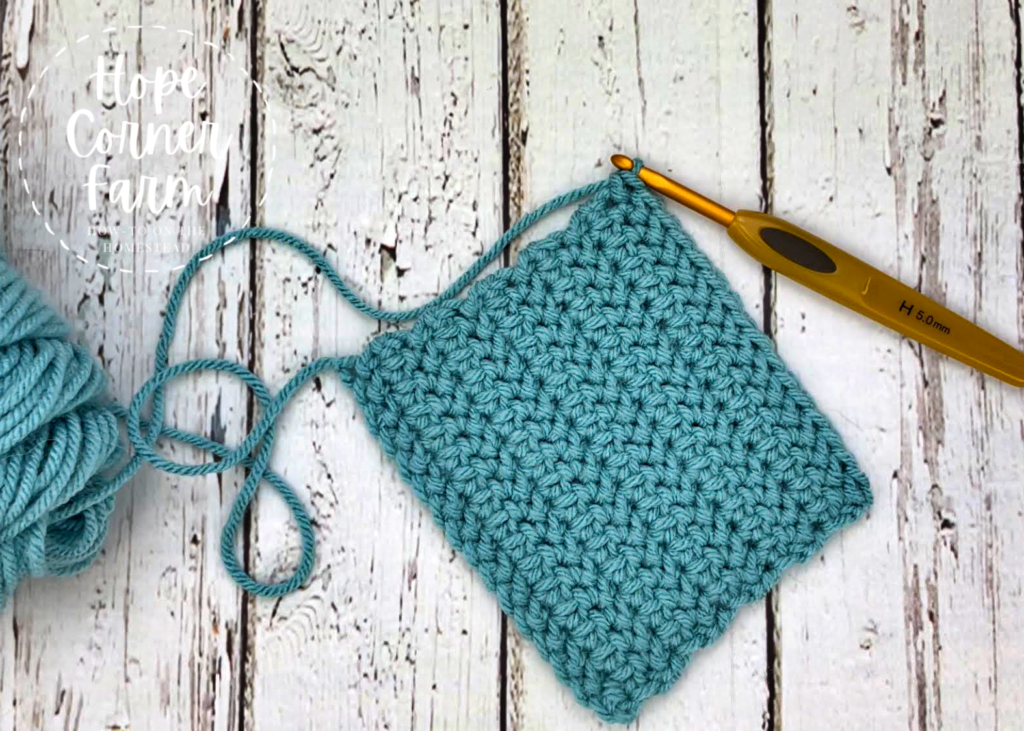
Begin the Half Herringbone Twist Crochet Headband by placing a slip knot on the crochet hook and CHAINING 17 (17).
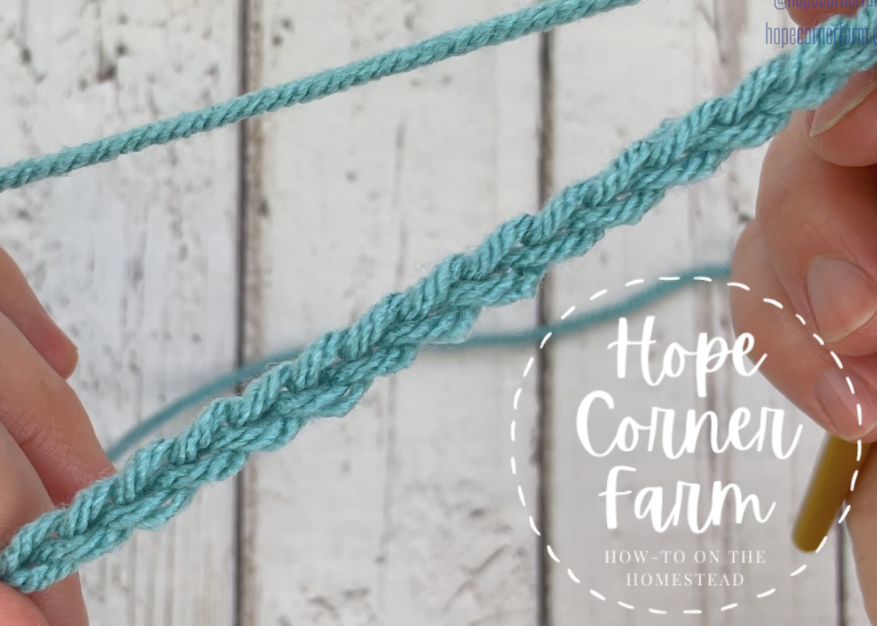
Row 1:
Place one Herringbone Half Double Crochet (HHDC) in the 2nd chain from the hook.
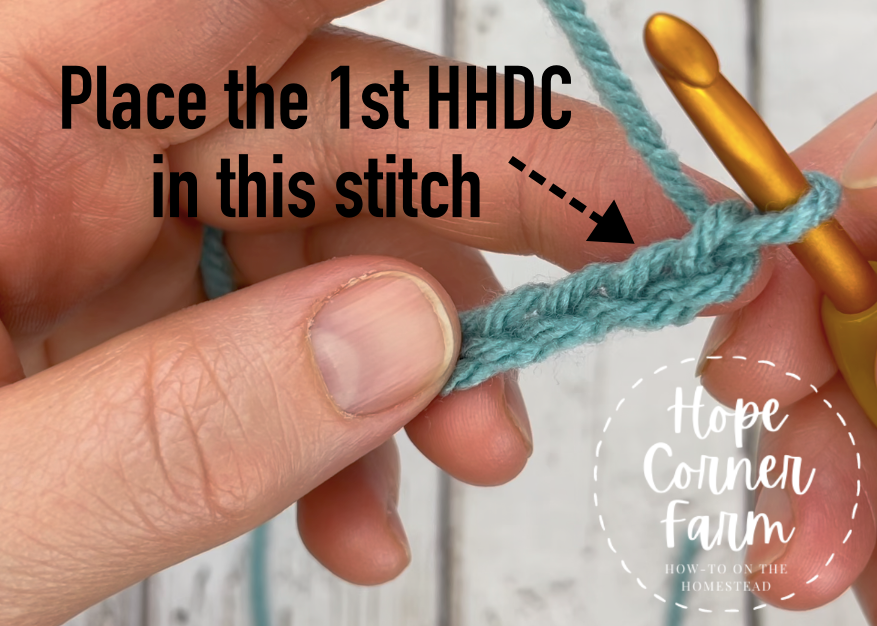
For the stitches in this row, I put two legs of the chain stitch on top of the hook, and the last single leg on the bottom.
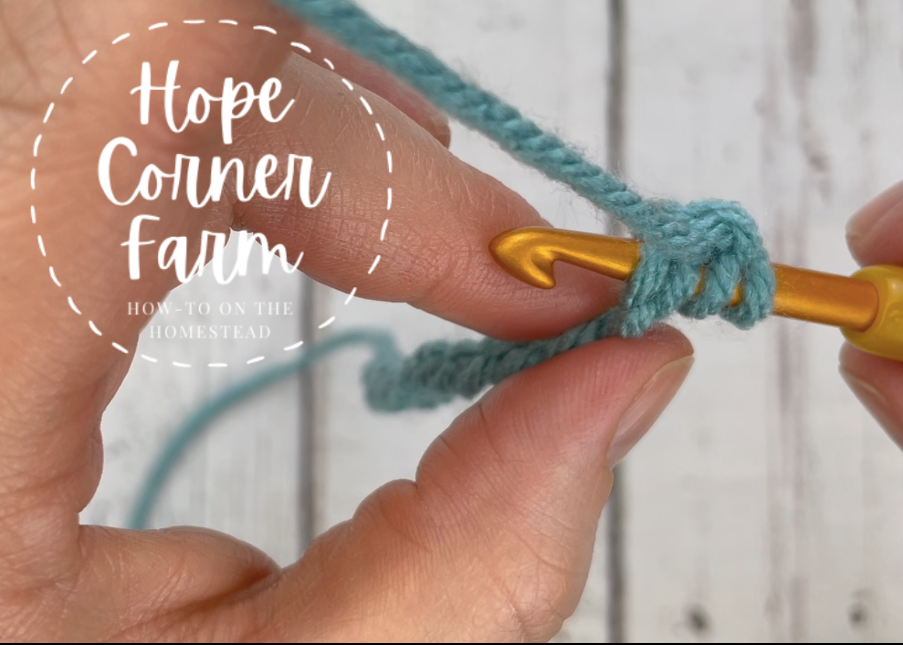
Put one HHDC in each of the remaining 15 chains across (16).
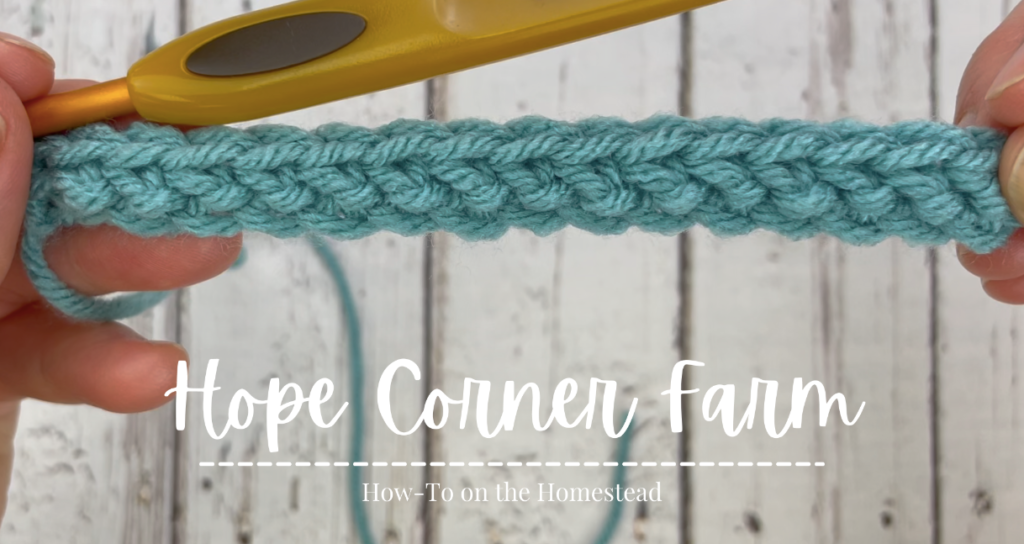
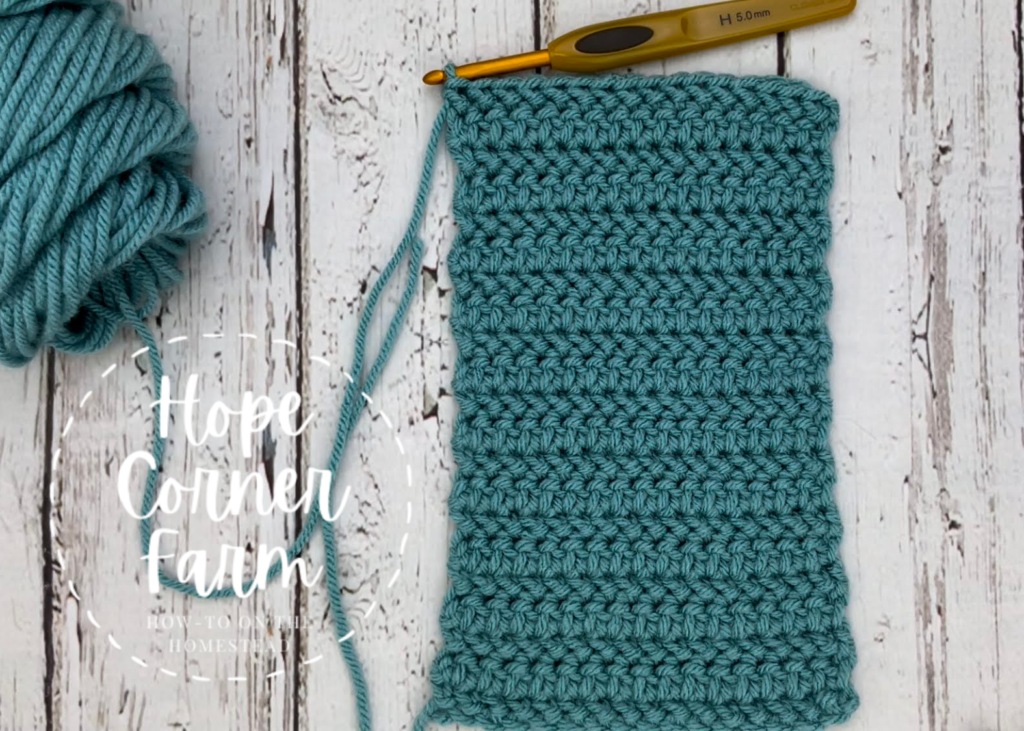
Row 2:
Chain 1, turn. Place one HHDC in each stitch across (16).
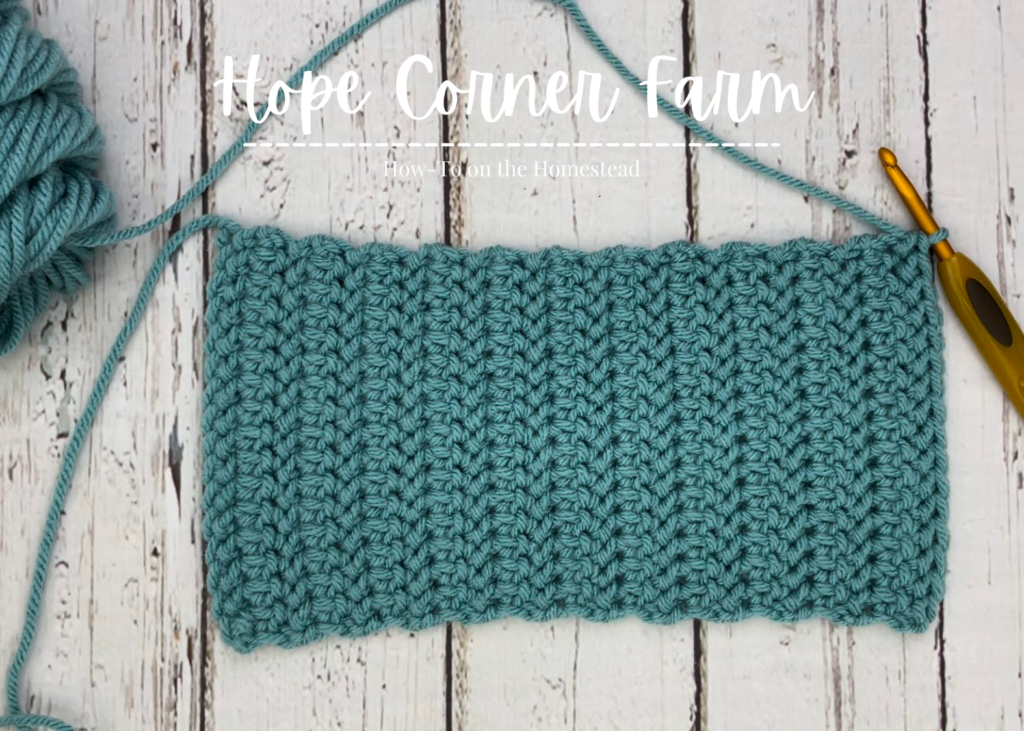
Herringbone Twist Crochet Headband Row 3 – Row 23:
Repeat row 2.
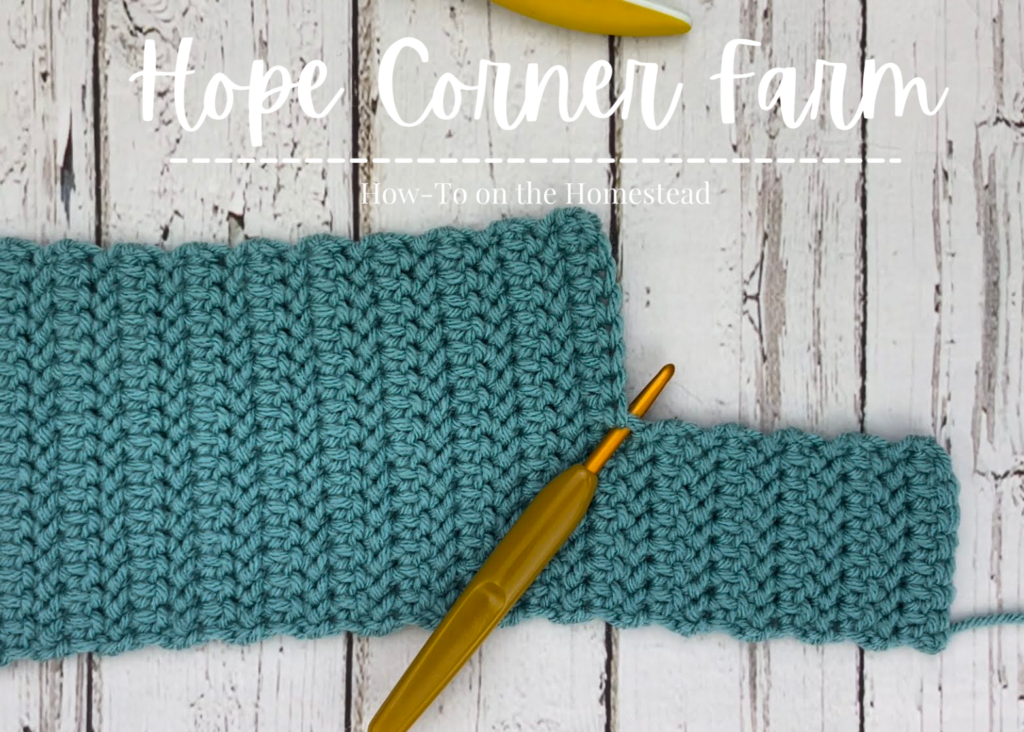
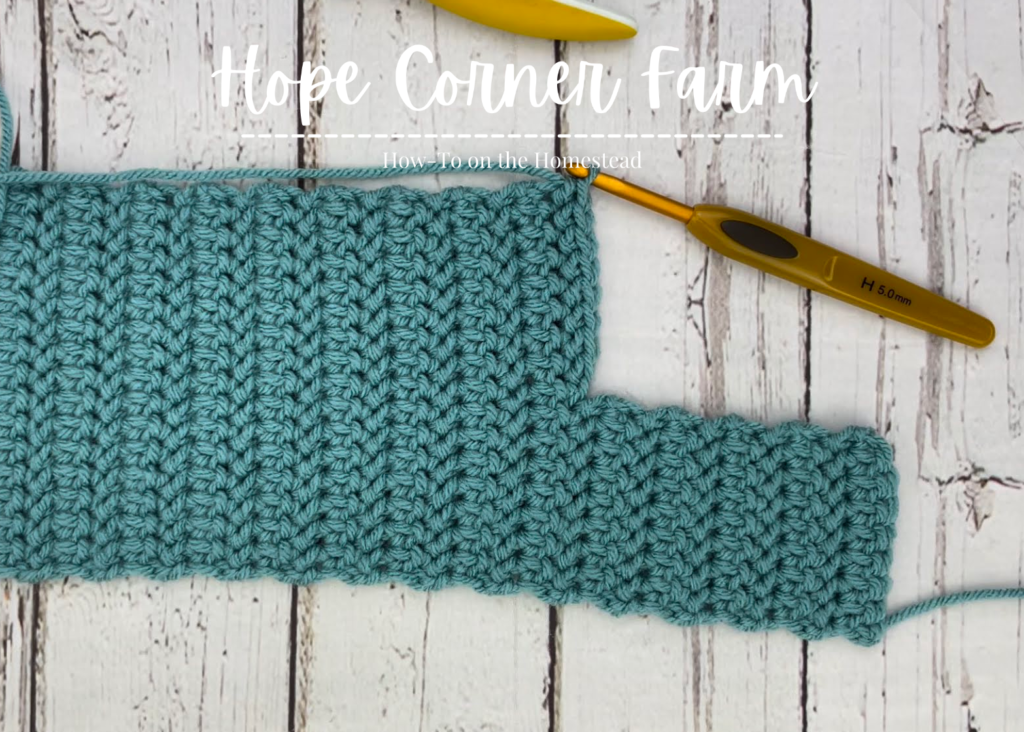
Twist Side 1, Row 1:
Chain 1, turn. Place one HHDC in each of the first 8 stitches (8). The stitches only go halfway across the headband.
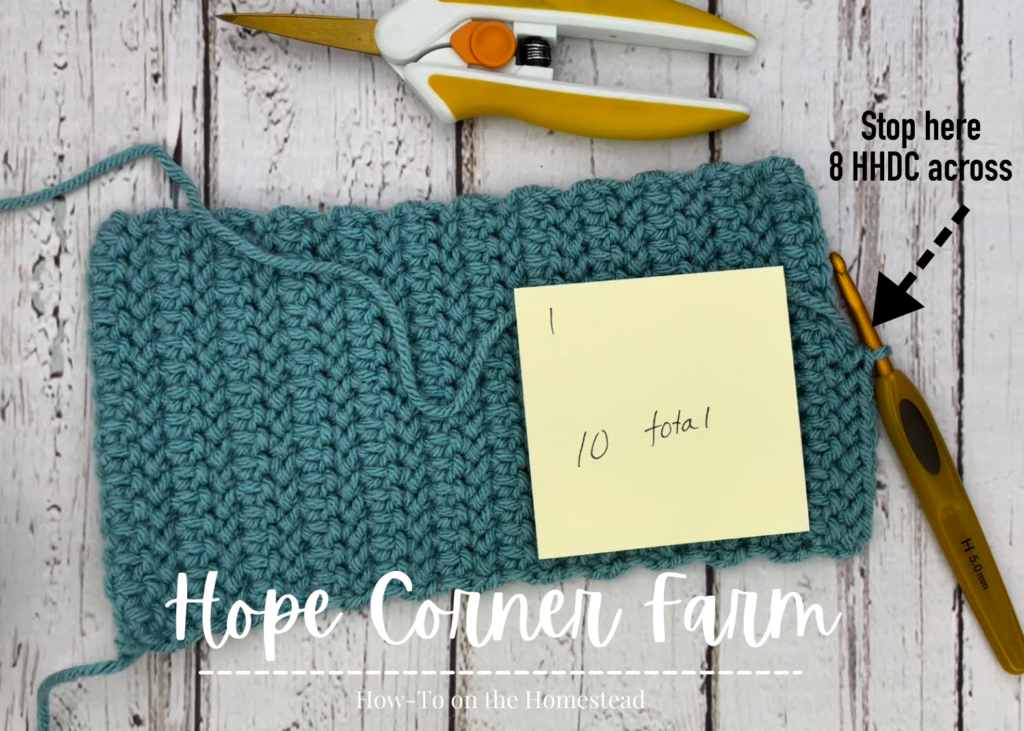
Twist Side 1 – Rows 2-9:
Repeat Twist Side 1 – Row 1 (8).
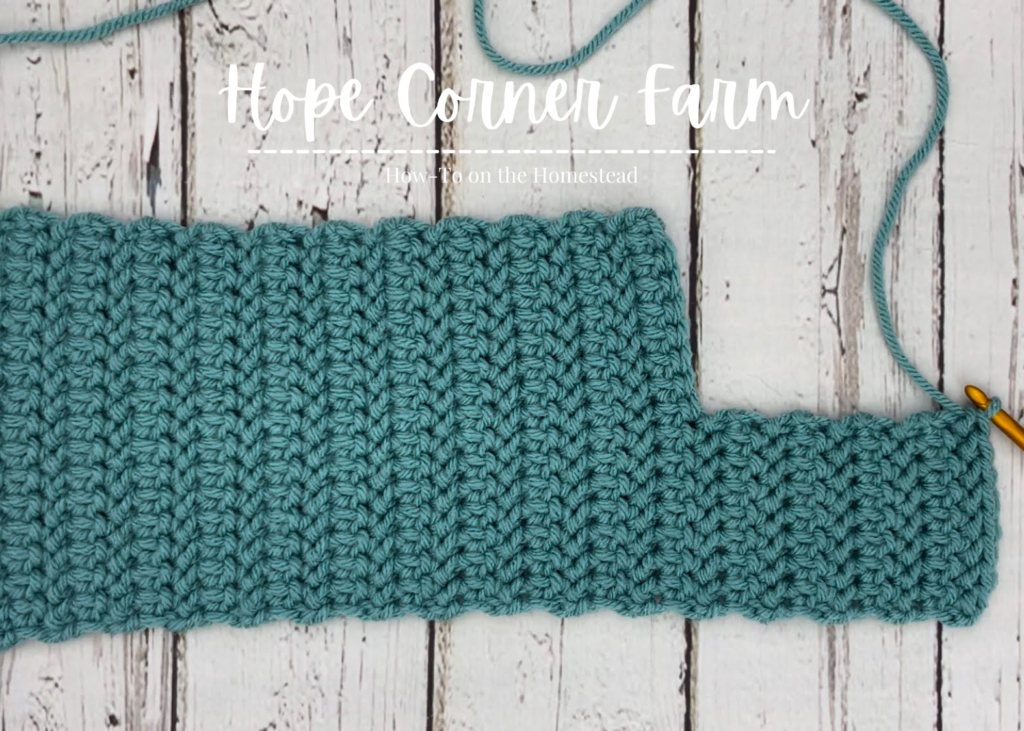
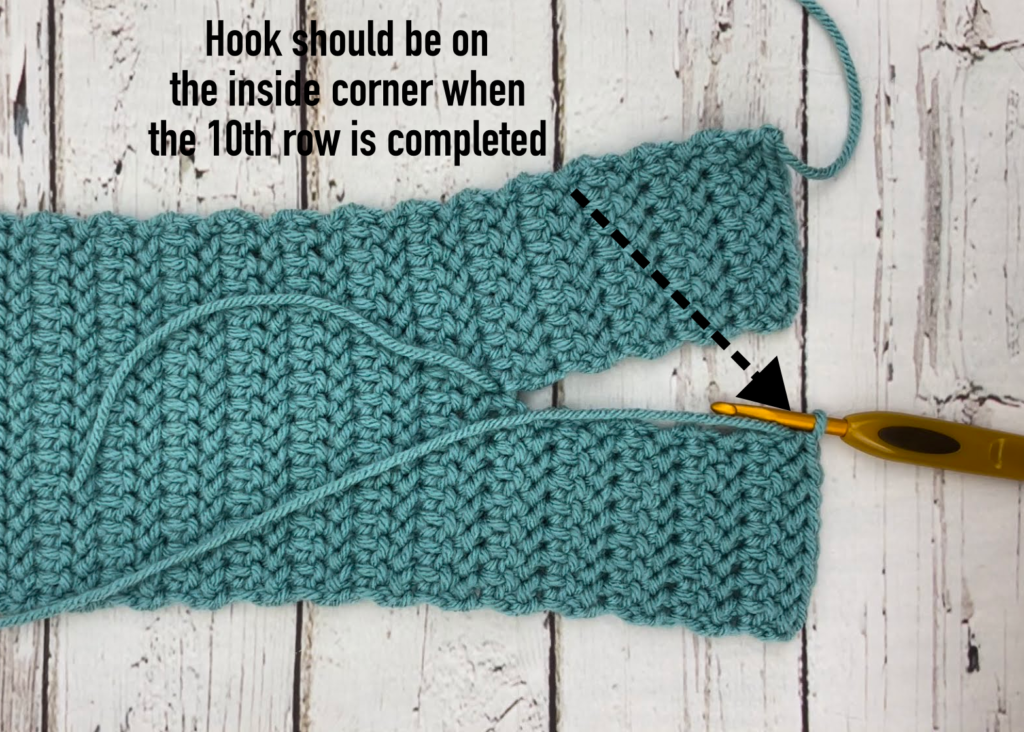
Twist Side 1 – Row 10:
Ch 1, turn. Place one HHDC in each stitch across (8). The hook should be on the outside edge of the Twist Side 1.
Cut the headband free from the yarn. Fasten off.
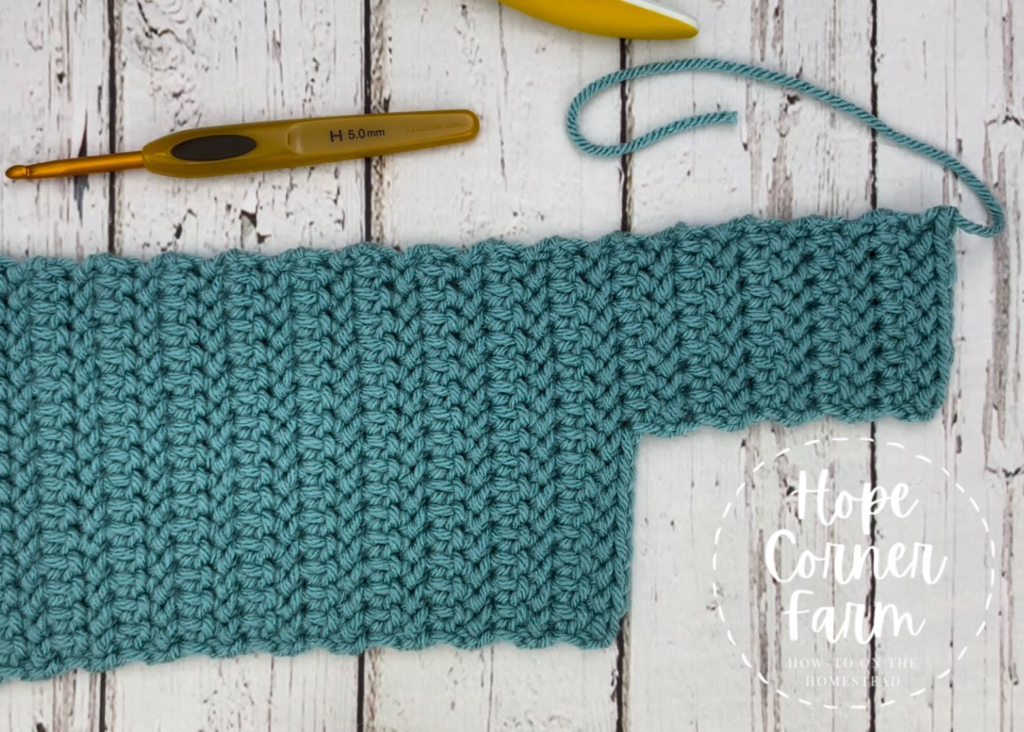
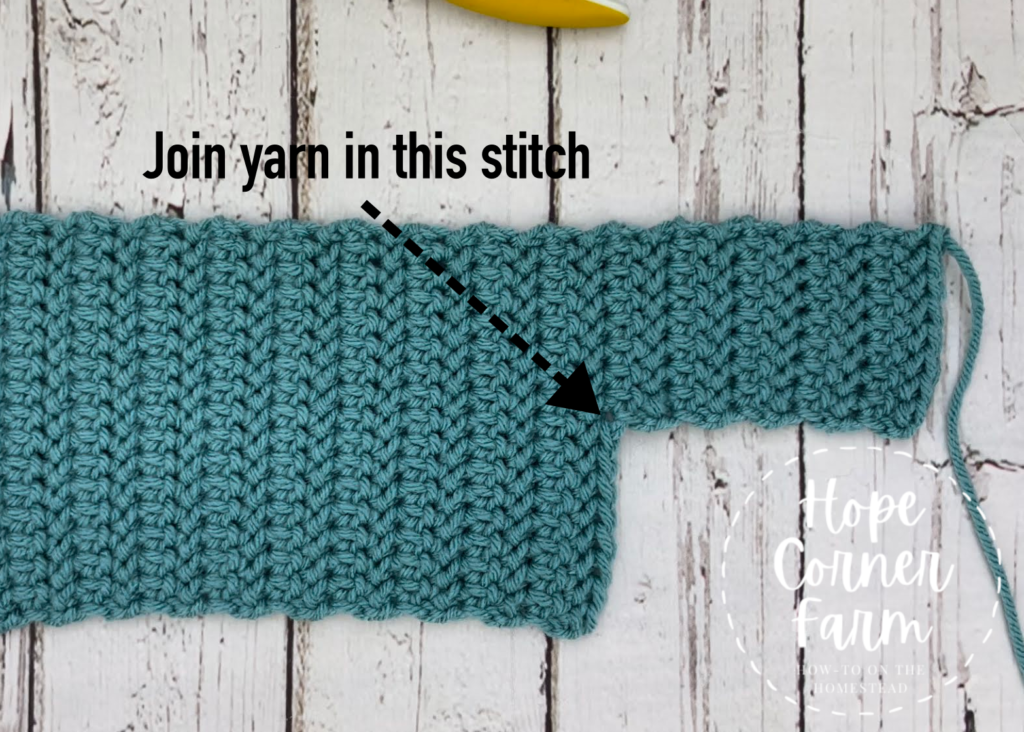
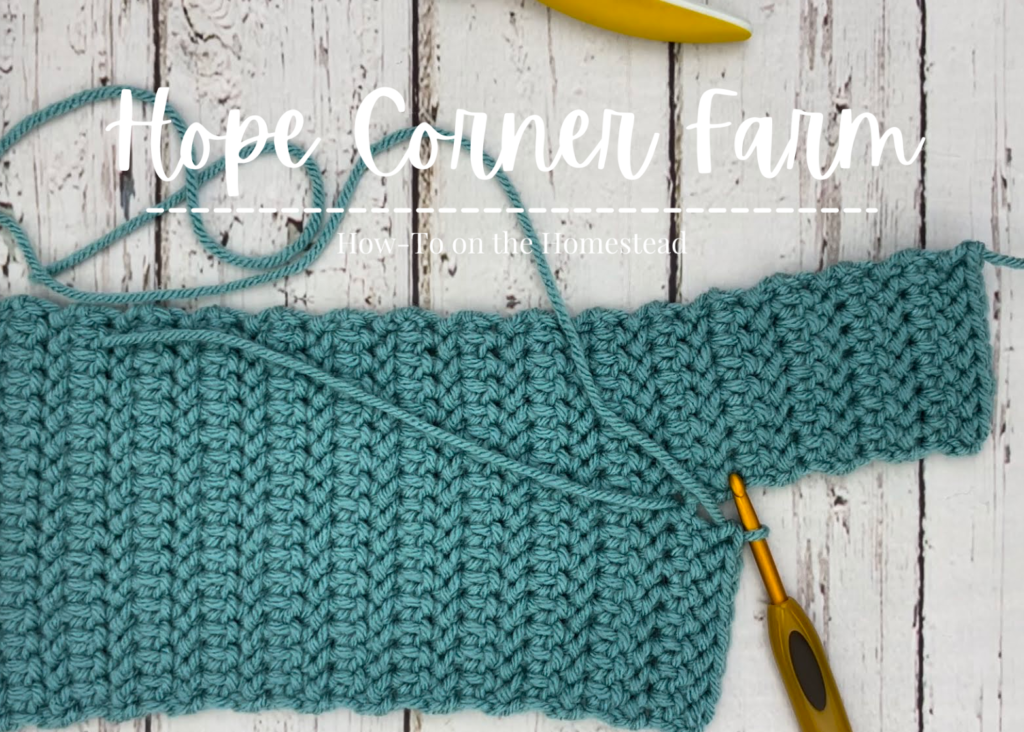
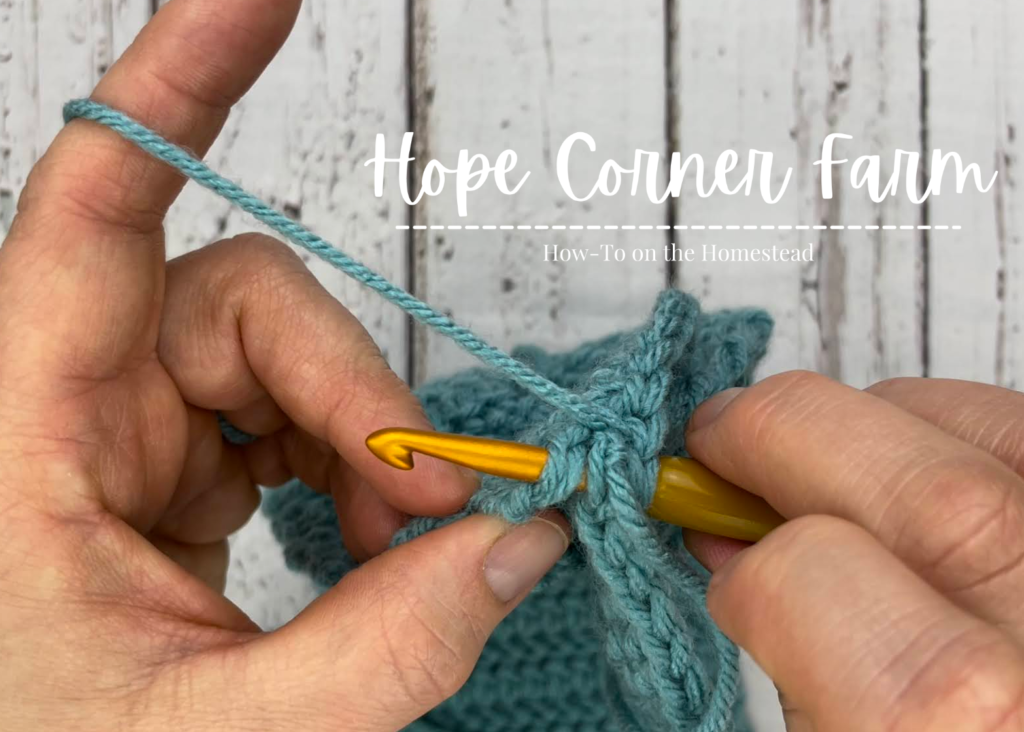
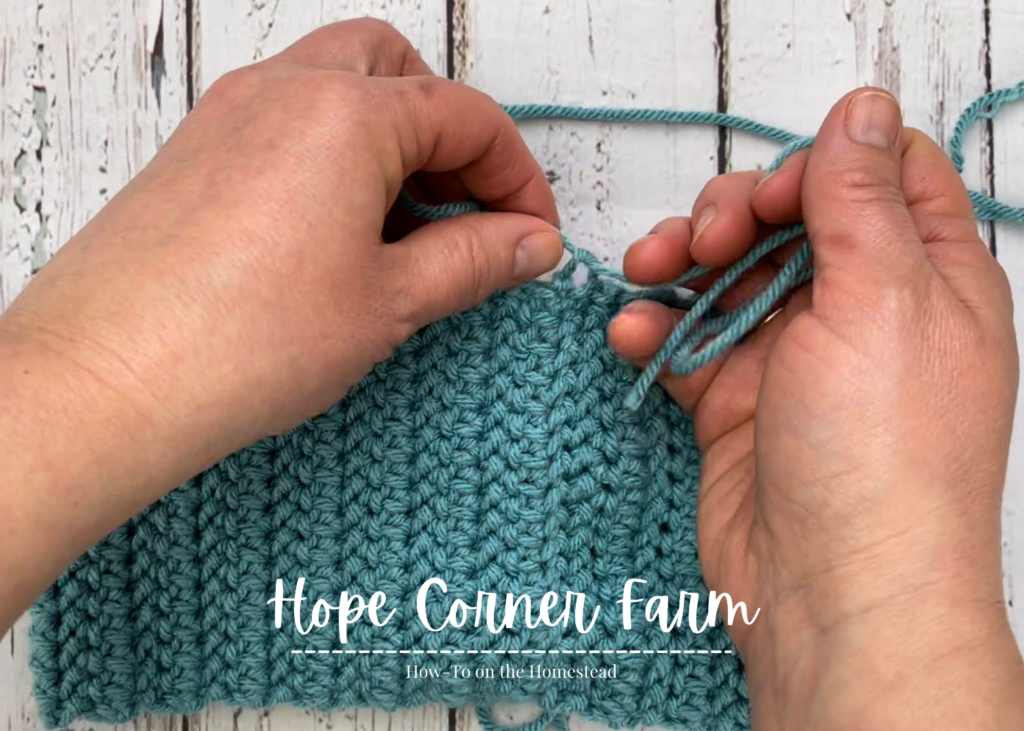
Twist Side 2 – Row 1:
To begin the second side of the twist, join the yarn in the 8th HHDC from the first row of twist side 1. See pictures attached below for a visual.
After joining by pulling up a loop, in the next stitch place one HHDC. Place one HHDC in each of the remaining 7 stitches across (8).
Twist Side 2 – Row 2:
Begin by chaining 1 and then turning. Place one HHDC in each stitch across (8).
Twist Side 2 – Rows 3-9:
Repeat Row 2 (8).
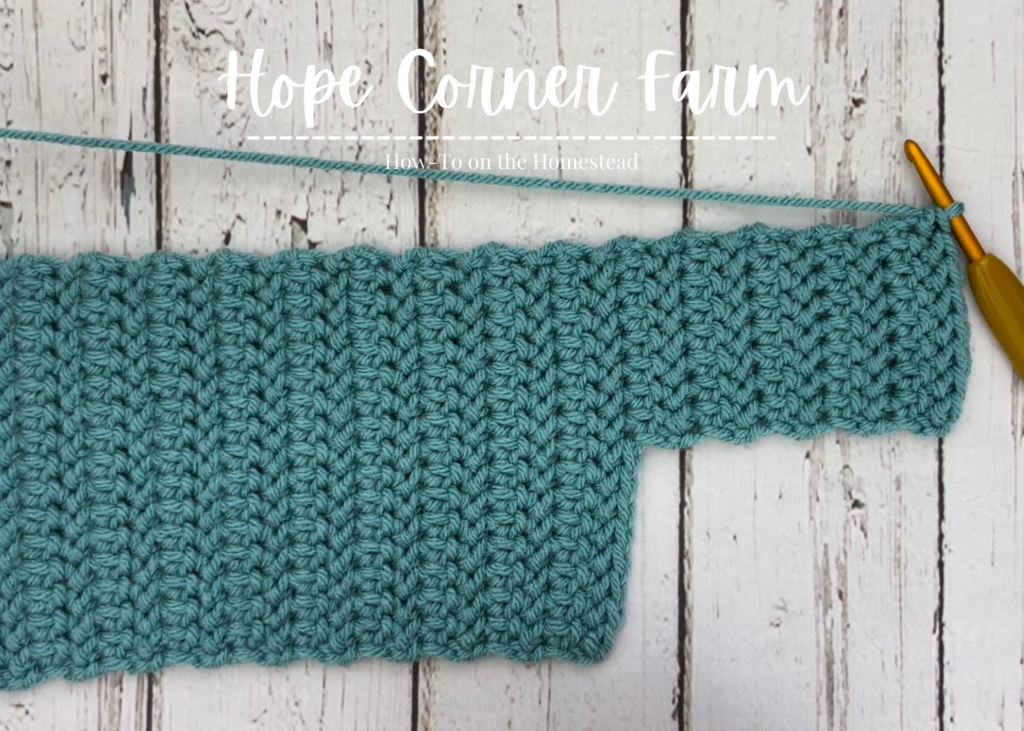
Twist Side 2 – Row 10:
Start by chaining 1 and turning. Place one HHDC in each stitch across (8). The hook should be on the inside corner of Twist Side 2. DO NOT CUT THE YARN OR FASTEN OFF!
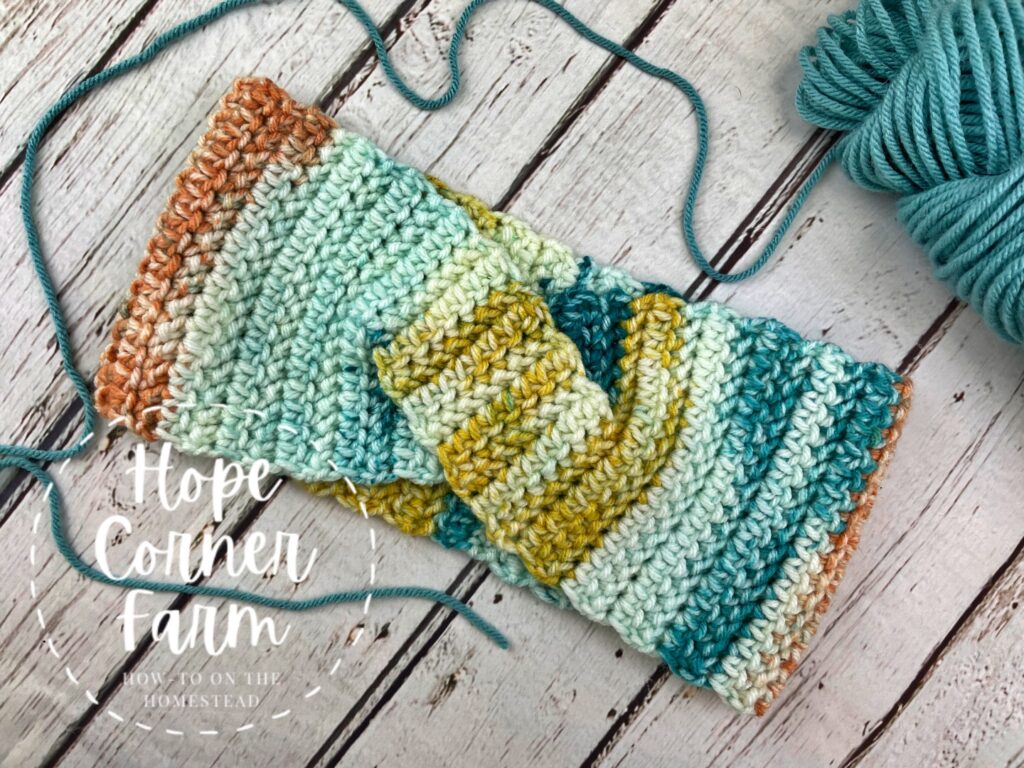
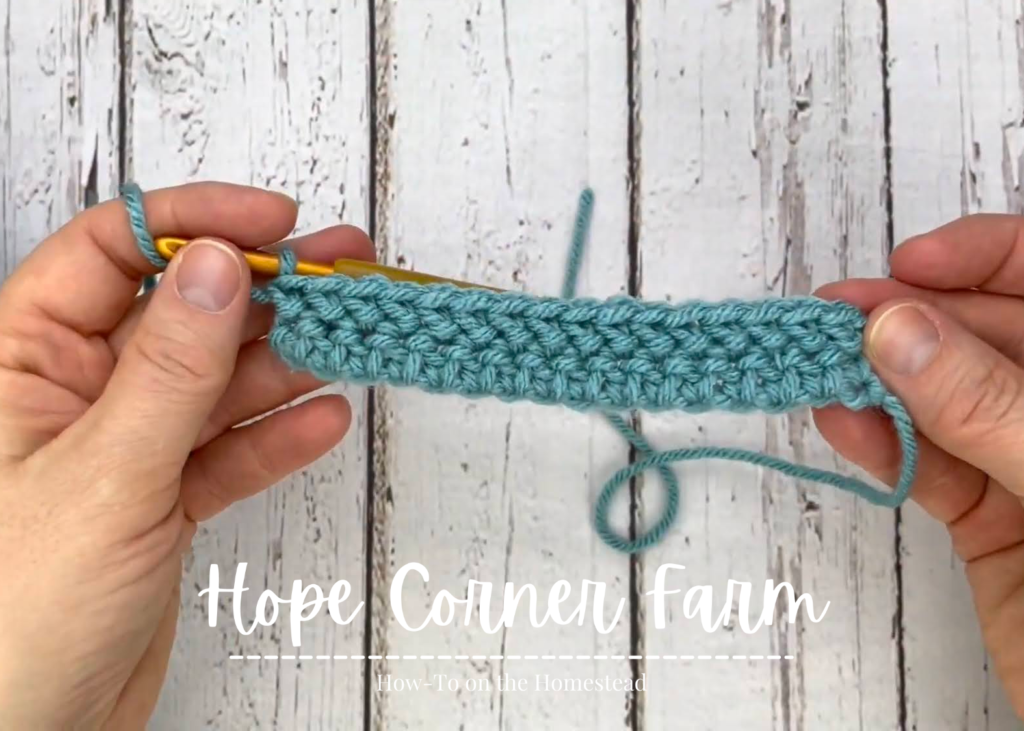
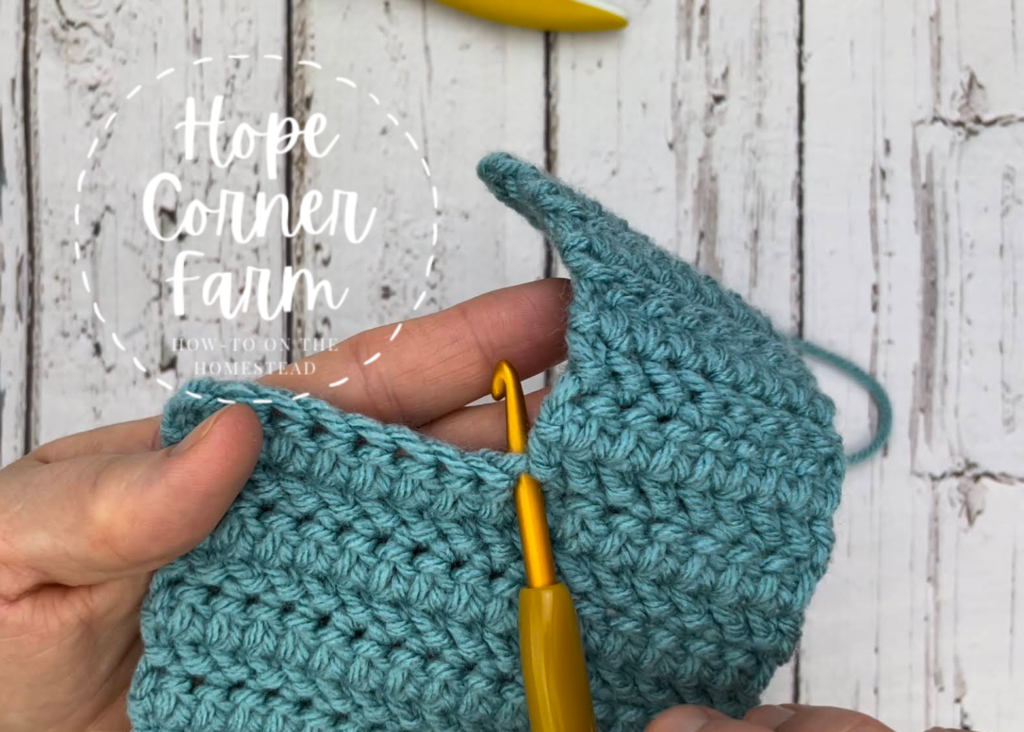
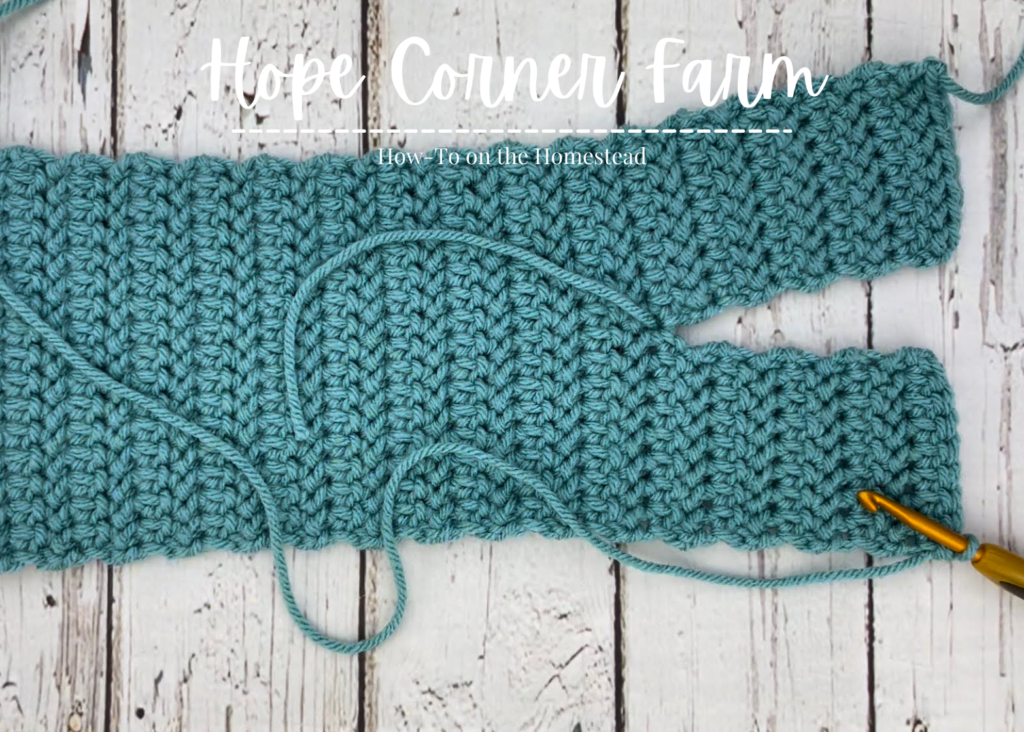
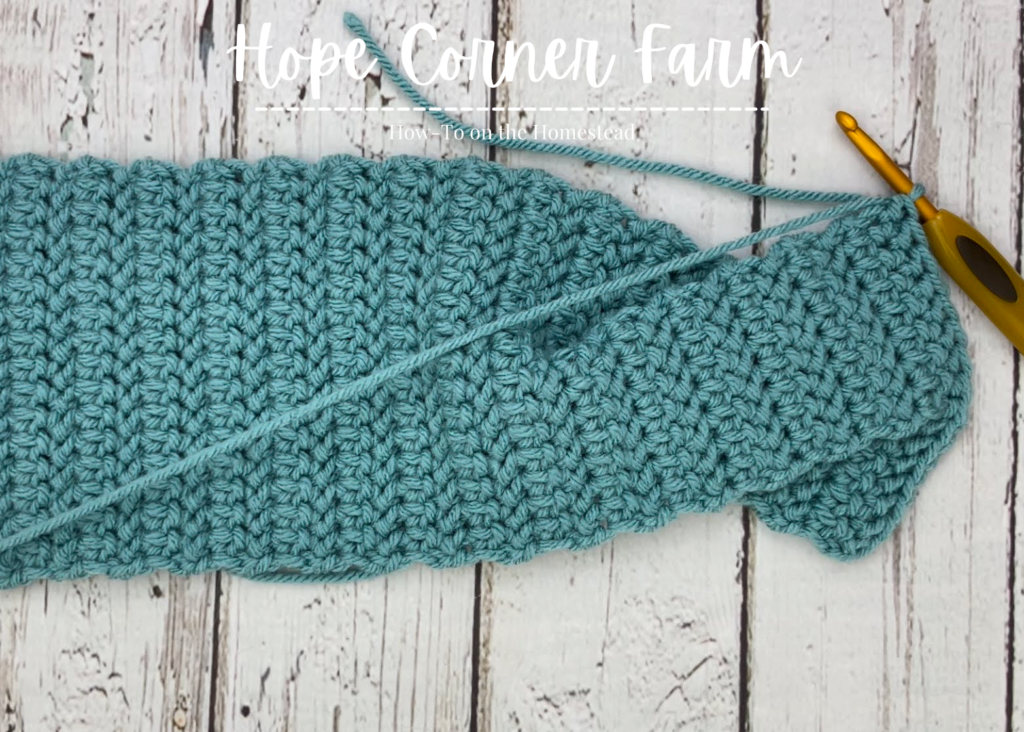
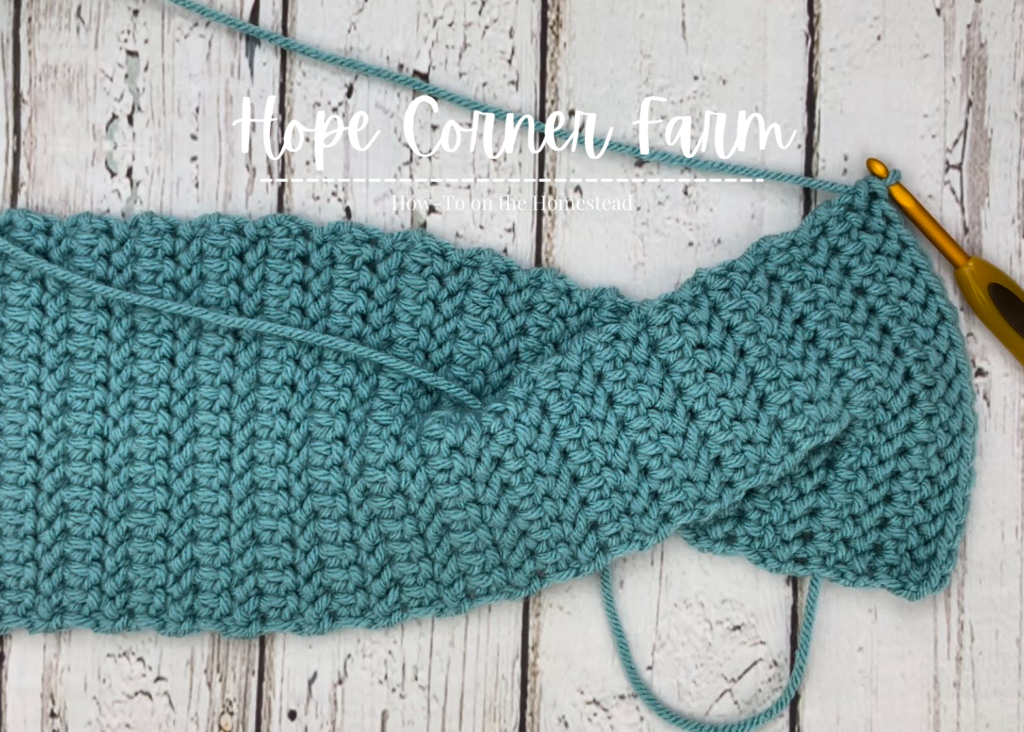
Creating the Twist of the Half Herringbone Twist Crochet Headband:
Again, remember that the hook should be located on the inside corner of the Twist Side 2. If it is not, it is on the wrong row for creating the twist!
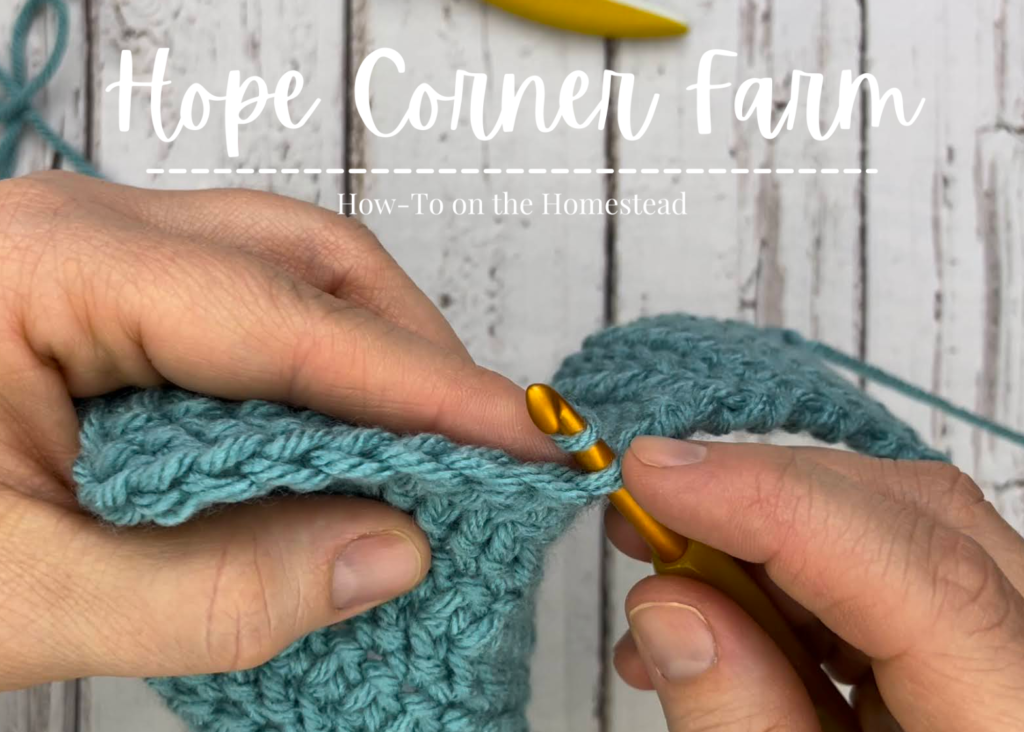
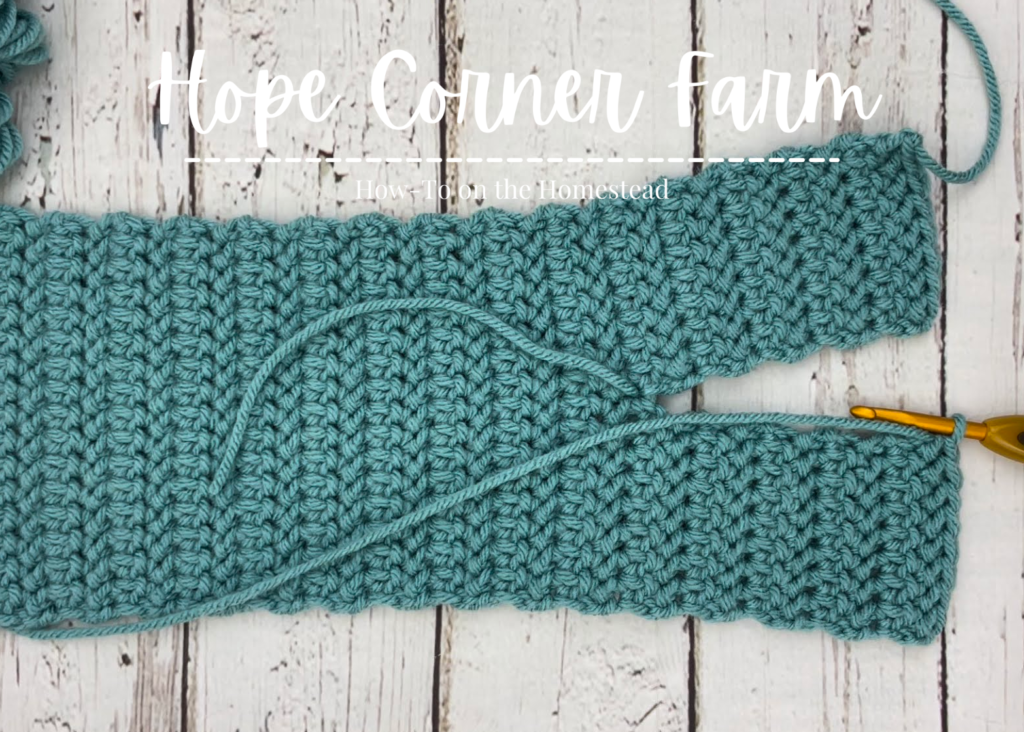
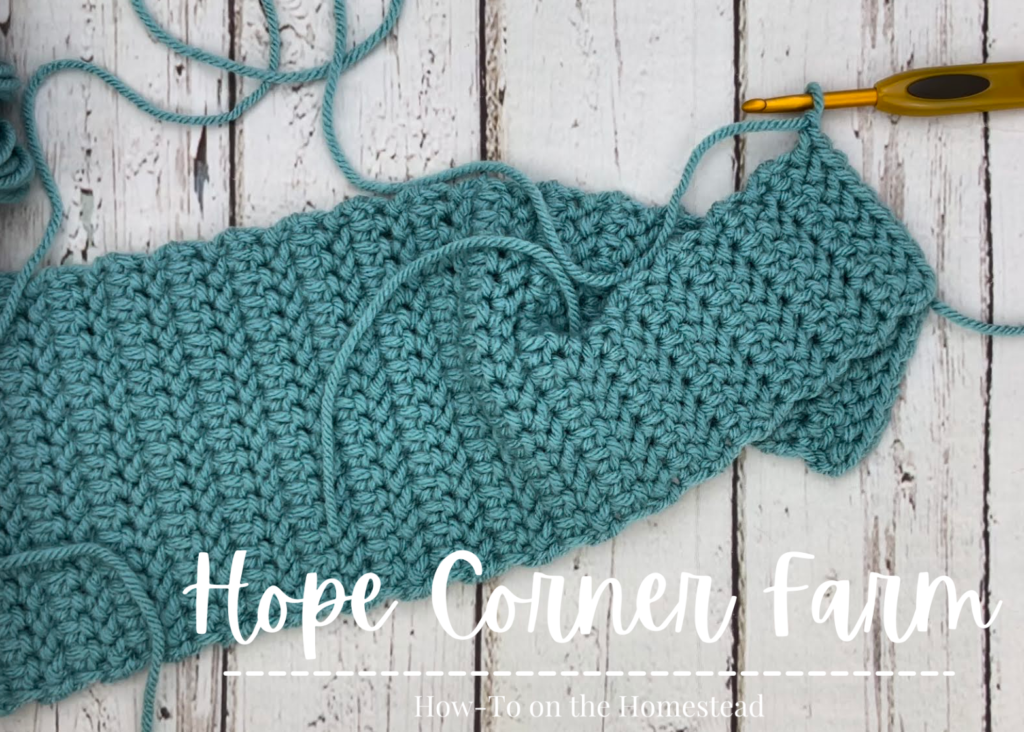
Start with a chain 1. After doing that, match up the outside corners of Twist Side 1 and Twist Side 2. When matching up the corners, cross one twist side over the top of the other twist side. See the pictures.

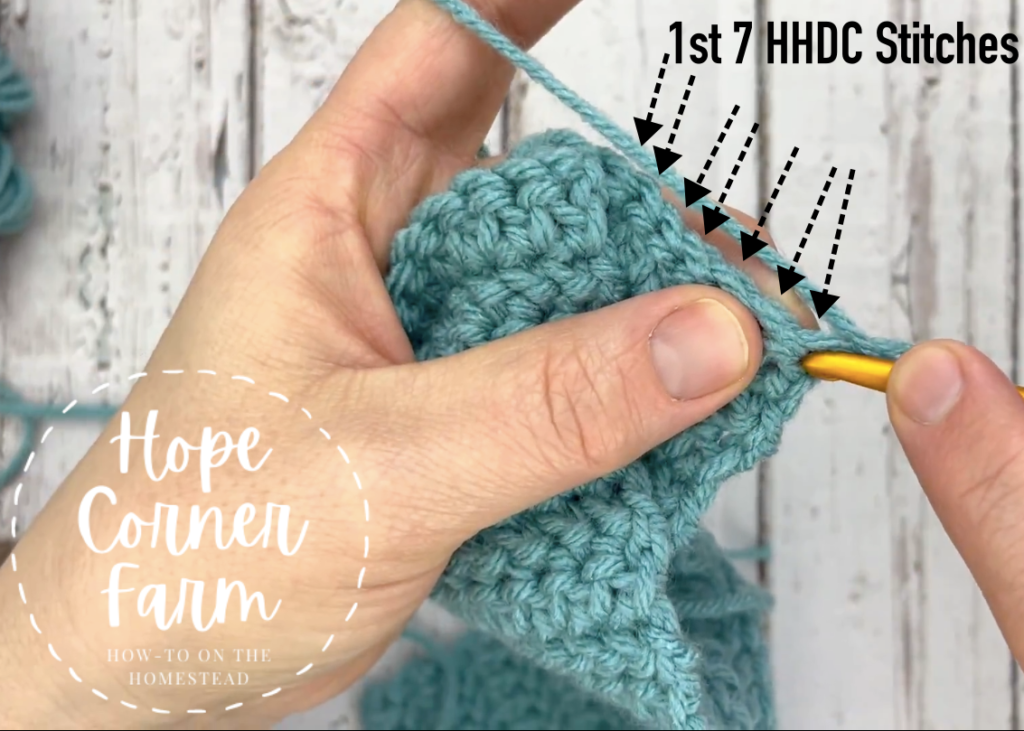
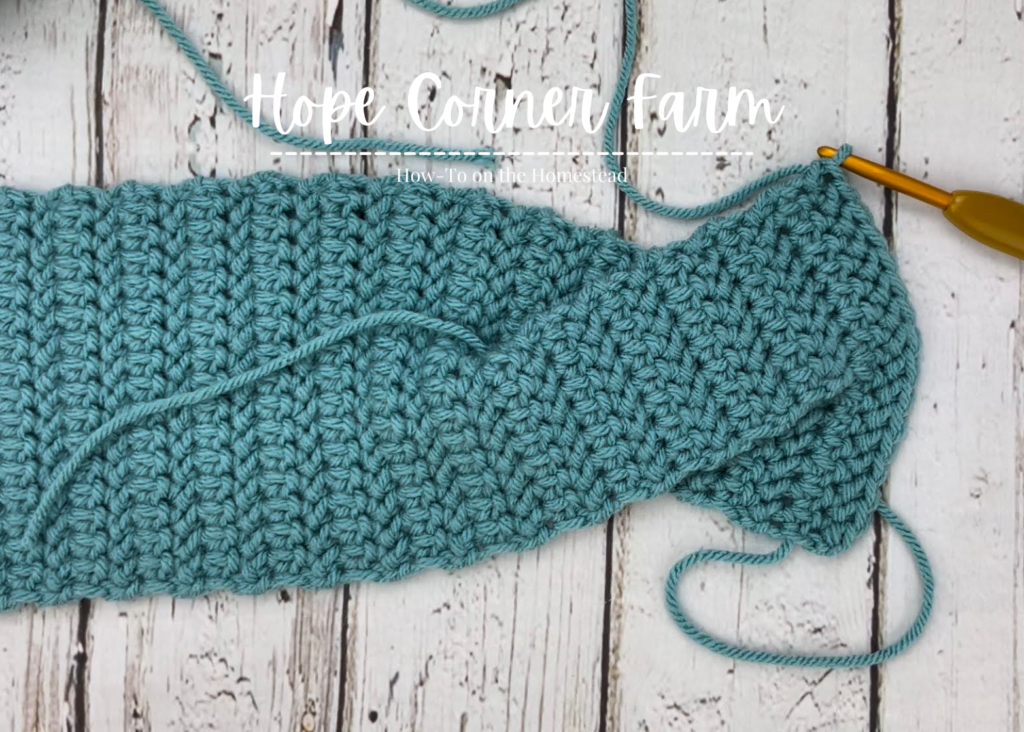
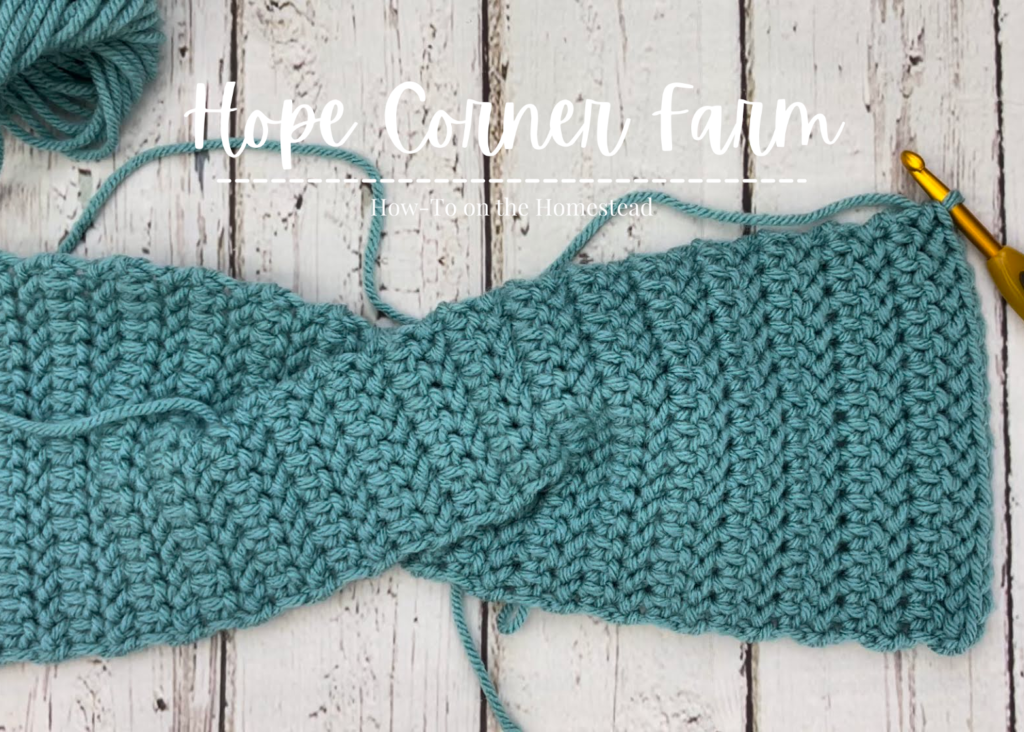
Turn and place one HHDC in each of the first 7 stitches.
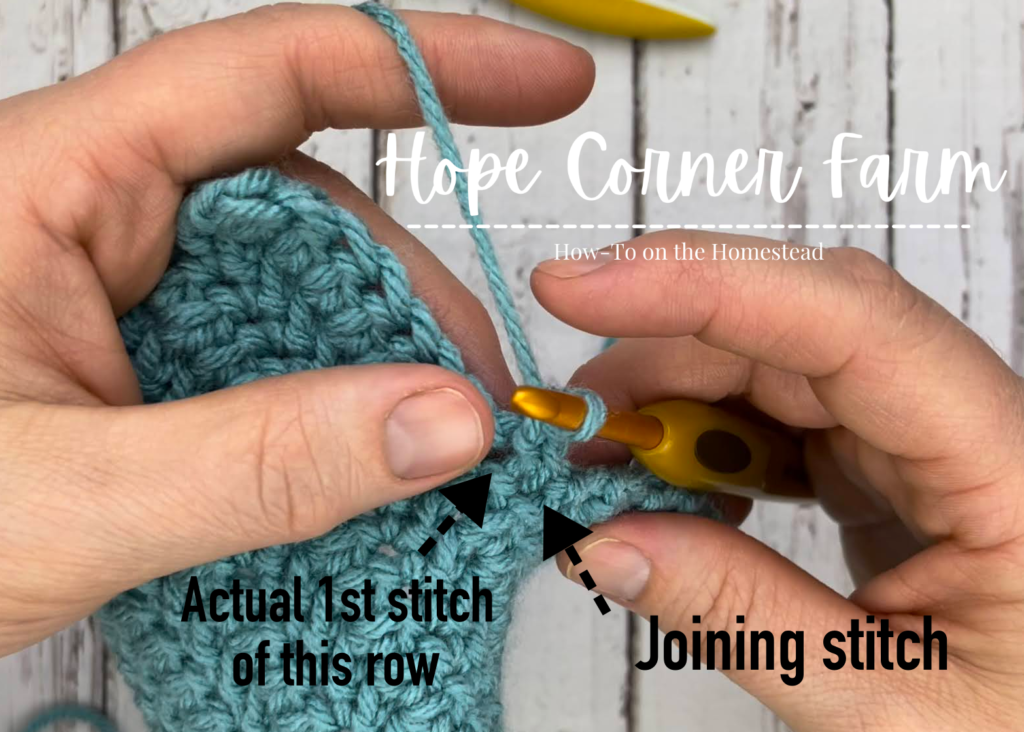
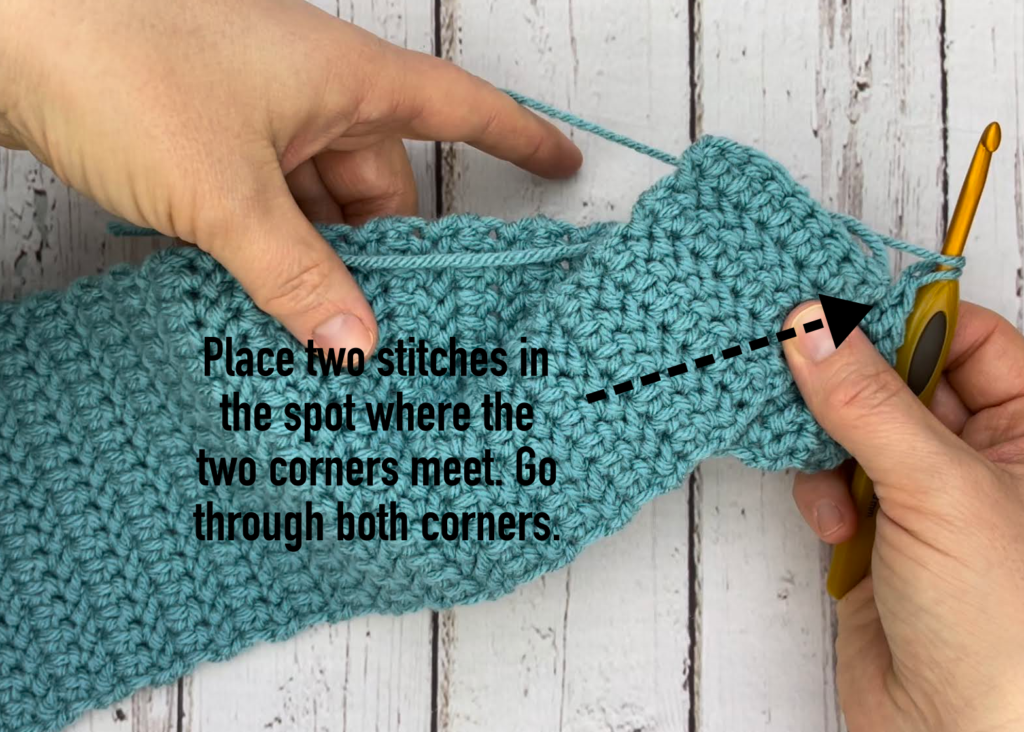
Next, place one HHDC in BOTH corner stitches at the same time (the same HHDC is placed in 2 stitches at one time). Place one more HHDC in the same place ( there will be 2 HHDCs going through the stacked corner stitches).
Place one HHDC in each of the next 7 stitches. There will be a total of 16 stitches in this row (16).
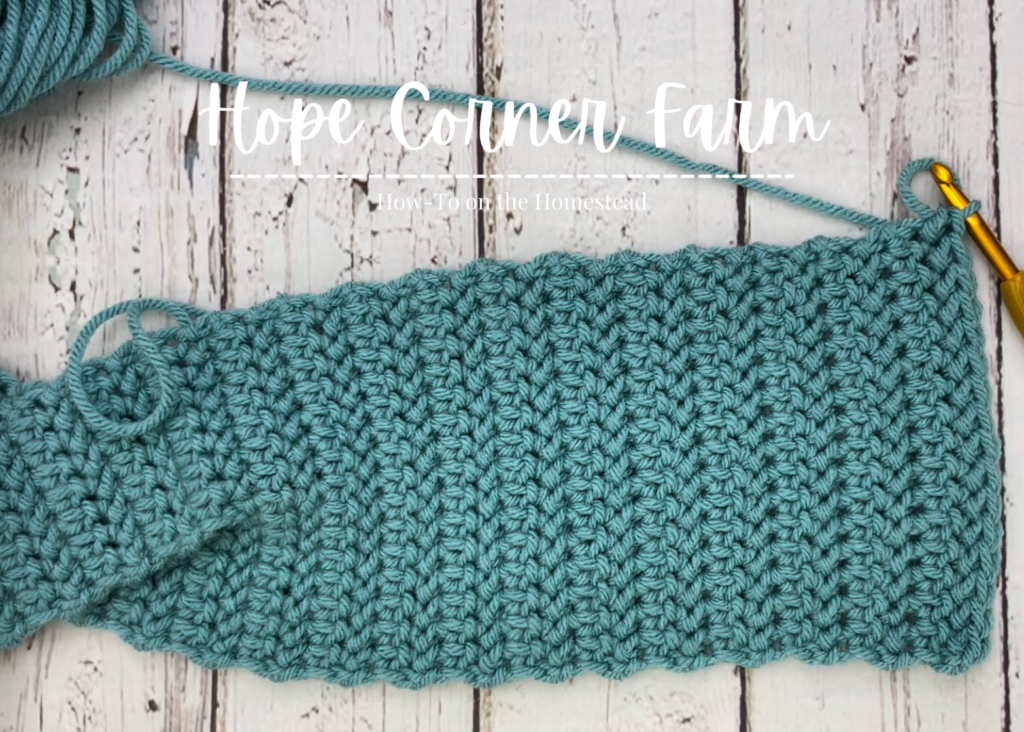
Row 35:
Chain 1, turn. Place one HHDC in each of the stitches across the row (16).
Note, this row is repeated for a total of 22 times (including this row).
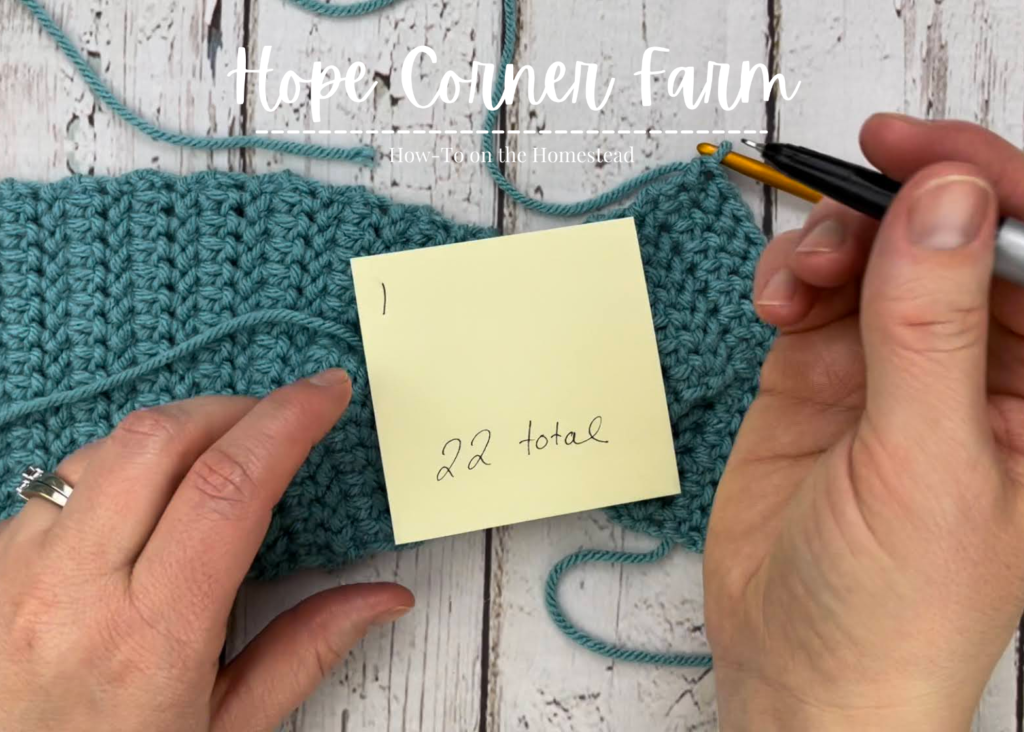
Herringbone Twist Crochet Headband Rows 36-56:
Repeat Row 35 (16).
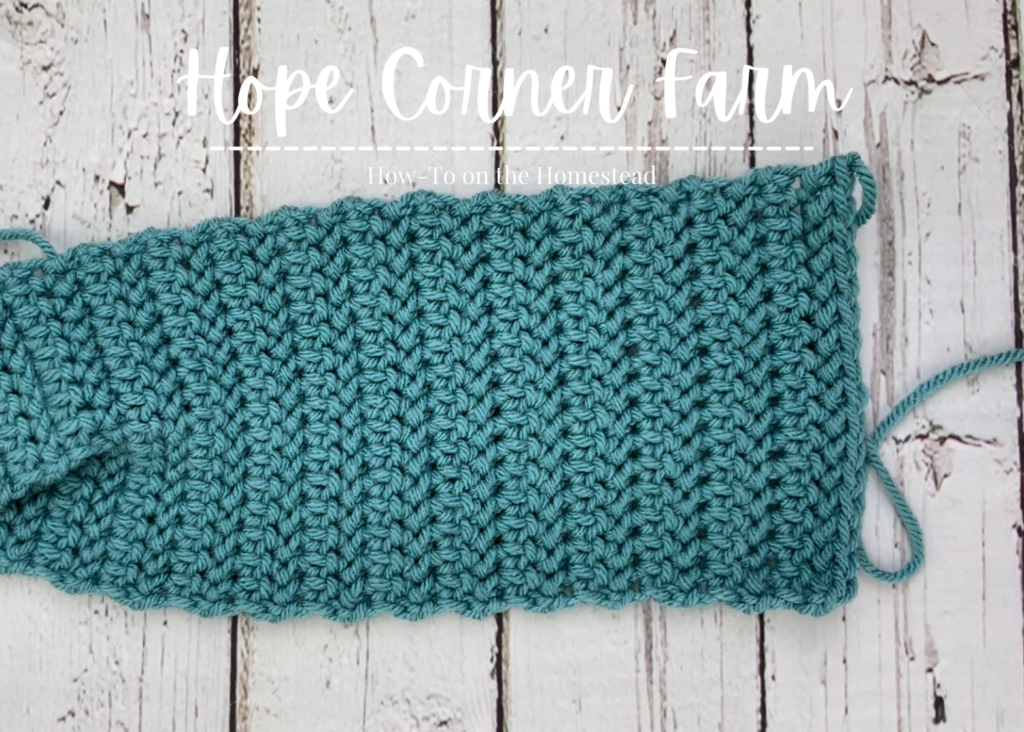
Fasten off and clip the headband free from the skein of yarn, leaving at least a 12″ yarn tail.
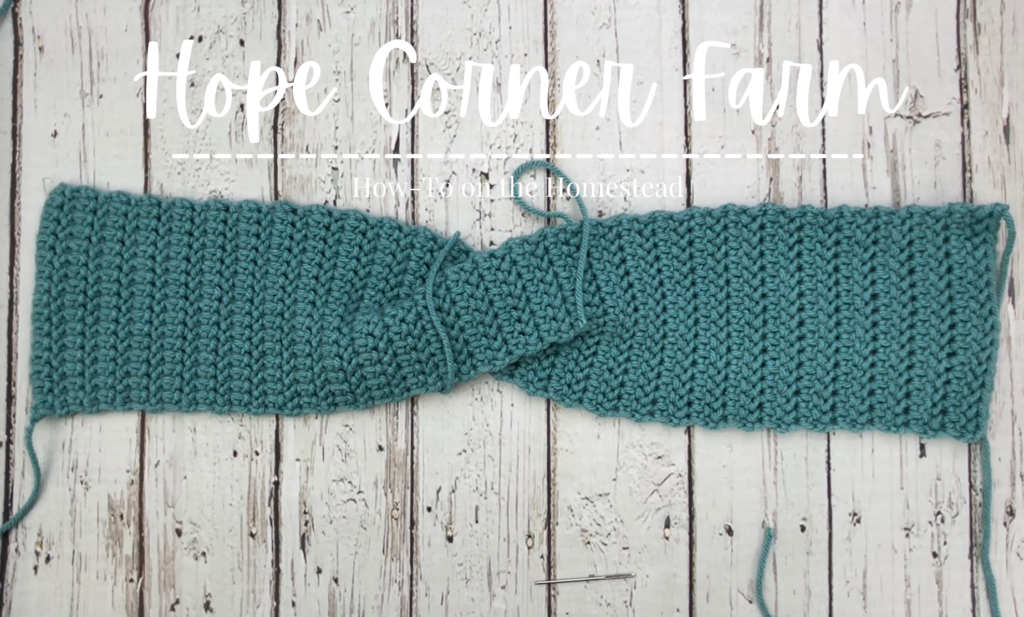
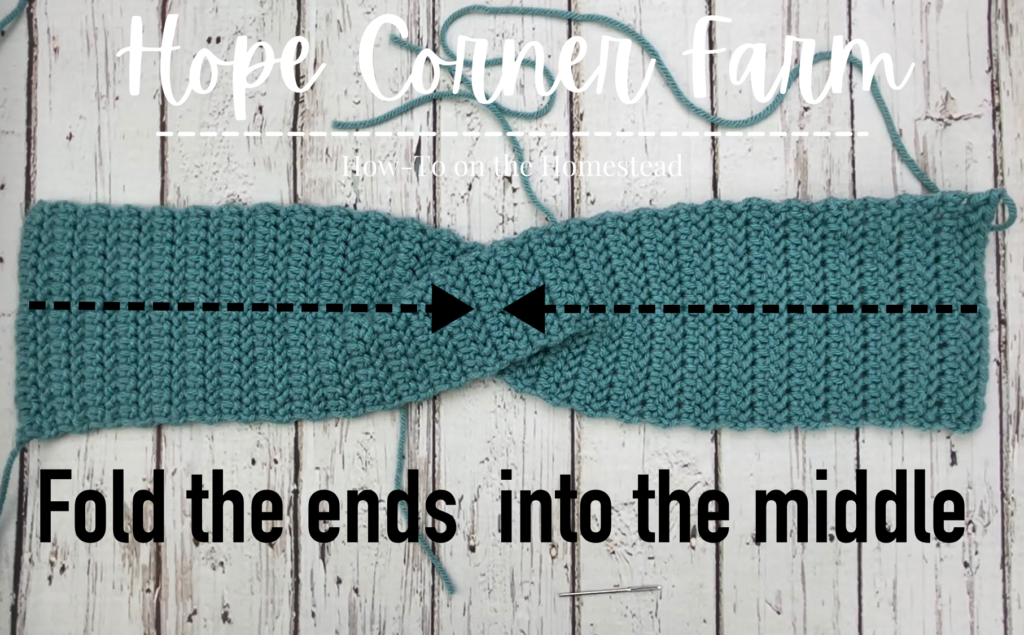
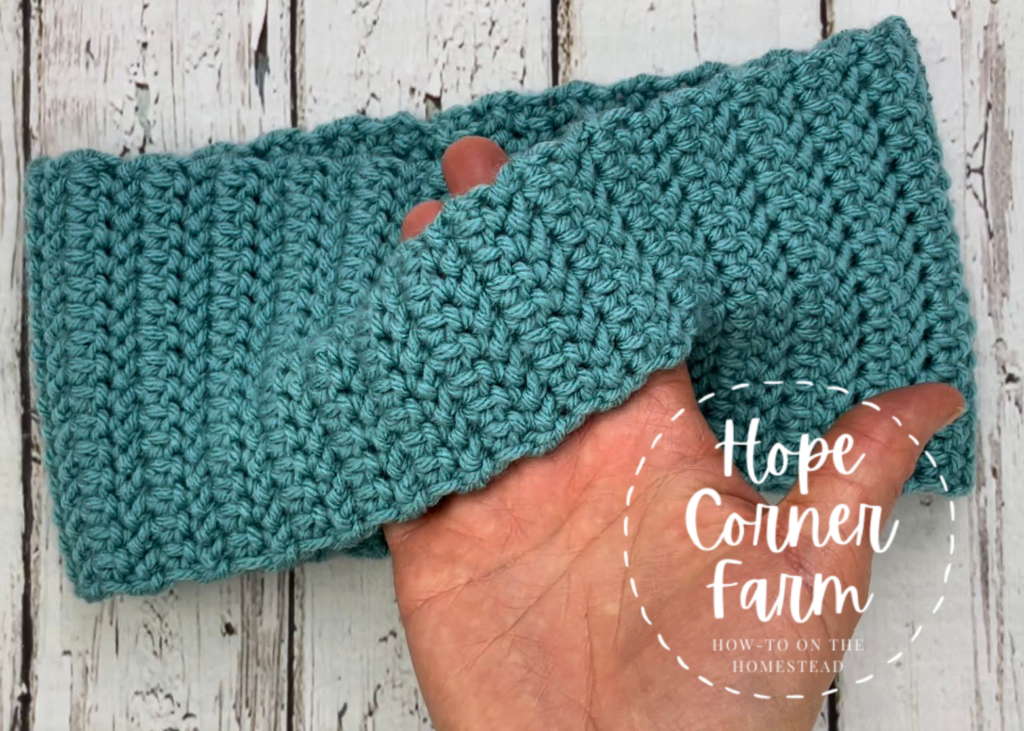
Folding the Half Herringbone Twist Crochet Headband:
Start by laying the headband flat on a table (or other flat surface).
Bring both of the edges in to the midpoint of the headband. Match them up.
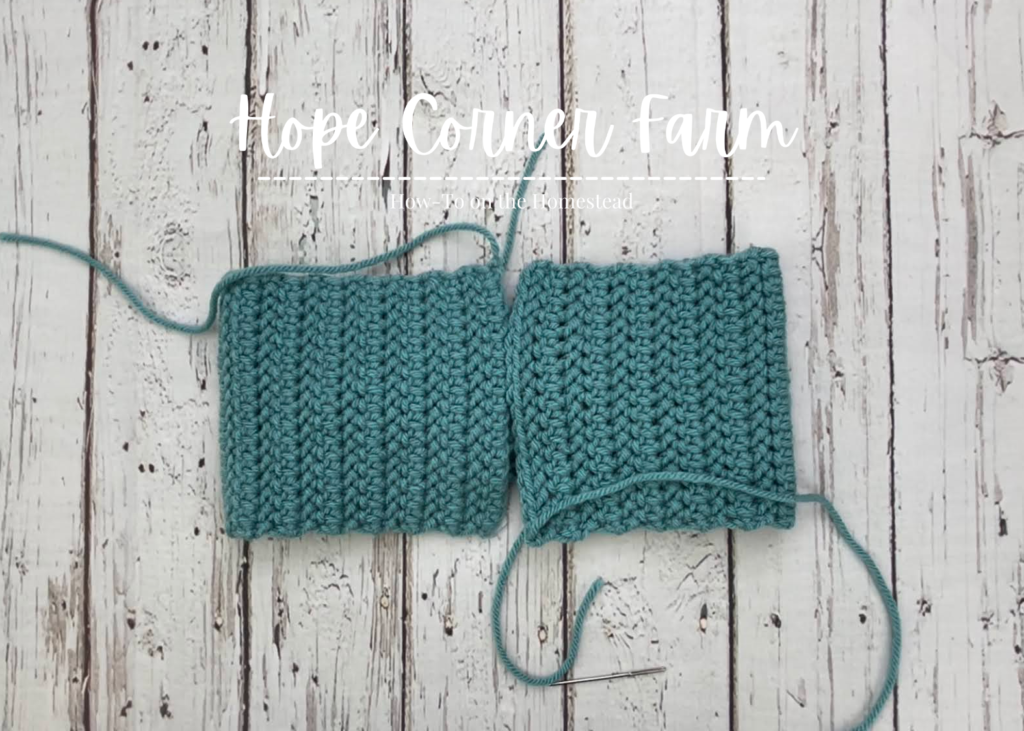
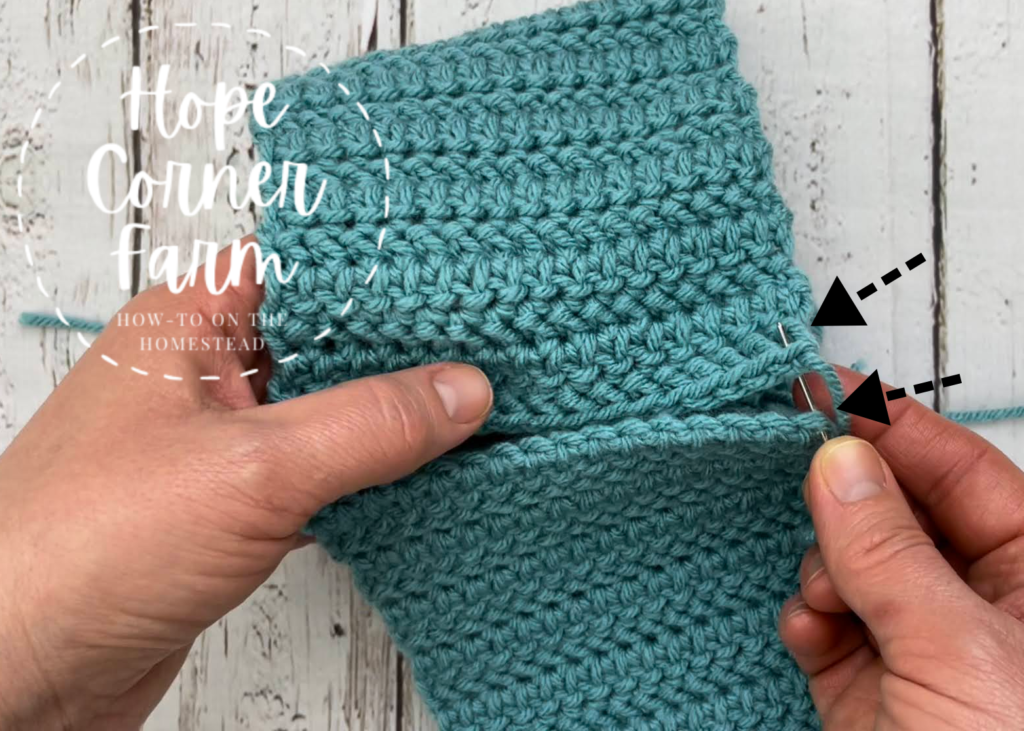
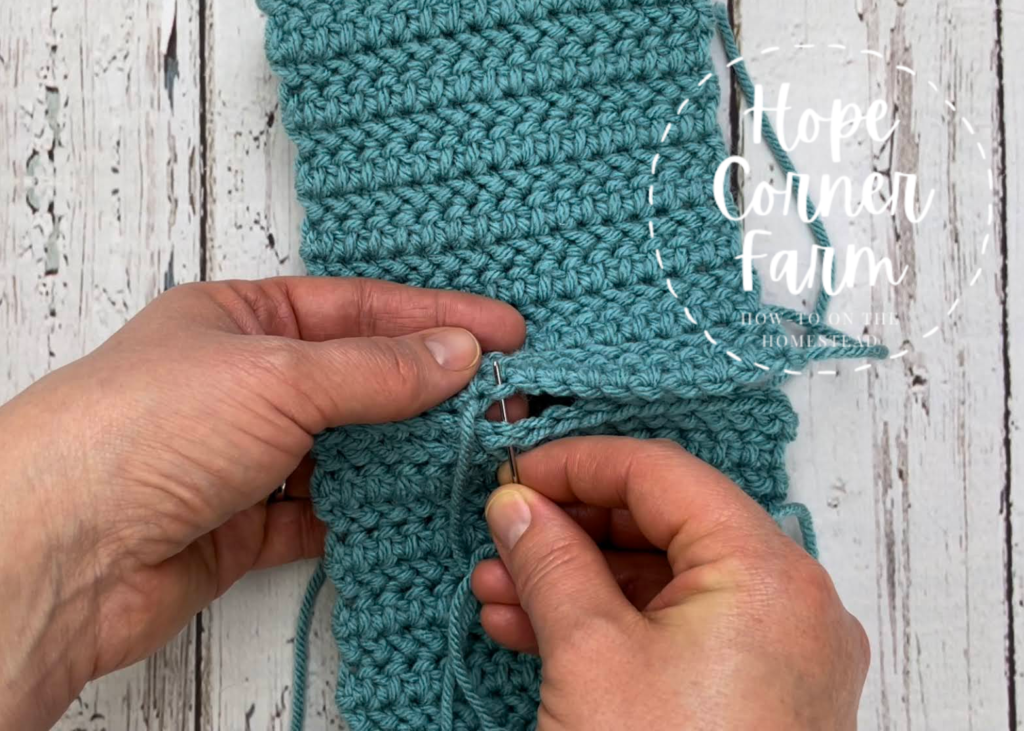
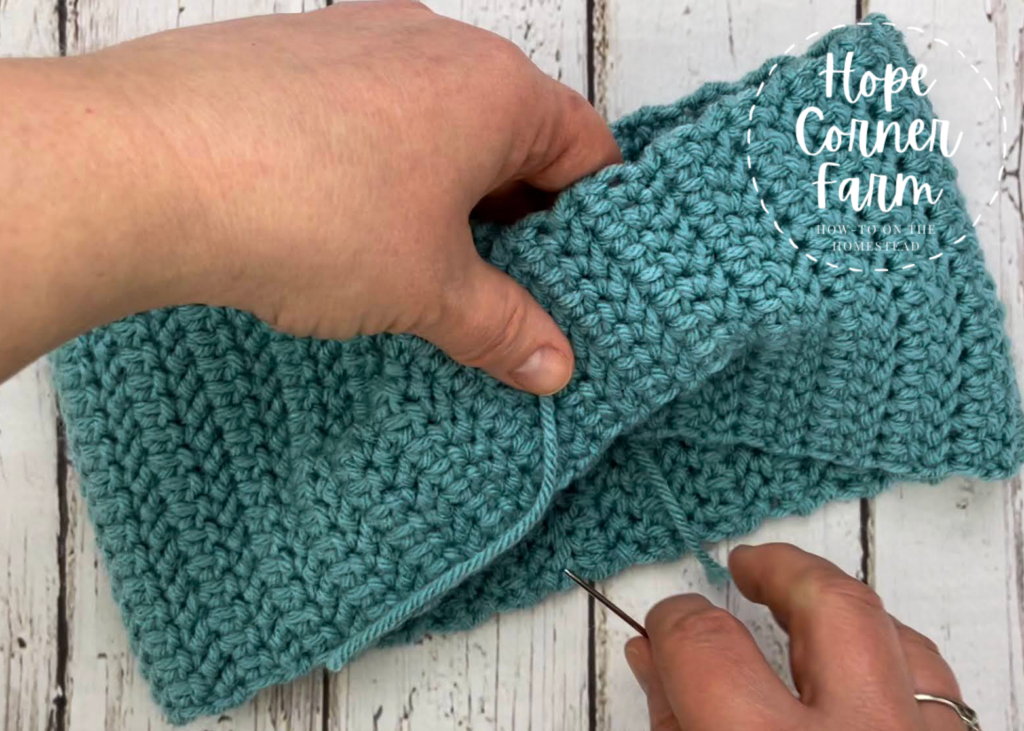
Sewing the Ear Warmer:
Place the yarn needle on one of the yarn tails. Sew the two ends together using an overcast stitch. The best way to make this seam invisible is to put the yarn needle through both top loops of the last HHDC row and then through the one remaining loop of the chain that started this headband.

Once the seam is sewn all of the way across, make sure that the yarn tail that is attached to the yarn still is on the opposite side of the seam from the other yarn tail.
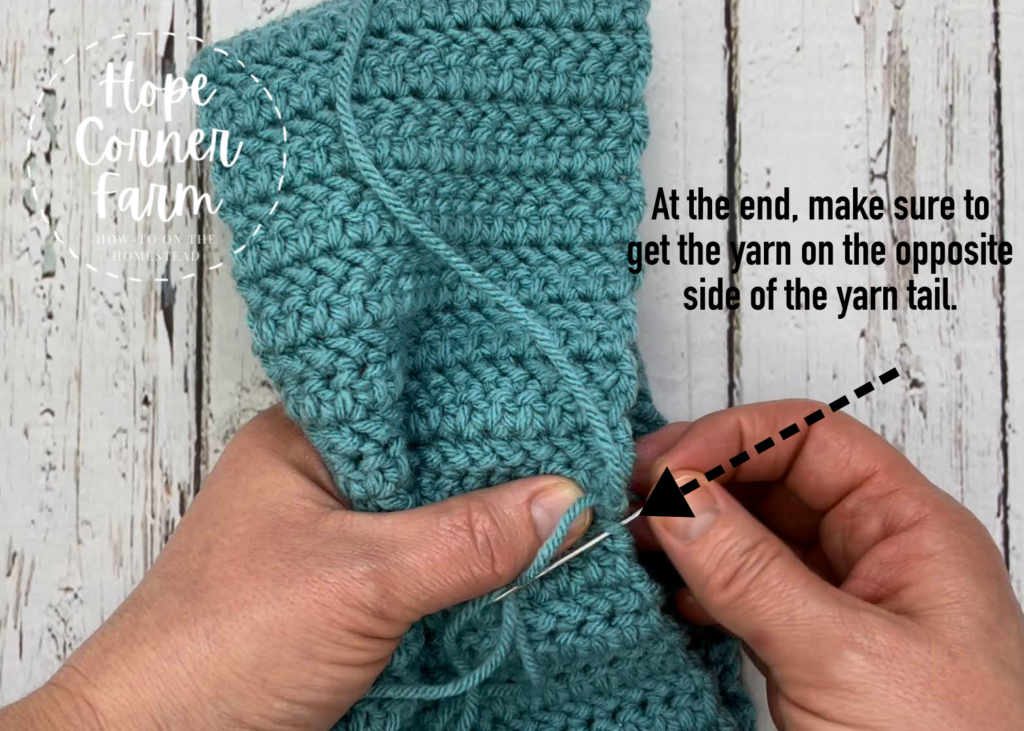
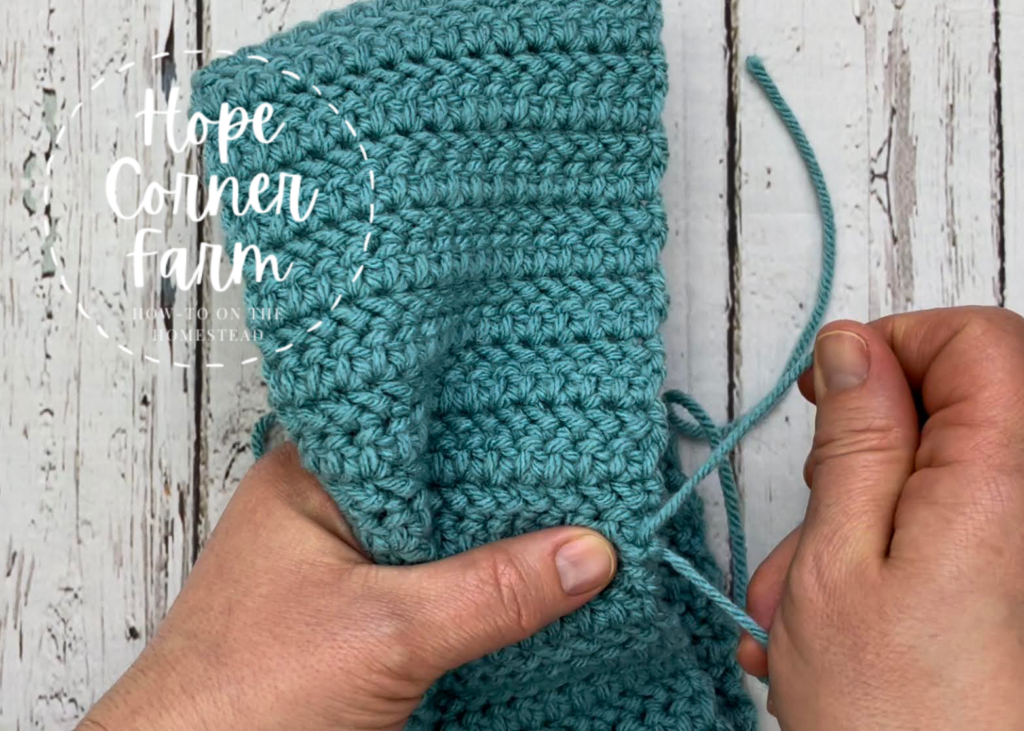
After moving the yarn tails to opposite sides of the seam, tie these two ends in a knot for extra security.
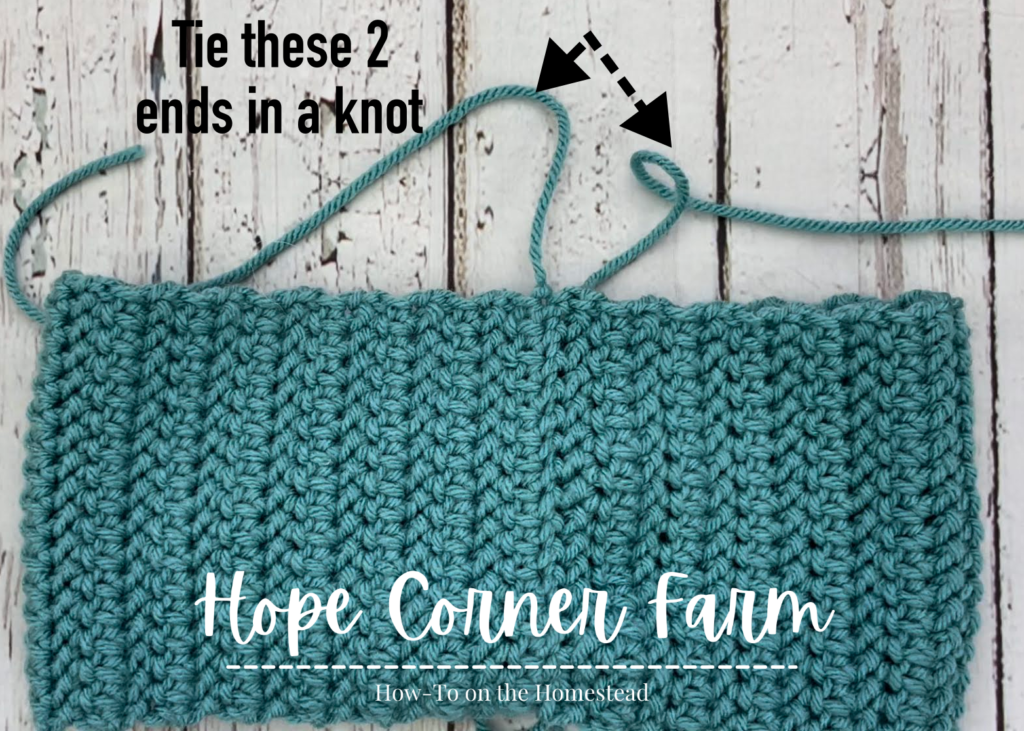
After tying the ends in a double knot, weave in the yarn tails and clip off any remaining yarn.
Securing the Twist of the Ear Warmer:
The last step in making this crochet headband is securing the twist. This is needed because the twist pieces are separate.
To secure the two sides of the twist together, begin by grabbing a small piece of yarn (around 6″ in length). Place the yarn on the yarn needle. Locate the center of the twist. Going from the top down, put the needle through both layers of the twist.
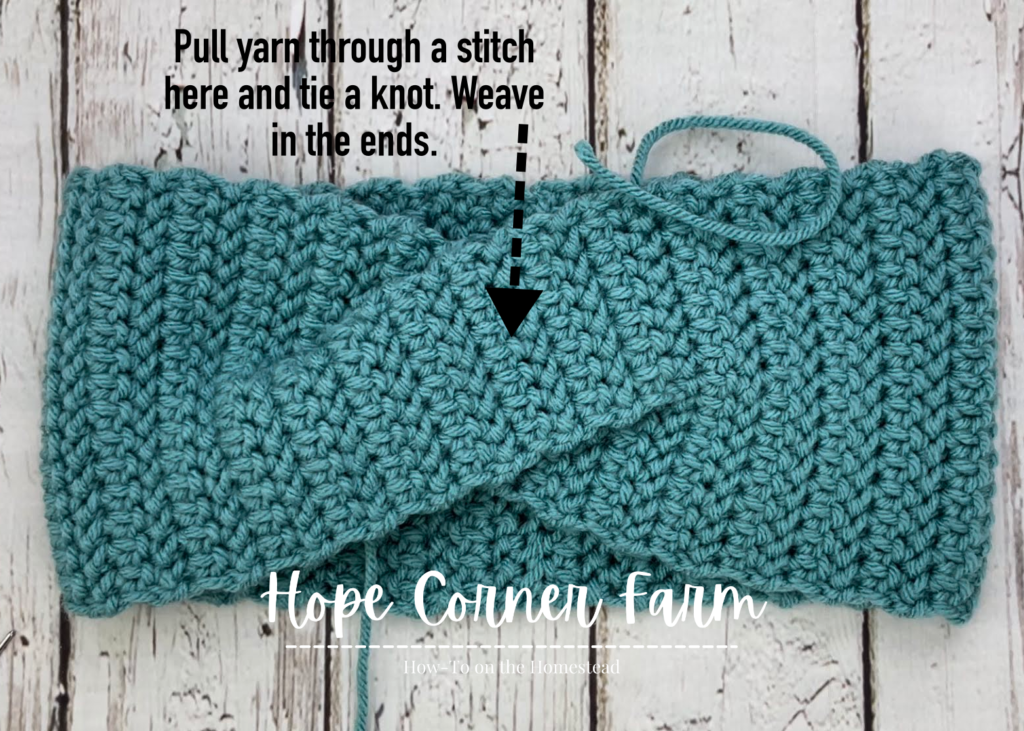
Remove the needle from the yarn. Place it on the other end of the yarn and thread the yarn tail to the backside (inside) of the headband. Tie the two ends in a knot. Weave in the ends.

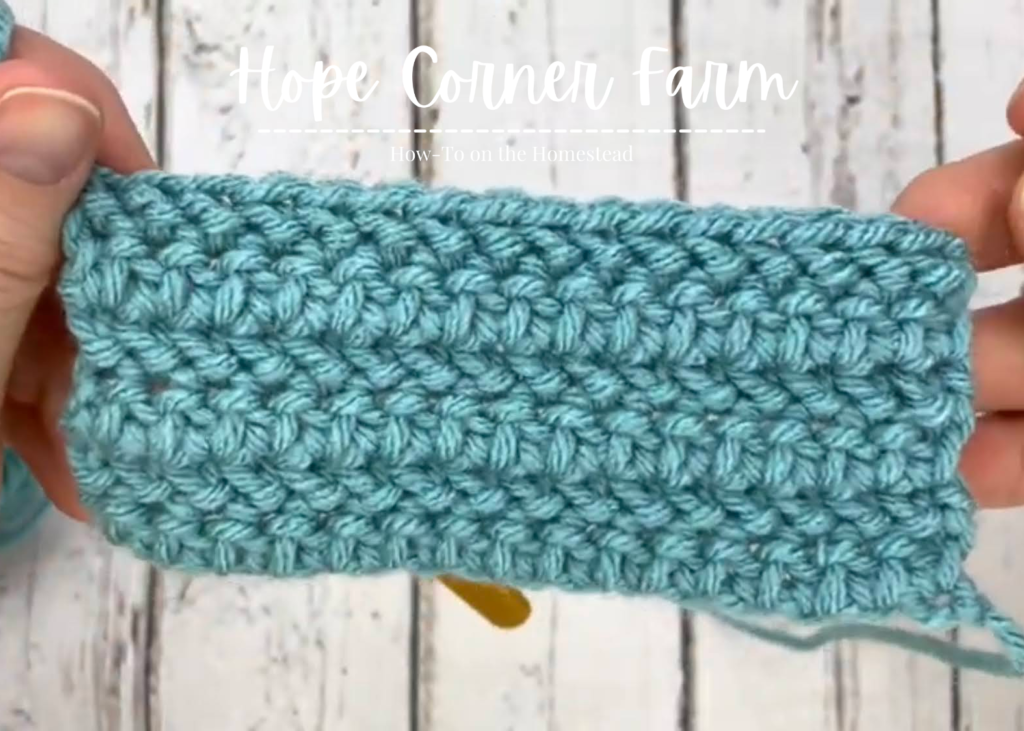
Finished Product:
Congratulations! The Half Herringbone Twist Crochet Headband is now complete!
Herringbone Twist Crochet Headband Video Tutorial:
Looking for More Crochet Headband or Ear Warmer Patterns?
Herringbone Twist Crochet Headband Written Pattern:
Please keep in mind that this is the written pattern only!
1st Half of the Half Herringbone Twist Headband:
To Start: Begin the Half Herringbone Twist Crochet Headband by placing a slip knot on the crochet hook and CHAINING 17 (17).
Row 1: Place one Herringbone Half Double Crochet (HHDC) in the 2nd chain from the hook. For the stitches in this row, I put two legs of the chain stitch on top of the hook, and the last single leg on the bottom. Put one HHDC in each of the remaining 15 chains across (16).
Row 2: Chain 1, turn. Place one HHDC in each stitch across (16).
Rows 3-23: Repeat Row 2 (16).
Twist Side 1, Row 1: Chain 1, turn. Place one HHDC in each of the first 8 stitches (8). The stitches only go halfway across the headband.
T Side 1, Rows 2-9: Repeat Twist Side 1 – Row 1 (8).
T Side 1, Row 10: Ch 1, turn. Place one HHDC in each stitch across (8). The hook should be on the outside edge of the Twist Side 1. Cut the headband free from the yarn. Fasten off.
Twist Side 2, Row 1: To begin the second side of the twist, join the yarn in the 8th HHDC from the first row of twist side 1. After joining by pulling up a loop, in the next stitch place one HHDC. Place one HHDC in each of the remaining 7 stitches across (8).
T Side 2, Row 2: HHDC in each stitch across (8).
T Side 2, Rows 3-9: Repeat Row 2 (8).
Twist Side 2, Row 10: Start by chaining 1 and turning. Place one HHDC in each stitch across (8). The hook should be on the inside corner of Twist Side 2. DO NOT CUT THE YARN OR FASTEN OFF!
Creating the Twist to the Headband:
Again, remember that the hook should be located on the inside corner of the Twist Side 2. If it is not, it is on the wrong row for creating the twist!
Start with a chain 1. After doing that, match up the outside corners of Twist Side 1 and Twist Side 2. When matching up the corners, cross one twist side over the top of the other twist side.
Turn and place one HHDC in each of the first 7 stitches.
Next, place one HHDC in BOTH corner stitches at the same time (the same HHDC is placed in 2 stitches at one time).
Place one HHDC in each of the next 7 stitches. There will be a total of 16 stitches in this row (16).
Creating the Second Half of the Half Herringbone Twist Headband:
Row 35: Chain 1, turn. Place one HHDC in each of the stitches across the row (16).
Rows 36-56: Repeat Row 35 (16).
Clip the yarn, leaving a long (at least 12″) tail. Fasten off.
Folding the Headband:
Start by laying the headband flat on a table (or other flat surface). Bring both of the edges in to the midpoint of the headband. Match them up.
Sewing the Twist Headband/Ear Warmer:
Place the yarn needle on one of the yarn tails. Sew the two ends together using an overcast stitch. The best way to make this seam invisible is to put the yarn needle through both top loops of the last HHDC row and then through the one remaining loop of the chain that started this headband.
Once the seam is sewn all of the way across, make sure that the yarn tail that is attached to the yarn still is on the opposite side of the seam from the other yarn tail.
After moving the yarn tails to opposite sides of the seam, tie these two ends in a knot for extra security.
After tying the ends in a double knot, weave in the yarn tails and clip off any remaining yarn.
Securing the Twist of the Headband:
The last step in making this crochet headband is securing the twist. This is needed because the twist pieces are separate.
To secure the two sides of the twist together, begin by grabbing a small piece of yarn (around 6″ in length). Place the yarn on the yarn needle. Locate the center of the twist. Going from the top down, put the needle through both layers of the twist.
Remove the needle from the yarn. Place it on the other end of the yarn and thread the yarn tail to the backside (inside) of the headband. Tie the two ends in a knot. Weave in the ends.
Many Blessings,

COPYRIGHT STATEMENT: This pattern is copyrighted in 2022 by Hope Corner Farm. Sharing information (photos and text) from this pattern is prohibited unless permission is specifically given by Hope Corner Farm. Selling items made from this pattern is permitted as long as a design reference is made to Hope Corner Farm (Ex. Pattern by Hope Corner Farm).