
How to Crochet the Back Post Double Crochet Stitch (BPDC): Step-by-Step Tutorial
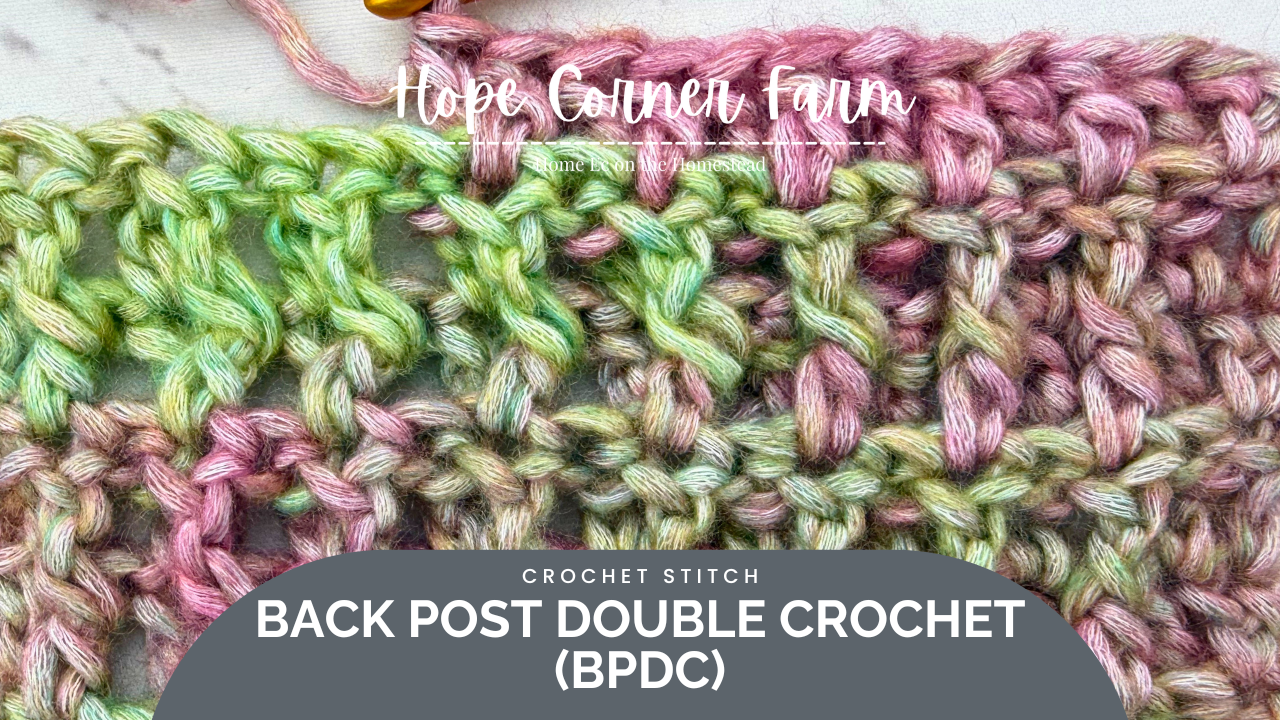

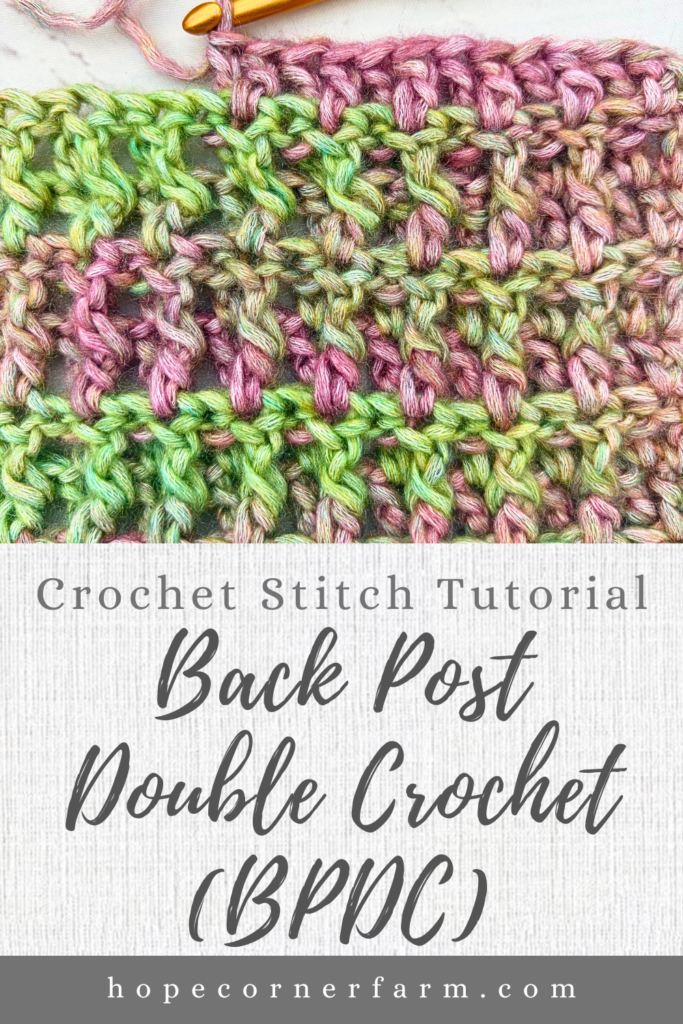
The Back Post Double Crochet Stitch (BPDC) is a simple crochet technique that creates beautiful raised texture and dimension in your projects. By working the double crochet around the back of the post instead of into the top loops of the stitch, you can create the popular ribbed effect often seen in crochet garments, blankets, hats, baskets, and more. In this tutorial, I’ll show you how to crochet the Back Post Double Crochet Stitch step by step, with written instructions, a detailed photo tutorial, and a video tutorial to help you master this versatile stitch. Whether you’re new to post stitches or just looking to add more texture to your crochet projects, this tutorial will walk you through everything you need to know.


First, check out my video tutorial on my You Tube Channel! Subscribe to get the latest crochet fun from Hope Corner Farm Crochet!
What is the Back Post Double Crochet Stitch?
The Back Post Double Crochet Stitch (BPDC) is a textured crochet stitch created by working a double crochet around the back of the post of the stitch from the previous row, rather than into the top loops. This technique causes the stitch to sit slightly forward, creating a raised, ribbed texture on the front of your work. The Back Post Double Crochet is often paired with the Front Post Double Crochet Stitch to create ribbing, cables, basketweave patterns, and other textured designs. Once you understand where to insert your hook around the post, this stitch is easy to learn and is a great technique to add to your crochet skill set.
Ways to Use the Back Post Double Crochet (BPDC)
The Back Post Double Crochet Stitch is a versatile technique that can be used to add texture, dimension, and structure to a wide variety of crochet projects. It works especially well for creating ribbing on hats, scarves, sweaters, and other garments, and it can be combined with Front Post Double Crochet Stitches to create beautiful textured patterns. You can also use BPDC stitches in blankets, afghans, pillows, baskets, bags, and home décor projects to create raised designs and interesting stitch patterns. Because post stitches can add both texture and structure, the Back Post Double Crochet is a great technique to keep in your crochet toolbox when you want to give a project a little extra visual interest.
Materials Used In This Tutorial
Crochet hook of choice (I used a size J 6.0mm hook)
Yarn (I used a size 4 medium weight yarn
This Crochet Tutorial is written using US Crochet Terms
Crochet Stitches to Know
Foundation Double Crochet Stitch (FDC)
Helpful Tips for Crocheting the Back Post Double Crochet Stitch
When crocheting the Back Post Double Crochet Stitch, the most important thing is to pay attention to where you insert your hook. Instead of working into the top loops of the stitch, insert your hook around the back of the post from the previous row. Keep your tension relaxed so the stitches are easy to work around, especially when you are first learning the technique. It can also help to count your stitches as you work to make sure you don’t accidentally skip a stitch or work into the wrong space. If you are combining Back Post Double Crochet with Front Post Double Crochet, remember that the two stitches are worked around opposite sides of the post, which creates the raised and recessed texture. With a little practice, you’ll find that BPDC becomes a quick and easy way to add beautiful texture and dimension to your crochet projects.
Multiples for the BPDC
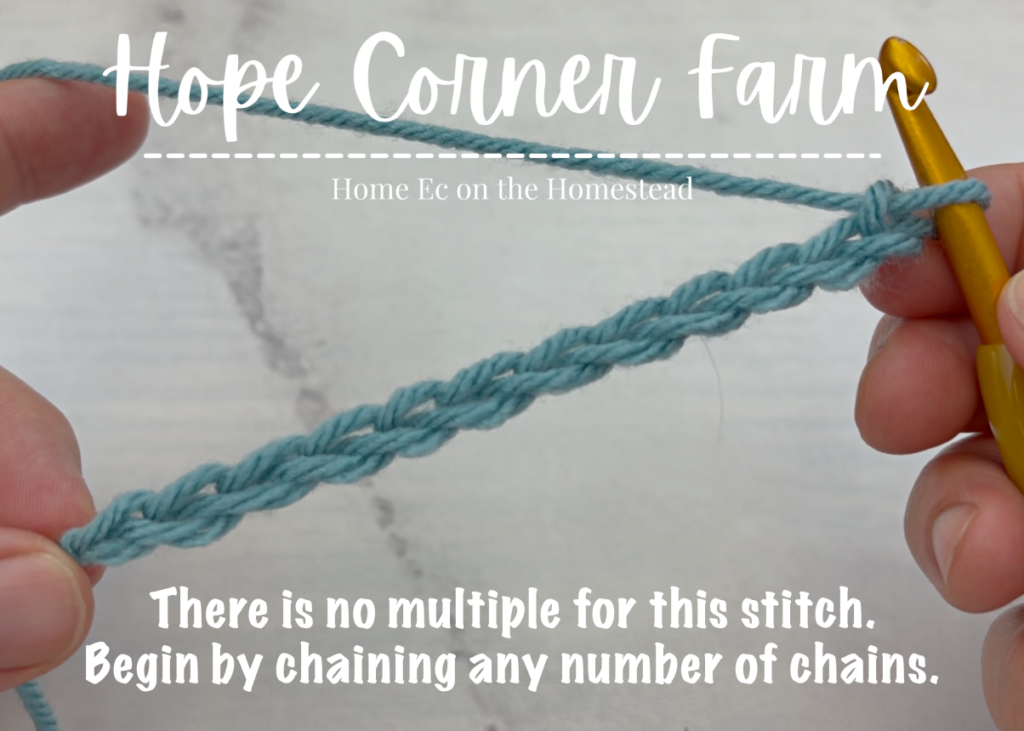
There are no multiples for this crochet stitch. Chain as many as you would like. Keep in Mind that you will lose 2 stitches because we work our first stitch into the 3rd chain from the crochet hook.
How to Start
Begin by chaining however many chains you would like.
NOTE: You could also start this stitch by Foundation Double Crocheting as many as you would like. If you choose this option, skip to ROW 2. The Foundation Double Crochet combines the chain and Row 1.
Row 1
First Row 1 is a row of regular Double Crochet Stitches. These will be the posts that we work around in the following row.
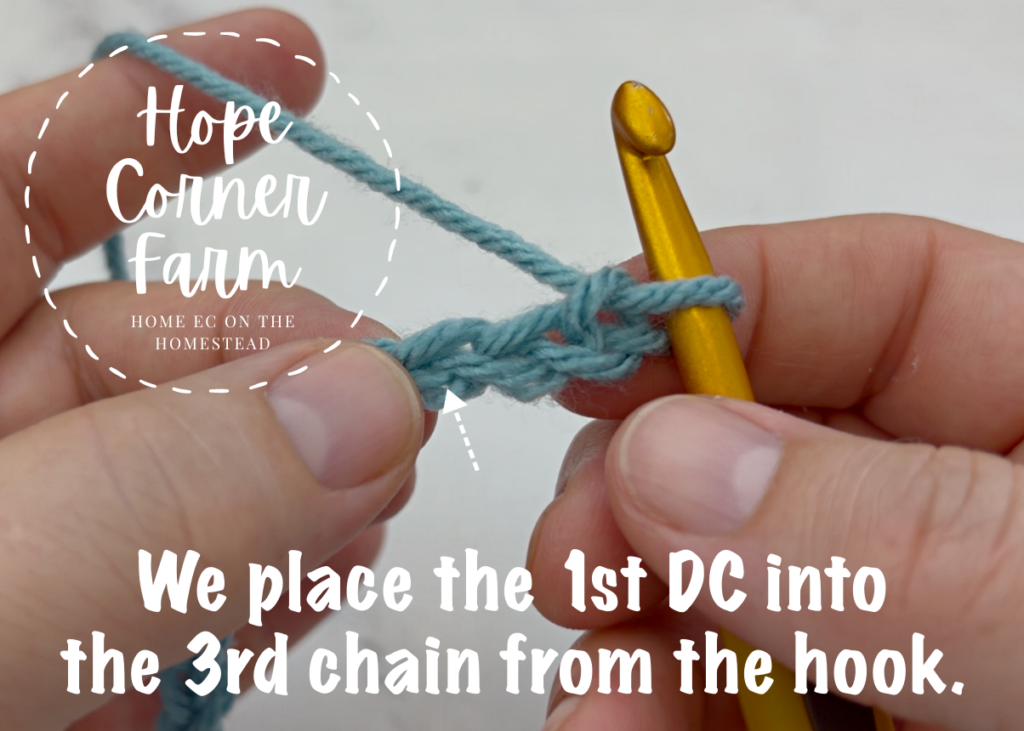
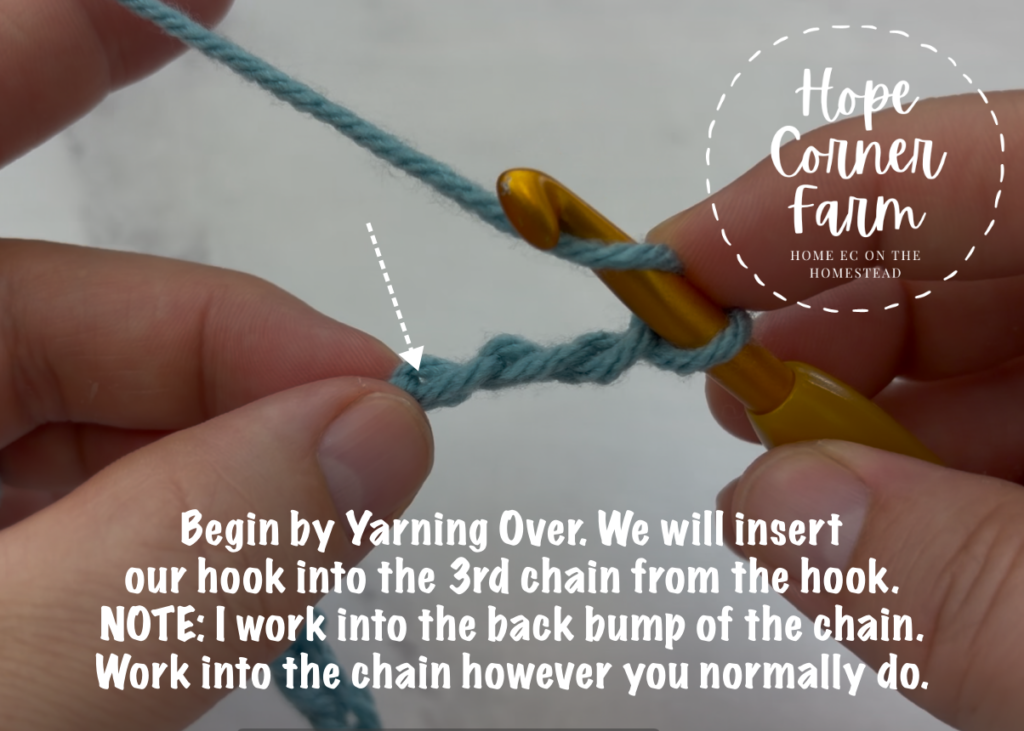
Now we begin by working into the 3rd chain from the crochet hook. Note: I like to work into the back bump of the chain because I personally like how it looks. You can work into the chain however you normally do
Step 1 Row 1
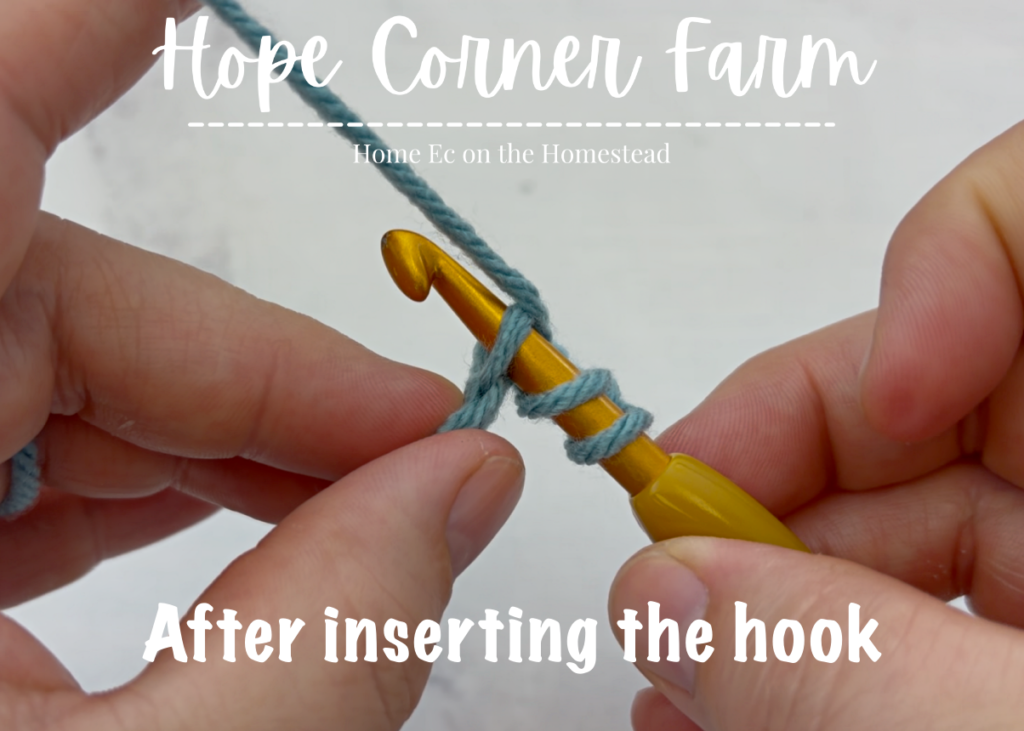
Begin by yarning over and then inserting the crochet hook into the 3rd chain from the hook.
BPDC Row 1 Step 2
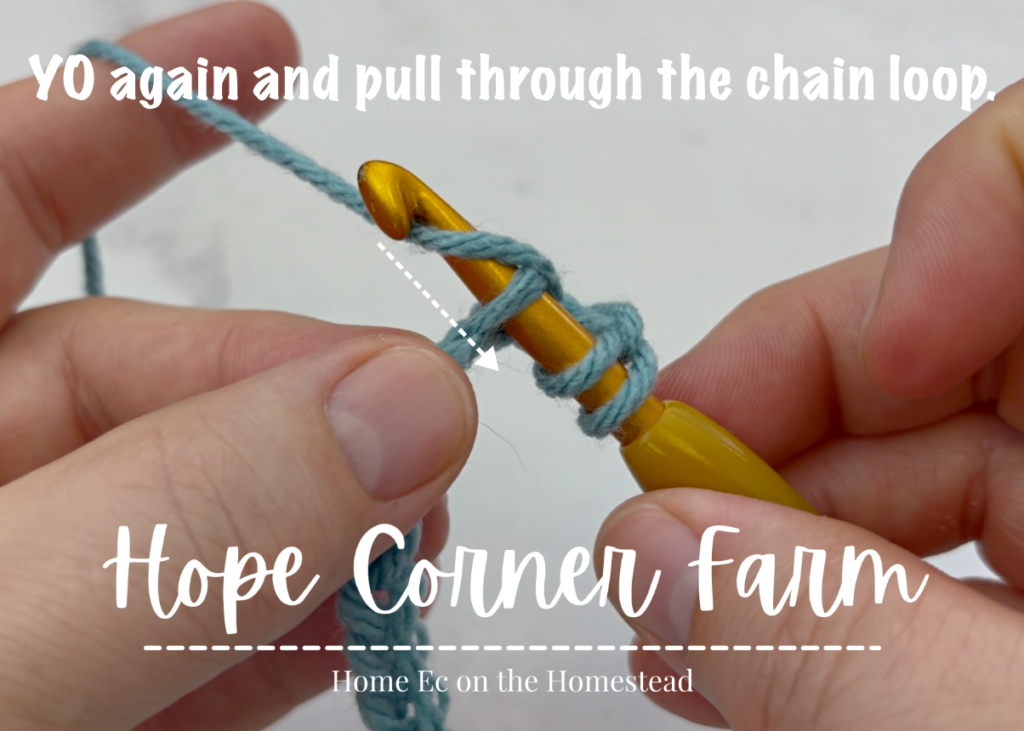
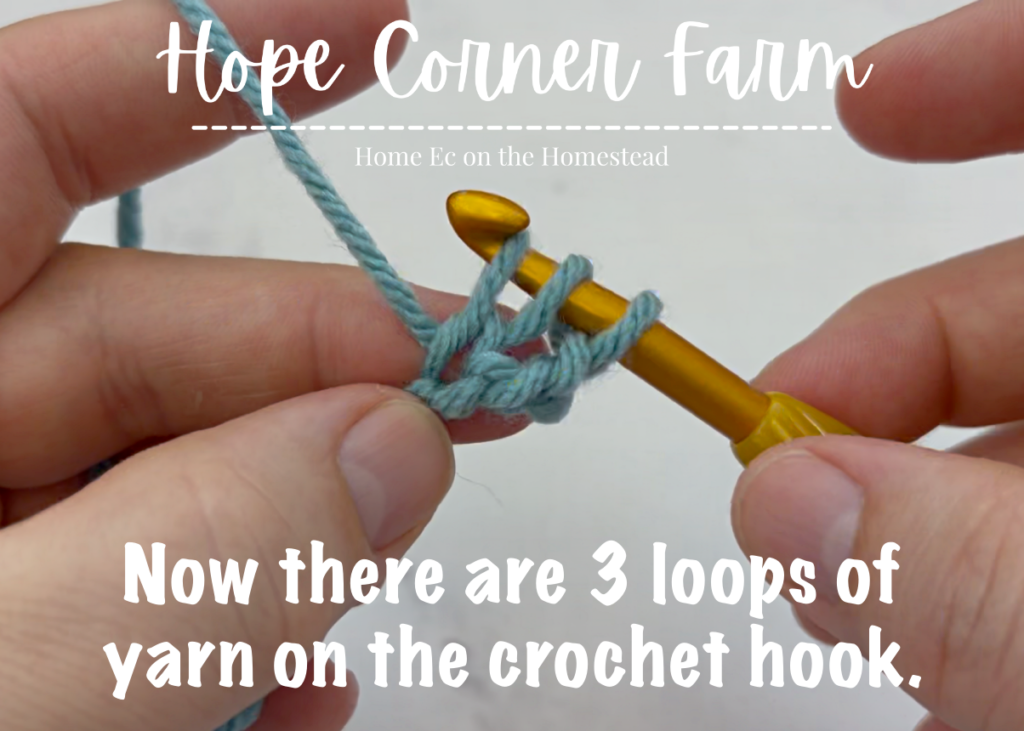
Now Yarn Over and pull through the chain stitch. There will be 3 loops of yarn on the crochet hook at this point.
Step 3 Row 1
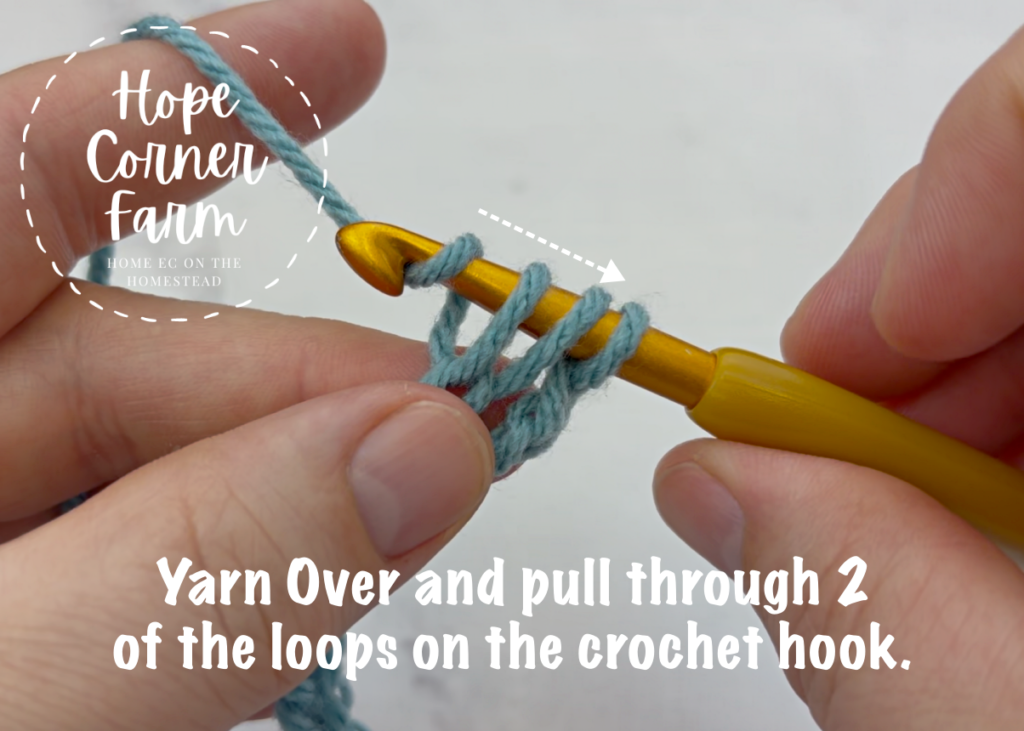
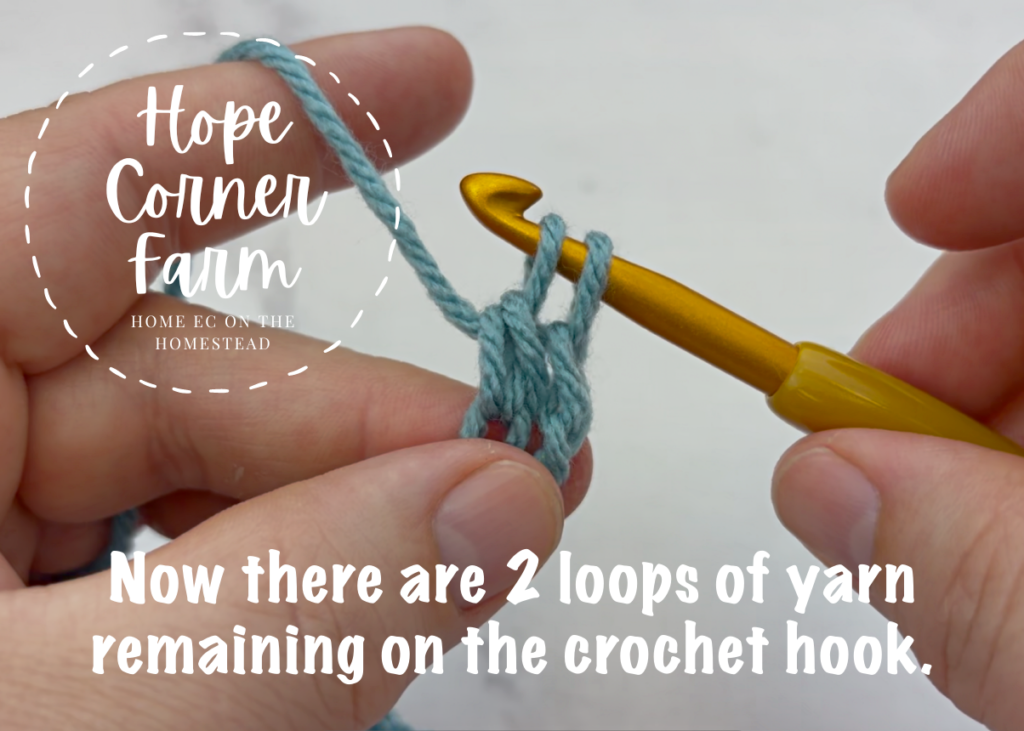
Next Yarn Over and pull through 2 of the loops on the crochet hook. There will be 2 loops remaining on the hook at the end of this step.
Row 1 Step 4 Back Post Double Crochet
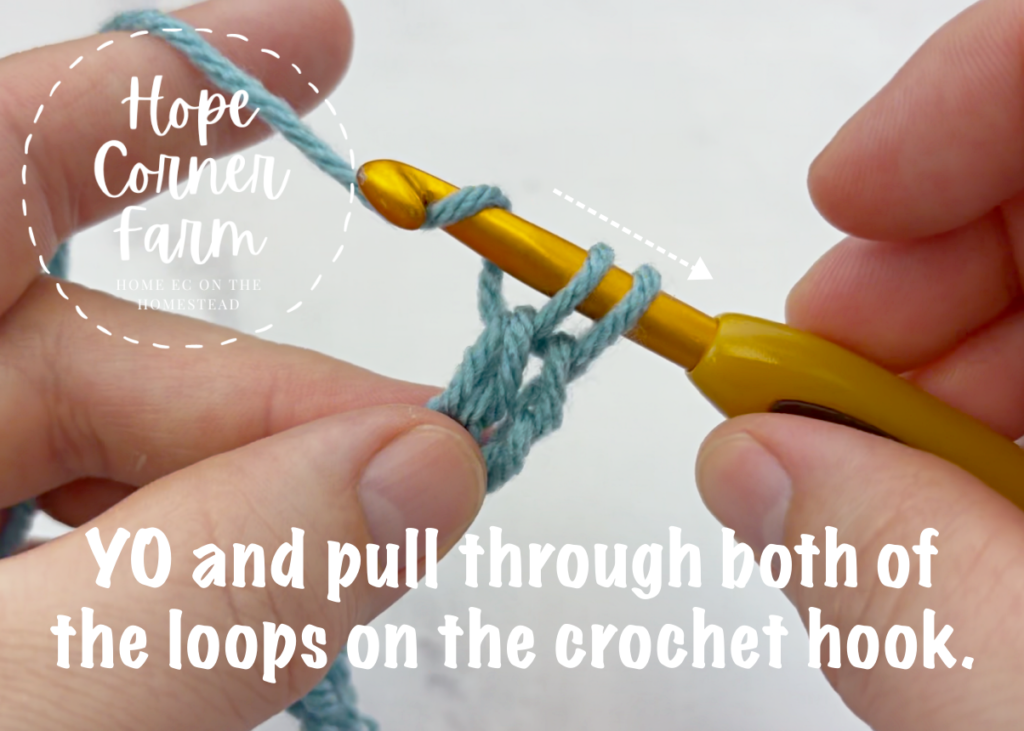
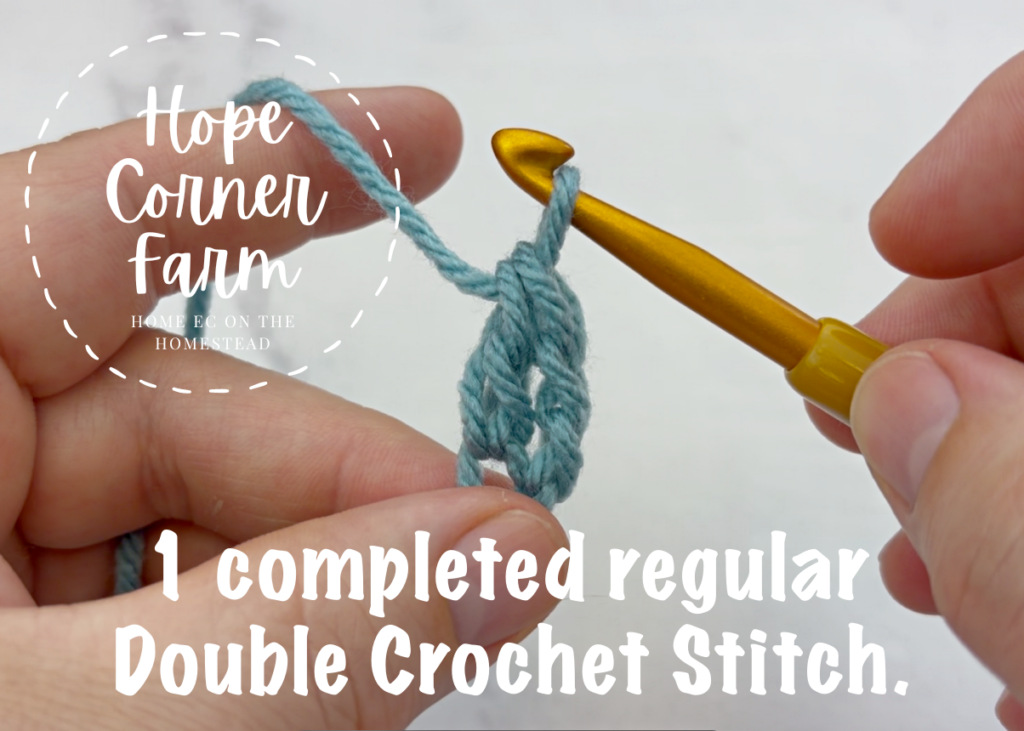
Finally Yarn Over again and pull through the remaining 2 loops on the crochet hook. This will complete 1 REGULAR Double Crochet Stitch.
Remaining Stitches for Row 1
Now place 1 REGULAR Double Crochet Stitch in each of the remaining chains across the row.
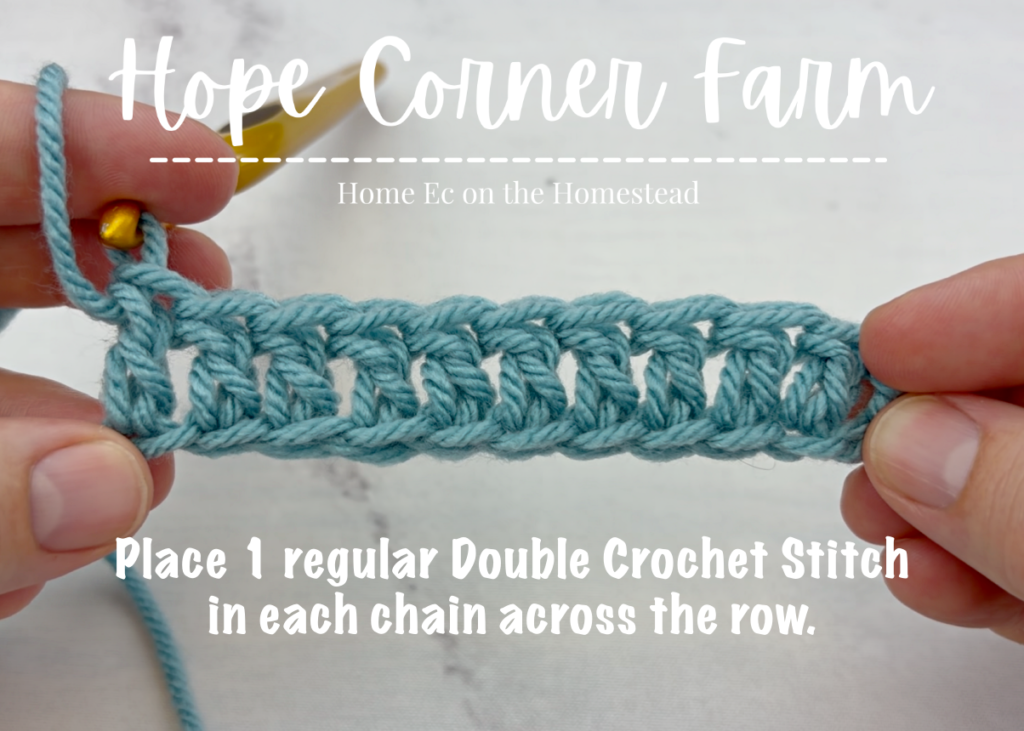
How to Back Post Double Crochet Row 2
To start the next row, chain 2 and turn your work. Work a REGULAR Double Crochet in the 1st stitch of the row.
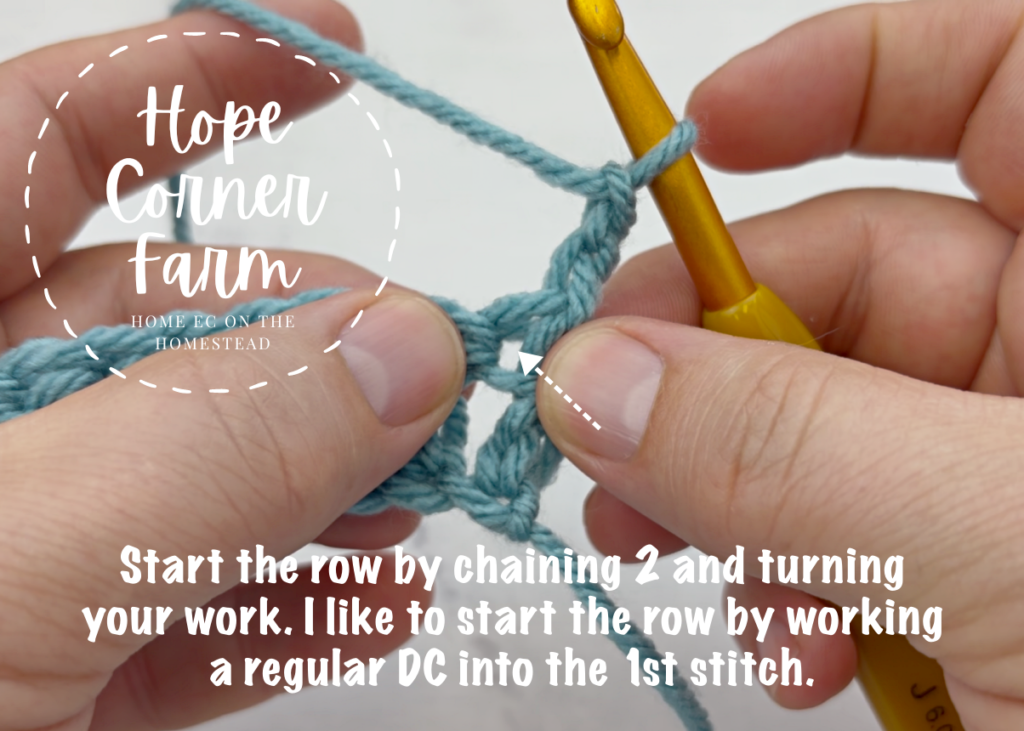
Step 2 Row 1
Begin by identifying which post you will work the BPDC around.
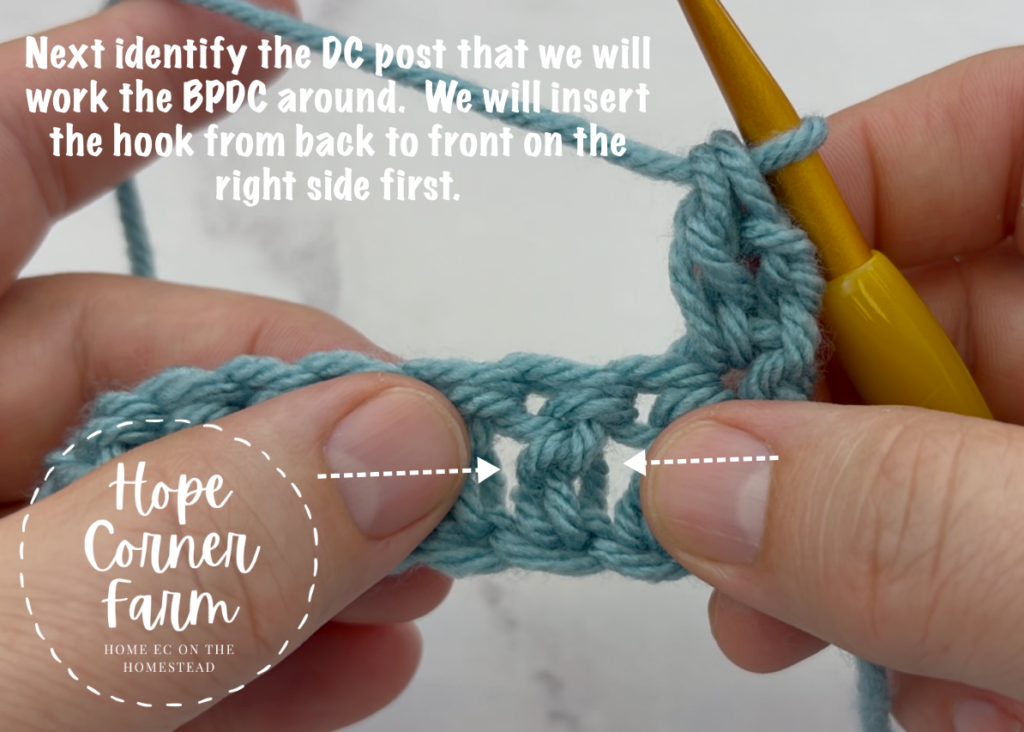
BPDC Row 2 Step 3
Now Yarn Over and then insert the crochet hook from the back side into the gap to the immediate right of the post we are working around. The hook should pop out on the front side of the work. NOTE: The hook is inserted from the back side and comes out on the front side of our work.
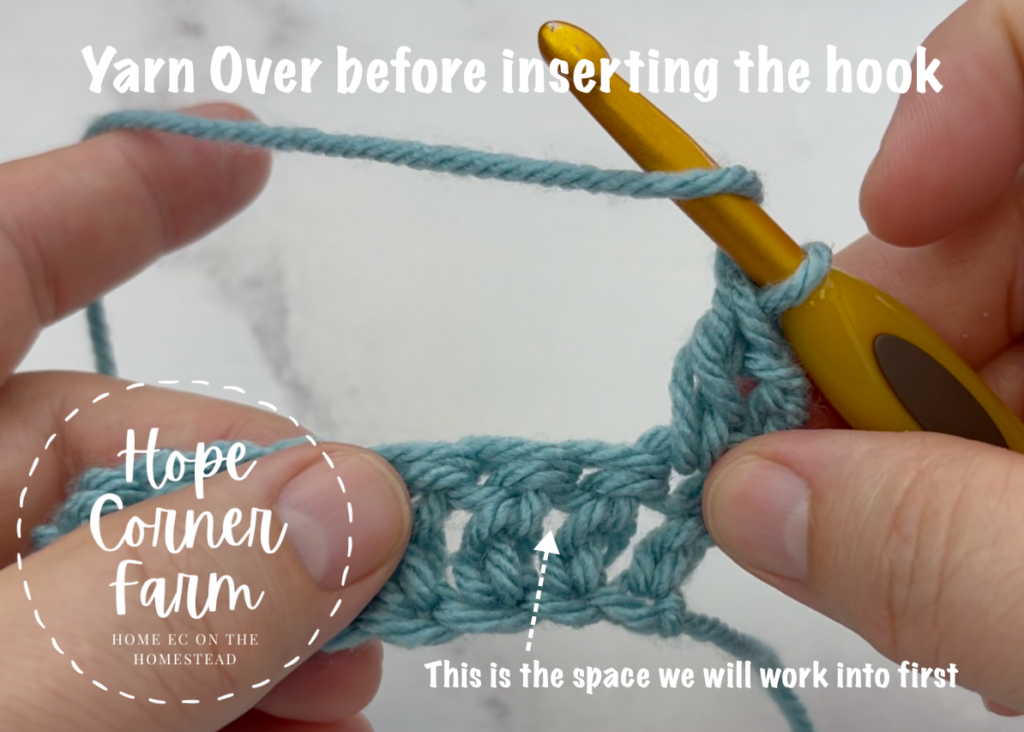
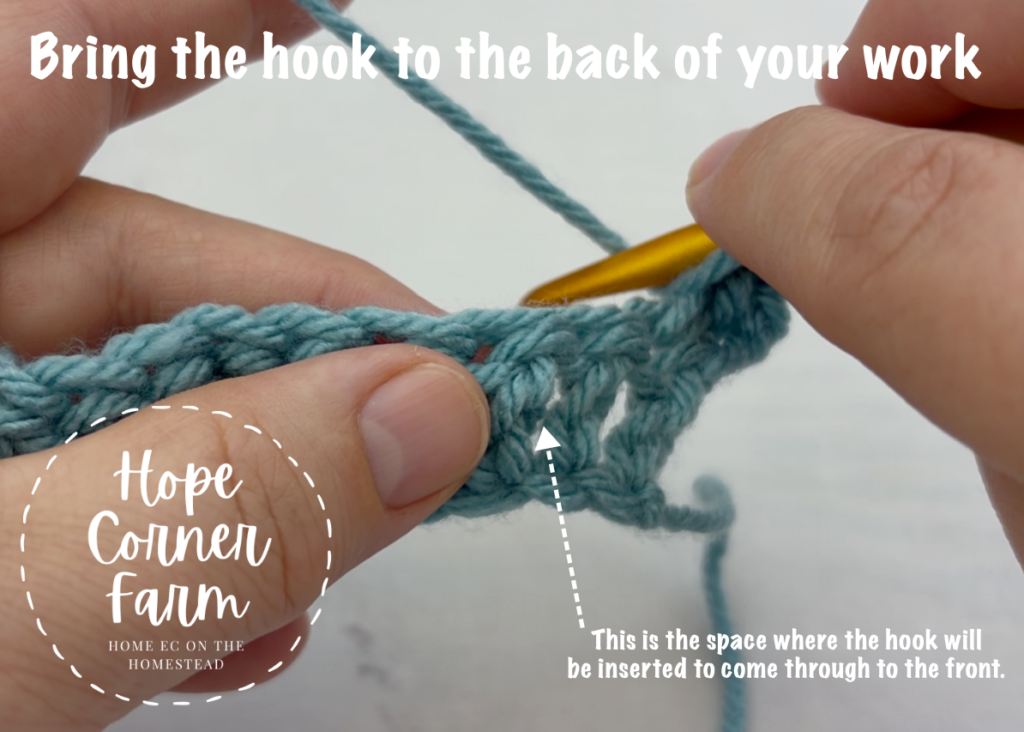
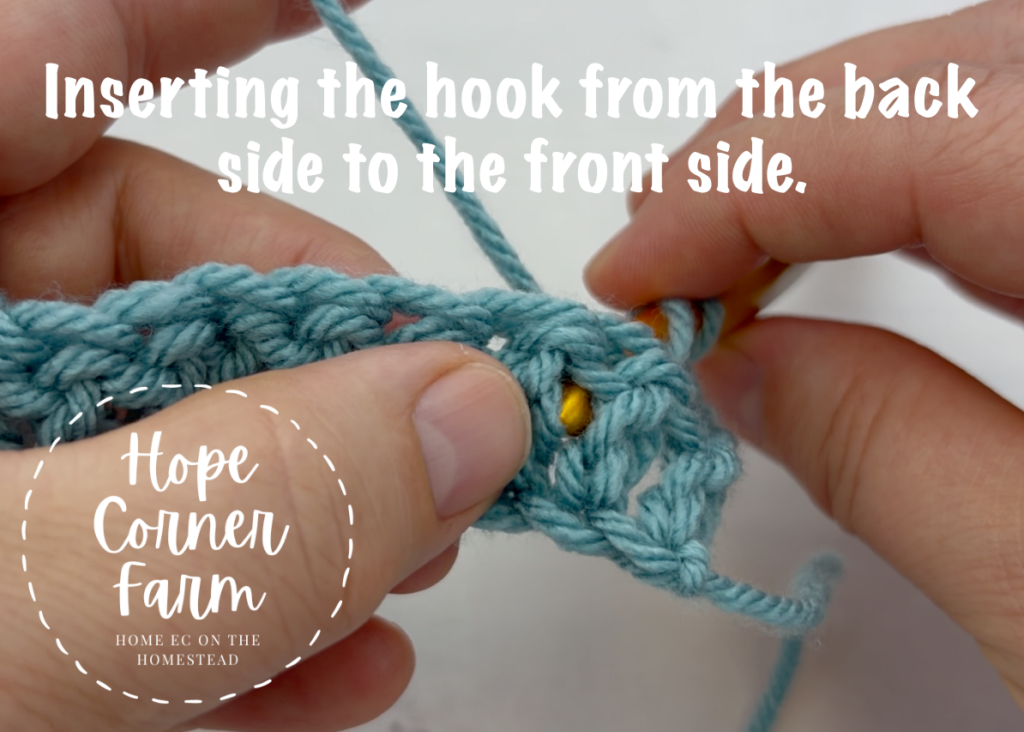
Step 4 Row 2 How to Back Post Double Crochet Stitch
Next angle the crochet hook and have it go across the front of the post we are working around.. Then insert the hook (from front to back) on the left side of the post we are working around now. The hook is now isolating the post that is being worked around. NOTE: The hook part of the crochet hook is now on the back side of our work again. We have now isolated the post we are working around.
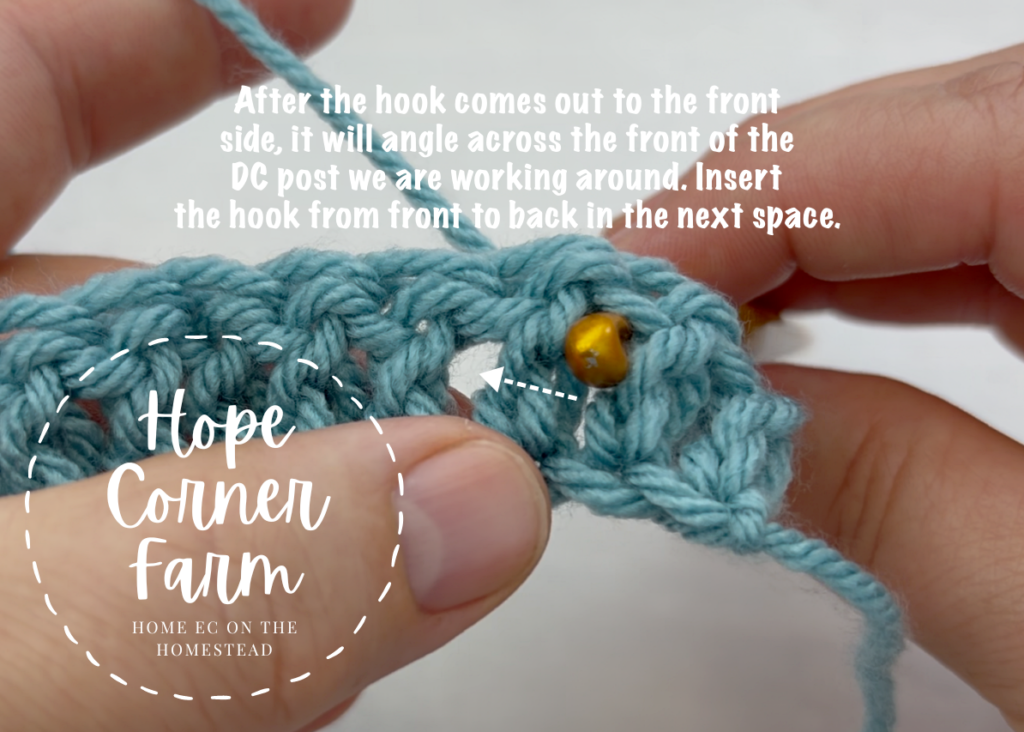
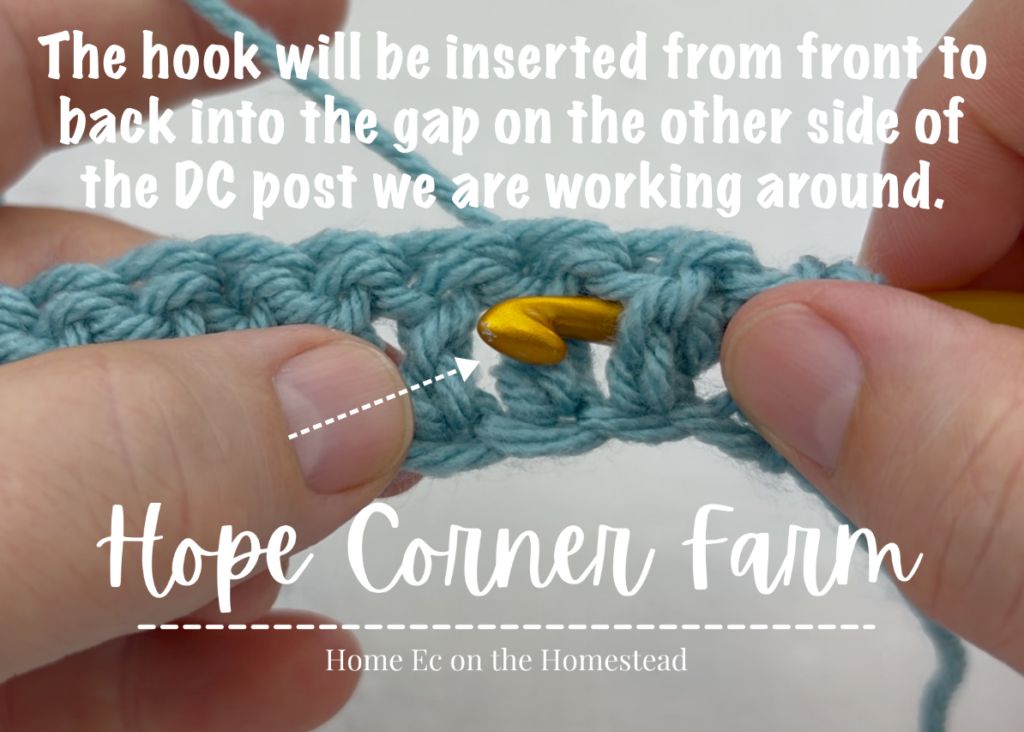
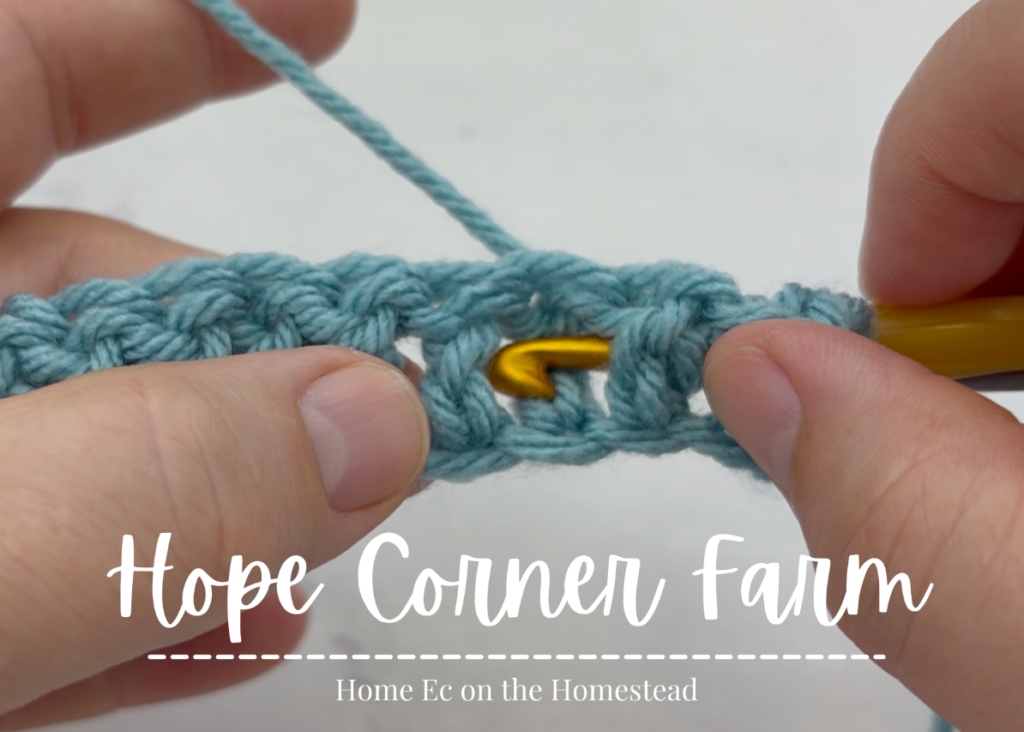
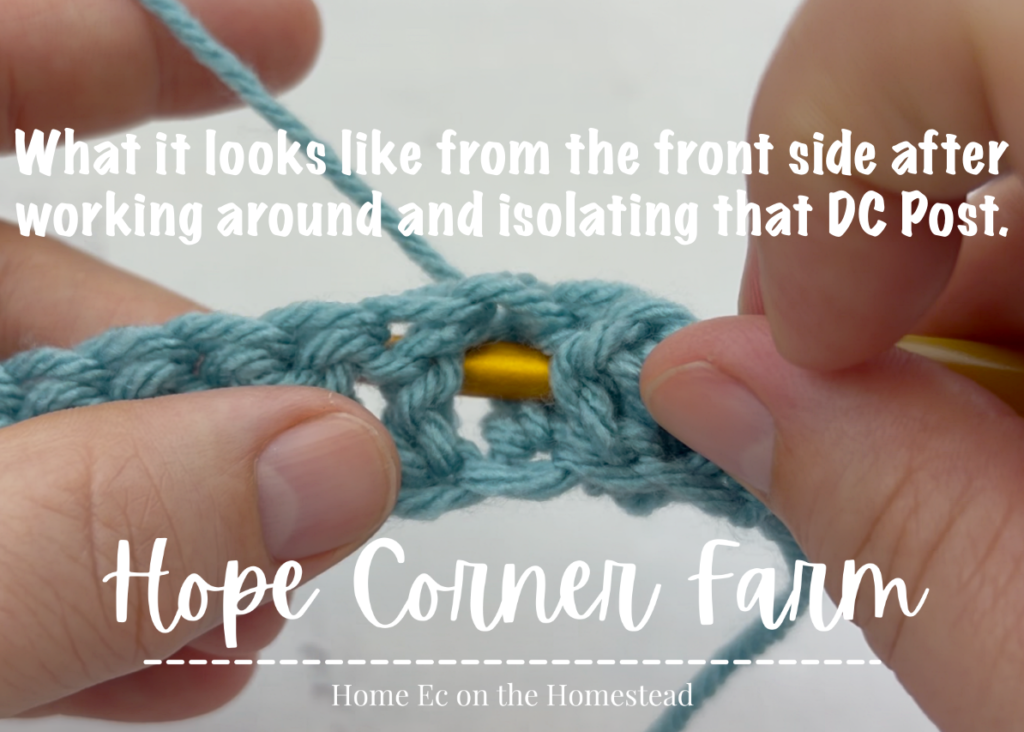
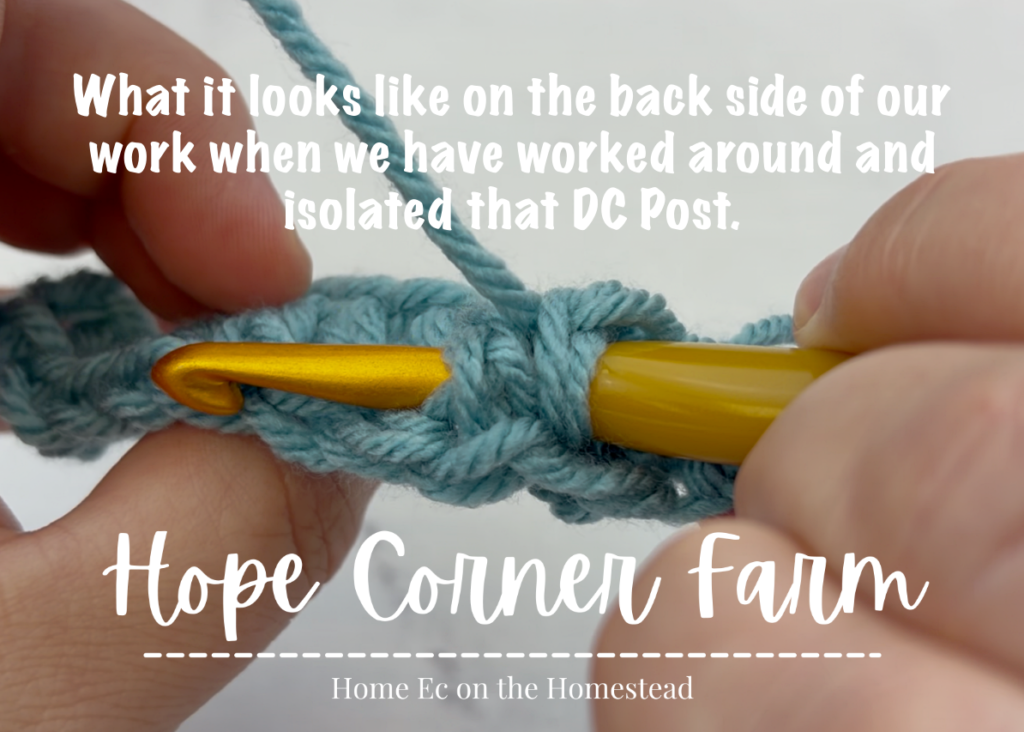
Row 2 Step 5
Now Yarn Over and pull the yarn through and in front of the post that is being worked around. There will be 3 loops of yarn on the crochet hook at the end of this step.
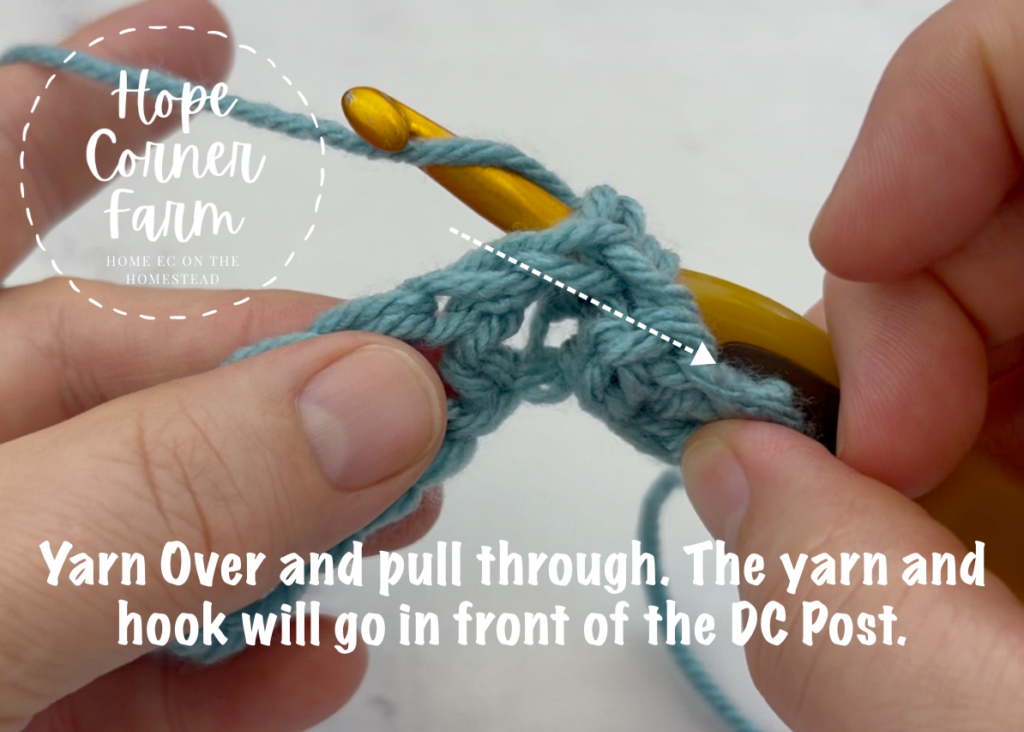
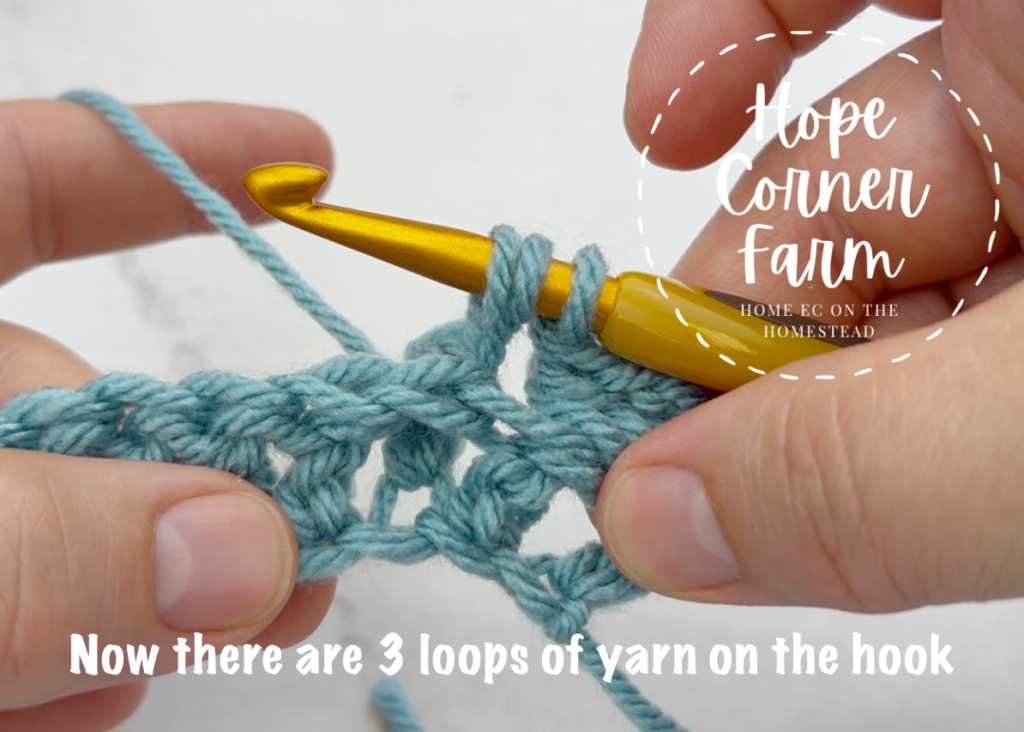
Step 6 Row 2 Back Post Double Crochet Stitch
Next Yarn Over and pull through 2 of the loops on the crochet hook. There will be 2 loops of yarn remaining on the hook at the end of this step.
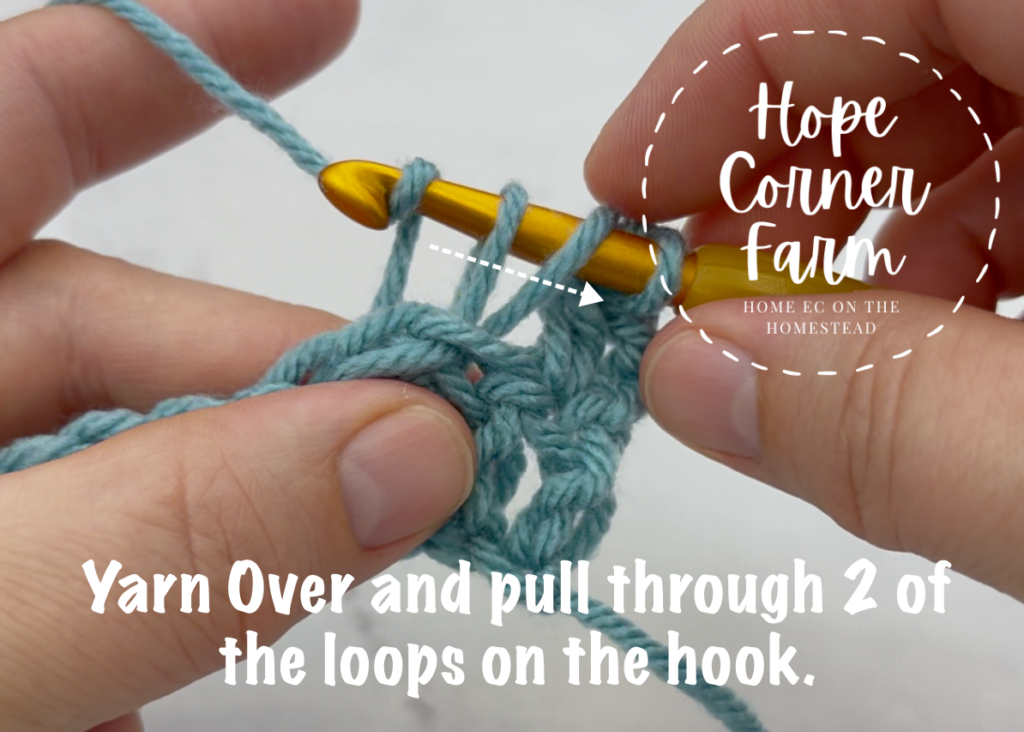
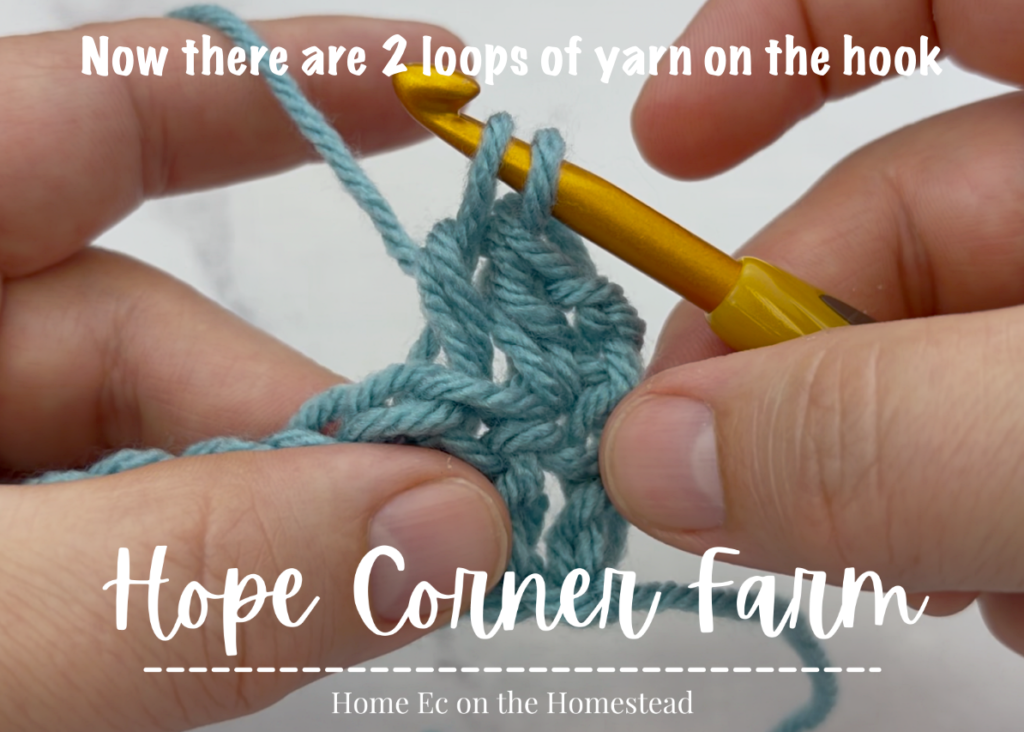
Row 2 Step 7
Finally Yarn Over and pull through the remaining 2 loops on the crochet hook. This completes one Back Post Double Crochet Stitch.
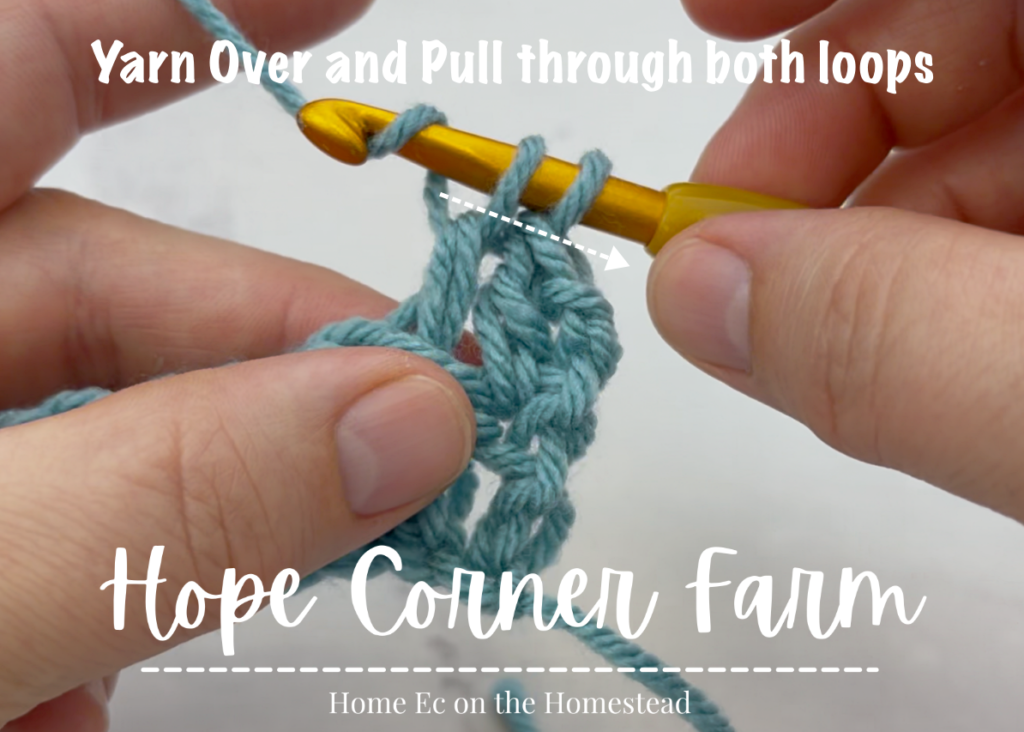
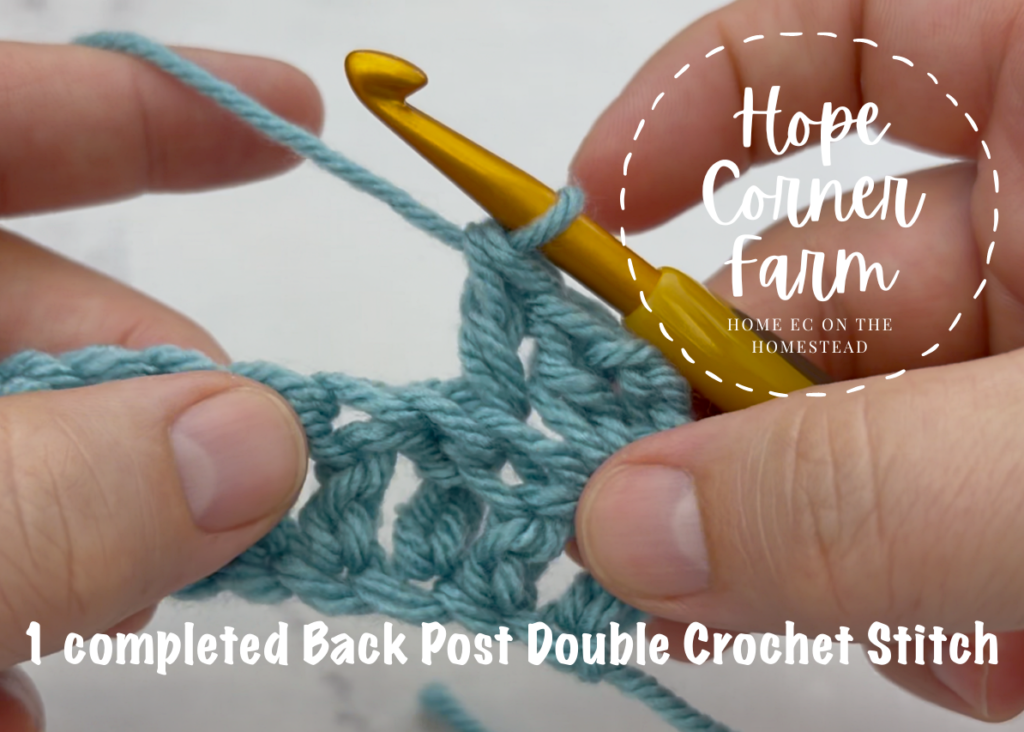
Remaining Back Post Double Crochet Stitches
Repeat Steps 2-7 for any remaining Back Post Double Crochets that you would like to complete.
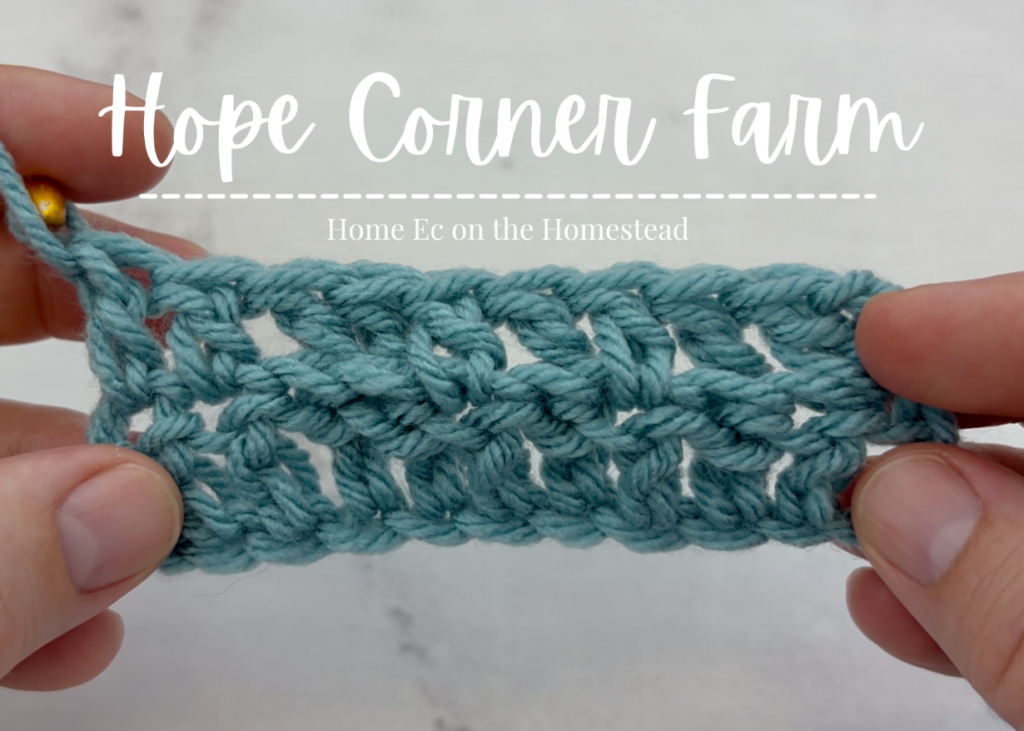
Video Tutorial How to Back Post Double Crochet Stitch
Written Instructions Only
Start by chaining any number of chains. There is no multiple for this crochet stitch.
NOTE: You could start this stitch by Foundation Double Crocheting any number. If you choose this option, skip to Row 2 (do not complete Row 1).
Row 1
Begin this row by working into the 3rd chain from the crochet hook.
Place 1 REGULAR Double Crochet Stitch into each chain across the row. This row is all REGULAR Double Crochets.
Row 2
Now start by chaining 2 and turning your work. Place one REGULAR Double Crochet Stitch into the 1st stitch.
Next identify which double crochet post from the previous row you are going to be working around.
Now Yarn Over and insert the hook from the back side into the gap to the immediate right of the post. The hook should pop out to the front side of the work.
Then angle the hook so it goes in front of the post we are working around. The hook should then pop behind and come back to the back side of your project. The hook should be coming out on the back side in the gap to the immediate left of the post. Your crochet hook is crossing IN FRONT of the post we are working around.
Next Yarn Over and pull the yarn in front the post. There will be 3 loops of yarn on the hook now.
Now Yarn Over again and pull through 2 of the loops on the hook. There will be 2 loops of yarn left on the hook.
Finally Yarn Over one more time and pull through the remaining 2 loops of yarn on the hook. This completes one Back Post Double Crochet Stitch.
Remaining BPDC Stitches
Keep repeating those steps for each Back Post Double Crochet that you would like to complete.
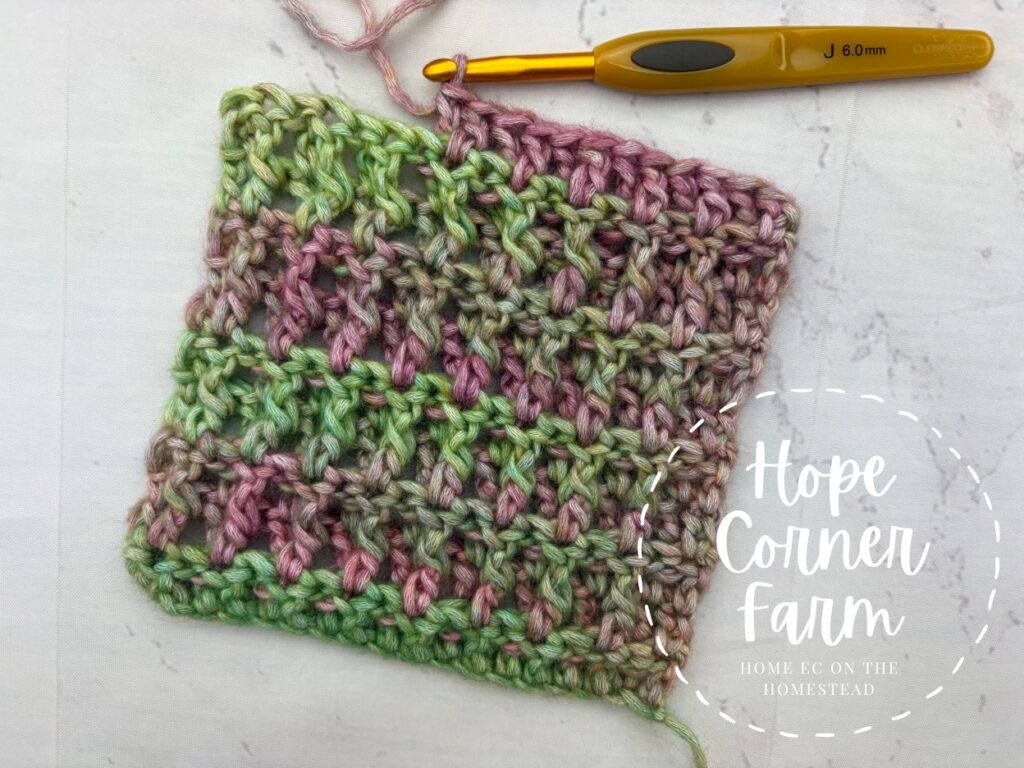
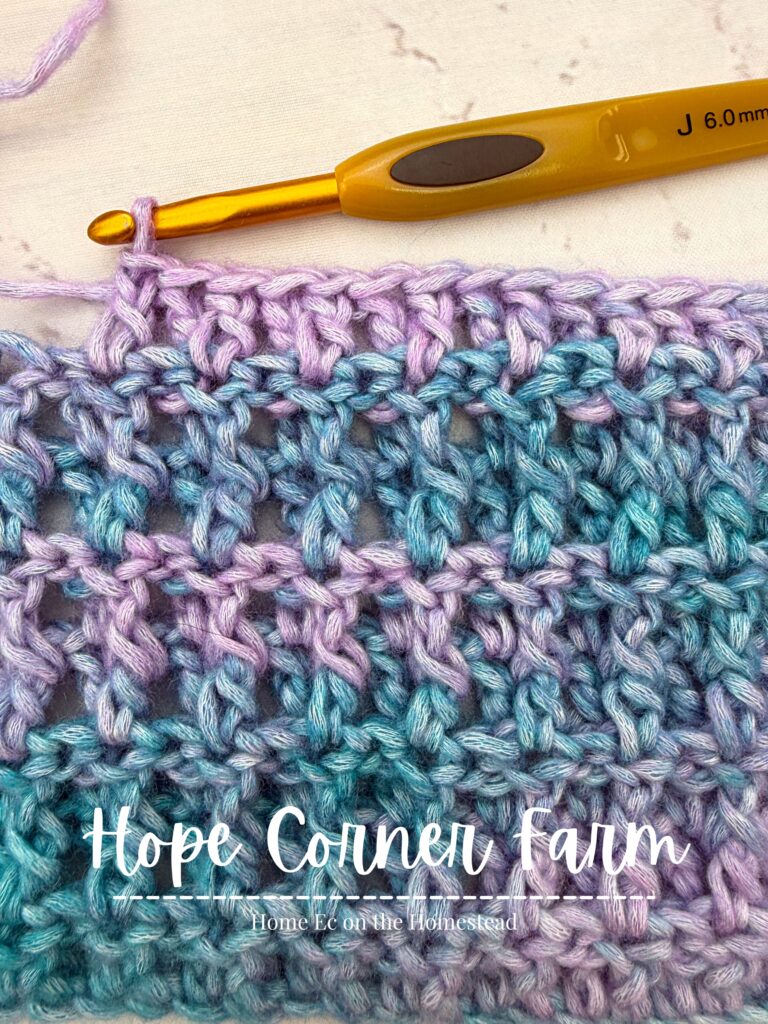
ENJOY LEARNING NEW CROCHET STITCHES? DON’T MISS OUT ON MORE!
Subscribe below to get free crochet patterns, tutorials, and inspiration delivered straight to your inbox. If you want more crochet fun delivered to your inbox hop on over and join my newsletter!

Join my creative community and keep your crochet queue full of beautiful, fun-to-make projects!
If you loved this tutorial and want more crochet inspiration, come connect with me on social! Subscribe on YouTube (Hope Corner Farm Crochet) for full, step‑by‑step videos, follow along on TikTok and Instagram for quick tips and reels, pin your favorite projects on Pinterest, and join the conversation on Facebook. Don’t forget to tag your makes with #HopeCornerFarmCrochet so I can cheer you on and share your beautiful work!
Happy Crocheting!

LOVE THIS CROCHET STITCH? CHECK OUT THESE OTHER CROCHET TUTORIALS!
I hope you enjoyed learning how to crochet the Back Post Double Crochet Stitch! This versatile stitch is a great way to add texture, dimension, and interesting raised details to your crochet projects. If you’re ready to practice more double crochet techniques, be sure to check out my tutorials for the Front Post Double Crochet Stitch, Double Crochet Stitch, and Herringbone Double Crochet Stitch. Each stitch creates a different look and texture, making them fun techniques to add to your crochet toolbox. Happy crocheting!