How to Extended Moss Stitch in Crochet
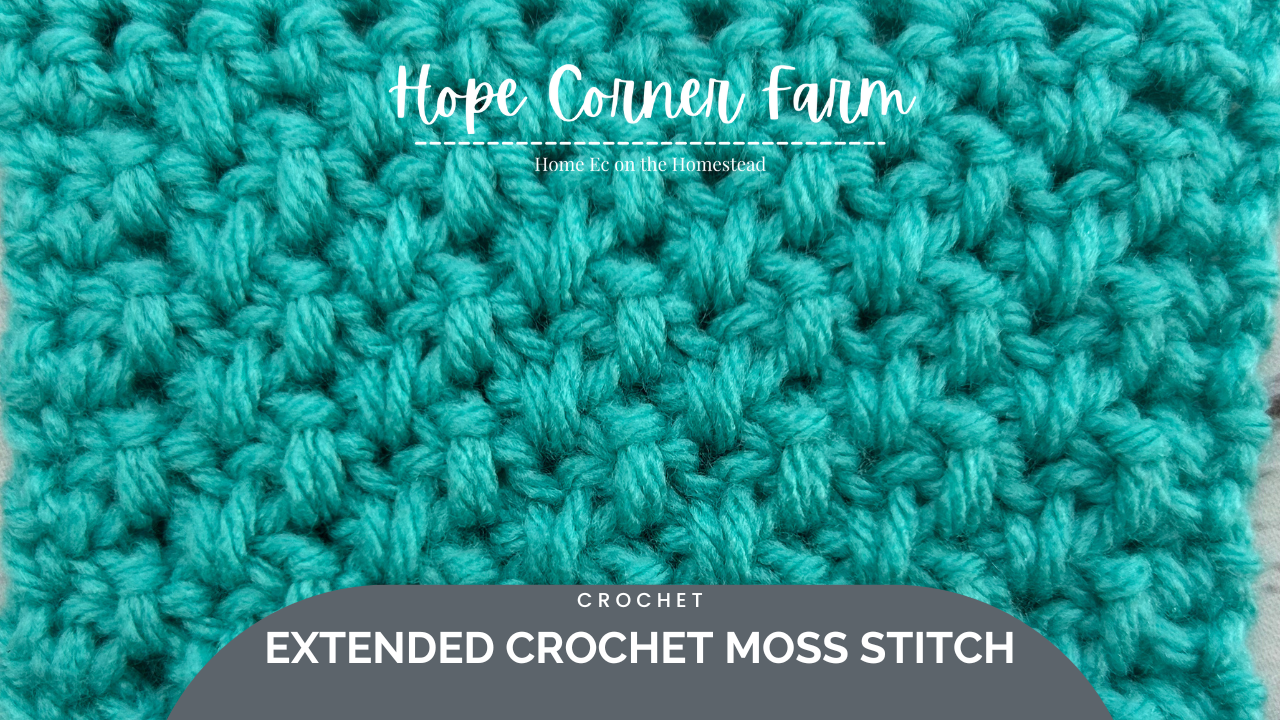
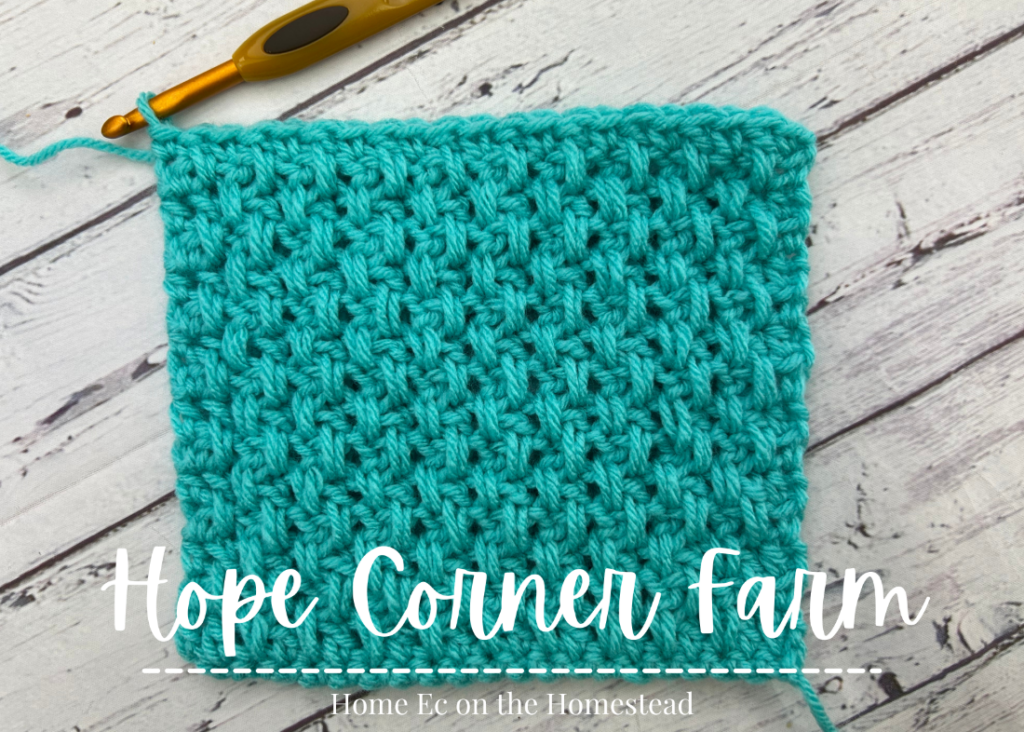
I love a good textured crochet stitch, and the crochet Extended Moss Stitch fits the bill. If you love the regular crochet moss stitch, you are going to love this stitch! This crochet stitch is sometimes called the Double Crochet Moss Stitch, since we use double crochet stitch to created this stitch. This stitch is a 2 row repeat stitch for the most part once you get to Row 3. Ready to learn? Let’s grab a hook and some yarn and get crocheting!

First, check out our video tutorial on our You Tube Channel! Subscribe to get the latest crochet fun from Hope Corner Farm Crochet!
Materials Needed:
This tutorial uses US Crochet Terms
Crochet hook of choice (I am using a size J 6.0mm crochet hook for this tutorial)
Yarn of choice (I am using a medium weight, size 4 yarn in this tutorial)
Crochet Terms and Abbreviations Used:
Foundation Single Crochet Stitch (FSC)
Half Double Crochet Stitch (HDC)
Row 1 – Extended Moss Stitch in Crochet:
This crochet stitch can be started in 2 different ways. Either option will make up Row 1. Here are the options:
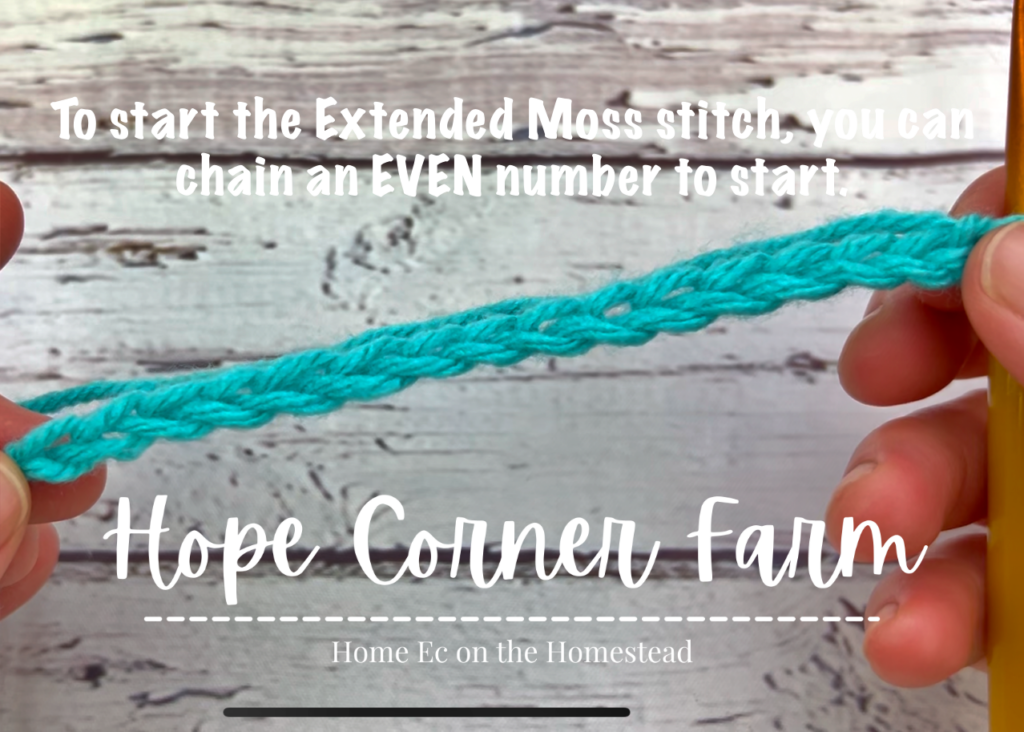
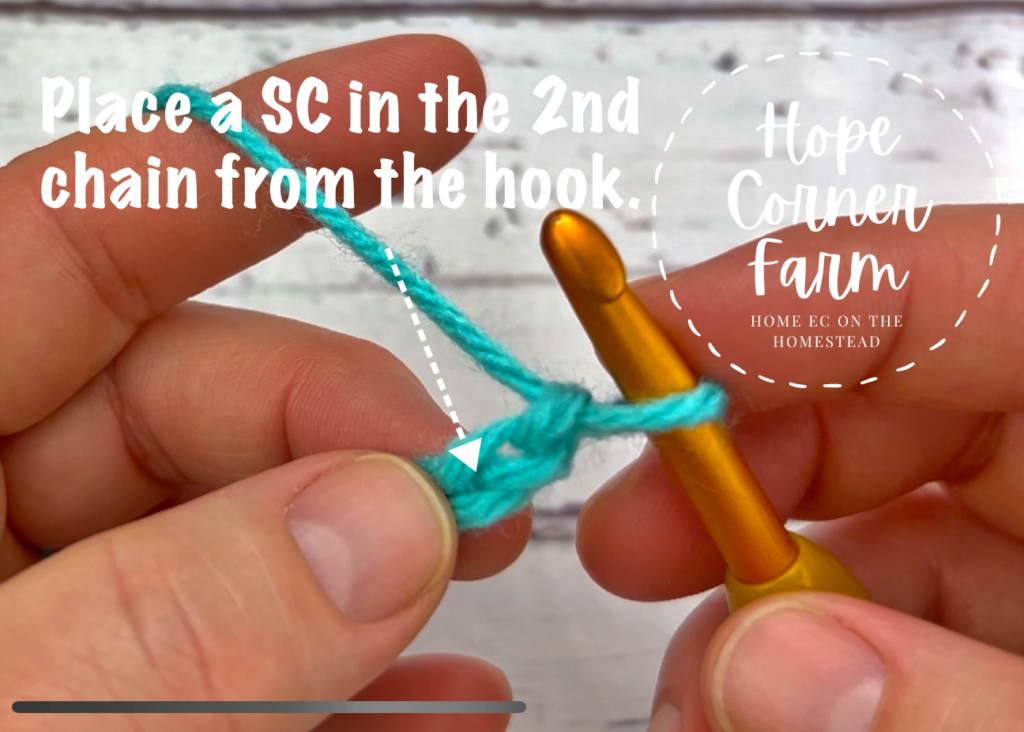
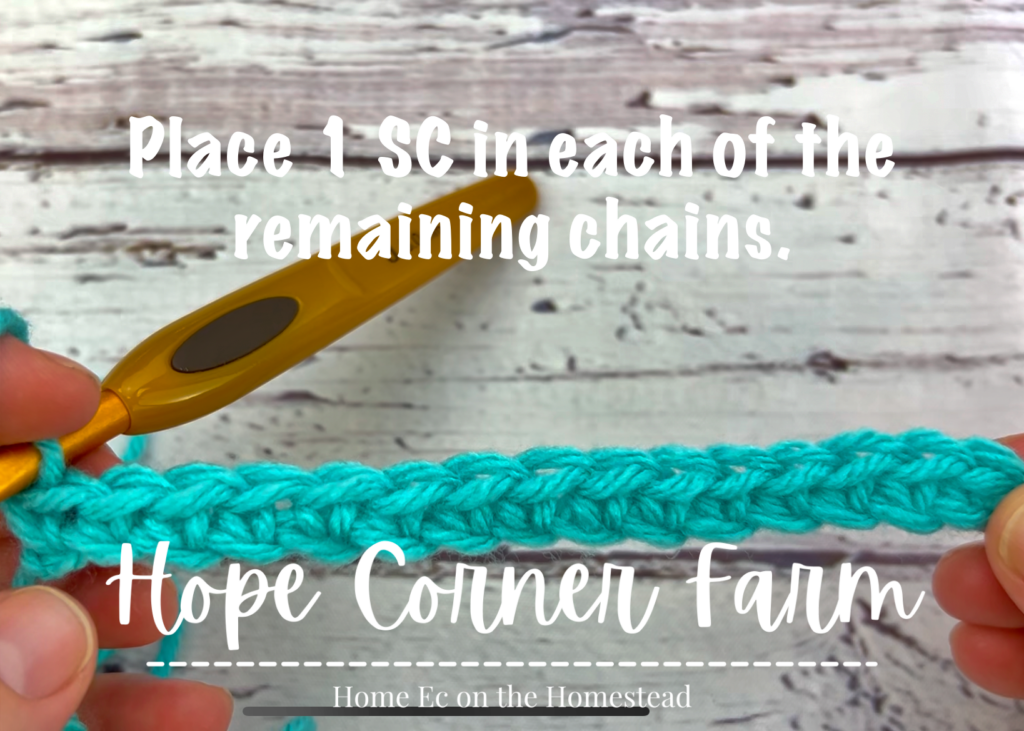
Either start by chaining an EVEN number. Then you will place a single crochet stitch in the second chain from the crochet hook. Continue placing a single crochet stitch in EACH remaining chain. This will leave you with an ODD number stitch count (which is what we want).
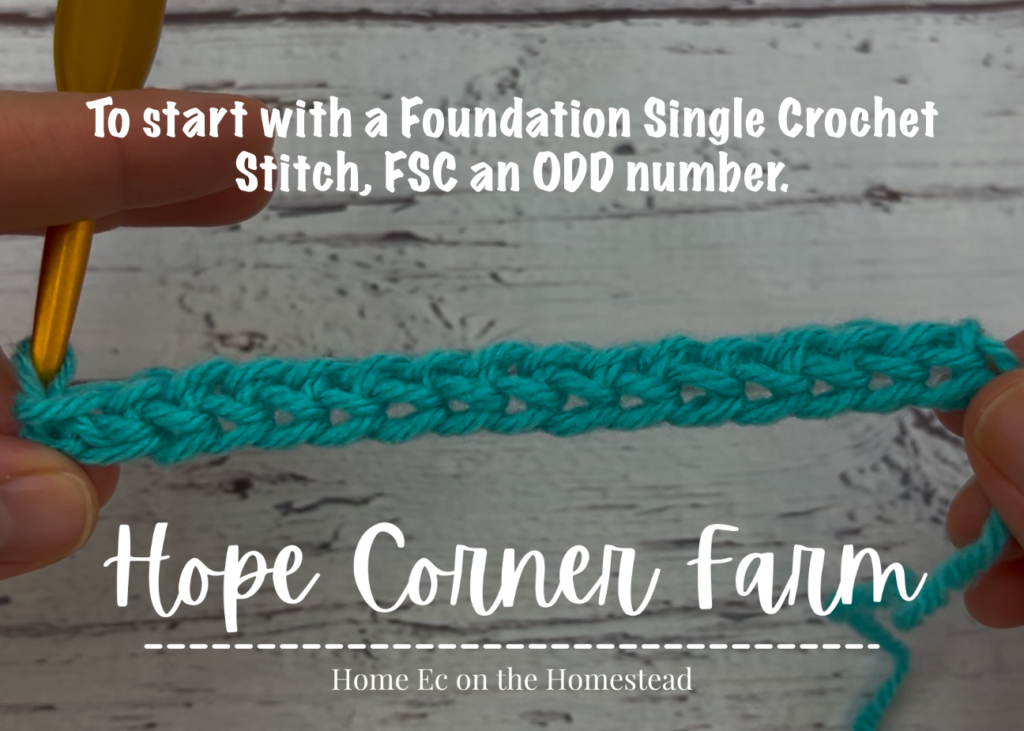
OR you can begin by Foundation Single Crocheting an ODD number.
Row 2:
First, the key to this row is knowing where the stitches go. Row 2 is written as follows: Begin by chaining 1 and turning. Place a DC in the same stitch. DC in the next. Ch 1, then skip the next stitch. (DC in the next stitch, Ch 1, skip the next stitch) until there are 3 stitches remaining in the row. Place one DC in the last 2 stitches. I will walk through the steps in detail below.
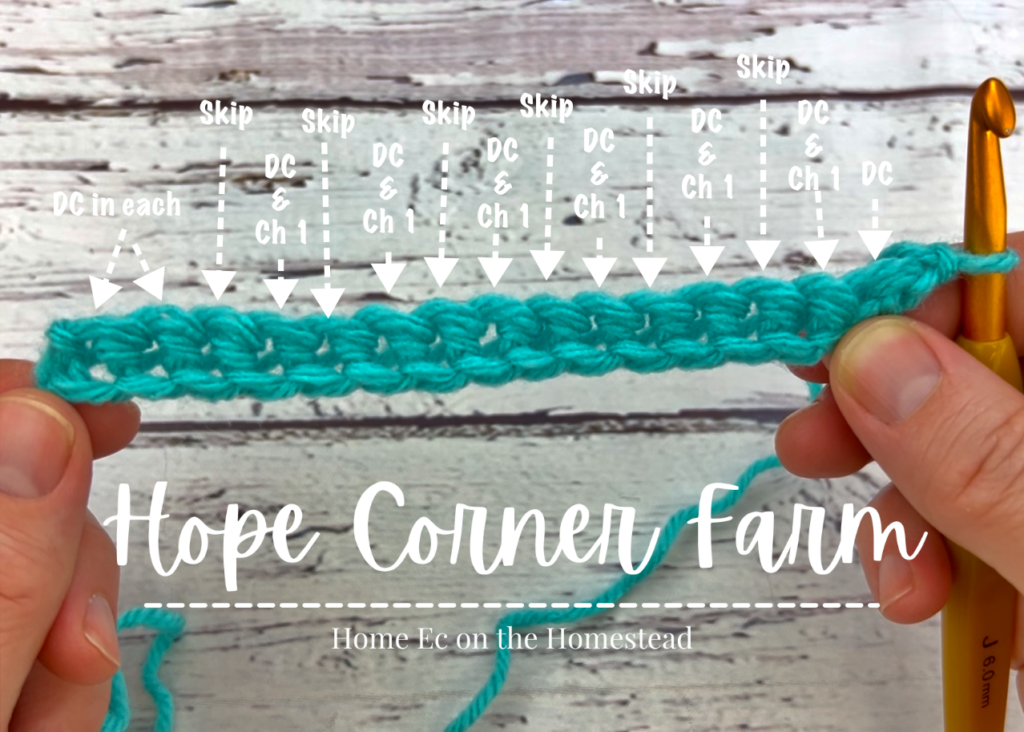
Now we will start the step by step photo tutorial for Row 2. To start Row 2 begin by chaining 1 and turning your work. Please note that the chain 1 DOES NOT count as a stitch for this row!
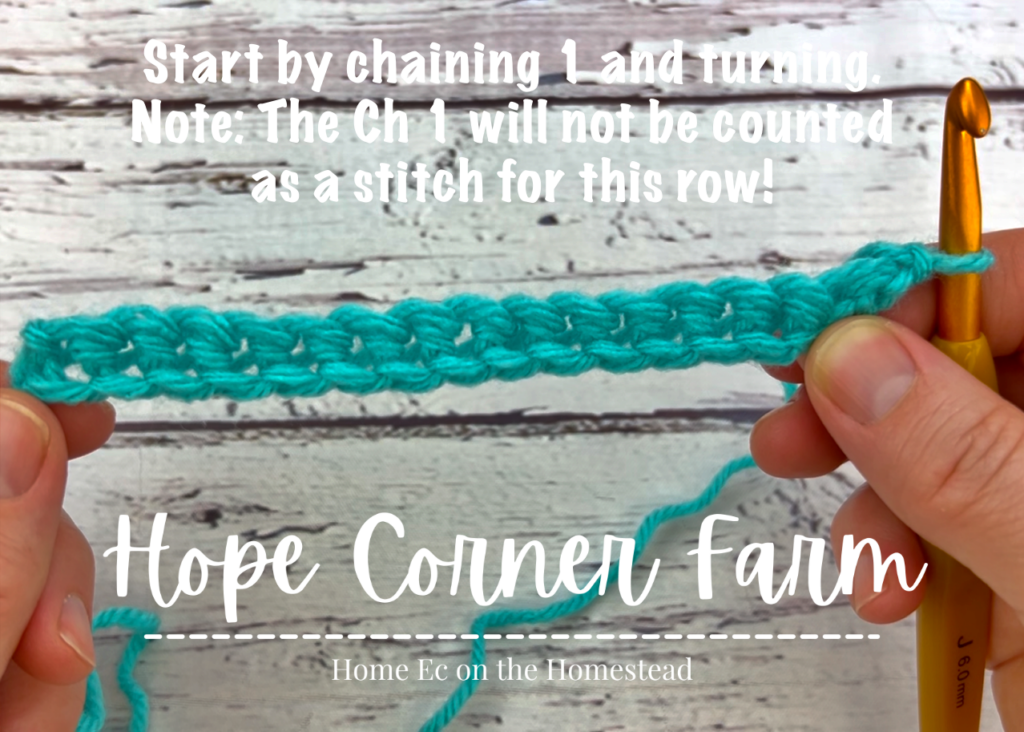
Next, place a double crochet stitch in the same stitch.
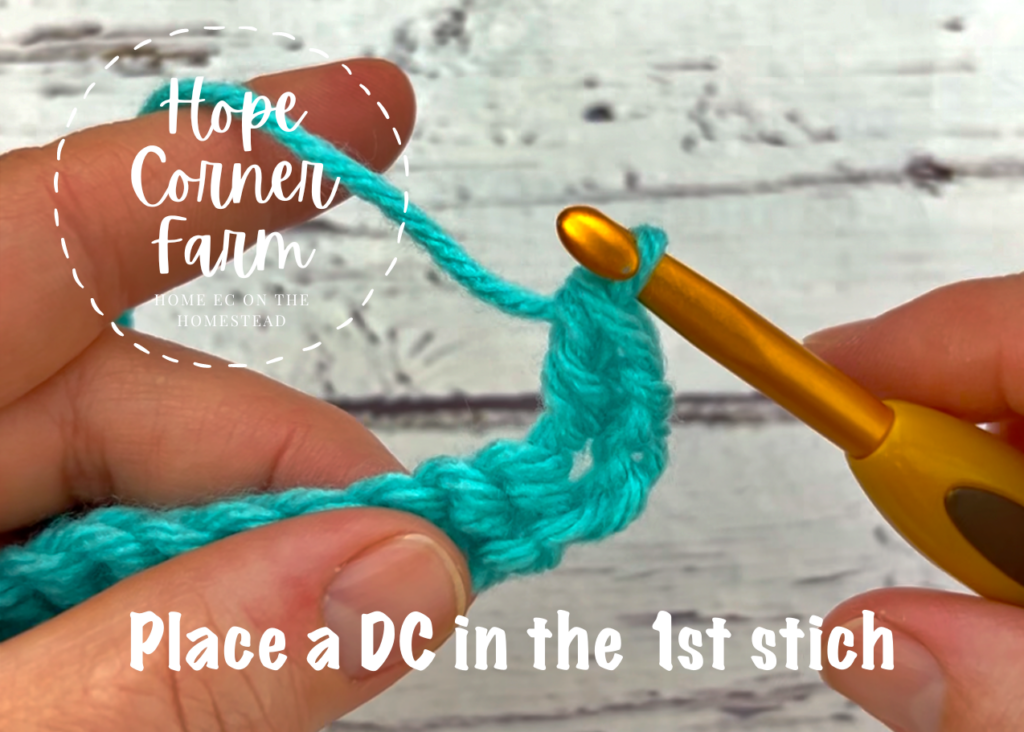
Now, place a DC in the next stitch and then chain 1. Skip the next stitch.
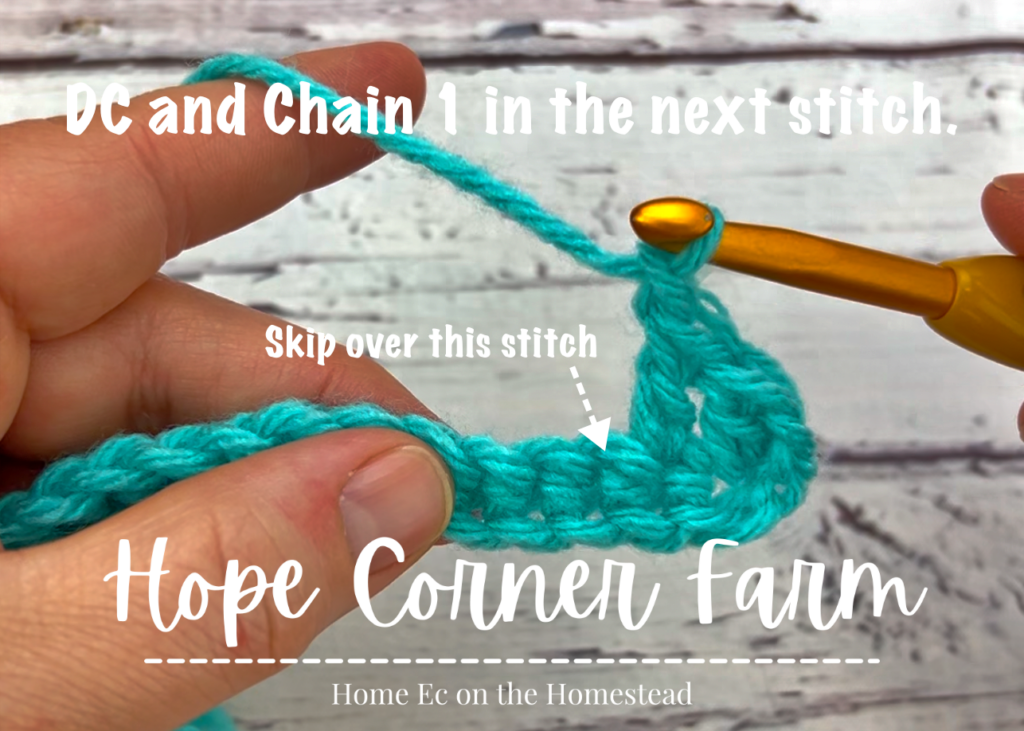
Next, repeat the following across the row: DC, Ch 1, skip next. Repeat until there are 3 stitches remaining for the row (including the last skipped stitch).
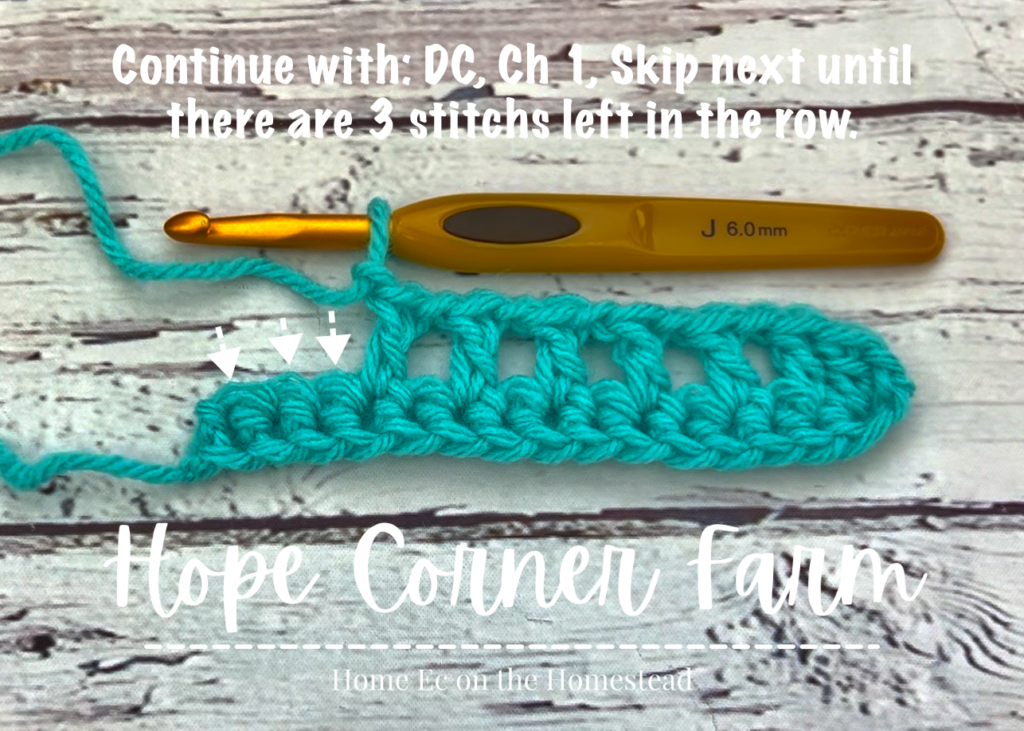
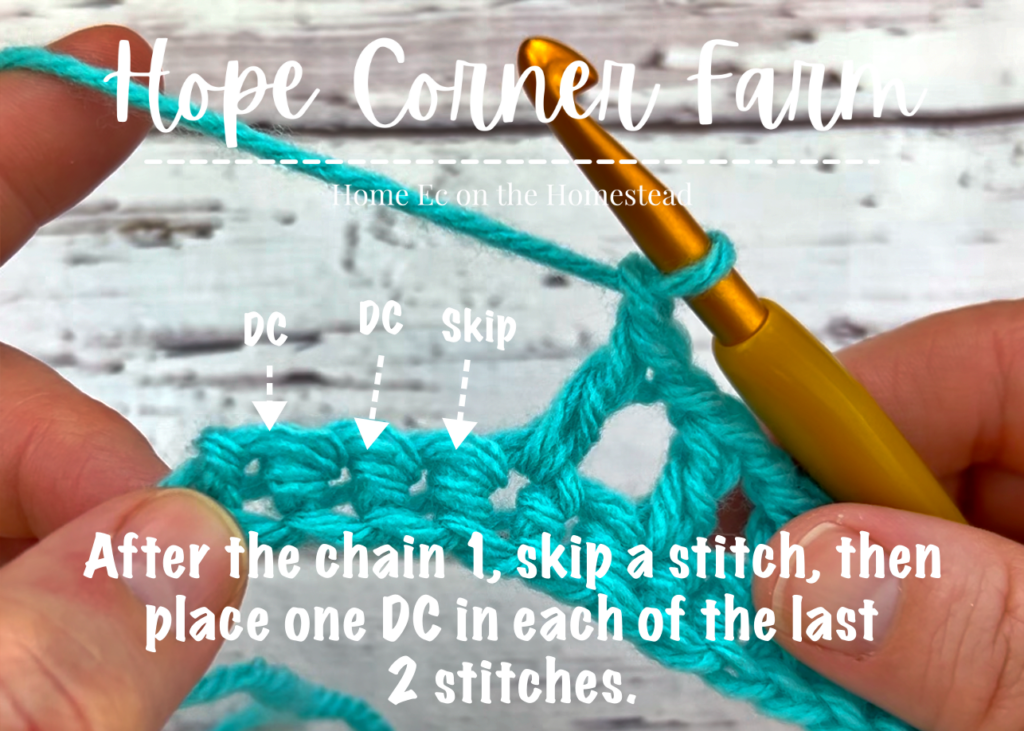
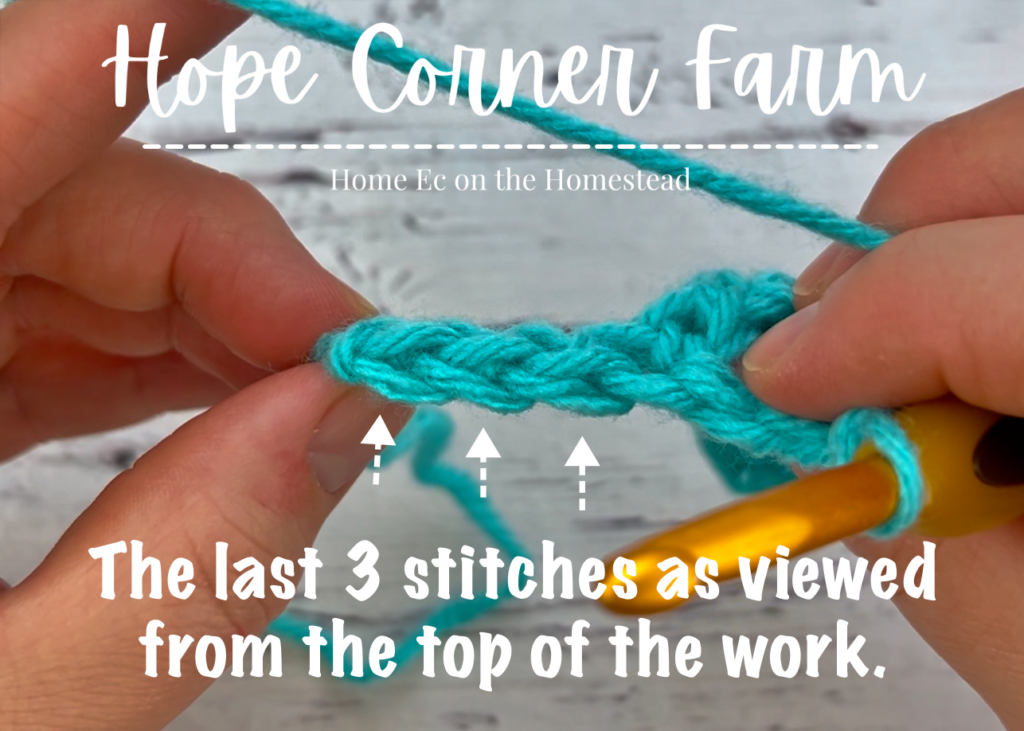
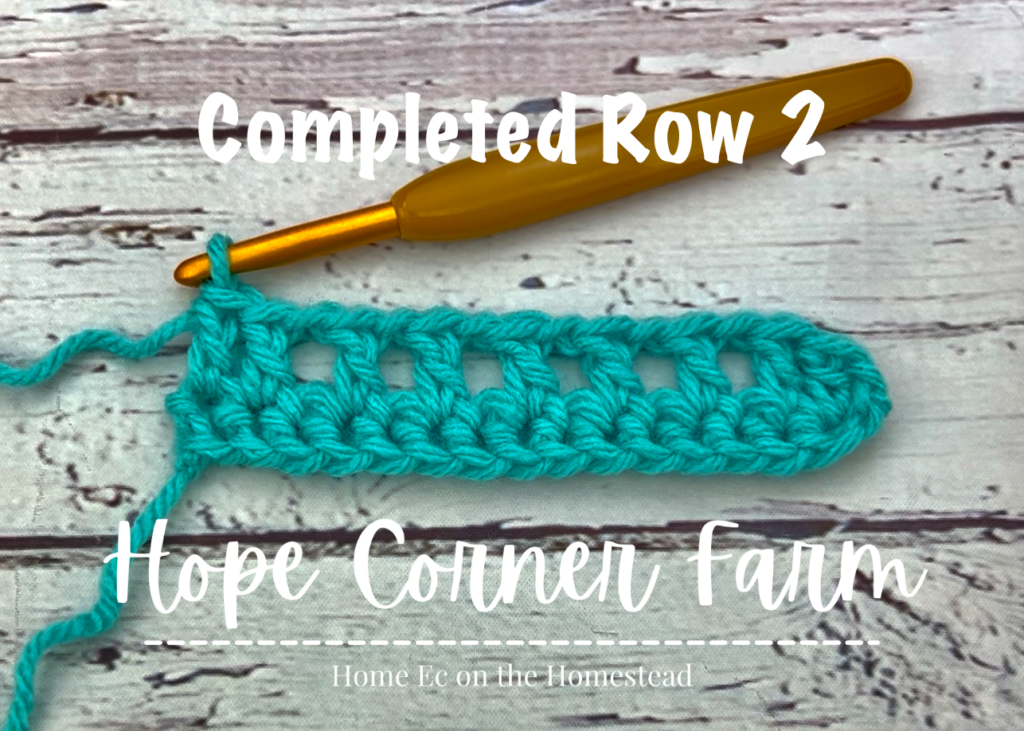
Now, place one double crochet stitch in each of the last 2 stitches. This completes Row 2.
Extended Moss Stitch – Row 3:
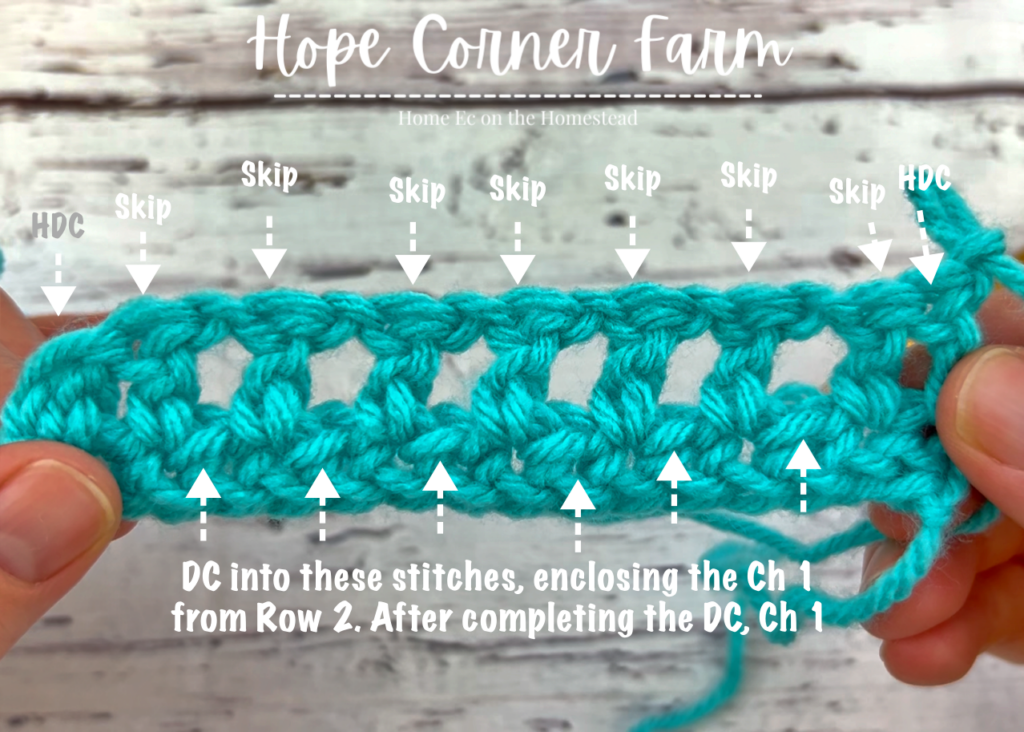
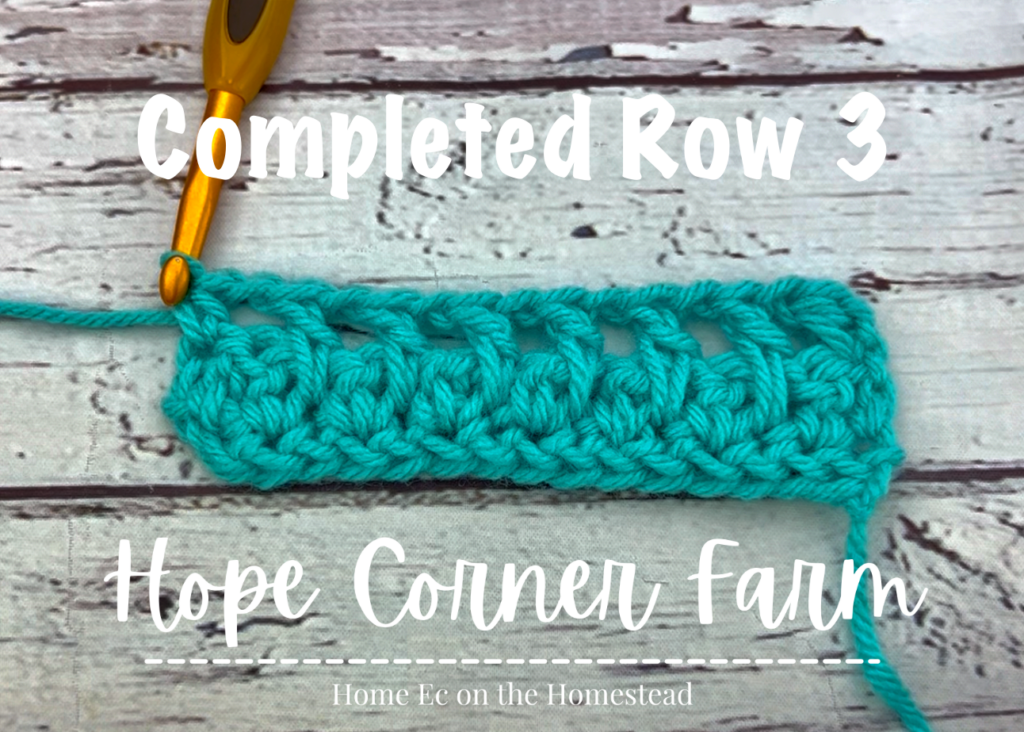
To start, this is how Row 3 is written: Begin by chaining 1 and turning. Place a HDC in the same. chain 1. Skip next. Loosely DC into the skipped stitch from the previous row (make sure to enclose the chain 1 stitch from the previous row into the DC). Chain 1. Skip the next stitch. (Loosely DC into the skipped stitch from the previous row. Chain 1. Skip next). Repeat until there is 1 stitch left after the last skipped stitch (it will look like there are 2 stitches left, but we skip 1). HDC in the last stitch of the row.
Row 3 Photo Tutorial:
Begin Row 3 by chaining 1 and turning your work.
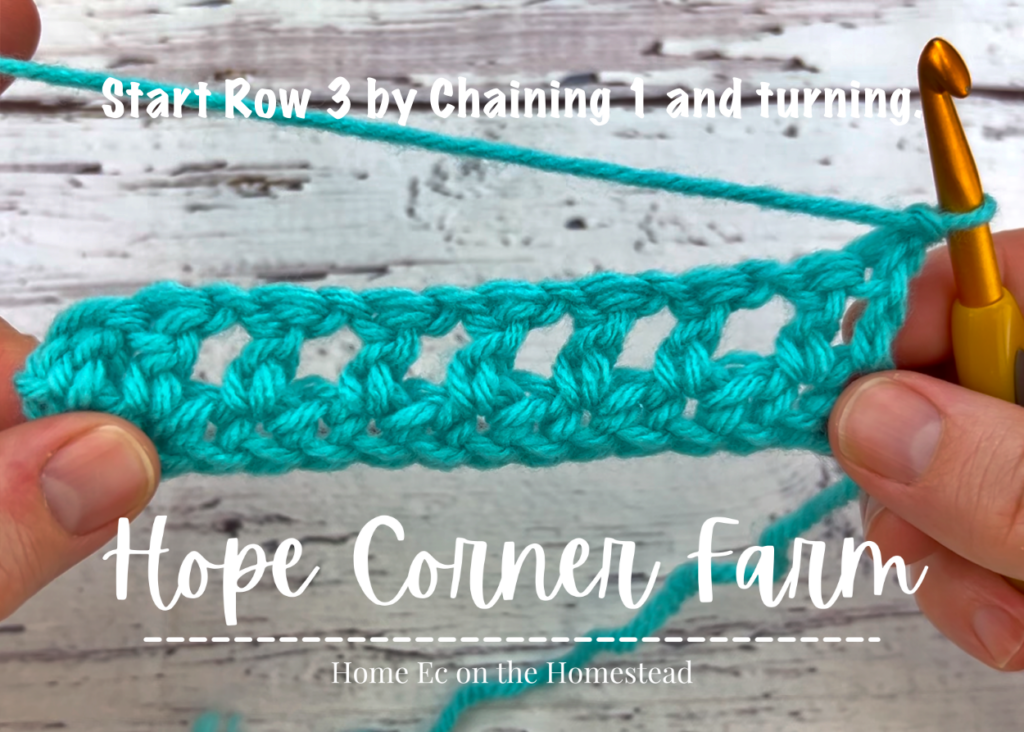
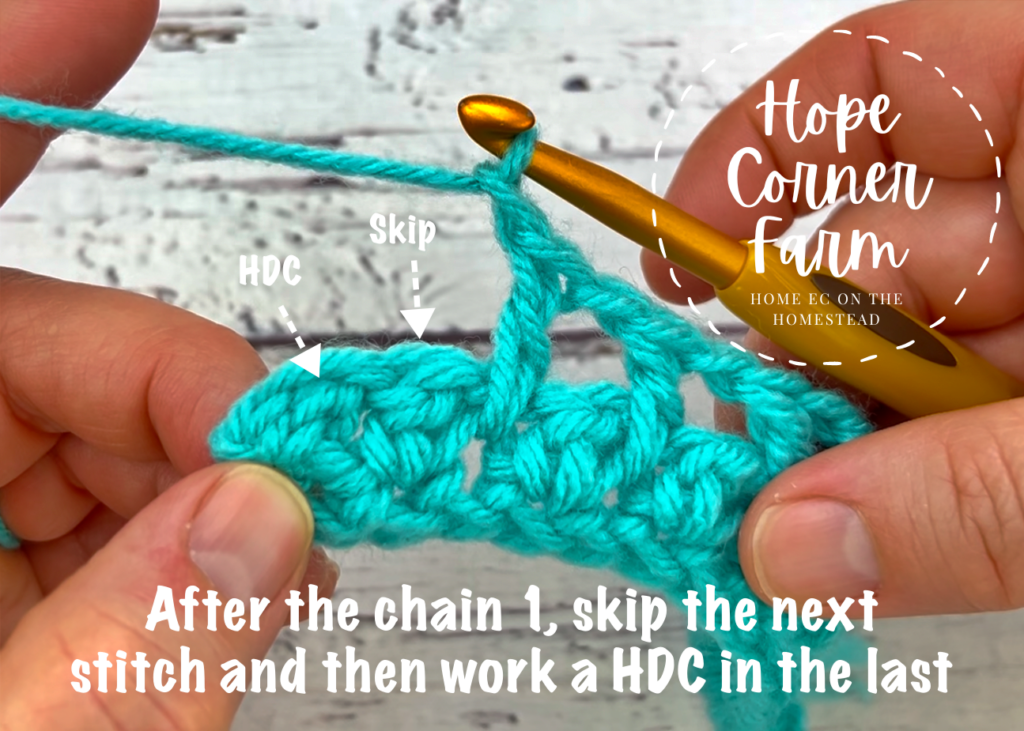
Now, place a half double crochet stitch in the same stitch, then chain 1. Skip the next stitch.
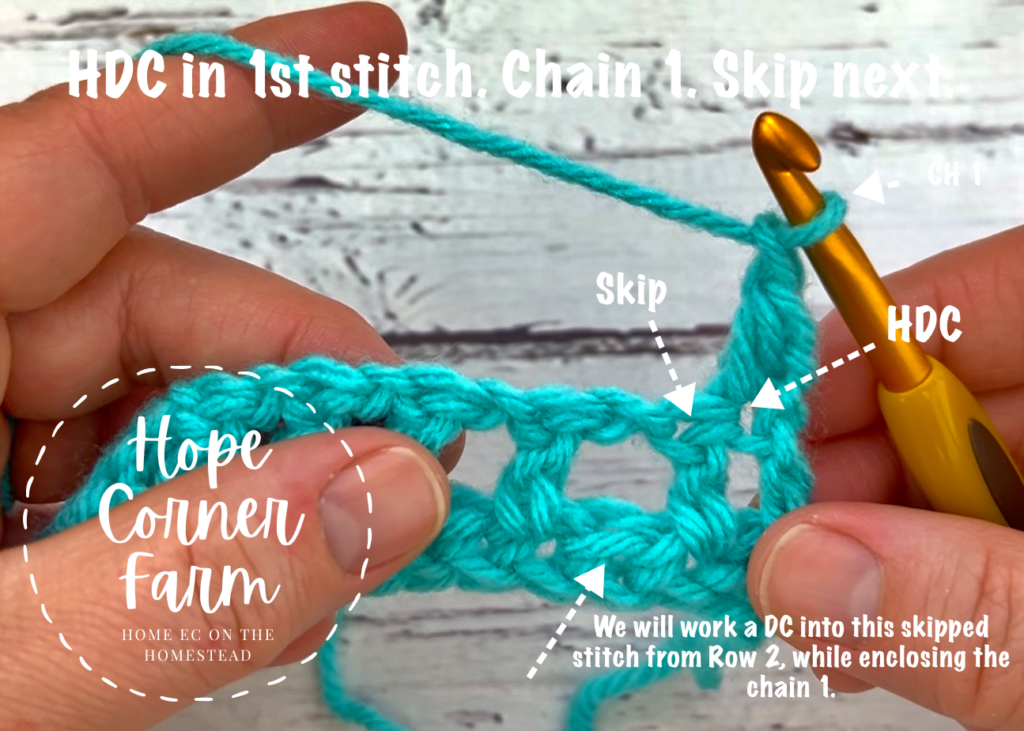
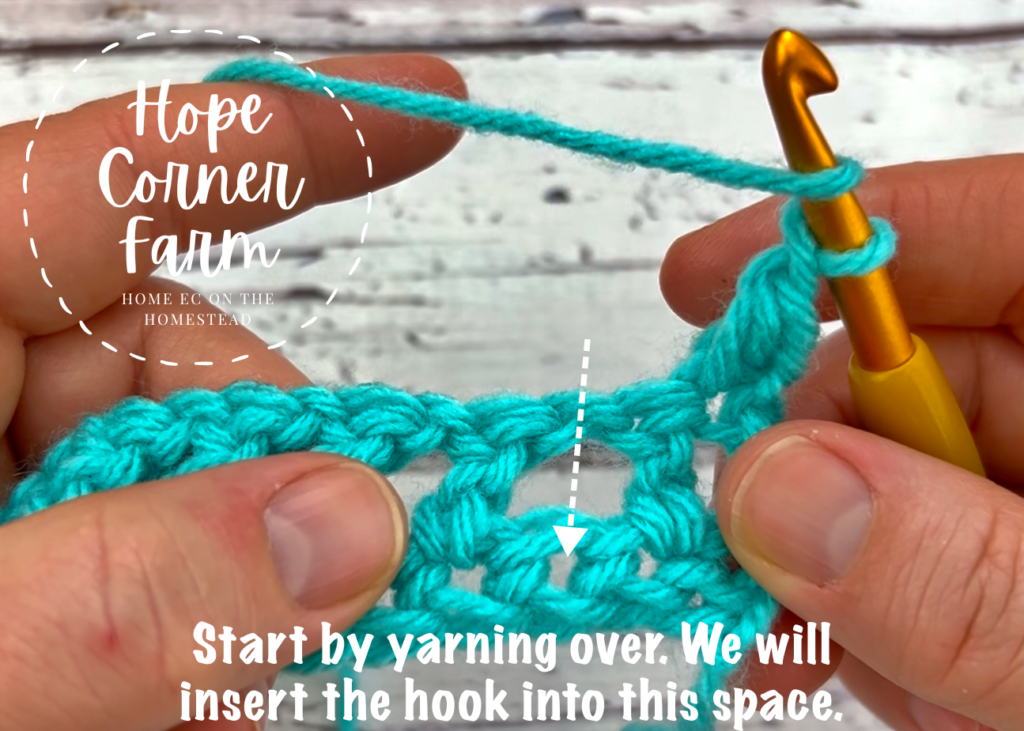
Next, to work the loose DC and fully enclose the chain 1 from the last row, begin by yarning over. We will insert the hook into the skipped stitch from the previous row.
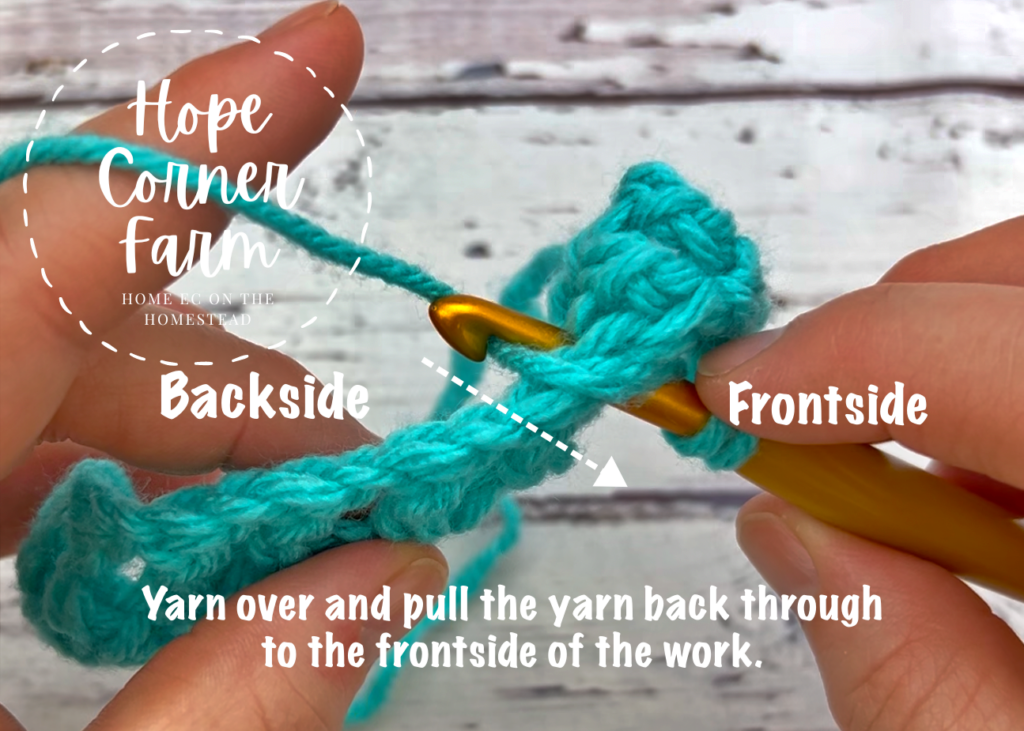
Now, insert the hook into the skipped stitch from the previous row. Make sure that the hook comes out on the backside of the work.
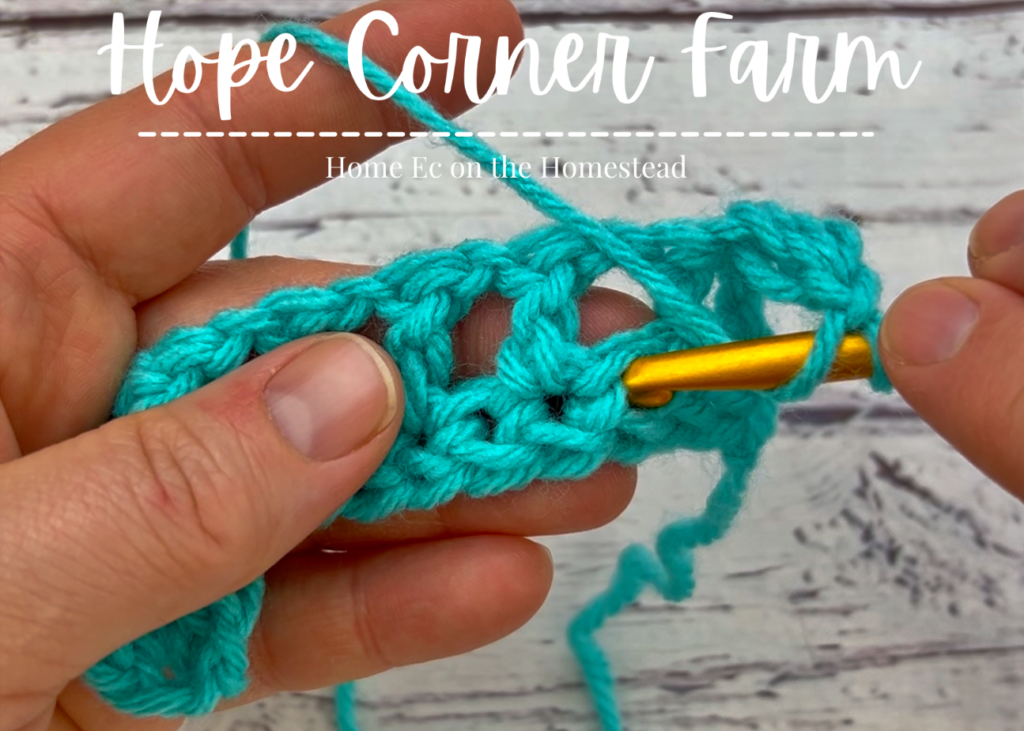
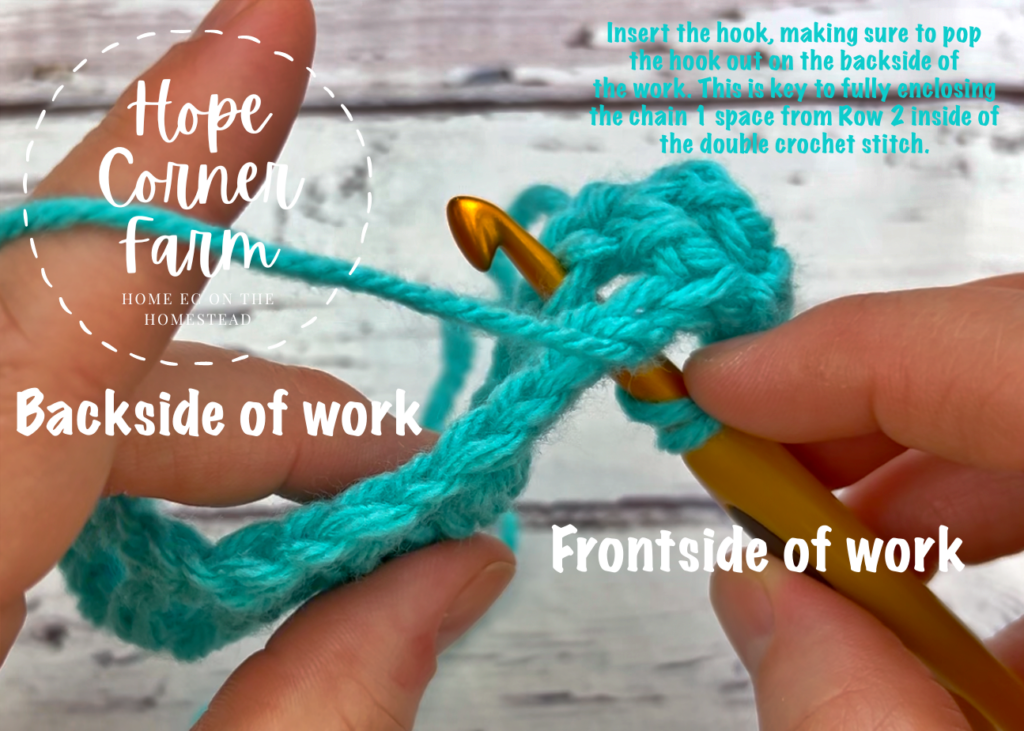
Next yarn over and pull through the stitch, keeping the yarn a little looser and longer than normal. Pull all of the way through back to the frontside of the work. There will be 3 loops of yarn on the crochet hook at this point.
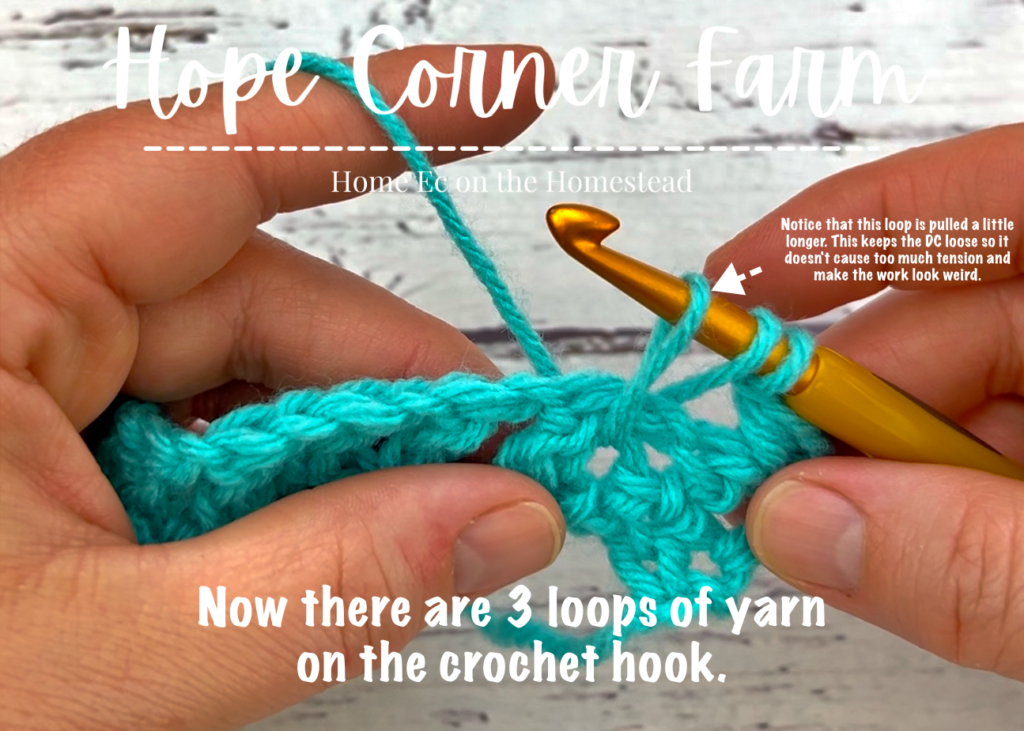
Now, yarn over and pull through 2 of the loops of yarn on the crochet hook. There will be 2 loops left at this point.
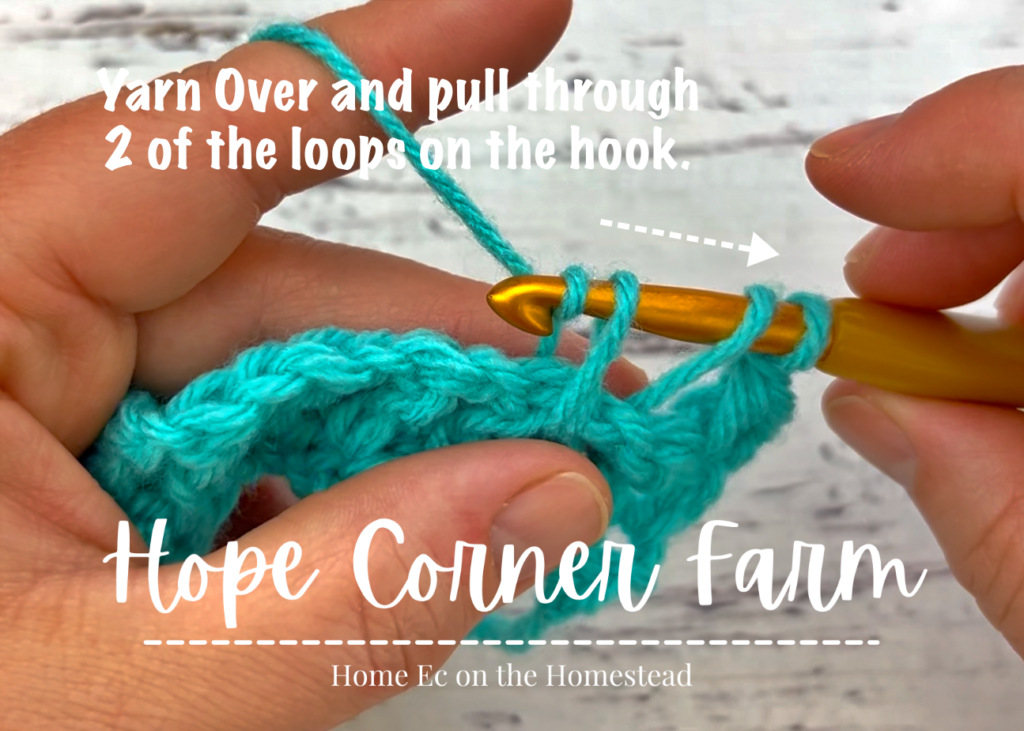
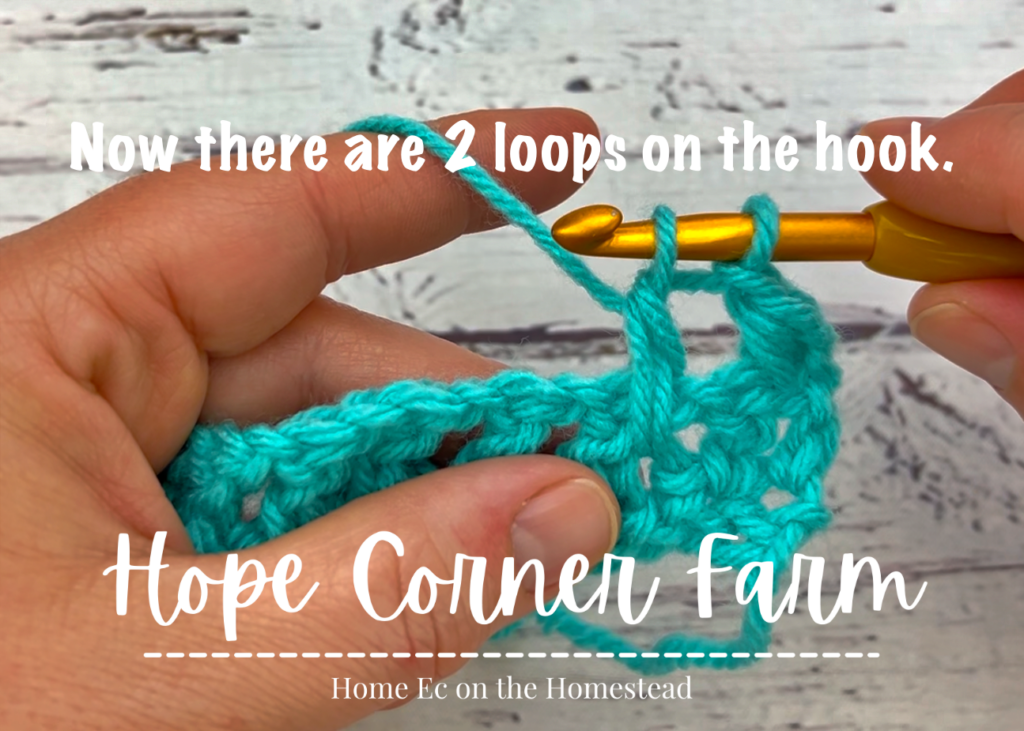
Finally, to complete the loose DC in the skipped stitch, yarn over and pull through both loops of yarn on the hook. This completes the DC. After that, chain 1.
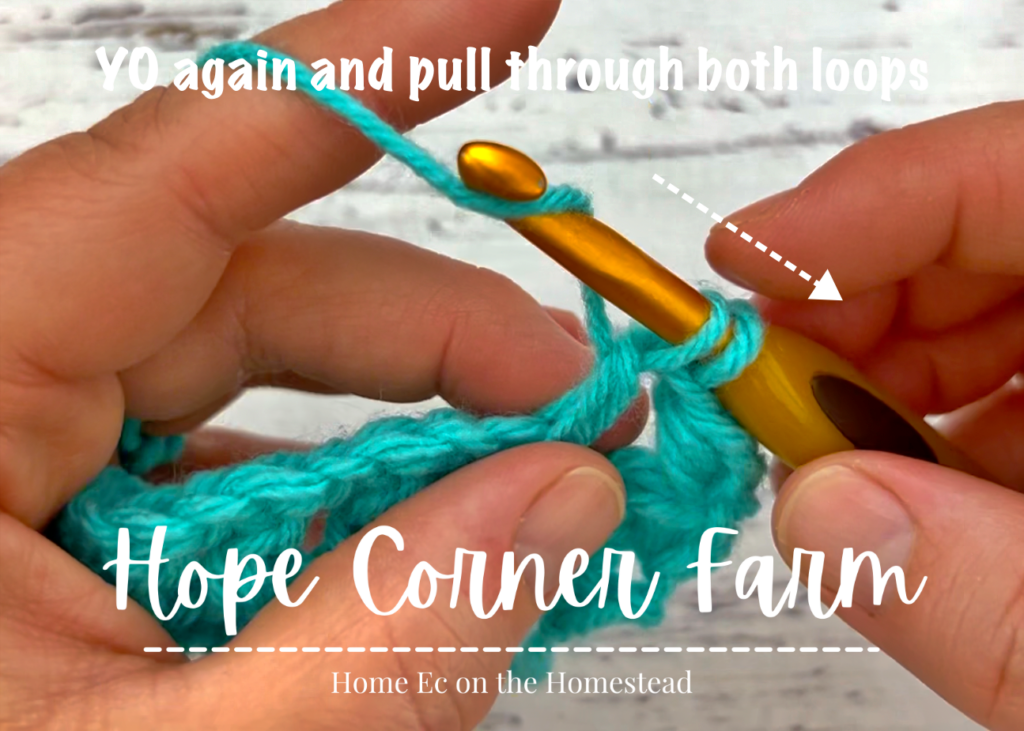

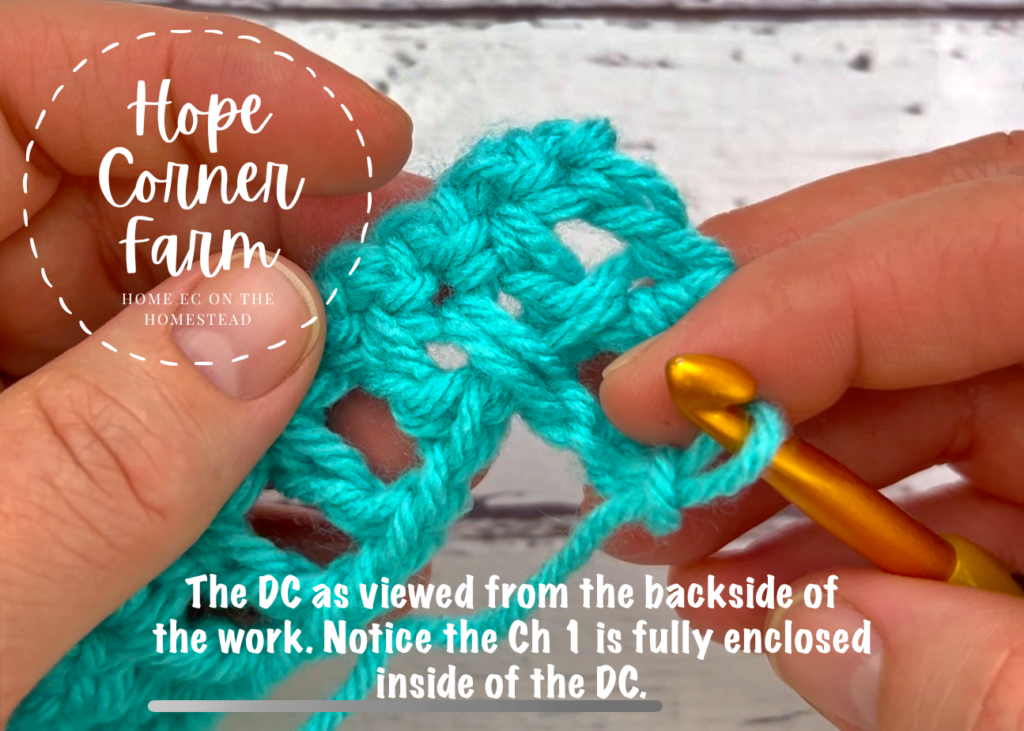
Now, (DC, Ch 1, skip next stitch) across the row until there are 2 stitches remaining after the last skipped stitch (it will look like there are 2 stitches at the end.
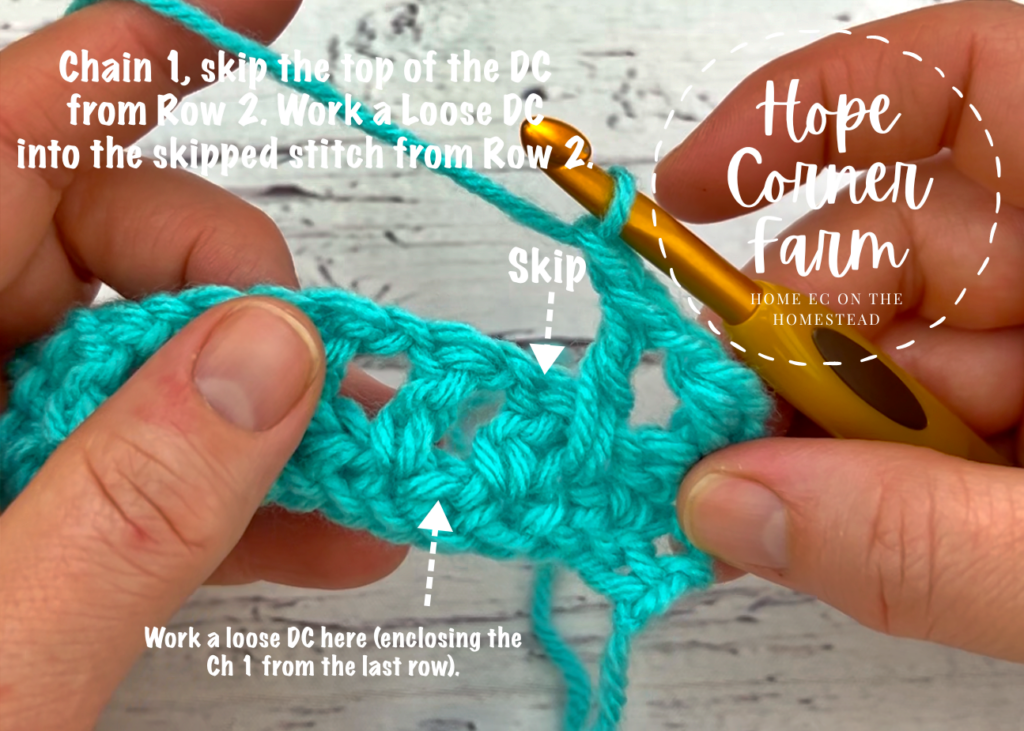
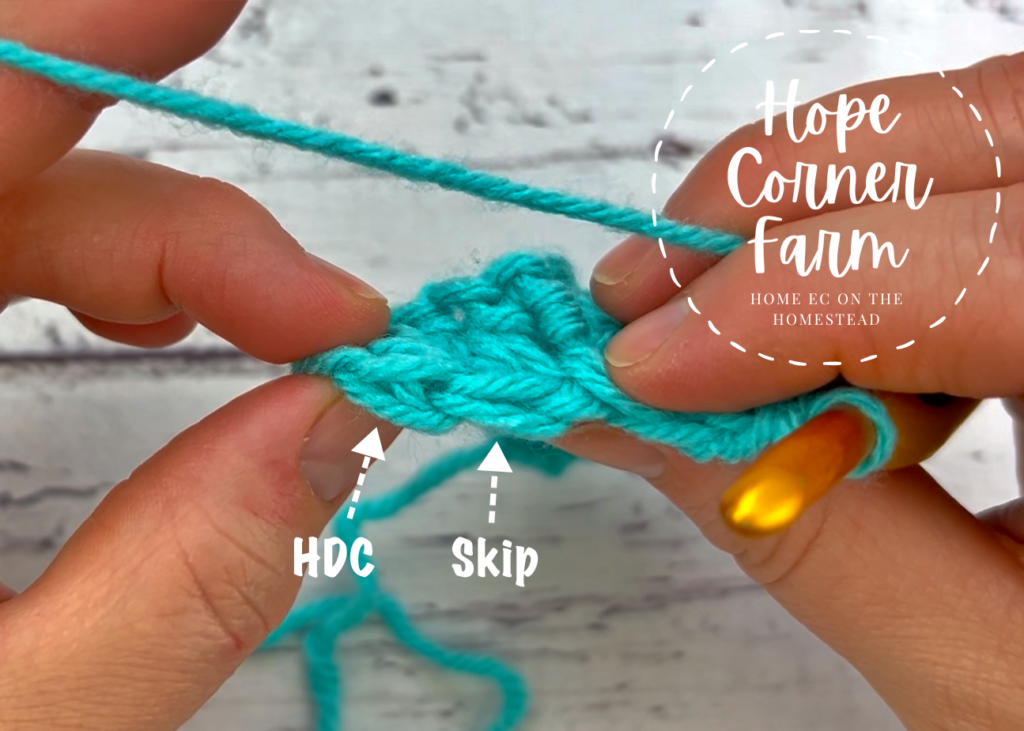
Row 4 – Written Instructions:
Now, Row 4 is the last “new” row for this stitch. After Row 4 we begin repeating and alternating rows 3 & 4.
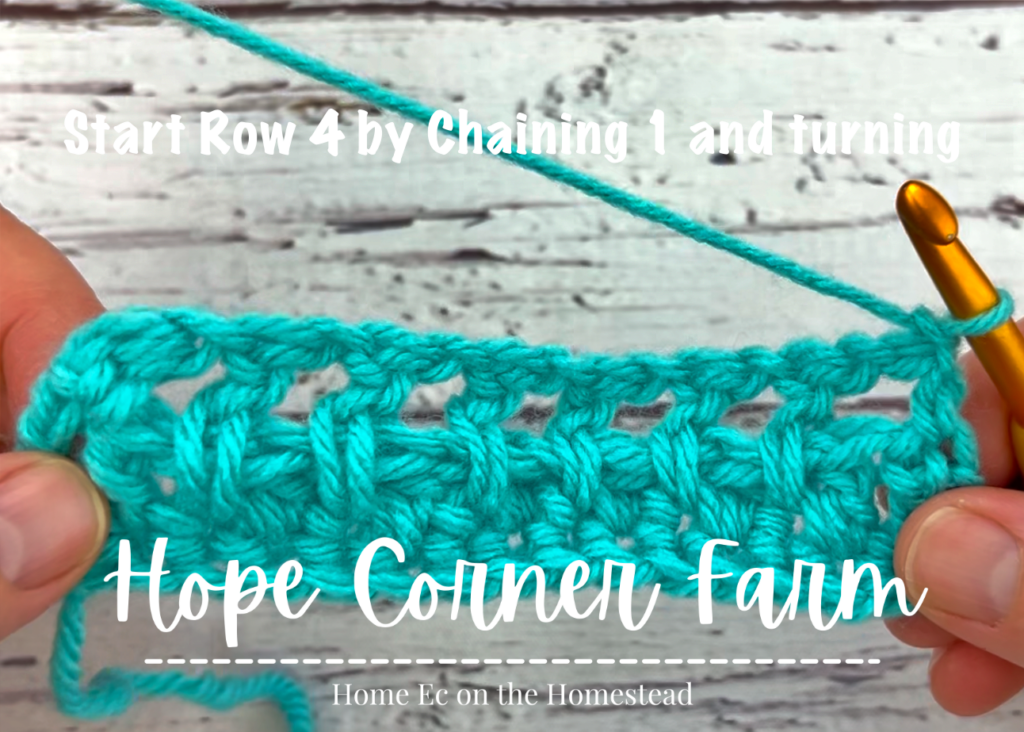
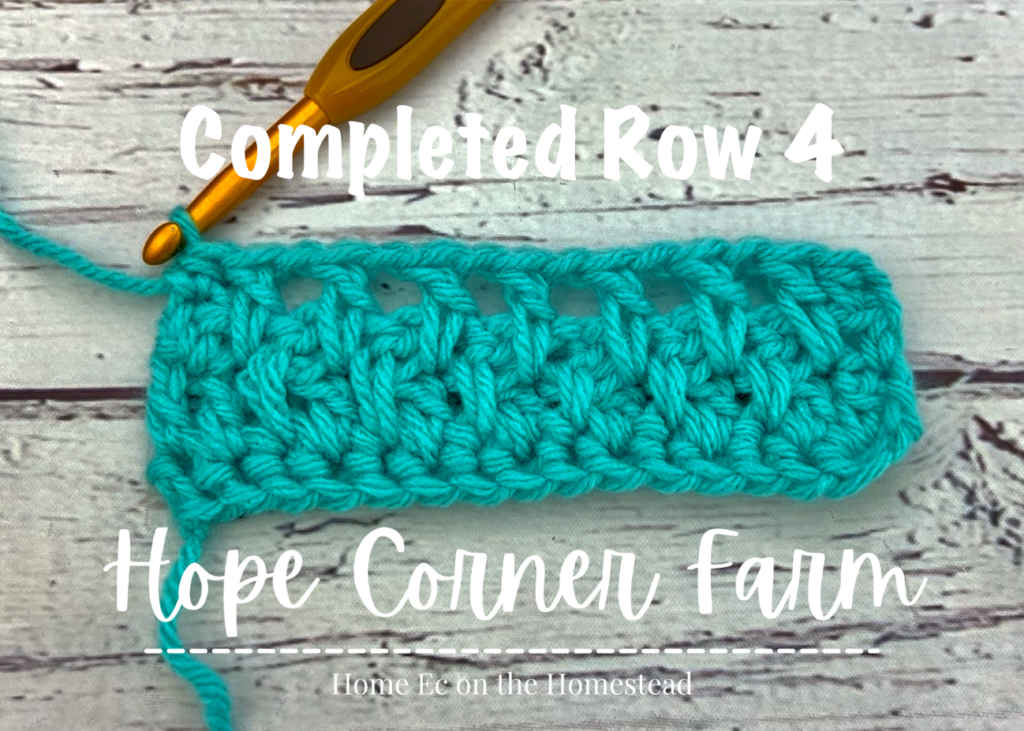
Begin Row 4 by chaining 1 and turning your work. Work a HDC into the same stitch. Immediately loosely DC into the skipped stitch from the previous row. (Chain 1 and then skip the next stitch. DC in skipped stitch from previous row) across. HDC in last.
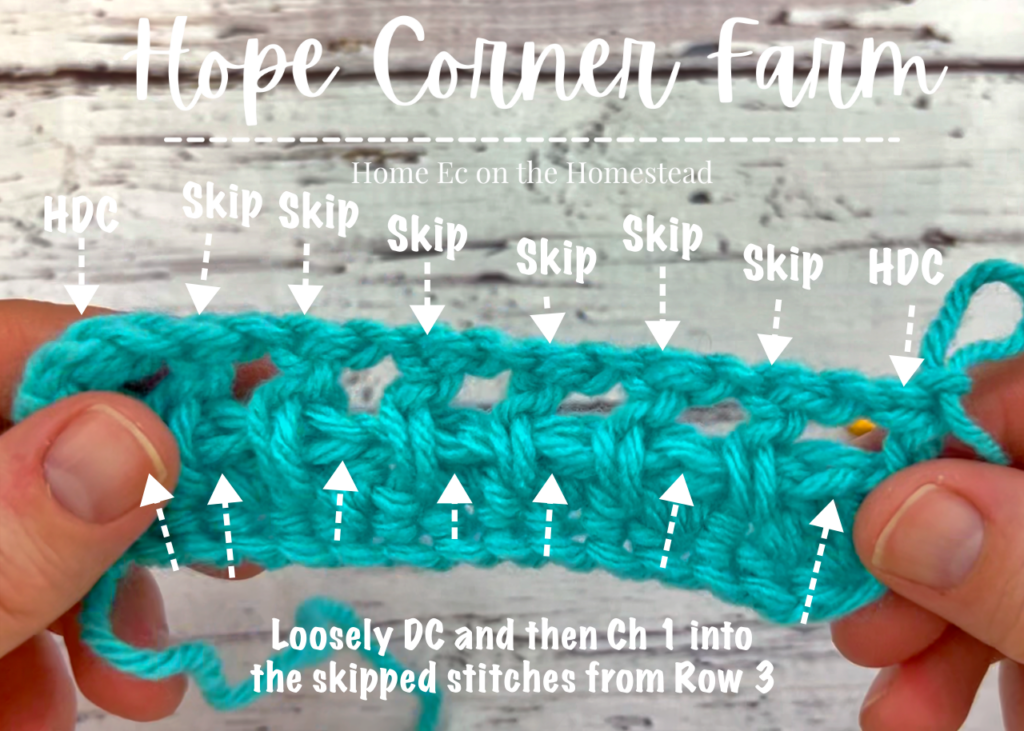
Photo Tutorial – Row 4:
Now, start by chaining 1 and turning.
Next, HDC in the first stitch.
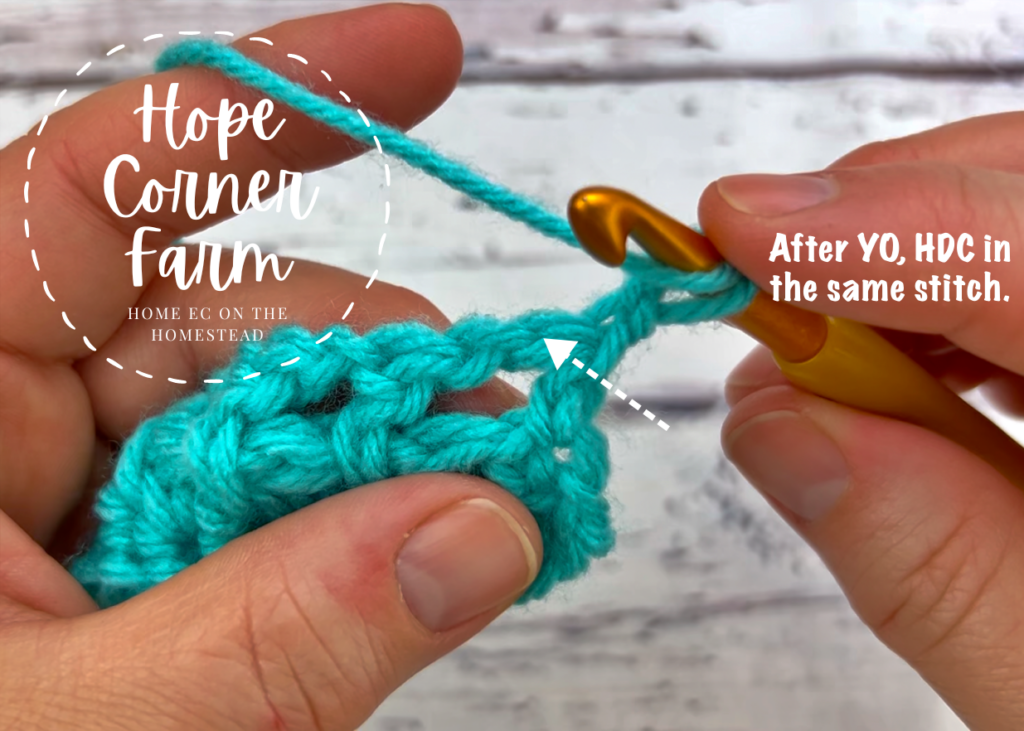
Now, immediately DC (loosely) into the skipped stitch from the previous row.
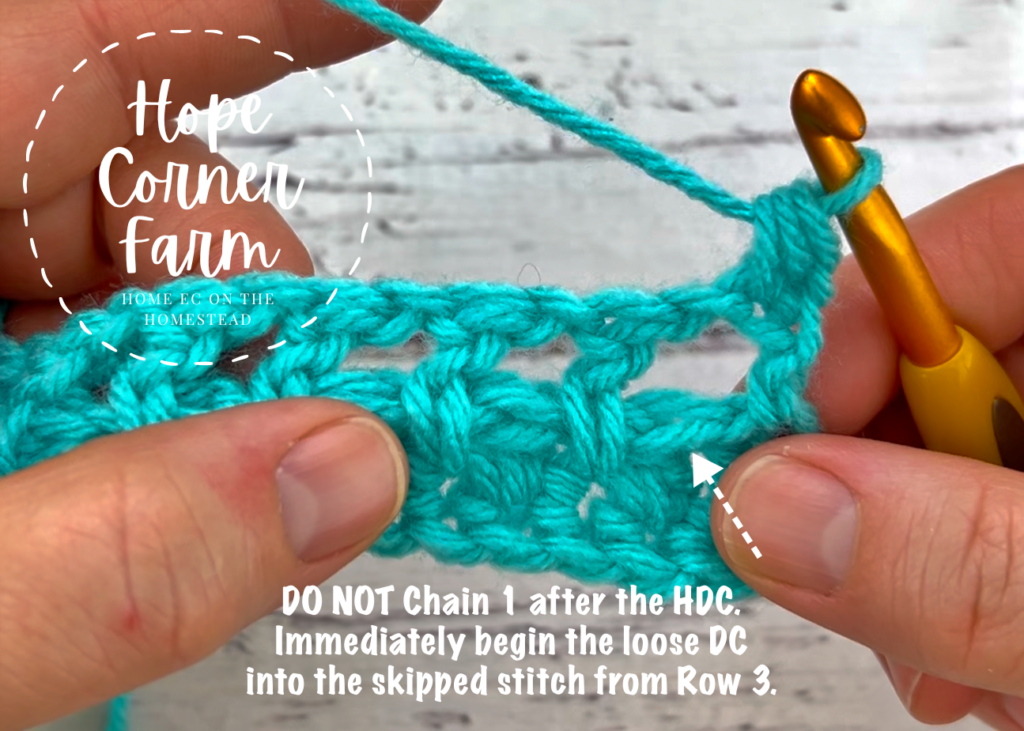
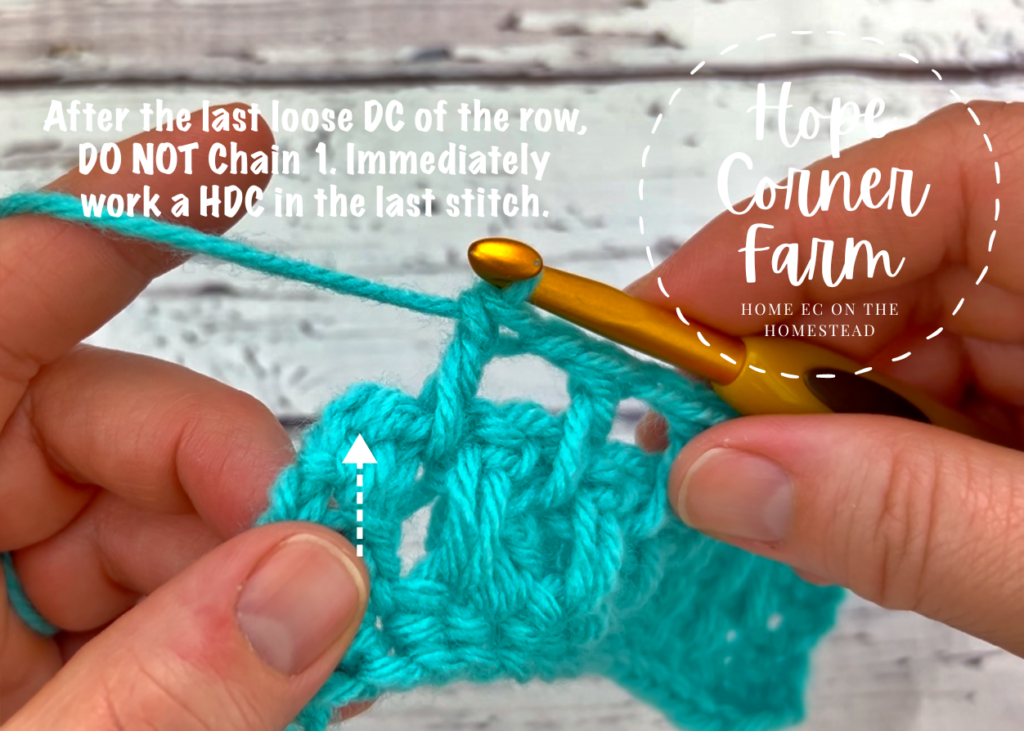
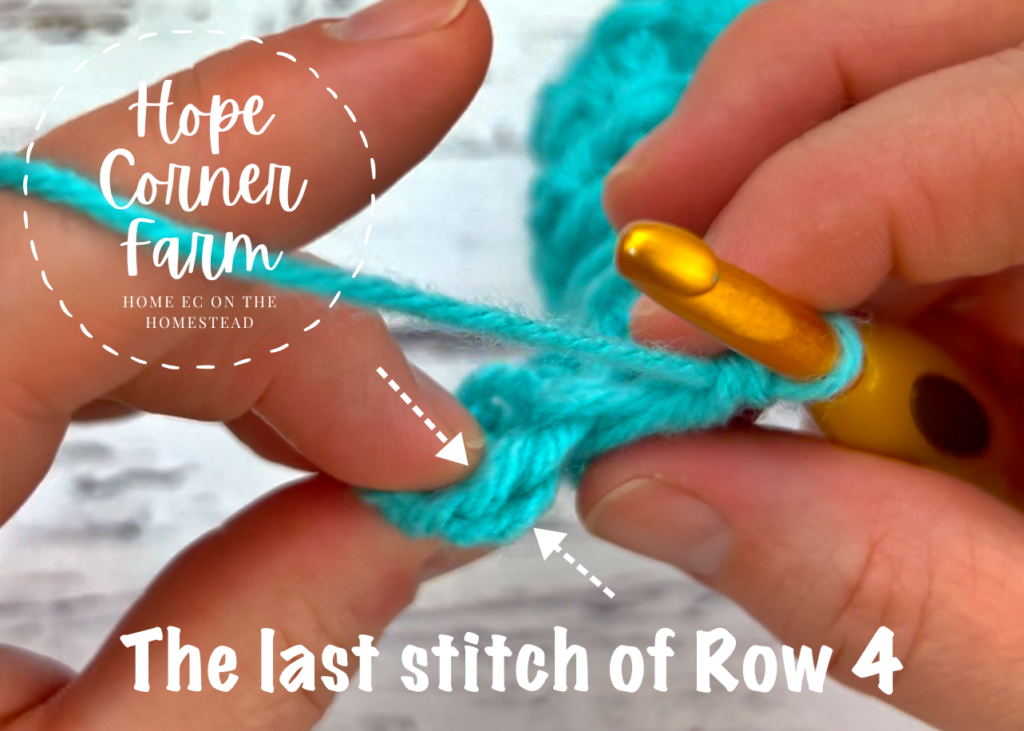
Next you will (Chain 1 and skip the next stitch and then DC loosely into the skipped stitch from the last row) across the row until there is 1 stitch left. HDC in the last stitch.
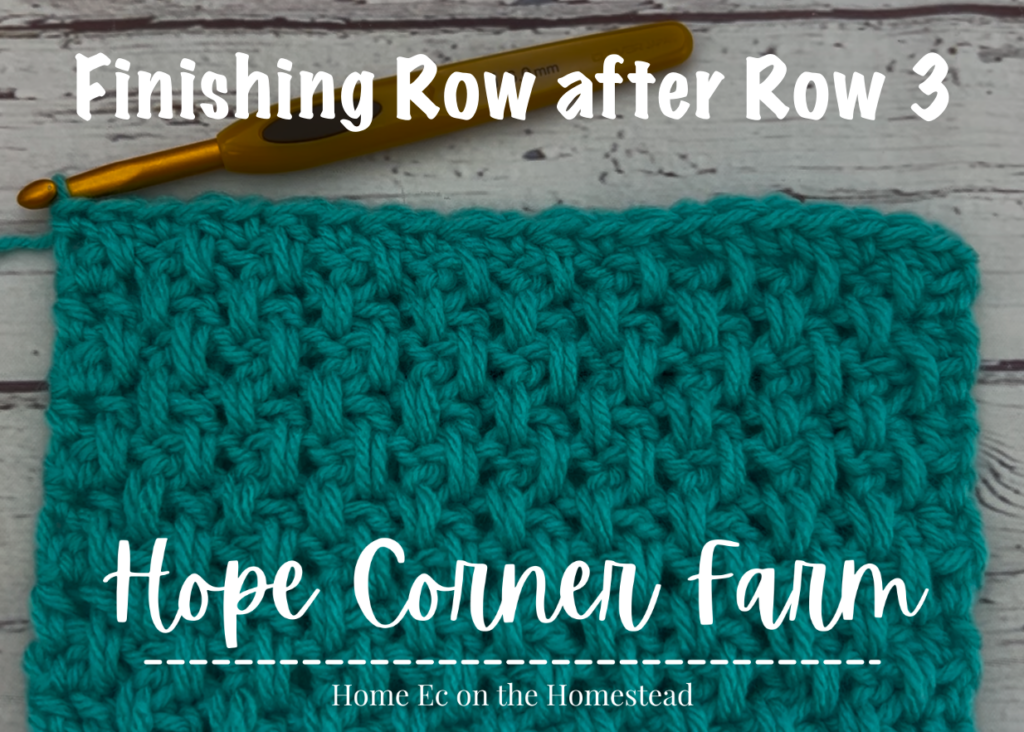
Finishing After Row 3:
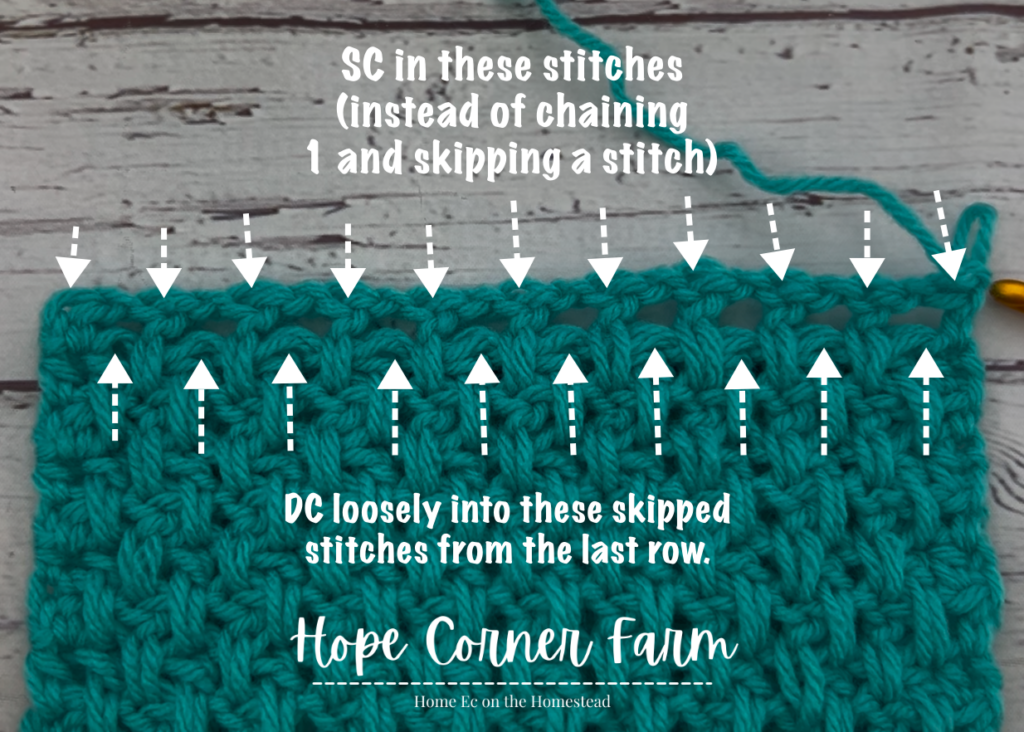
Now, when you are ready to finish the top of your project using the Extended Moss Crochet Stitch, this row is worked a little differently.
Firstly keep in mind that instead of chaining 1 and skipping a stitch, you instead single crochet.
Start by chaining 1 and turning. Place a SC in the first stitch. Loosely DC into the skipped stitch from the last row (make sure to enclose the chain 1 from the last row). (Single Crochet in next, loosely DC into the skipped stitch from the last row) across until there is 1 stitch left. SC in last.
Extended Moss Stitch in Crochet – Finishing After Row 4:
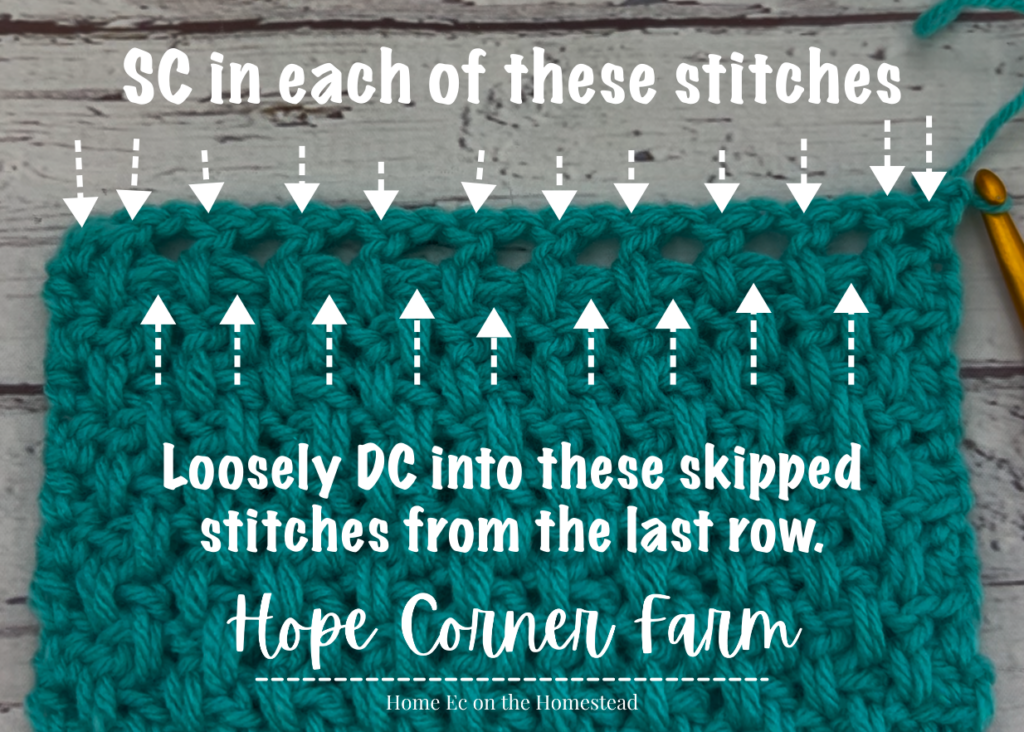
Now, to finish after Row 4, it is the same idea. Instead of chaining 1 and skipping a stitch, you place a single crochet stitch.
Firstly chain 1 and turn. Place a single crochet stitch in each of the first 2 stitches. (DC loosely into the skipped stitch from the last row. Single crochet in next) across until there are 2 stitches left. Place a single crochet in each of the last 2 stitches.
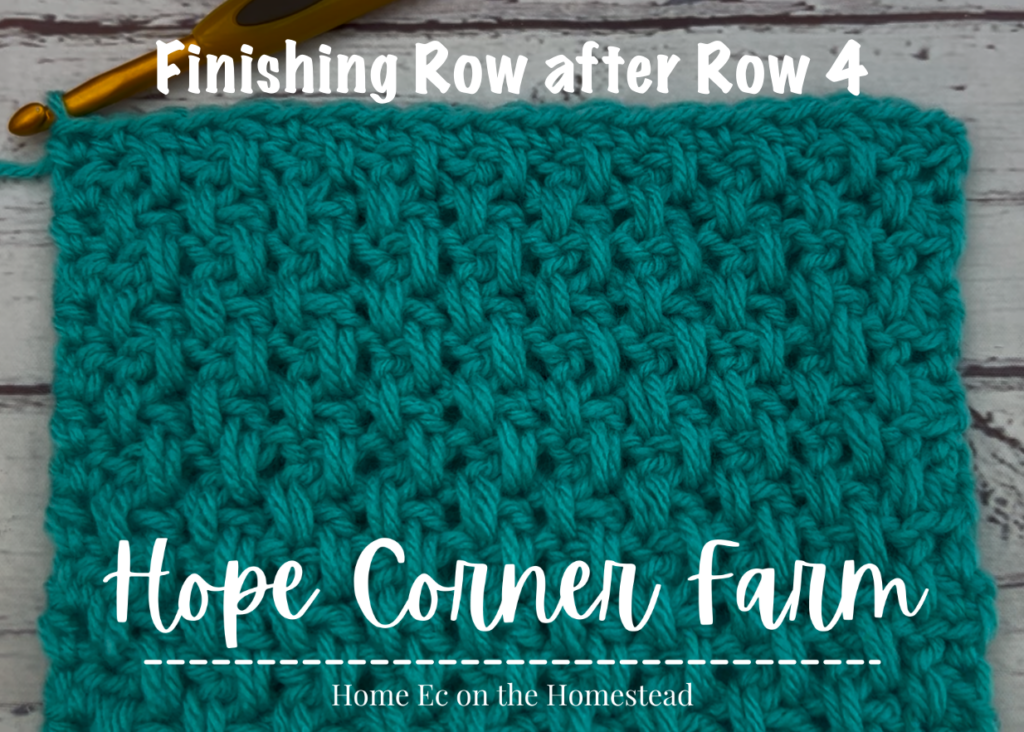
Row of Single Crochet Stitches:
Lastly, I like to put a row of single crochet stitches across the top of the work AFTER completing the finishing row. This is a total personal preference, but I like how it looks. To do this, start by chaining 1 and turning. Place one SC in each stitch across.
Tip for Success:
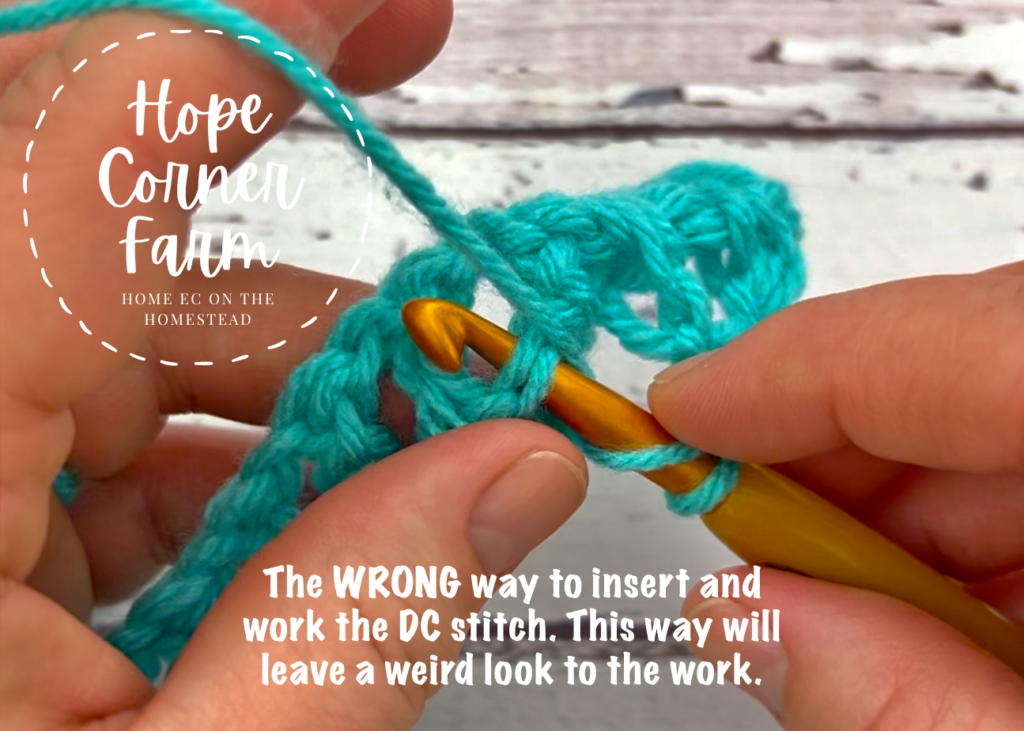
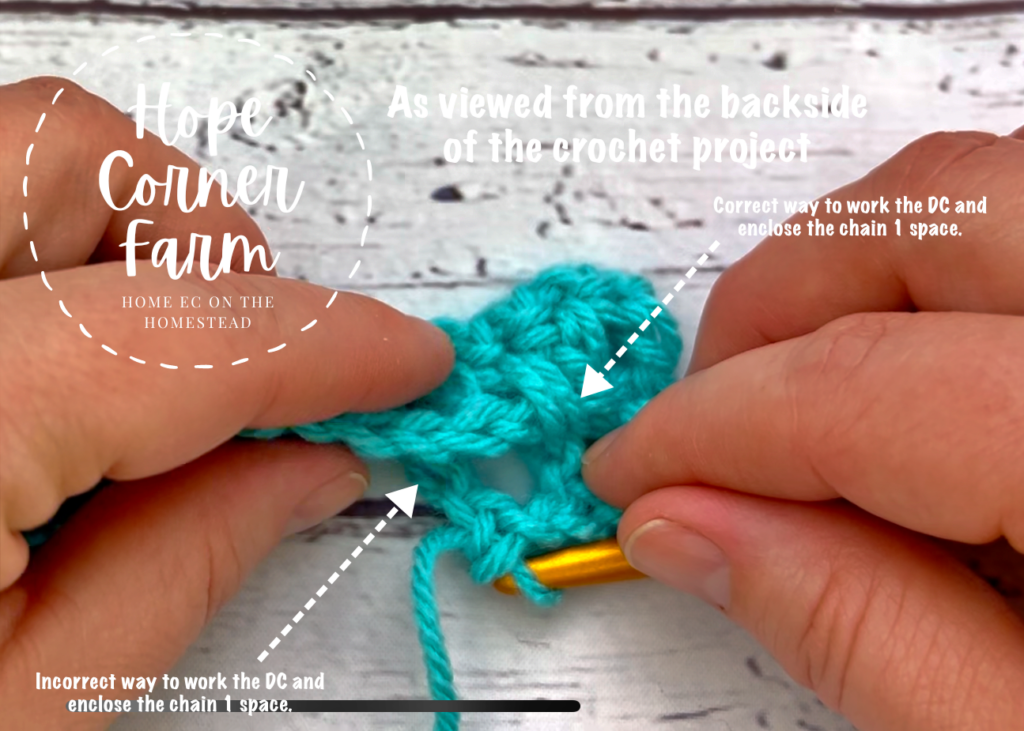
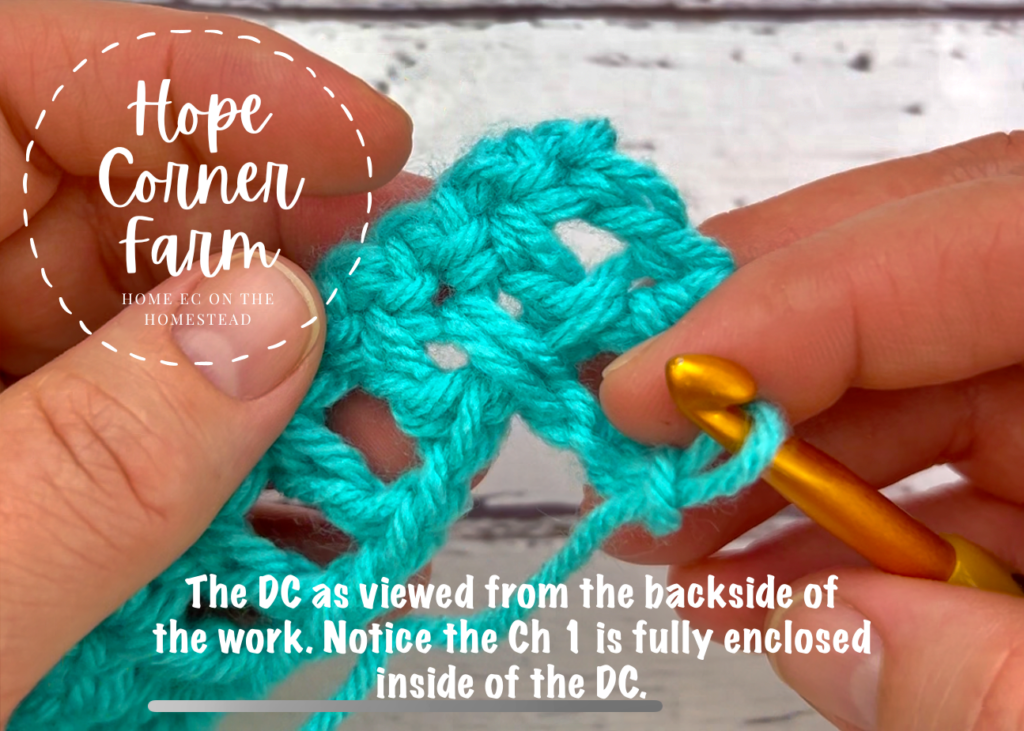
Finally, one of the keys to success for this crochet stitch is making sure that we are fully enclosing the chain 1 stitch from the previous rows inside of the double crochet stitch. If that chain 1 is not enclosed, we will end up with a weird 2-row looking top, instead of a nice thick stitch that looks the same on both sides. See the photos below.
Video Tutorial for How to Extended Moss Stitch in Crochet:
Written Instructions Only:
First start by EITHER Foundation Single Crochet Stitching an ODD number OR chaining and EVEN number and then placing a single crochet in the second chain from the hook. SC in each remaining chain. Either version counts as ROW 1.
Row 2:
Now start by chaining 1 and turning. DC in the same stitch. (DC in next, chain 1, skip next) across until there are 3 stitches (including the skipped stitch) left. DC in the last 2 stitches.
Row 3:
Next begin by chaining 1 and turning. HDC in the same stitch. Chain 1. Loosely DC (fully enclosing the chain 1 from the last row) into the skipped stitch from the previous row. Chain 1, skip the next. (DC into the skipped stitch from the last row, chain 1, skip next) across until there is 1 stitch remaining (after the skipped stitch). HDC in last.
Row 4:
Now chain 1 and turn. HDC in the same. Loosely DC (enclosing the chain 1 from the last row) into the skipped stitch from the last row. (Chain 1, skip next, loosely DC into skipped) across the row until there is 1 stitch left. HDC in last.
Finishing After Row 3:
Next, chain 1 and turn. SC in same. Loosely DC in the skipped stitch from the previous row. (SC in next, loosely DC into skipped stitch from last row) across the row. SC in last.
Finishing After Row 4:
Now, chain 1 and turn. SC in the first 2 stitches. (DC loosely into the skipped stitch from the last row, SC in next) across the row. SC in last.
Row of Single Crochets:
Lastly, I like to put a row of single crochet stitches after the finishing row. This is a total person preference, but I like how it looks. To do this, chain 1, and turn. Place one single crochet stitch in each stitch across.
Many Blessings,

Looking for more crochet fun? Check these out!
Crochet Puff Granny Square from Hope Corner Farm
How to Crochet the Cluster Stitch in Crochet from Hope Corner Farm
Free and Easy Crochet Headband Pattern – The Sweetgrass from Hope Corner Farm


