Half Square Triangle Rag Quilt
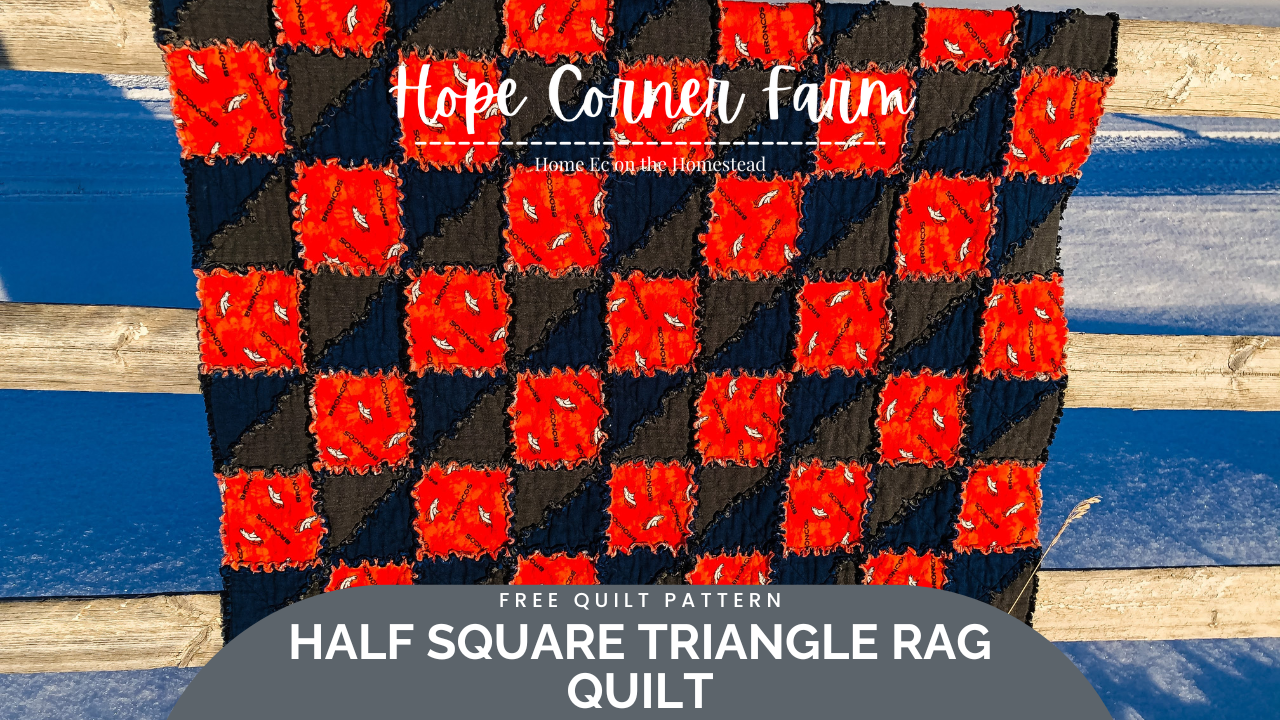
We love rag quilts in our house, but finding different styled patterns for a rag quilt can be difficult! When I decided to make gifts from the heart last Christmas I came up with this pattern. I am sharing the tutorial with you today. It is simple to make and cute to look at! The Half Square Triangle Rag Quilt is sure to be a favorite!

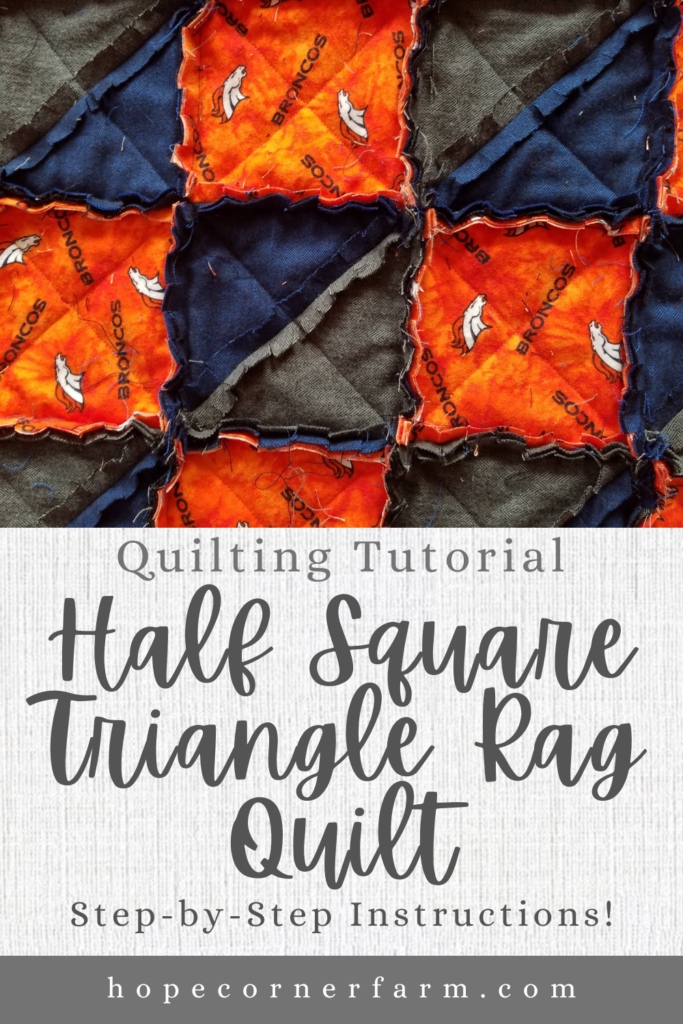
Finished Size:
43″ x 63″
Now it is important to note that this quilt is child-sized, so if you want it wider, simply add more rows. If you want it longer, add more blocks to the rows.
Materials Needed:
4 yards Main Fabric (the Denver Broncos fabric in my quilt)
2 yards Color #2 (the navy blue herringbone fabric in my quilt)
2 yards Color #3 (the gray herringbone fabric in my quilt)
3-4 yards of cotton batting (depending on the width of the batting)
Matching thread(s)
Rotary cutter
6″ x 24″ quilter’s ruler
6.5″ x 6.5″ quilter’s square
9.5″ x 9.5″ quilter’s square
Scissors
6″ x 6″ Squares Needed:
118 – Main Fabric (Denver Broncos in mine)
27 – Color #1 (navy in mine)
31 – Color #2 (gray in mine)
7″ x 7″ Squares Needed:
Next, we will sew these together to create the Half Square Triangles (this happens AFTER cutting them into 7″ squares).
29 – Color #1 (navy in mine)
29 – Color #2 (gray in mine)
5″ x 5″ Batting Squares Needed:
Finally, EACH square in the quilt needs batting in it!
Next, cut 117 – 5″ x 5″ batting squares
Cutting the Main Color Squares:
Now cut 118 of the 6″ squares of Main Fabric.
To begin, make sure to straighten the fabric and get a nice straight edge to cut from – this is key to accurate cutting! See this video for instructions.
After securing a straight edge, cut 6″ strips the width of the fabric (usually 42″ – 44″ in width). See this video for instructions.
Next, cut the 6″ x 42″/44″ strip into 6″ squares (there are 6 squares cut from each strip).
When cutting the squares, make sure that the square it truly square.
Cutting the Color #1 & Color #2 Backing Squares:
Now we need to cut the following 6″ x 6″ squares:
27 of Color #1 (navy in my quilt)
31 of Color #2 (gray in my quilt)
Repeat the steps from the Main Color 6″ x 6″ strips:
1.) Straighten one side of the fabric.
2.) After securing a straight edge, cut 6″ strips of fabric the width (most quilting fabrics are 42″ – 44″ in width) of the fabric (see video).
Now for Color #1 cut FIVE 6″ strips.
Next for Color #2 cut SIX 6″ strips.
3.) From one side, cut off the selvage edge.
4.) Cut the 6″ strip of fabric into 6″ squares
Cutting the 7″ Squares for the Half Square Triangles:
Now the Half Square Triangles are constructed from 7″ x 7″ squares. Cut the following number of squares from each color:
29 from Color #1 (navy)
29 from Color #2 (gray)
Cutting the 7″ squares is exactly like the 6″ squares, only the strips and the squares are cut at 7″ instead of 6″.
1.) Straighten one side of the fabric.
2.) After securing a straight edge, cut 7″ strips of fabric the width (most quilting fabrics are 42″ – 44″ in width) of the fabric.
Now for Color #1, cut FIVE 7″ strips.
Next for Color #2, cut FIVE 7″ strips.
3.) From one side, cut off the selvage edge.
4.) Cut the 6″ strip of fabric into 7″ squares.
Cutting the 5″ x 5″ Batting Squares:
First secure a straight edge to cut from (same steps as the fabric squares).
Next cut a 5″ strip the width of the batting.
Finally cut the 5″ strip into 5″ squares of batting.
Remember, this quilt requires 117 of the 5″ x 5″ batting squares.
Creating the Half Square Triangles:
Now for EACH Half Square Triangle (HST), ONE Color #1 and ONE Color #2 square (7″ x 7″) are needed.
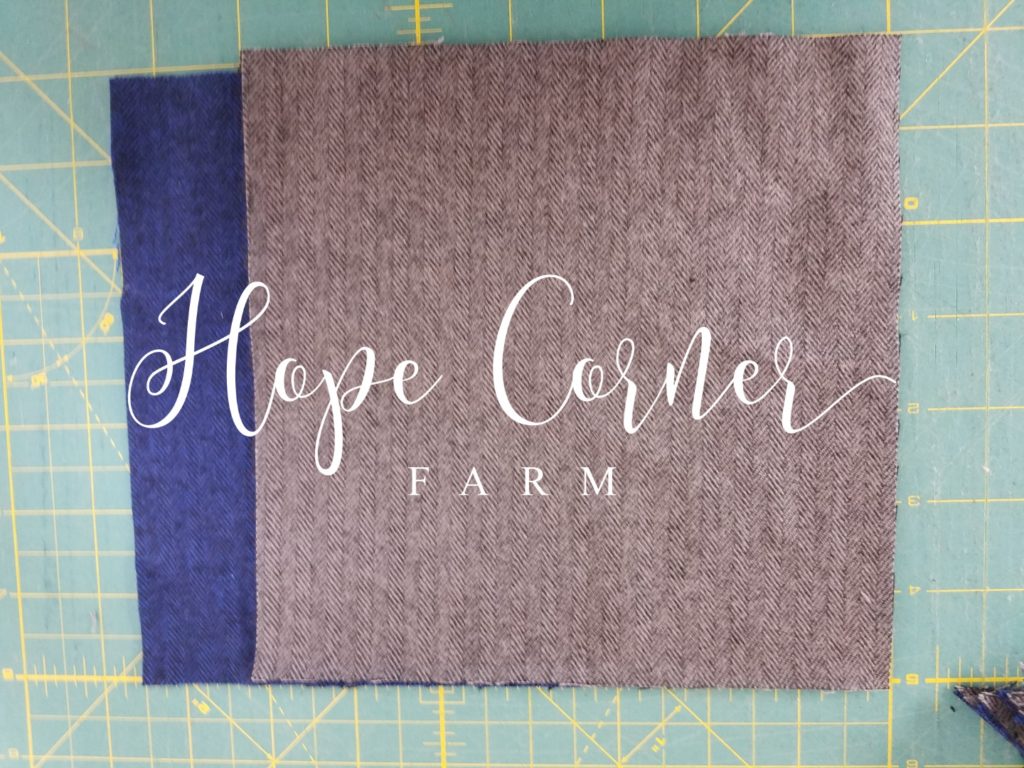
First on one of the blocks (I used the gray because the lines will show up better) mark lines 1/2″ to each side of the diagonal.
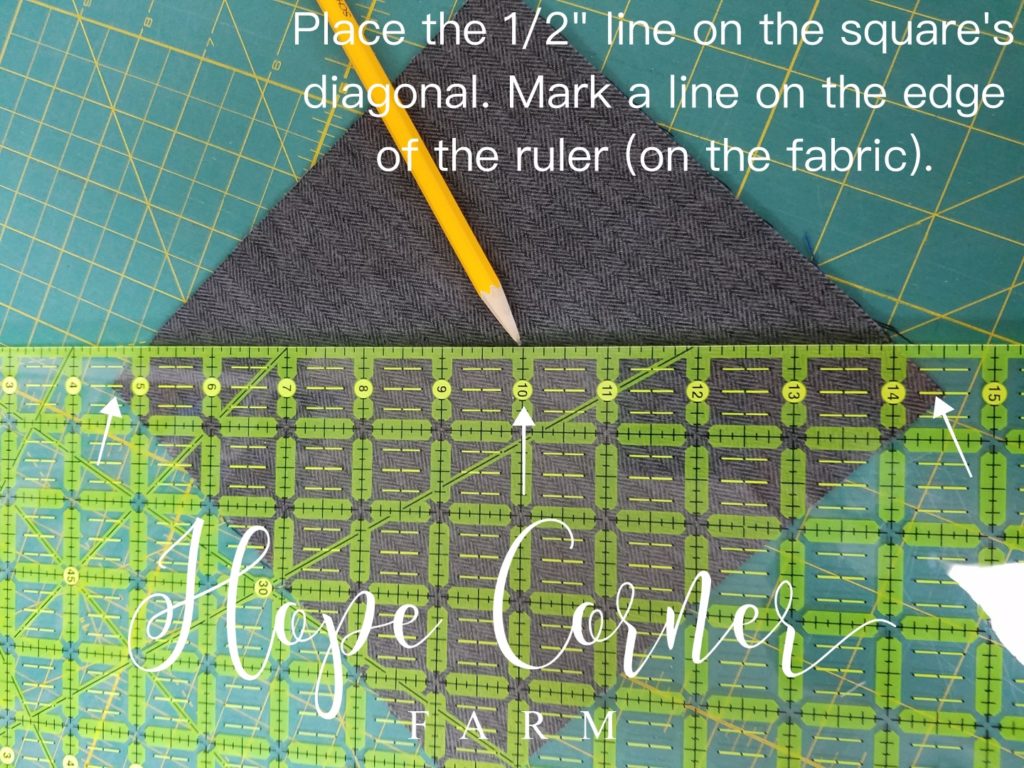
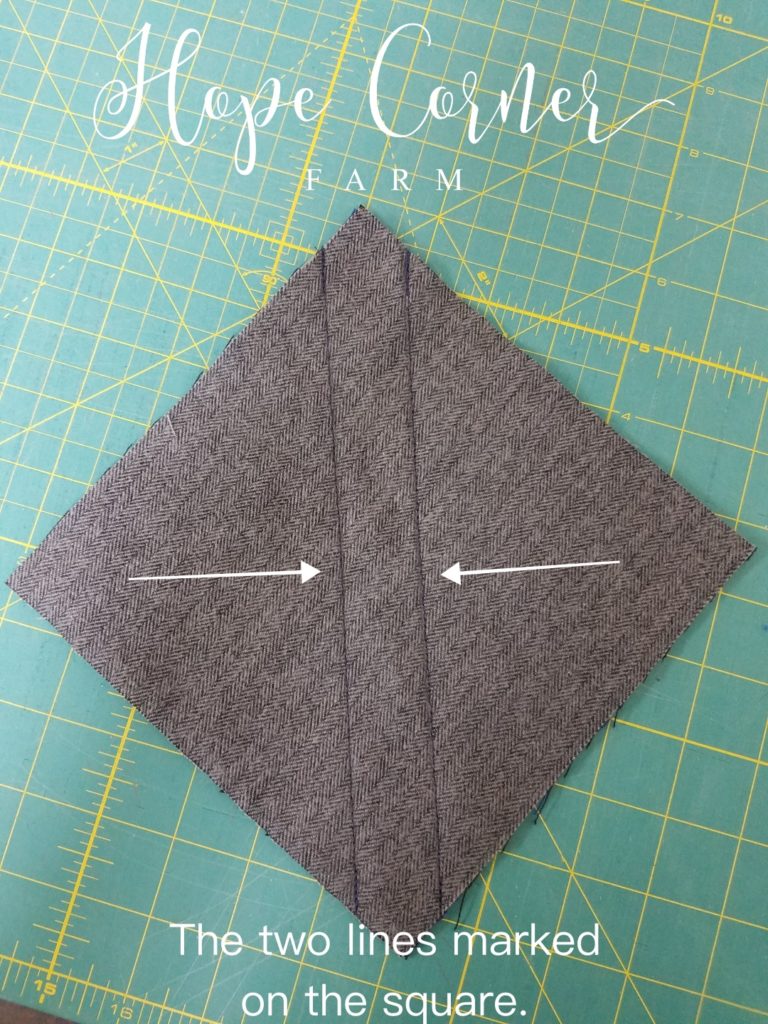
Now place the Color #1 square directly underneath the Color #2 square. Match up all of the sides. Pin the blocks together to ensure that they do not move when sewing them together.
NOTE: My Color #1 and Color #2 fabrics have a direction in their pattern. I had to make sure that the squares had the direction going in the same way for ALL of my HST blocks.
Next sew directly on top of EACH of the marked lines. Remember to backstitch at the start and stop of each line (4 backstitches in total). This keeps the block from falling apart.
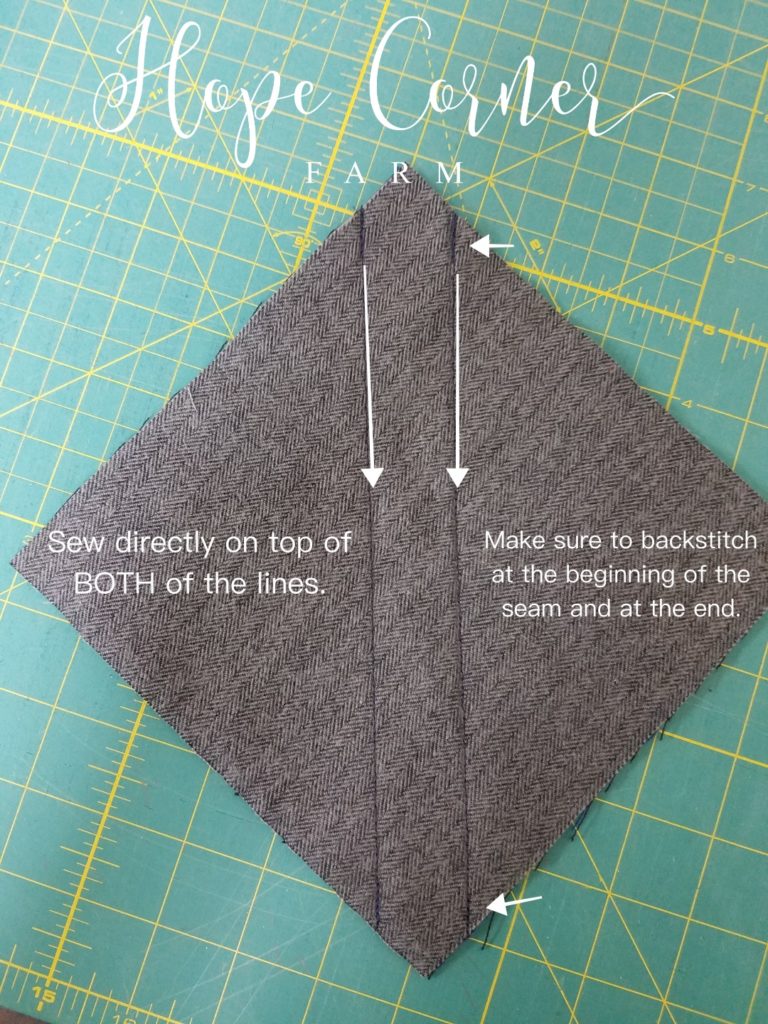
Now sew BOTH lines, then place the 6″ x 24″ quilter’s ruler directly on the diagonal.
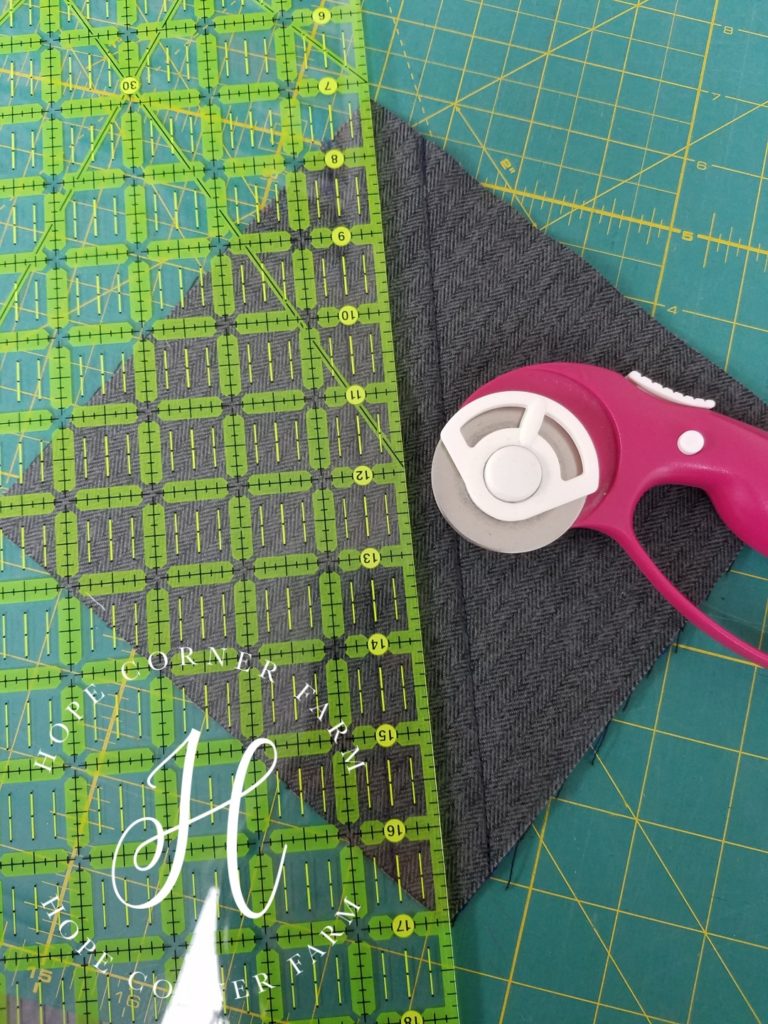
Next using a rotary cutter, cut the block in half down the diagonal.
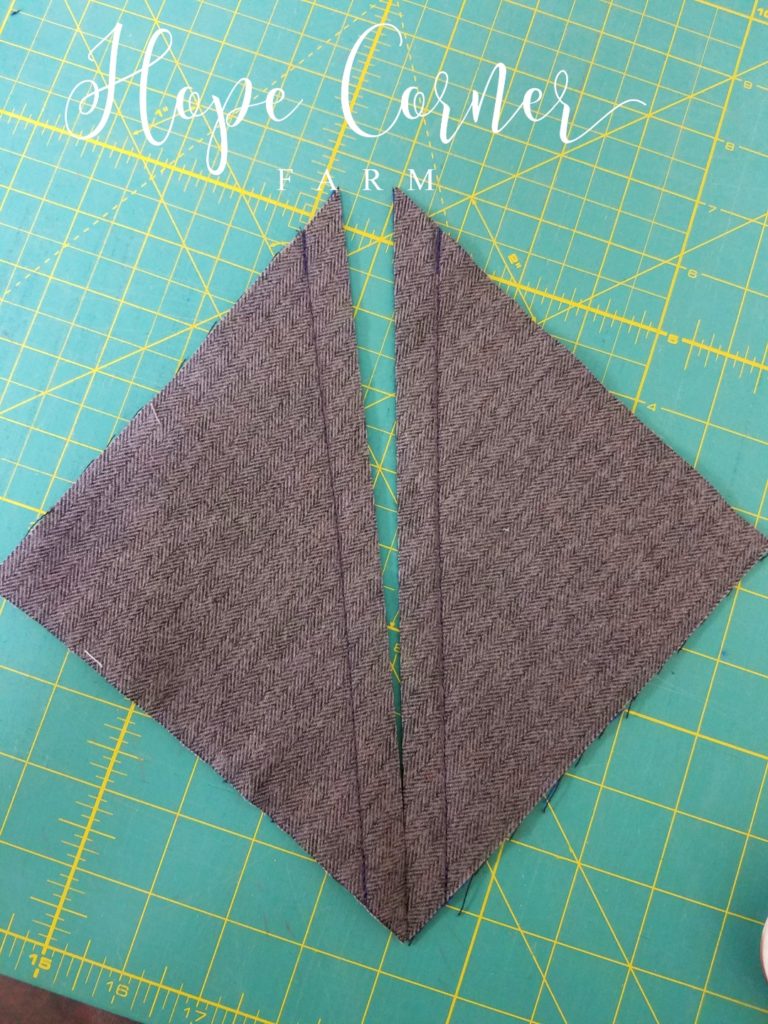
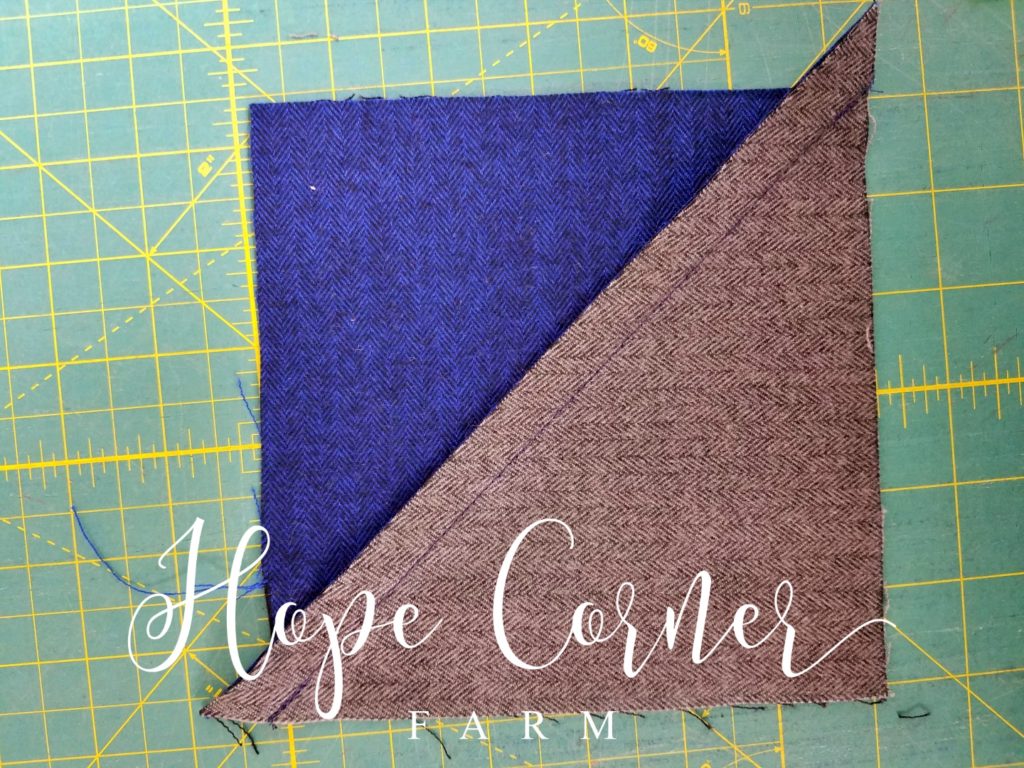
Now the Half Square Triangle looks like this before trimming:
Squaring up the Half Square Triangle Rag Quilt Block:
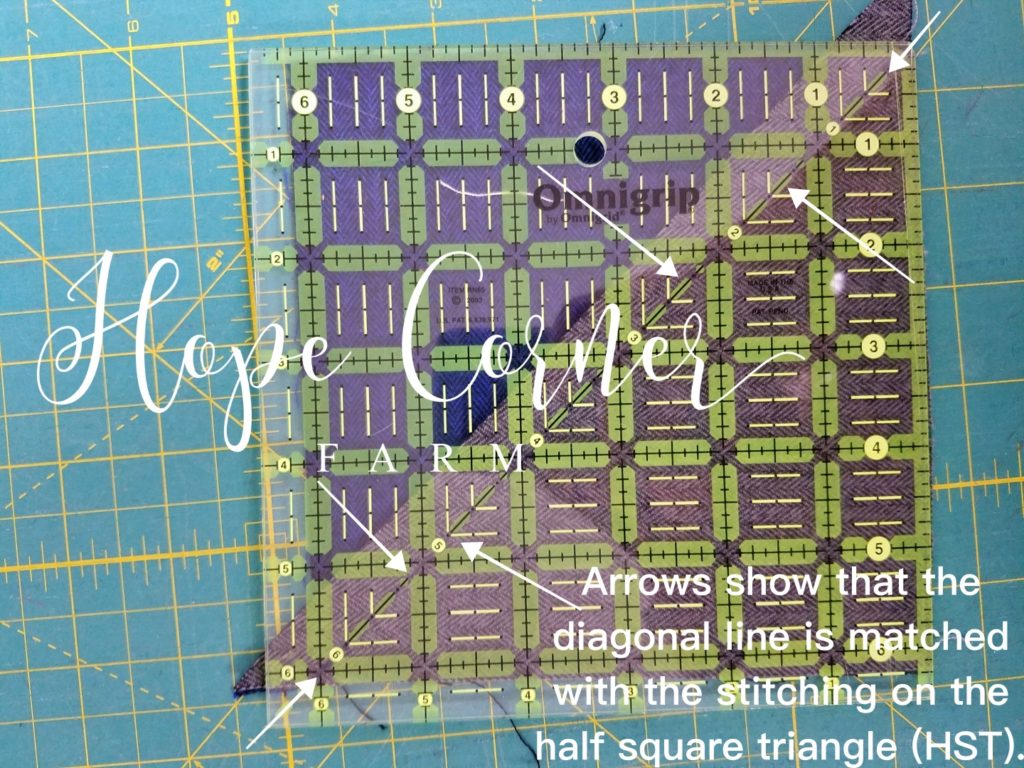
Using the 6.5″ x 6.5″ quilter’s square, square up the HST block. This is done by placing the diagonal line of the square on the diagonal seam/stitching for the HST. See the attached photos for more details.
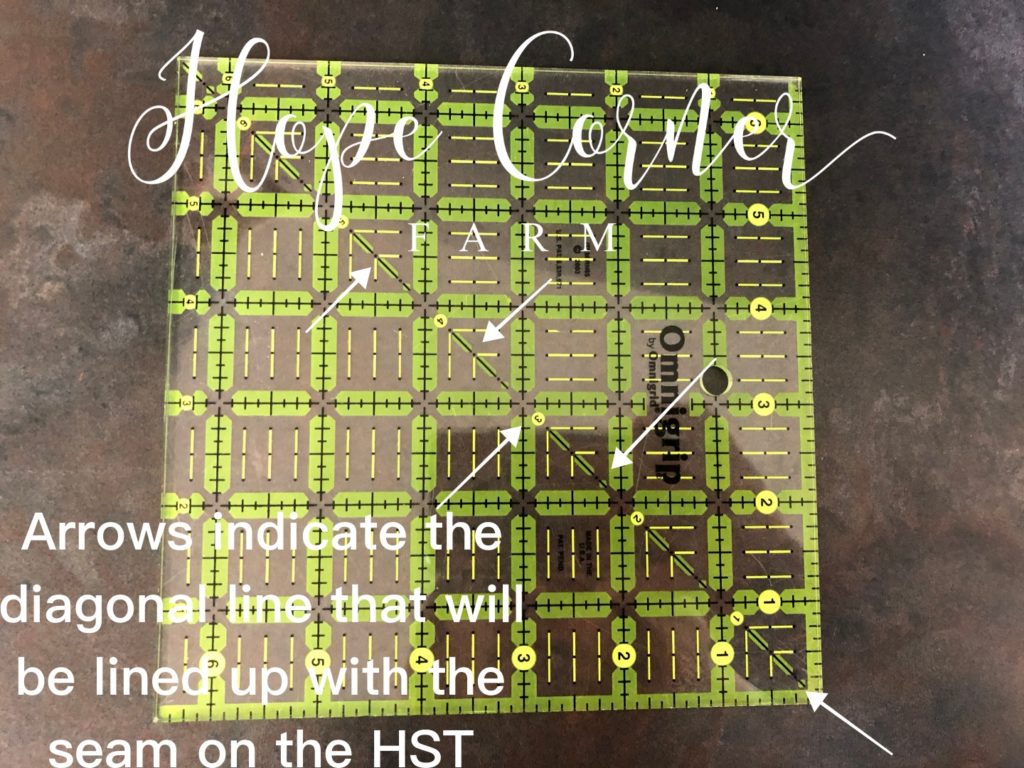
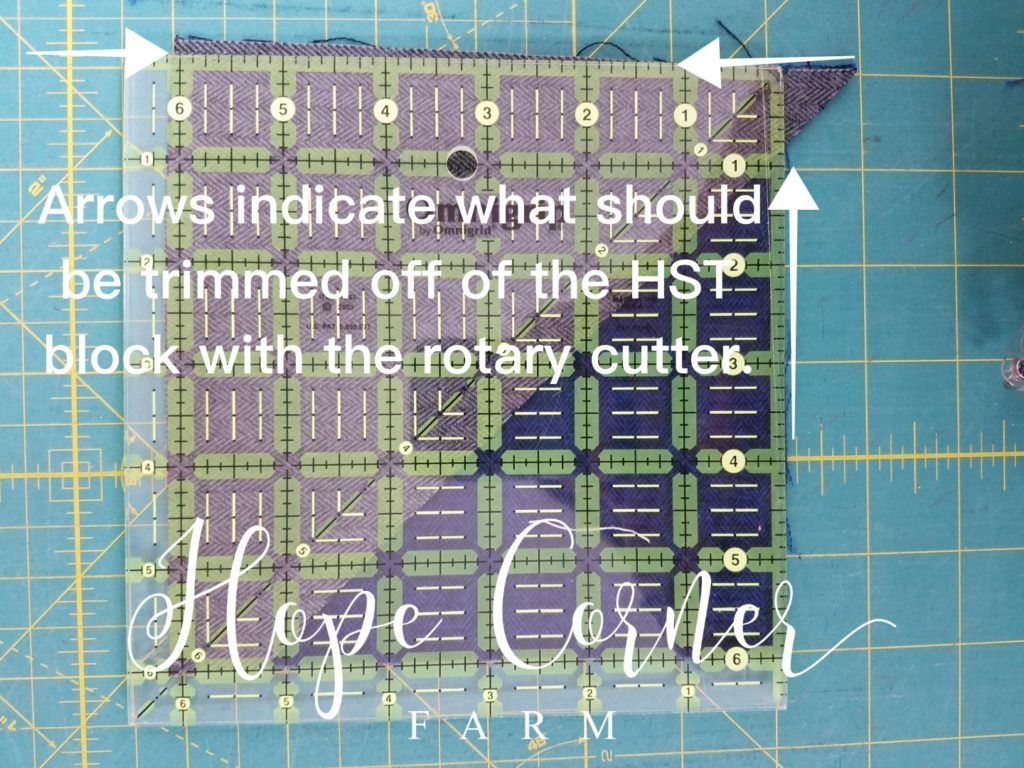
Along with lining up the diagonal line, pick one side to trim first. Trim that side, then move to the next, and so on, until the entire block is trimmed.
Finally, the finished and trimmed square measures 6″ x 6″.
Need to see it created? Check out my tutorial for creating this Half Square Triangle block:
Press the seam of the HST open:
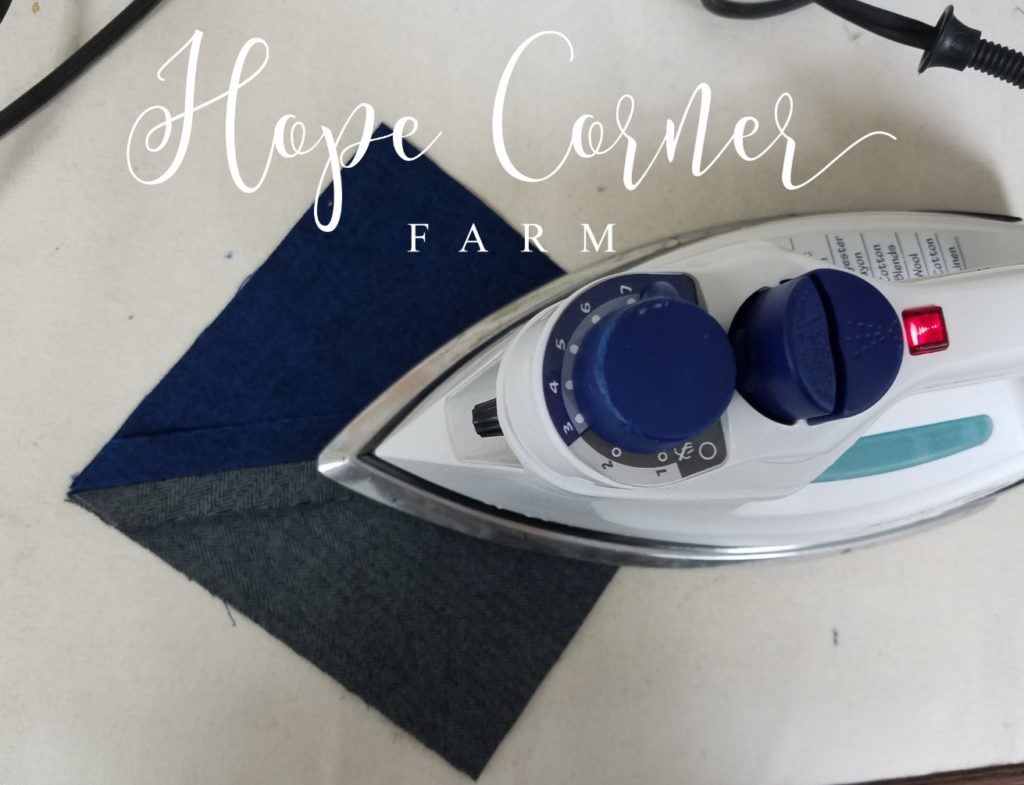
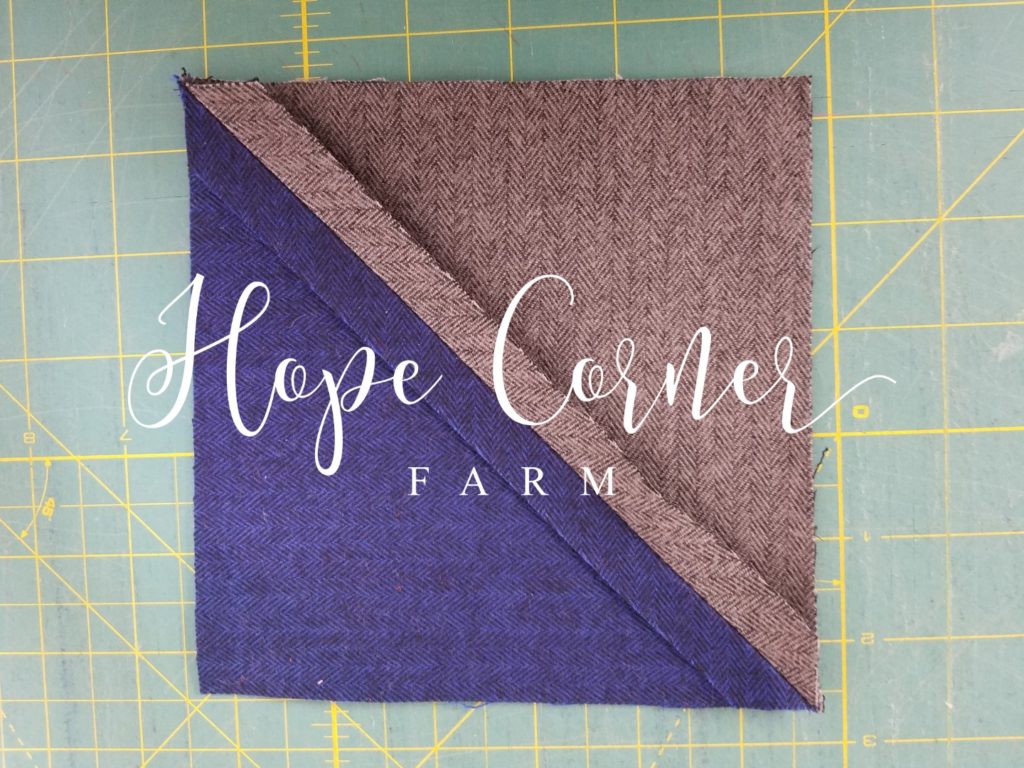
Now repeat this process until there are 58 Half Square triangle blocks. Remember, each set of 7″ squares that are sewn together make TWO Half Square Triangles.
Creating the Main Color Rag Blocks:
Now, take ONE of the Main Color squares and place it right-side down (face down) on the mat.
Next place one of the 5″ squares of batting on top of the Main Color fabric (6″ x 6″) square.
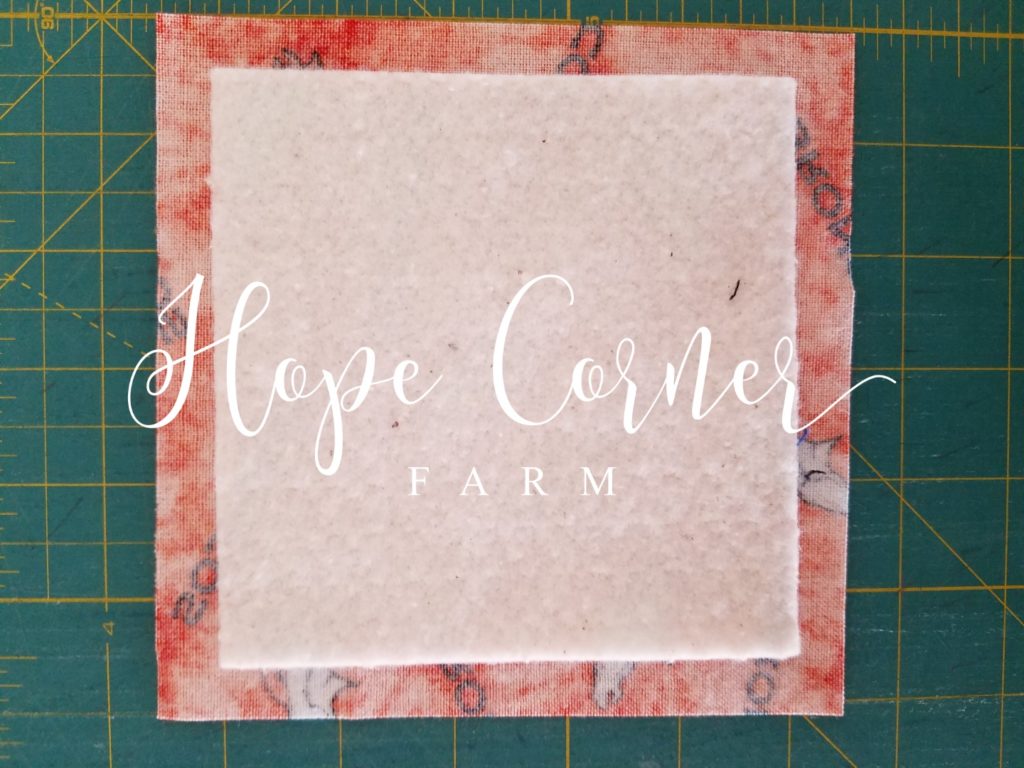
Now place another Main Color square on top of the batting and the other fabric square. Pay attention to lining up all four of the edges!
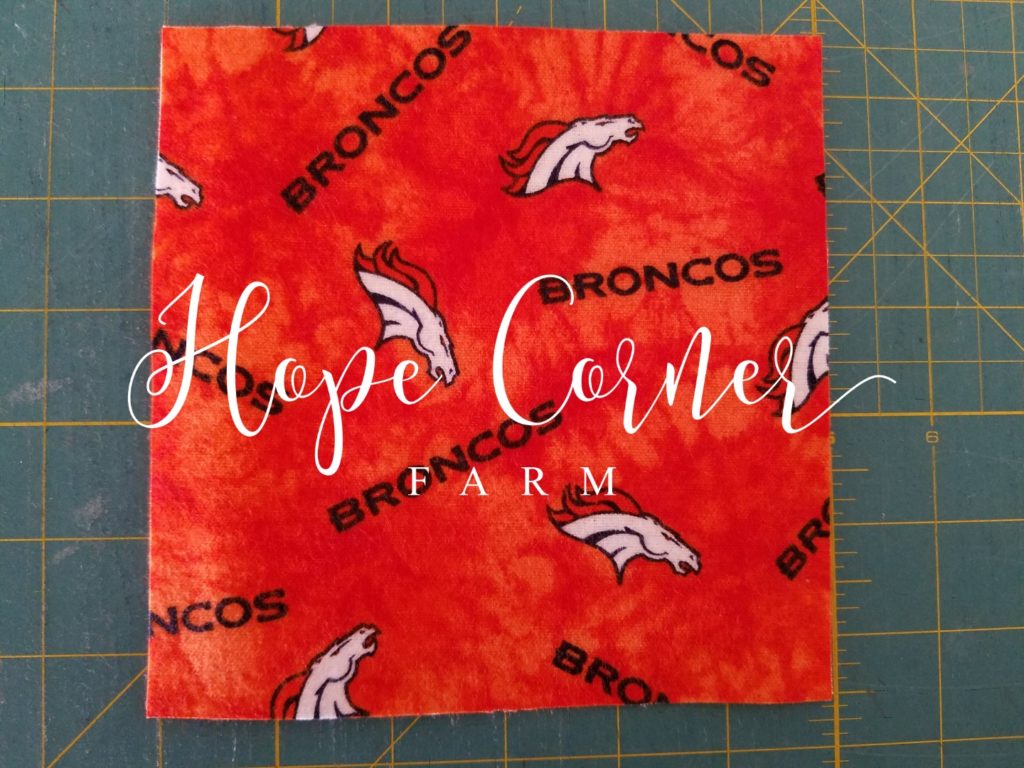
Nex sew an “X” across the block. Start and end EACH seam 1/2″ in from the corners of the block.
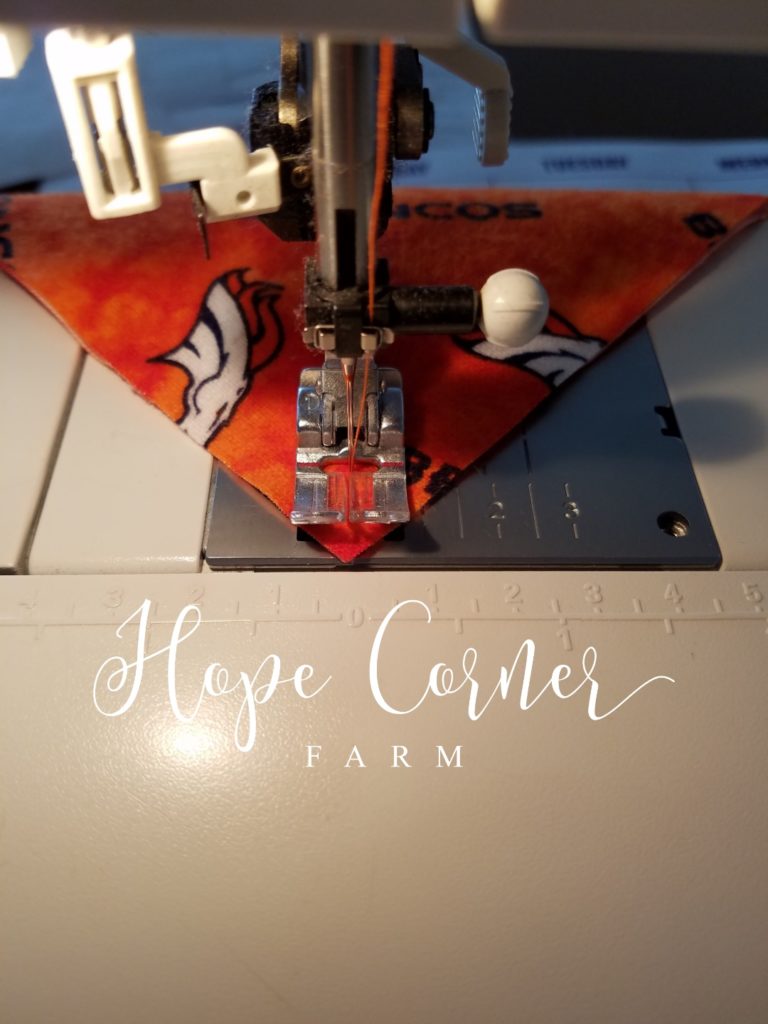
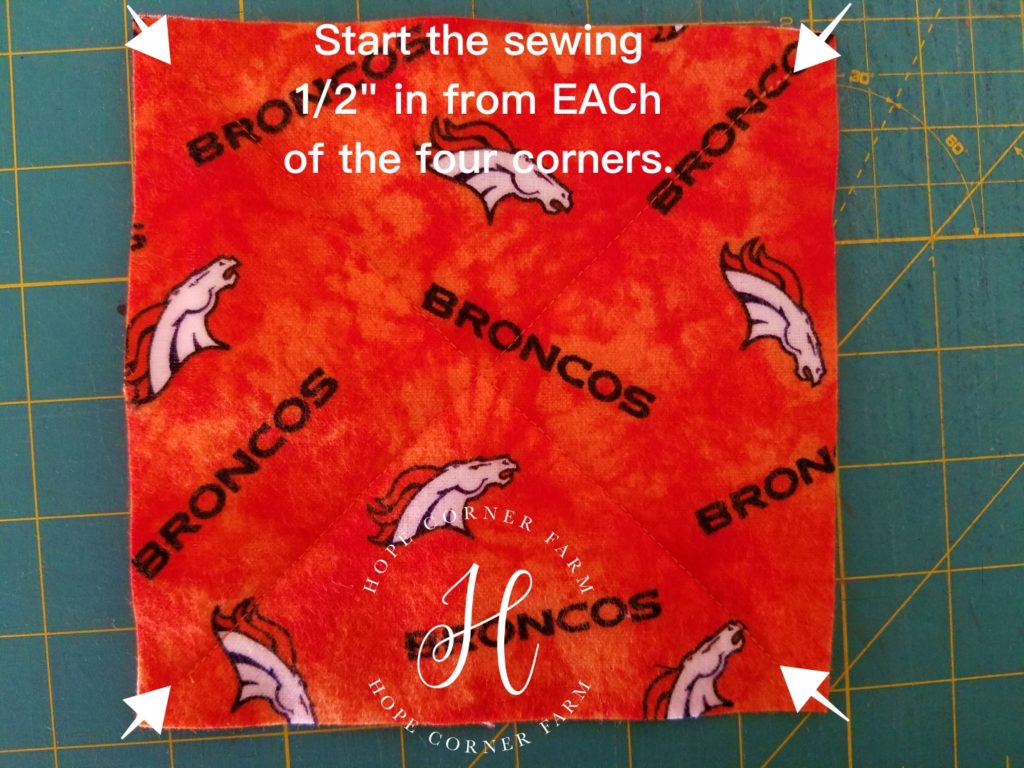
Repeat this process 58 more times until there is a total of 59 Main Color blocks.
Creating the Half Square Triangle Rag Blocks:
Begin by placing ONE of the 6″ Color #1 OR Color #2 squares right-side down on the mat.
Next, place a 5″ square of batting in the middle of the previous square.
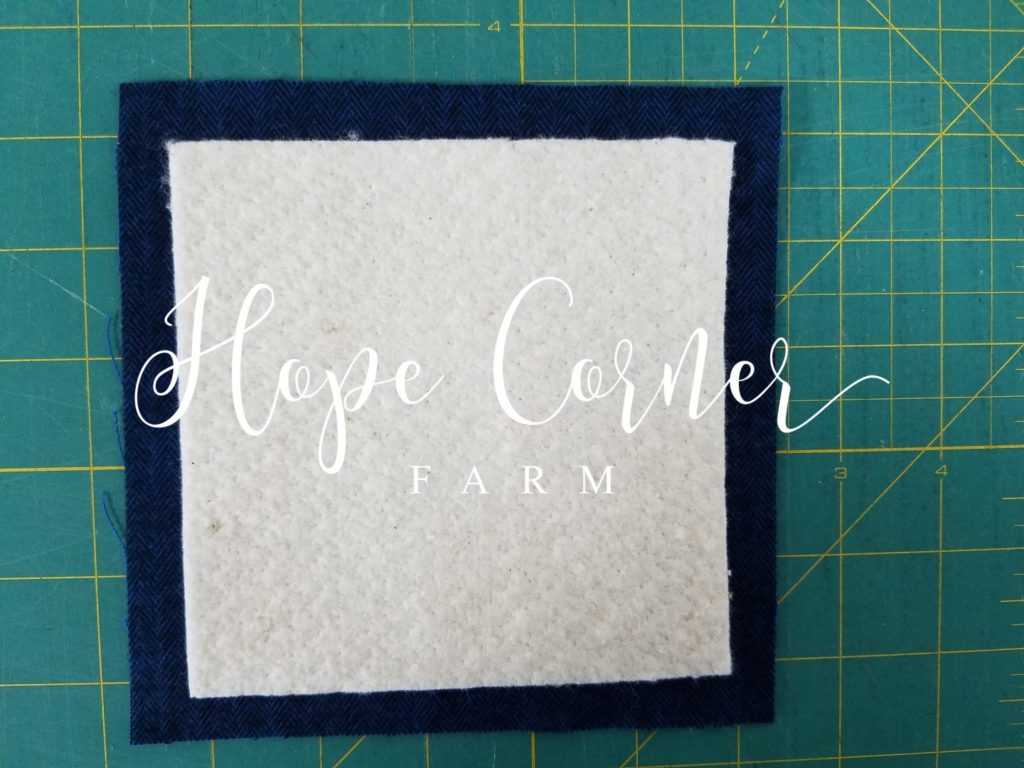
Now place one of the 6″ x 6″ HST squares right-side (face up) on top of the batting square the the solid square. The seam allowance is on the outside of the block (facing out).
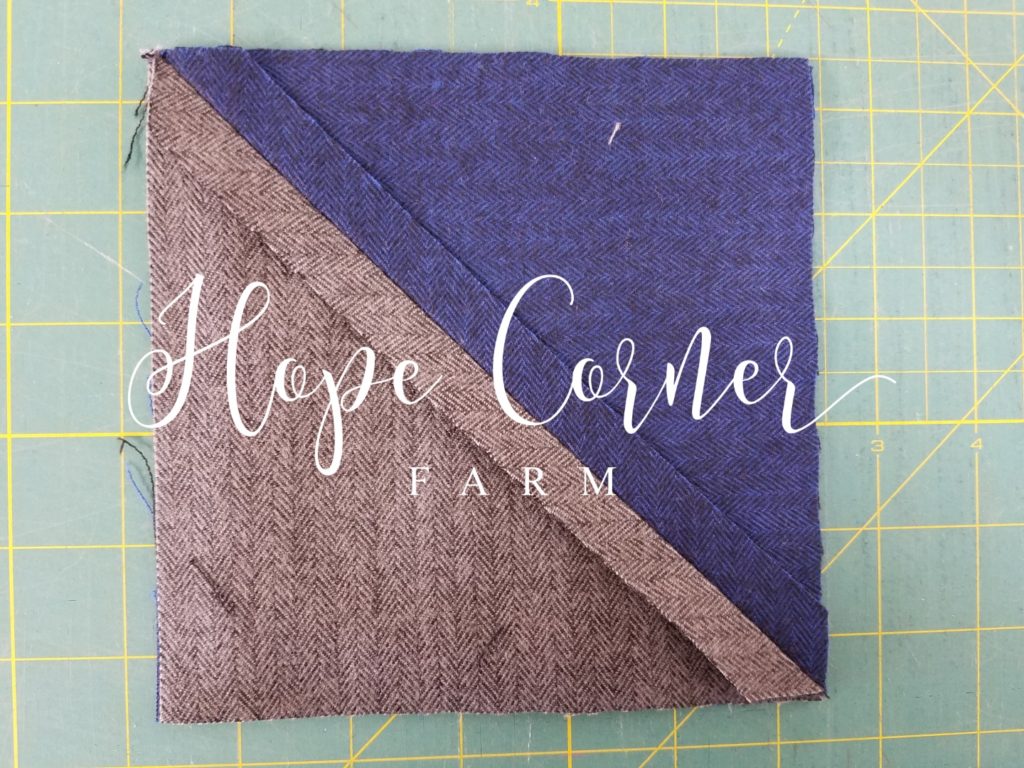
Next wew an “X” on across the block. Remember to start and stop the stitching 1/2″ in from each corner. Sew directly down the seam line.
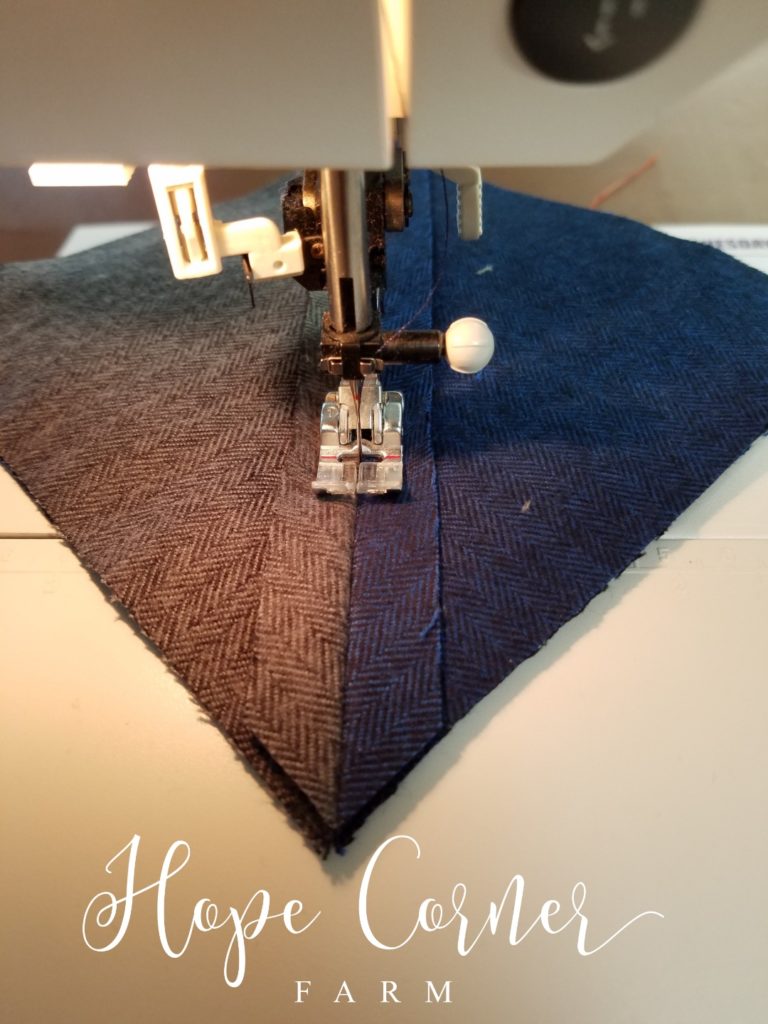

Note that the batting is 1/2″ in from the edge of the fabric. This ensures that the batting doesn’t show in the final product.

Finally, repeat this process 57 more times. There is a total of 58 of these “sandwiches.”
YouTube Tutorial for Creating the “Sandwich Blocks”:
The Block Sandwiches:
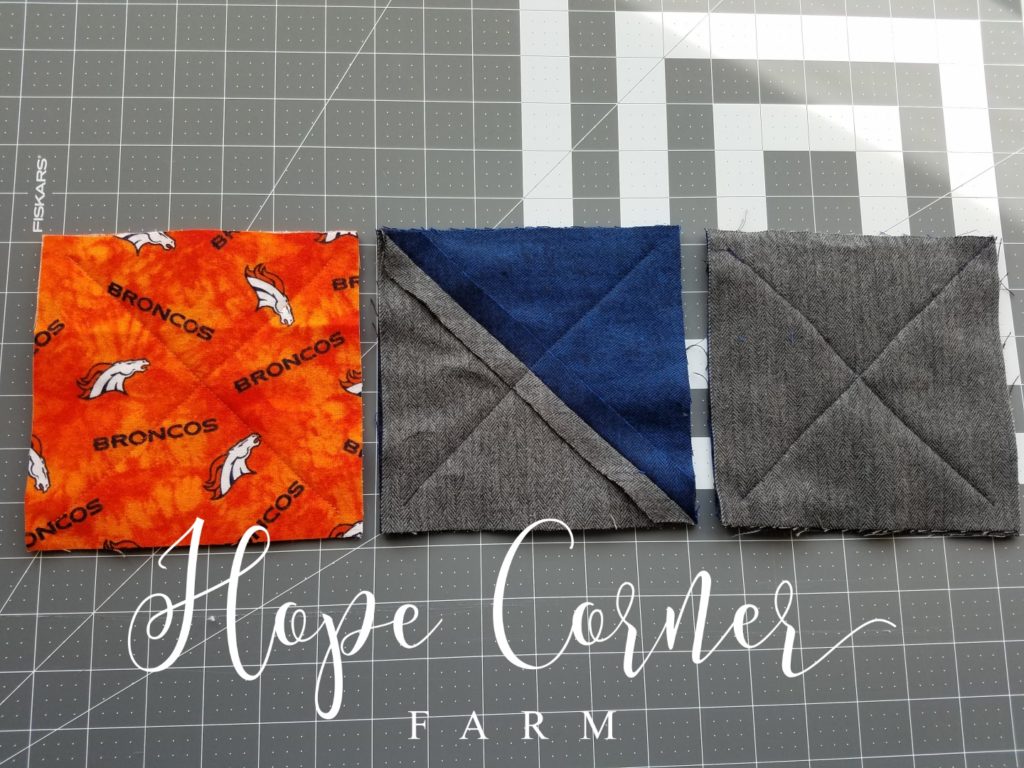
Row 1 Construction – Half Square Triangle Rag Quilt:
For this row, there are the following number of blocks:
Main Color sandwich blocks: 7
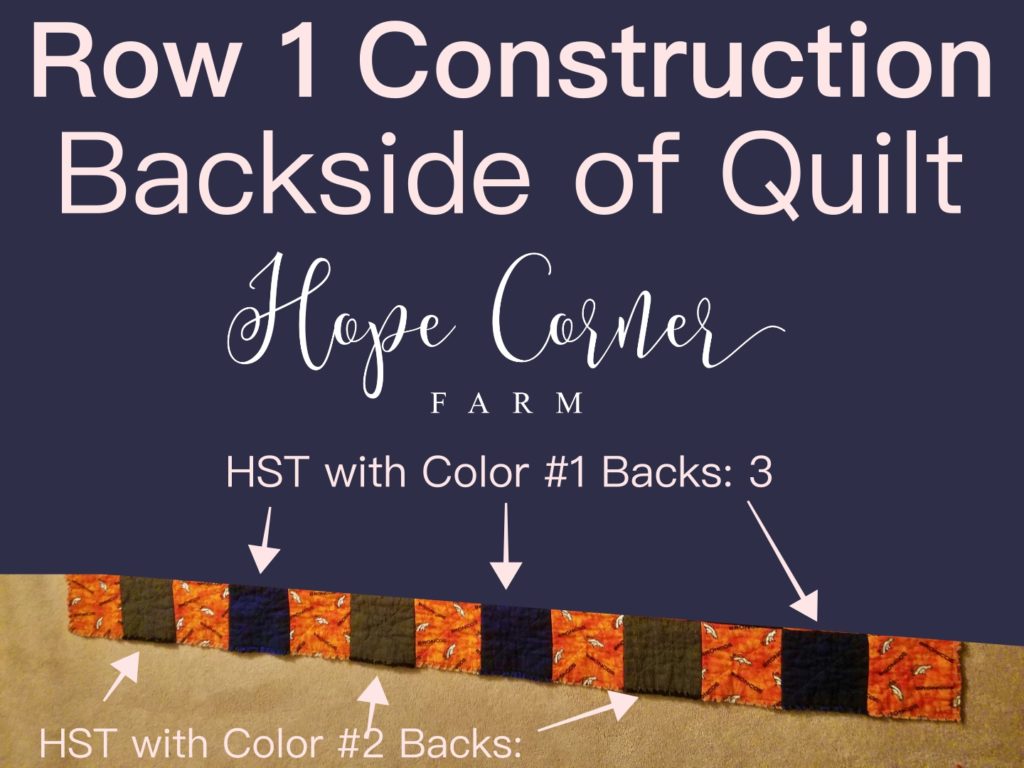
Half Square Triangle sandwich blocks with Color #1 back: 3
Half Square Triangle Sandwich blocks with Color #2 back: 3
THERE ARE A TOTAL OF 13 BLOCK “SANDWICHES” USED FOR THIS ROW!
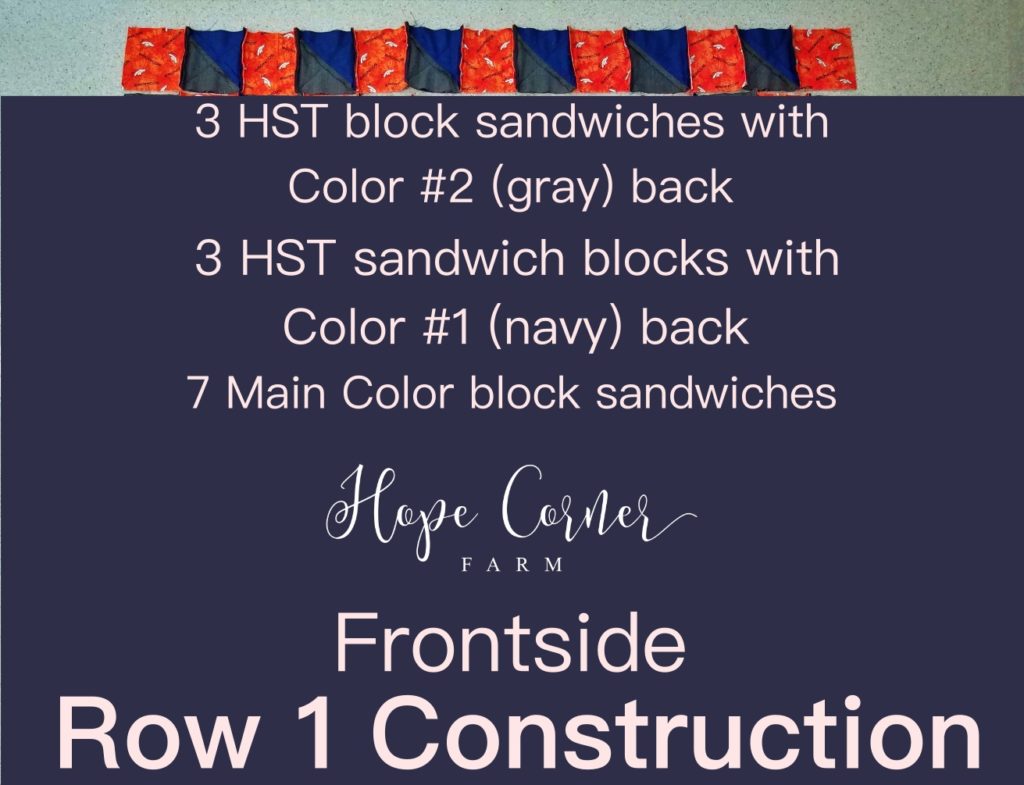
Begin by sewing ONE Main Color block to ONE Half Square Triangle block. Sew them together using a half inch seam allowance.
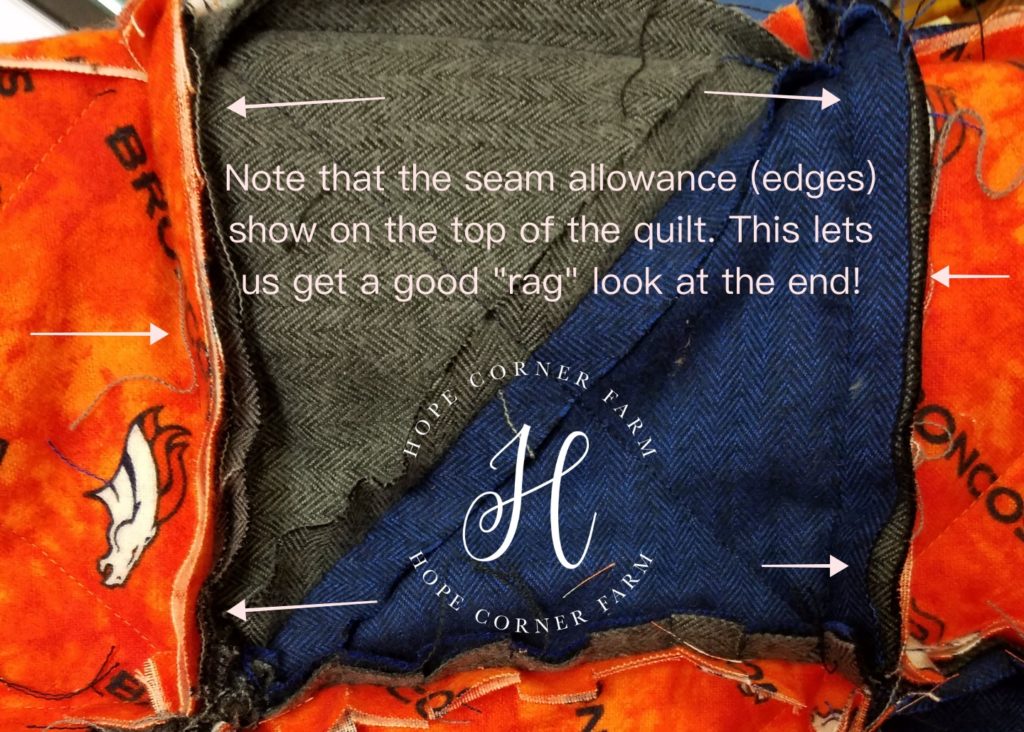
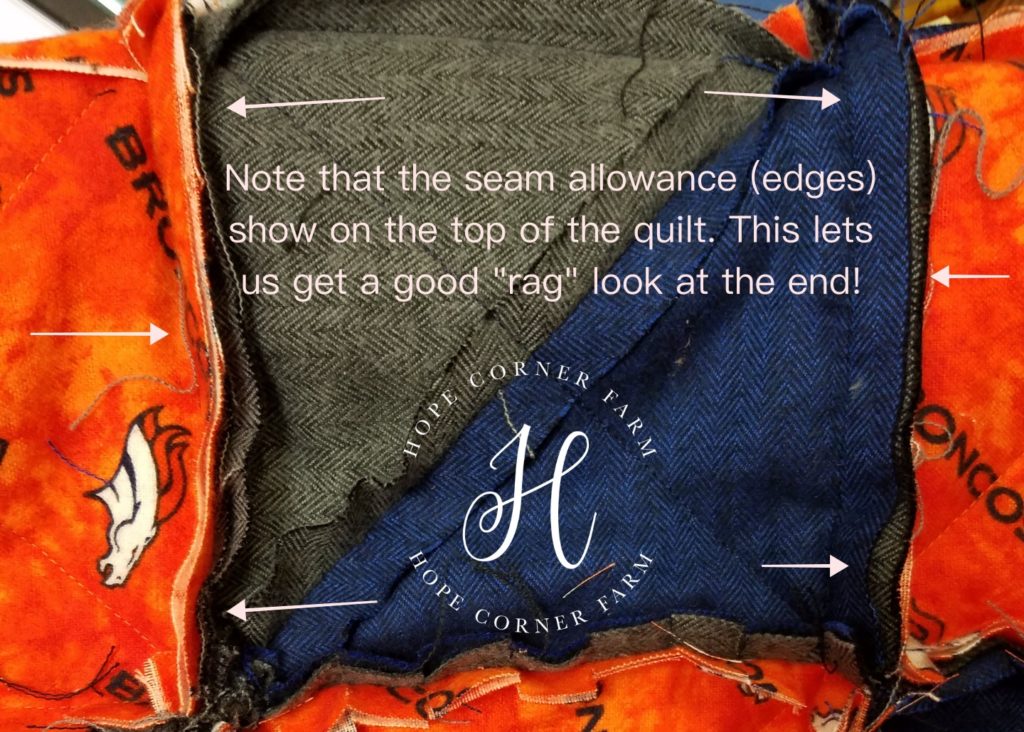
NOTE: The seam is sewn with the seam allowance showing on the top side of the quilt. This is key for getting that “rag” look at the end of the project! See picture for details:
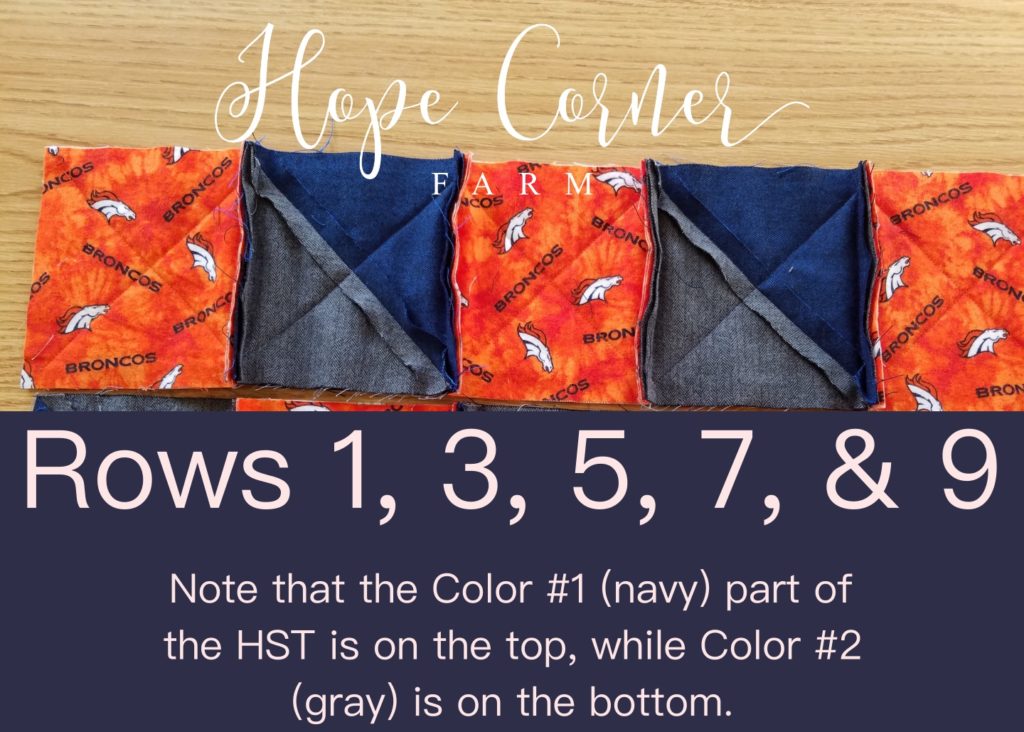
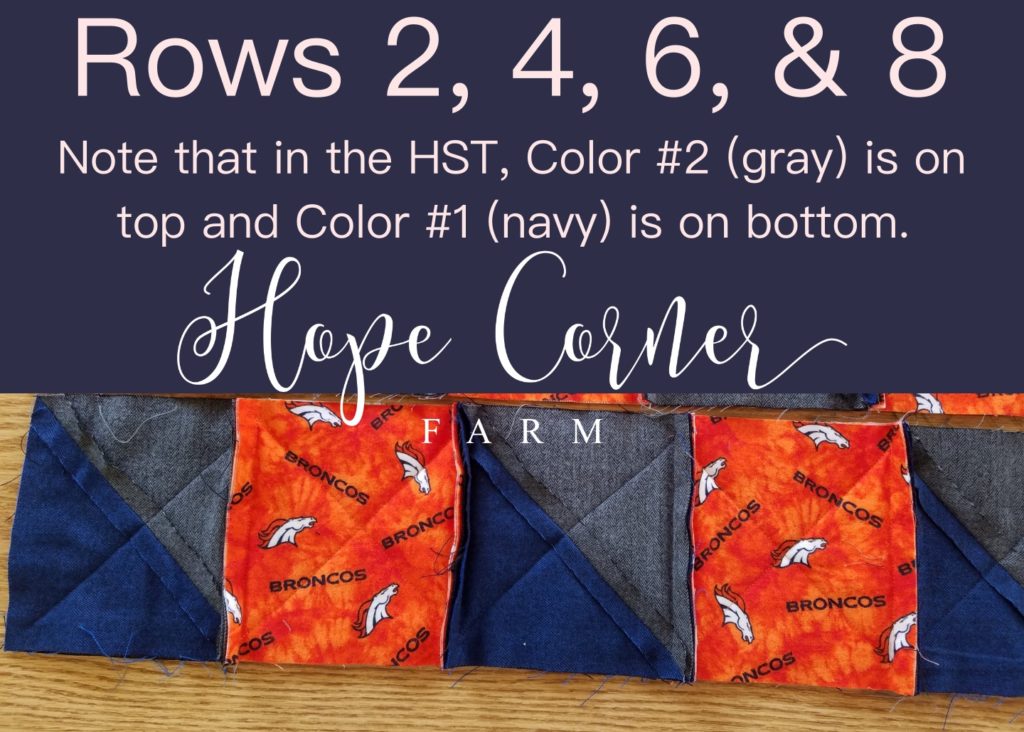
Now make sure that the Color #1 part of the HST is on top, with the Color #2 part on bottom. See pic for details:
Next, sew ONE Main Color block to the OTHER side of the Half Square Triangle block. Again, use a 1/2″ seam allowance.
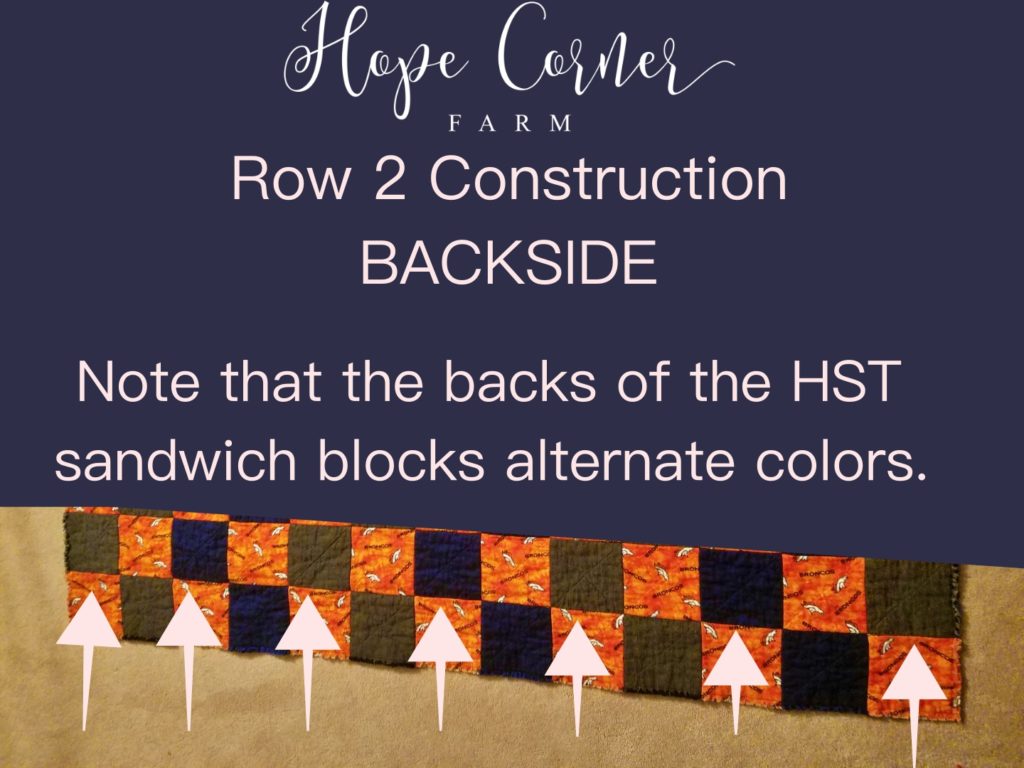
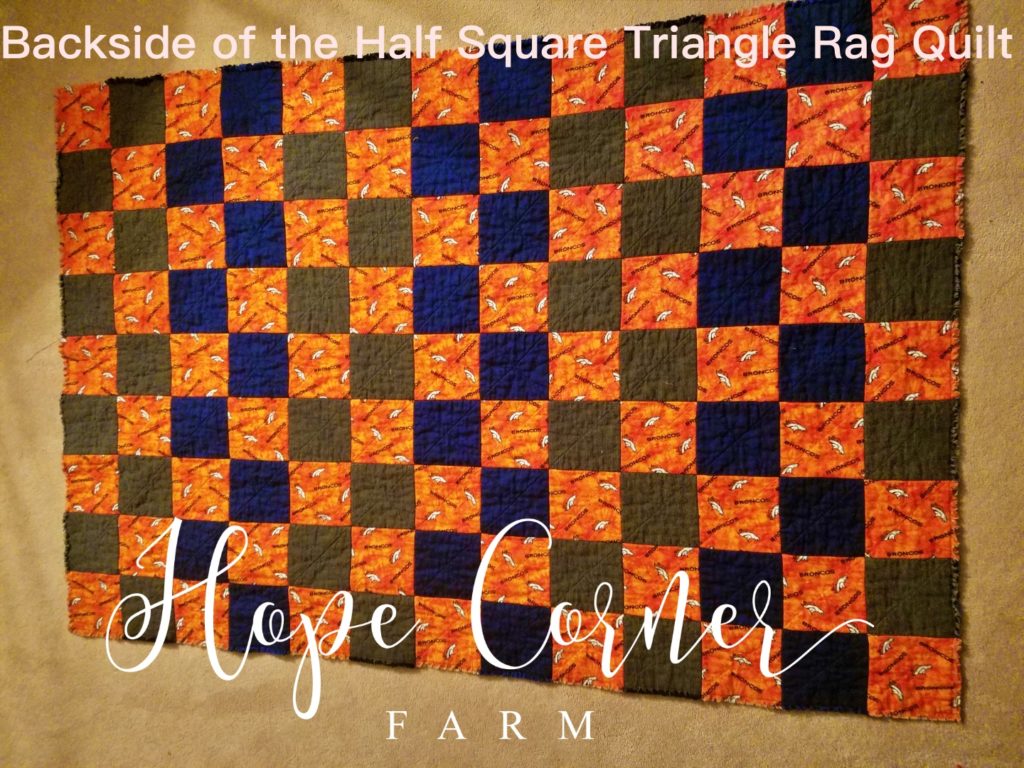
Now, add another Half Square Triangle block to the other side of the most recent Main Color block. Remember to alternate the backside colors of the Half Square Triangles. For row 1, it should go: gray, navy, gray, navy, gray, navy. Look at the above (the one that says “Backside”) picture for details.
Finally continue adding blocks. Alternate a Main Color Block with a Half Square Triangle Block across the quilt. The outermost blocks will be the Main Color blocks.
Row 2 Construction:
For this row there are the following number of blocks:
Main Color sandwich blocks: 6
Half Square Triangle sandwich blocks with Color #1 back: 3
Half Square Triangle sandwich blocks with Color #2 back: 4
THERE ARE A TOTAL OF 13 SANDWICH BLOCKS USED FOR THIS ROW.
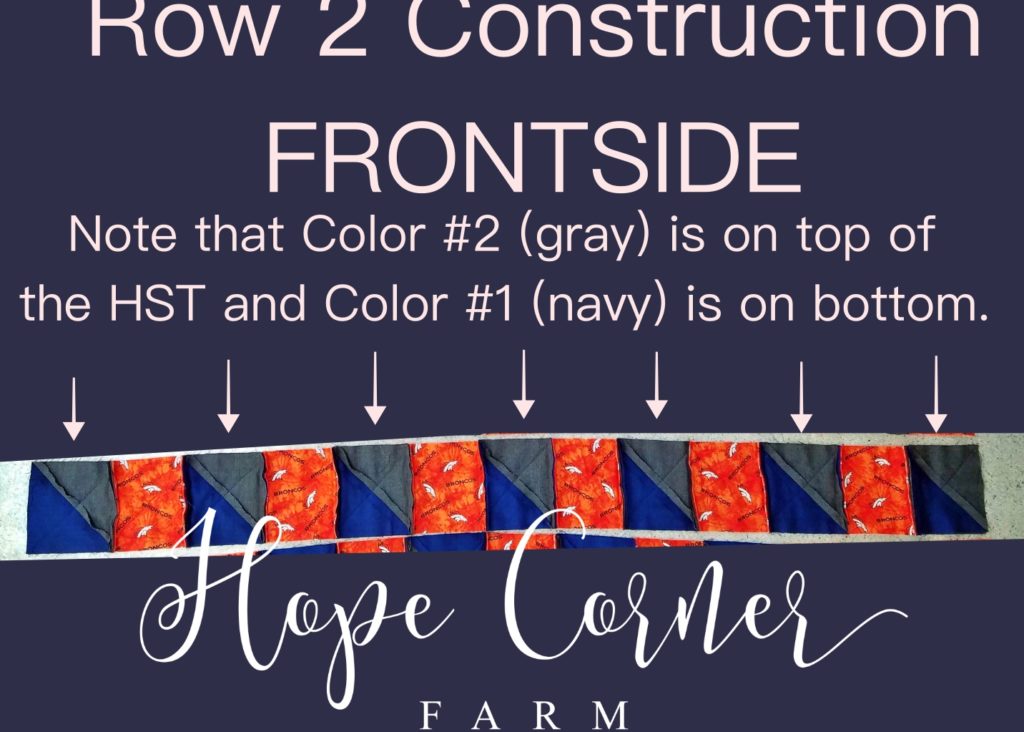
Begin by sewing a Half Square Triangle block (with a Color #2 back) to ONE Main Color block. Sew them together using a half inch seam allowance.
NOTE: The seam is sewn with the seam allowance showing on the top side of the quilt. This is key for getting that “rag” look at the end of the project! See picture for details:
Now make sure that the Color #2 (gray) part of the HST is on top, with the Color #1 (navy) part on bottom. See pic for details:
Next, sew another Half Square Triangle sandwich block (this time with a Color #1 – navy – back) to the OTHER side of the Main Color sandwich block. Again, use a 1/2″ seam allowance. Remember to alternate the backside colors of the Half Square Triangles. For row 2, it should go: navy, gray, navy, gray, navy. Look at the above (the one that says “Backside”) picture for details.
Now, add another Main Color block to the other side of the most recent Half Square Triangle block.
Continue adding blocks. Alternate a Main Color Block with a Half Square Triangle Block across the quilt. The outermost blocks will be the Half Square Triangle blocks.
Rows 3, 5, 7, & 9 – Half Square Triangle Rag Quilt:
Repeat the instructions for Row 1.
Rows 4, 6, & 8:
Now repeat the instructions for Row 2.
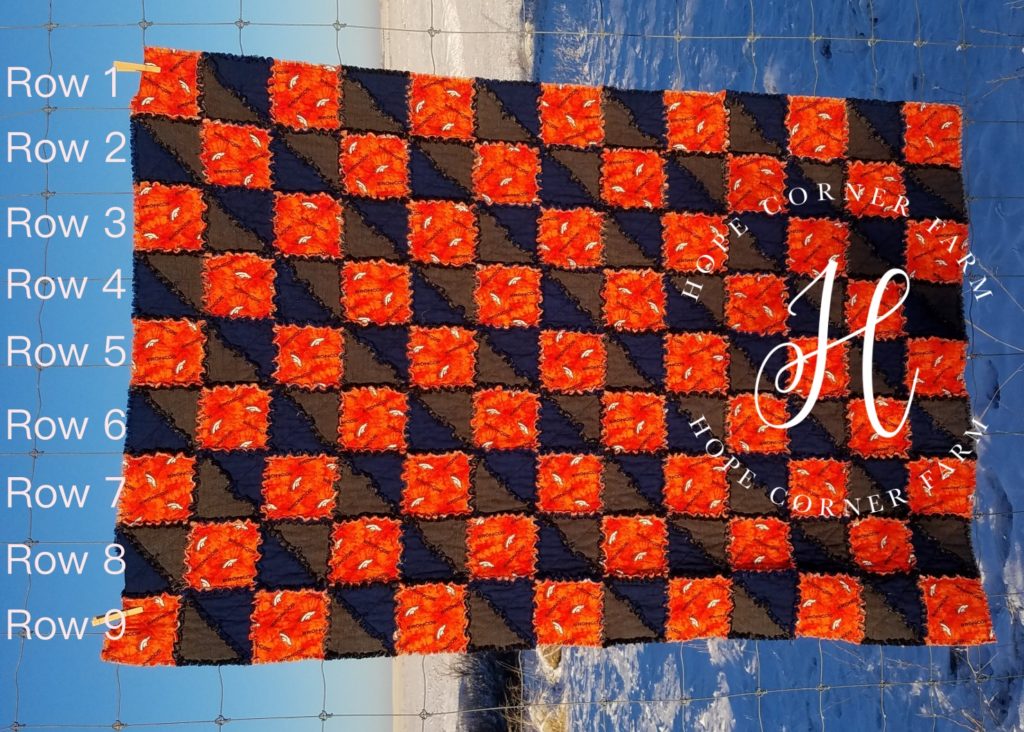
All of the Rows in the Half Square Triangle Rag Quilt:
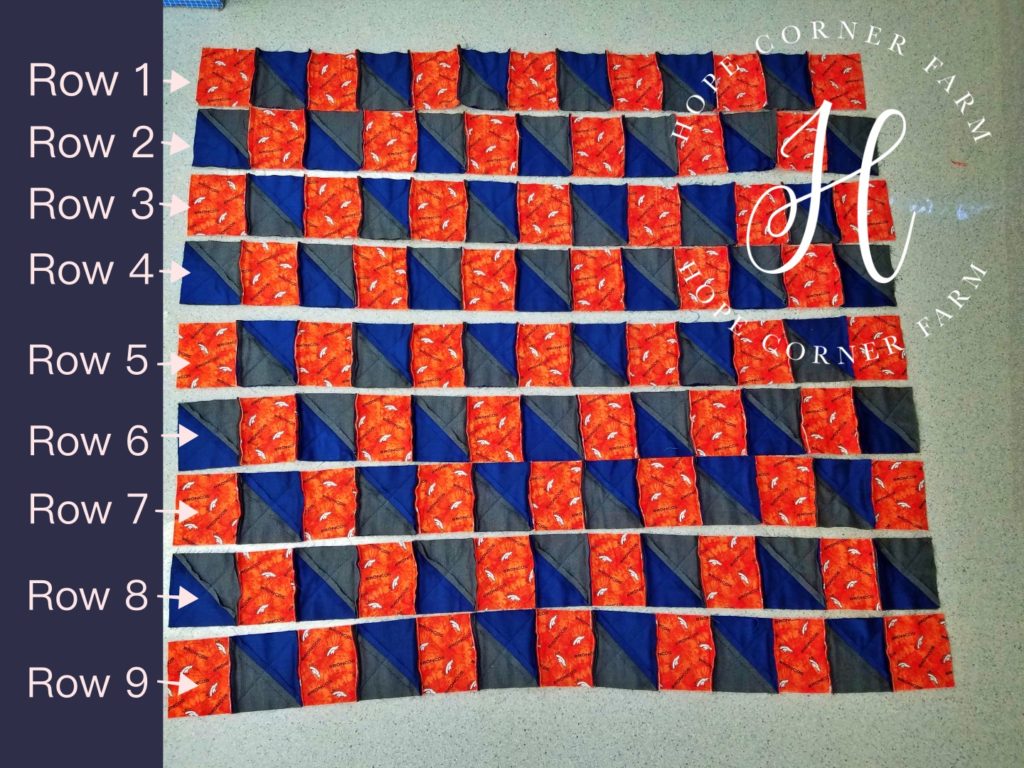
Sewing Row 1 to Row 2:
After completing construction of Rows 1-9, they will be sewn together to create the Half Square Triangle Rag Quilt.
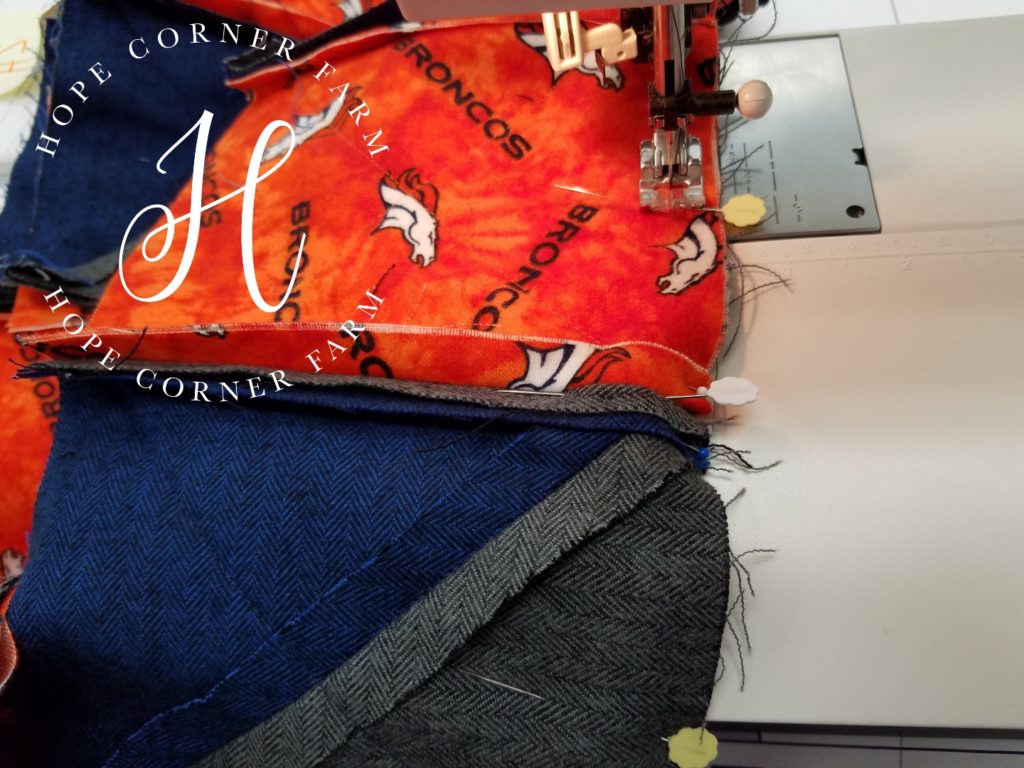
Start by grabbing Row 1 AND Row 2. We will be sewing these rows together.
Now sew these rows together by placing the back sides of the rows facing each other. Remember, the seams show on the stop side of the quilt.
Next match all of the seams up (see attached picture). Pin the seam allowances open and flat.
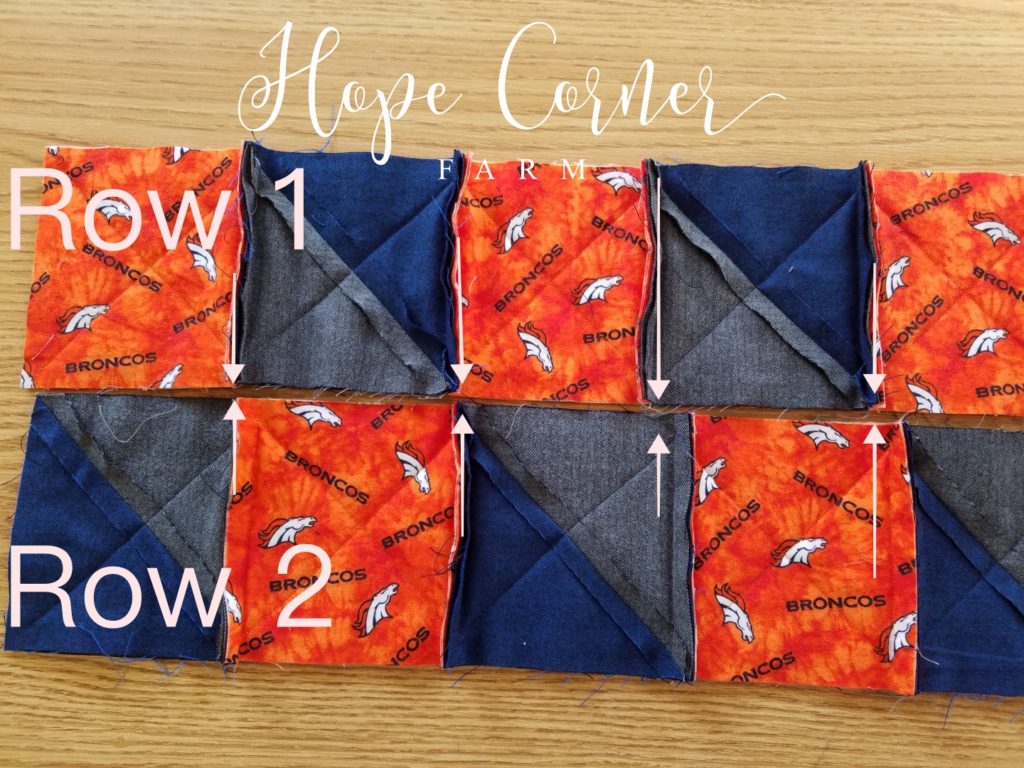
Now wew the two rows together with a 1/2″ seam. Sew the seam allowances open and flat. Don’t forget to backstitch at the beginning of the seam and at the end of the seam. This keeps the quilt from falling apart when washing.
Sewing Row 3 to the HST Rag Quilt:
Now on the other (not sewn) side of Row 2, pin Row 3. Make sure to match up seams. Pin the seams that show flat.
Next sew across the rows. Remember to do a back stitch at the start of the seam and at the end of the seam. This keeps the seam from coming apart when washing.
Note that the seam allowance is 1/2″.
Adding the Remaining Rows to the Half Square Triangle Rag Quilt:
Repeat the previous step (adding Row 3) for the remaining rows 4-9.
Now remember that the rows alternate between starting with a Main Color (Broncos in mine) and a Half Square Triangle block.
Next make sure that in Rows 2, 4, 6, & 8 Color #2 is on the top part of the row.
Now make sure that in Rows 1, 3, 5, 7, & 9 Color #1 is on the top part of the row.
Sewing a Border Seam Around the Quilt:
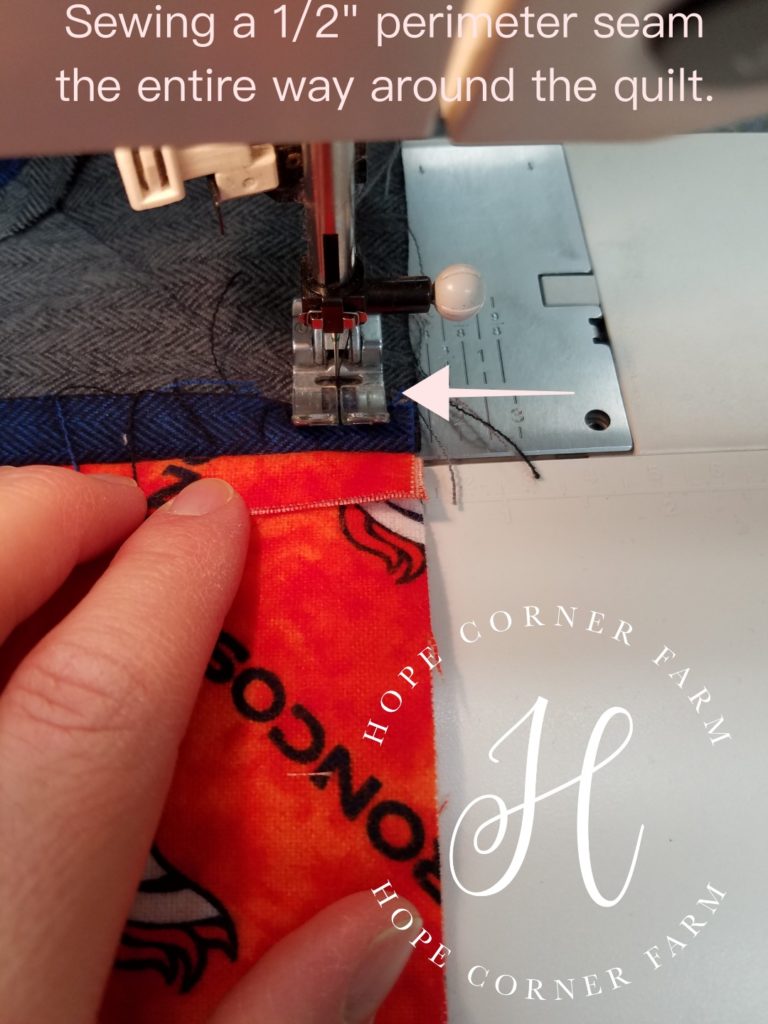
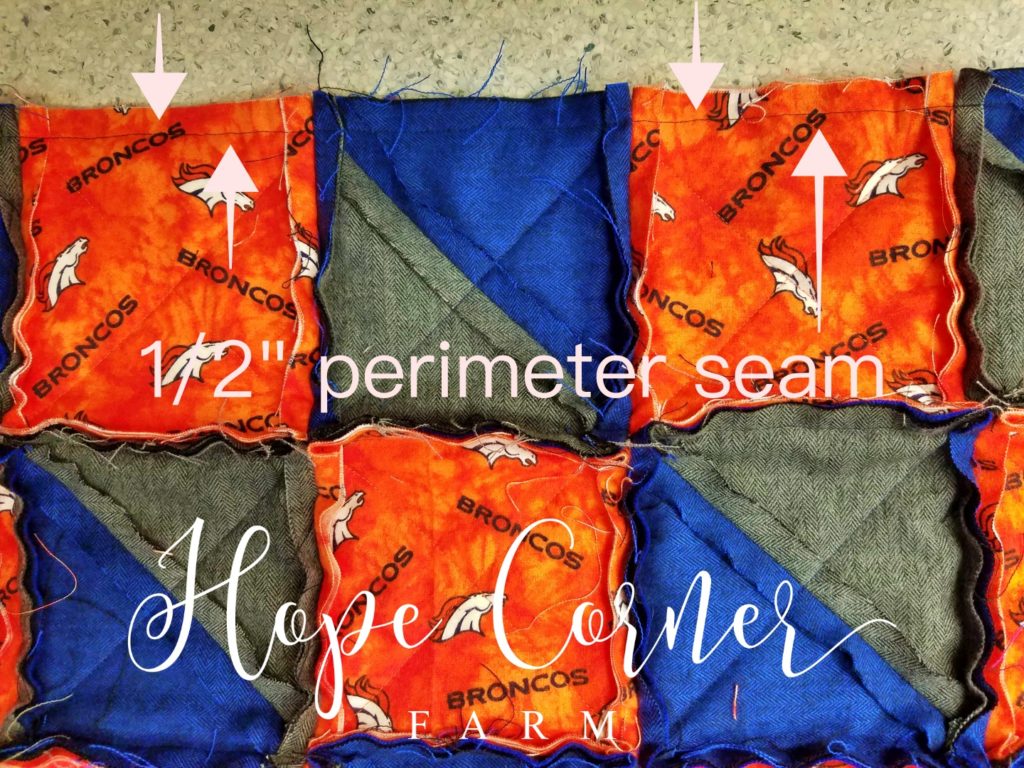
Before clipping the quilt, run a border stitch around the entire perimeter of the quilt.
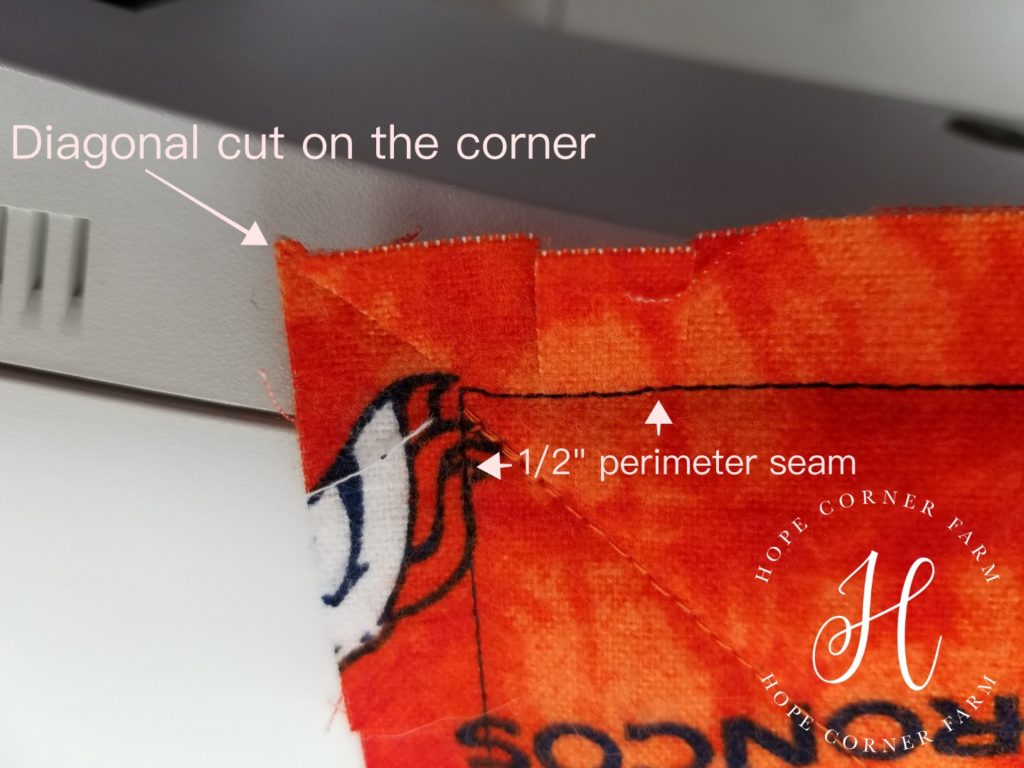
Now note that this perimeter seam is 1/2″ in from the edge (it has a 1/2″ seam allowance).
Next remember to backstitch for at least 5 stitches when starting the seam and when ending the seam. This will keep the quilt from coming apart when washing it.
Clipping the Half Square Triangle Rag Quilt:
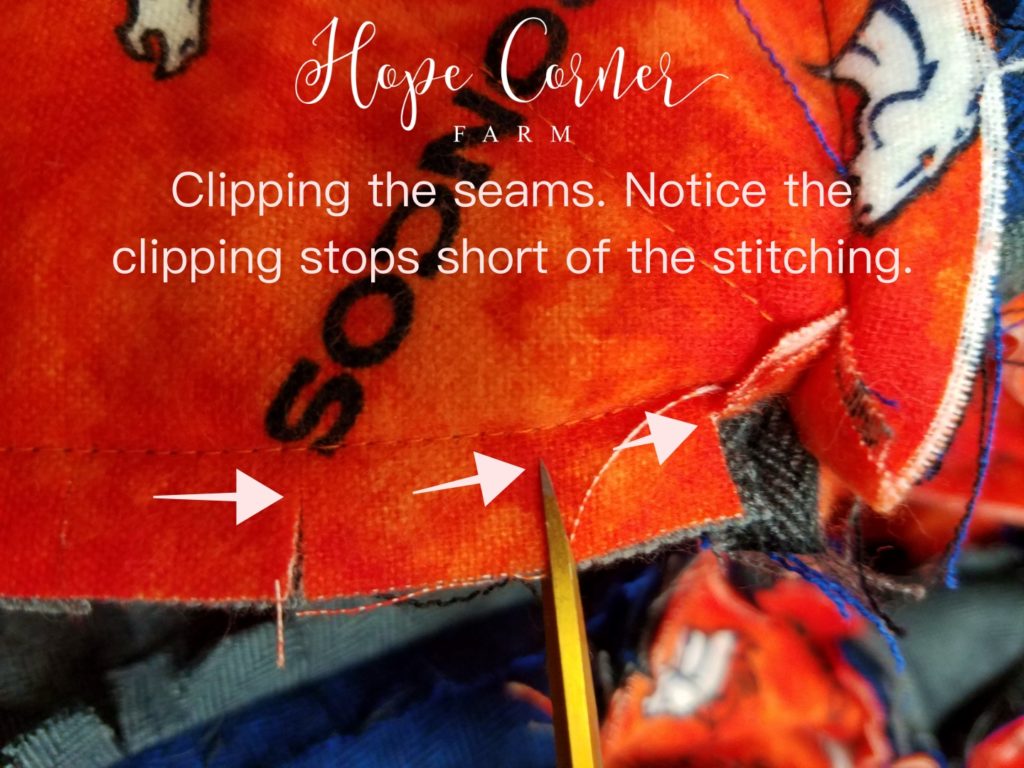
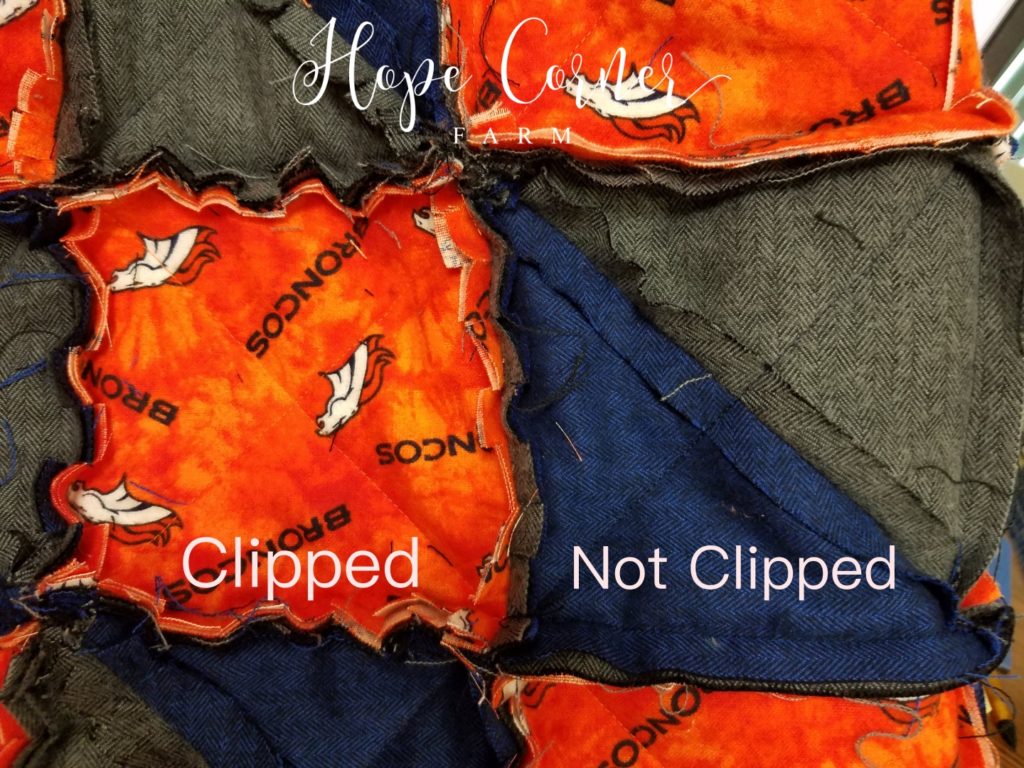
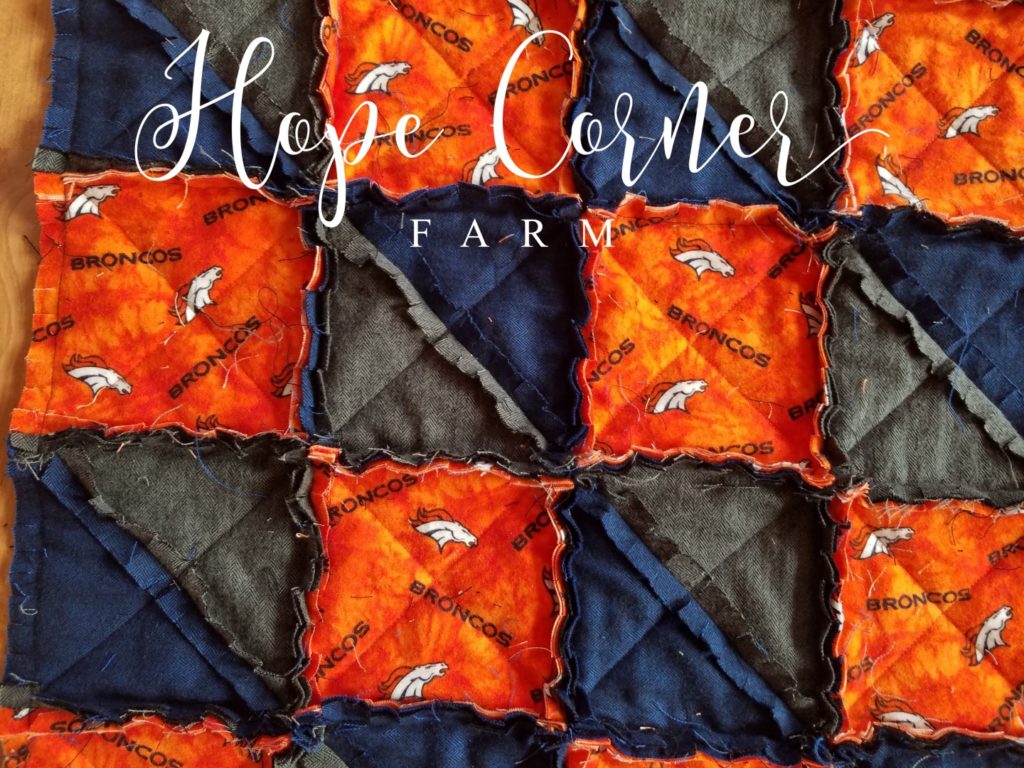
Now what makes rag quilts unique is their worn, shaggy look. This is accomplished by clipping every 1/2″ or so on EVERY seam that shows.
Not, do not clip all of the way to the stitching. Stop a little short (1/8″ or so) from the stitching. If the stitching is clipped, the quilt will fall apart.
Clip the corners on a diagonal.
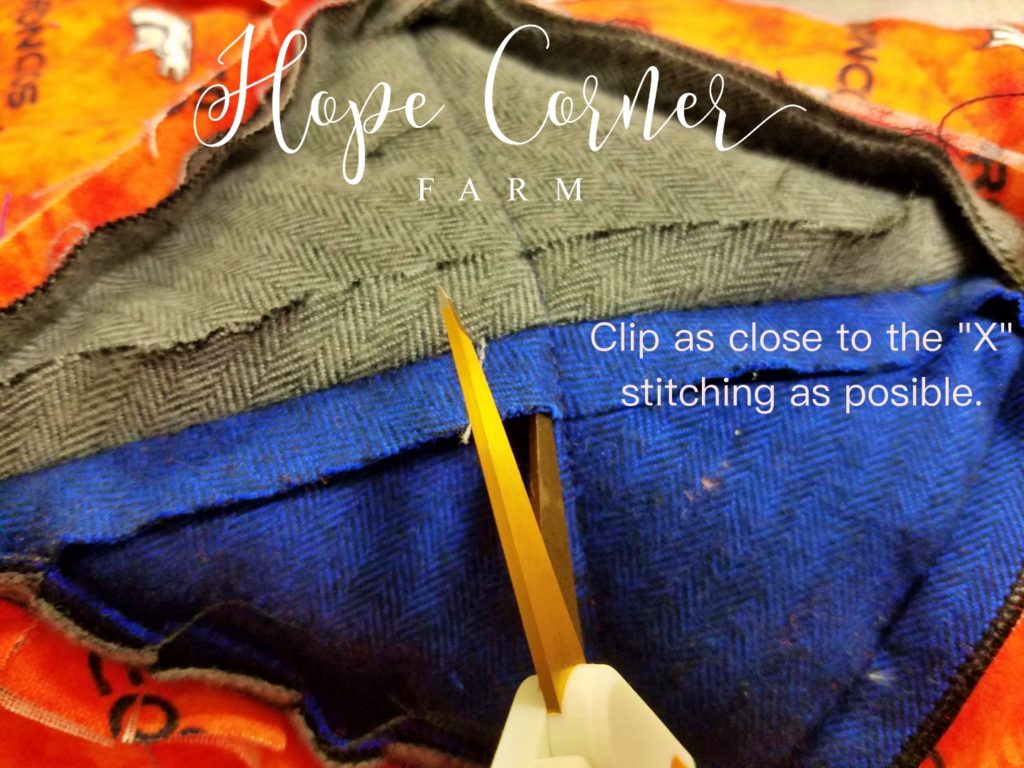
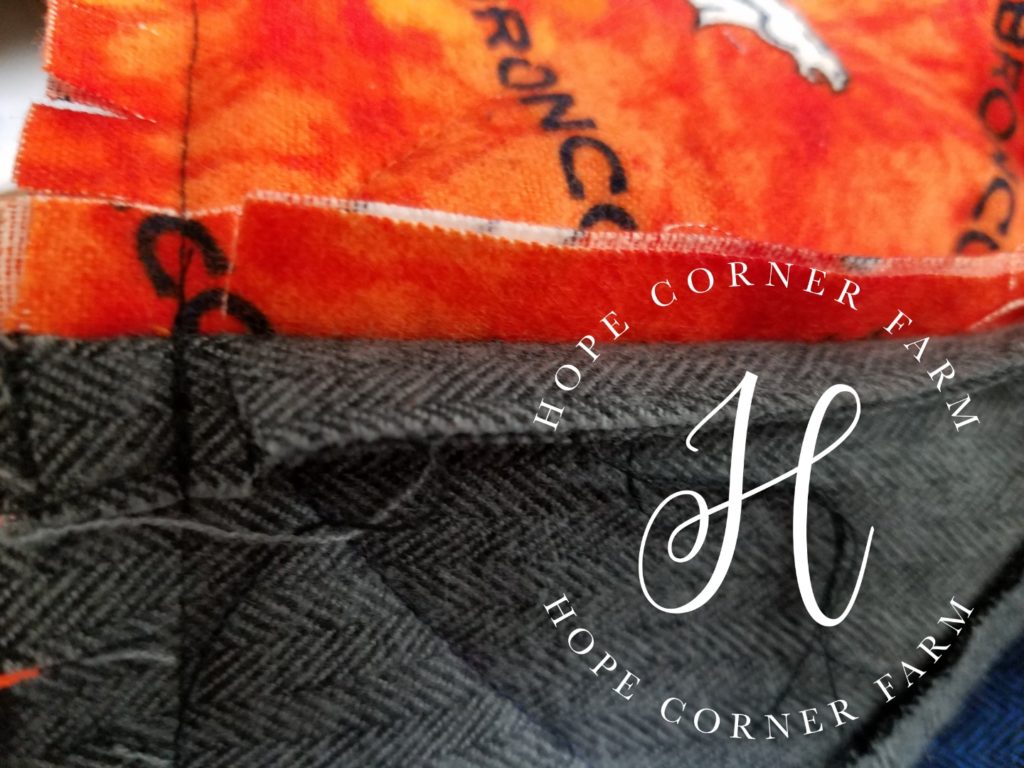
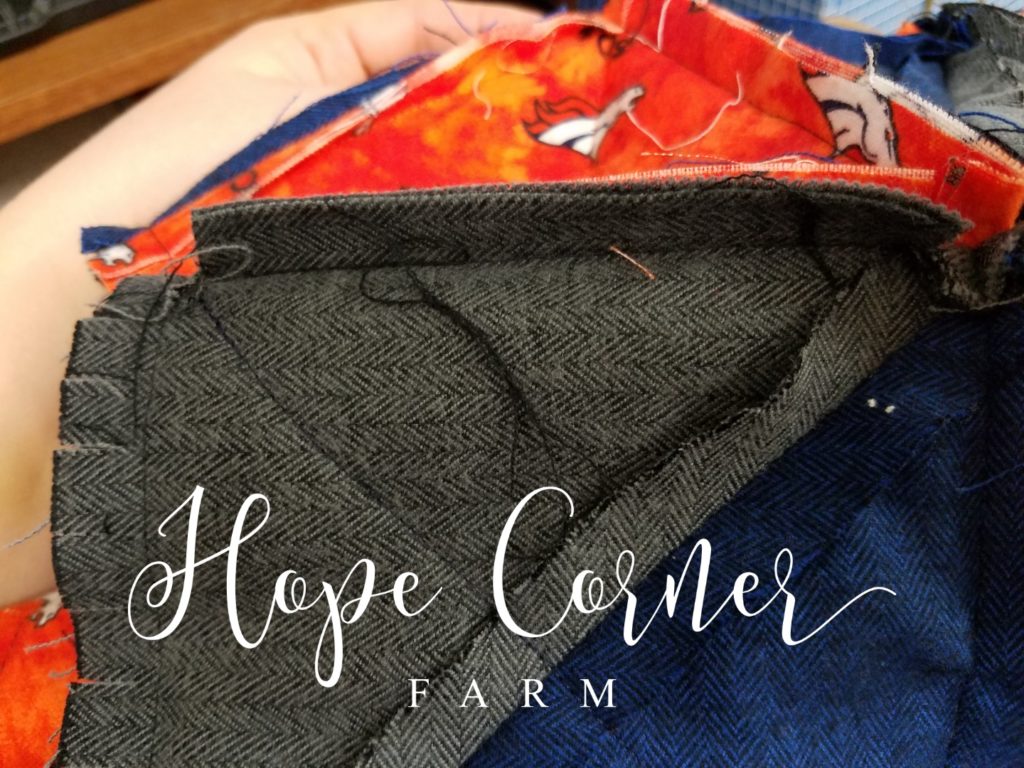
Now don’t forget to clip the seam allowances on the Half Square Triangle blocks. Clip as close to the “X” as possible.
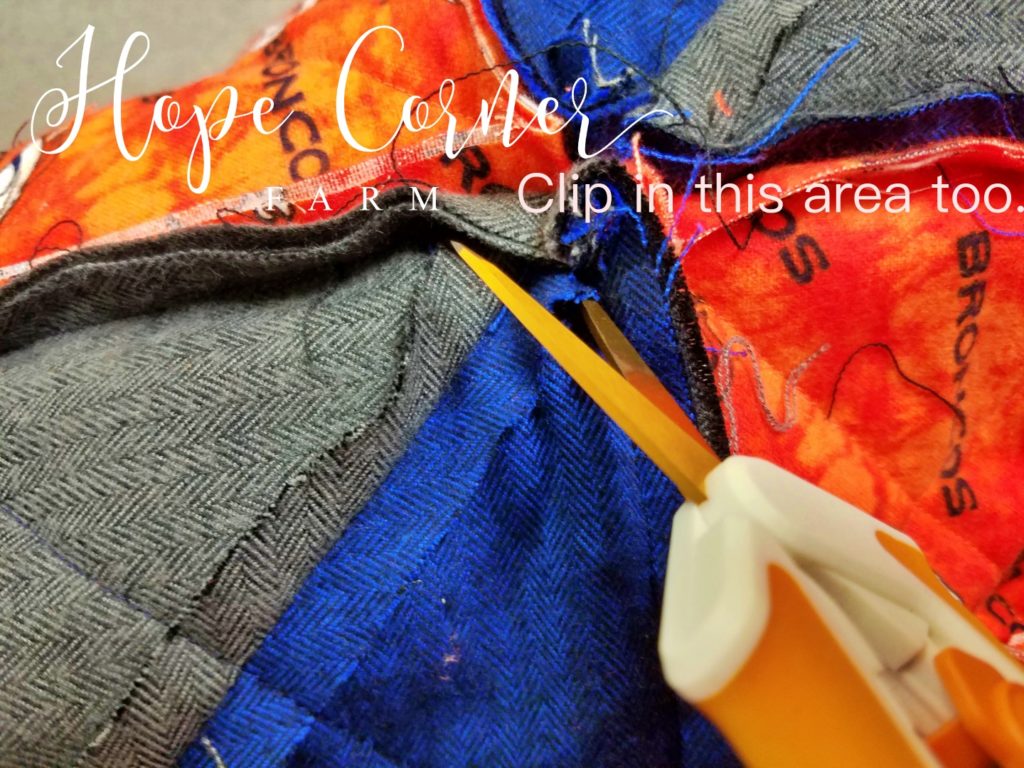
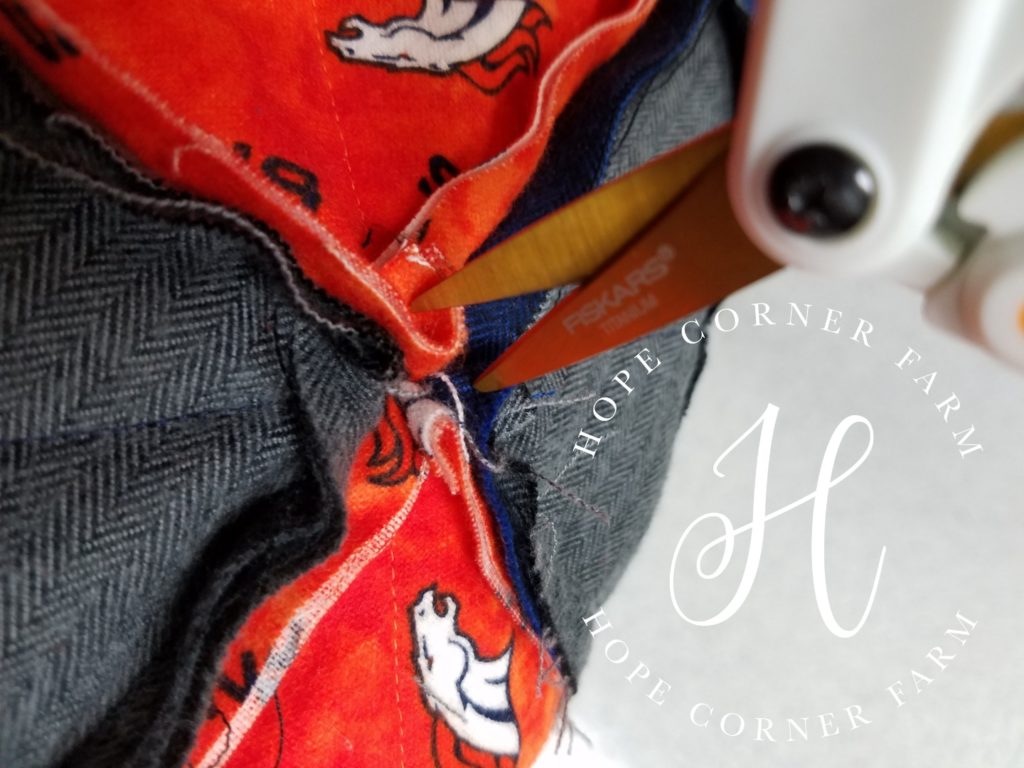
Next clip in the corner where the blocks meet too.
What the clipped Half Square Triangle block looks like:
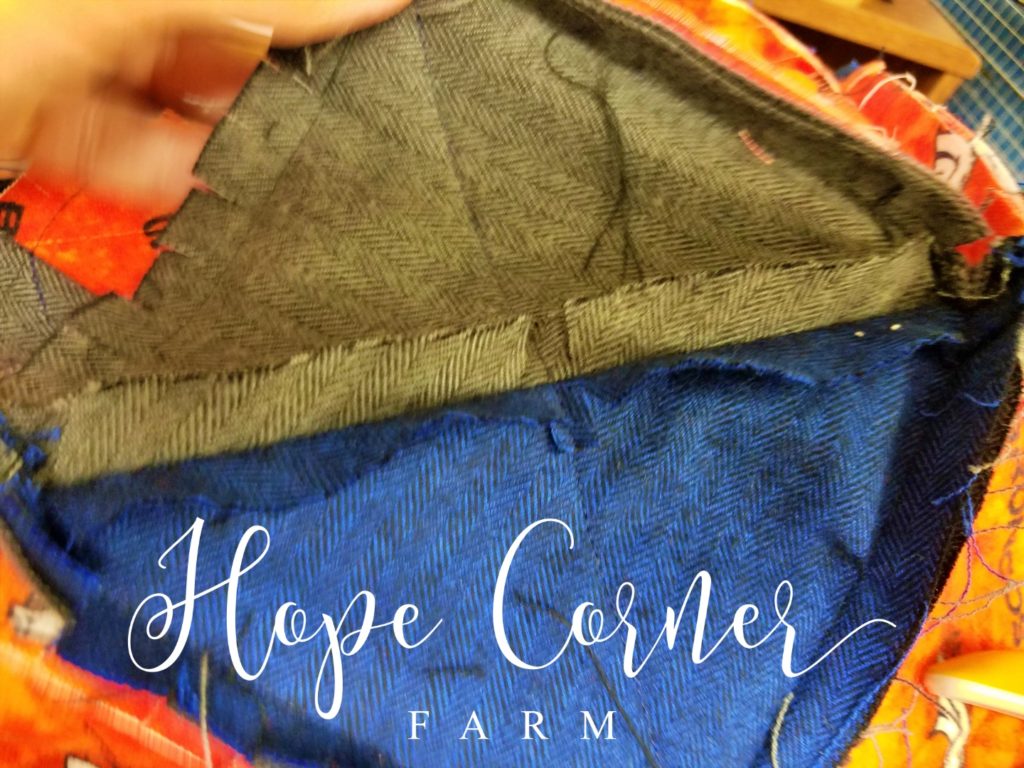
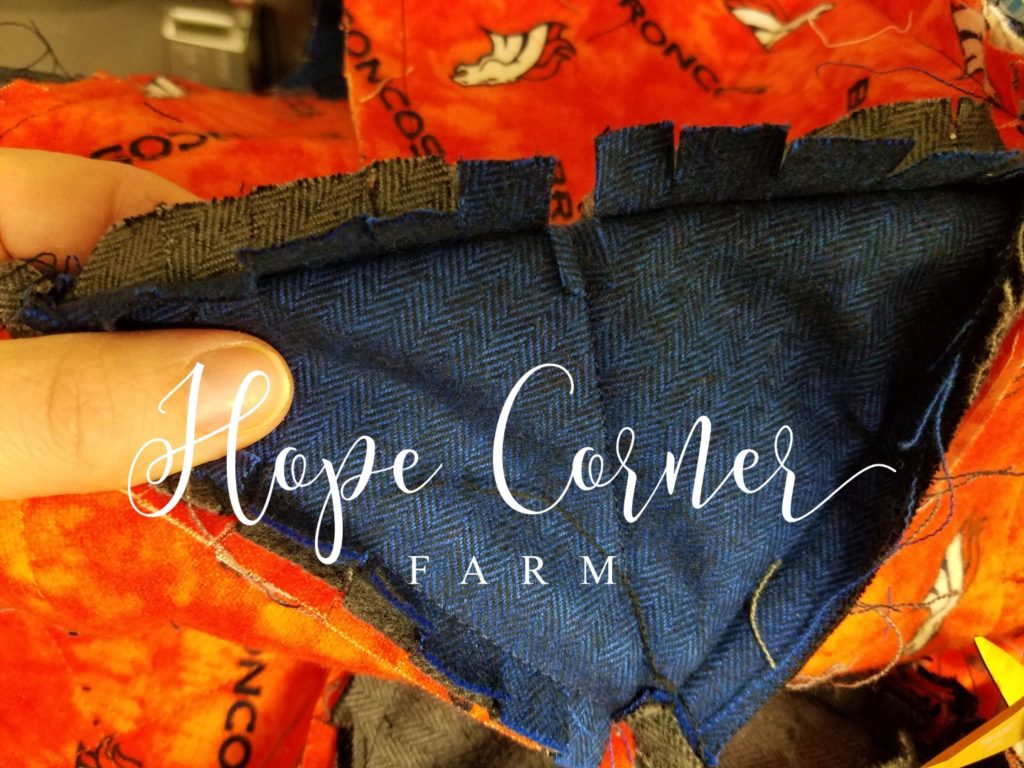
Additional Areas to Clip on the Half Square Triangle Rag Quilt:
First clip at the corner where each block meets, clip the seams. See the following picture:
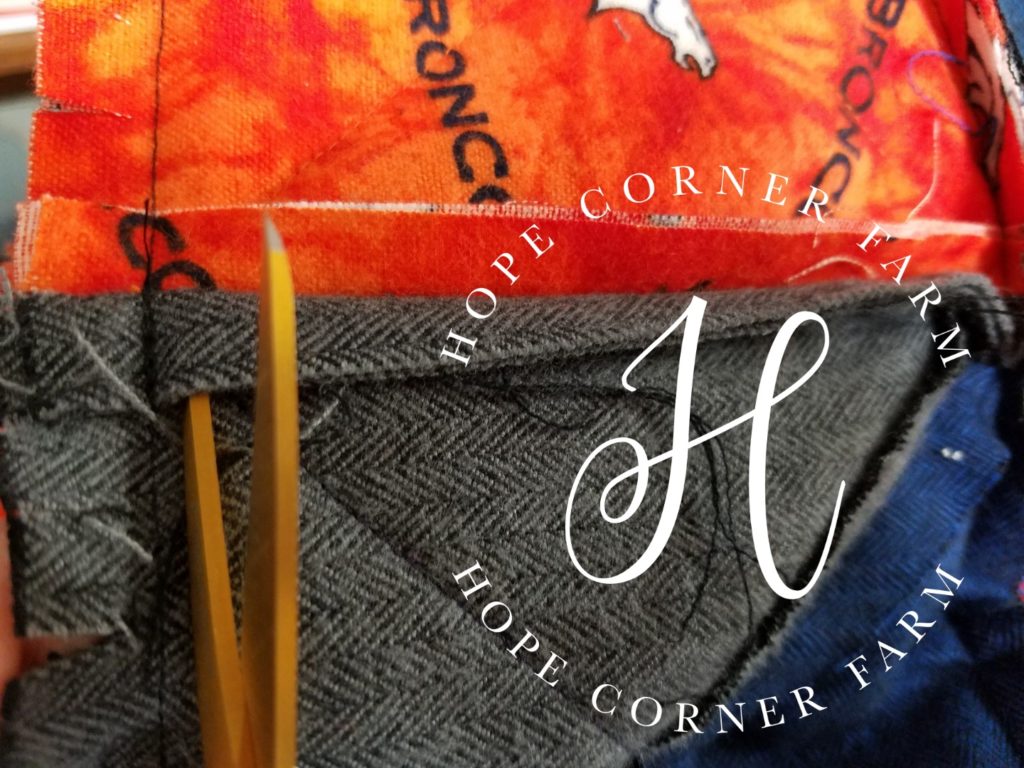
Now clip the seam allowance free close to the perimeter stitching:
Clipped vs. Unclipped Half Square Triangle Blocks:
Fully Clipped Rag Quilt:
Washing the HST Rag Quilt:
Now to complete the Half Square Triangle Rag Quilt, wash the quilt. Be prepared for quite a bit of thread to come off of the quilt into the lint trap of the dryer!
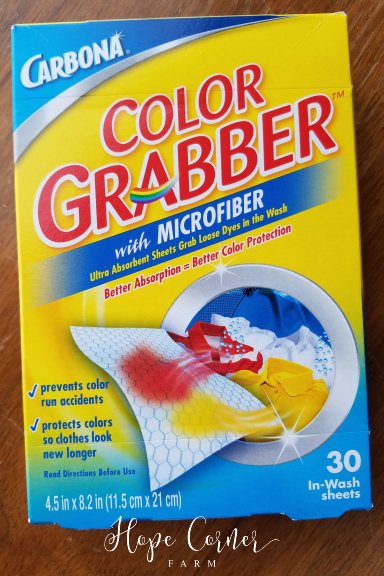
First wash the quilt with a Color Catcher or Color Grabber. Also, make sure that the quilt is washed in COLD water. Both of these steps ensure that colors don’t bleed onto another fabric.
Now dry the quilt in the dryer to fully maximize the “rag” look to the quilt.
HST Rag Quilt Before Washing:
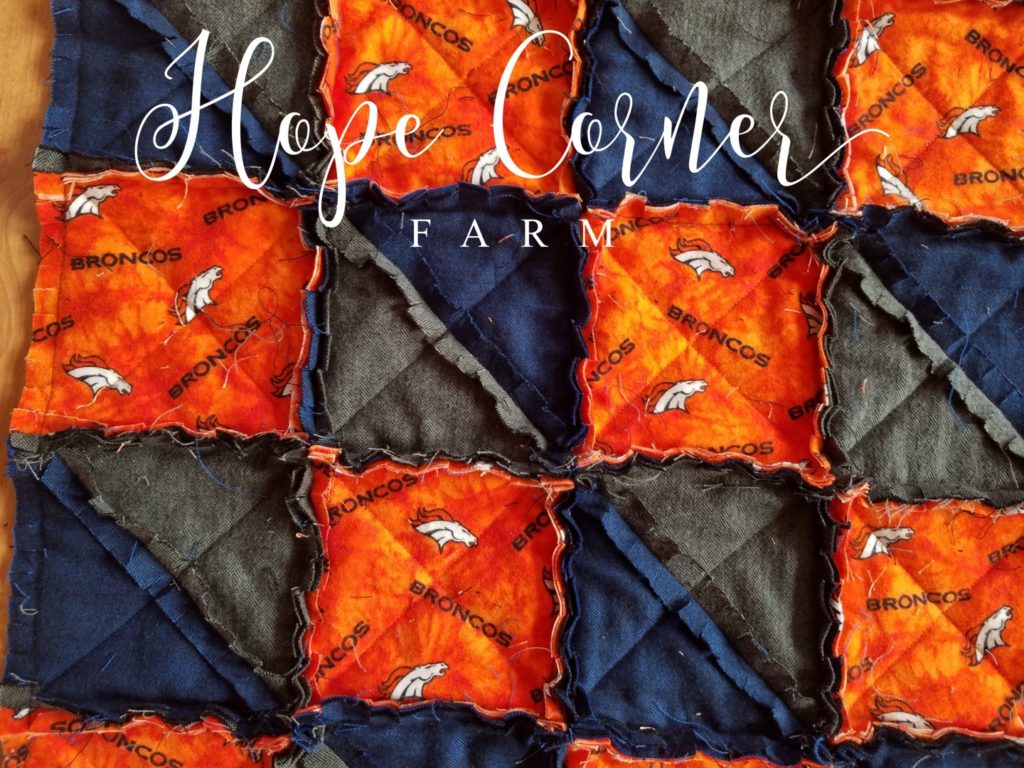
Half Square Triangle Rag Quilt After Washing:
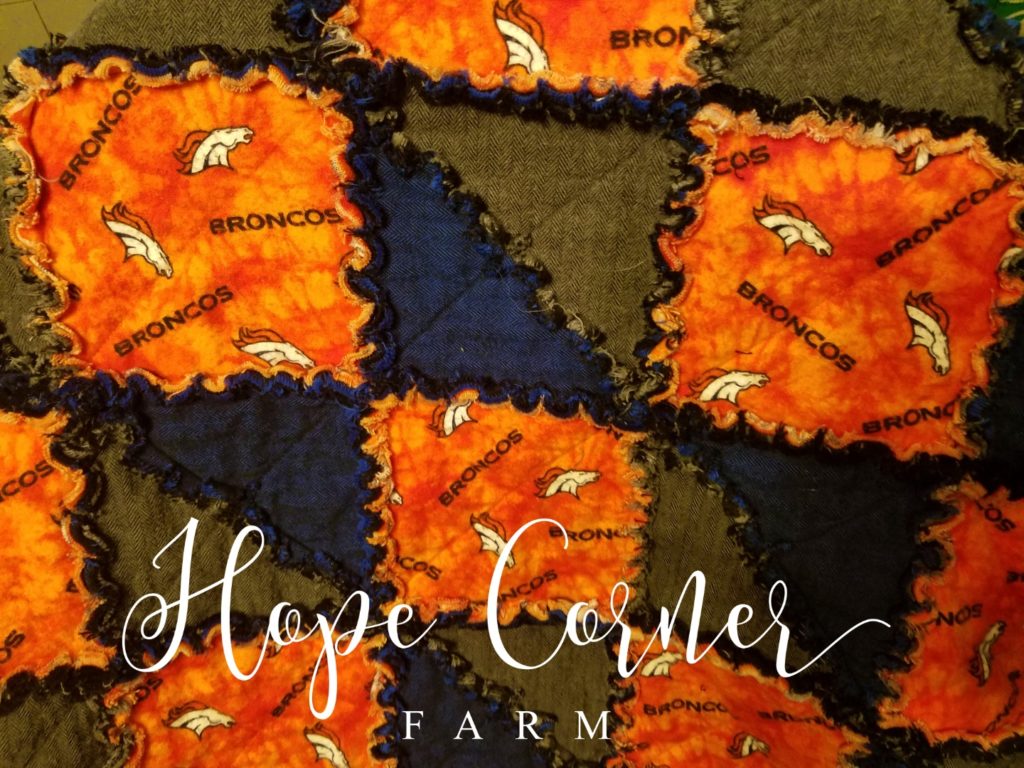
The Finished Half Square Triangle Rag Quilt:
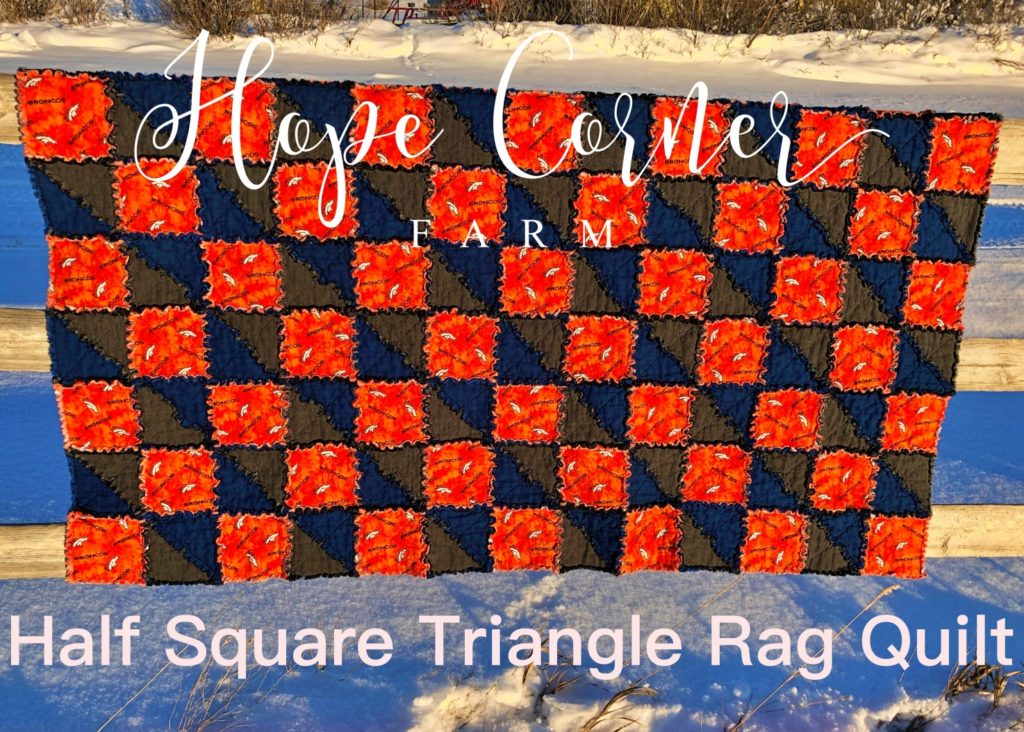
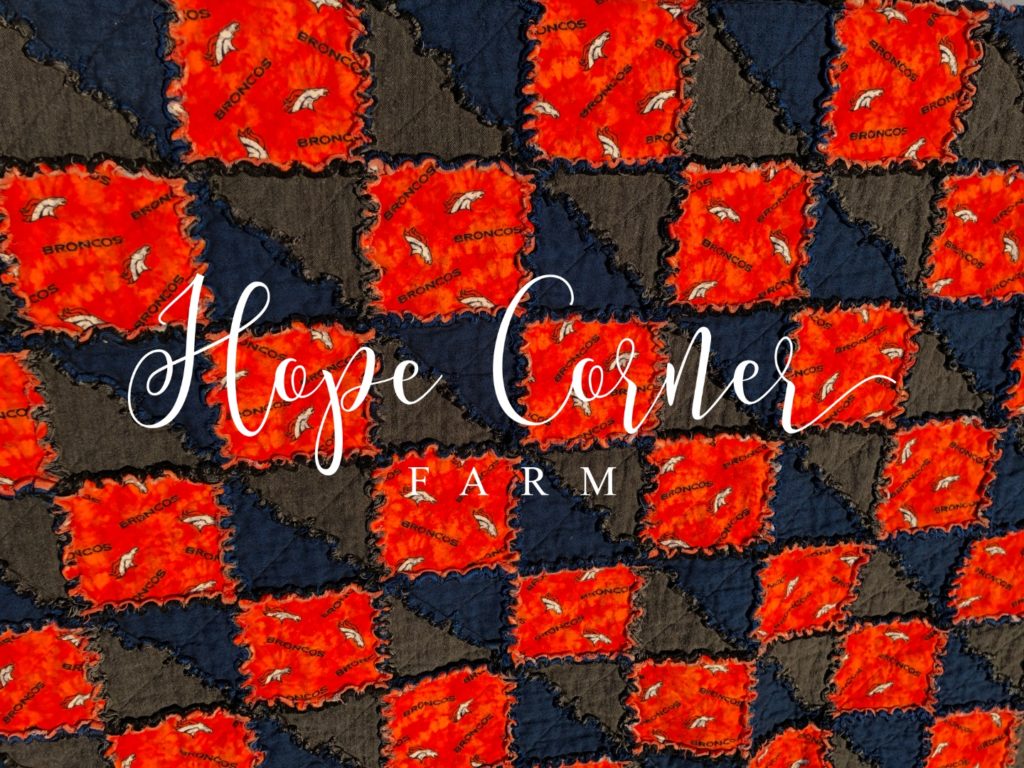
And that’s the Half Square Triangle Rag Quilt! I hope you found this tutorial helpful! Finally if you want more crafty fun delivered to your inbox hope on over and join our newsletter!

Many Blessings,

COPYRIGHT STATEMENT: This pattern is copyrighted in 2019 by Hope Corner Farm. Sharing information (photos and text) from this pattern is prohibited unless permission is specifically given by Hope Corner Farm. Selling items made from this pattern is permitted as long as a design reference is made to Hope Corner Farm (Ex. Pattern by Hope Corner Farm).


