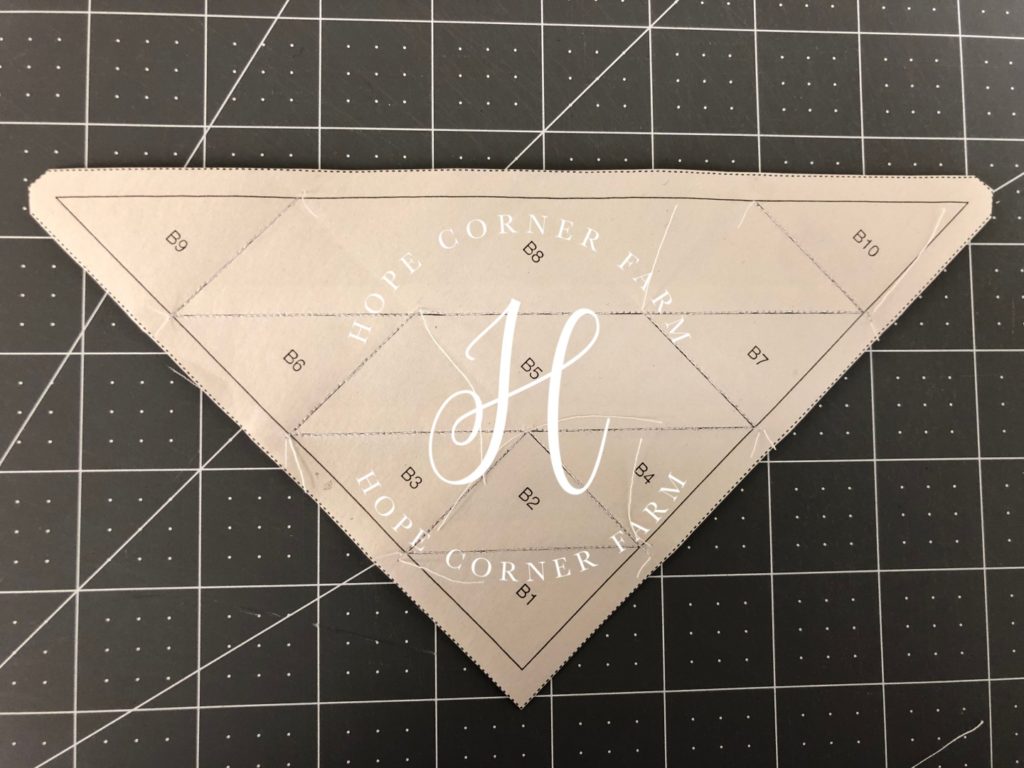
Paper Piecing Tutorial

I have been sewing since I was 8 (it was one of my first projects in 4-H). Even though I have sewn many things, I had a fear of paper piecing. Fast-forward to two years ago and I decided to take a paper piecing class at my local quilt shop. If I had only realized how awesome paper piecing is, I would have started many years ago! The following is a tutorial for paper piecing. If you are looking for this specific block, it is the Mrs. Taft Block from the Farmer’s Wife 1930s book.
Materials Needed:
1/8 yard of different cotton quilting fabrics
Paper for paper piecing (I like Carol Doak’s paper)
Copier (for copying the paper piecing pattern)
Matching thread
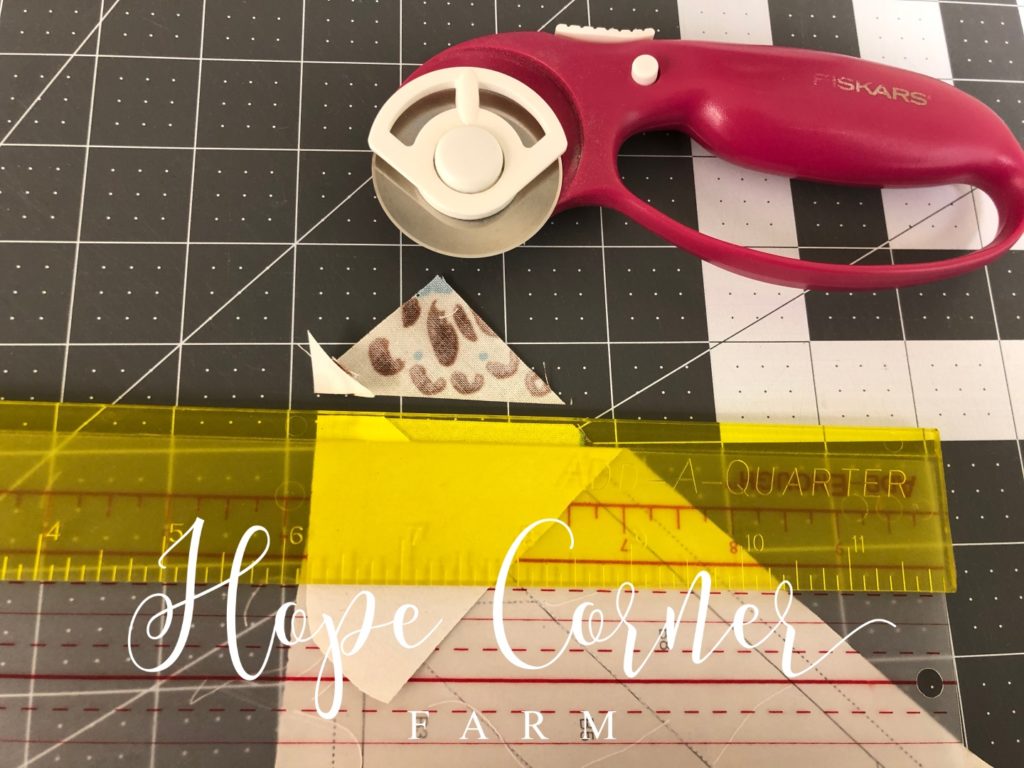
Rotary cutter
Cutting mat
Add a Quarter ruler
Add Enough ruler
Scissors
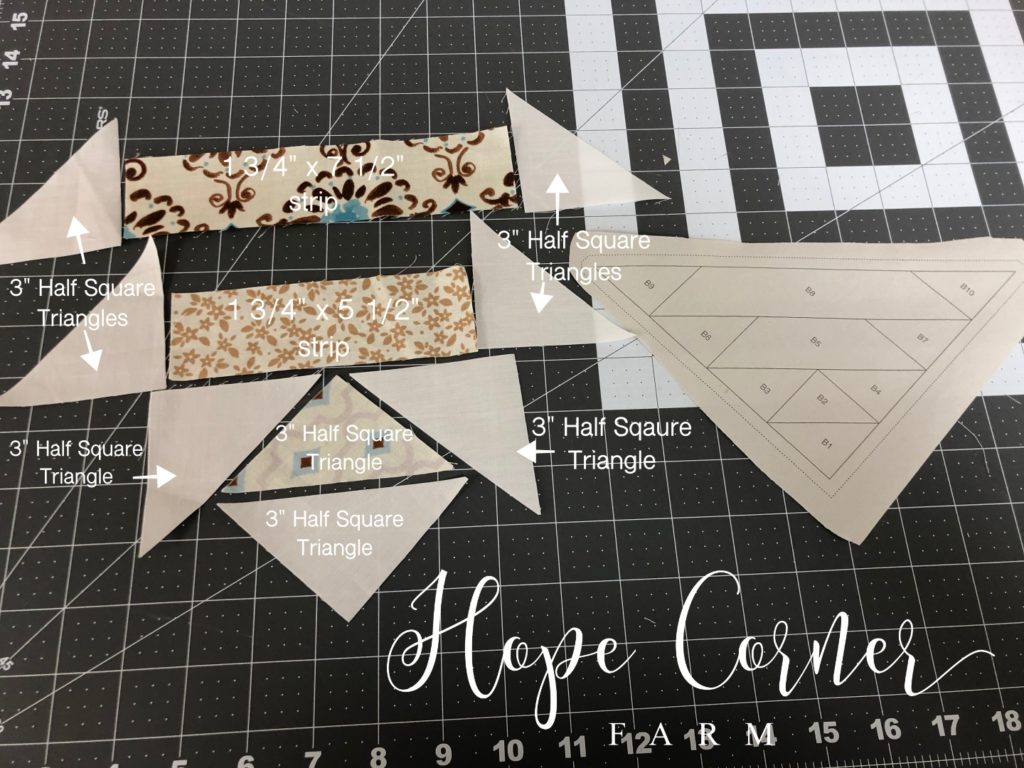
Cutting Instructions:
1.) Background Color – Fourteen 3″ Half Square Triangles
-Take a 3″ square and cut it in half
-This covers pieces A1, A3, A4, A6, A7, A9, & A10
-This covers pieces B1, B3, B4, B6, B7, B9, & B10
2.) A2 – Half Square Triangle – half of a 3″ square
3.) A5 – 1 3/4″ x 5 1/2″ strip of fabric
4.) A8 – 1 3/4″ x 7 1/2″ strip of fabric
5.) B2 – Half Square Triangle – half of a 3″ square
6.) B5 – 1 3/4″ x 5 1/2″ strip of fabric
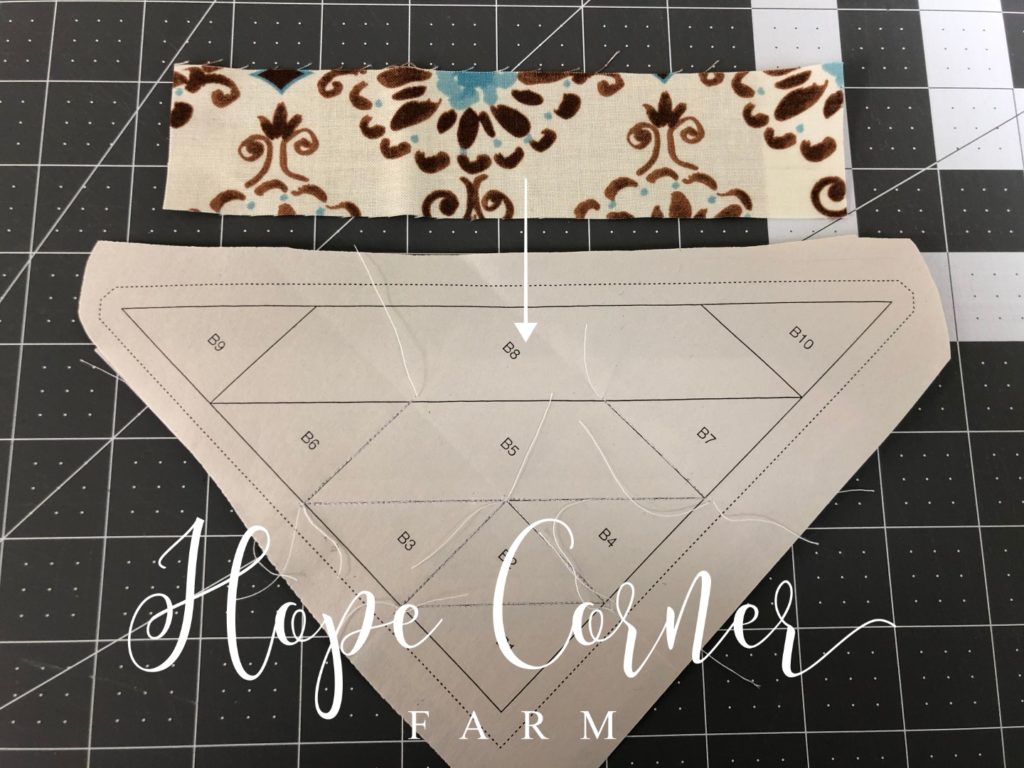
7.) B8 – 1 3/4″ x 7 1/2″ strip of fabric
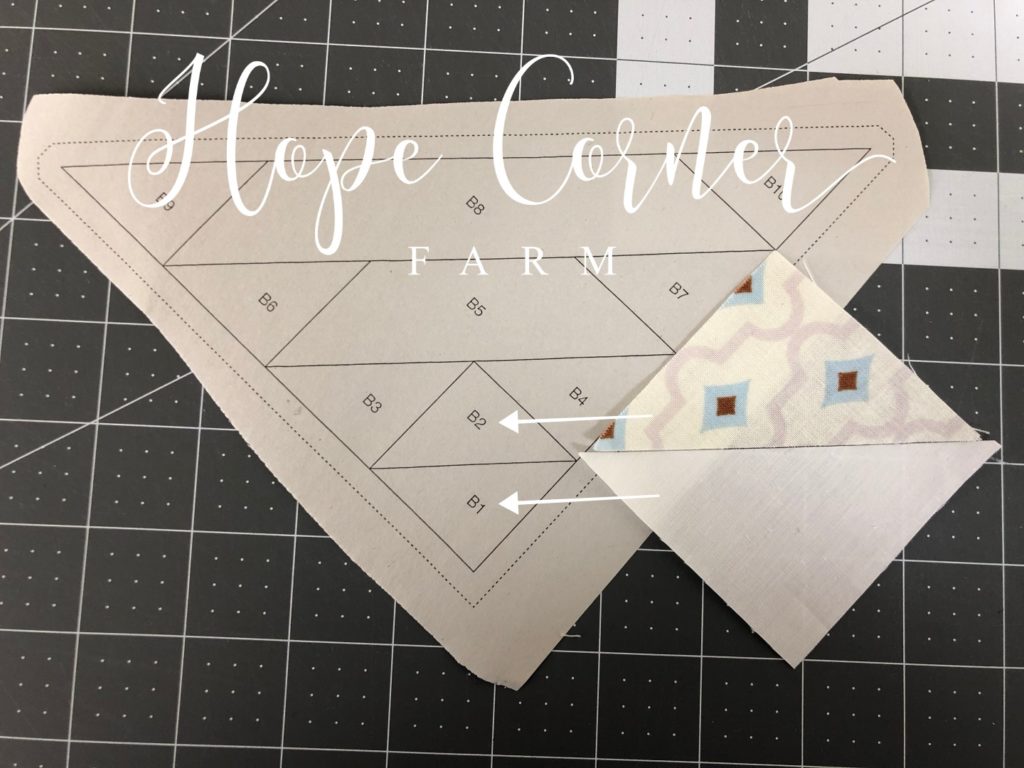
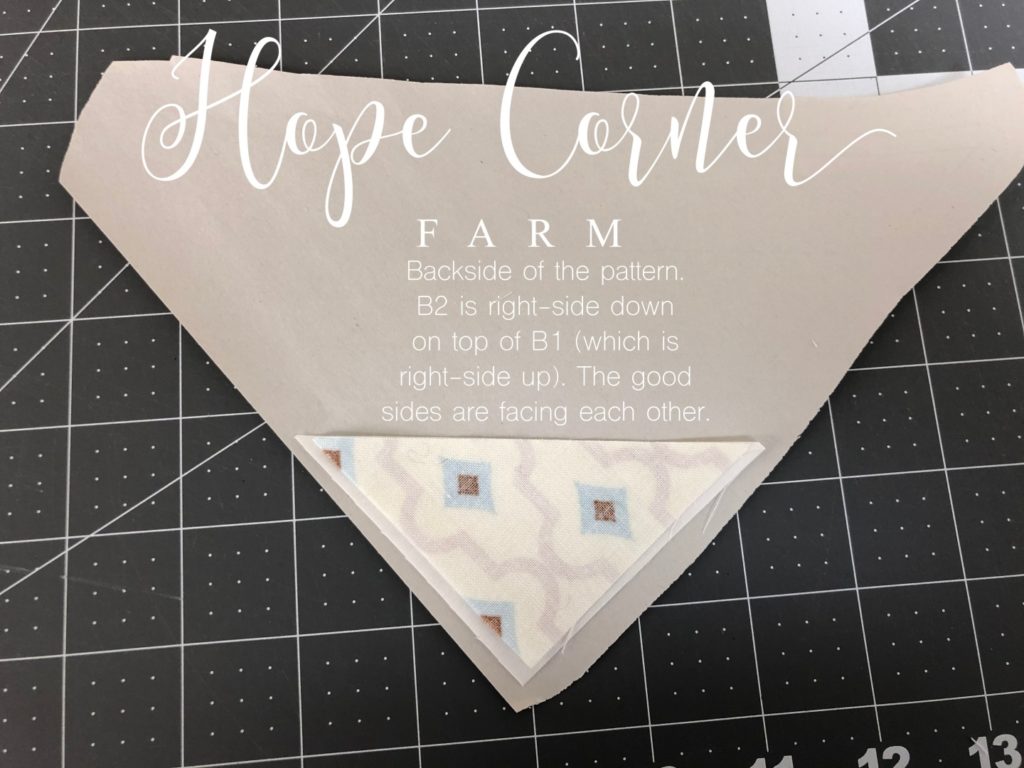
Sewing A1/B1 to A2/B2:
Note that both halves (side A and side B) are constructed in the exact same manner. I will only explain one side. Repeat the steps for the other half.
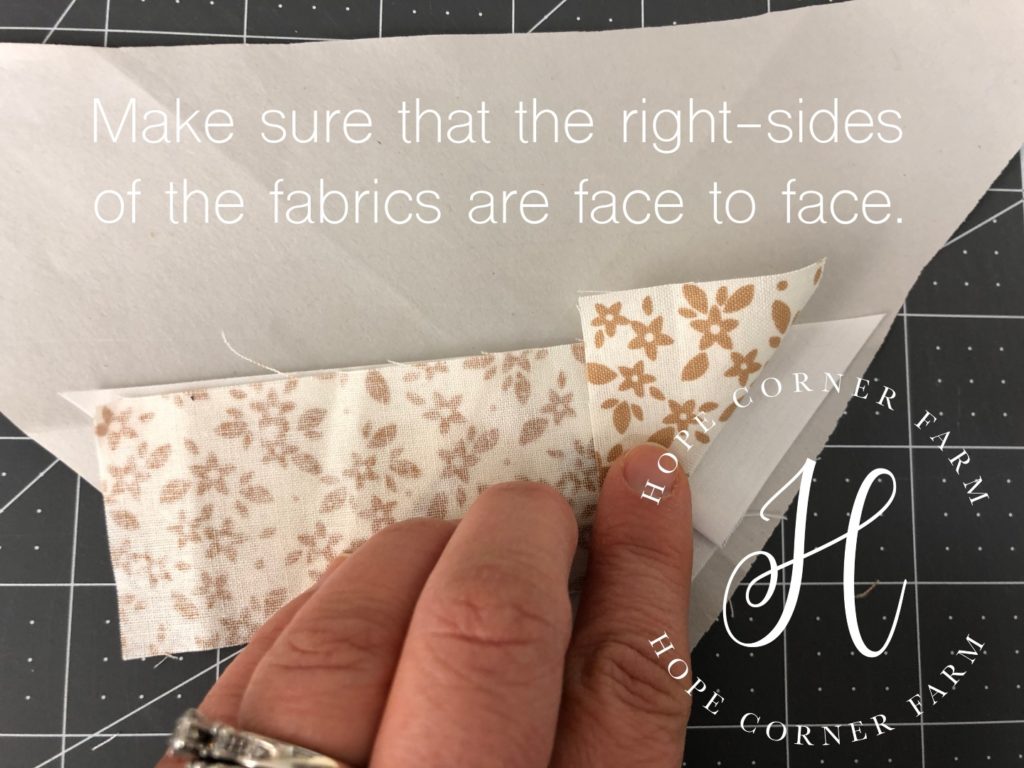
Begin by placing A2/B2 face down on top of B1/B2.
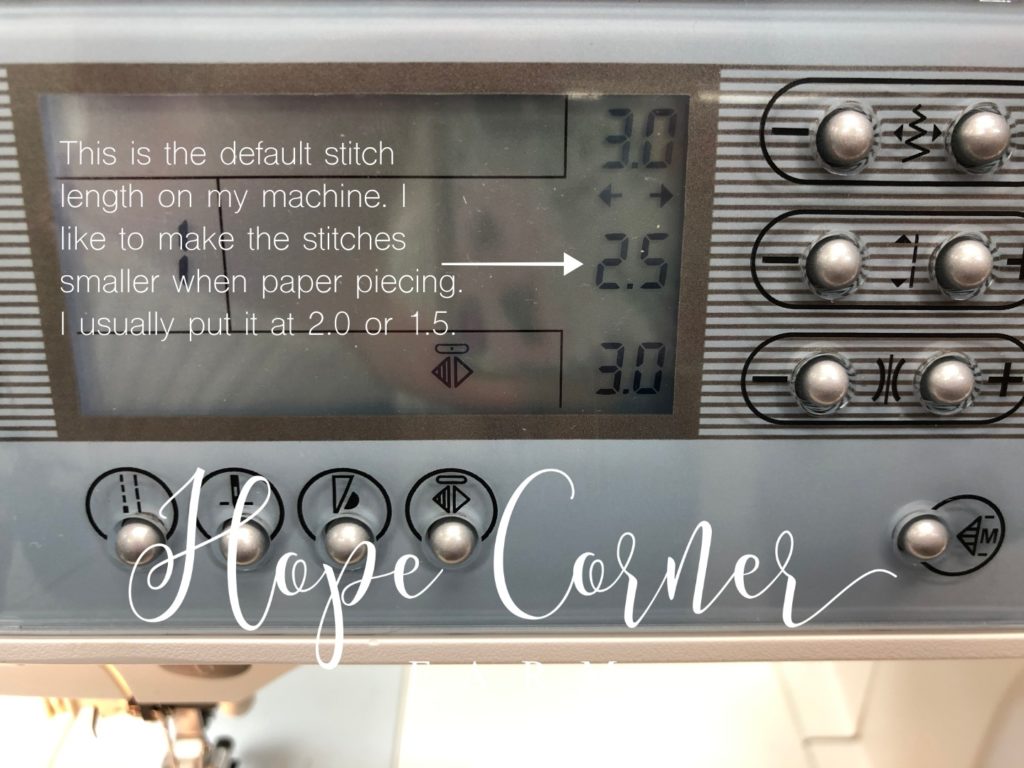
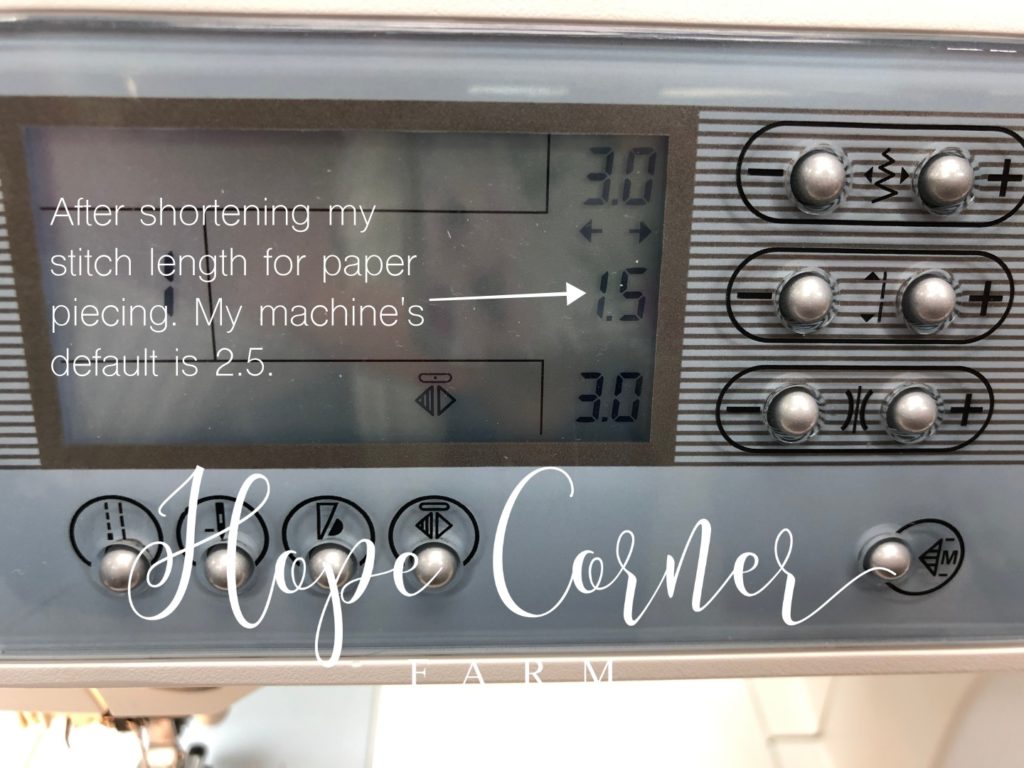
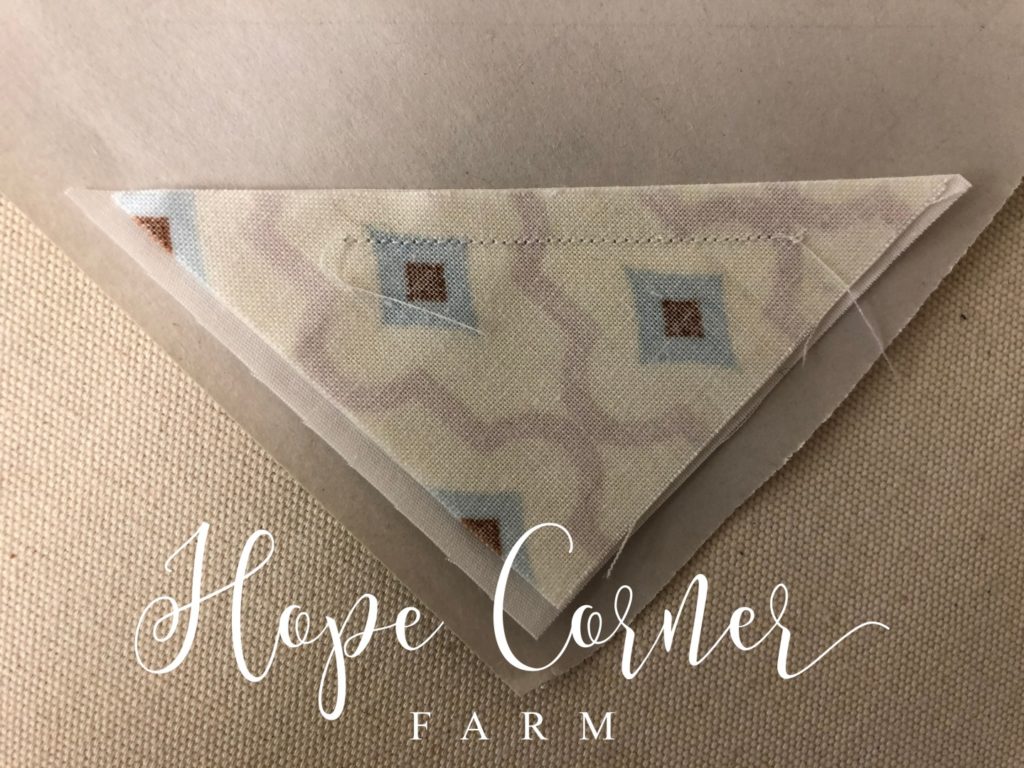
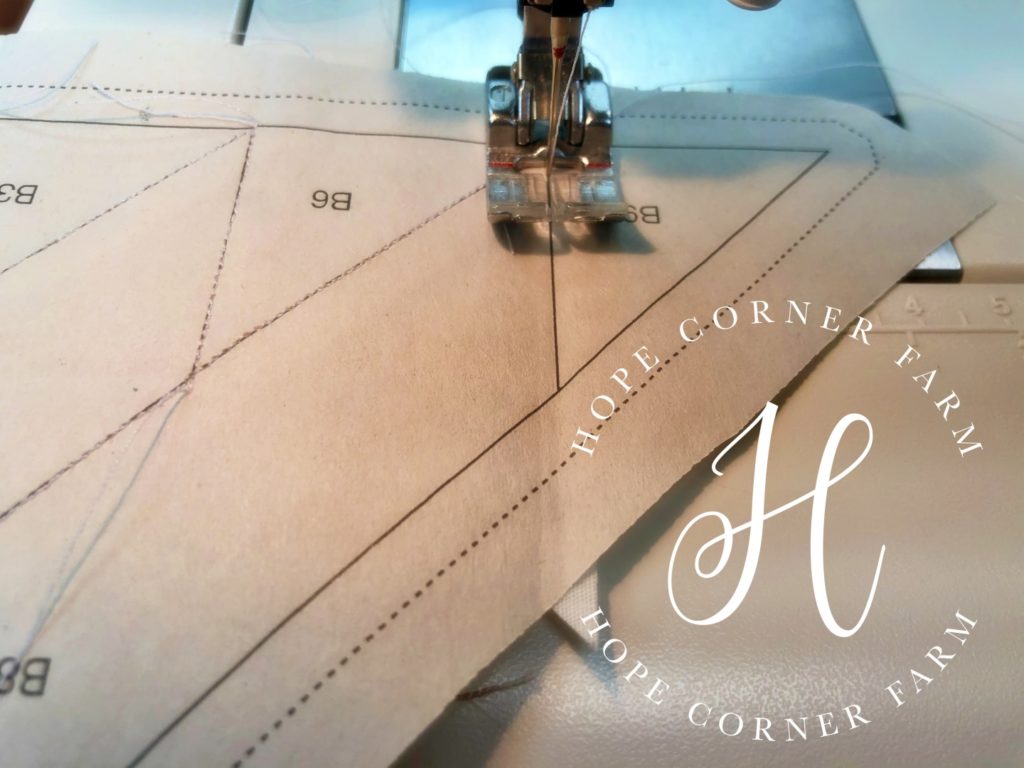
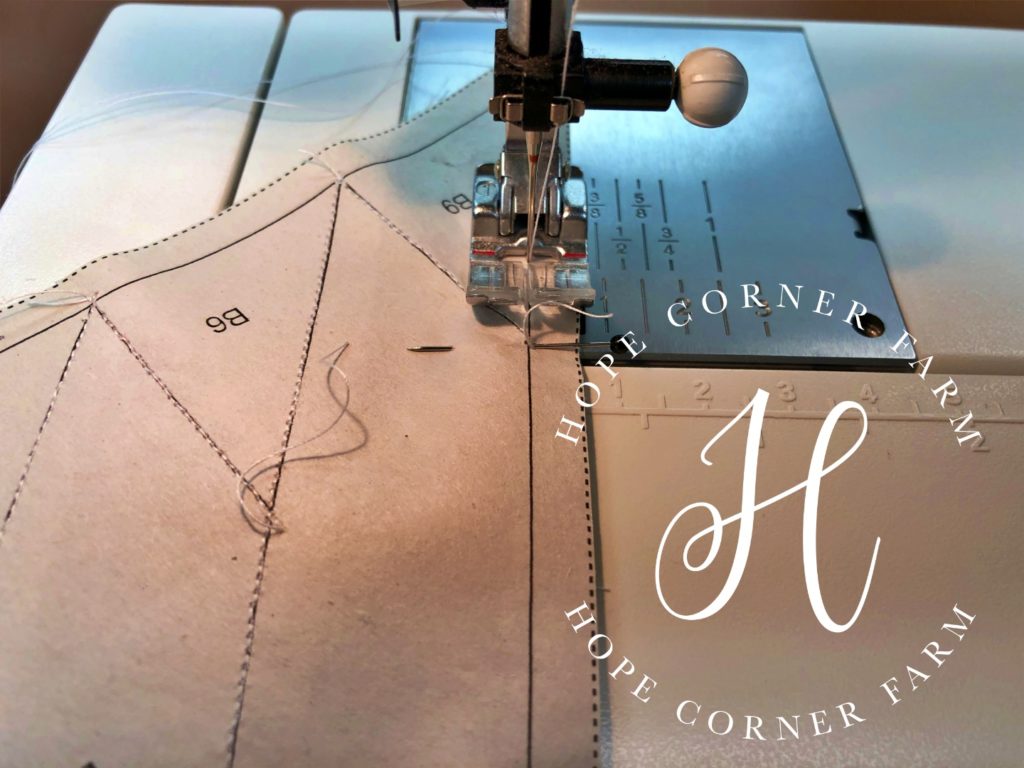
Before sewing, there are a couple of things to check. First, I like to make my stitch length shorter when paper piecing. This makes it easier to tear the paper off at the end of sewing.
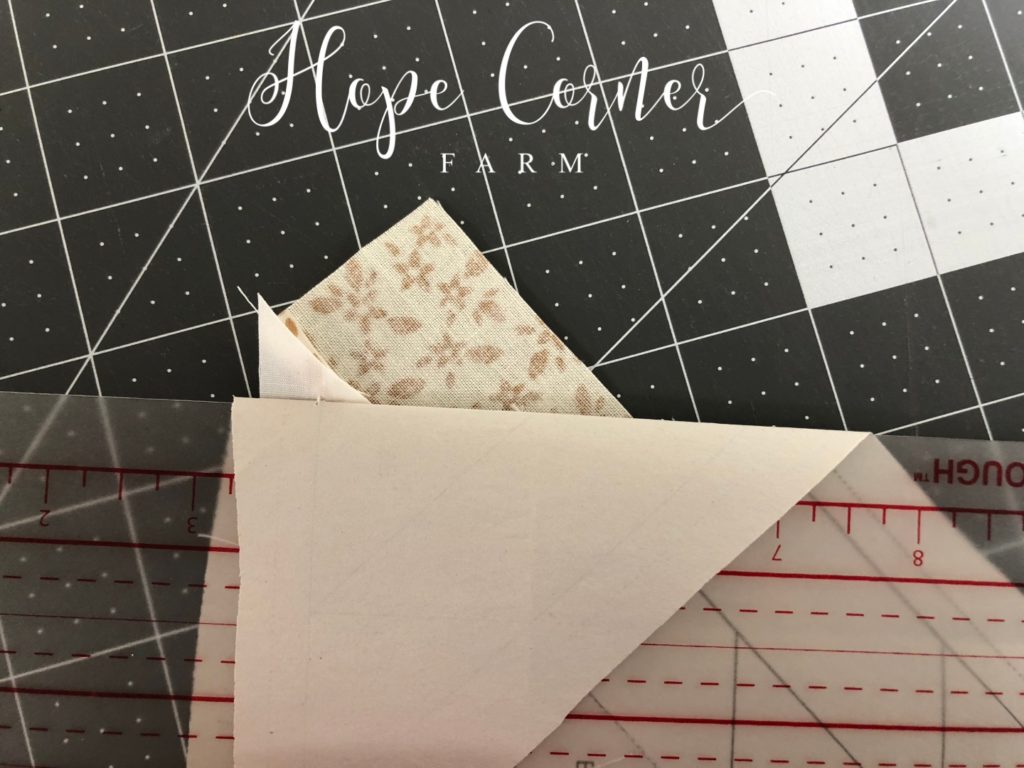
The second thing to look at is making sure that there is at least a 1/4″ seam allowance of fabric past the stitching line. I do this by holding onto the fabrics that I have placed and then hold the paper and the fabrics up to a light to ensure that I have the needed 1/4″ seam allowance. See attached picture for details.

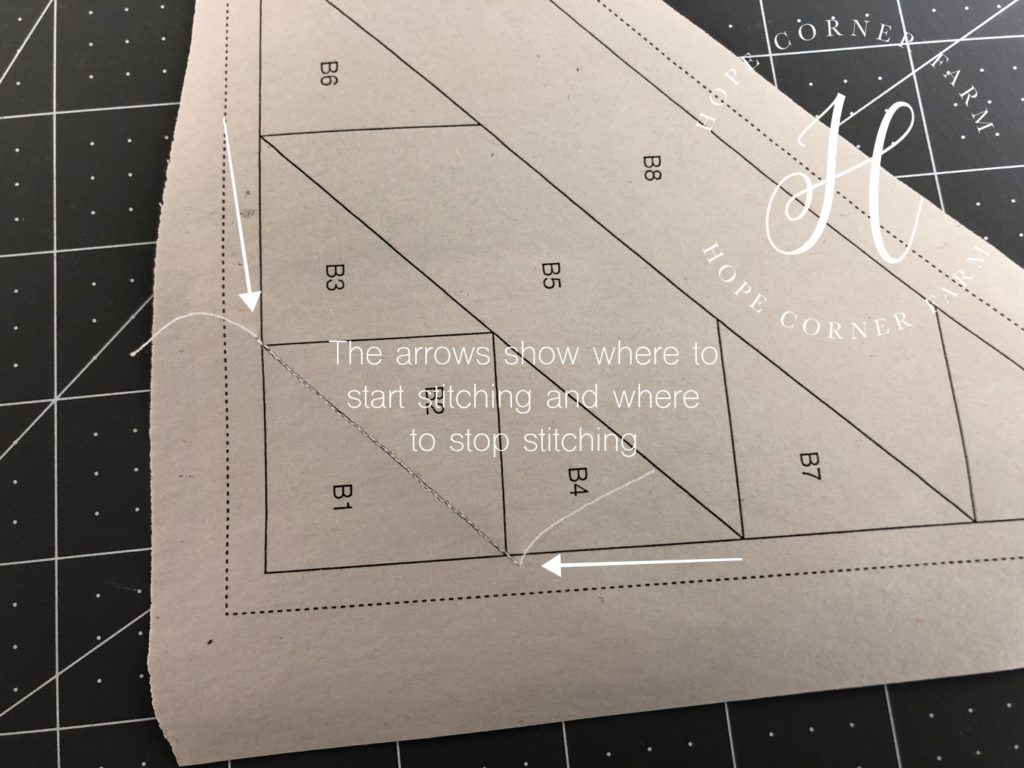
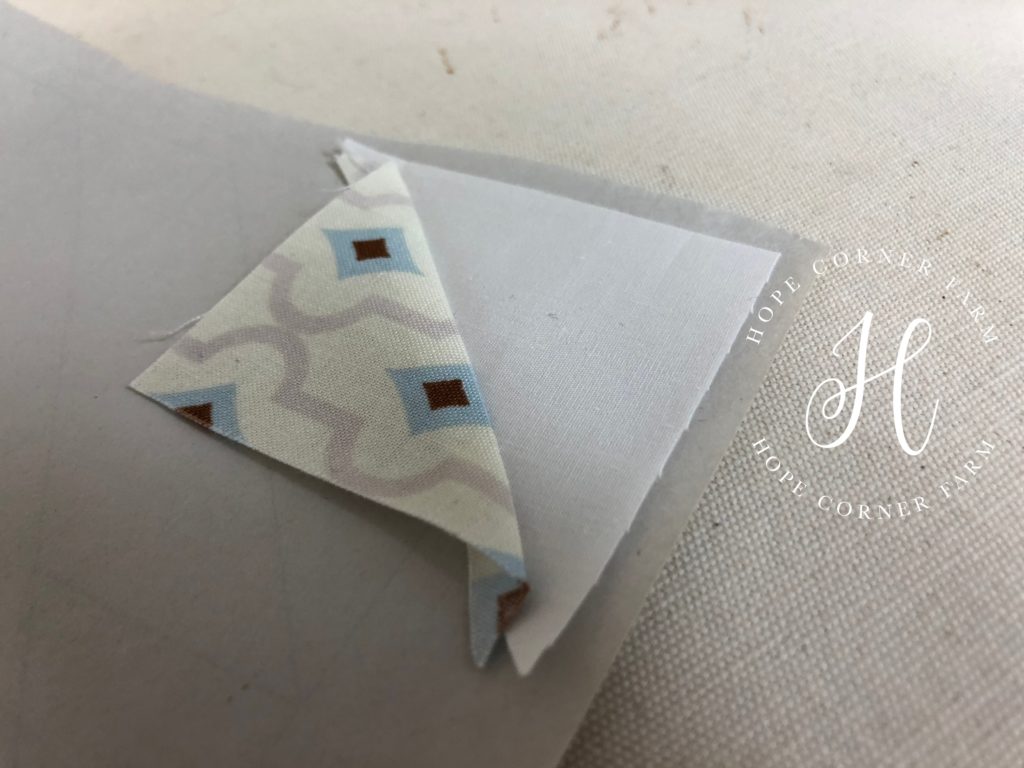
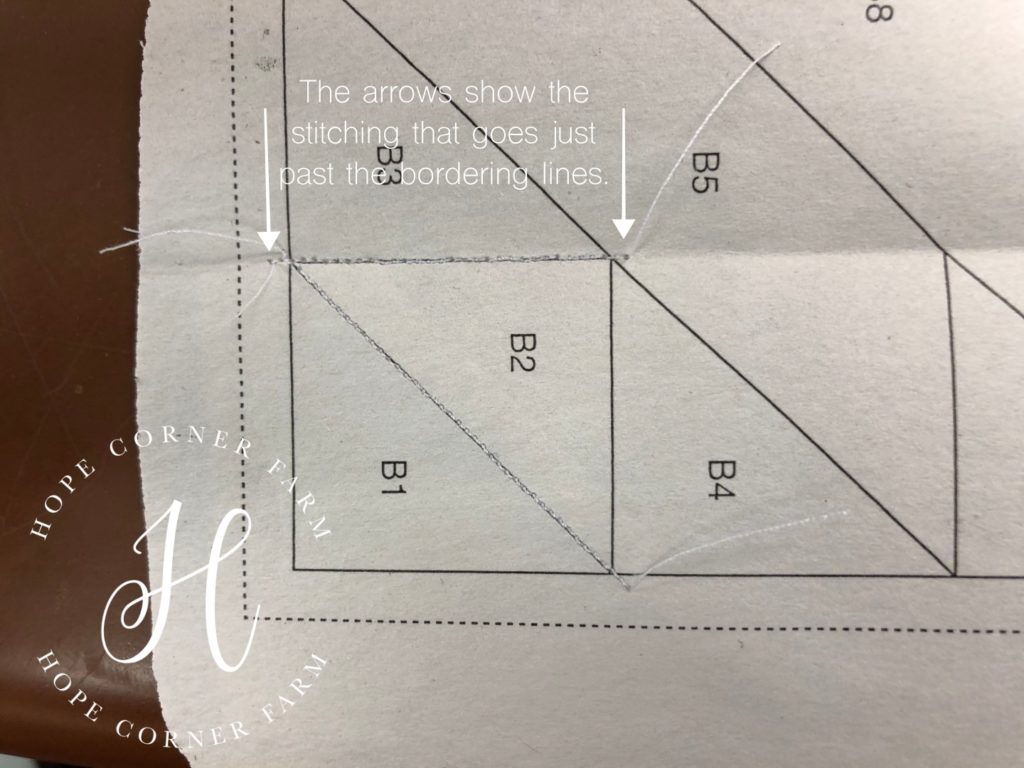
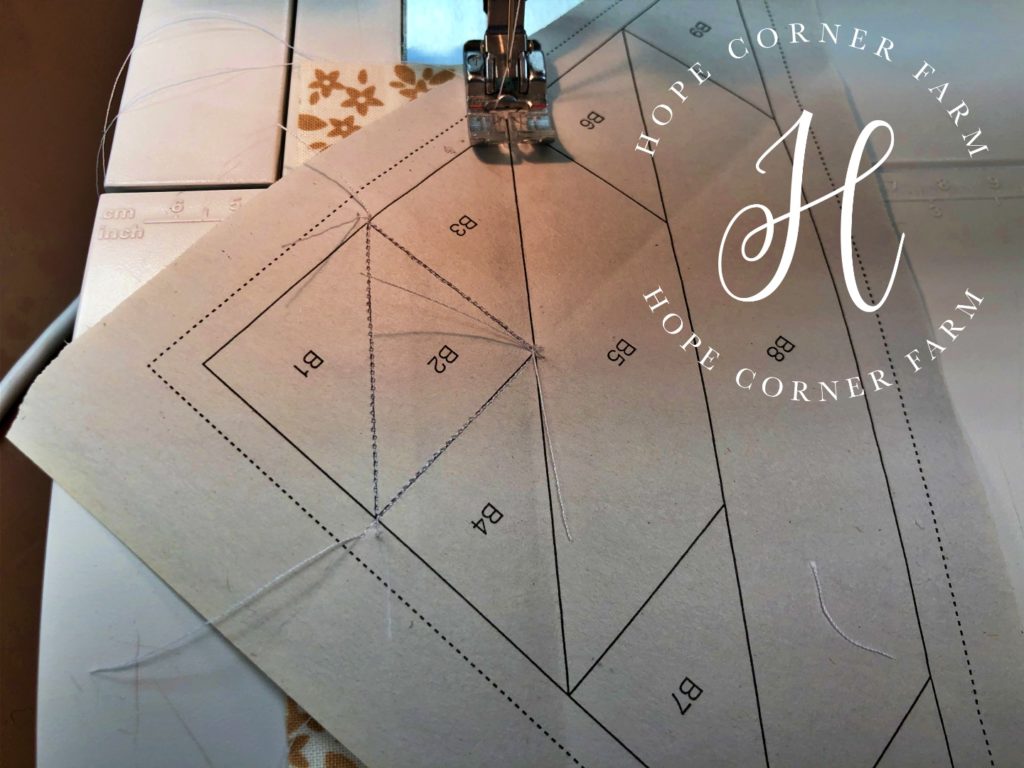
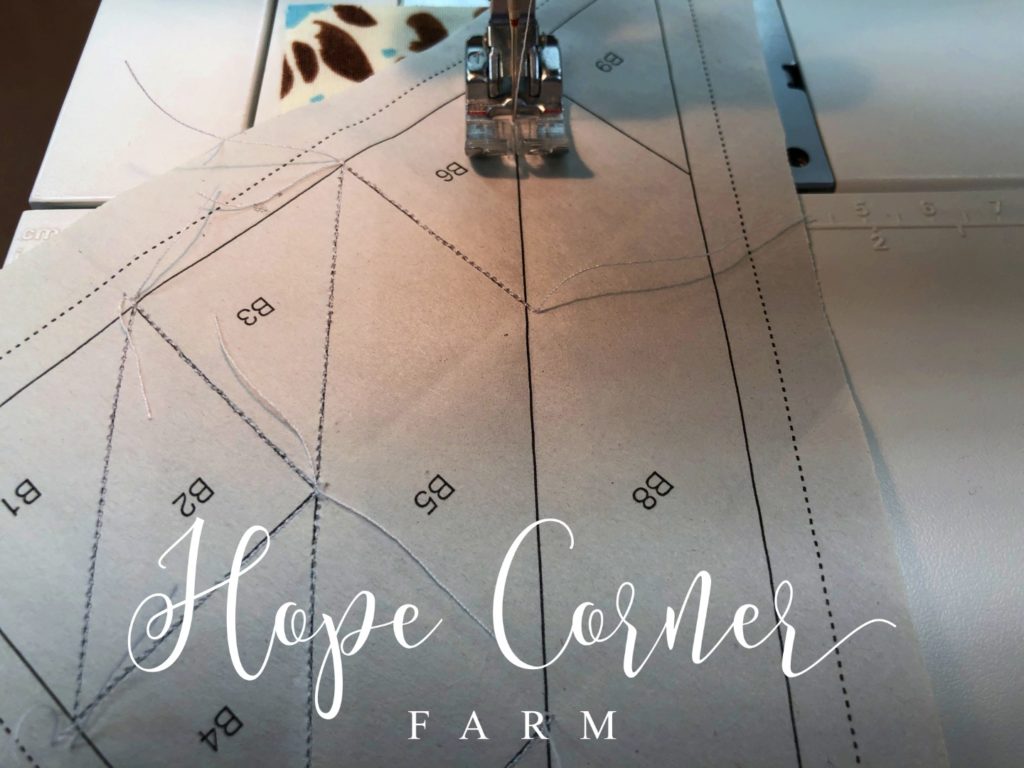
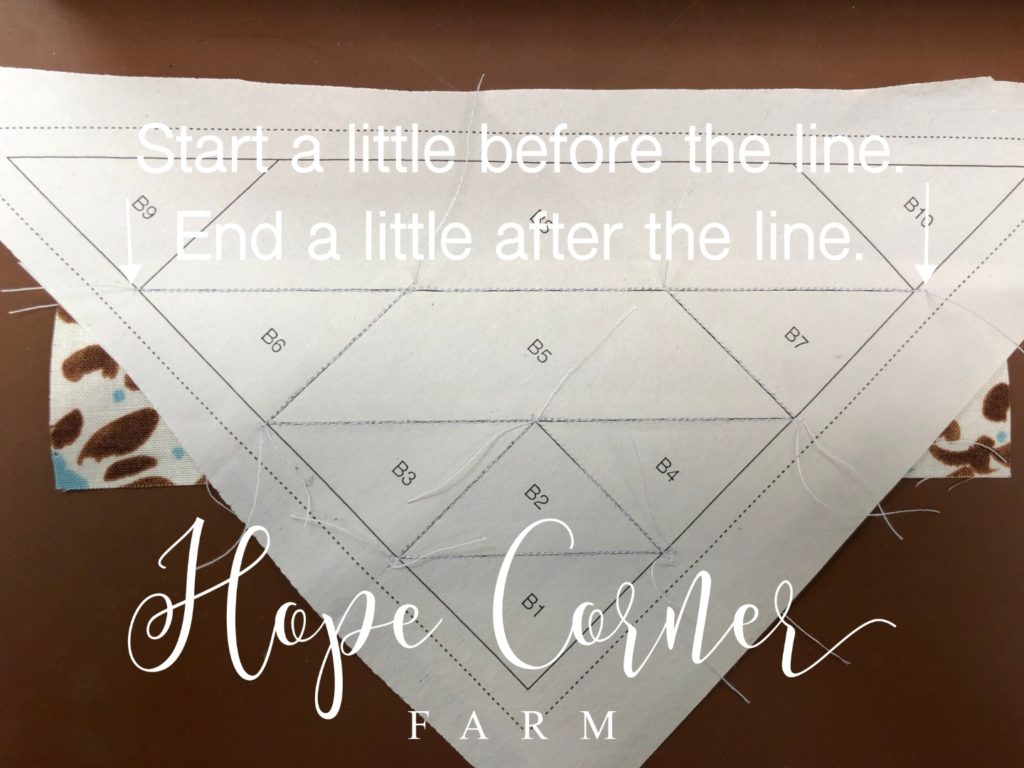
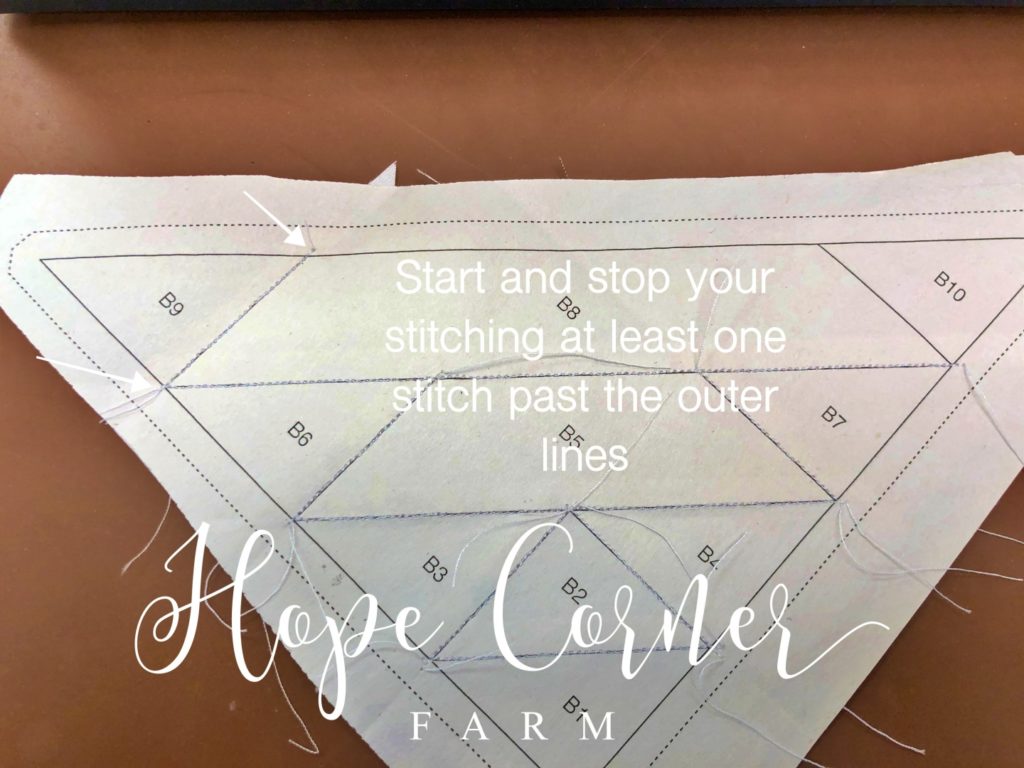
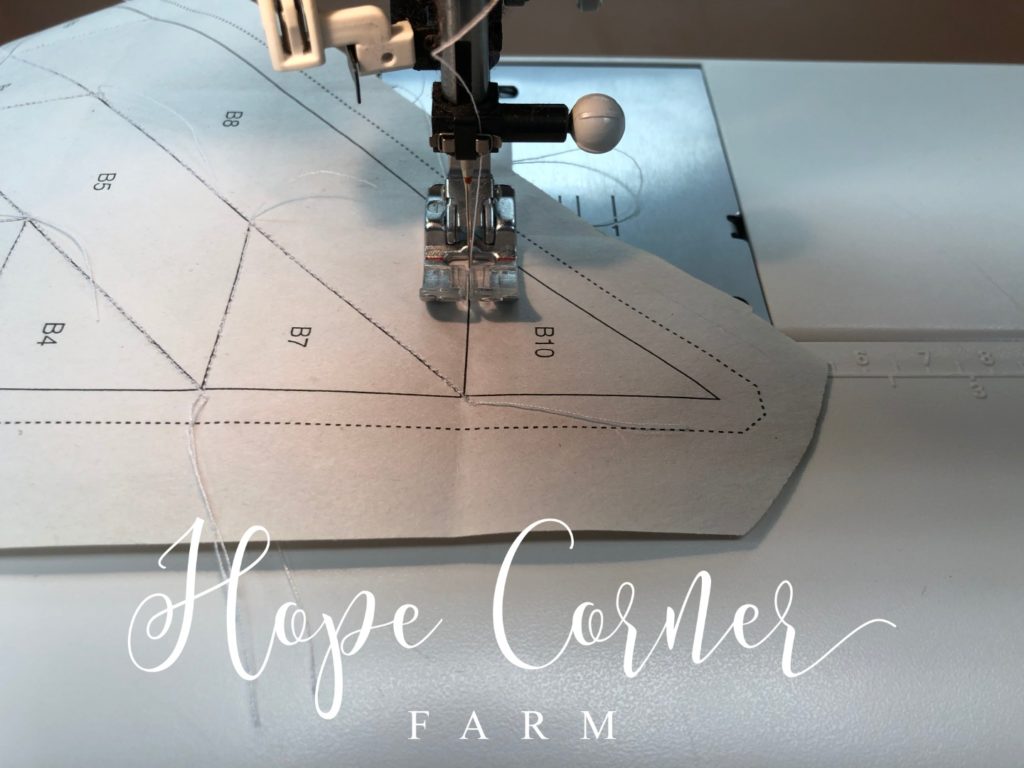
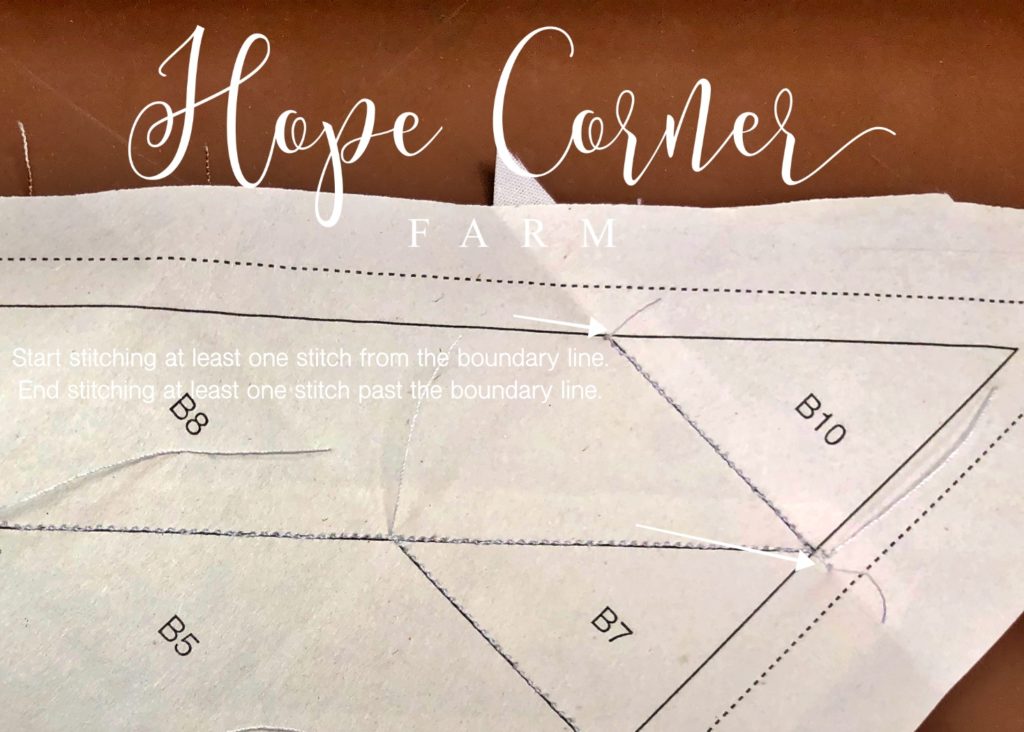
Sew directly down the line that is located in between A1/B1 and A2/B2. Start and end at least one stitch past the solid line that runs around the entire big triangle half.

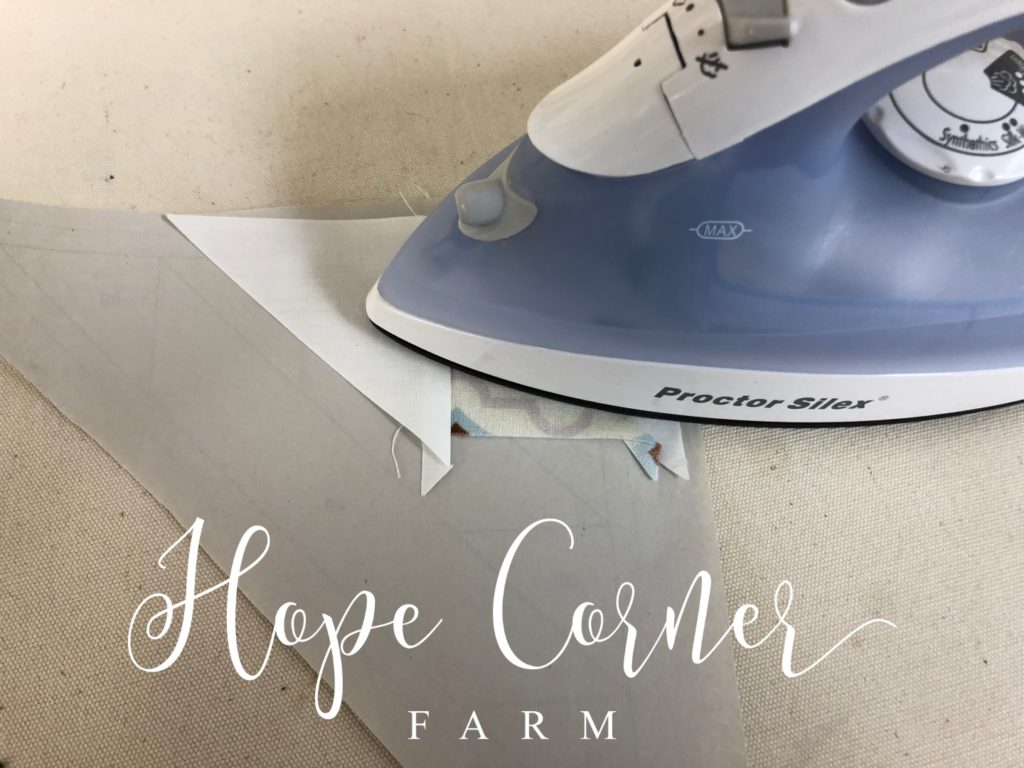
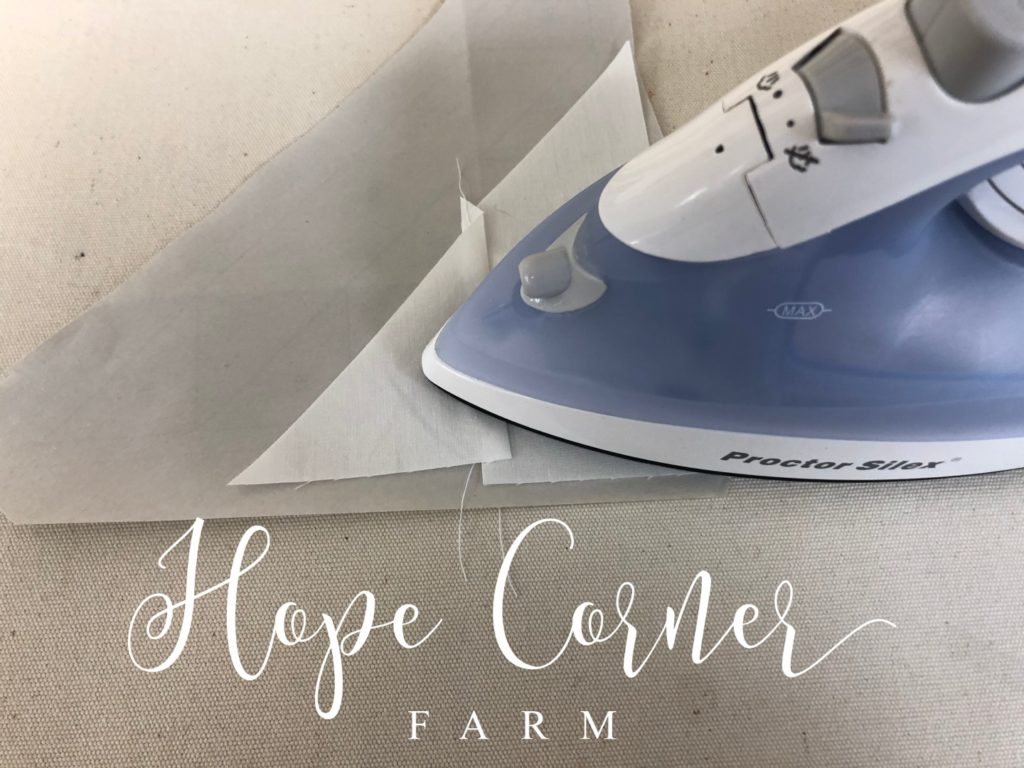
After sewing, iron the seam towards the A2/B2 piece.
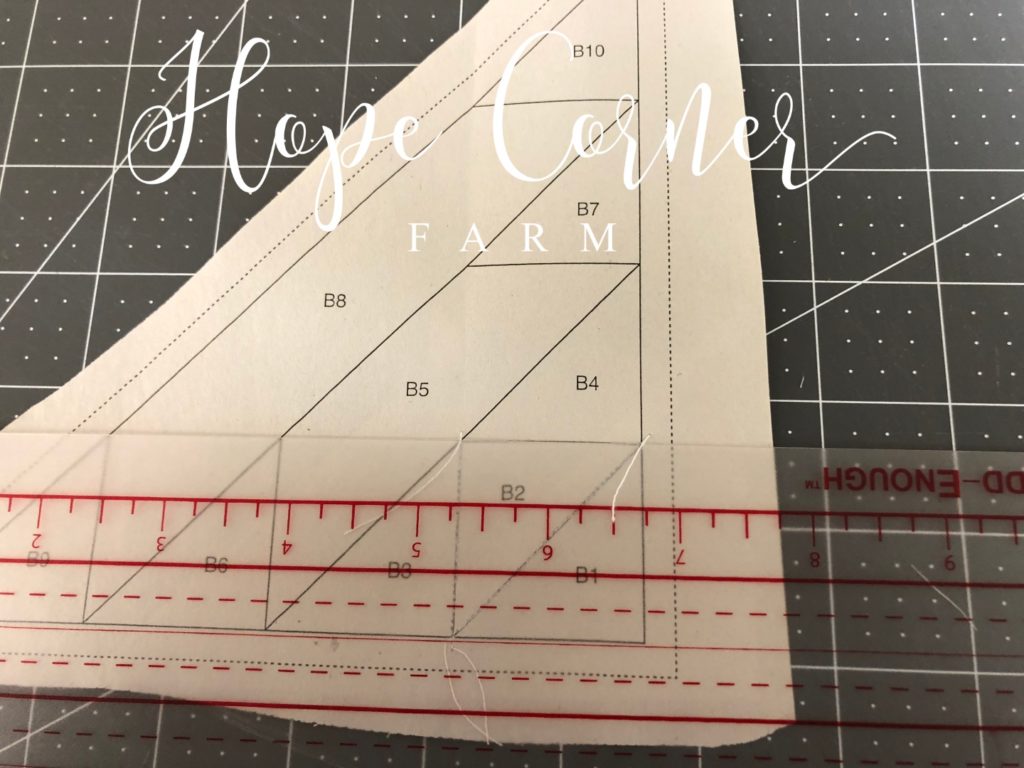
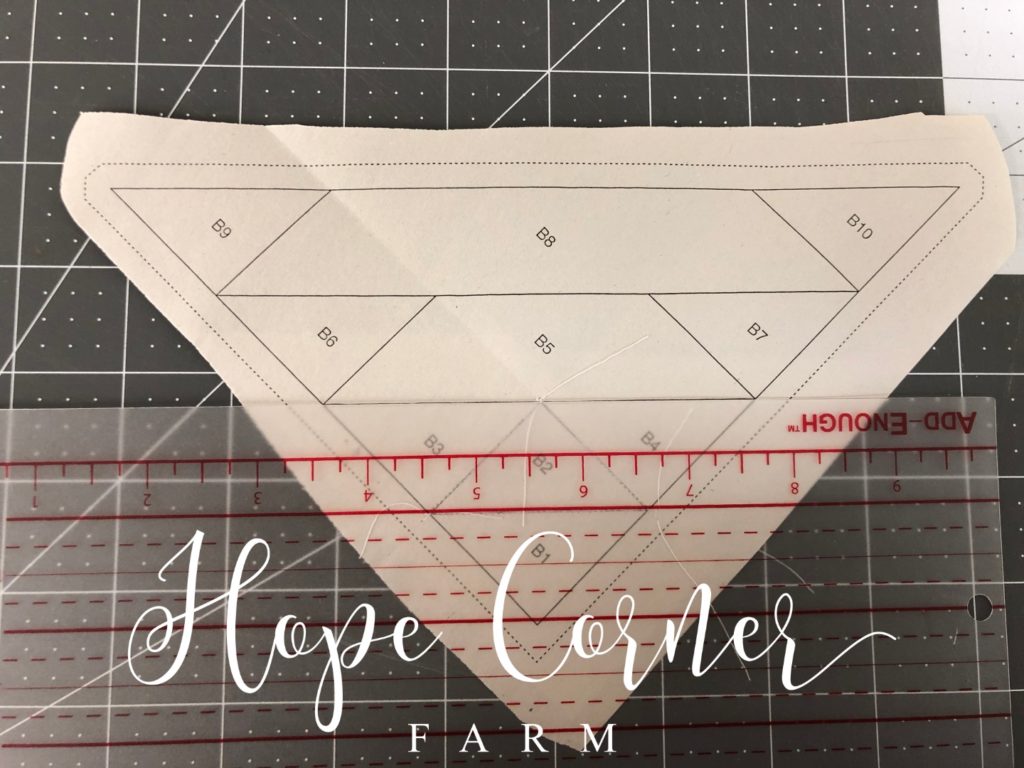
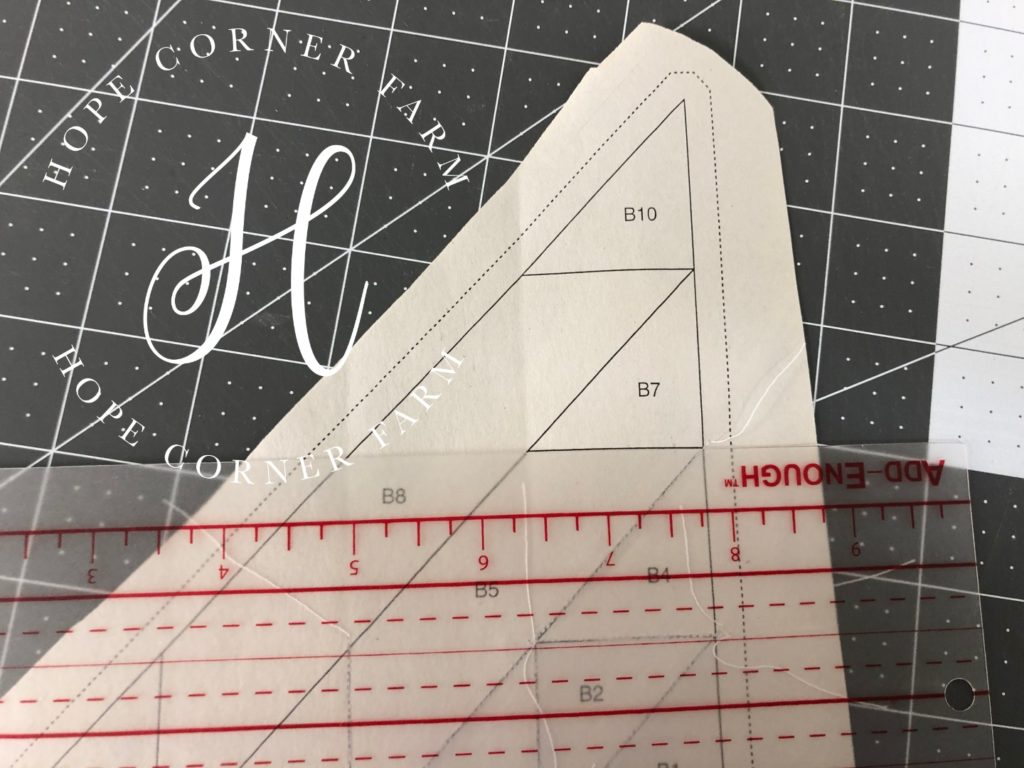
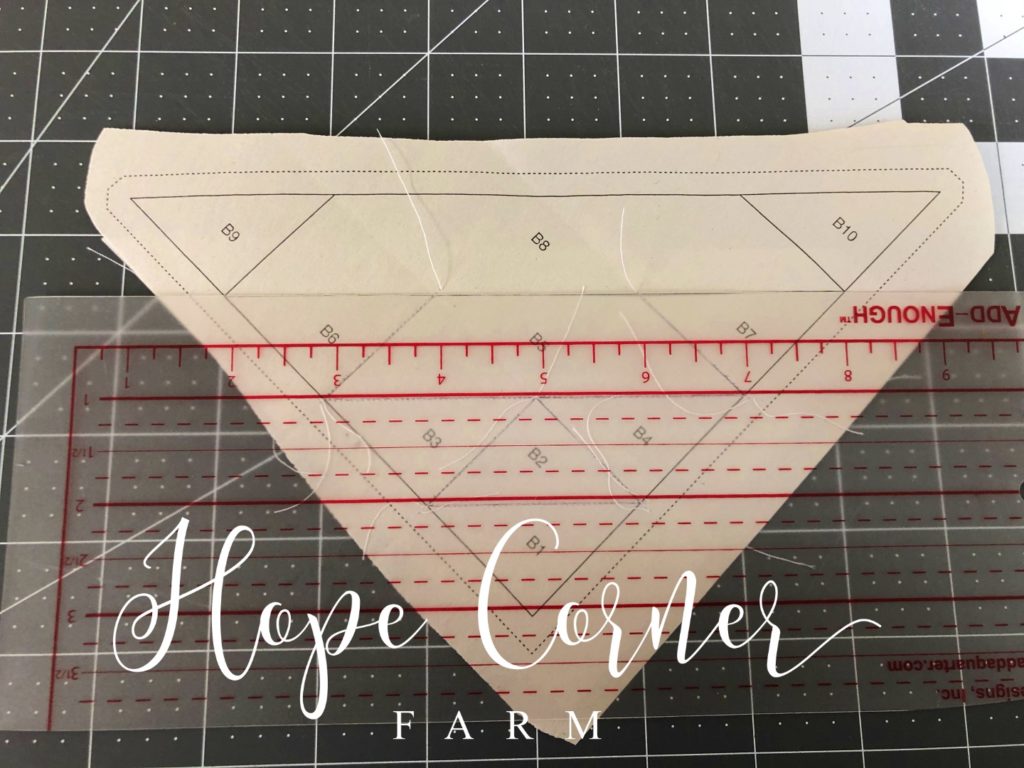
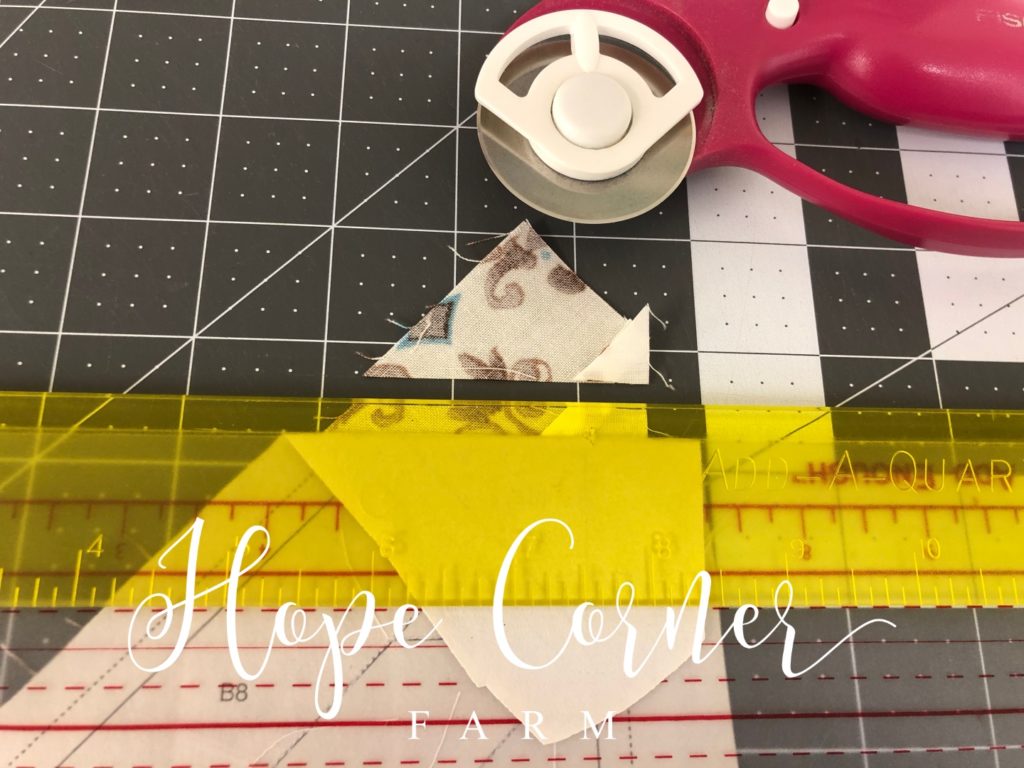
Sewing A2/B2 to A3/B3:
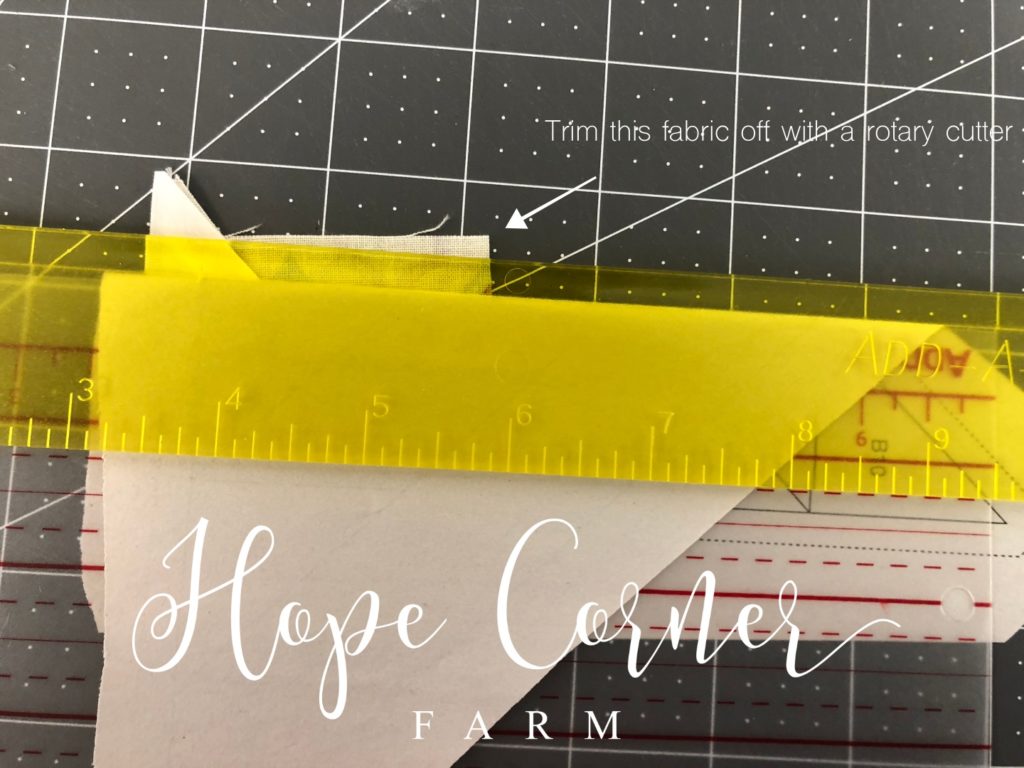
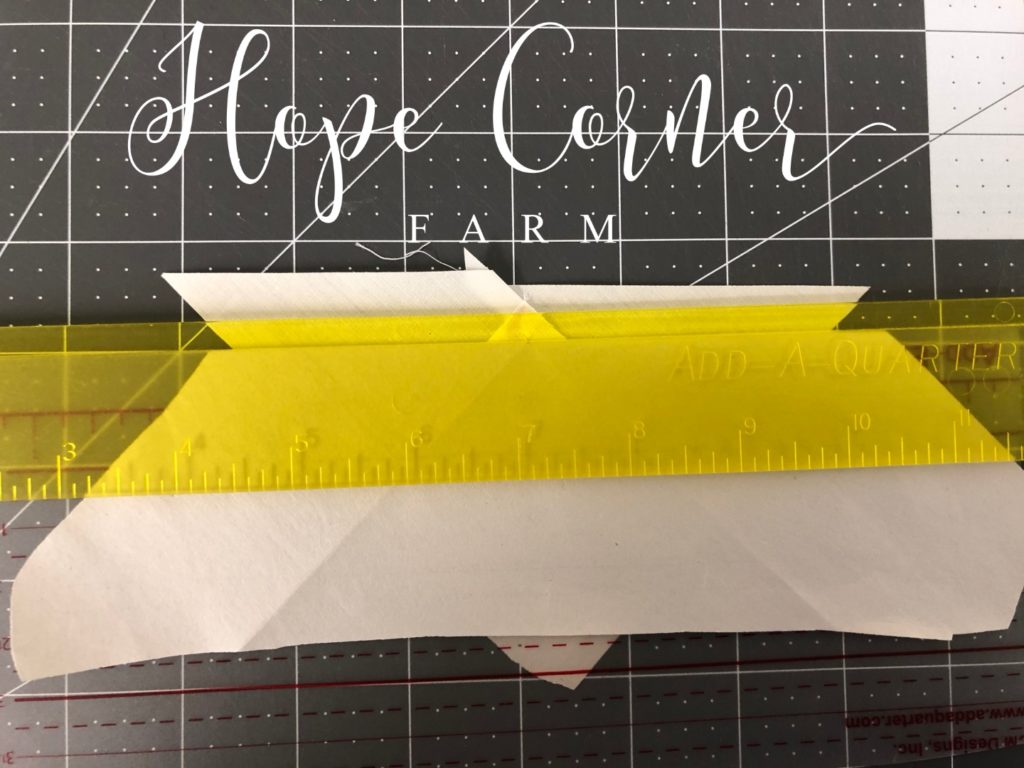
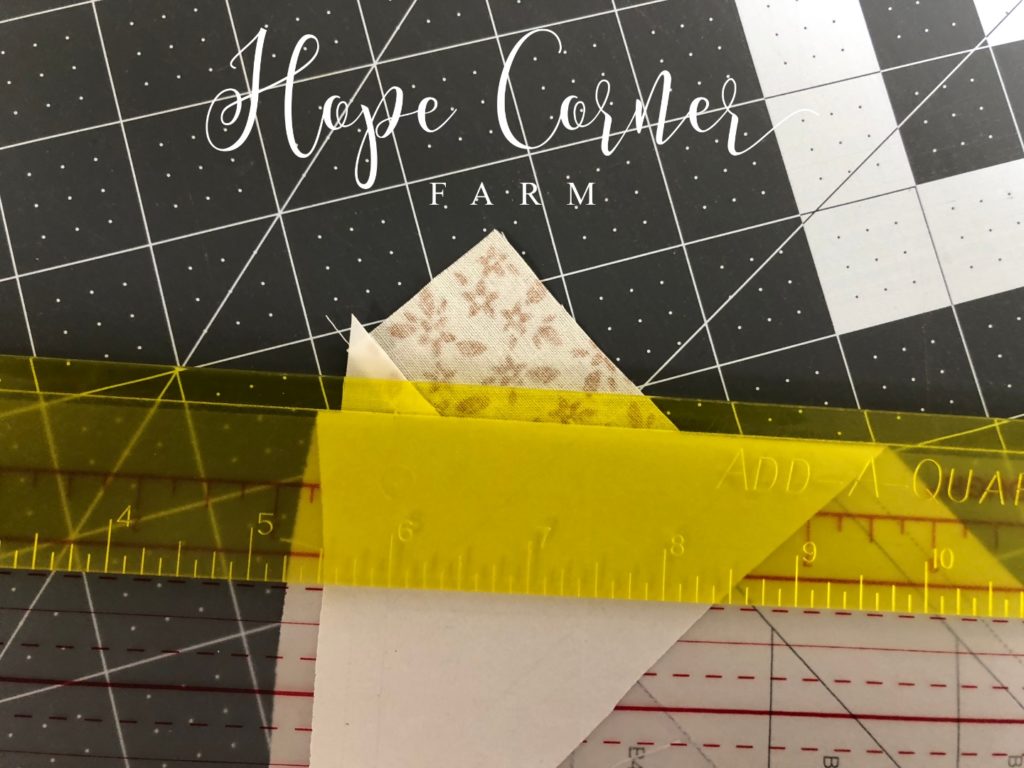
To begin, we need to trim the fabric for the seam allowance between these two pieces. Start by placing the paper with the printed side up on the cutting mat. Next, place the Add-Enough ruler directly on top of the line between pieces A2/B2 and A3/B3.
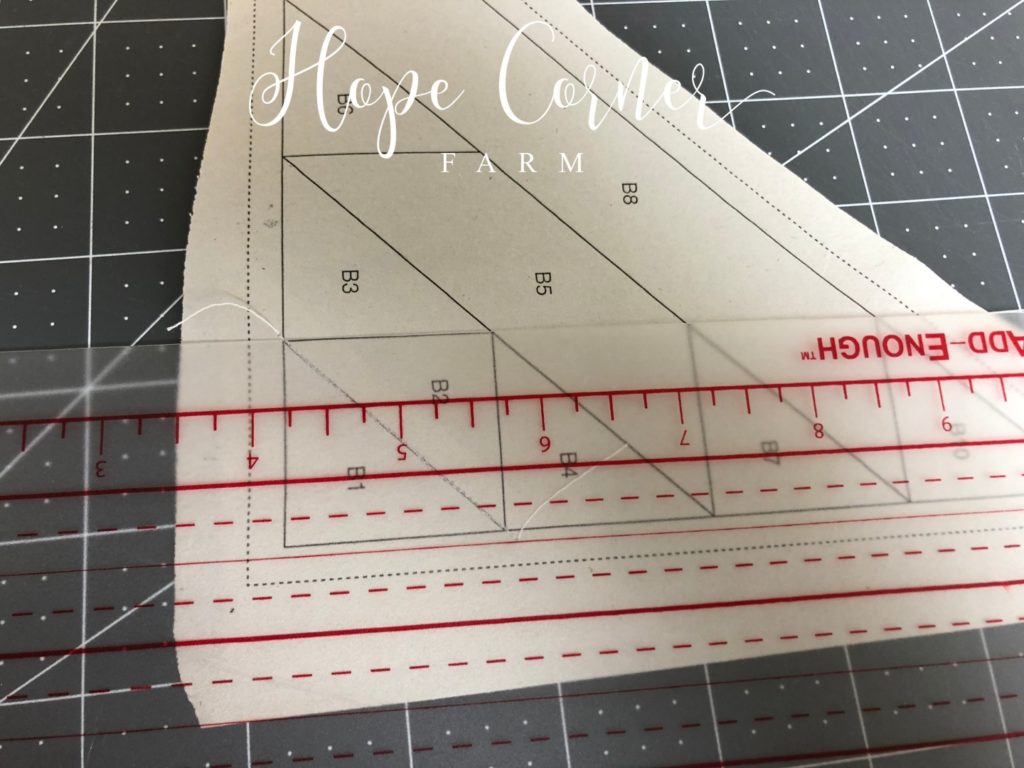
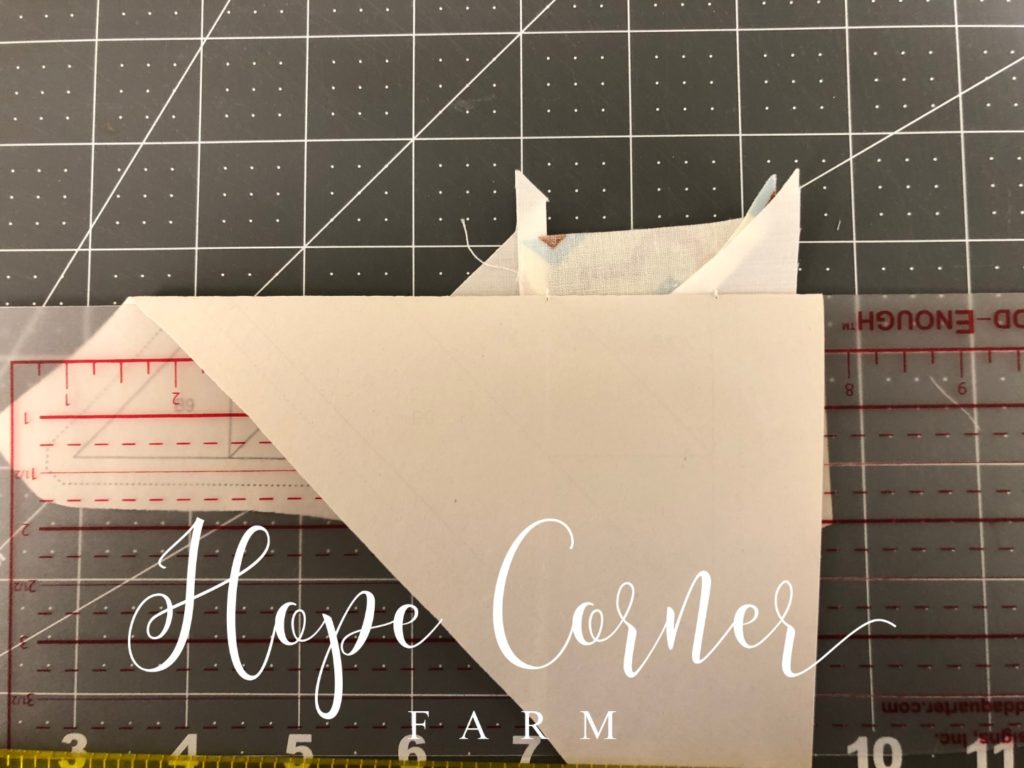
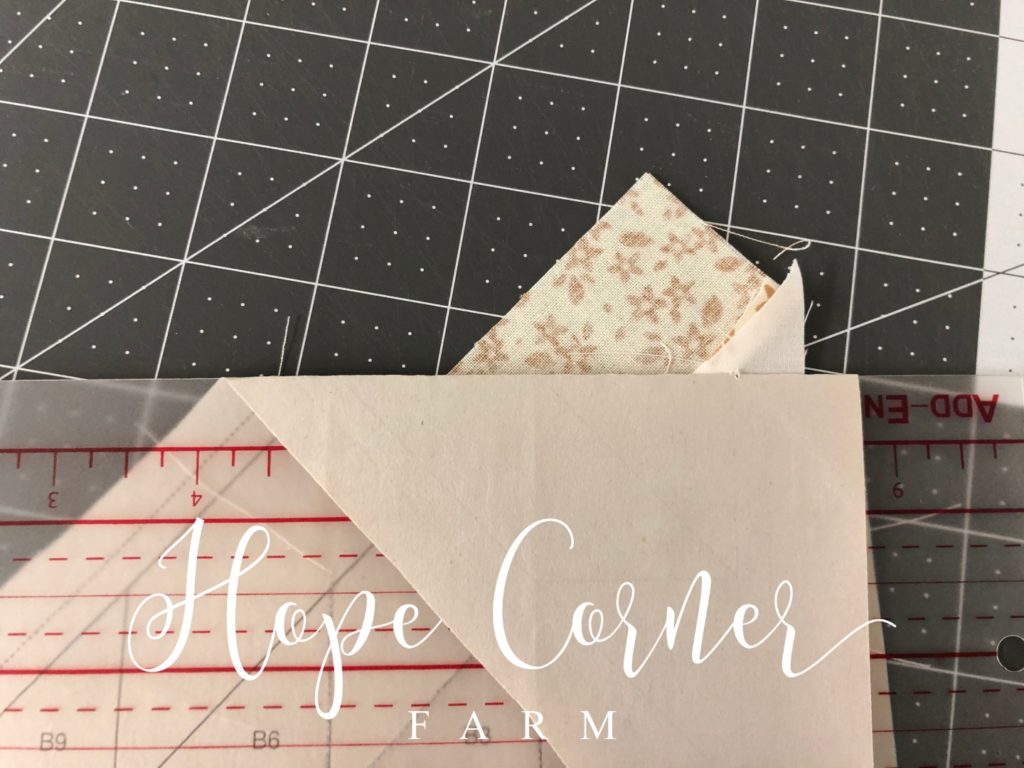
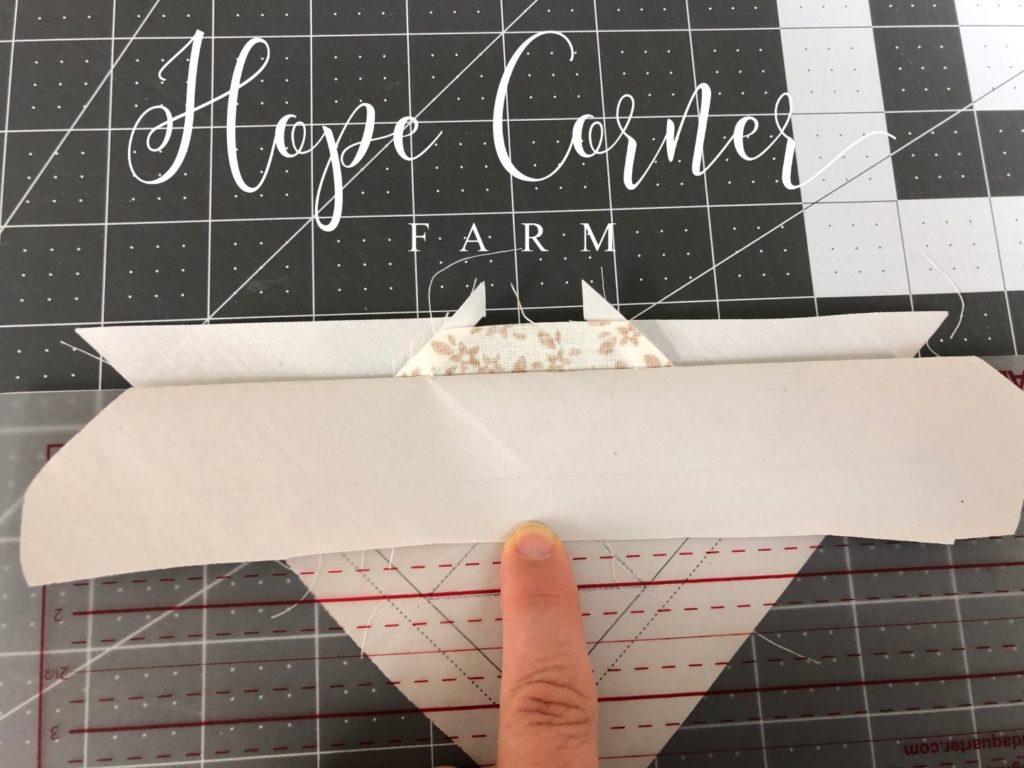
Now, fold the paper down over top of the Add-Enough ruler.
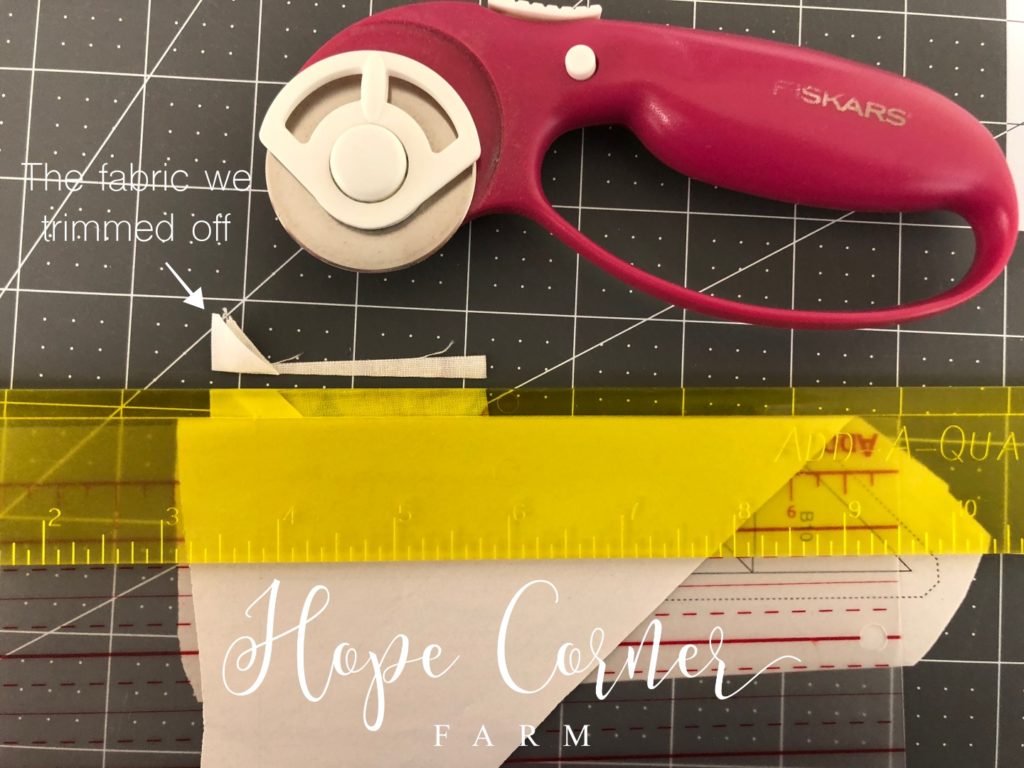
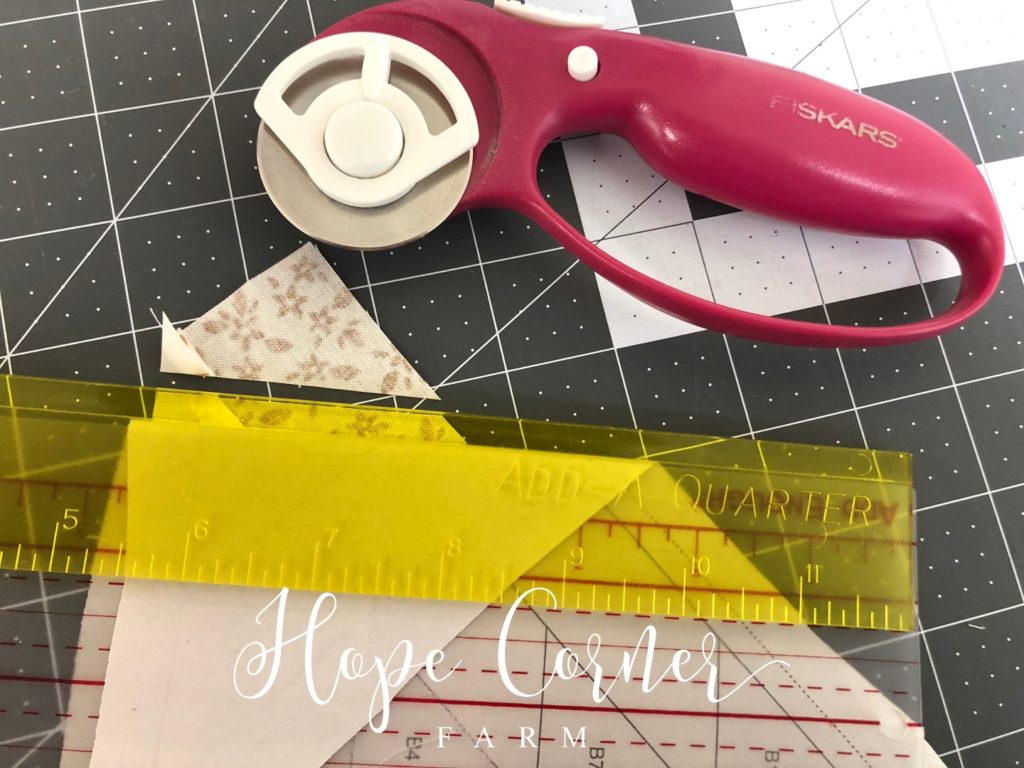
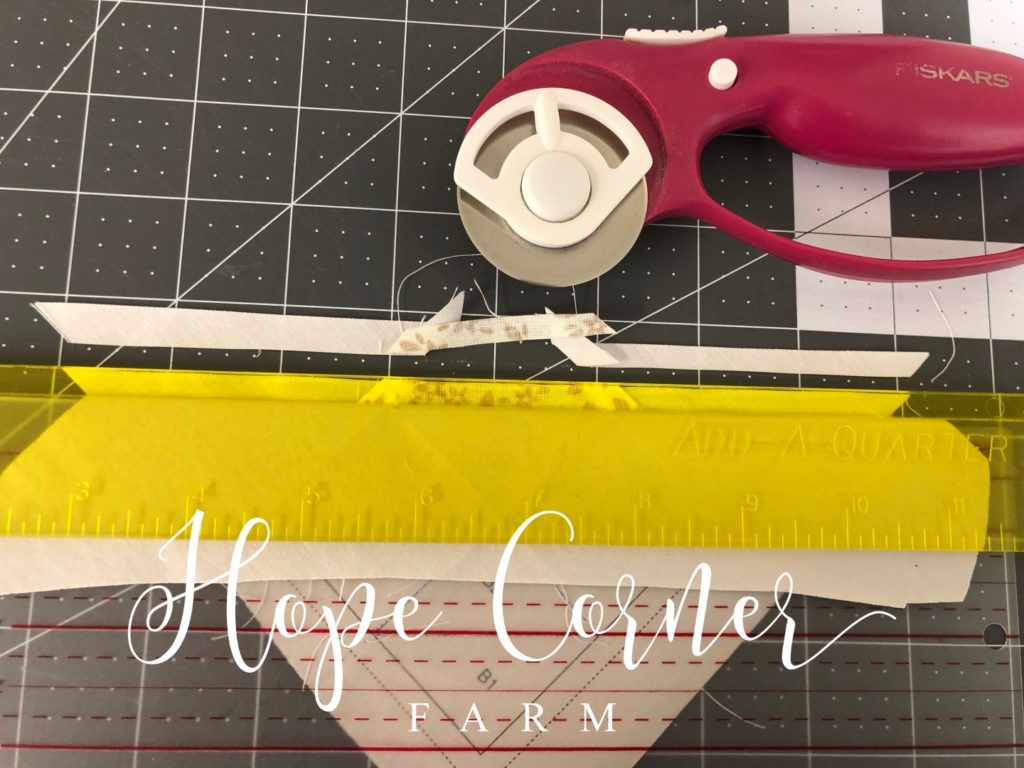
Place the Add-a-Quarter ruler on top of the paper and the Add-Enough ruler. Make sure that the Add-a-Quarter ruler is snug against the ledge of the Add-Enough ruler. Trim any excess fabric off with a rotary cutter.
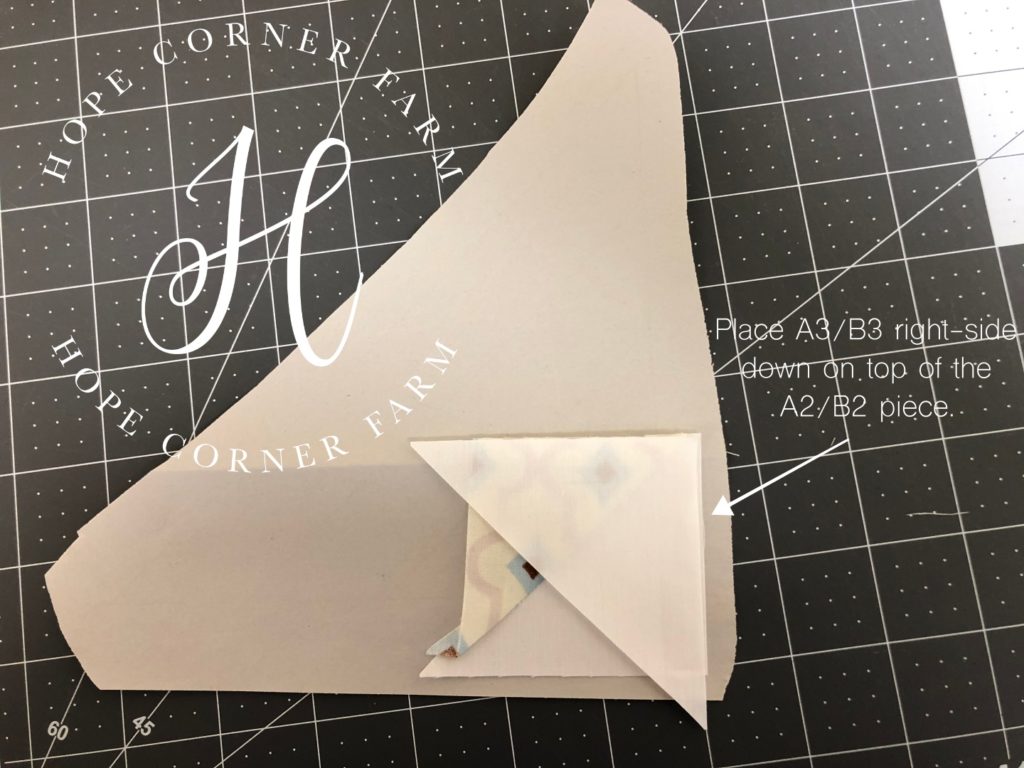
Locate one of the Background Half Square Triangles. This will be piece A3/B3.
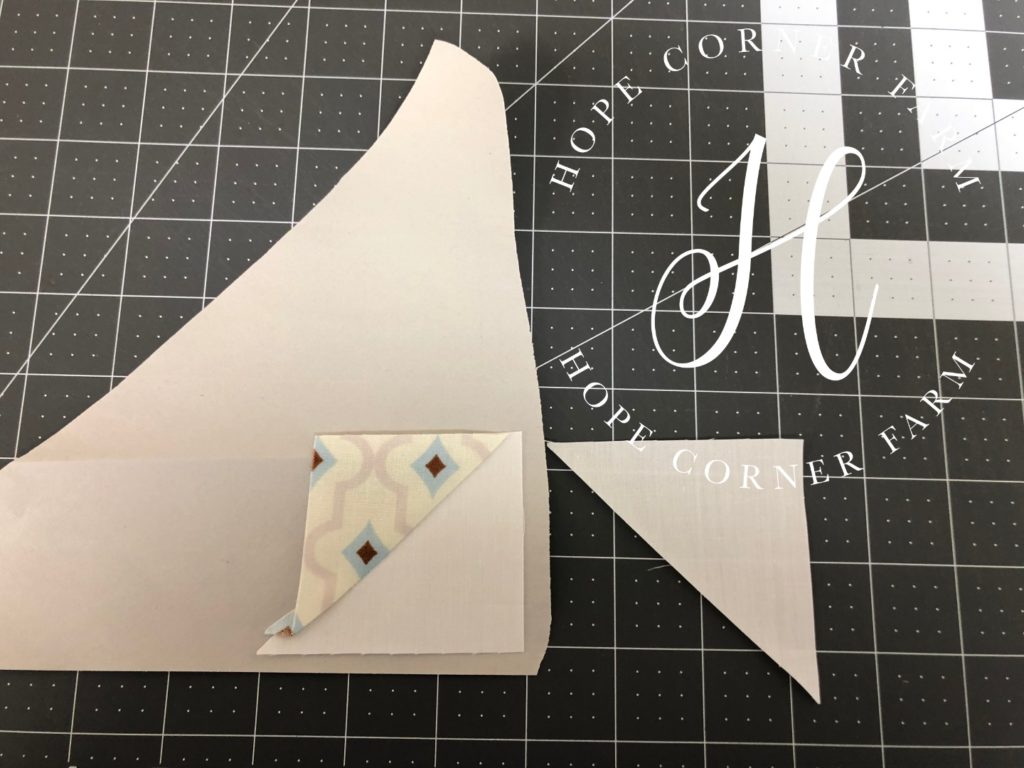
After locating the A3/B3 piece, place it right side down on top of the A1/B1 piece.
Now, sew directly down the line between A2/B2 and A3/B3.
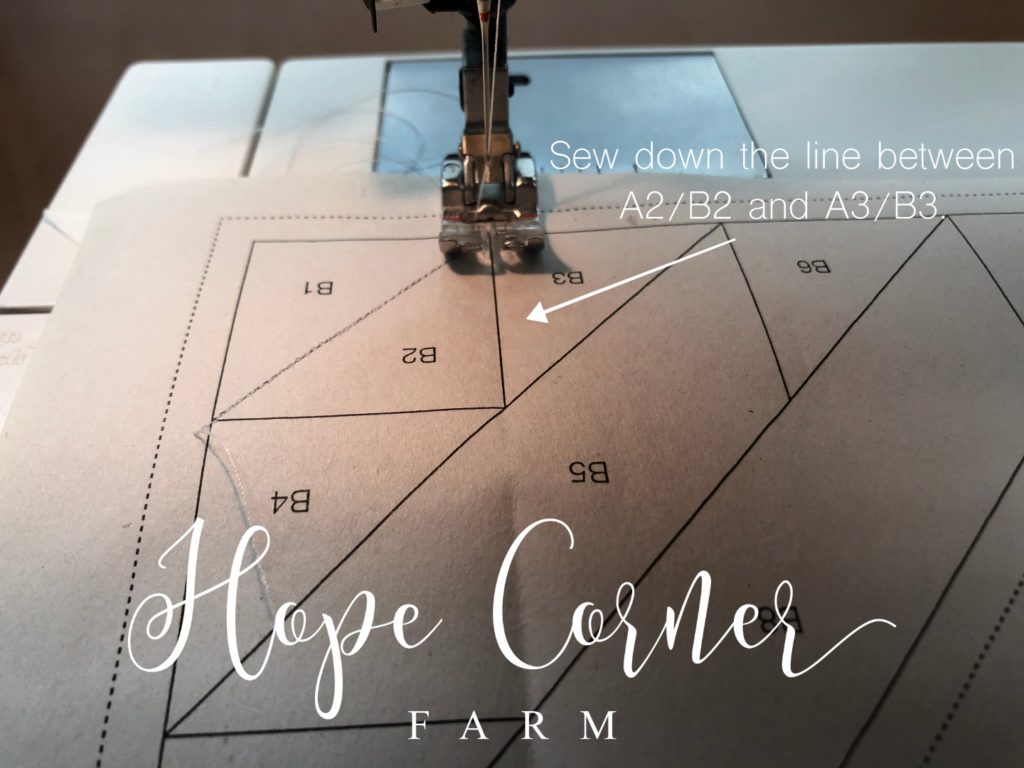
Remember that the stitching starts and stops at least one stitch before and one stitch past the border lines. See picture for details.
After sewing, press towards A3/B3.
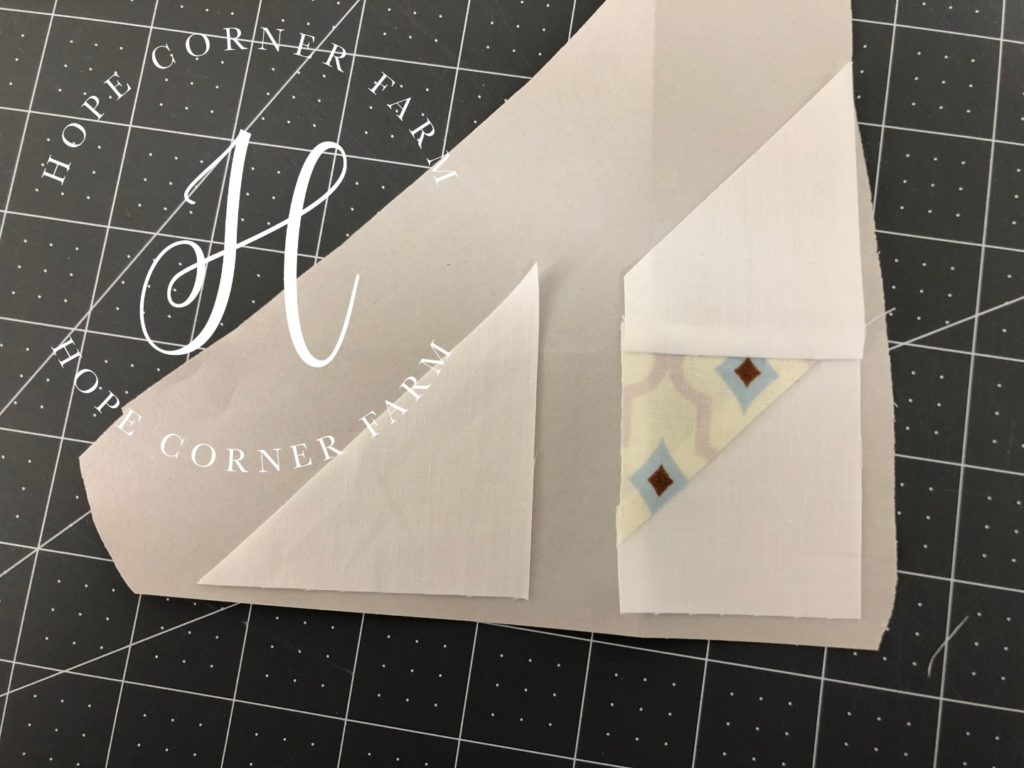
Sewing A4/B4 to A2/B2:
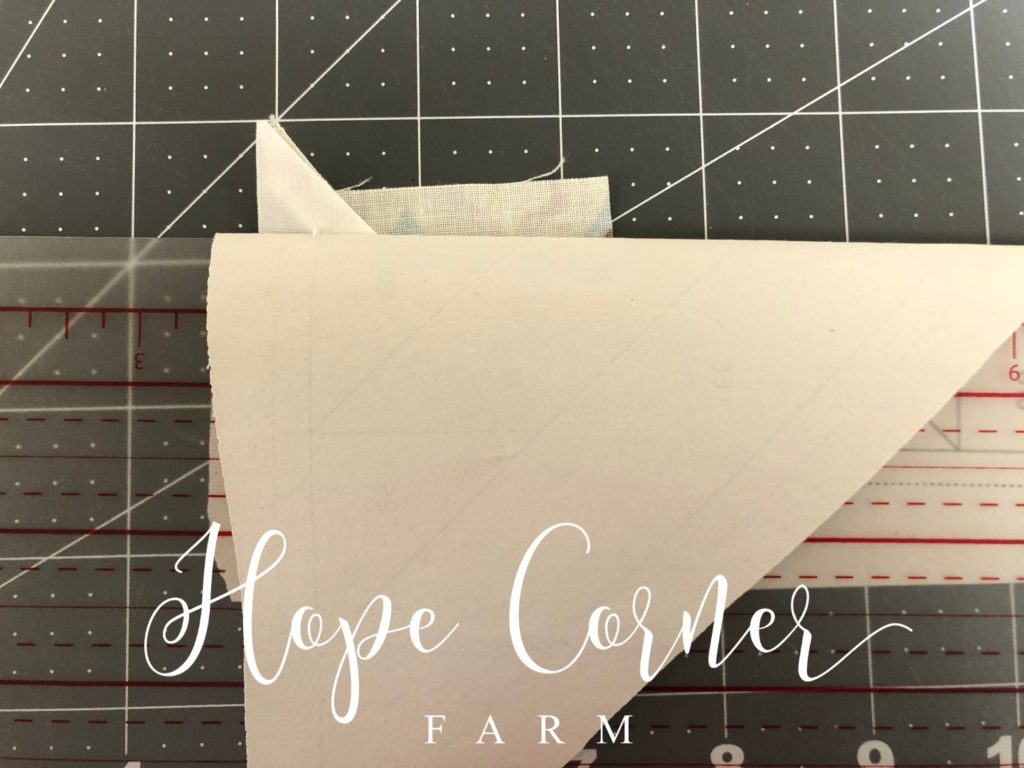
Now we need to trim the seam allowance between A2/B2 and A4/B4. Again we place the Add-Enough ruler directly on the line between A2/B2 and A4/B4.
Fold the paper over the Add-Enough ruler. This keeps the paper out of the cutting path and it allows us to see the fabric that needs to be trimmed.
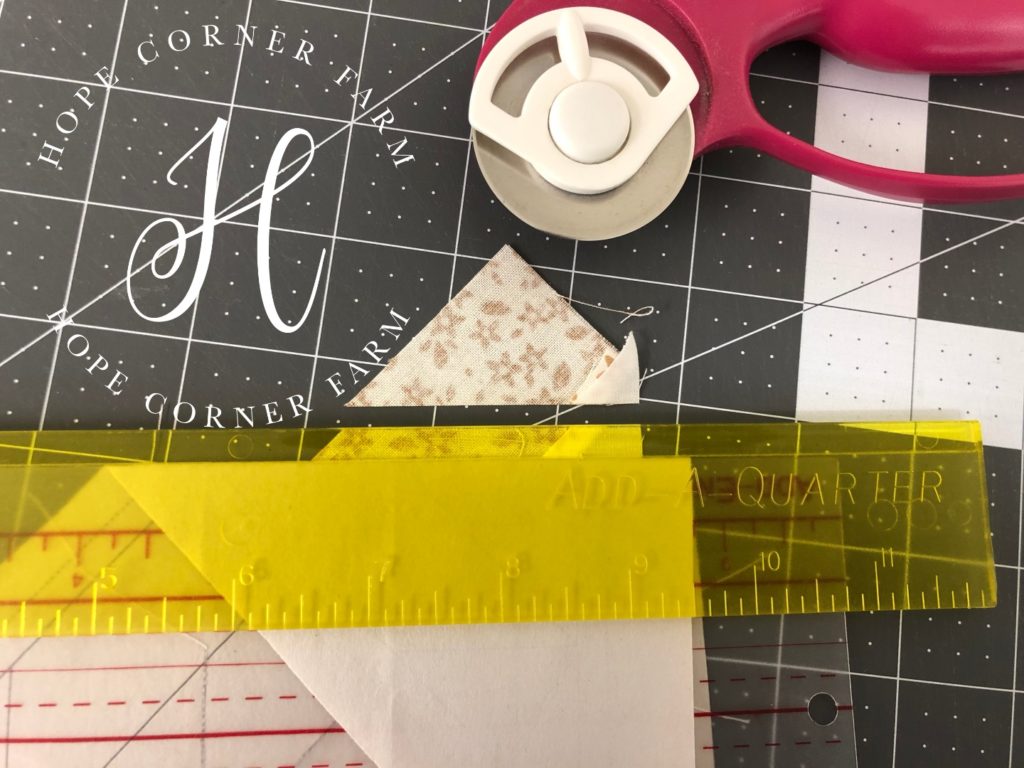
Place the Add-a-Quarter rule on top of the paper and the Add-Enough ruler. Make sure that the Add-a-Quarter ruler is nestled tightly against the Add-Enough ruler.
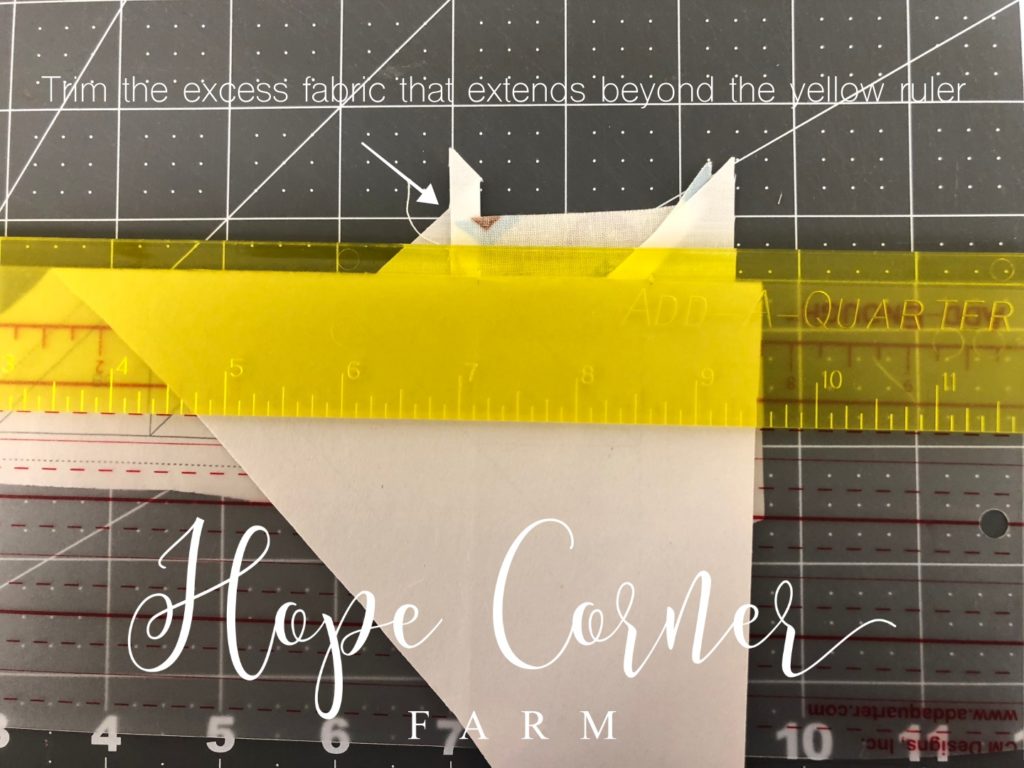
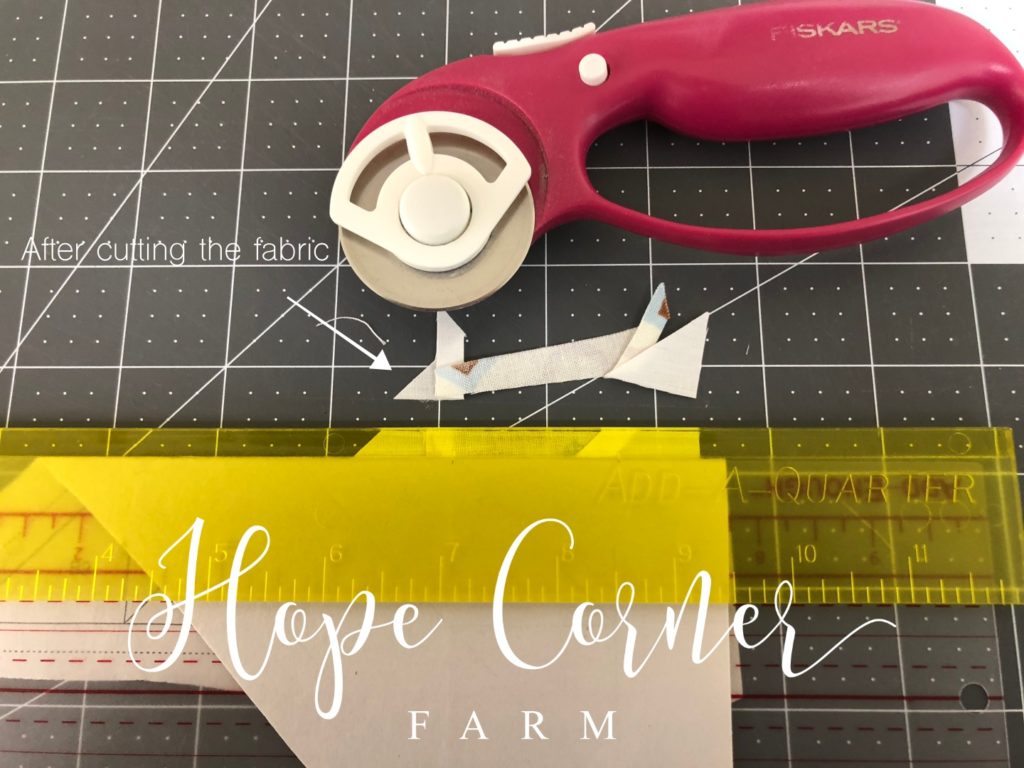
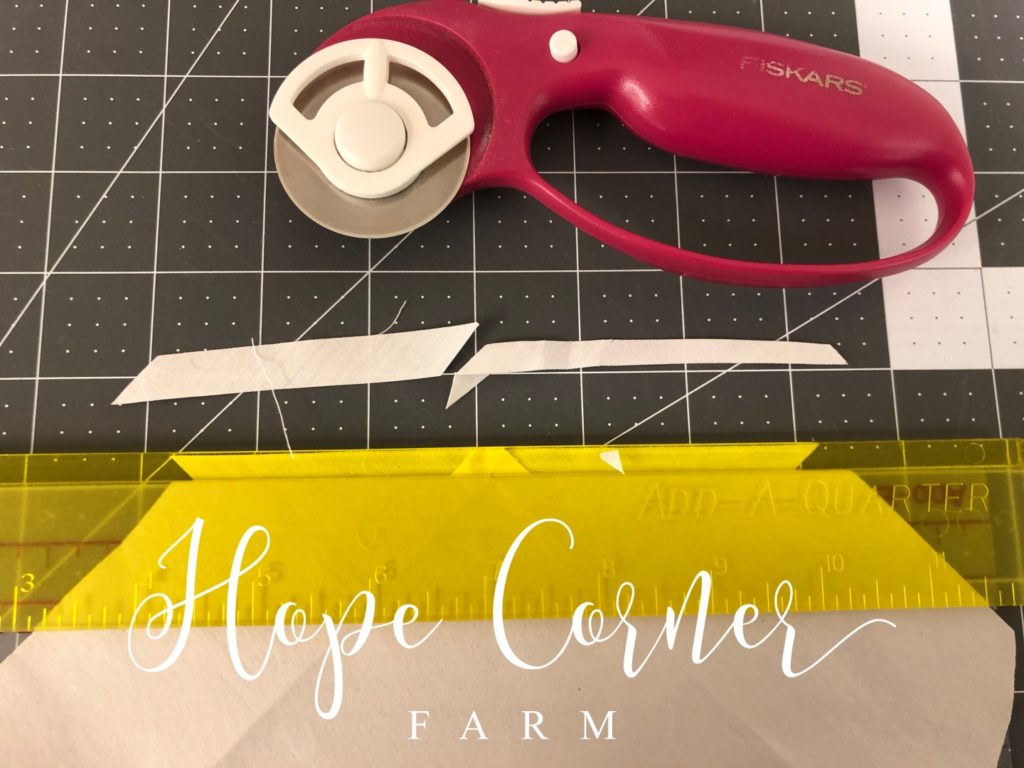
Using the rotary cutter, trim away the fabric that extends beyond the yellow Add-a-Quarter ruler.
Next, grab another Background Half Square Triangle. This is piece A4/B4.
Now, take the A4/B4 piece and place it right-side down on top of the A2/B2 piece. A2/B2 is right-side up, so the right sides of both pieces are face to face.
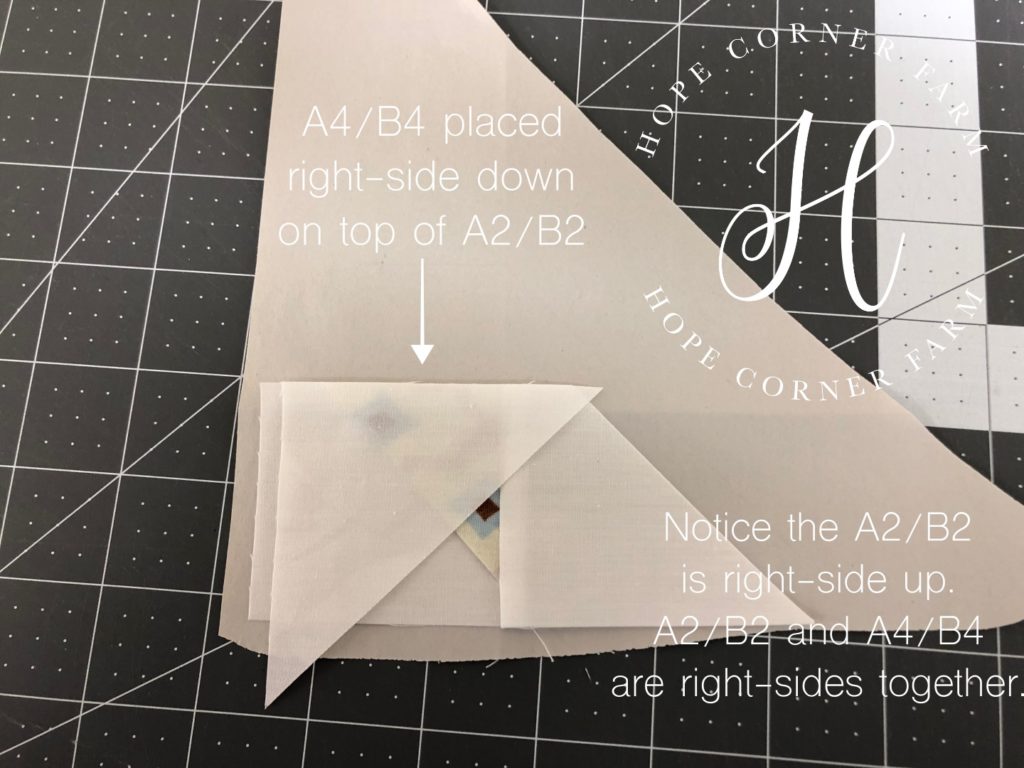
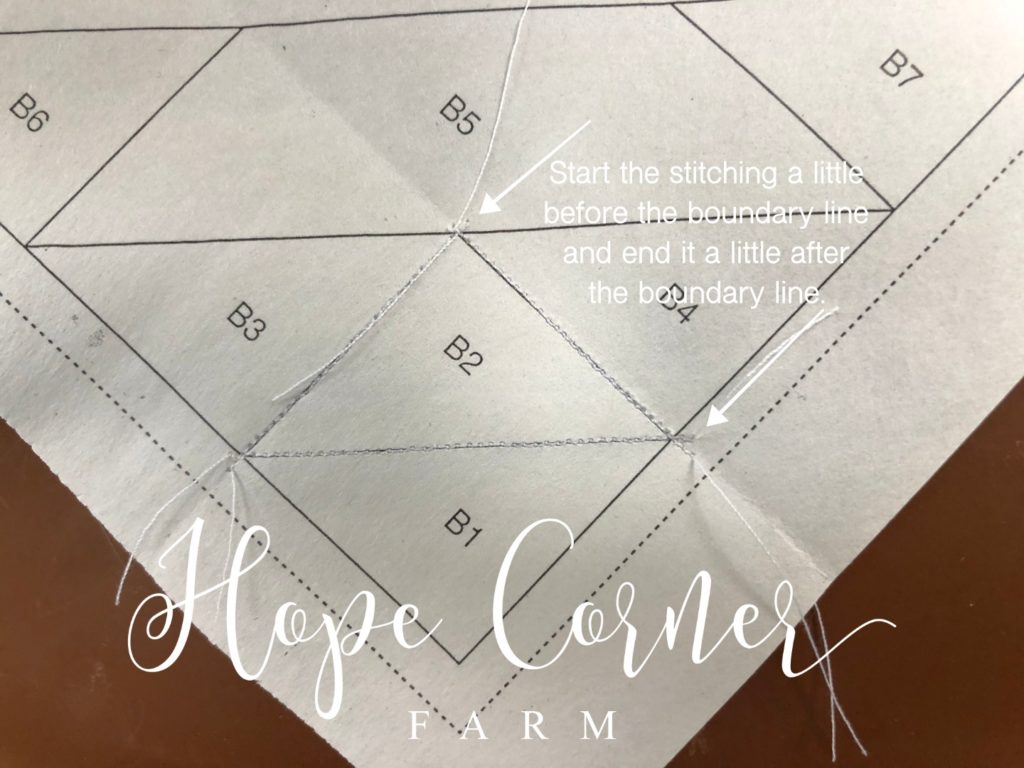
Sew directly down the line between A2/B2 and A4/B4.
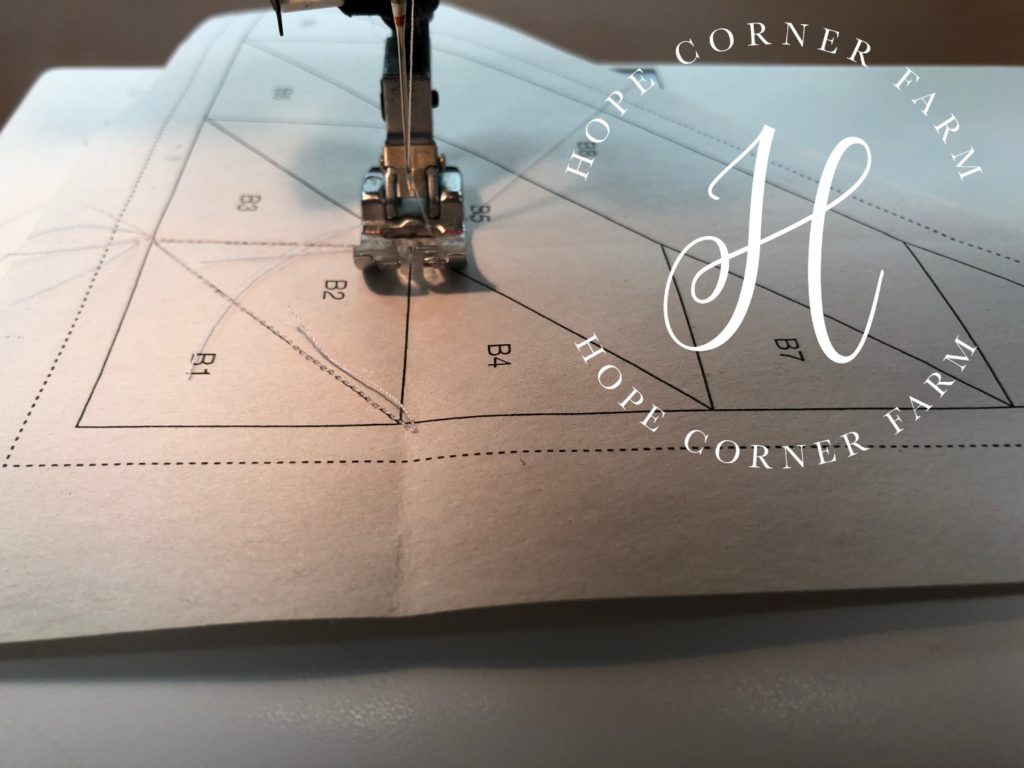
Start the stitching at least one stitch before the boundary line and end the stitching at least one stitch after the following boundary line. See attached picture.
Iron the seam towards A4/B4.
Sewing A5/B5 to A2/B2, A3/B3, & A4/B4:
Again, place the Add-Enough ruler directly on the line between A5/B5 and A2/B2, A3/B3, and A4/B4.
Fold the paper down over the Add-Enough ruler to reveal the fabric that needs to be trimmed for the seam allowance.
Now, place the Add-a-Quarter ruler on top of the paper and the Add-Enough ruler. Make sure that the Add-a-Quarter ruler is sitting snugly against the Add-Enough ruler to ensure an accurate cut.
Using a rotary cutter, trim away the excess fabric that extends beyond the Add-a-Quarter ruler.
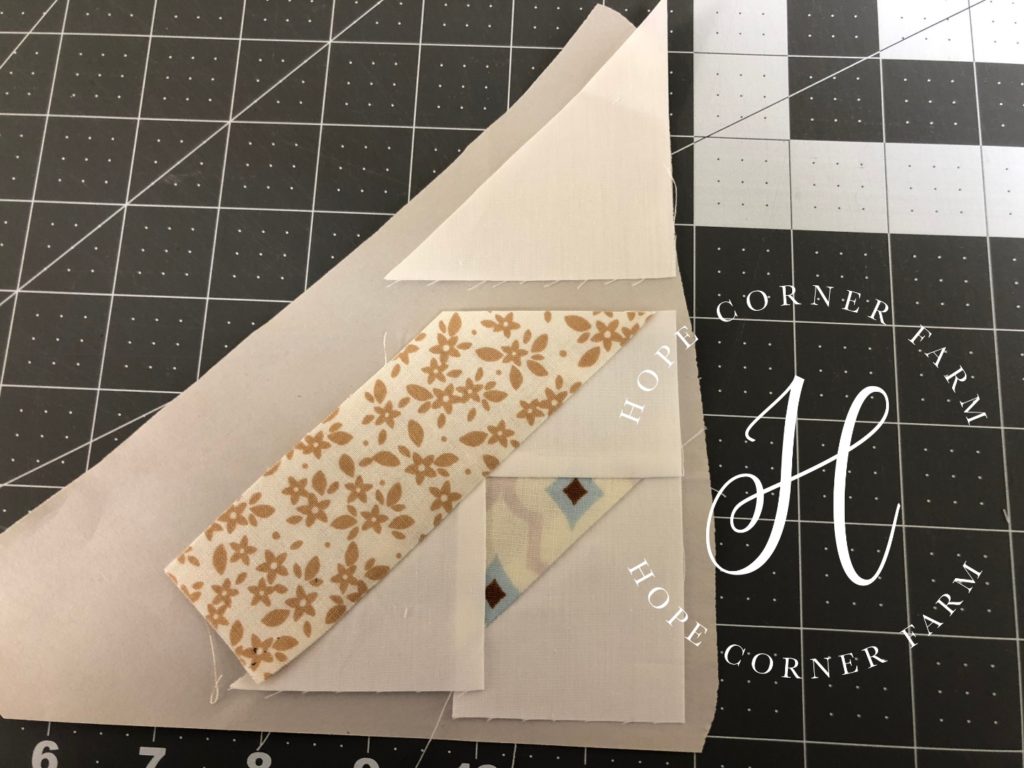
Locate the 1 3/4″ x 5 1/2″ strip for A5/B5.
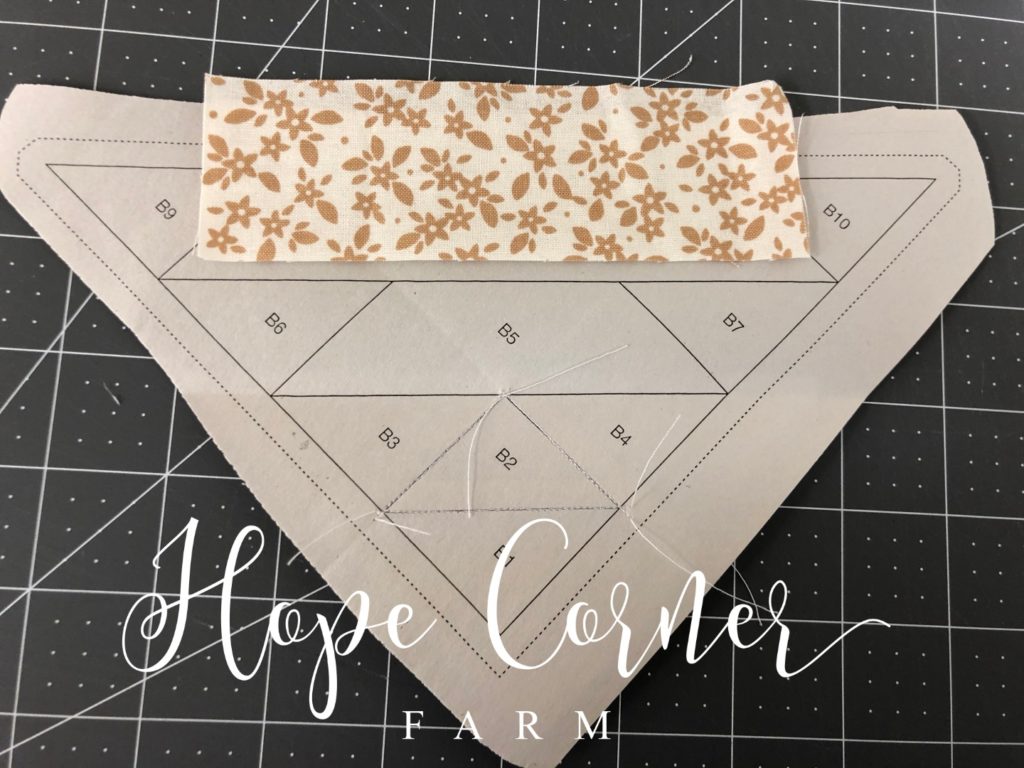
Place the A5/B5 strip face-down on top of the face up A2/B2, A3/B3, and A4/B4 piece.
Sew directly down the line between A5/B5 and A2/B2, A3/B3, and A4/B4. Make sure none of the fabrics shift before sewing.
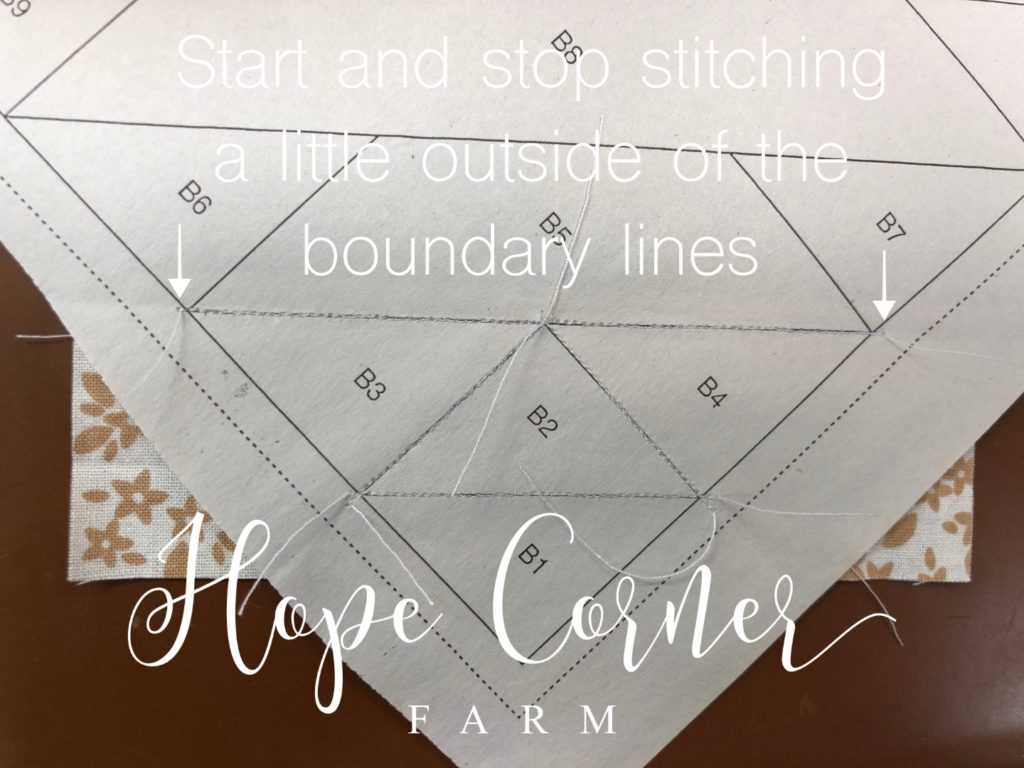
Remember to start and stop the stitching for this seam a little outside of the boundary lines.
Press the seam towards A5/B5.
Sewing A6/B6 to A5/B5:
To begin, we need to trim away the excess at the seam allowance. Place the Add-Enough ruler directly on top of the line between A5/B5 and A6/B6. Fold the paper over the Add-Enough ruler.
Now, place the Add-a-Quarter ruler right on top of the Add-Enough ruler. Make sure that it is locked into place.
Trim away any excess fabric that sticks out beyond the yellow ruler. This should leave a 1/4″ seam allowance.
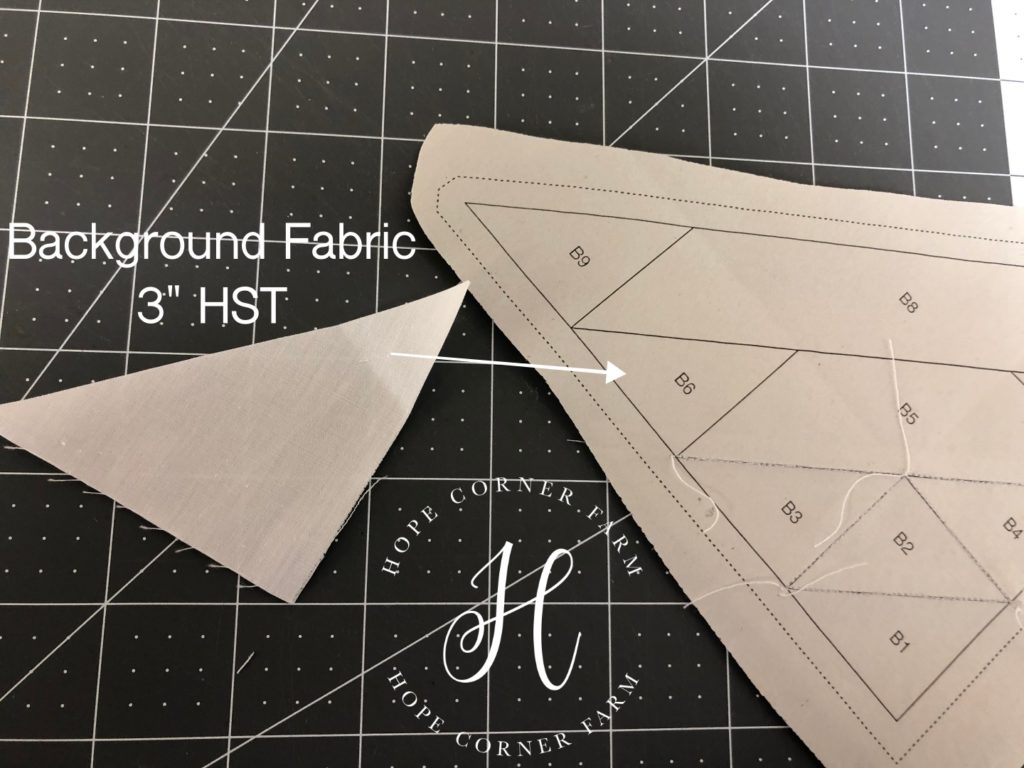
Locate one of the Background Fabric 3″ Half Square Triangles. This is A6/B6.
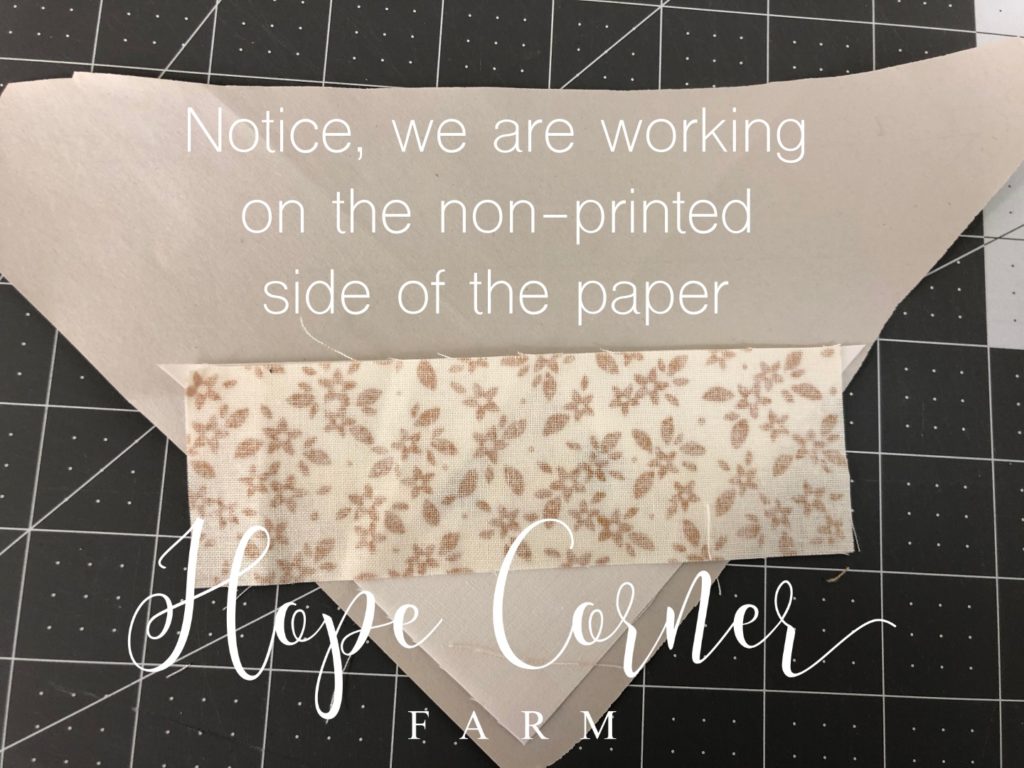
On the unprinted side of the paper, place A6/B6 right-side down on top of a right-side up A5/B5.
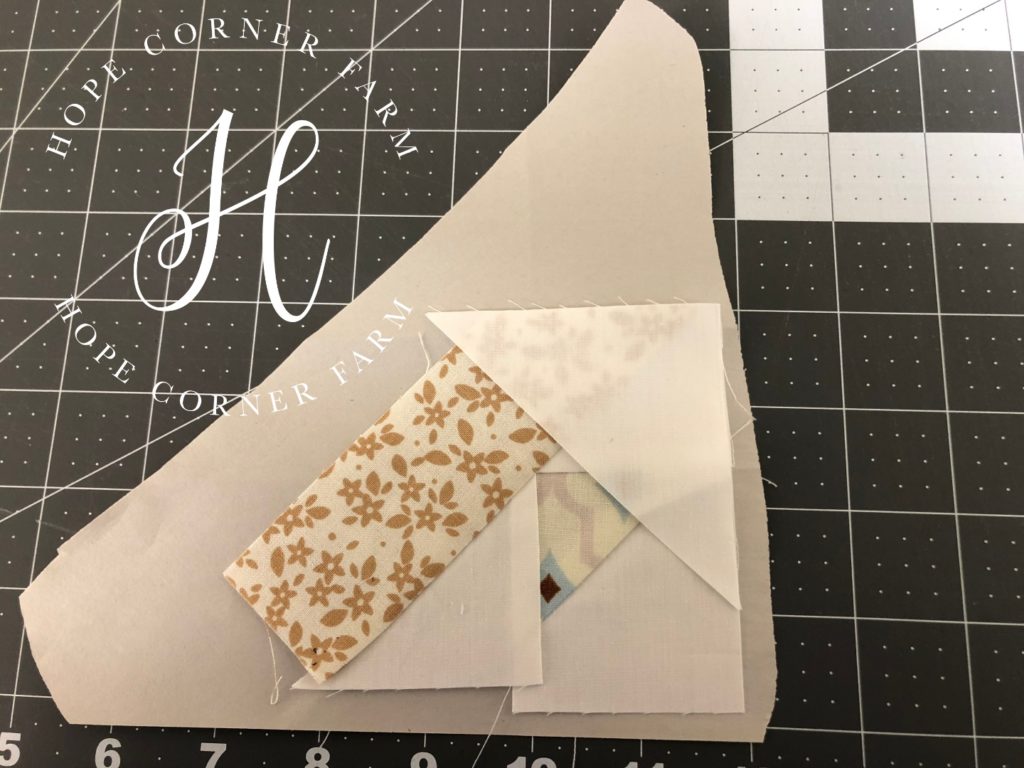
Sew directly down the line between A5/B5 and A6/B6. Make sure nothing shifted when putting the block on the sewing machine.
Make sure to start and stop just a little past the adjacent lines.

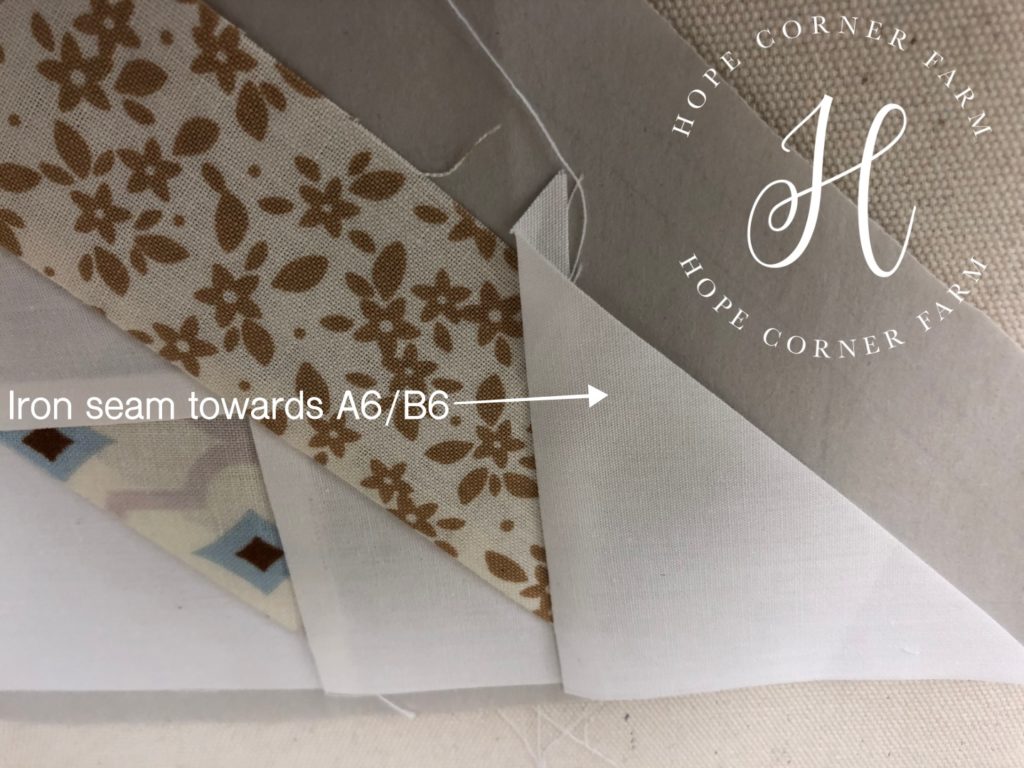
Press the seam towards A6/B6.
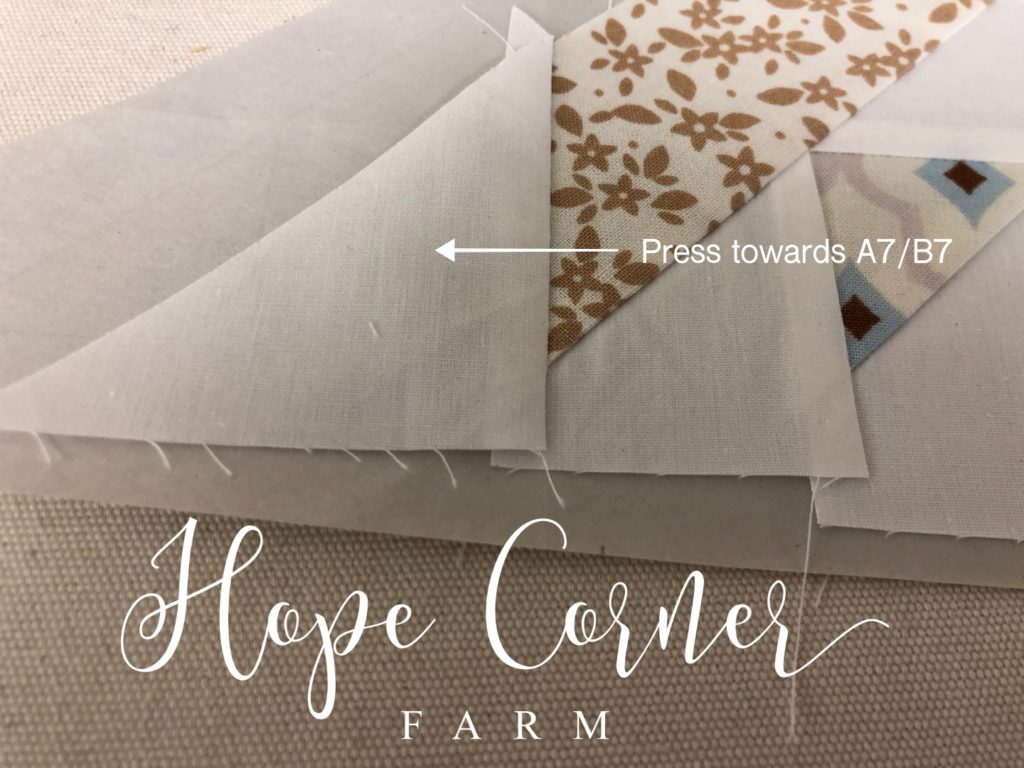
Sewing A7/B7 to A5/B5:
Start by placing the Add-Enough ruler right on the line between A5/B5 and A7/B7.
Next, fold the paper down over the Add-Enough ruler. This will reveal the fabric that needs to be trimmed.
Place the Add-a-Quarter Ruler on top of the paper and the Add-Enough ruler. Make sure it locks in tight next to the Add-Enough ruler. Use the rotary cutter to trim away any excess fabric.
Locate a Background Fabric 3″ HST for piece A7/B7.
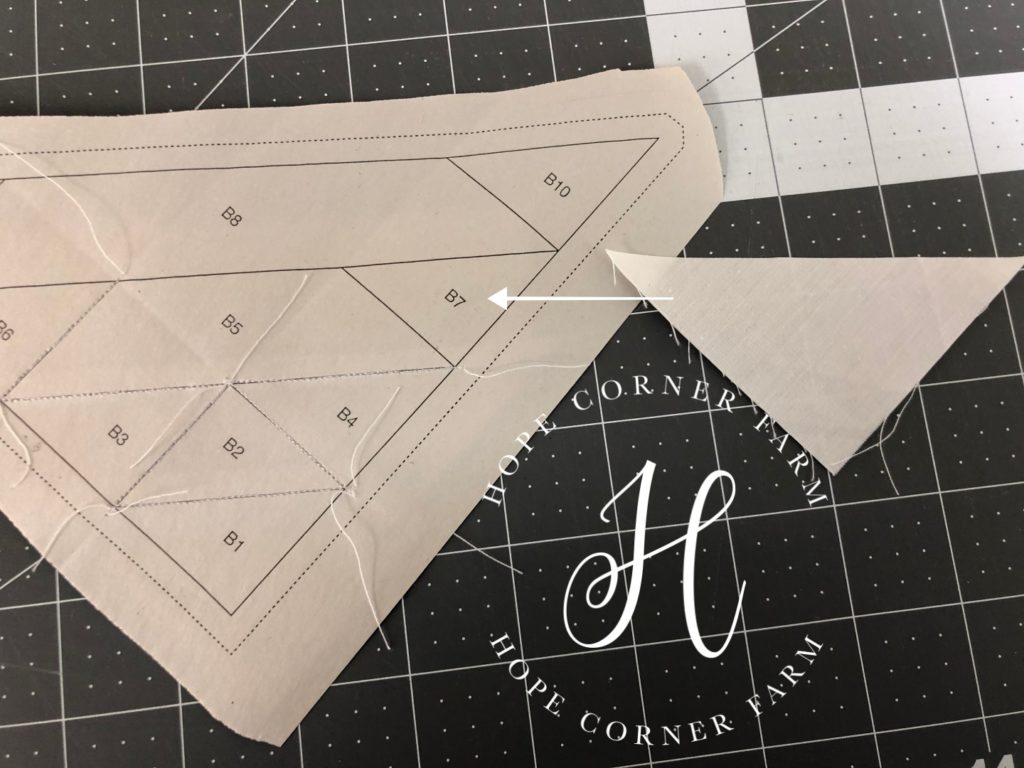
Place the A7/B7 piece right-side down on top of the A5/B5 piece (which is face up).
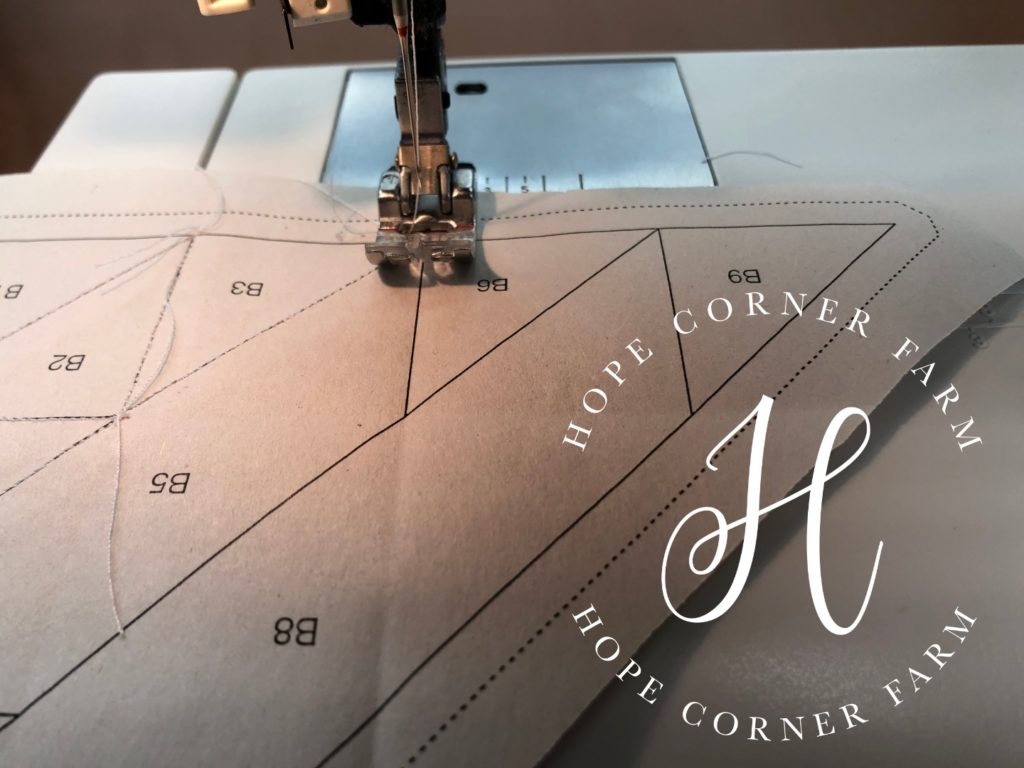
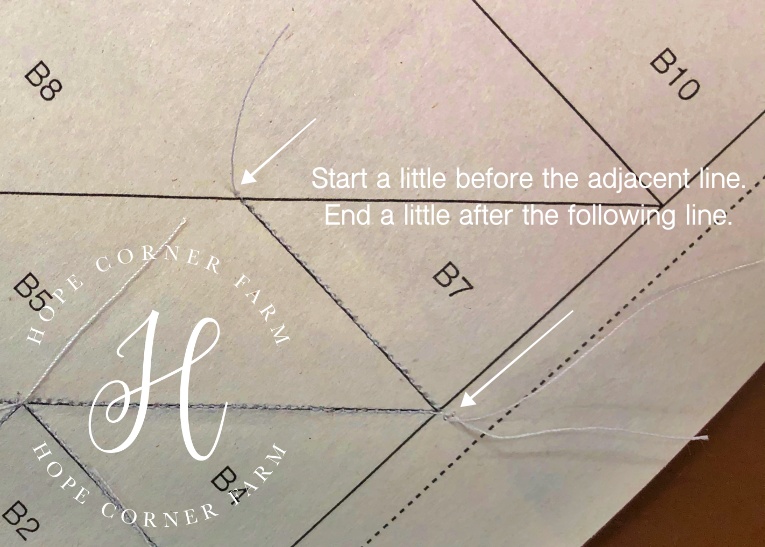
Move the whole piece to the sewing machine (being very careful to keep everything in the proper place). Sew directly down the line between A5/B5 and A7/B7.
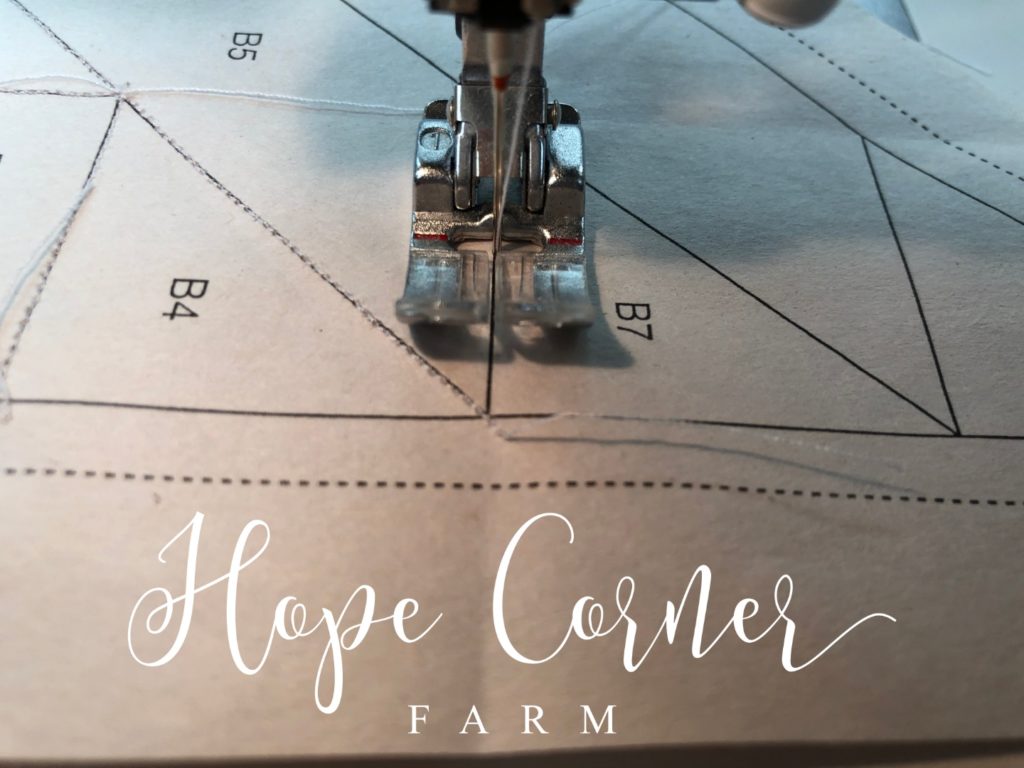
Remember to start a little before the adjacent line and stop a little after the following adjacent line. See attached picture for details.
Iron the seam towards piece A7/B7.
Sewing A8/B8 to A5/B5, A6/B6, & A7/B7:
To begin, place the Add-Enough ruler directly on top of the line between A8/B8 and A5/B5, A6/B6, & A7/B7.
Fold the paper over top of the Add-Enough ruler to reveal the fabric that needs to be trimmed.
Now place the Add-a-Quarter ruler on top of the paper and the Add-Enough ruler. Make sure to lock the Add-a-Quarter ruler in place. Trim away any extra fabric with the rotary cutter.
Now, locate the 1 3/4″ x 7 1/2″ strip for A8/B8.
Place A8/B8 face down on top of the A5/B5, A6/B6, & A7/B7 piece (which is face up). Right sides of the fabric are together when sewing.
Move everything to the sewing machine, being careful to keep everything lined up before sewing. Sew directly down the line between A8/B8 and A5/B5, A6/B6, & A7/B7.
Remember to start and stop the stitching at least one stitch before and one stitch after the opposite lines.
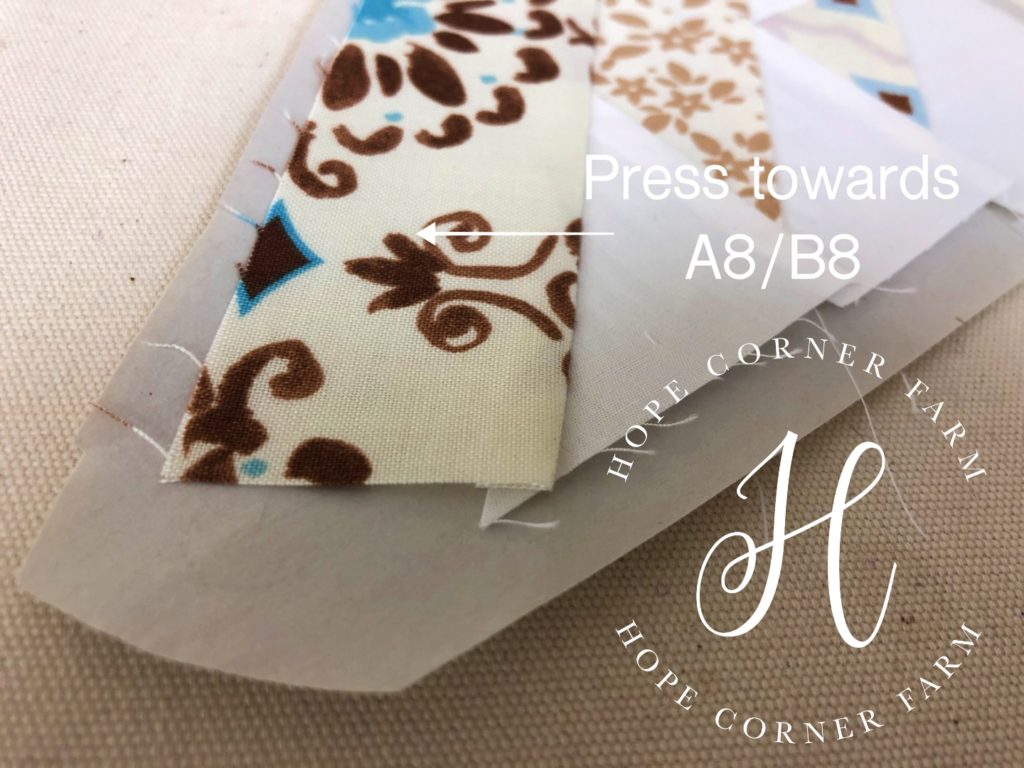
Iron towards A8/B8.
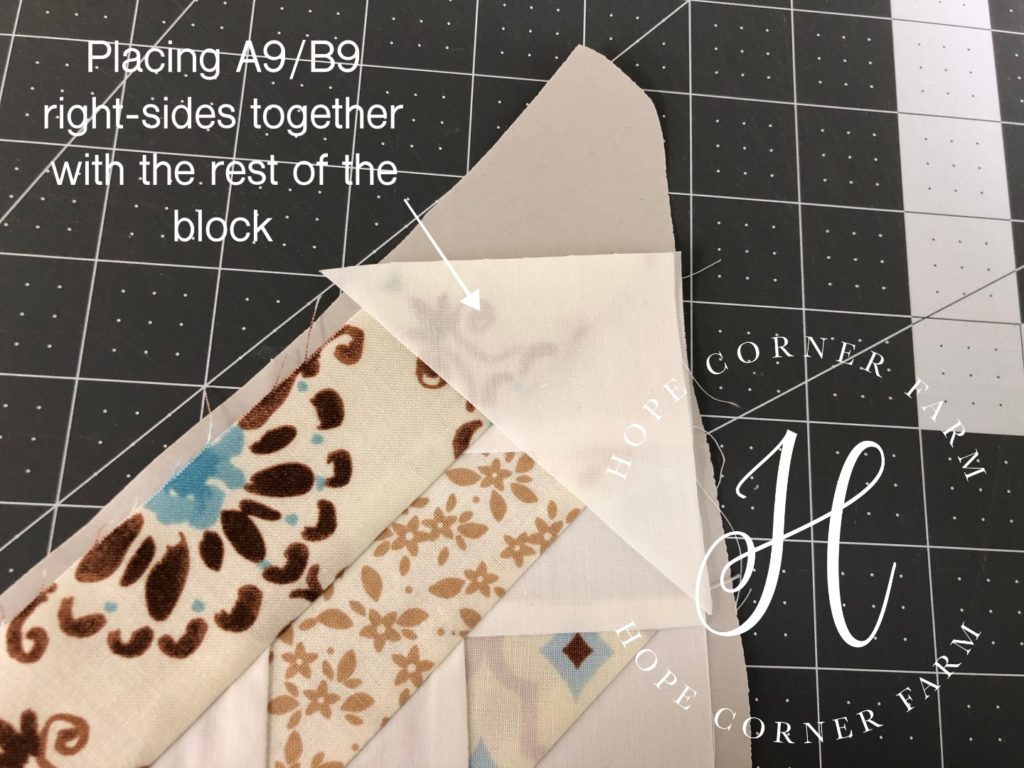
Sewing A9/B9 to A8/B8:
Just like we have done with the previous 8 spots, take the Add-Enough ruler and place it on top of the line between A8/B8 and A9/B9.
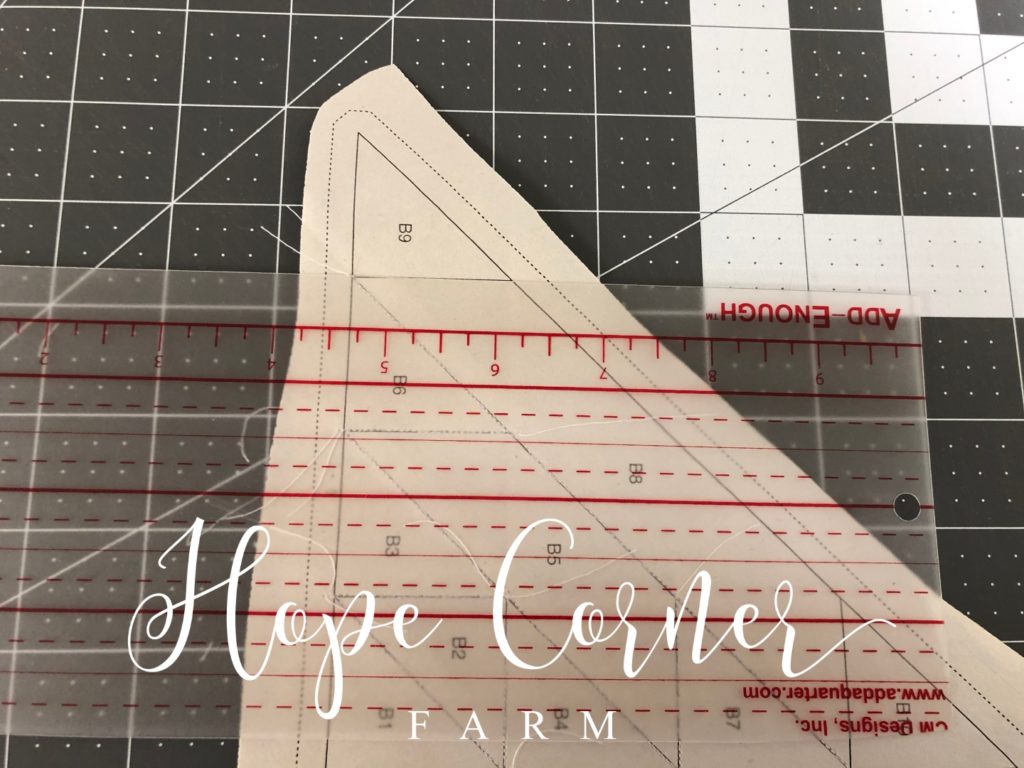
Now, fold the paper down over top of the Add-Enough ruler. This shows the extra fabric that will need to be trimmed to bring the seam allowance down to 1/4″.
Next, place the Add-a-Quarter ruler on top of the paper and the Add-Enough ruler. Make sure it is locked in place so that the cut is accurate. Trim any extra fabric that extends beyond the Add-a-Quarter ruler.
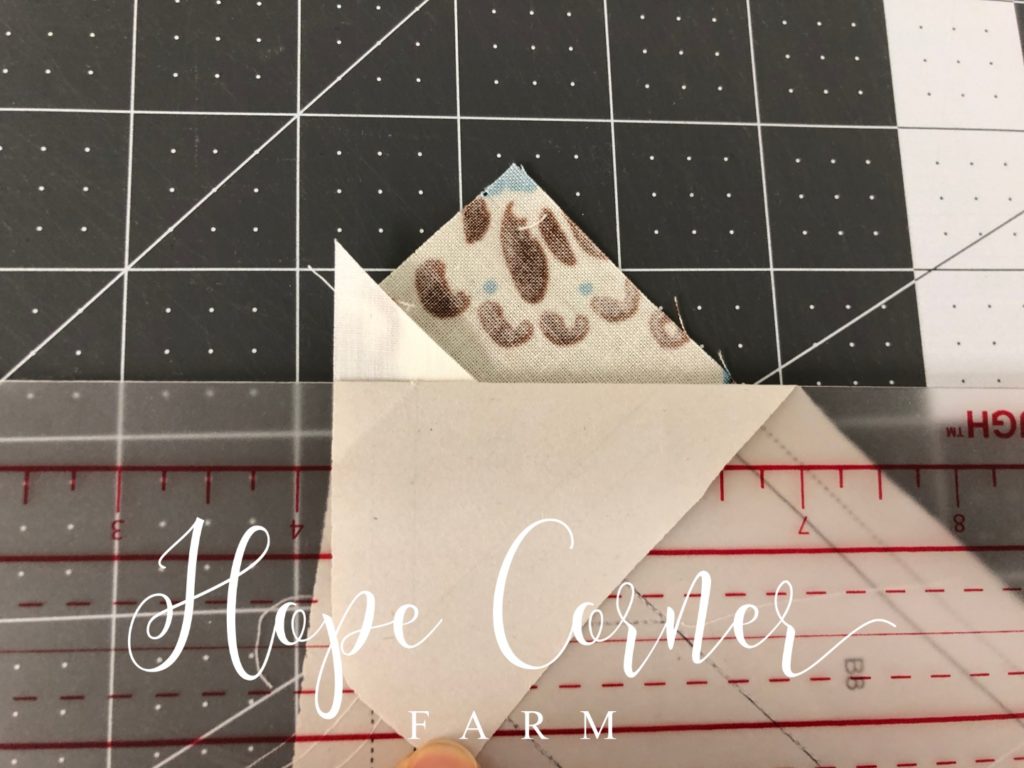
Locate a Background fabric 3″ HST for the A9/B9.
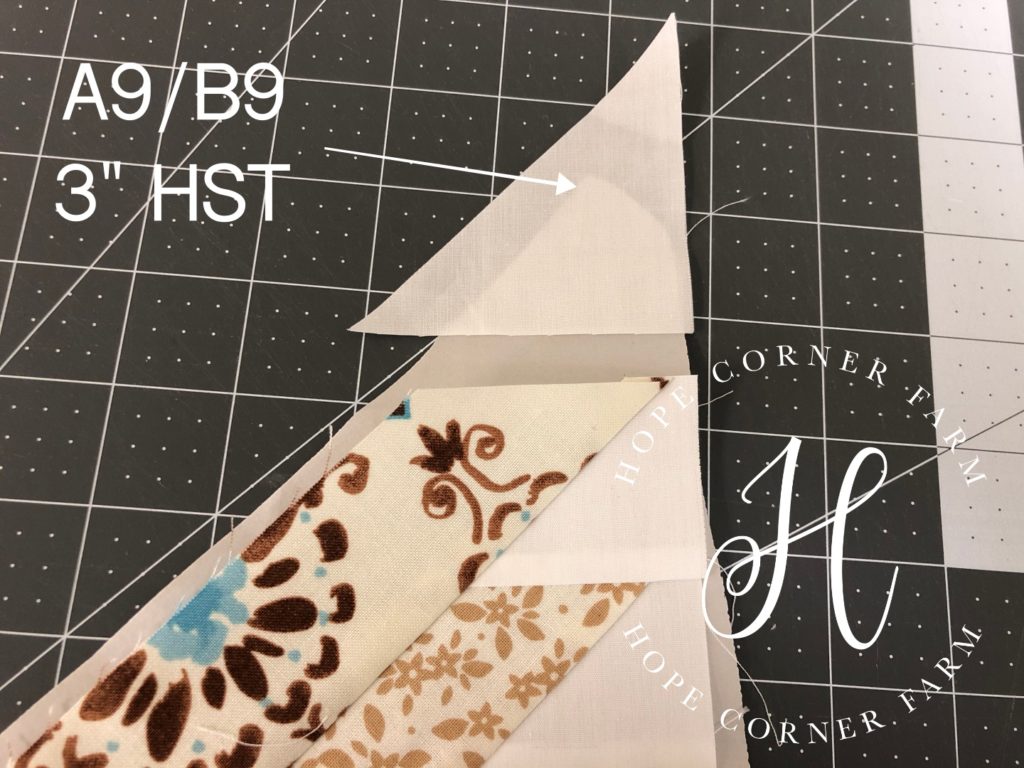
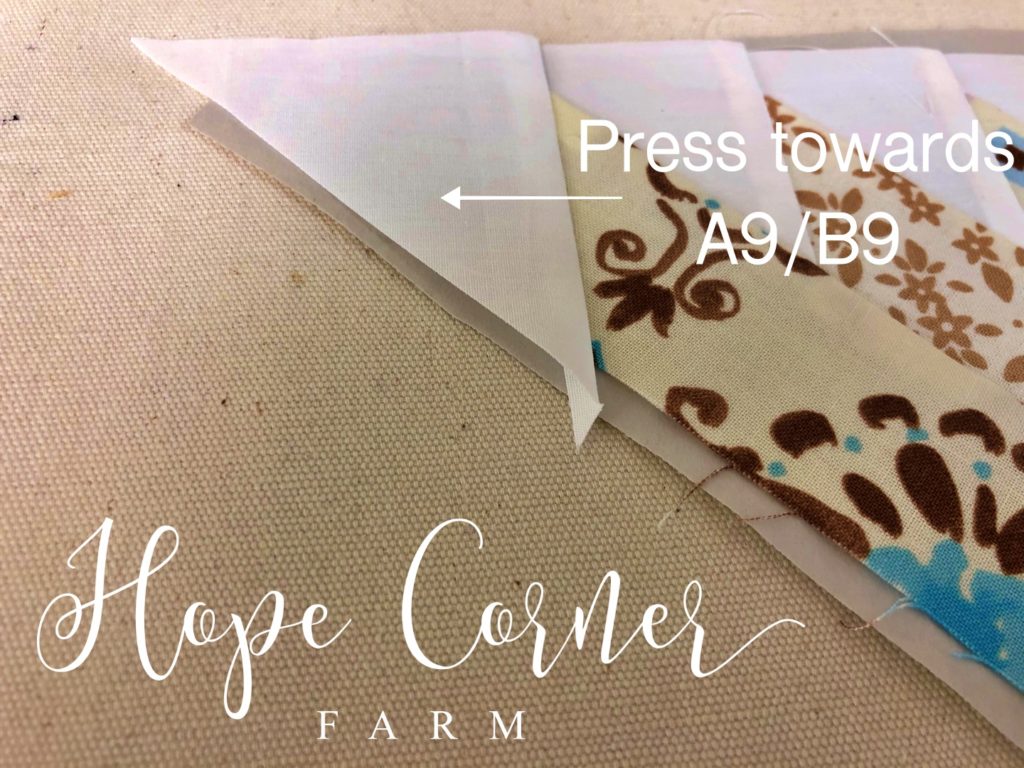
Again, we place A9/B9 right-side down on top of A8/B8. Make sure to match up edges.
Move everything to the sewing machine. Be careful to not shift any of the pieces out of place – double check placement before sewing. Sew directly down the line between A8/B8 and A9/B9.
Remember to start and stop the stitching at least one stitch past the outer boundary lines.
Iron the seam allowance towards A9/B9.
Sewing A10/B10 to A8/B8:
Just like the previous pieces, place the Add-Enough ruler directly on top of the line between A8/B8 and A10/B10.
Fold the paper down over top of the Add-Enough ruler to reveal the fabric that needs to be trimmed away.
Next, place the Add-a-Quarter ruler on top of the paper and the Add-Enough ruler. Make sure it is tight against the Add-Enough ruler. Trim away any extra fabric with a rotary cutter.
Now, locate a Background Fabric 3″ HST. This will be piece A10/B10.
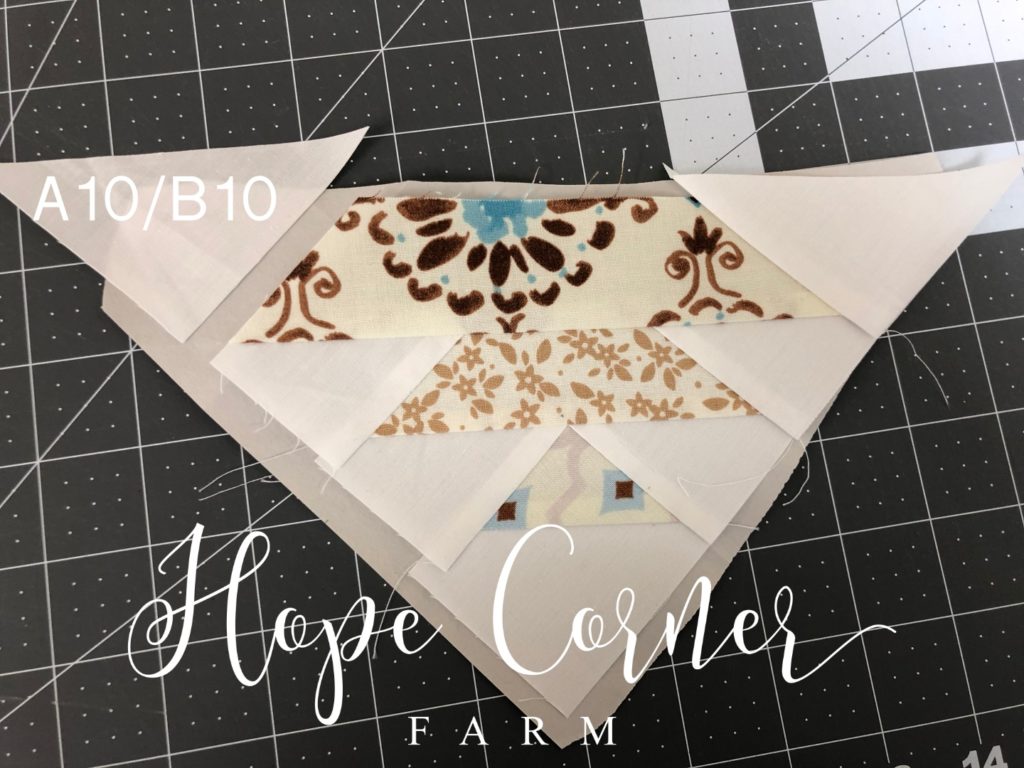
Place A10/B10 face down on top of A8/B8. Right sides will be facing each other. Make sure to line up the edges.
Move everything carefully to the sewing machine. Double-check to see that all of the pieces are still lined up before sewing them together. Sew directly down the line in between A10/B10 and A8/B8.
Remember to start stitching at least one stitch before the boundary line. End stitching at least one stitch after the boundary line.
Press the seam allowance towards A10/B10.

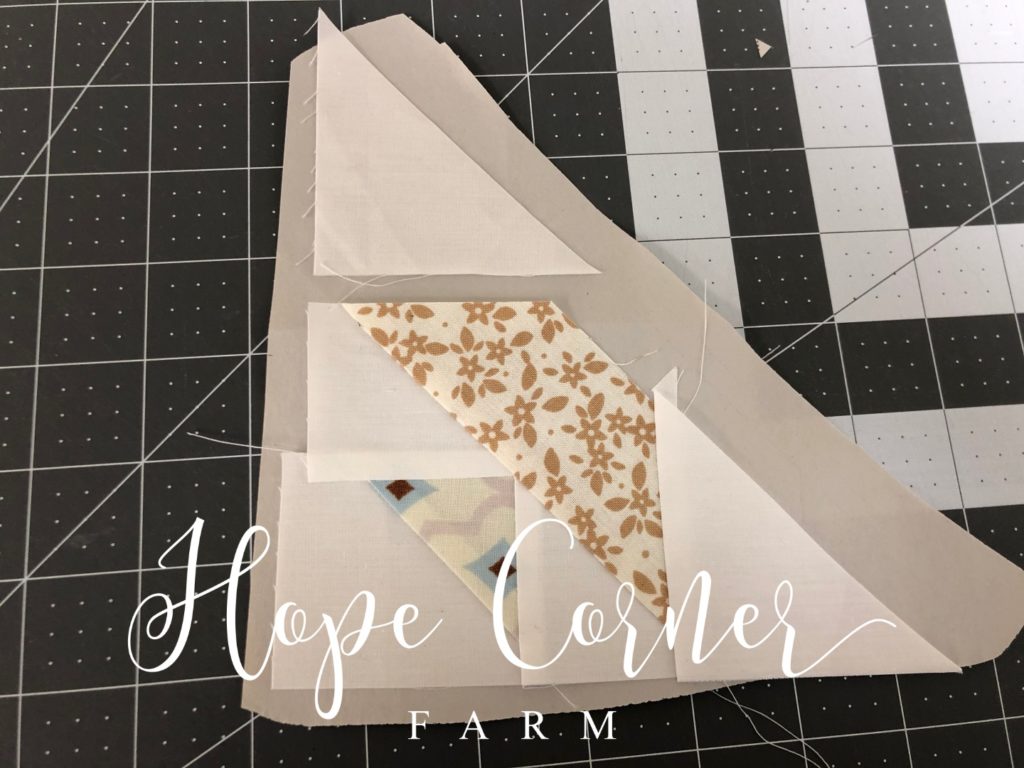
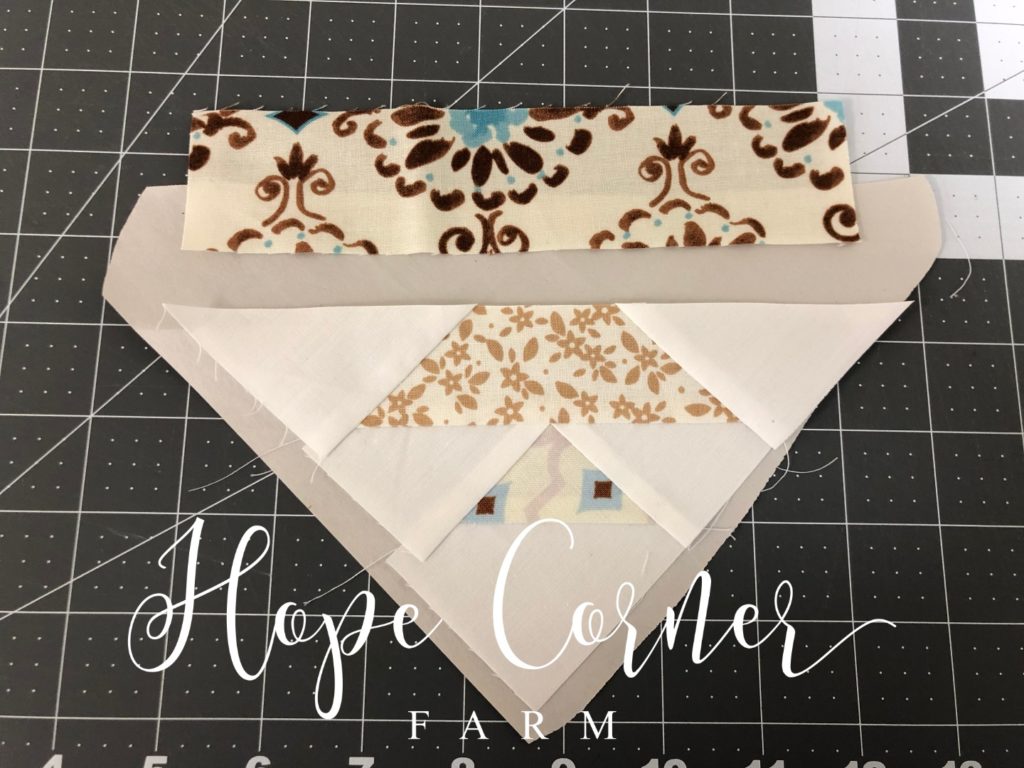
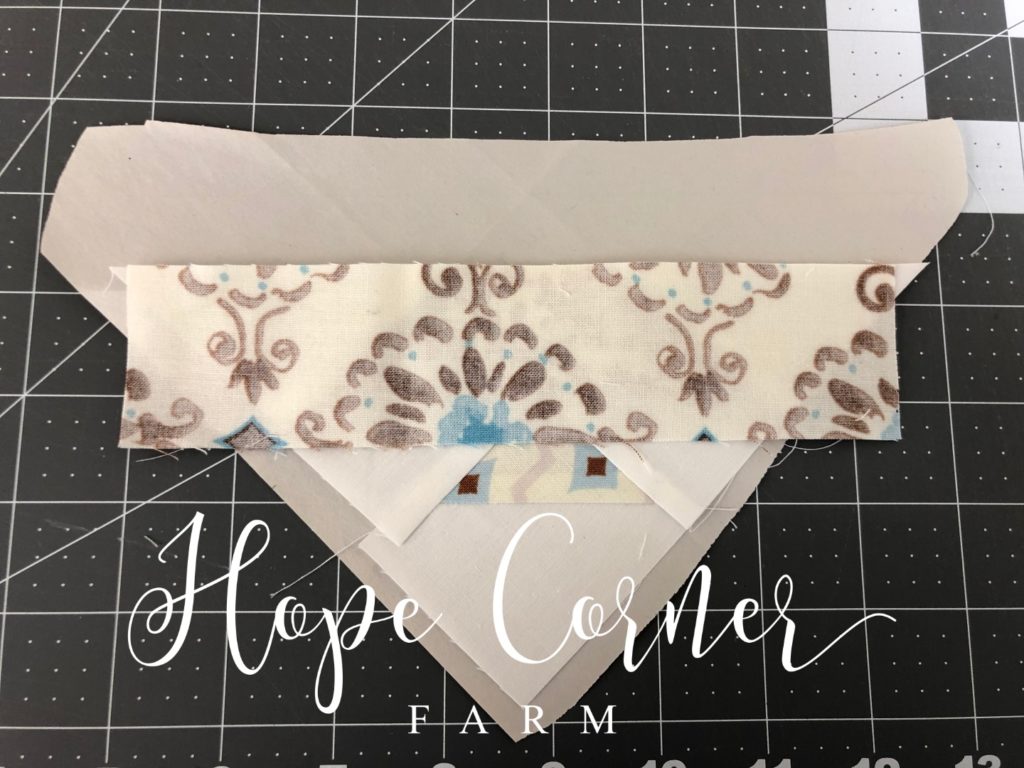
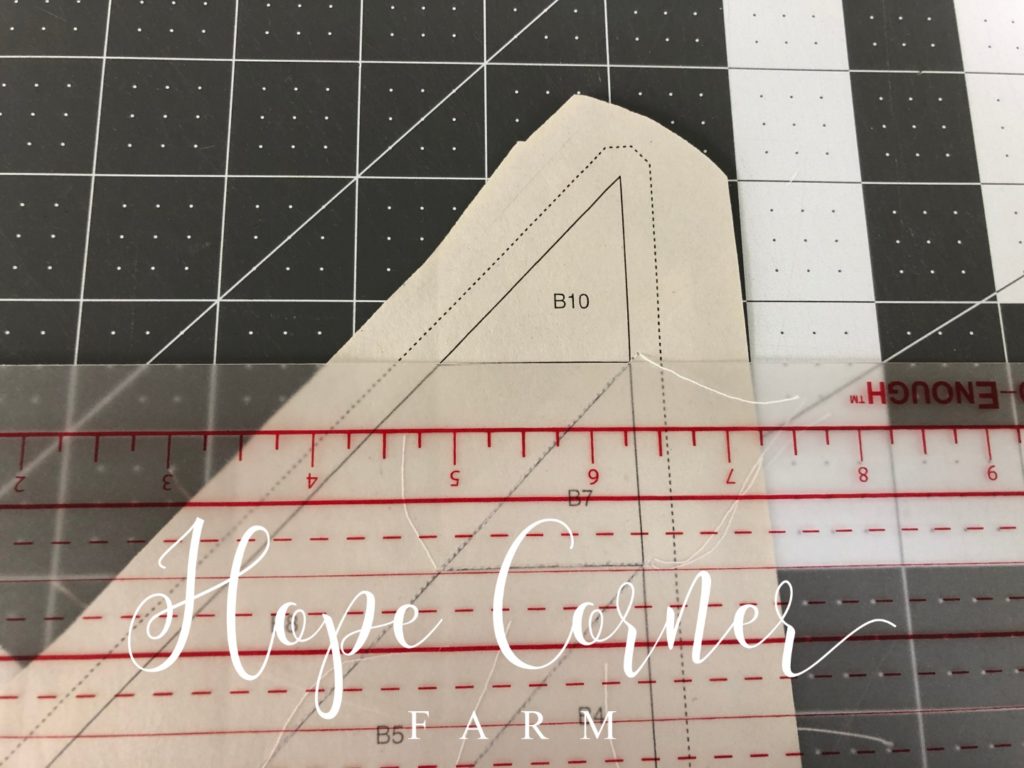
Trimming the Block:
The two halves of the block need to be trimmed before sewing them together. The block halves need to be trimmed down to the dotted lines. When trimmed to this point, the block will have a 1/4″ seam allowance.
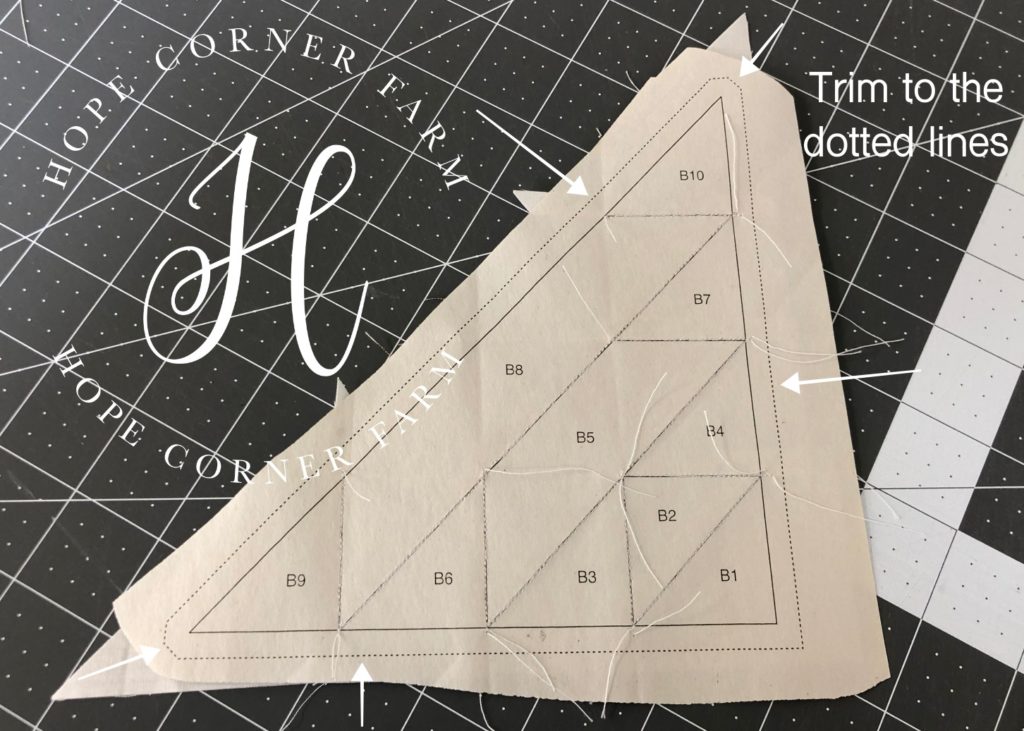
I also use a quilter’s ruler to double-check that the trimmed seam allowance is 1/4″. Trim any excess off of the block half.
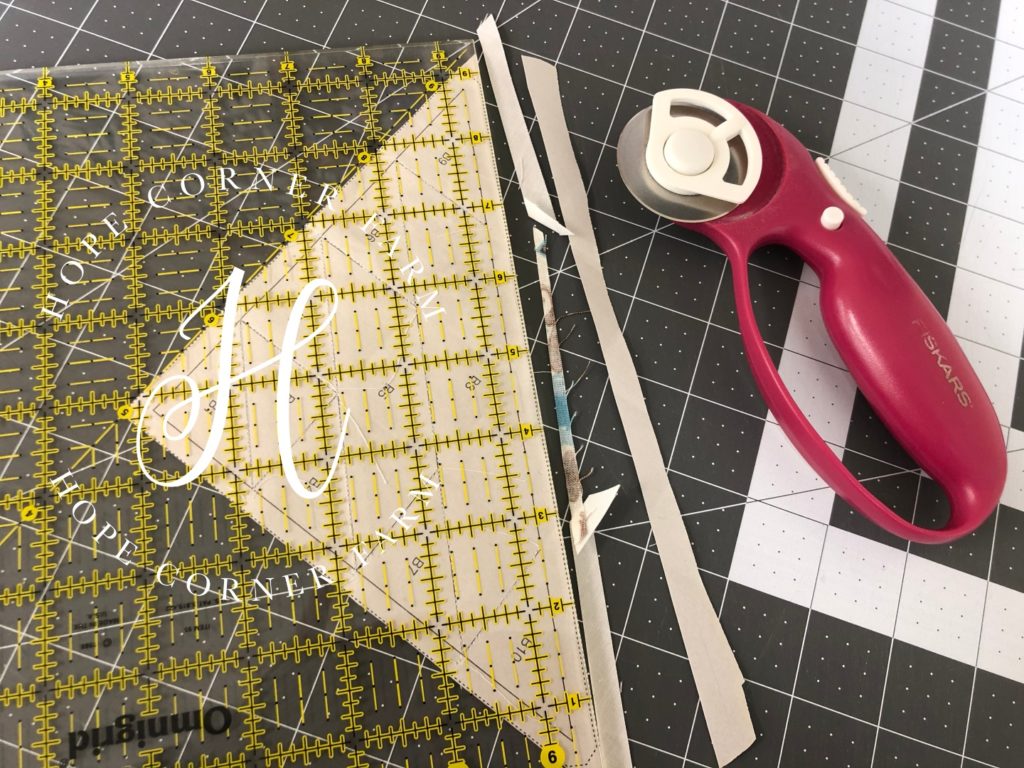
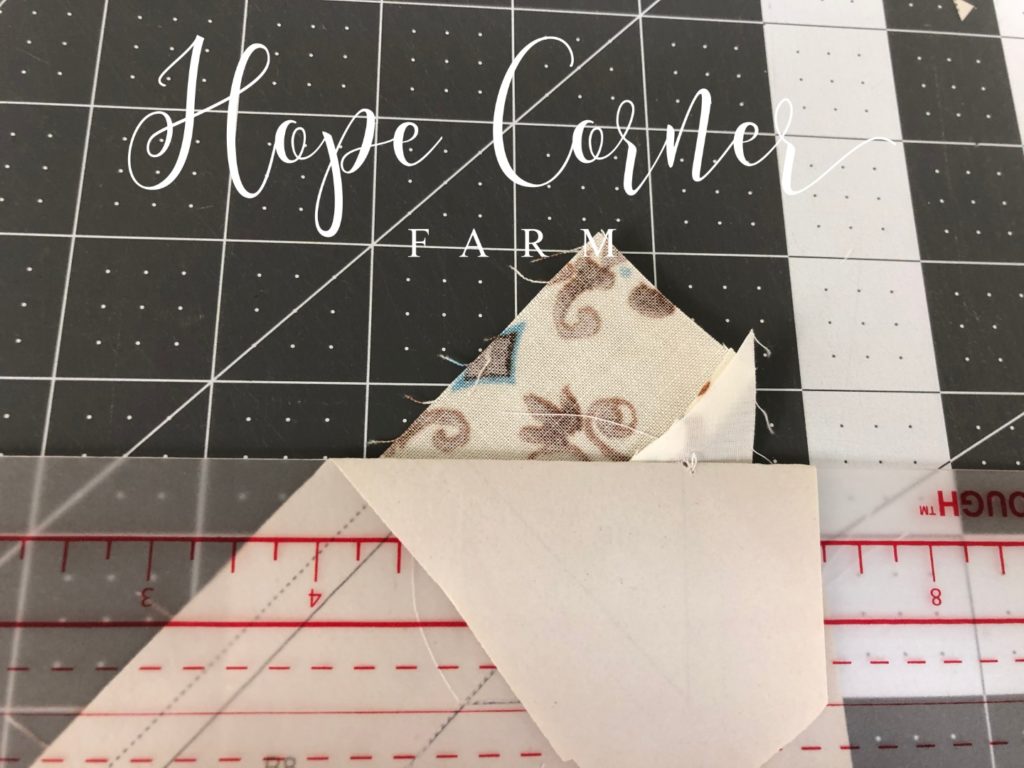
Trim each of the sides of the block half. After that, the only areas left to trim will be the corners.
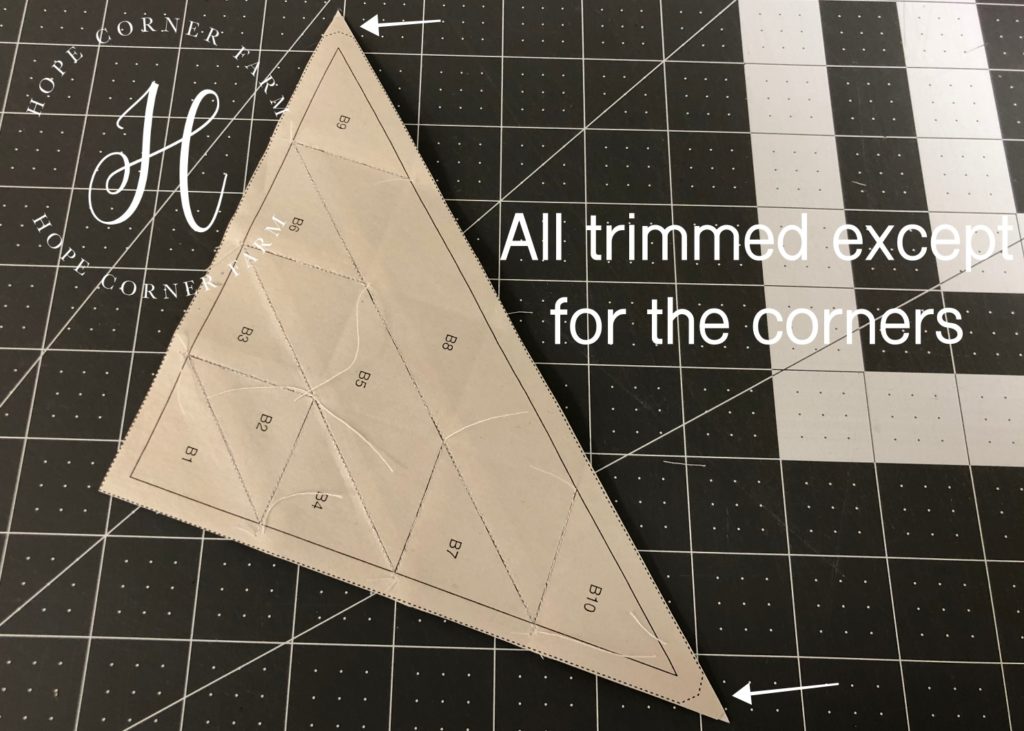
Trim the corners of the half block last.

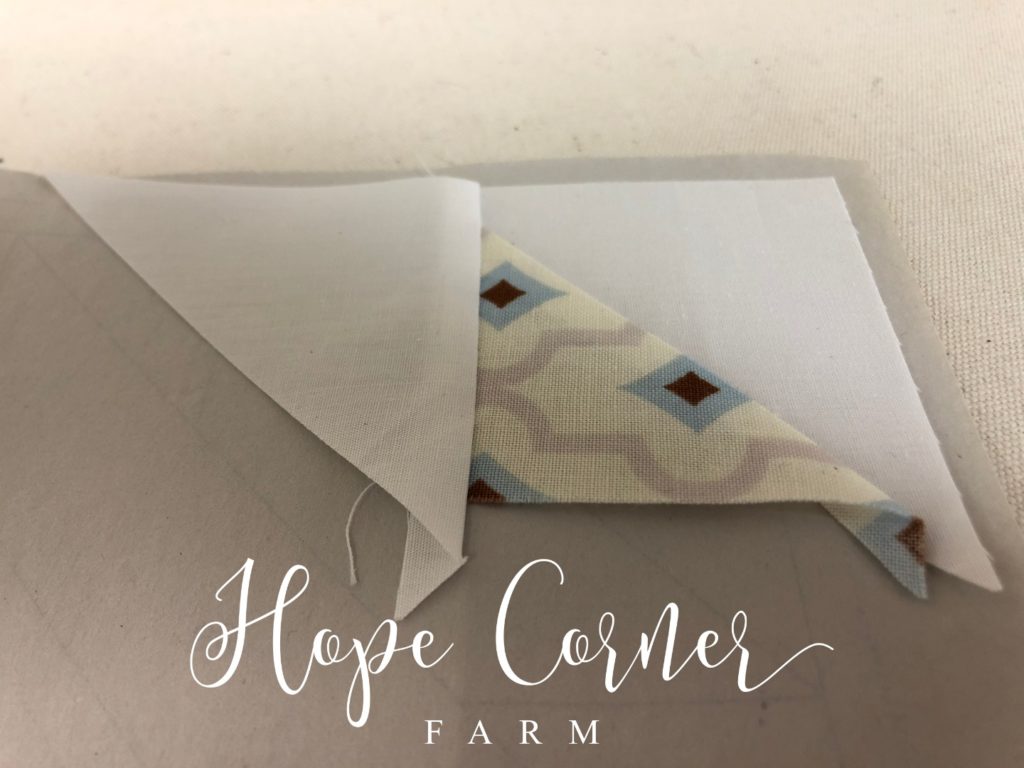
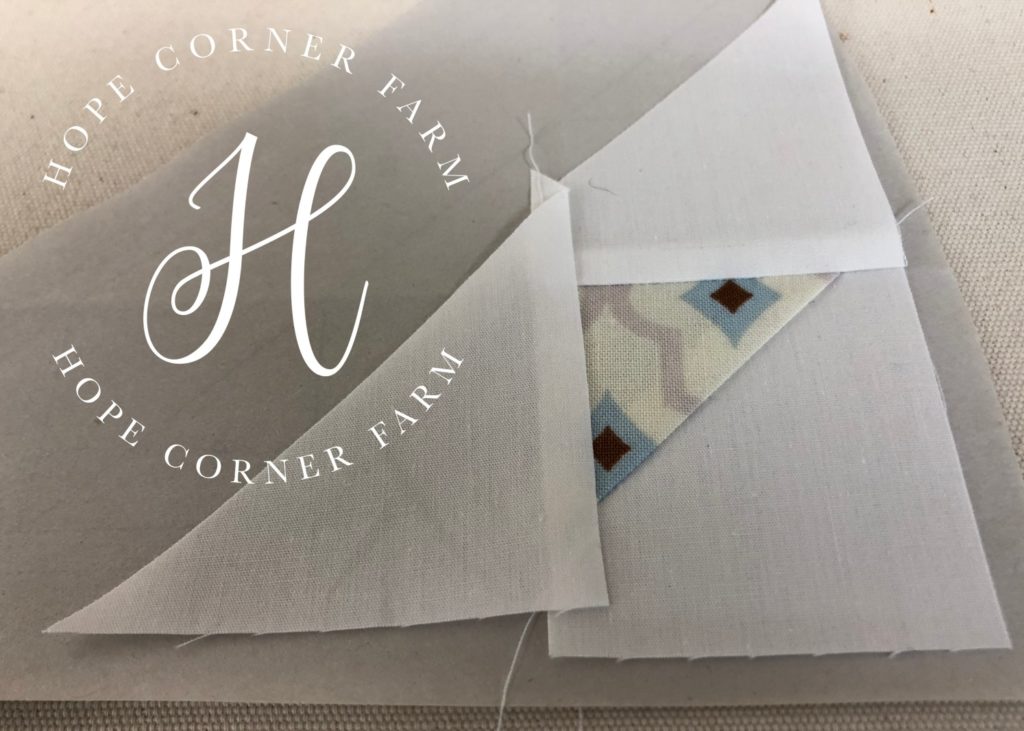
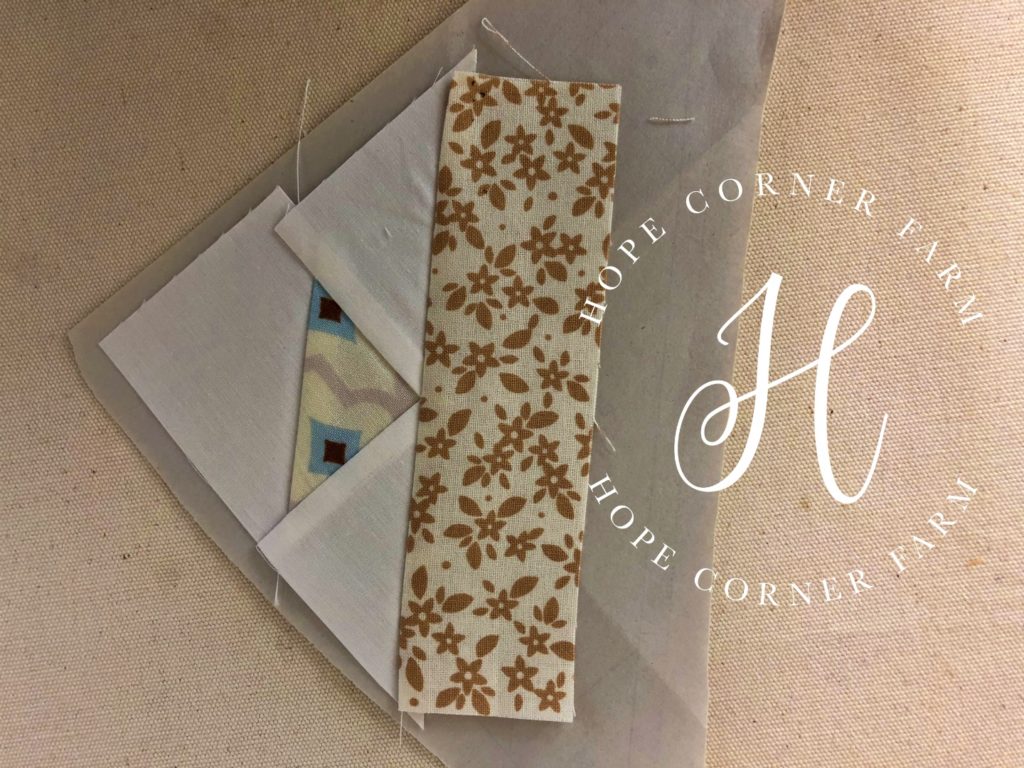
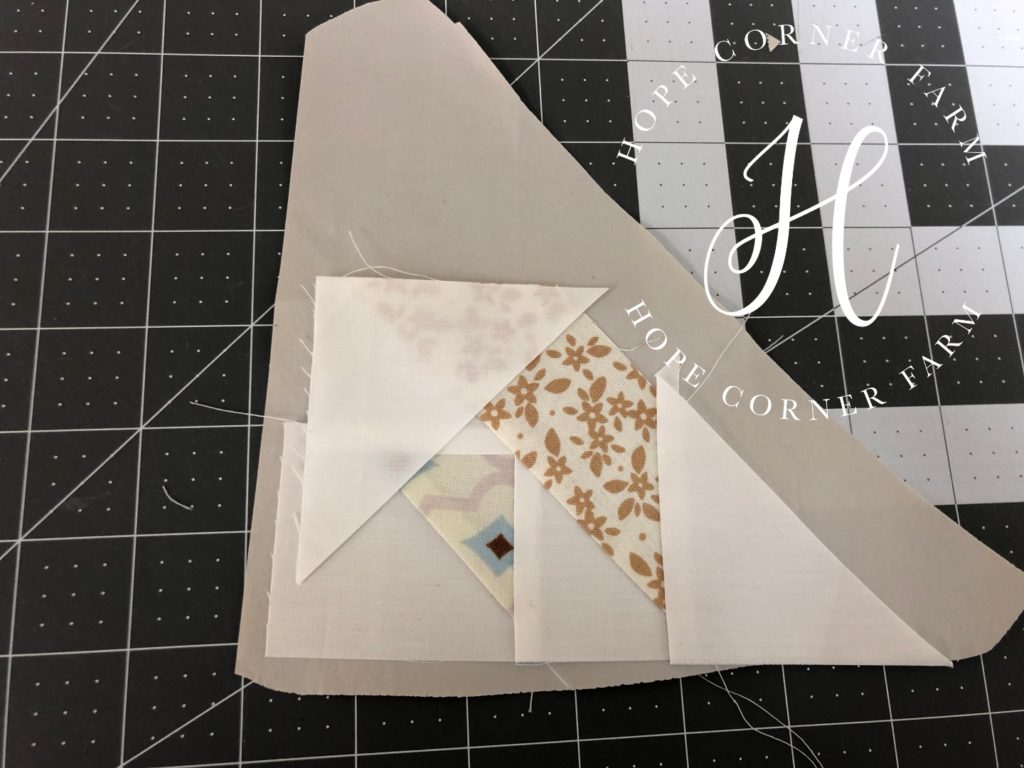
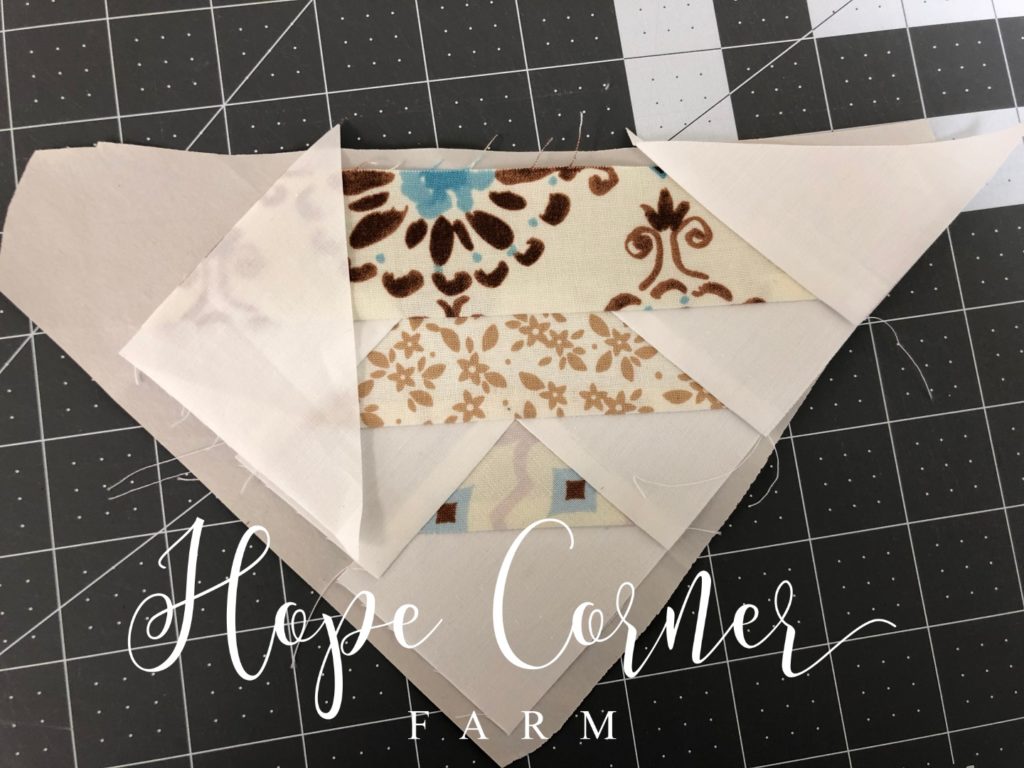
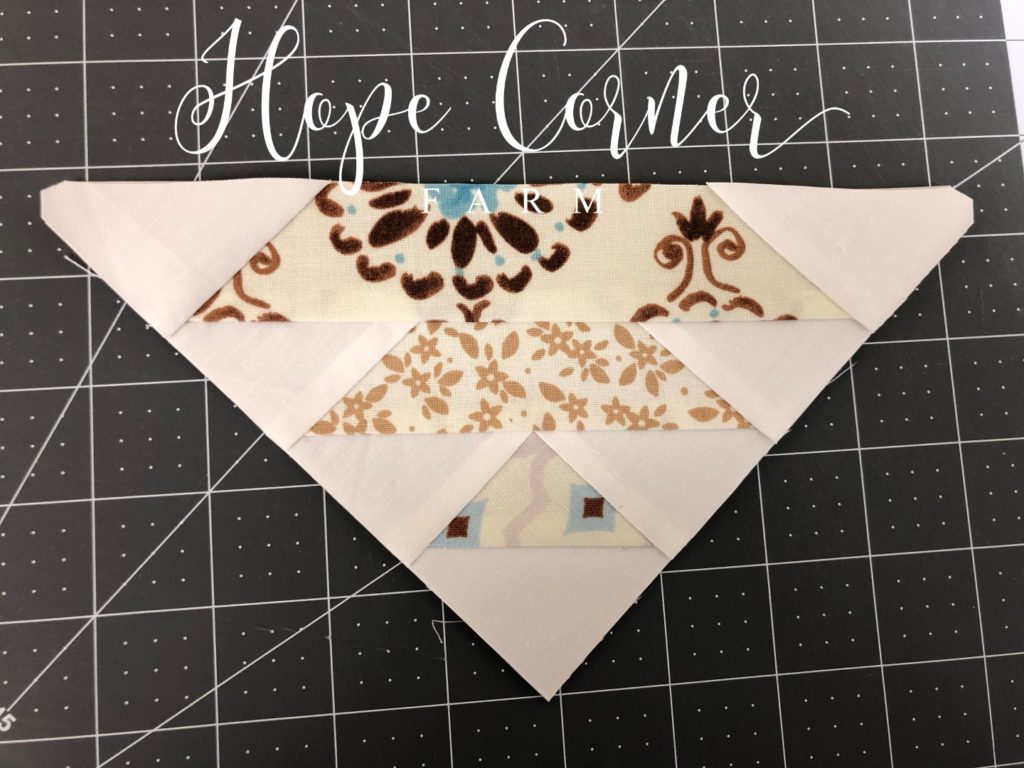
What the trimmed block looks like from the back:
The trimmed half block from the front:
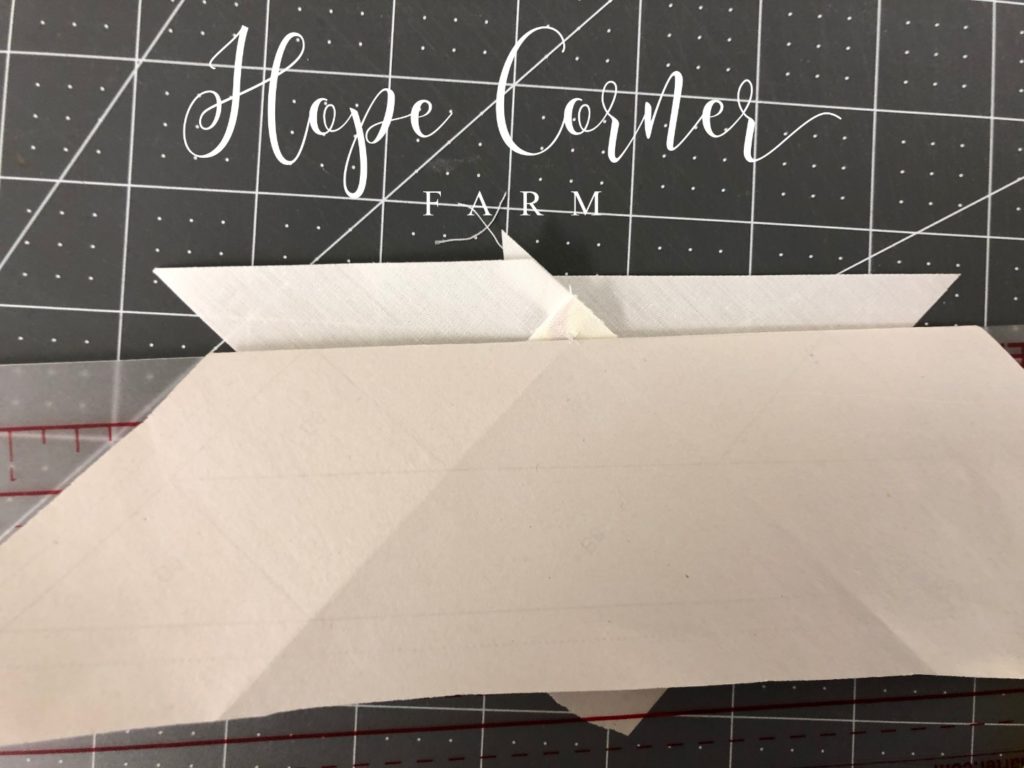
Sewing the Two Halves Together:
After repeating the entire process for the other half of the block, the two sides will be sewn together.
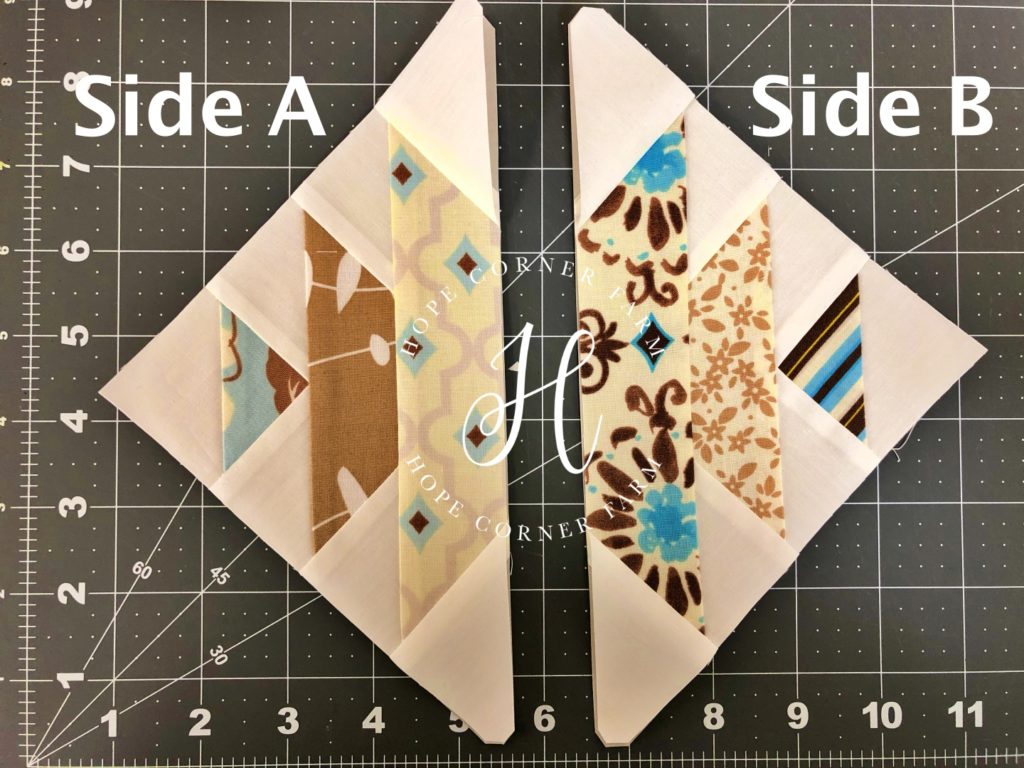
Place the two halves right-sides together. Match up the seams. Pin the blocks to ensure that the pieces don’t move around with sewing.

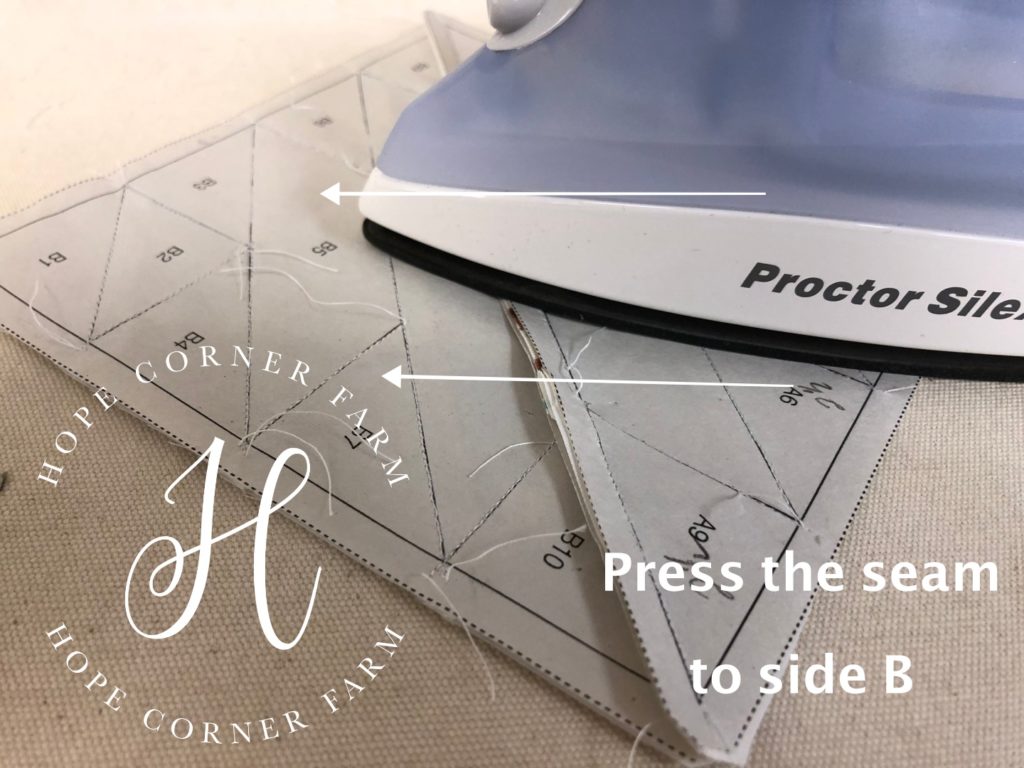
Sew directly down the line for the joining seam.
Press the seam towards Side B.
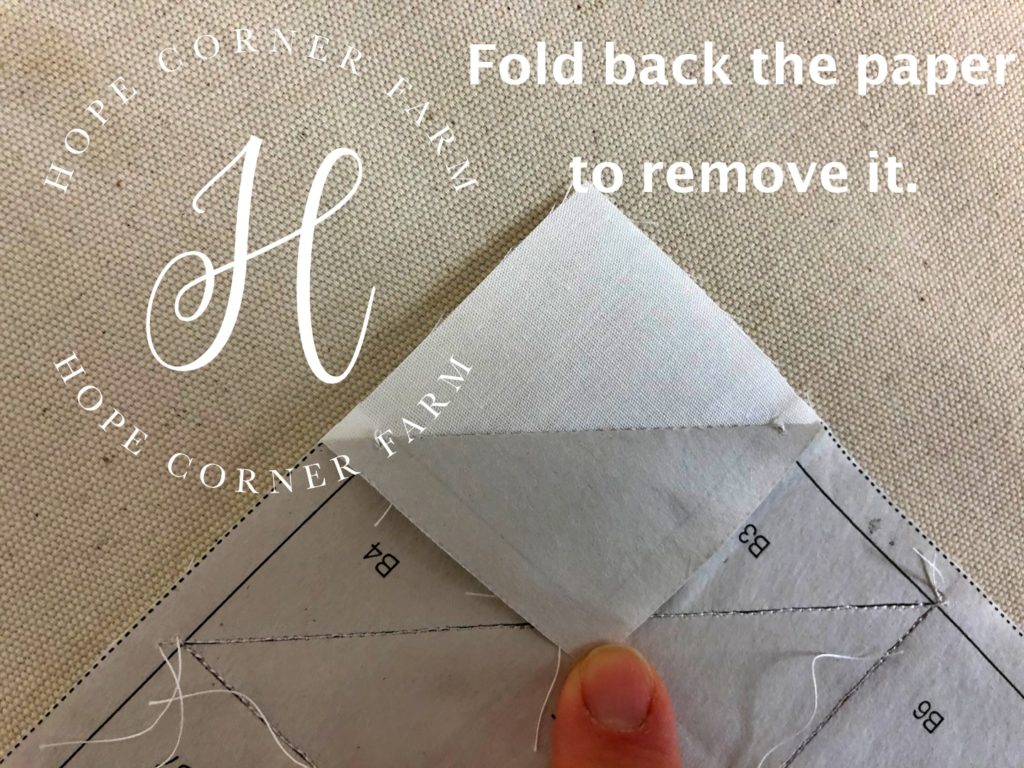
To remove the paper from the block, first fold back the paper along the stitching.
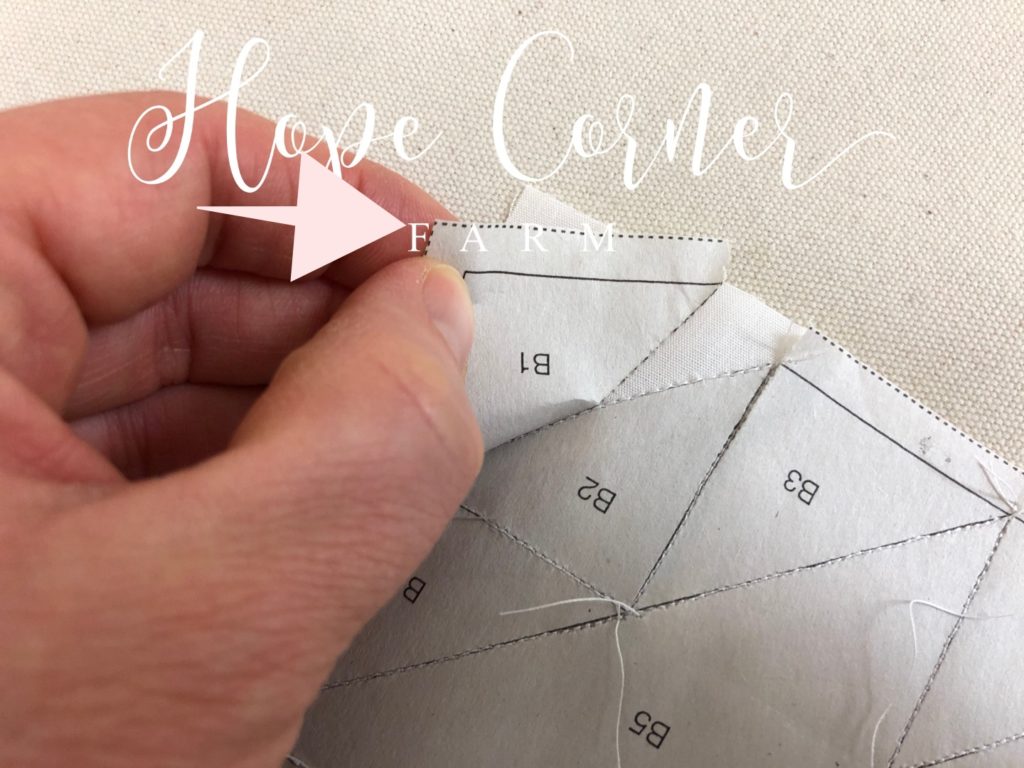
Next, gently tear away the paper from the block. Make sure to remove all tiny pieces of paper too.

After removing the paper:
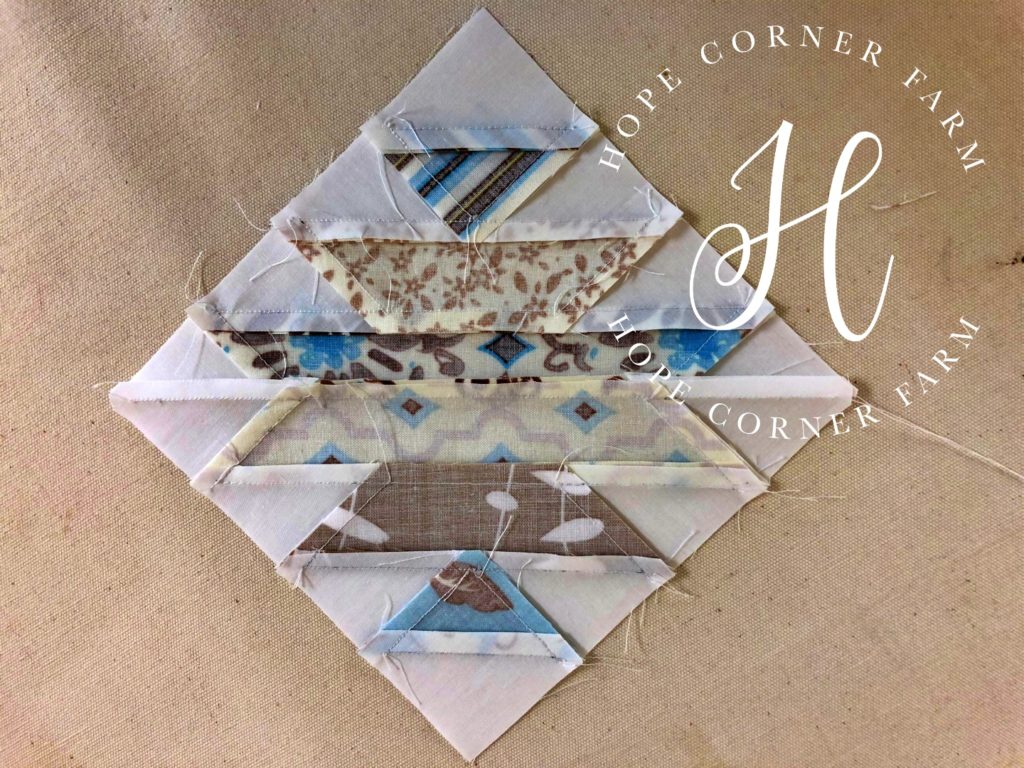
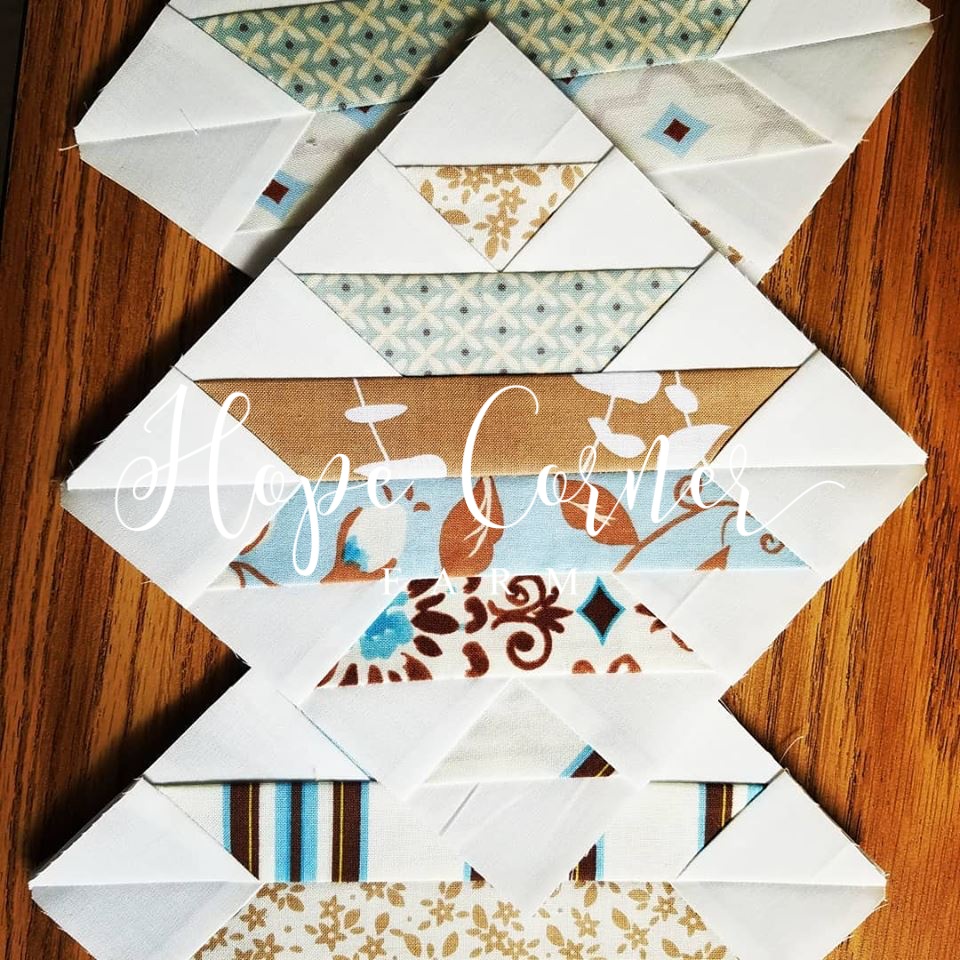
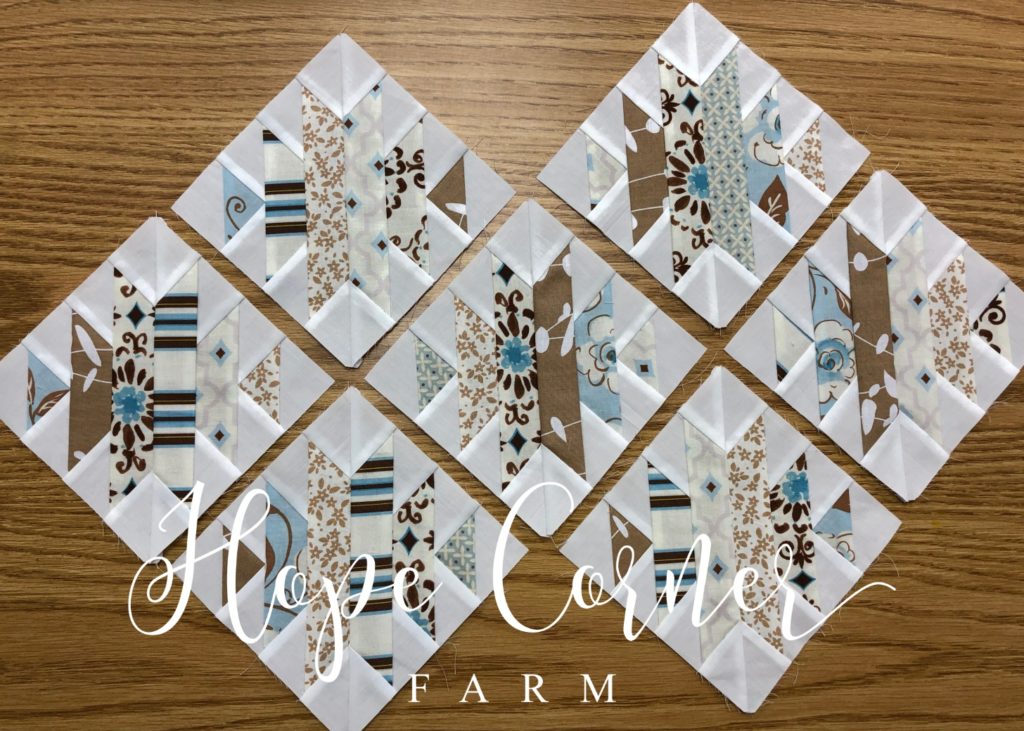
The Finished Block:
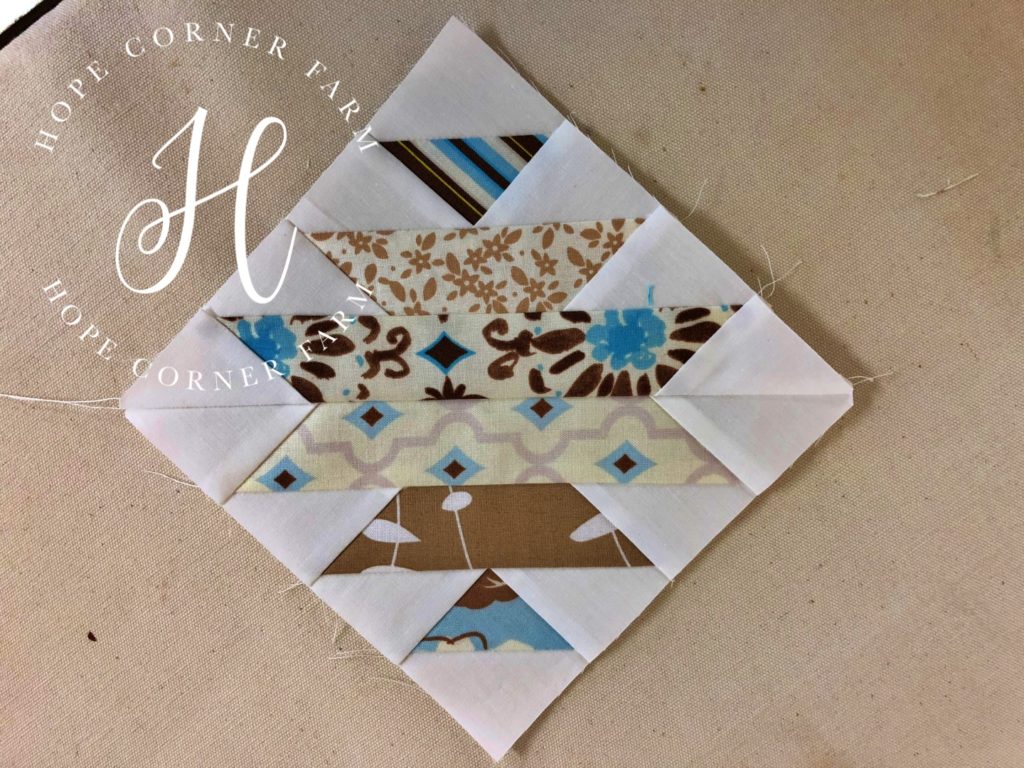
Many Blessings,