
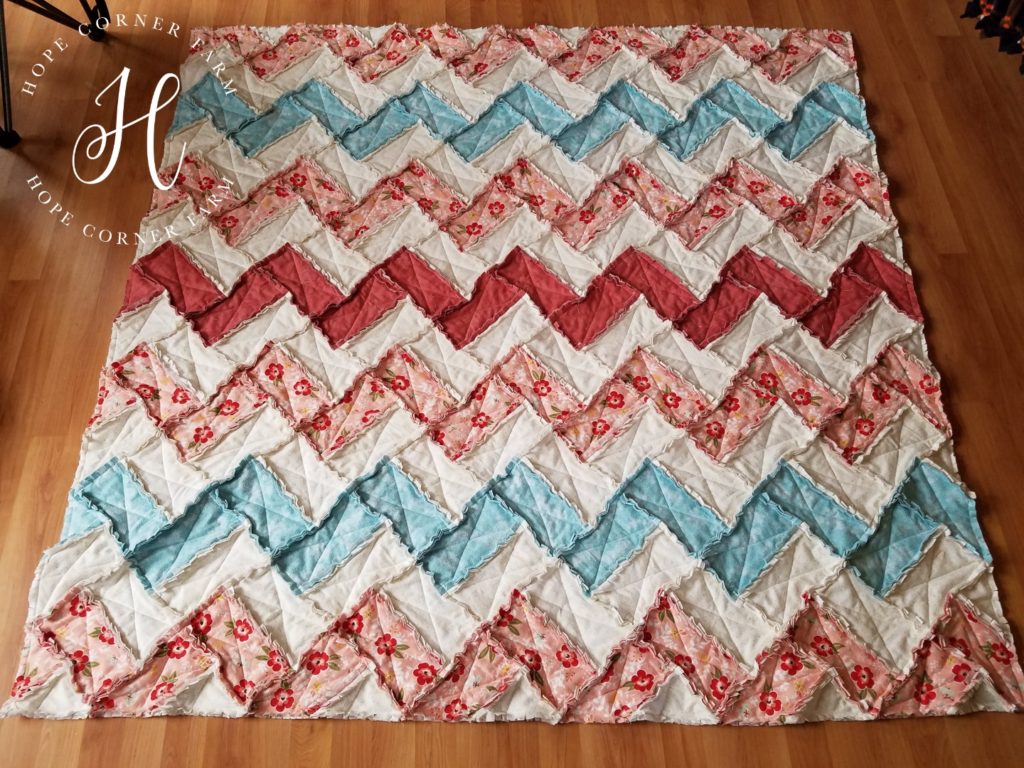
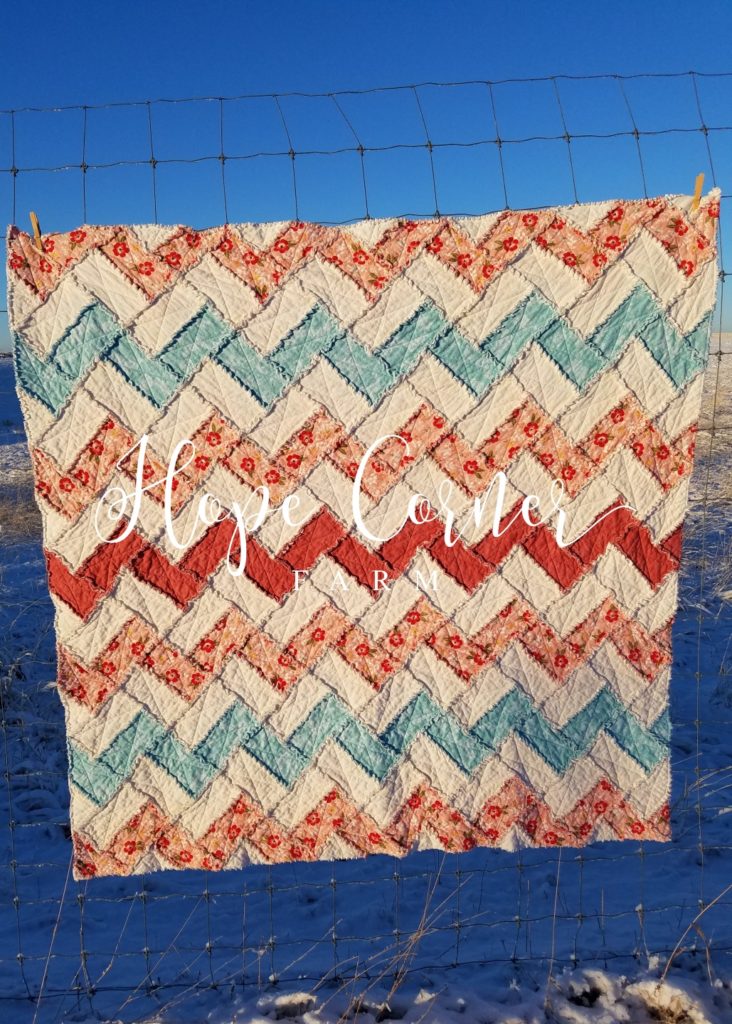
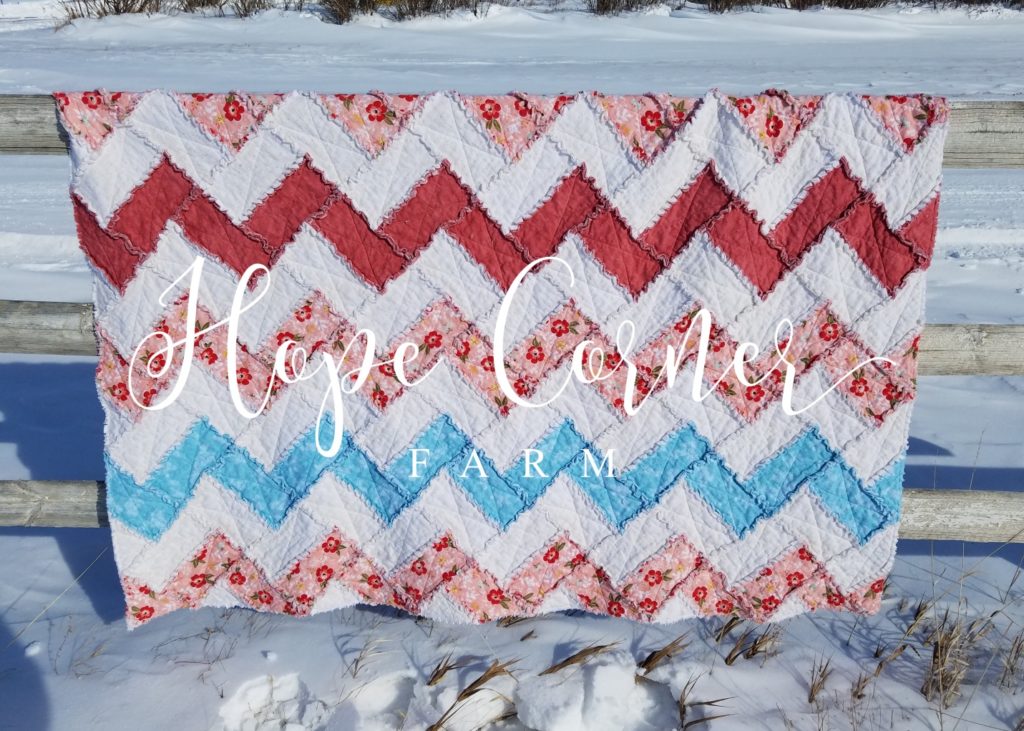
Rag Quilt – Chevron Style

Last Christmas I gave more personalized gifts to those I love. I wanted something that had my heart and soul put into it. One of those gifts was this different take on the rag quilt. Chevrons are a favorite of mine and rag quilts are so cozy, so this was a win-win! This quilt tutorial gives step-by-step instructions for how to create a beautiful Chevron Rag Quilt. Hopefully you enjoy this quilt as much as my gift recipient does!

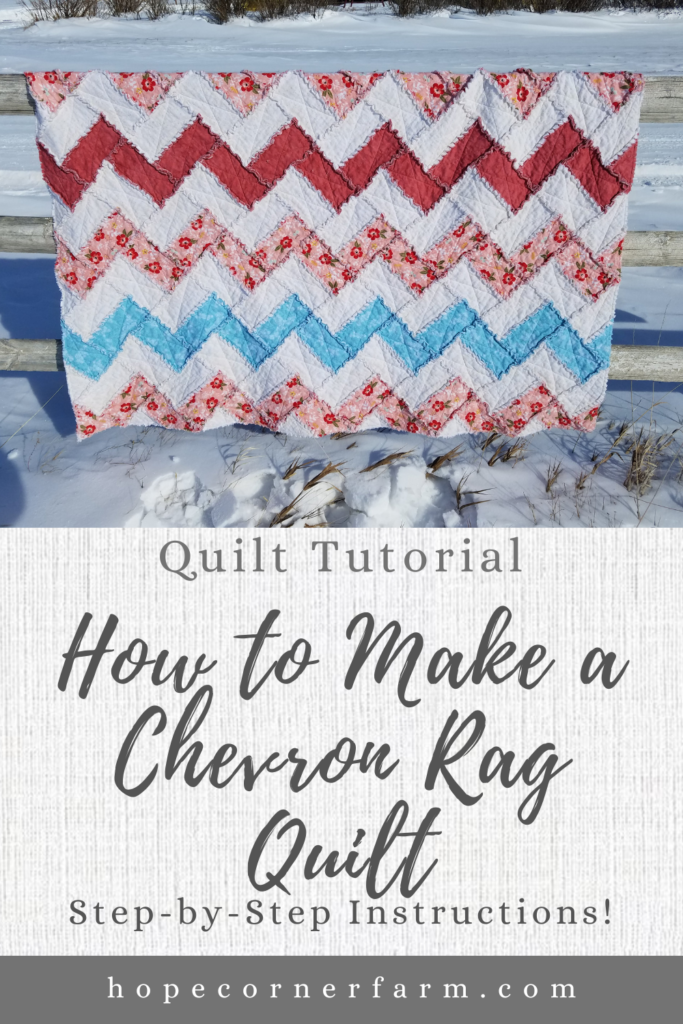

Finished Size = 63″ x 66″
Materials Needed:
4 yards cream colored flannel fabric (Main)
3 yards pink floral flannel fabric (Color 1)
3 yards blue flannel fabric (Color 2)
2 yards pink flannel fabric (Color 3)
1 bag of cotton batting (full-sized) or 1 1/2 yards of 96″ wide cotton batting on the roll
Coordinating thread
Rotary Cutter
6″x24″ quilter’s ruler
Fabric shears (I like these Fiskars for clipping my rag quilts)
Cutting mat
Pins
Sewing Machine
Fabric Cutting Instructions:
Square up the fabric and cut the following:
1- Main Fabric (cream in my quilt) – 4.5″ x 8″ rectangles. You will need 196.
2 – Color 1 (Pink floral in my quilt) – 4.5″ x 8″ rectangles. You will need 112.
3- Color 2 (Blue fabric in my quilt) – 4.5″ x 8″ rectangles. You will need 56.
4 – Color 3 (Pink fabric in my quilt) – 4.5″ x 8″ rectangles. You will need 28.
5 – Batting – 3.5″ x 7″ rectangles. You will need 196.
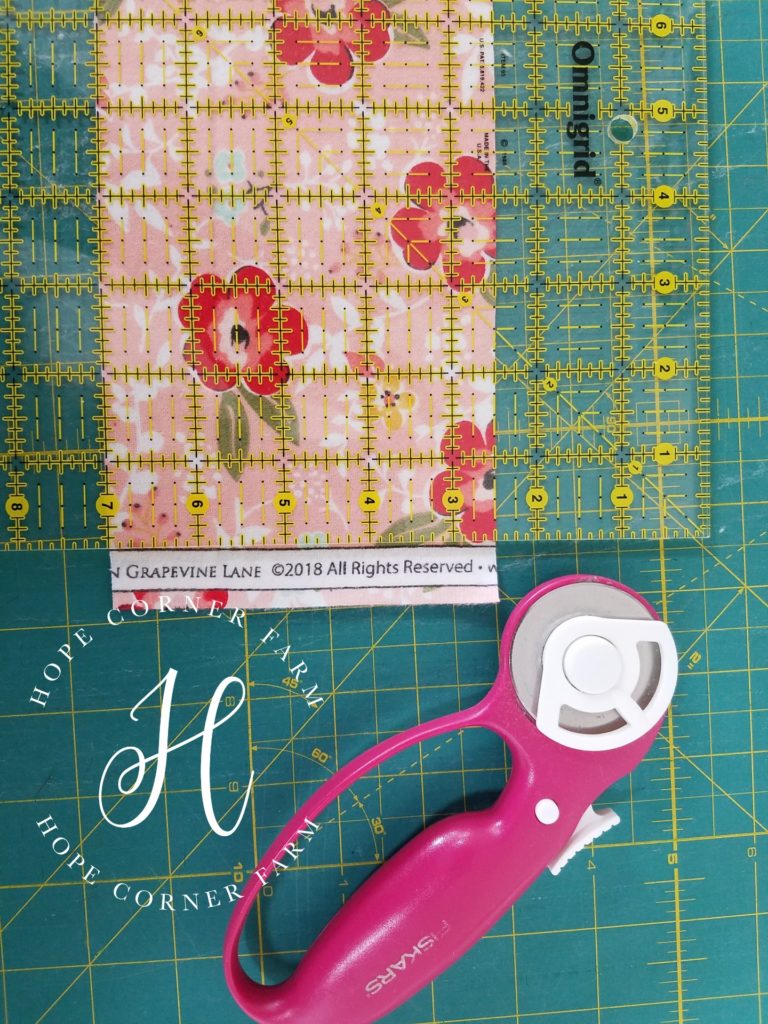
To begin with the cutting, cut the fabric in 4.5″ strips that are the width of the fabric. Don’t forget to square up the fabric first to ensure that the cuts are nice and straight.
Before cutting the 4.5″ strips into 4.5″x 8″ rectangles, cut off the selvage edge of the strip.
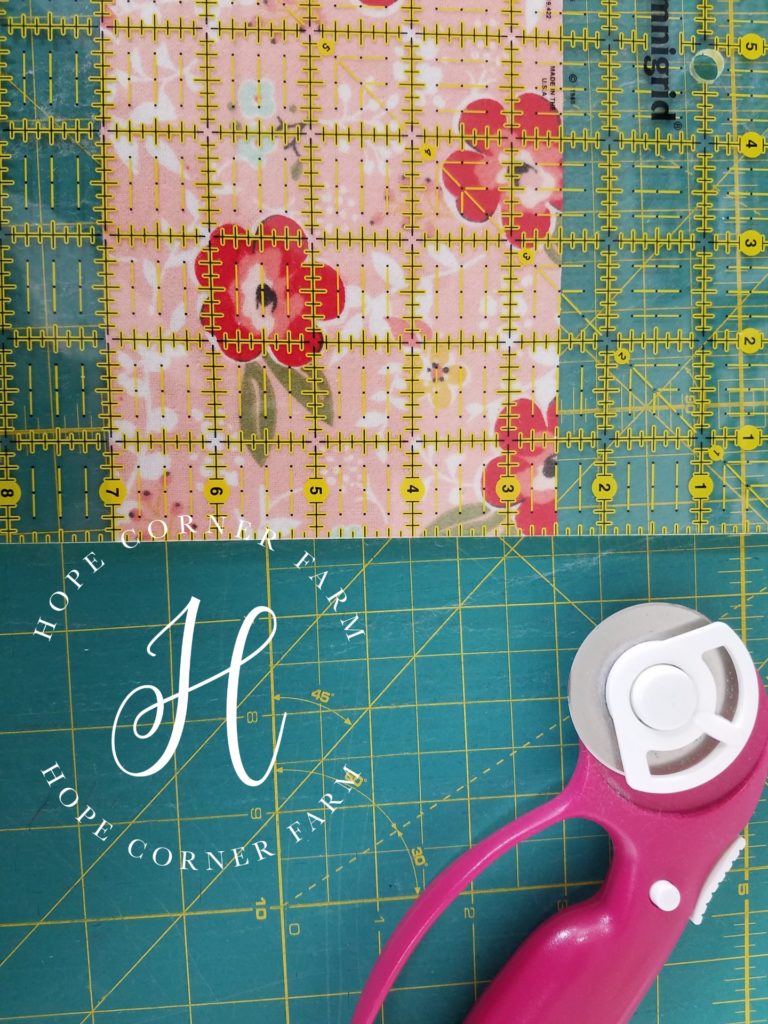
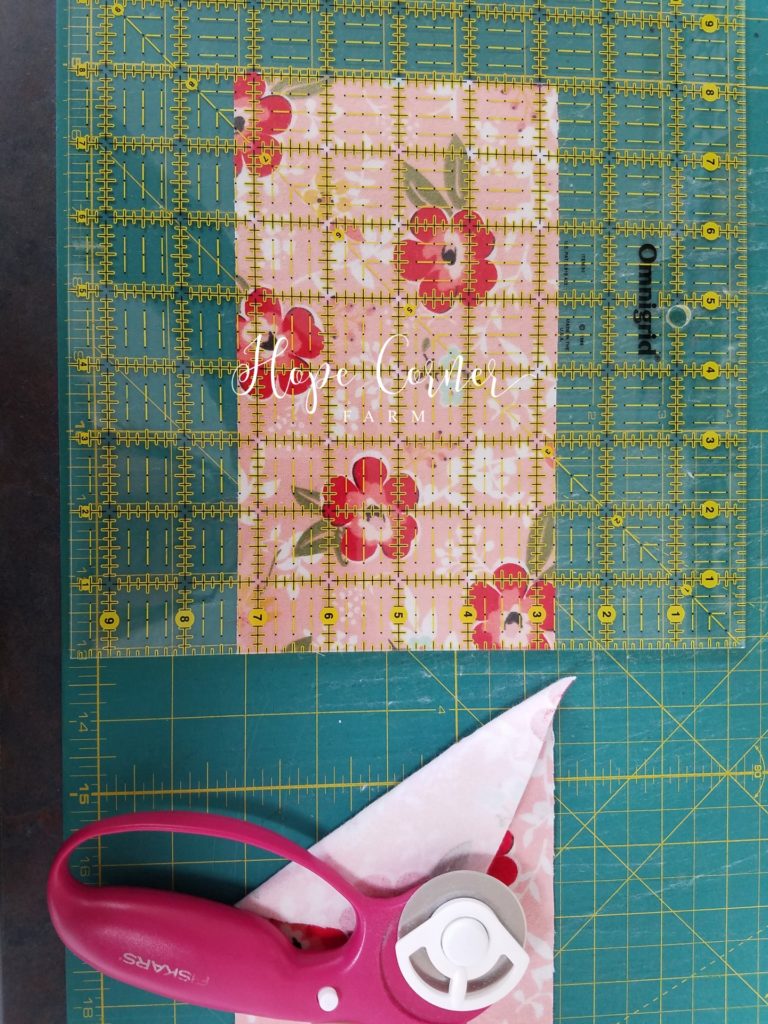
Next, cut the width of fabric strips and now cut them into 8″ segments. Usually there are 5 of the 4.5″x 8″ rectangles cut from one strip. Repeat this process until you have the following:
1 – Main Color rectangles (4.5″x 8″) = 196
2- Color 1 rectangles (4.5″x 8″) = 112
3- Color 2 rectangles (4.5″x 8″) = 56
4- Color 3 rectangles (4.5″ x 8″) = 28

Batting Cutting Instructions:
First, cut the batting into 3.5″ strips the width of the batting.
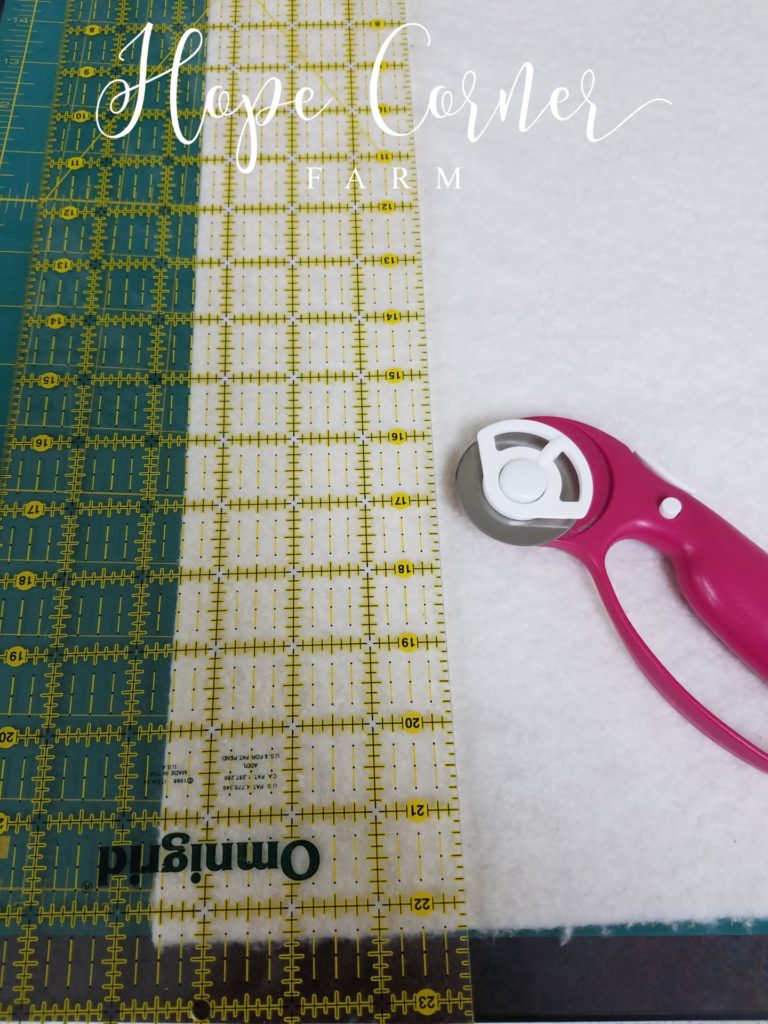
Second, cut the 3.5″ strips into 7″ rectangles. We end up with 3.5″ x 7″ rectangles this way. This process is repeated until you have rectangles of batting.
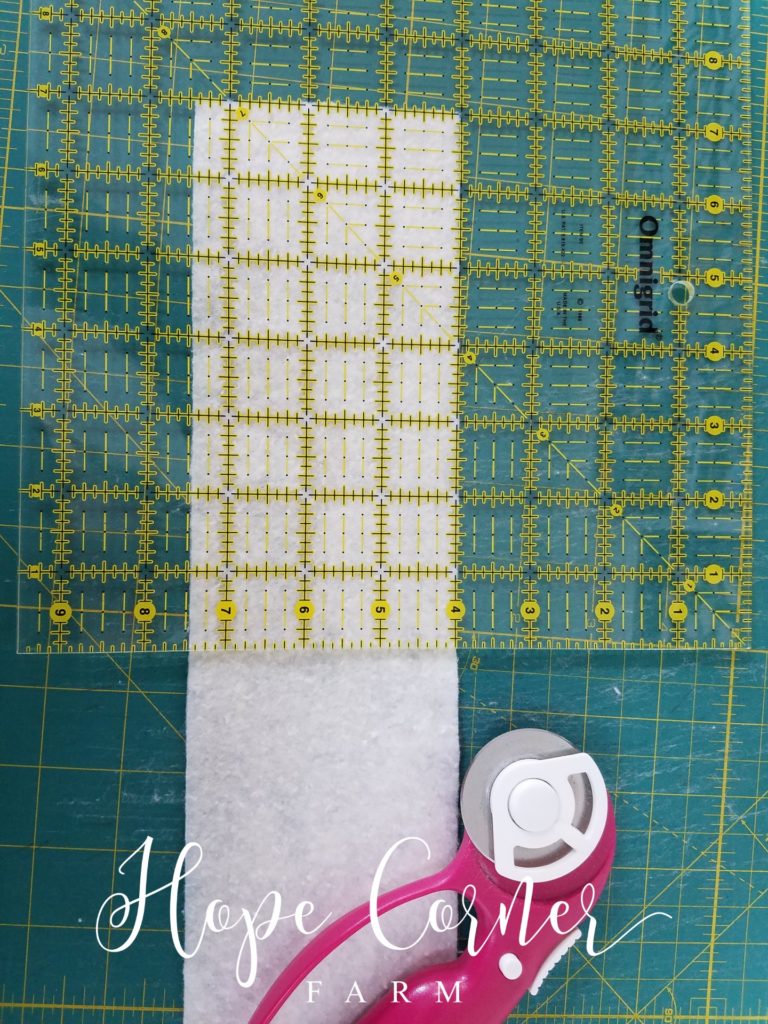
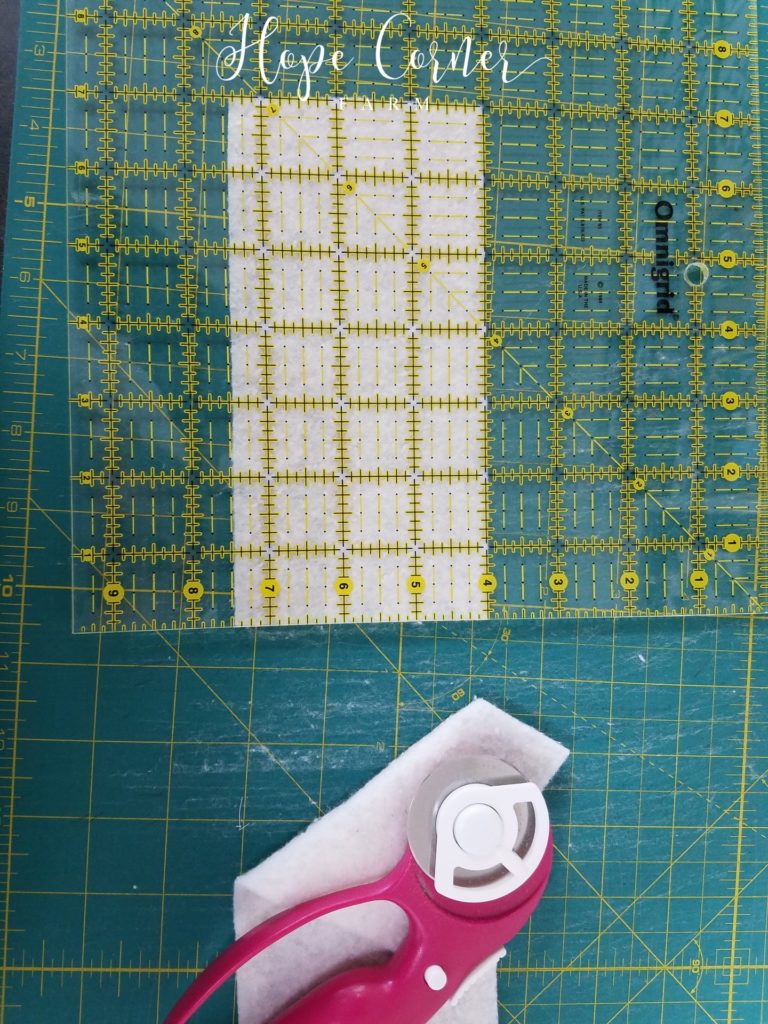
Remember, 196 3.5″x 7″ batting rectangles are needed for this quilt.
Assembling the Rag Quilt Pieces:
To start the assembly process, TWO 4.5″x 8″ fabric rectangles of the same color are needed. Additionally, ONE 3.5″x 7″ batting rectangle is needed.
First, set one of the fabric rectangles GOOD SIDE FACE DOWN on the mat.
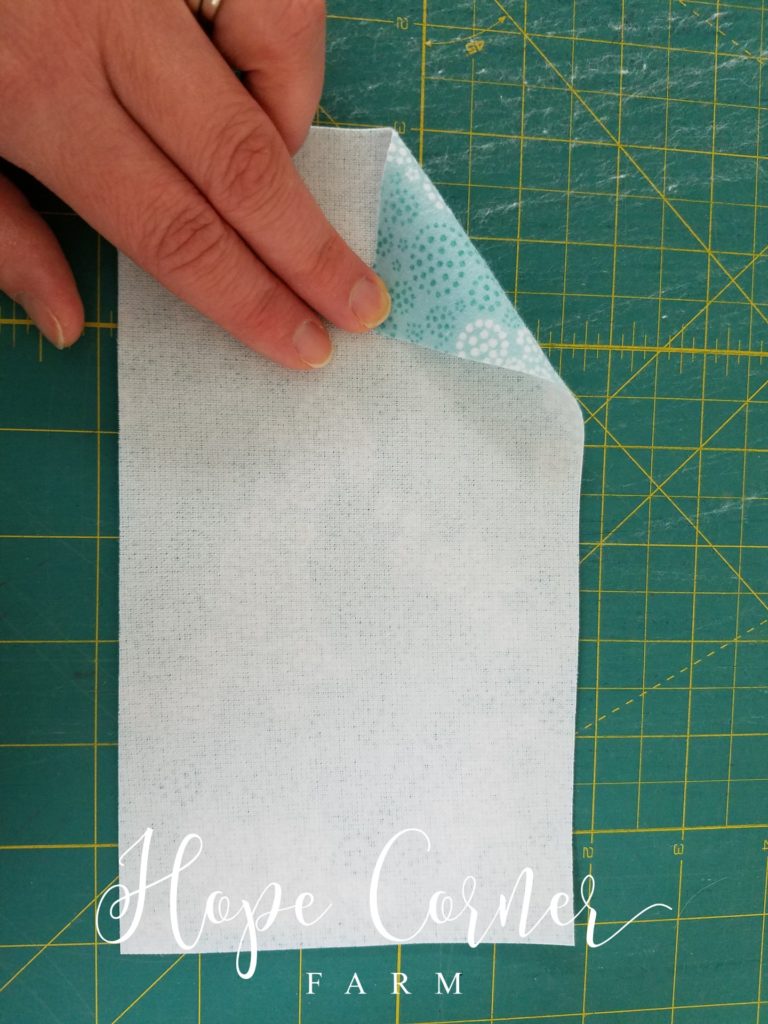
Second, set ONE 3.5″x 7″ batting rectangle on top of the fabric rectangle. Don’t forget to center the batting rectangle evenly on top of the fabric rectangle.
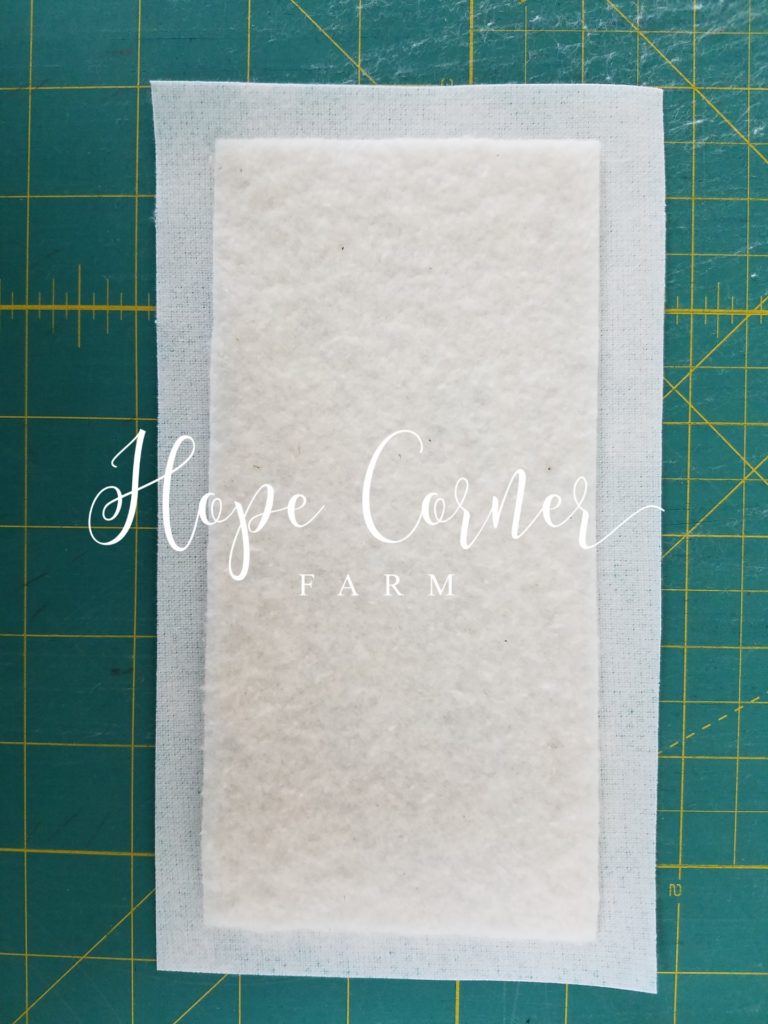
Finally, place another 4.5″x 8″ fabric rectangle FACE UP on top of the batting rectangle. Again, check to see that the fabric rectangle is centered evenly on top of the previous two layers.
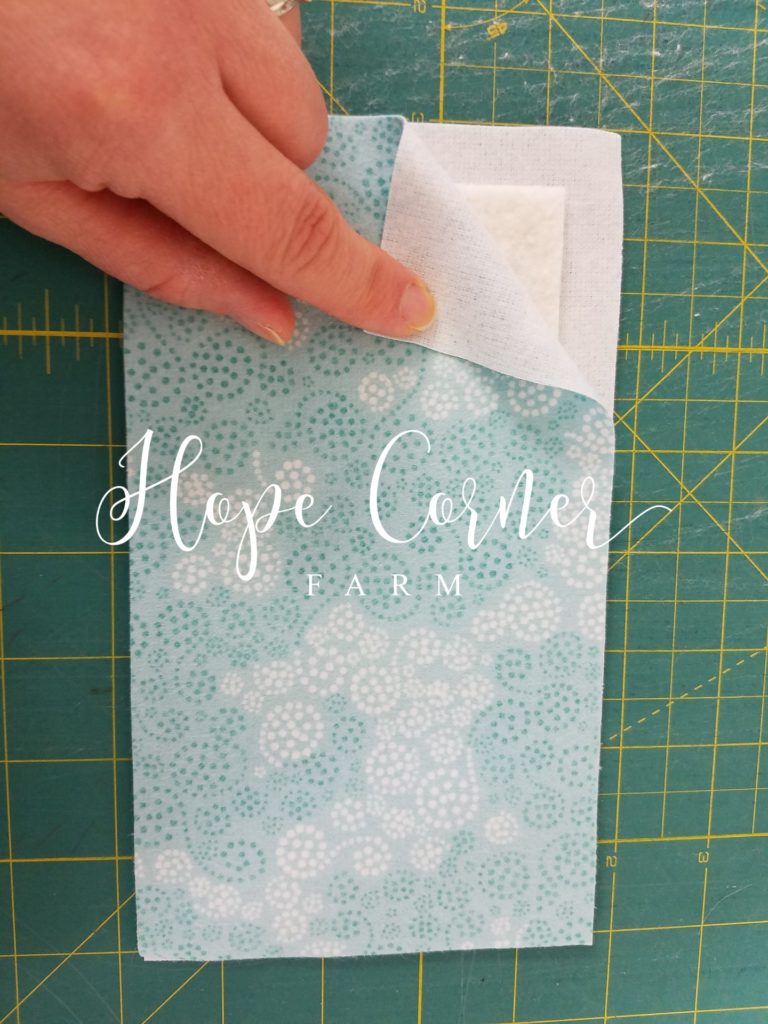
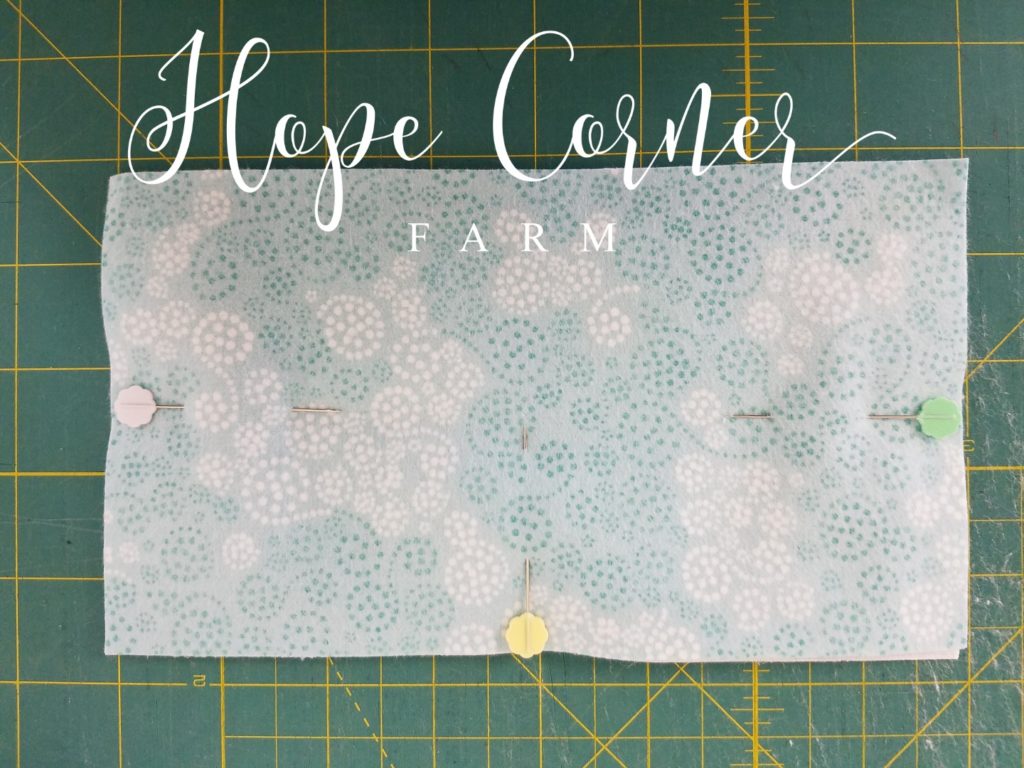
Now, immediately pin the 3 layers in place. This keeps the fabric and the batting from slipping and moving around.
Sewing the Rag Quilt Sandwiches:
Next, sew together the fabric sandwich by sewing an “X” pattern on the block. To complete this, start 1/2″ in at one corner of the rectangle and sew diagonally across the sandwich – making sure to stop 1/2″ short of the opposite corner. In addition, don’t forget to backstitch when beginning and when starting and ending the seam – this keeps the stitching from unravelling. Immediately repeat the process between the other corners.

Additionally, complete all of the remaining 195 fabric rectangle blocks using the exact same process. Keep in mind that there will be:
-98 Main Color Blocks
-56 Color 1 Blocks
-28 Color 2 Blocks
-14 Color 3 Blocks
Foundation Block Construction:
First, take one Main Color block and place it on top of one Color 1 block. Pin them together and sew down one of the long sides. Start the stitching 1/2″ in from the edge and end the stitching 1/2″ from the edge. The block will now look like this:
Now, keep repeating this process until there are the following number of 2 rectangle blocks:
56 Color 1 and Main Color combination blocks
28 Color 2 and Main Color combination blocks
14 Color 3 and Main Color combination blocks
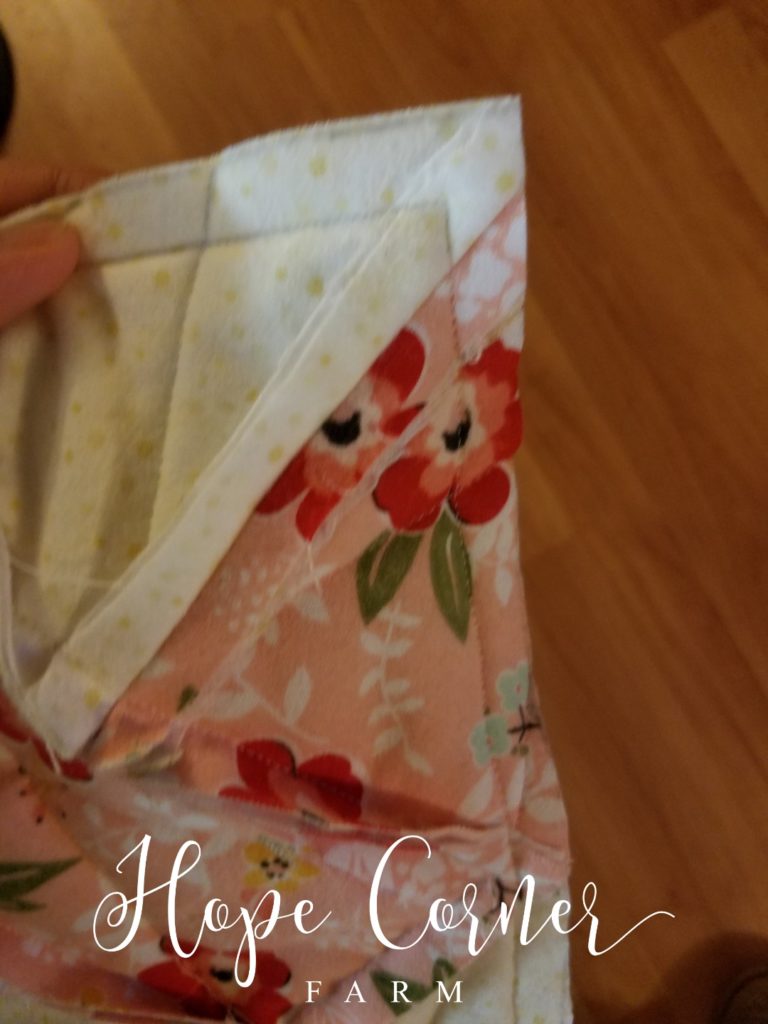
“Backwards L” Block Construction:
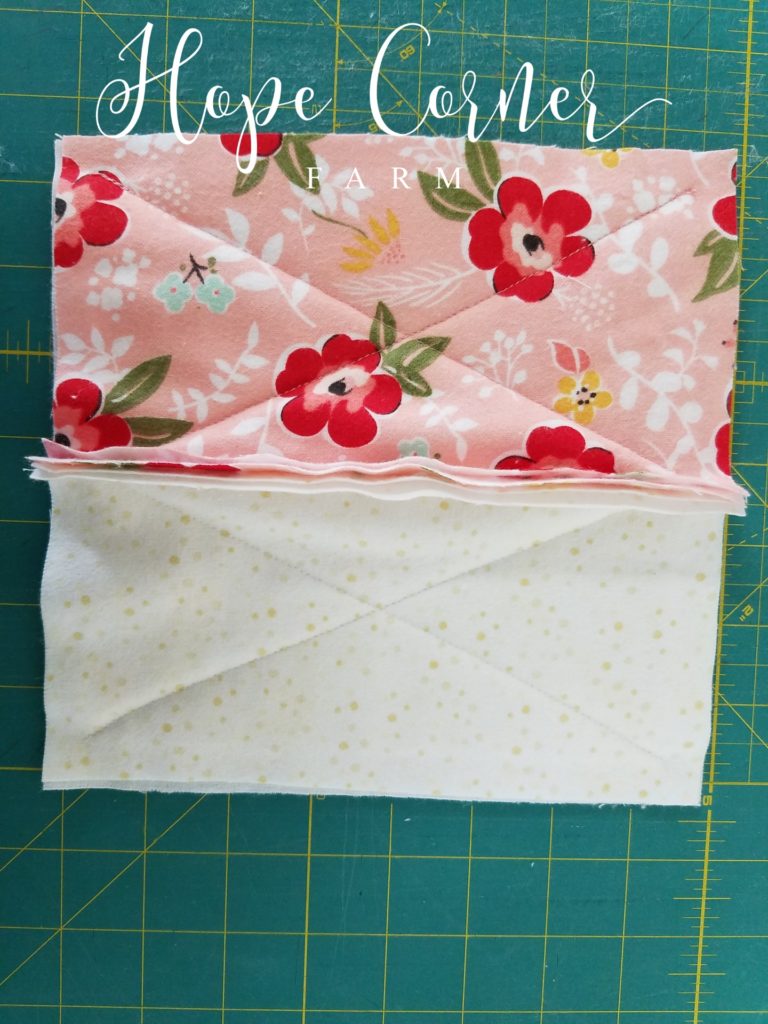
First, take TWO of the Color 1 & Main Color blocks. Sew them together like this:
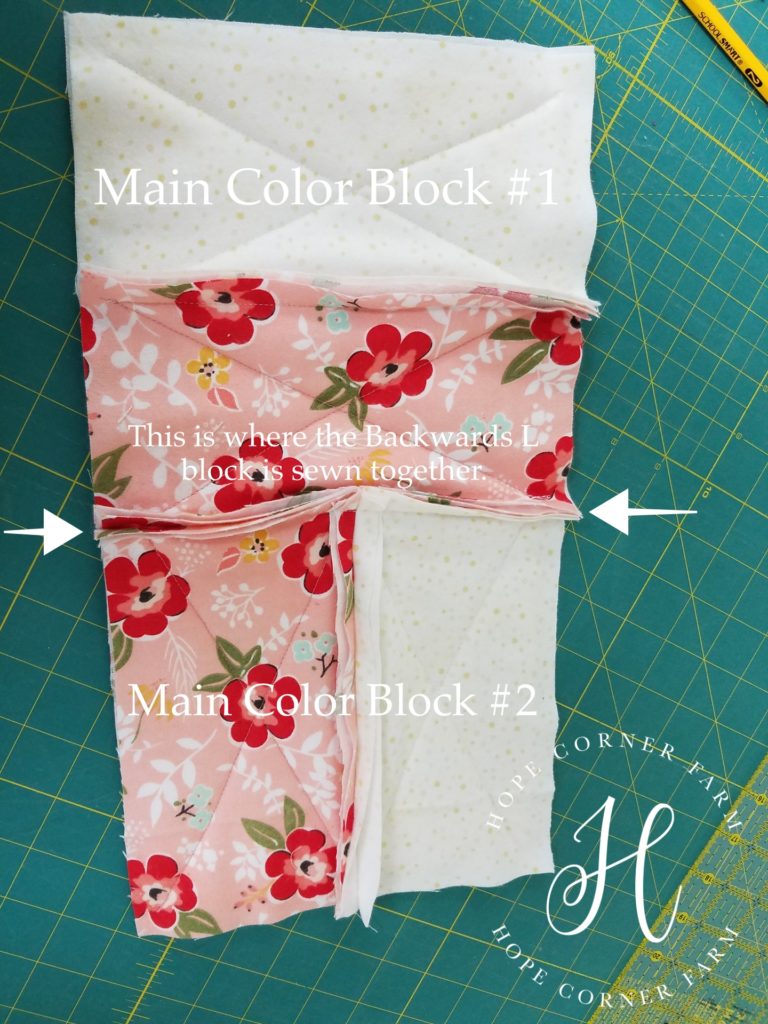
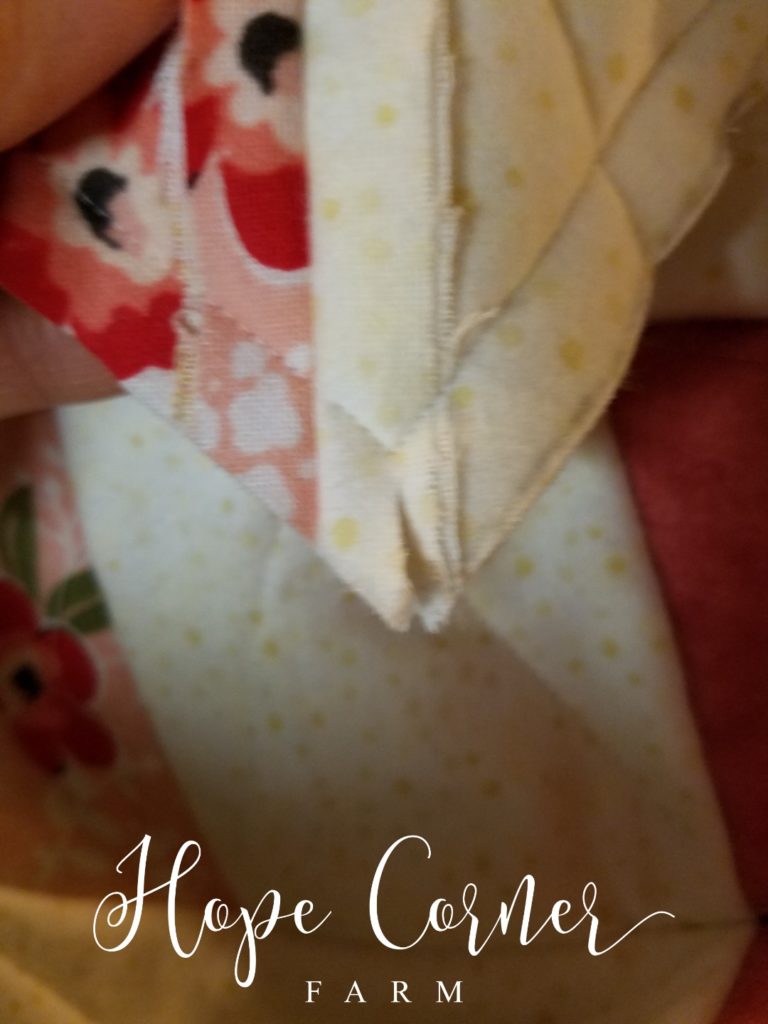
Now, another thing to pay attention to when sewing these Backwards L blocks together is how the seams from the two blocks are laying. I make sure to pin the seams open and flat before I go to sew them. Below, is a picture that illustrates this.
Because these “Backwards L” blocks are the foundation of our rag quilt, all of them need to be constructed before moving to the next step. There will be the following number of “Backwards L” blocks:
1. Color 1 – 28 blocks
2. Color 2 – 14 blocks
3. Color 3- 7 blocks
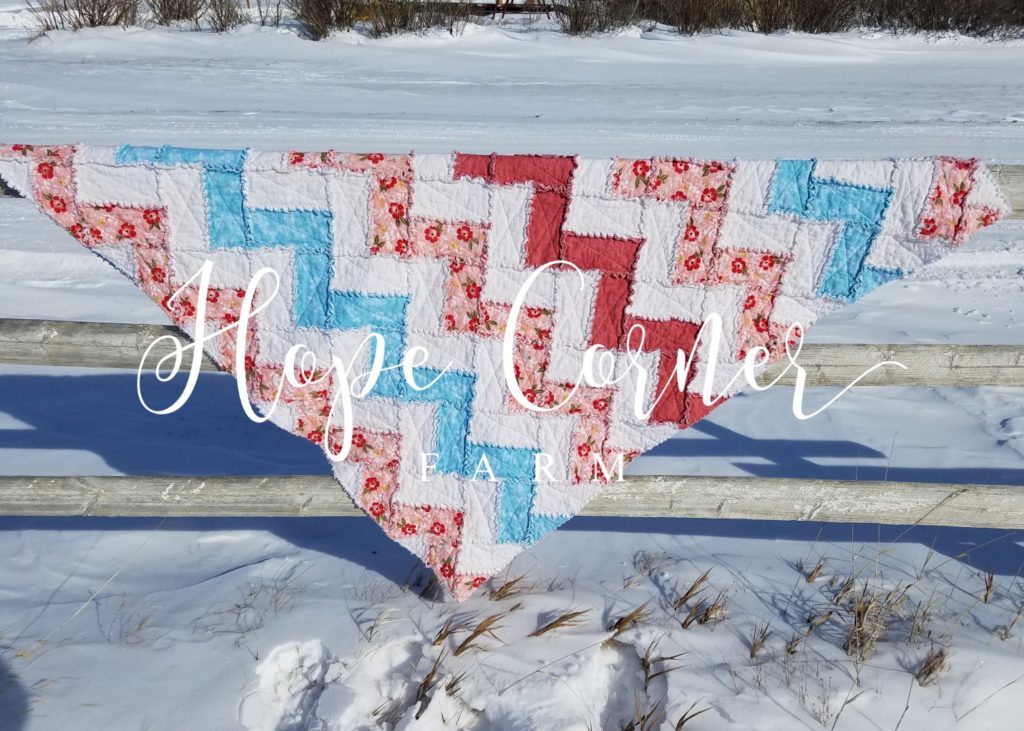
Rag Quilt Chevron Style Construction:
Finally, please note that this quilt is sewn in corner-to-corner construction. What this means is that this quilt starts at one corner with the rows growing bigger until the middle of the quilt. Once we reach the middle of the quilt, the blocks decrease in size until arriving at the opposite corner.
Row 1 Construction:
Begin by sewing one Color One “Backwards L (BL)” block to one Color Two BL block. They are sewn together one on top of the other (remember…seams are visible on the top of the quilt). The BL Blocks need to be facing in the same direction.
Rag Quilt Row 2 Construction:
Next, combine TWO Color 1 BL Blocks with ONE Color 2 BL Block. Sandwich the Color 2 BL Block in between the two Color 1 BL Blocks. Keep all of the seams face up (on the top of the quilt). Also, remember to pin flat any seams that will be sewn. Make sure that all of the BL blocks are facing the same direction when sewn together. First, sew the Color 2 BL Block to the top of the Color 1 BL Block. Next, sew the additional Color 1 BL Block to the top of the Color 2 BL Block.
Row 3 Construction:
Now, for Row 3, combine TWO Color 1 BL Blocks, ONE Color 2 BL Block, and ONE Color 3 BL Block. Note that all of the BL blocks are sewn together with the colors facing the same direction. Pay attention to this! First, sew a Color 1 BL Block to the top of the Color 3 BL Block. Second, add a Color 2 BL Block to the top of the Color 1 BL Block. Finally, sew the last Color 1 BL Block to the top of the Color 2 BL Block.
Rag Quilt Row 4 Construction:
Next, combine THREE Color 1 BL Blocks, ONE Color 2 BL Blocks, and ONE Color 3 BL Blocks. Keep all of the BL Blocks facing in the same direction when sewing them together. Also, make sure that all of the seams are open when sewing over them.
Row 5 Construction:
Now, row 5 is constructed by combining THREE Color 1 BL Blocks, TWO Color 2 BL Blocks, and ONE Color 3 BL Block. Keep all of the BL Blocks facing the same direction. In addition, all seams need to be open when sewing over them.
Sixth Row:
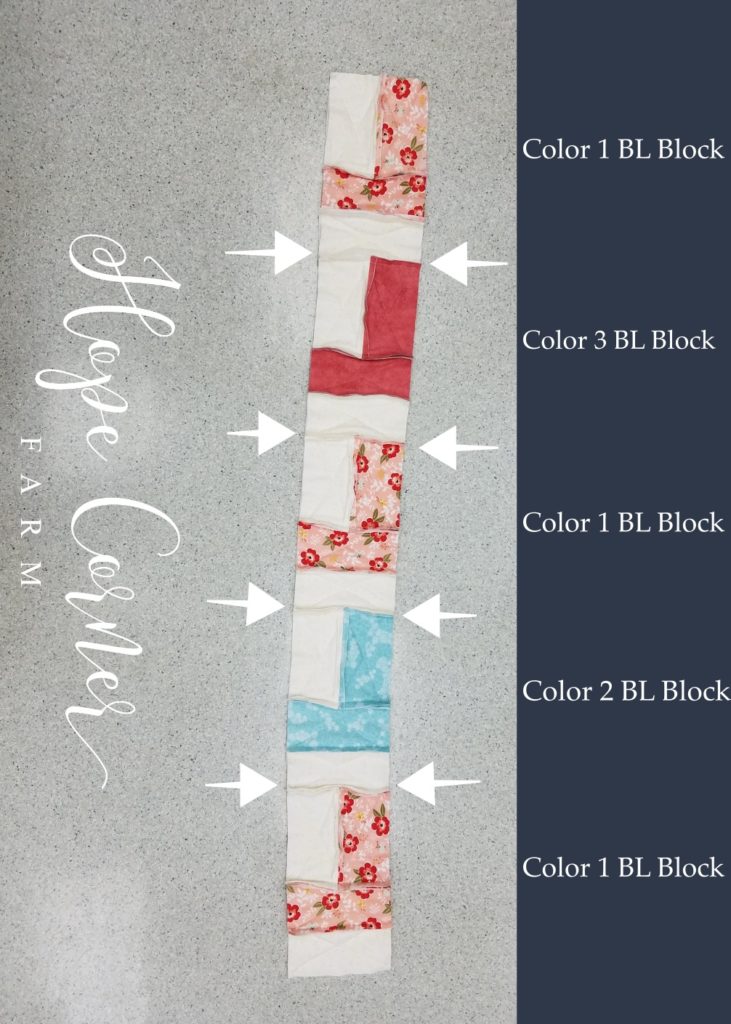
To Begin, gather THREE Color 1 BL Blocks, TWO Color 2 BL Blocks, and ONE Color 3 BL Blocks. Keep in mind that all of the BL Blocks need to face in the same direction. Additionally, when sewing over any seams, make sure that they are open. First, sew one Color 1 BL Block top to the top of one Color 2 BL Blocks. Next, sew one Color 3 BL Block to the top of the previous Color 2 BL Block. Now, sew one Color 1 BL Block to the top of the previous Color 3 BL Block. Fourth, sew one Color 2 BL Block to the top of the previous Color 1 BL Block. Finally sew one Color 1 BL Block to the top of the Color 2 BL Block. Yay! This is the middle row of the quilt!
Rag Quilt Row 7:
Now, for this row, we are in essence “subtracting a block from the top of each row. Notice that this is where the decrease in size for the blocks comes in to play. For this row, TWO Color 1 BL Blocks are needed, TWO Color 2 BL Blocks are needed, and ONE Color 3 BL Block is needed. First, sew one Color 2 BL Block to the top of one Color 1 BL Block. Second, add one Color 1 BL Block to the top of the Color 2 BL Block. Third, sewn a Color 3 BL Block to the top of the previous Color 1 BL Block. Add a Color 1 BL Block to the top of the Color 3 BL Block. Finally, sew a Color 2 BL Block to the top of the previous Color 1 BL Block.
Additionally, remember to keep all of the BL Blocks face the same direction (with the vertical color on the right). Also, when sewing over any seams make sure that they are open!
Row 8 Construction:
Now, for this row THREE Color 1 BL Blocks are needed, ONE Color 2 BL Block, and ONE Color 3 BL Block. To begin construction of this block, sew one Color 2 BL Block to the top of one Color 1 BL Block. Next, sew one Color 1 BL Block on top of the preceding Color 2 BL Block. Again, sew the Color 3 BL Block to the top of the previous Color 1 BL Block. Finally, sew the final Color 1 BL Block to the top of the Color 3 BL Block.
Rag Quilt 9th Row:
Next, to start row 9, TWO Color 1 BL Blocks are needed, as well as ONE Color 2 BL Block, and ONE Color 3 BL Block. Start by sewing the Color 2 BL Block to the top of one of the Color 1 BL Blocks. Next, sew another Color 1 BL Block to the top of the Color 2 BL Block. Finally, sew the Color 3 BL Block to the top of the previous Color 1 BL Block. As with the previous rows, make sure that the BL Blocks are facing in the same direction (vertical color strip to the right) and that the seams are open when sewn over.
Rag Quilt Row 10 Construction:
As we have previously done, gather the needed blocks for this row: TWO Color 1 BL Blocks, and ONE Color 2 BL Block. To start, sew the Color 2 BL Block on top of one of the Color 1 BL Blocks. Next, sew the other Color 1 BL Block to the top of the Color 2 BL Block. Keep the seams open and the BL Blocks facing the same direction!
Row 11 Construction:
Now, only two blocks are needed for this row. Begin by gathering ONE Color 1 BL Block and ONE Color 2 BL Block. This row has only one seam. Sew the Color 2 BL Block to the top of the Color 1 BL Block.
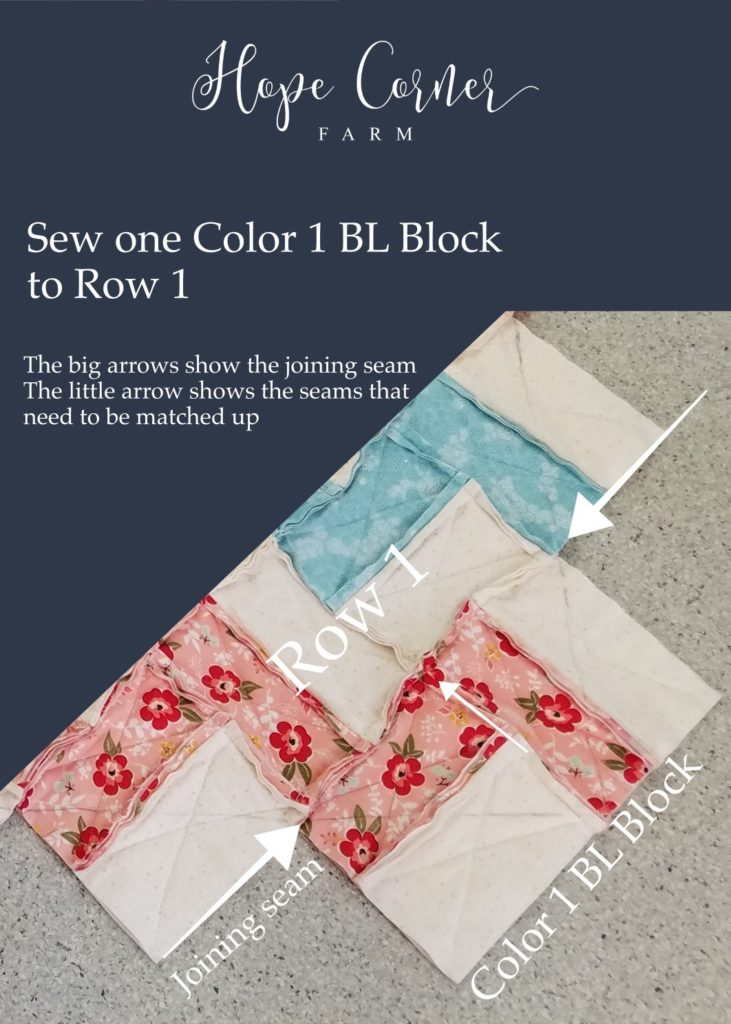
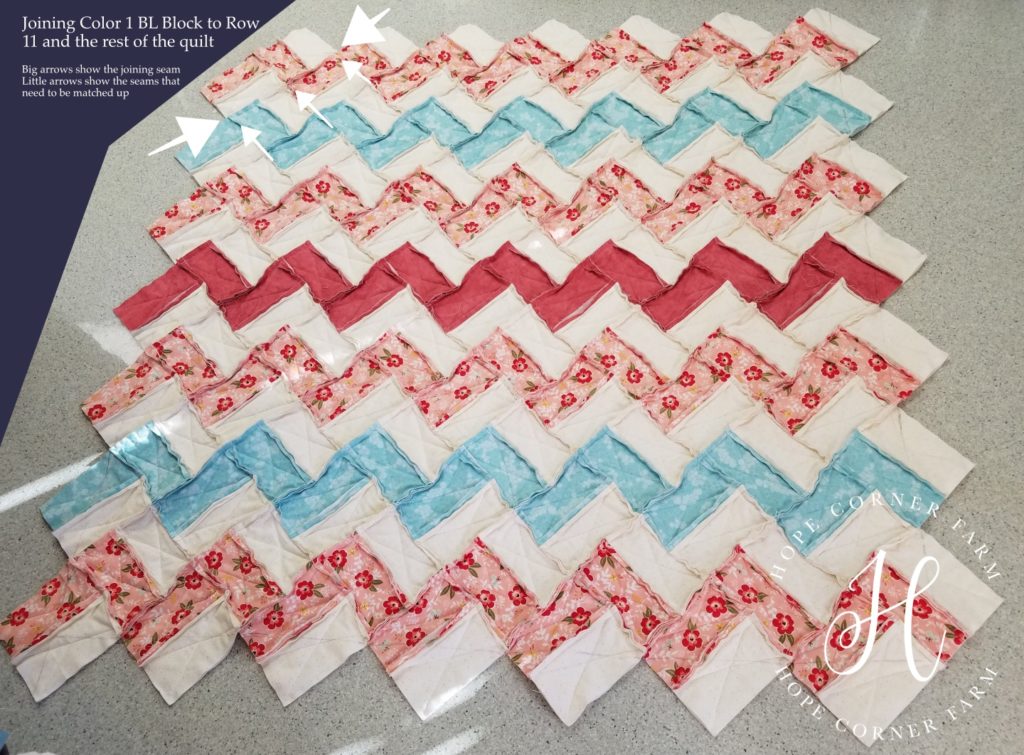
Chevron Rag Quilt Construction – First Seam:
Begin by sewing ONE Color 1 BL Block to Row 1. The edges of the Color 1 BL Block should match up with the horizontal colored fabrics in Row 1 (see the picture). Make sure that any seams that are sewn over are open. Also, pay attention to making sure that the seams are all facing to the top of the quilt.
This quilt is utilizing “corner-to-corner” construction. Sewing the rows happens by starting at one corner, growing to the middle, and then decreasing until reaching the opposite corner.
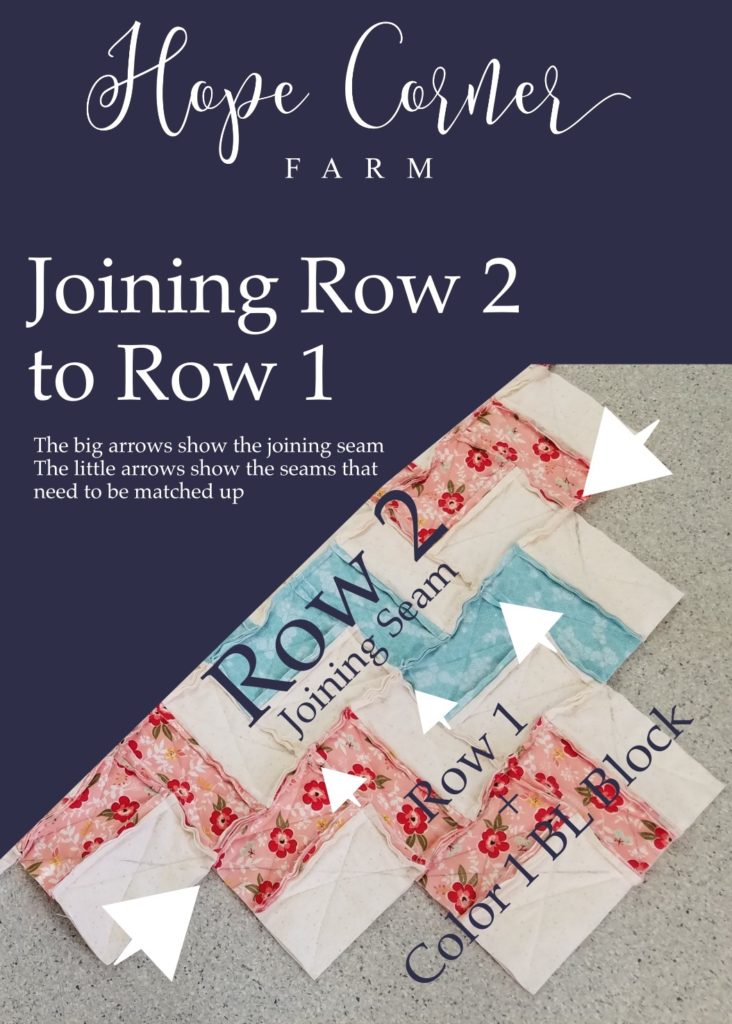
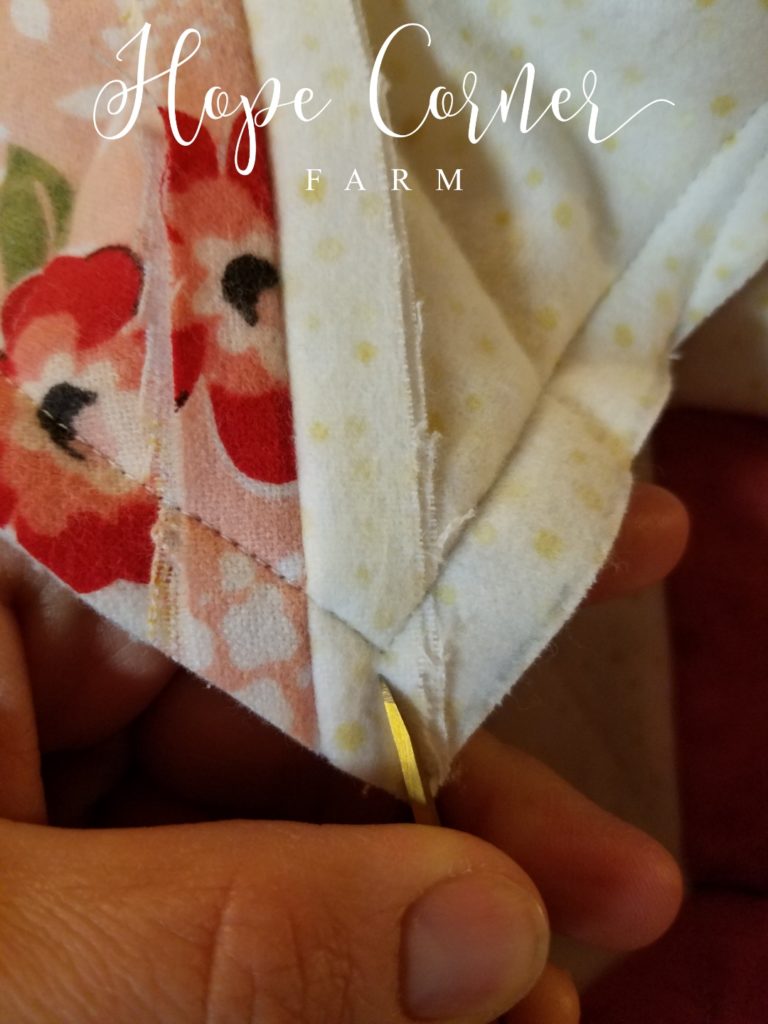
Quilt Construction – Second Seam:
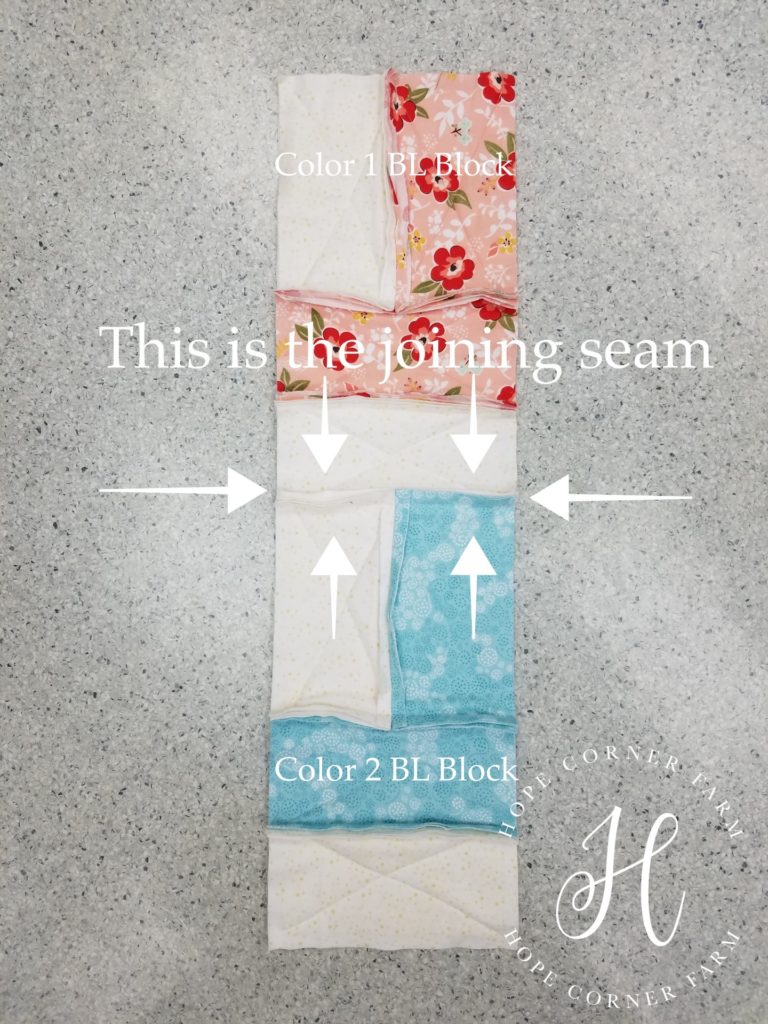
Begin by matching up the seams from Row 1 to Row 2. Not every seam will have a match, but the picture below shows arrows pointing to the seams that need to be matched. Remember to pin open the seams that are being matched and any seams that you sew over! Also, make sure that the BL Blocks from Row 2 are facing in the same direction as Row 1. Again, line up the edge of Row 1 with the vertical Color 1 pieces from Row 2. See the picture below for a visual.
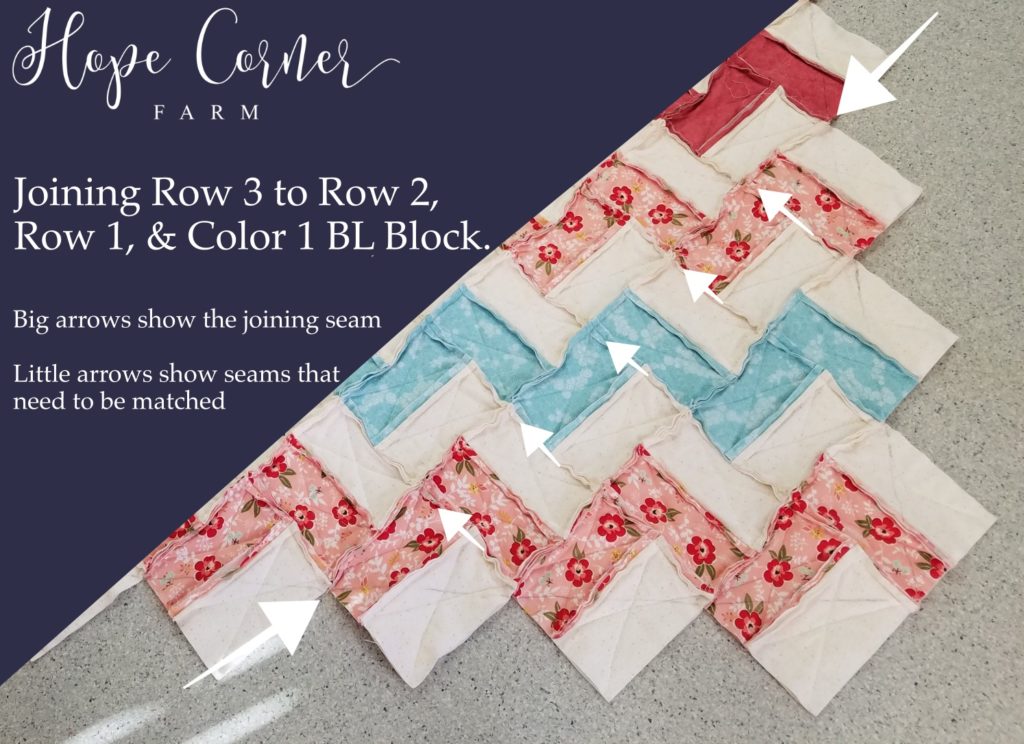
Quilt Construction – Third Seam:
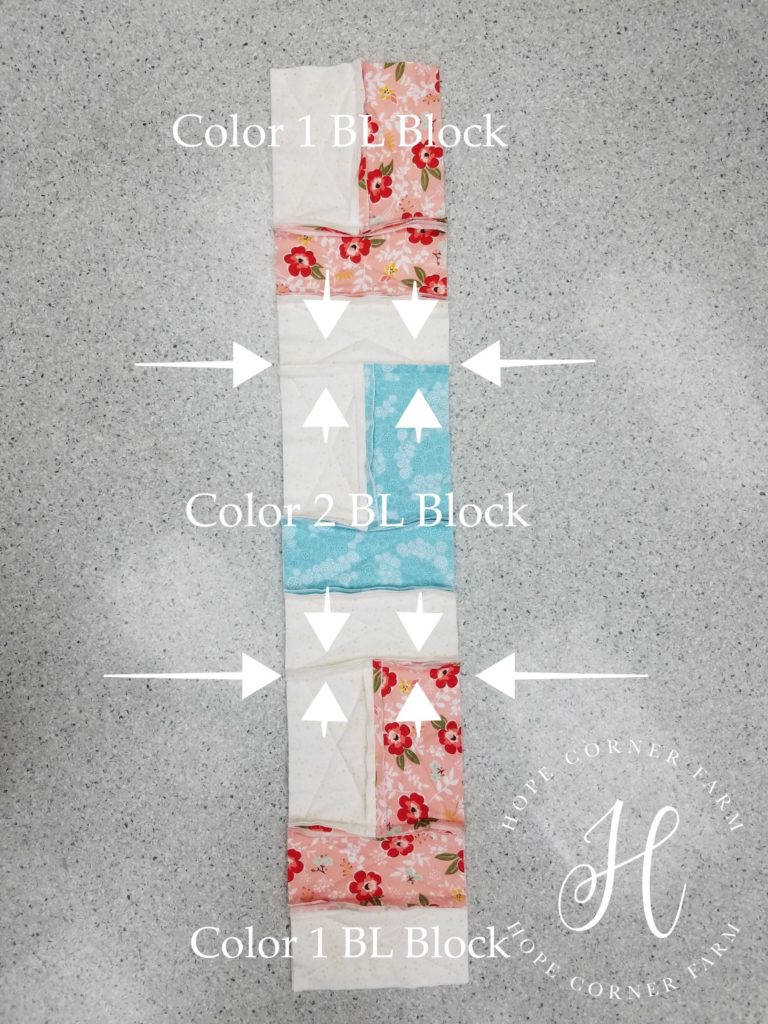
Now, start by matching up the seams from Row 2 to Row 3. Not every seam will have a match, but the picture below shows arrows pointing to the seams that need to be matched. Remember to pin open the seams that are being matched and any seams that you sew over! Also, make sure that the BL Blocks from Row 3 are facing in the same direction as Row 1 & Row 2. Again, line up the edge of Row 2 with the vertical Color 1 and Color 3 pieces from Row 3. See the picture below for a visual.
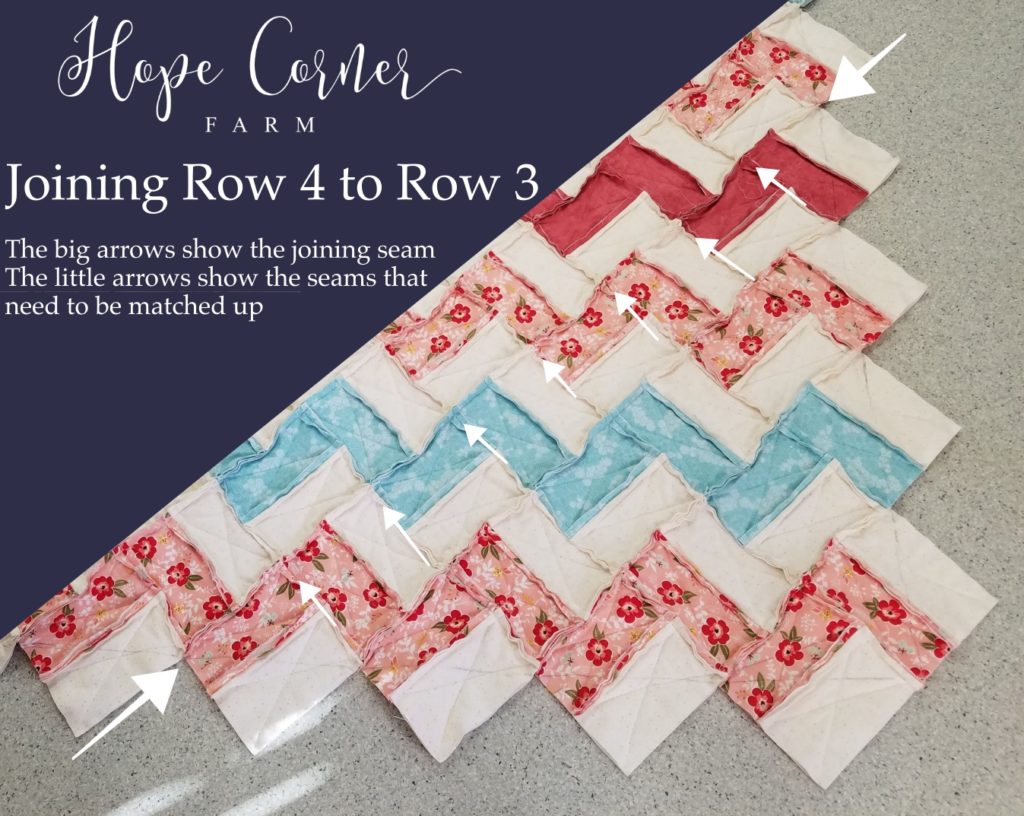
Fourth Seam – Rag Quilt:
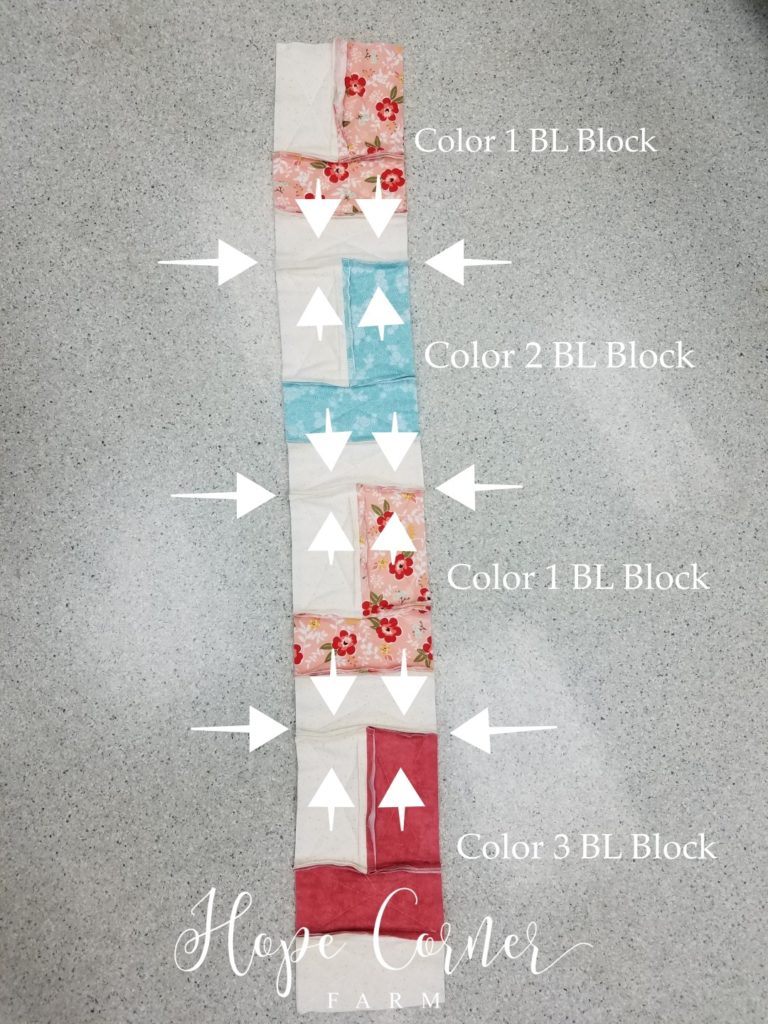
Next, start by matching up the seams from Row 3 to Row 4. Not every seam will have a match, but the picture below shows arrows pointing to the seams that need to be matched. Remember to pin open the seams that are being matched and any seams that you sew over! Also, make sure that the BL Blocks from Row 4 are facing in the same direction as Rows 1, 2, & 3. Again, line up the edge of Row 3 with the vertical Color 1 pieces from Row 4. See the picture below for a visual.
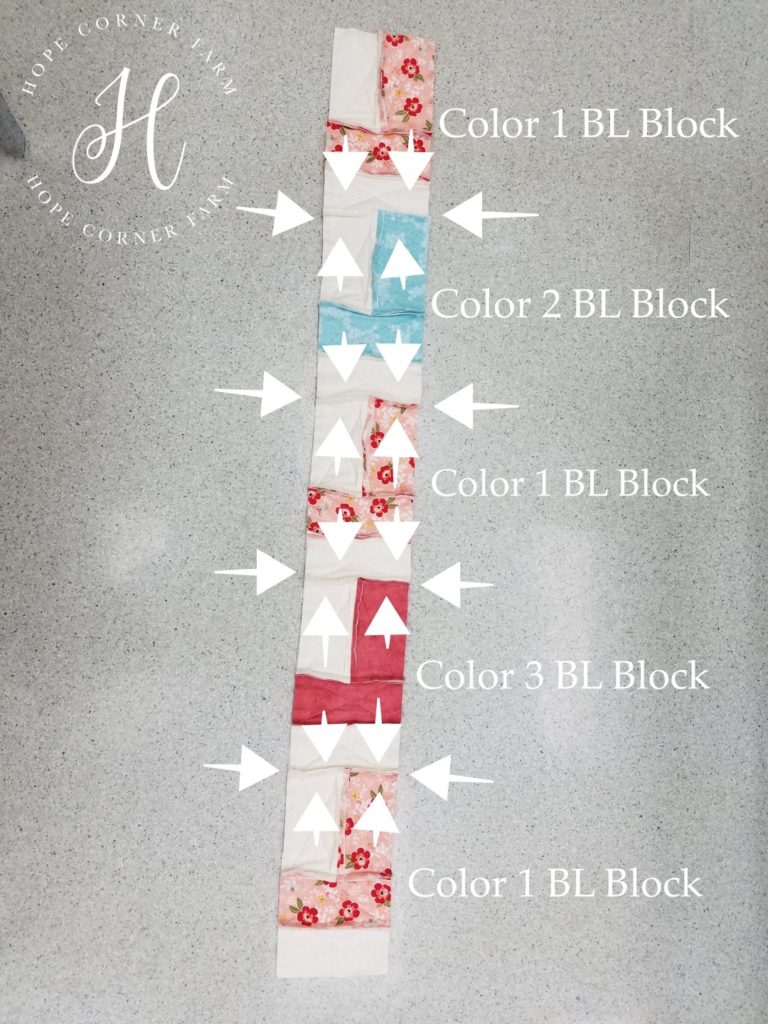
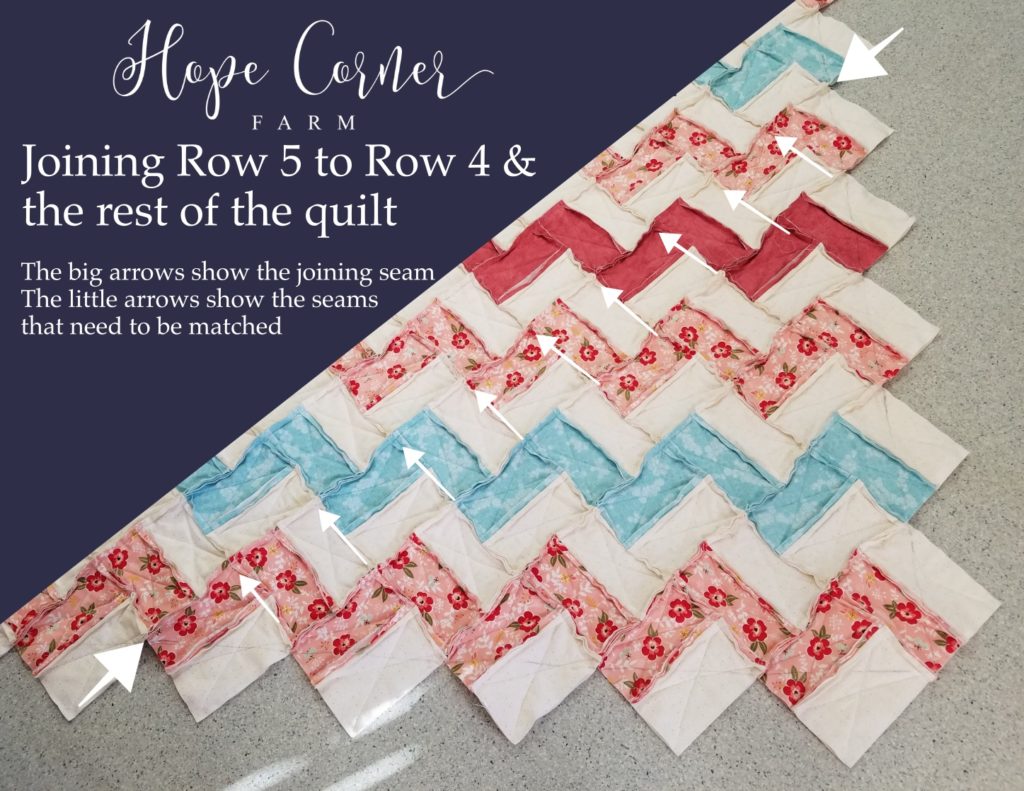
Quilt Construction – Fifth Seam:
Now, start by matching up the seams from Row 4 to Row 5. Not every seam will have a match, but the picture below shows arrows pointing to the seams that need to be matched. Remember to pin open the seams that are being matched and any seams that you sew over! Also, make sure that the BL Blocks from Row 5 are facing in the same direction as the previous rows. Again, line up the edge of Row 4 with the vertical Color 1 piece and vertical Color 2 piece from Row 5. See the picture below for a visual.
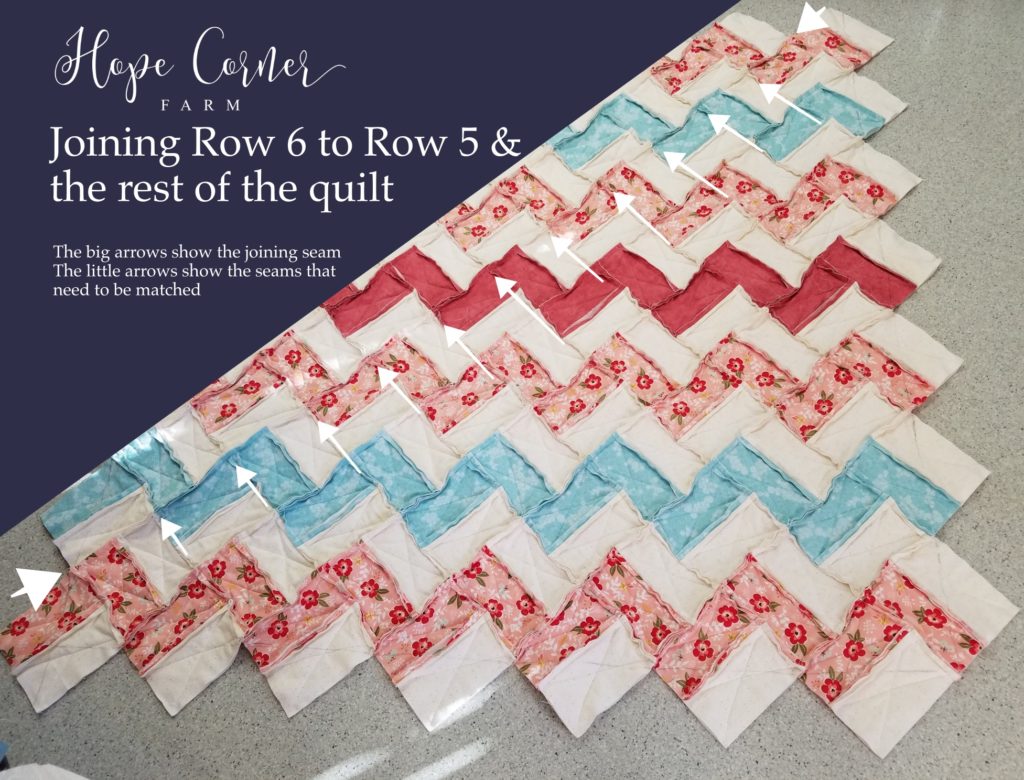
Sixth Seam (Middle of the Quilt):
Finally, T]the quilt begins to decrease from this point on until the opposite corner is reached.
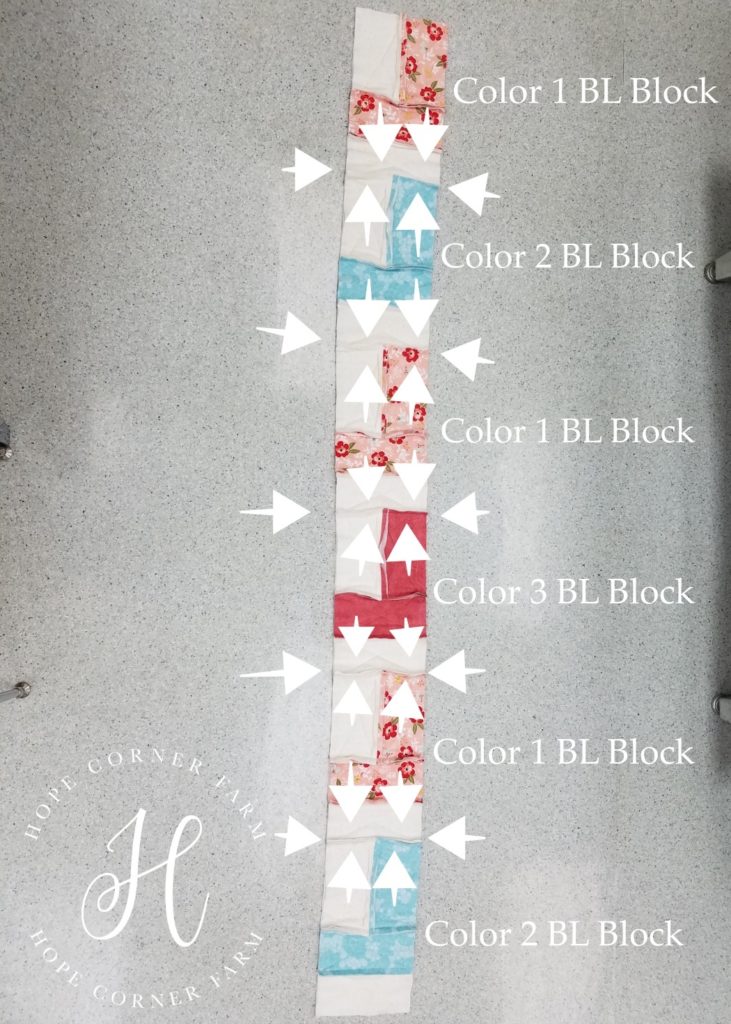
Begin by matching up the seams from Row 5 to Row 6. Not every seam matches, but the picture below shows arrows pointing to the seams that are matching. Remember to pin open the seams that are being matched and any seams that you sew over! Also, make sure that the BL Blocks from Row 6 are facing in the same direction as the rest of the quilt. Pay attention to the difference for this step: The edge of Row 6 is lined up with the HORIZONTAL Color 1 pieces from Row 5. See the picture below for a visual.
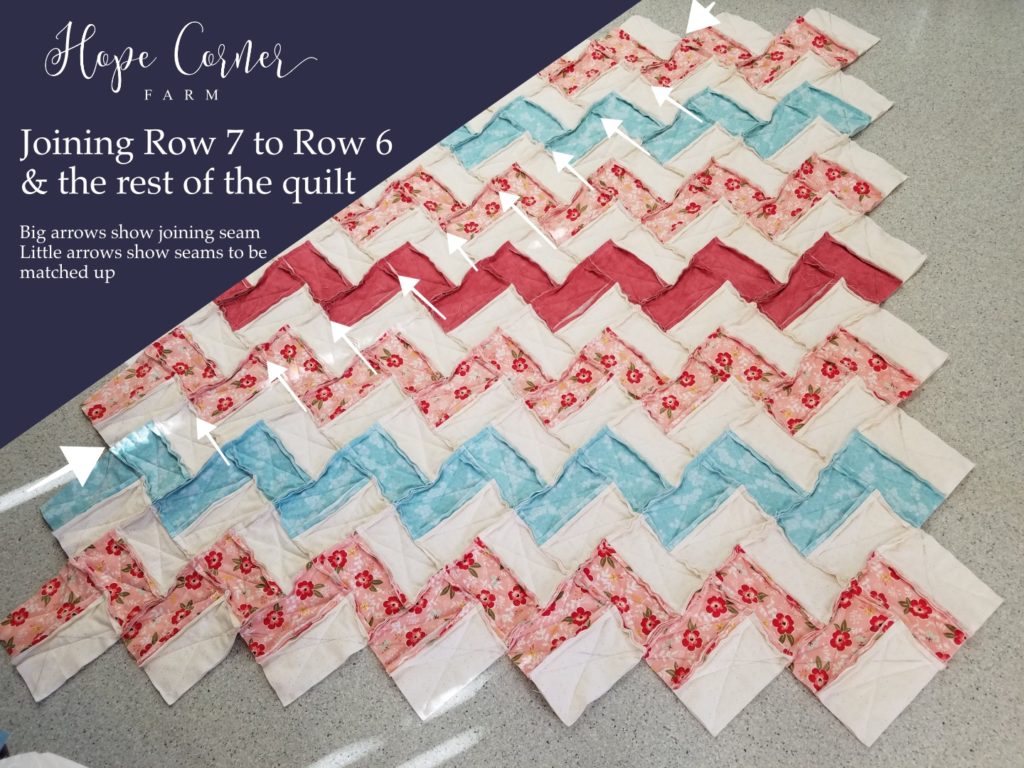
Quilt Construction – Seventh Seam:
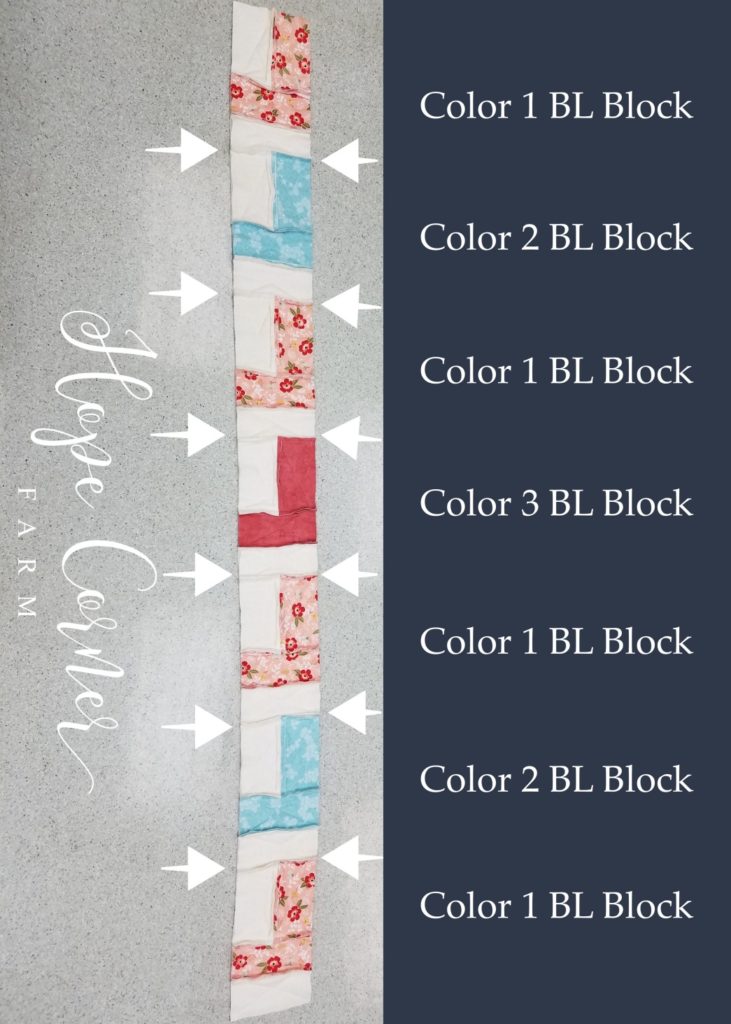
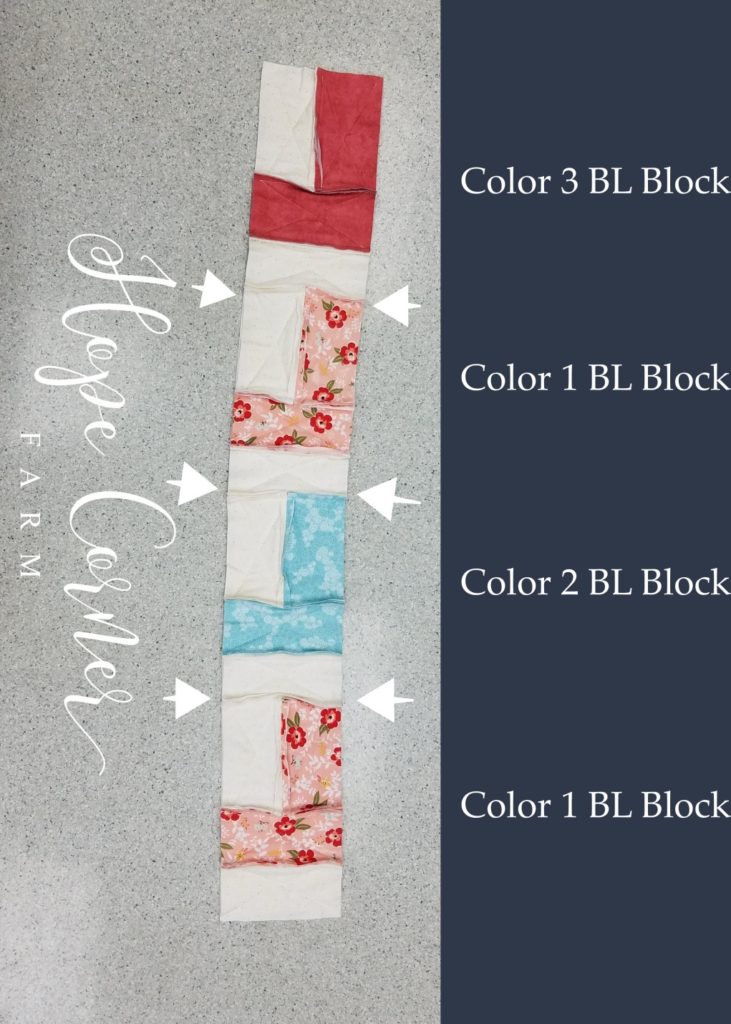
Start by matching up the seams from Row 6 to Row 7. Not every seam matches, but the picture below is showing arrows pointing to the seams that match. Remember to pin open the seams that match and any seams that the sewing machine crosses! Also, make sure that the BL Blocks from Row 7 face in the same direction as the rest of the quilt. Again, line up the edge of Row 7 with the horizontal Color 1 piece and Color 2 piece from Row 6. See the picture below for a visual.
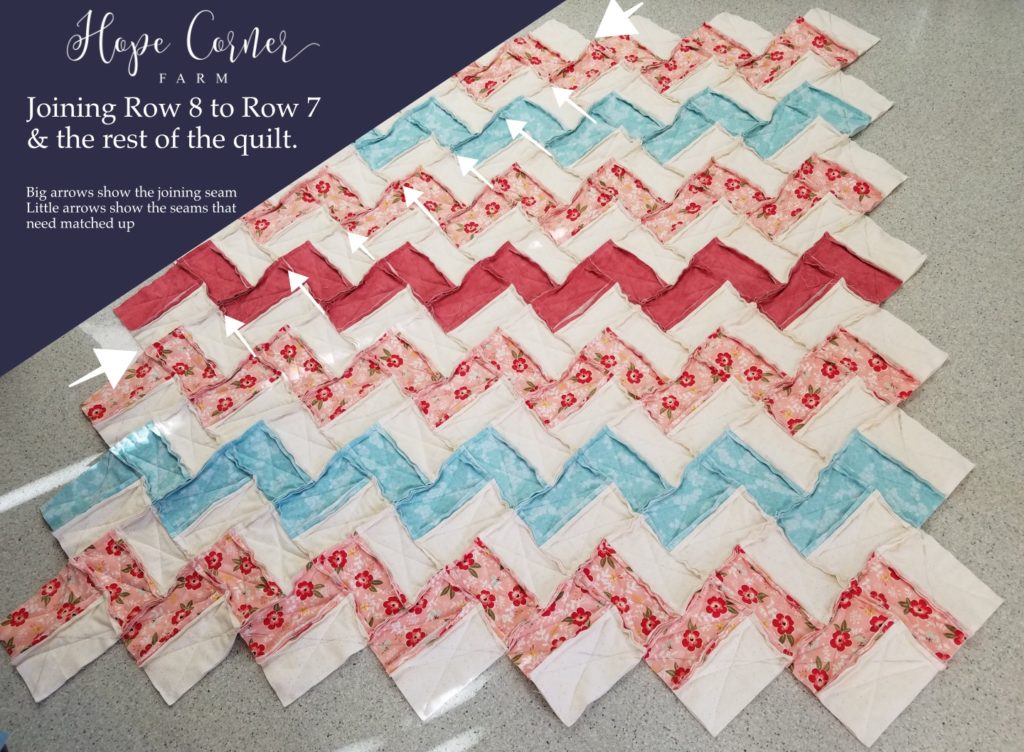
Quilt Construction – Eighth Seam:
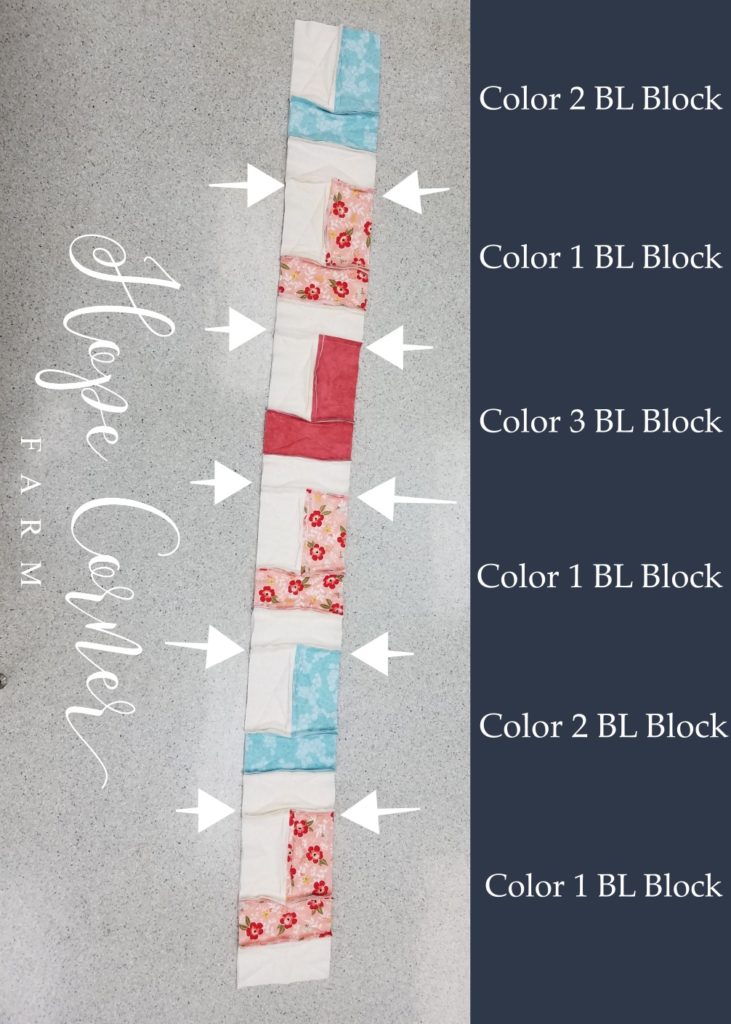
Begin by matching up the seams from Row 8 to Row 7. Not every seam matches, but the picture below shows arrows pointing to the seams that require matching. Remember to pin open the seams that are matching and any seams that you sew over! Also, make sure that the BL Blocks from Row 8 face in the same direction as all of the previous rows. Again, line up the edge of Row 1 with the vertical Color 1 piece and Color 2 piece from Row 7. See the picture below for a visual.
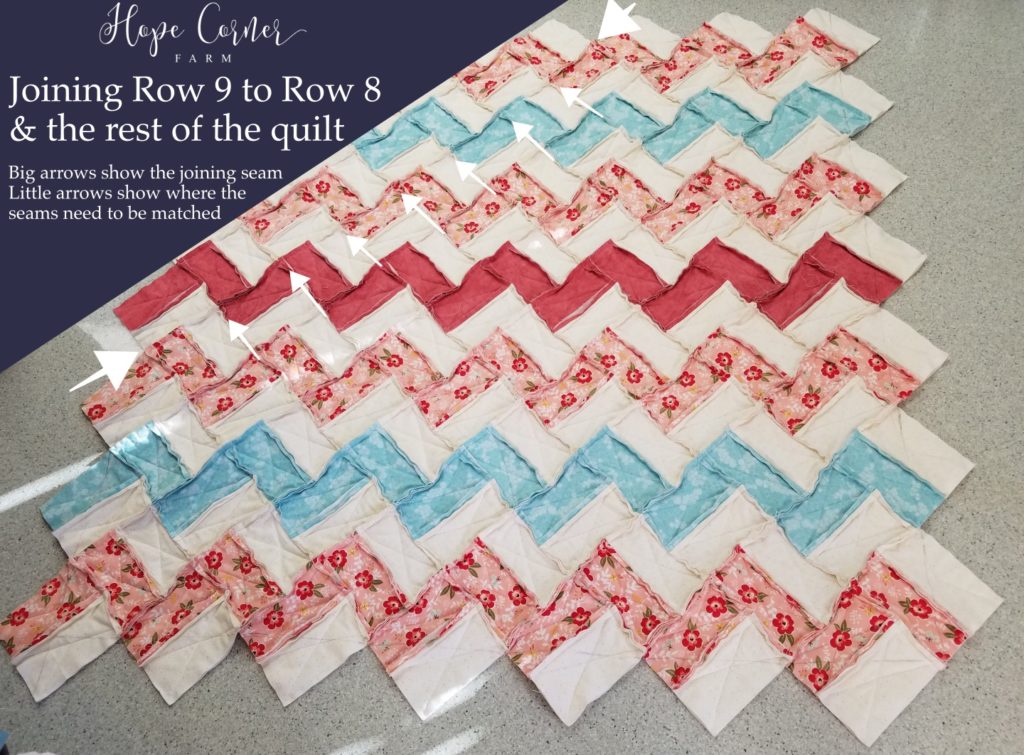
Quilt Construction – Ninth Seam:
Begin by matching up the seams from Row 9 to Row 8. Not every seam will have a match, but the picture below shows arrows pointing to the seams that need to be matched. Remember to pin open the seams that are being matched and any seams that you sew over! Also, make sure that the BL Blocks from Row 9 face in the same direction as the rest of the quilt. Again, line up the edge of Row 9 with the vertical Color 1 pieces from Row 8. See the picture below for a visual.
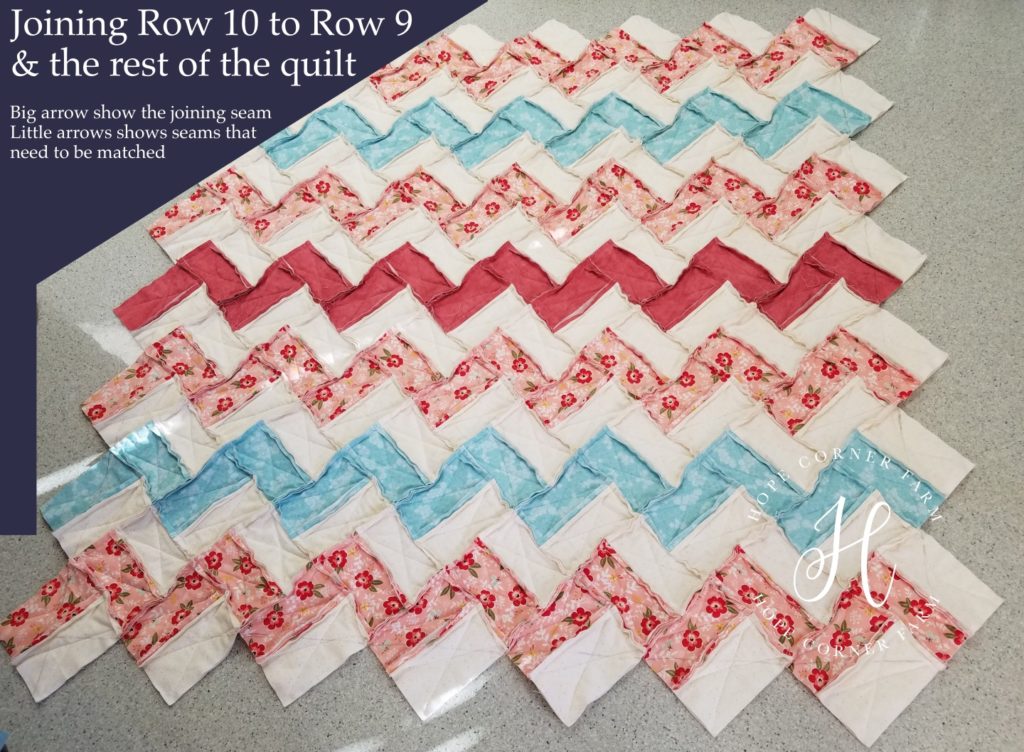
Quilt Construction – Tenth Seam:
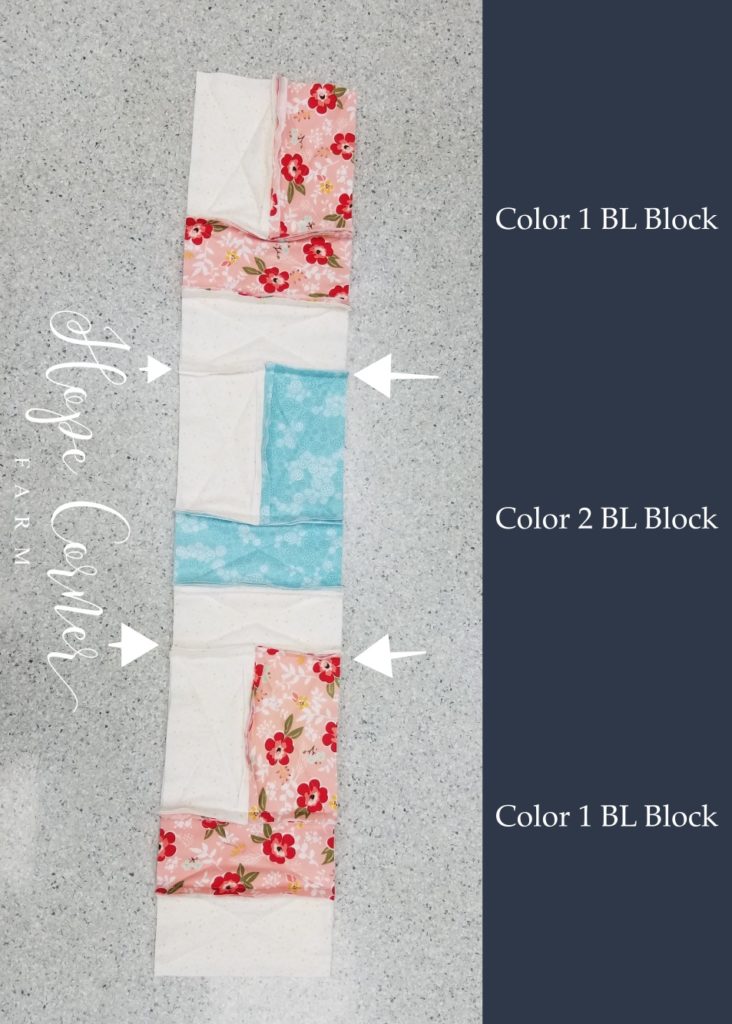
Start by matching up the seams from Row 10 to Row 9. Not every seam has a match, but the picture below shows arrows pointing to the seams that match. Remember to pin open the seams that match and any seams that you sew over! Also, make sure that the BL Blocks from Row 10 are facing in the same direction as the rest of the quilt. Again, line up the edge of Row 10 with the vertical Color 1 piece and Color 3 piece from Row 9. See the picture below for a visual.
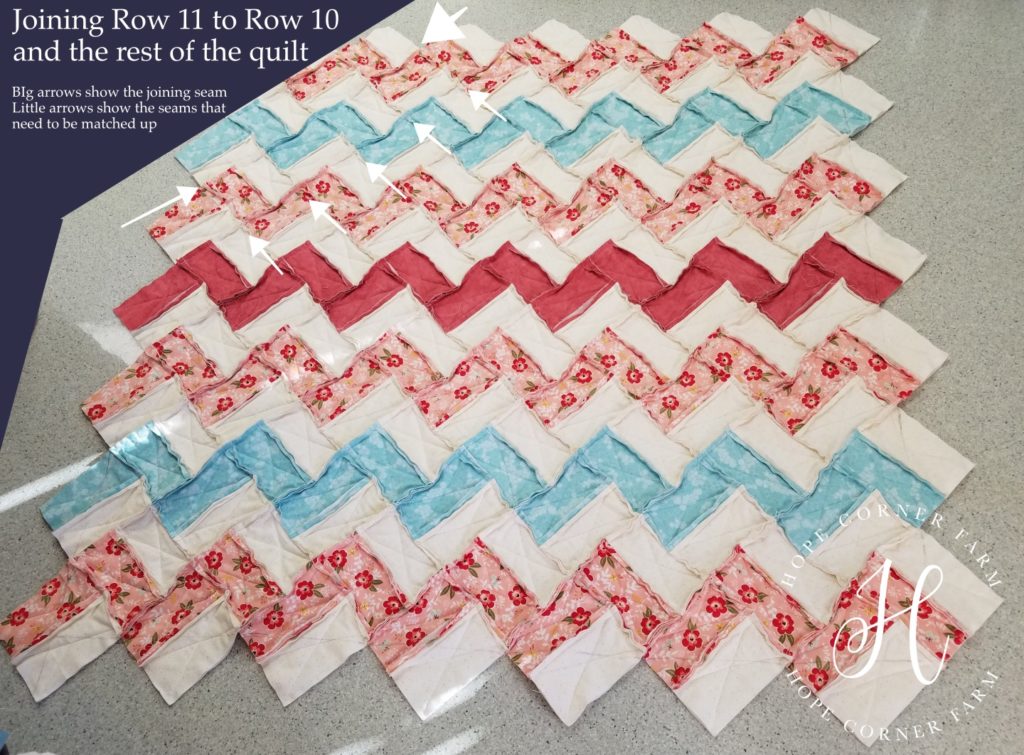
Quilt Construction – Eleventh Seam:
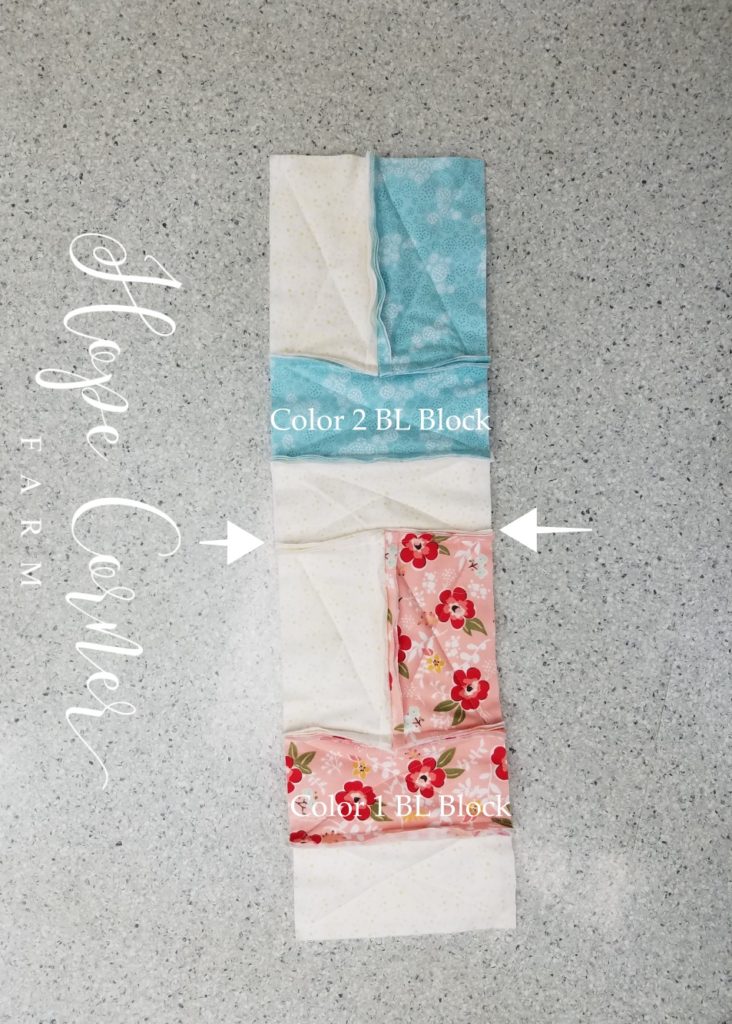
Begin by matching up the seams from Row 11 to Row 10. Not every seam matches, but the picture below shows arrows pointing to the seams that match. Remember to pin open the seams that match and any seams that you sew over! Also, make sure that the BL Blocks from Row 11 are facing in the same direction as Row 10 and the rest of the quilt. Again, line up the edge of Row 11 with the vertical Color 1 pieces from Row 10. See the picture below for a visual.
Quilt Construction – Twelfth Seam:
Begin by matching up the seams from Row 9 to Row 8. Not every seam will have a match, but the picture below shows arrows pointing to the seams that need to be matched. Remember to pin open the seams that are being matched and any seams that you sew over! Also, make sure that the BL Blocks from Row 2 are facing in the same direction as Row 1. Again, line up the edge of Row 1 with the vertical Color 1 pieces from Row 2. See the picture below for a visual.
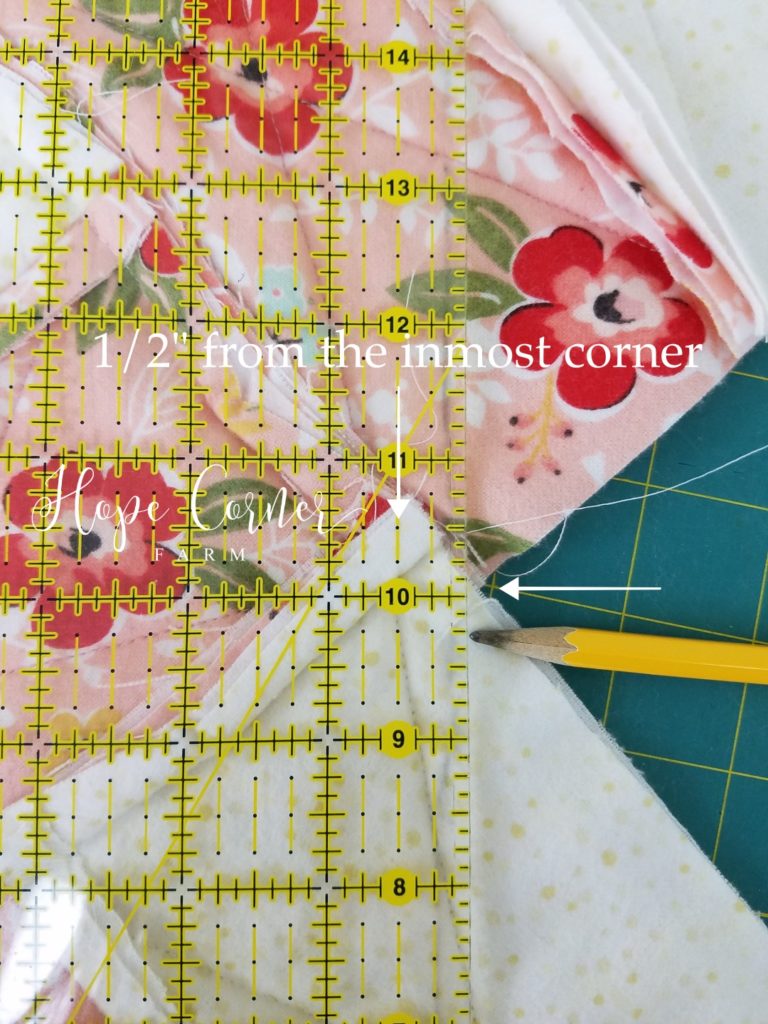
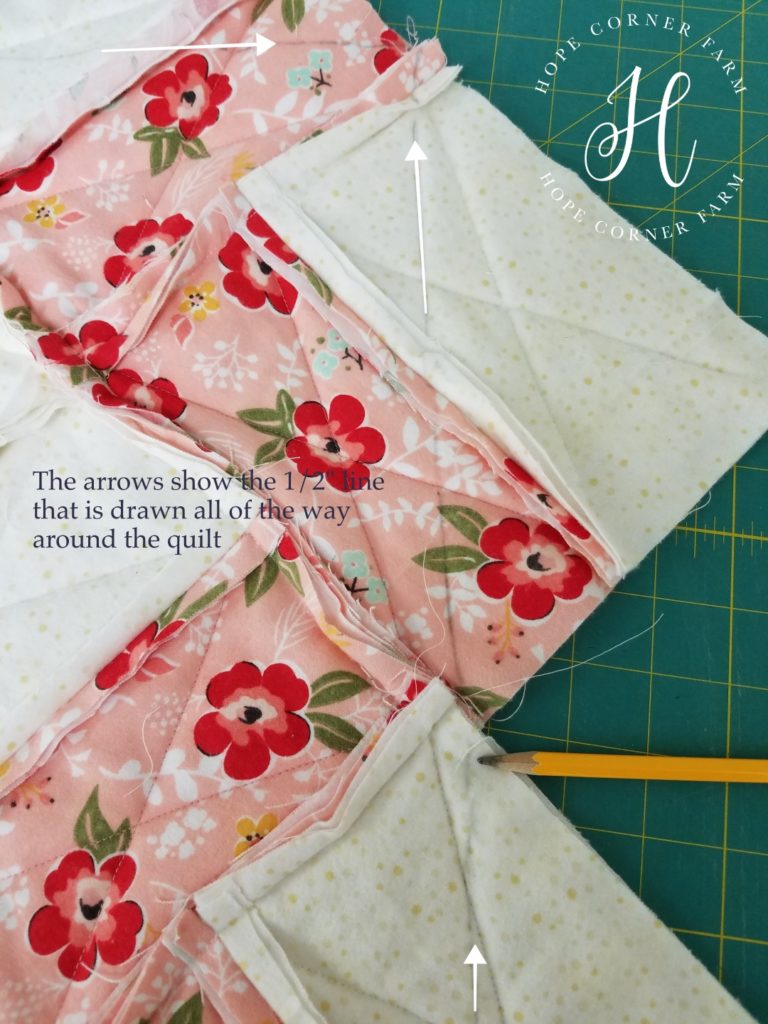
Preparing to Trim Quilt:
To make this quilt square/rectangle sized, using the 6″ x 24″ ruler draw a line 1/2″ from the inmost corners. See the attached pictures for more details.
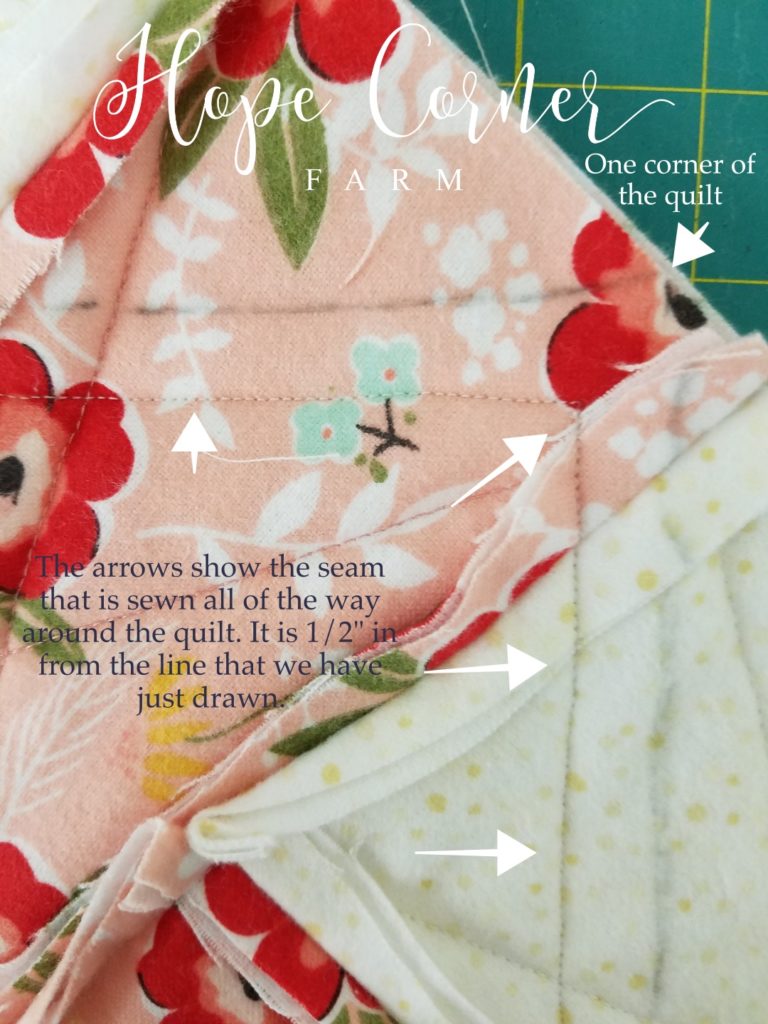
Sewing Around the Quilt:
Before we trim the excess off of the quilt, sew around the entire perimeter of the quilt. Sew this seam 1/2″ inside of the line that we drew. See the picture for details.
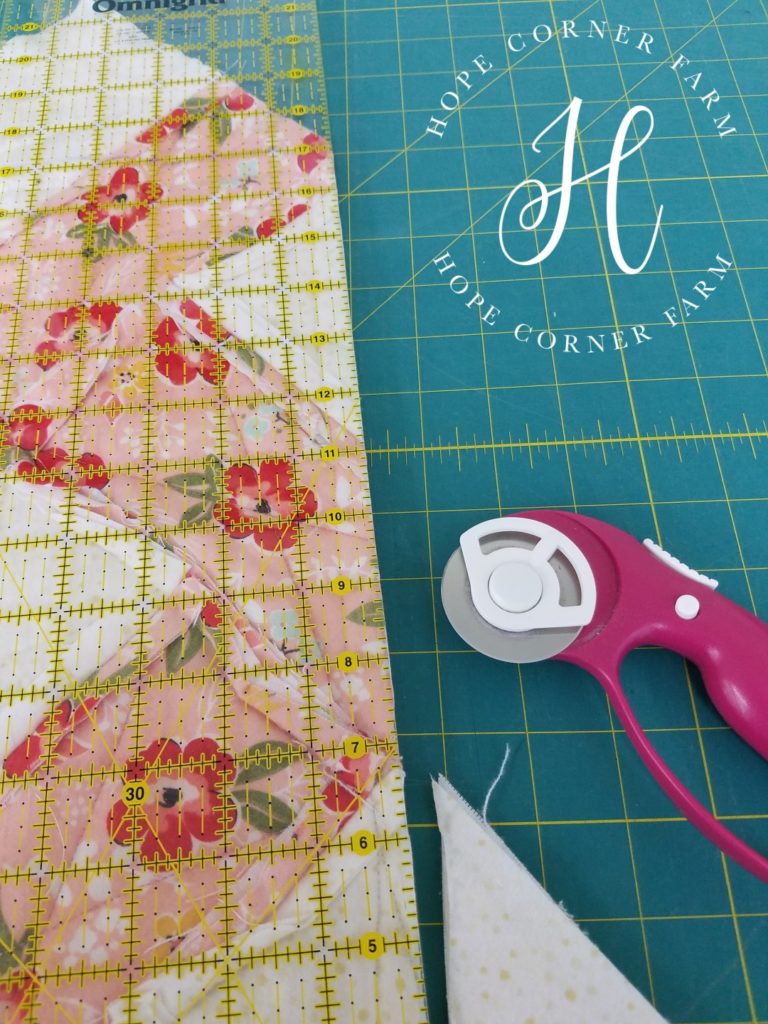
Trimming the Quilt:
After sewing the perimeter seam, trim the excess fabric and batting off of the quilt. Line up the 6″ x 24″ ruler 1/2″ from the perimeter seam, or line it up with the line drawn around the quilt (which should be 1/2″ from the perimeter seam). Trim all of the way around the quilt.
Clipping the Rag Quilt:
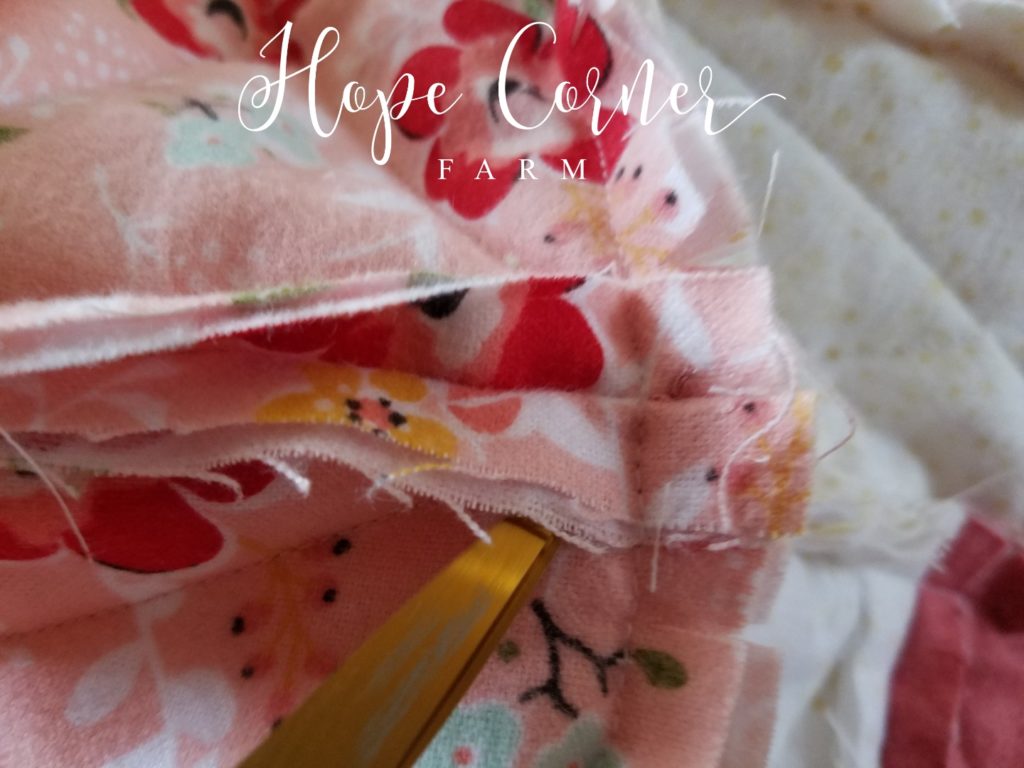
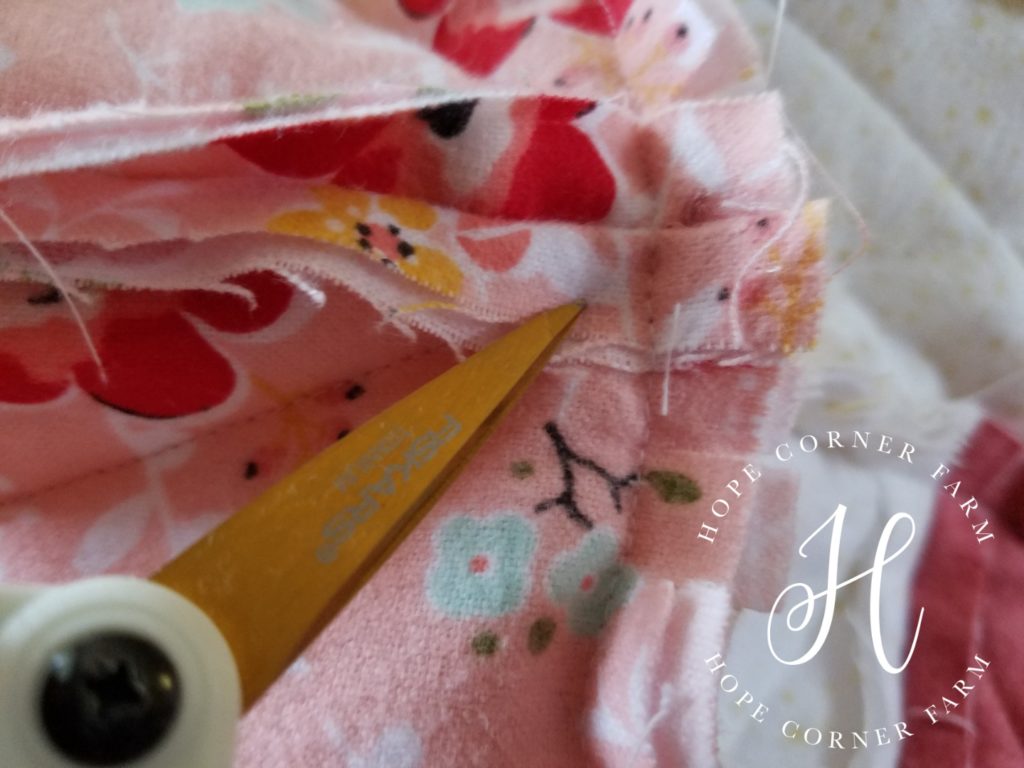
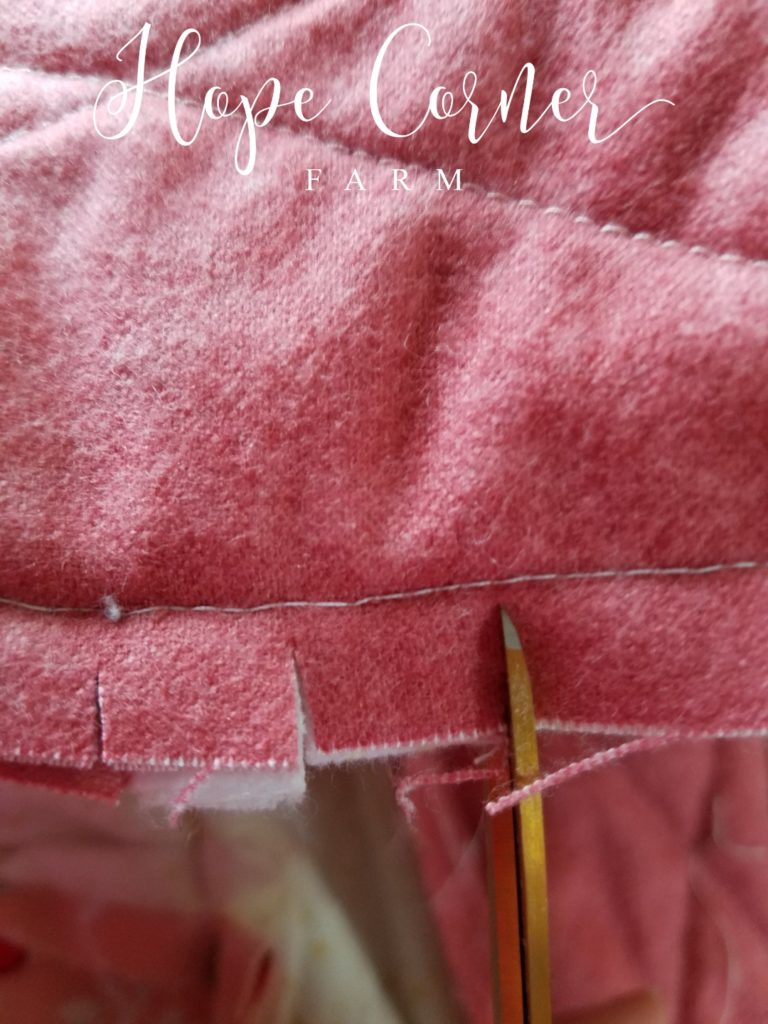
To create the “rag” look for our quilt, the quilt has to be clipped on every seam. Clip every 1/2″ on every seam. Start by clipping diagonally on each of the corners. Stop a short way before the stitches – DON’T cut the stitches! See the attached pictures.
Next, each seam that is sewn open needs to be clipped as well. Clip 1/4″ or so away from the stitching that sews the seam open. See the following pictures for more details.
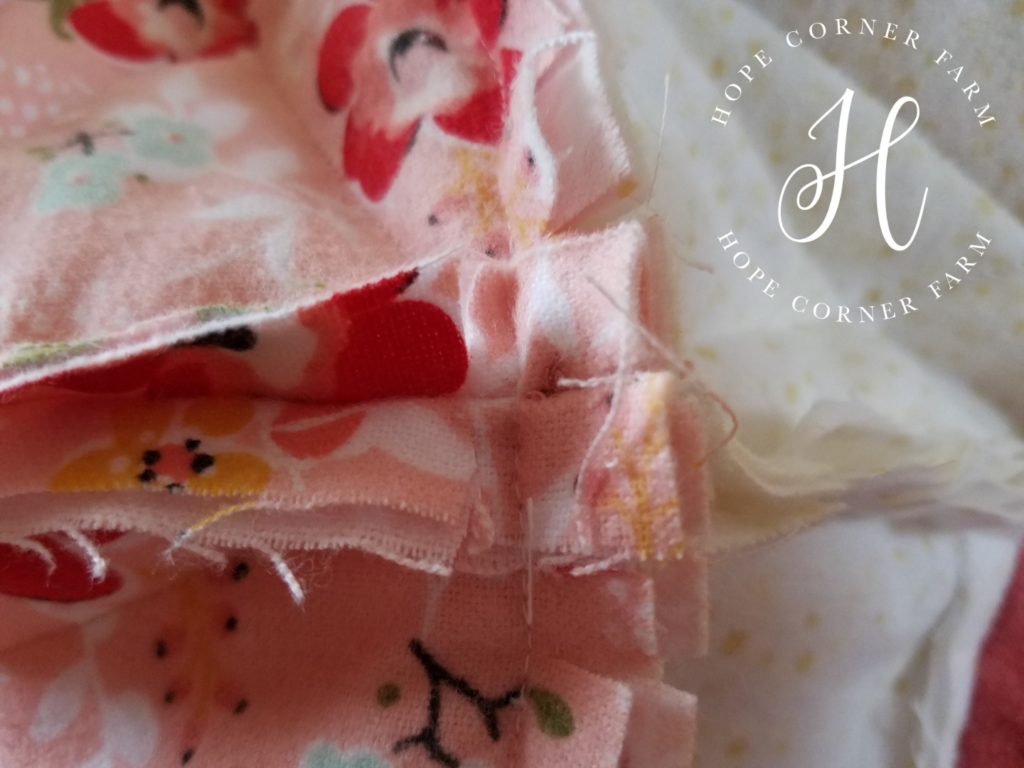
Each of the sewn-down seams that are on the edge also need clipping. Take the scissors and clip them as well. See the pictures for a visual.
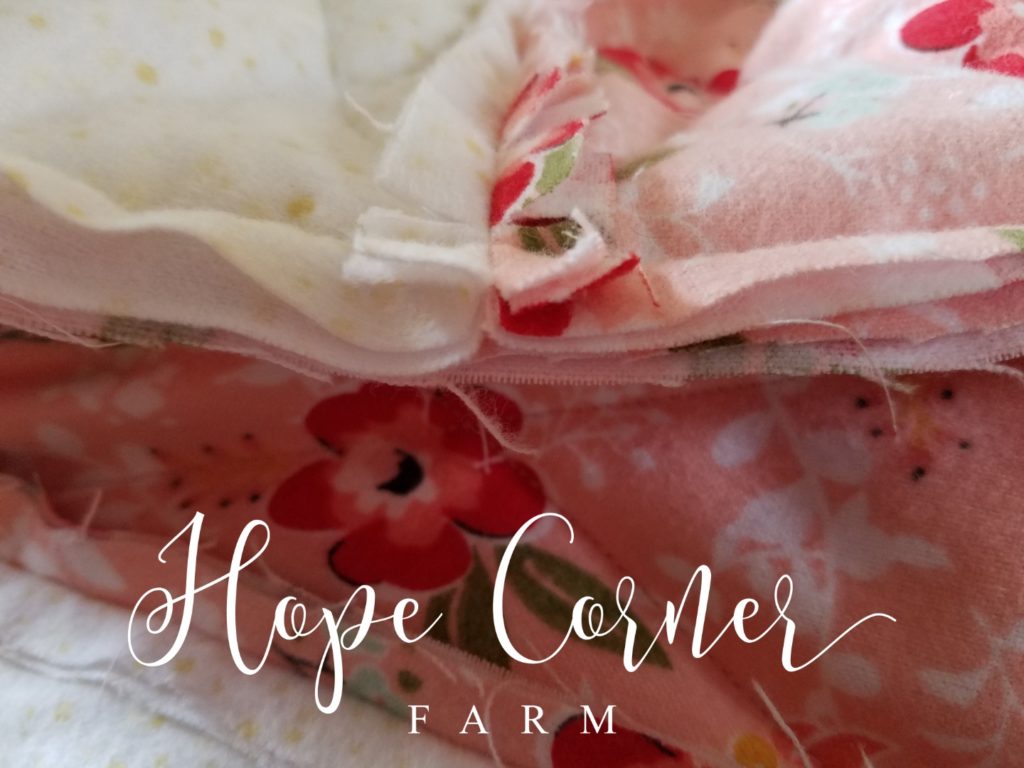
Finally, clip the remainder of the seams with a 1/2″ gap between each of the clips. Make sure to clip every seam on the quilt! This ensures a nice “rag” look when finished.
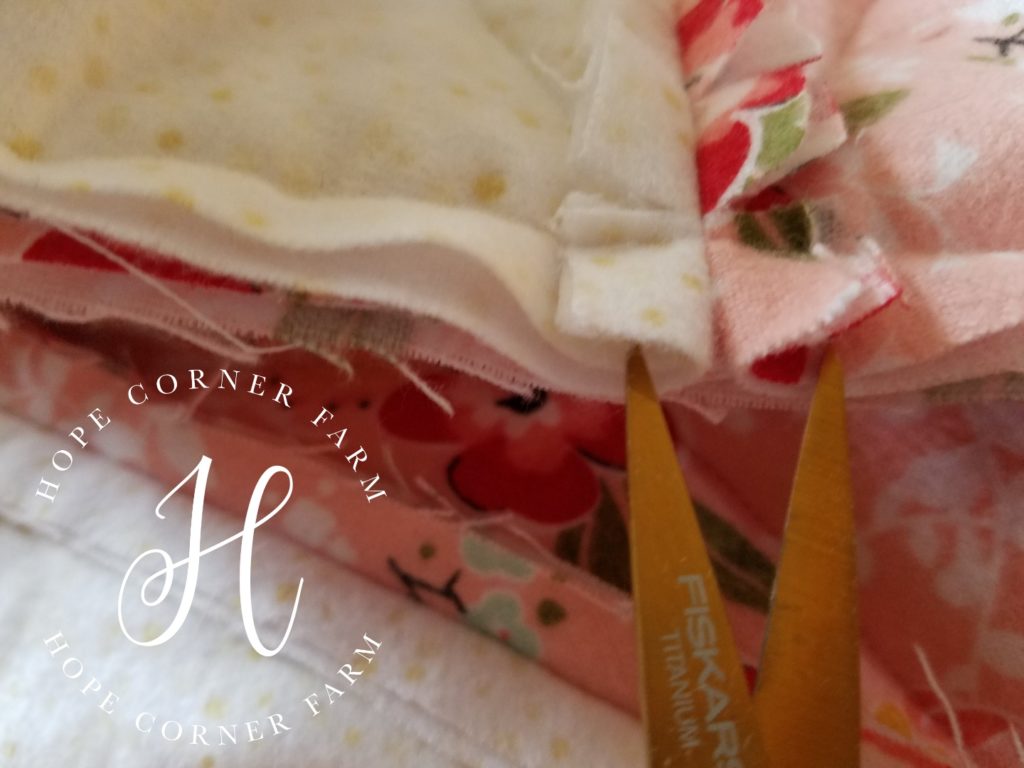
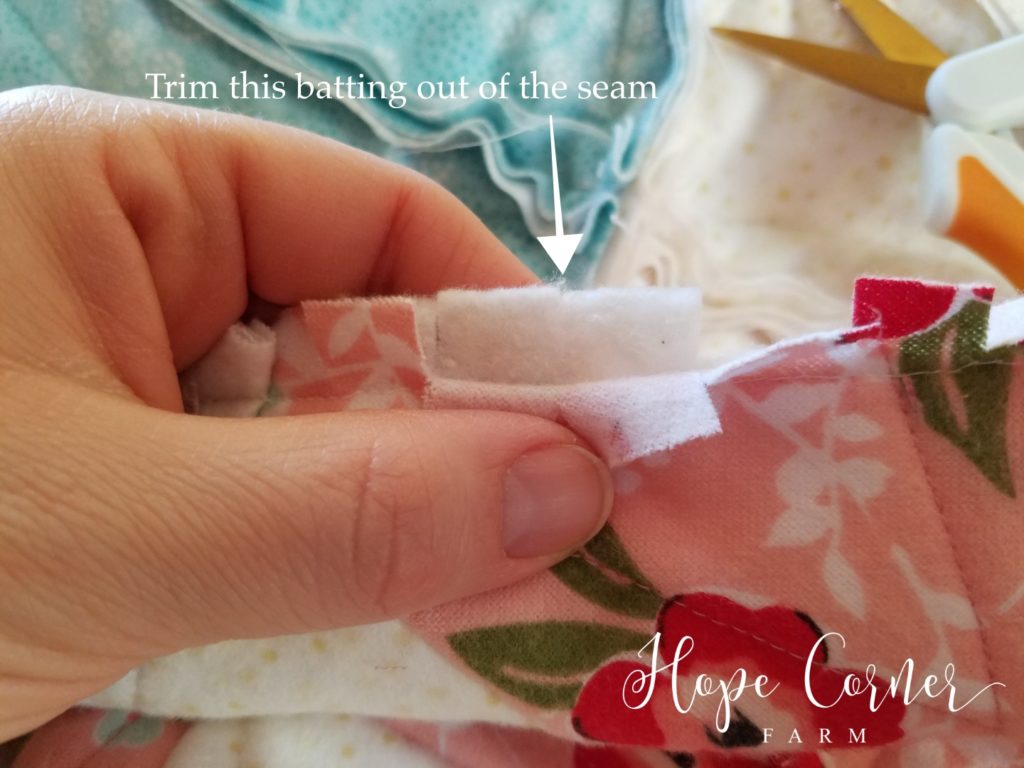
The very last thing that needs to be completed is on the edge of the quilt. When clipping the edge seams, some of the batting shows. Trim the batting out from in between these seams. The quilt looks funny if this batting is not trimmed away.
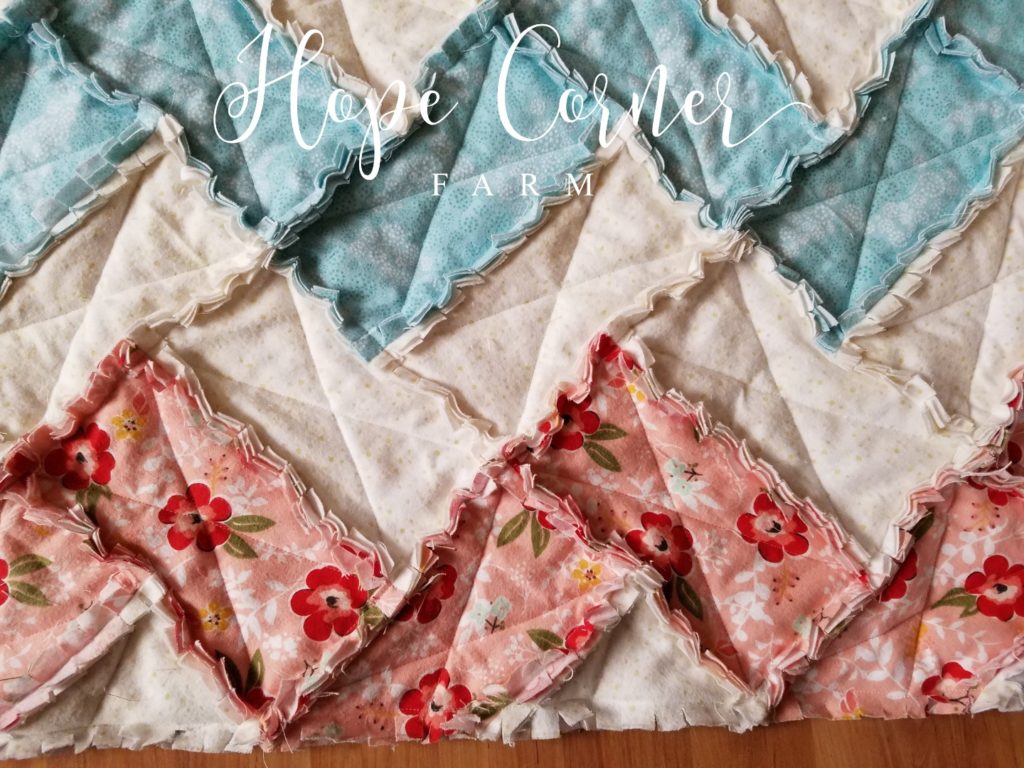
The quilt looks like this with the clipping:
Finishing Touch – Washing the Quilt:
To complete the “rag” look, wash the rag quilt in a washing machine and then dry it in a dryer. This helps fray the seams and gives the quilt the “rag” look.
Tip Number 1 for Washing: Use cold water and the delicate cycle on the washing machine.
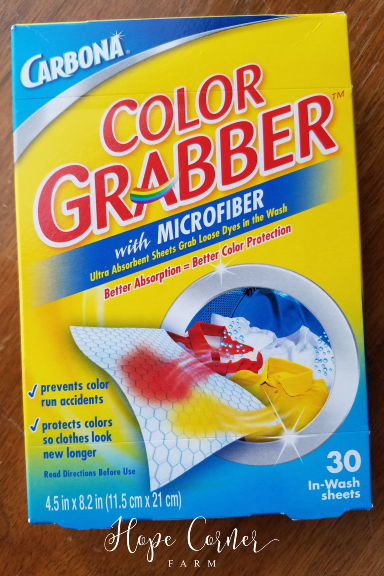
Tip Number 2 for Washing: Use a color catcher in the wash. This keeps the colors from running into each other in the quilt. Shout makes the Color Catcher and I also use the Color Grabber (like this)
Enjoy the Quilt!
Many Blessings,

COPYRIGHT STATEMENT: This pattern is copyrighted in 2019 by Hope Corner Farm. Sharing information (photos and text) from this pattern is prohibited unless permission is specifically given by Hope Corner Farm. Selling items made from this pattern is permitted as long as a design reference is made to Hope Corner Farm (Ex. Pattern by Hope Corner Farm).
Looking for more projects to complete with your sewing machine? Check these out!
Half Square Triangle Rag Quilt from Hope Corner Farm