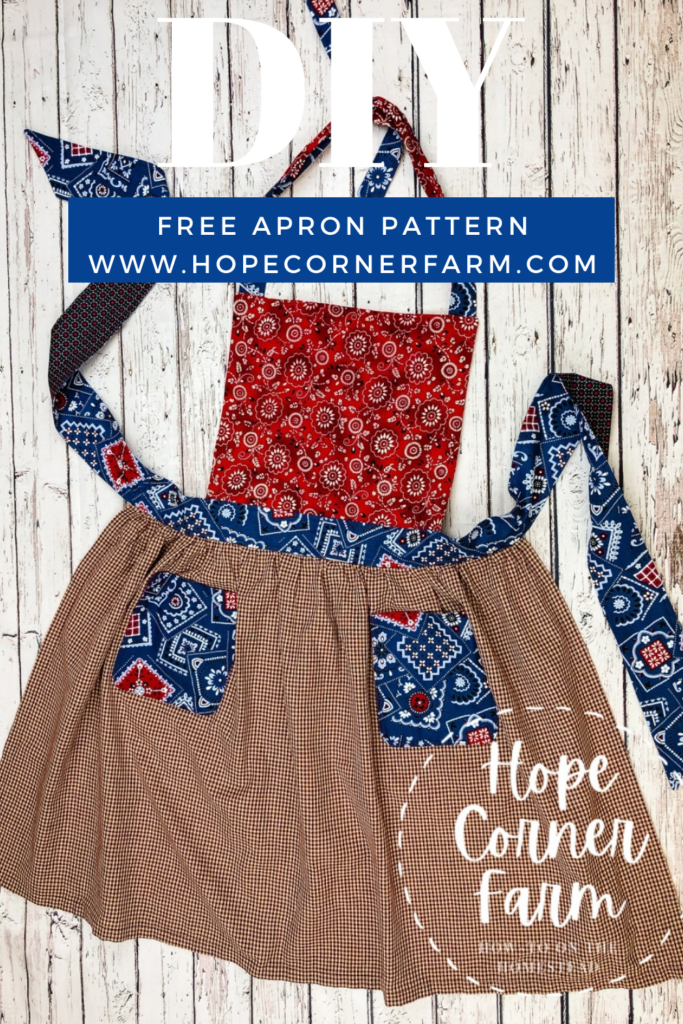
DIY Vintage Full Apron Pattern and Tutorial
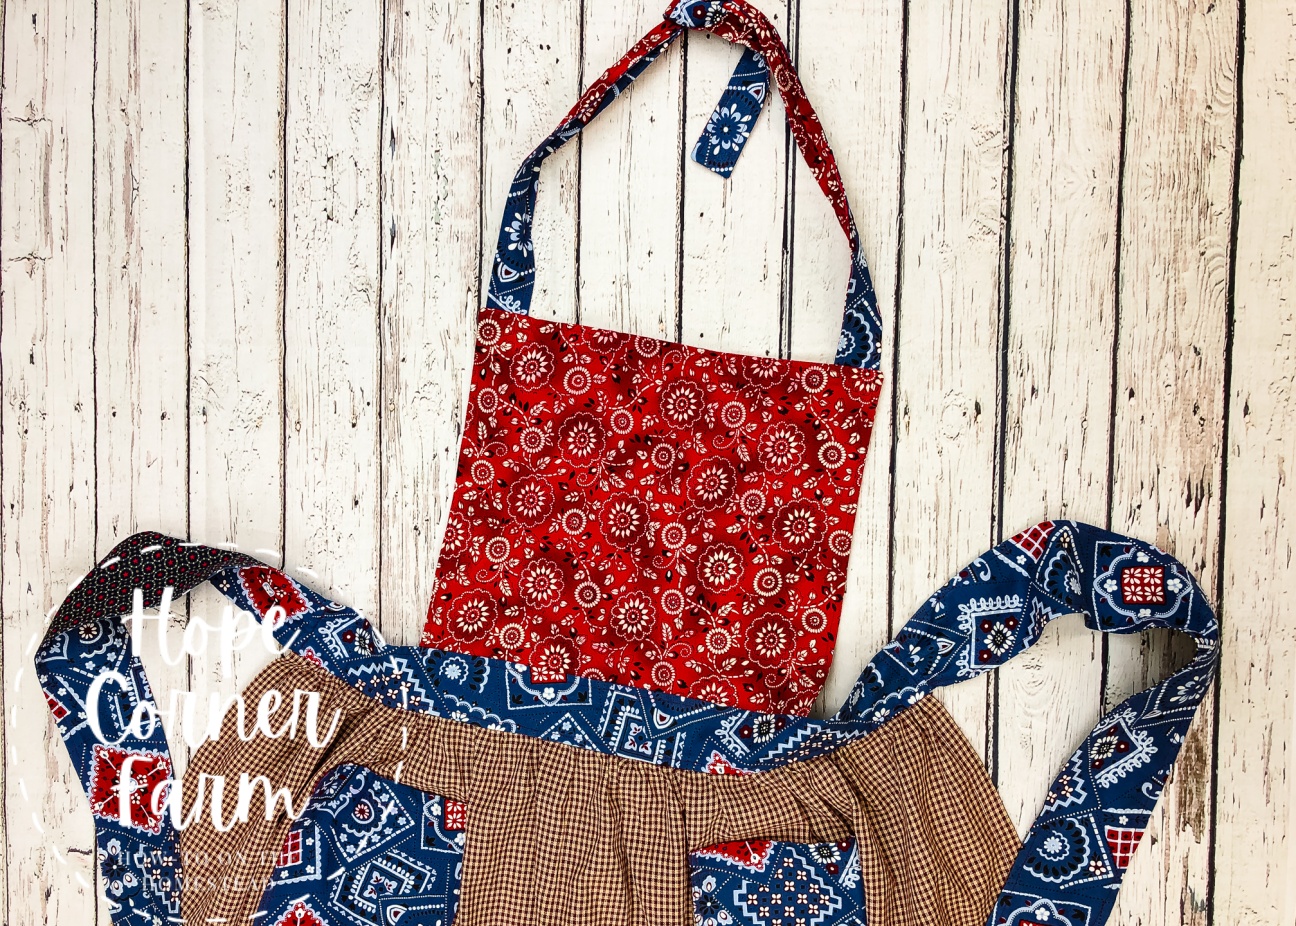

Aprons are not only cute, but they are really functional when working in the kitchen. I happen to be a VERY messy cook, so wearing an apron is a must for me (think fully covered with flour by the time I am done cooking in the kitchen)! There are a variety of apron patterns available on the internet, but none was quite what I was looking for, so I decided to come up with my own apron pattern. This pattern creates a vintage-looking apron that provides full-coverage when working in the kitchen. Let’s get sewing!

Materials for the Apron Pattern:
Skirt Fabric = 3/4 yard of cotton fabric that is 42″- 44″ wide (Red gingham fabric in my apron)
Bib Fabric, Back of Upper Straps, and Inside of Pockets = 1/2 yard of cotton fabric that is 42″ – 44″ wide (Red paisley fabric in my apron)
Straps, Pocket Fronts, and Waistband Fabric = 1/2 yard of cotton fabric that is 42″- 44″ wide (Blue paisley fabric in my apron)
Back of Waist Straps = 1/8 yard of cotton fabric that is 42″ – 44″ wide (Blue stars fabric in my apron)
Matching Thread
Sewing Machine
Scissors
Pins
To Begin the Apron Pattern:
Start by cutting out the following pieces from the fabric:
From the GINGHAM FABRIC:
-Skirt piece 22 1/2″ x 41″
From the RED PAISLEY FABRIC:
-Bib Pieces: 10 1/2″ x 13″ (cut 2)
-Inside Pocket Pieces: 6″ x 6 3/4″ (cut 2)
-Inside Upper Strap Pieces: 1 3/4″ x 21″ (cut 2)
From the BLUE PAISLEY FABRIC:
-Outside Pocket Pieces: 6″ x 6 3/4″ (cut 2)
-Waistband Pieces 2 1/2″ x 20″ (cut 2)
-Outside Upper Strap Pieces: 1 3/4″ x 21″ (cut 2)
-Outside Waistband Strap Pieces: 3 1/4″ x 31″ (cut 2)
From the BLUE STARS FABRIC:
-Inside Waistband Strap Pieces: 3 1/4″ x 31″ (cut 2)
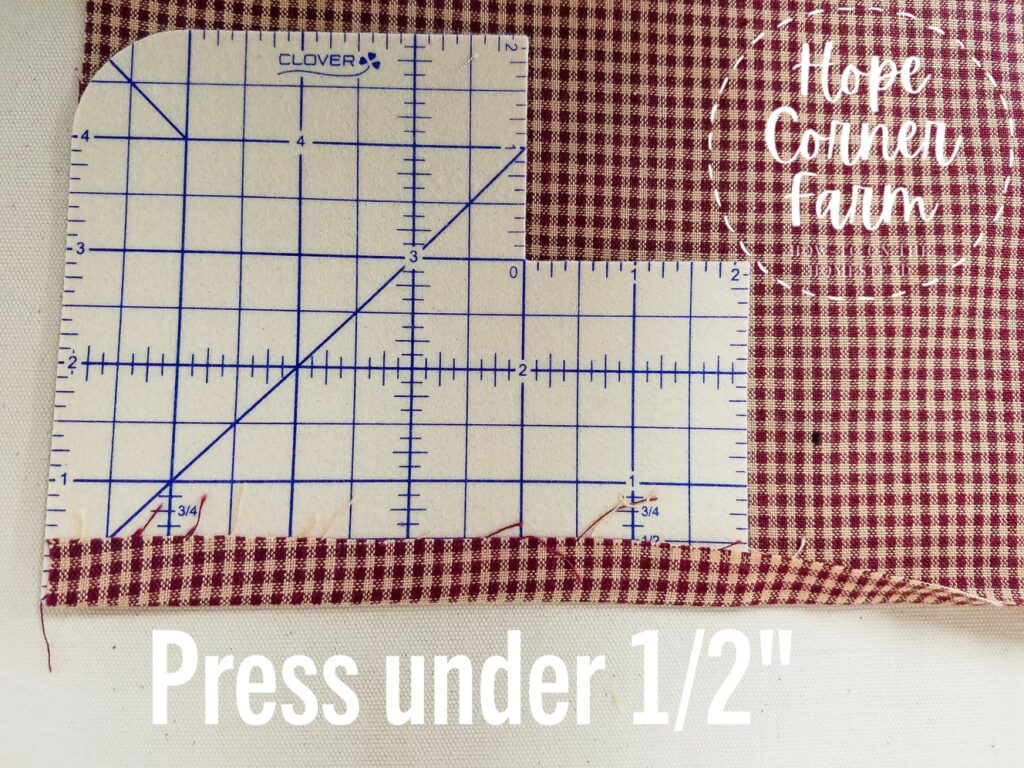
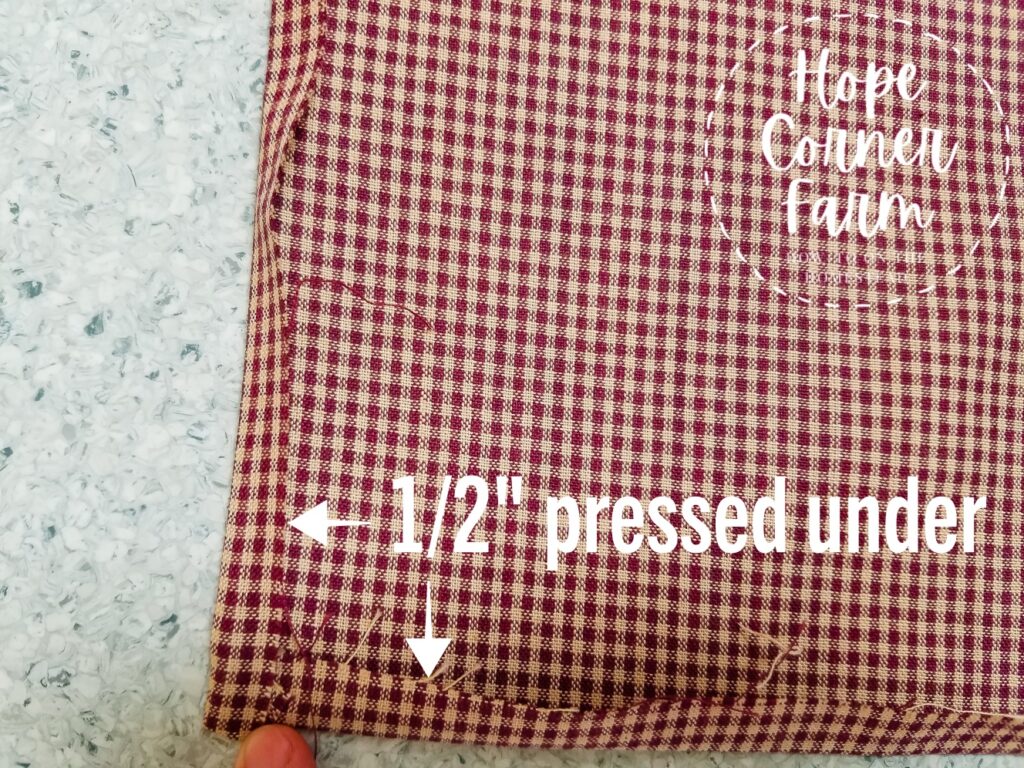
Step 1:
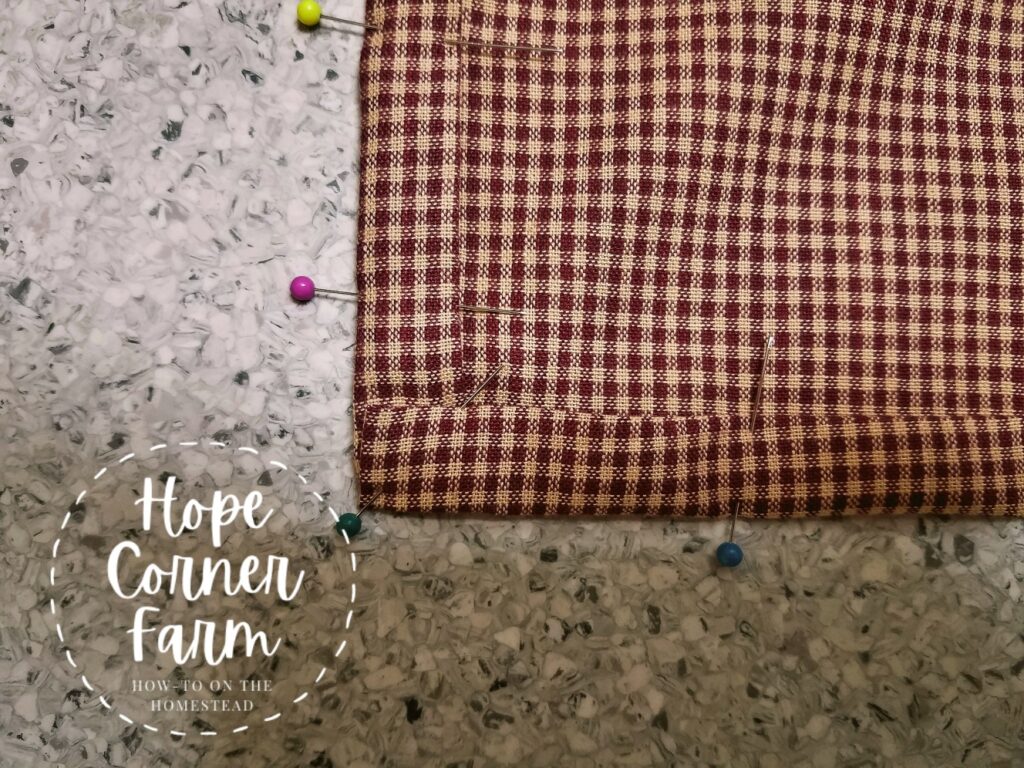
On the skirt piece, press under 1/2″ on THREE of the sides (the two short sides and one long side).
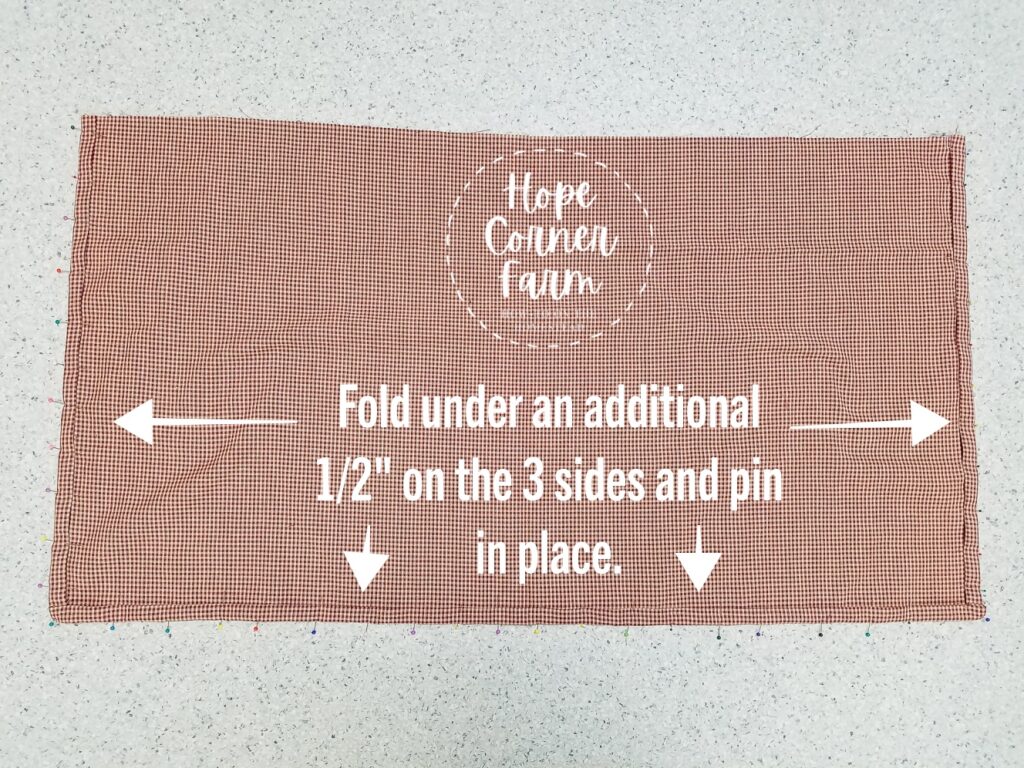
Step 2:
Fold the same 3 edges of the skirt piece under an additional 1/2″ (the same edges from Step 1) and pin in place.
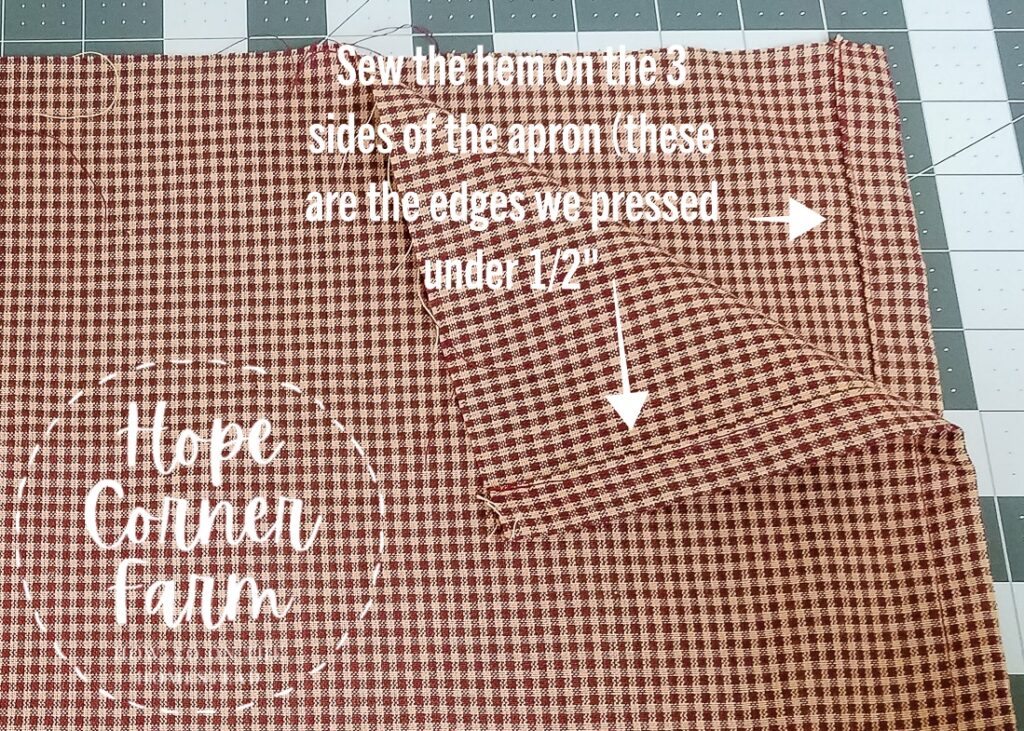
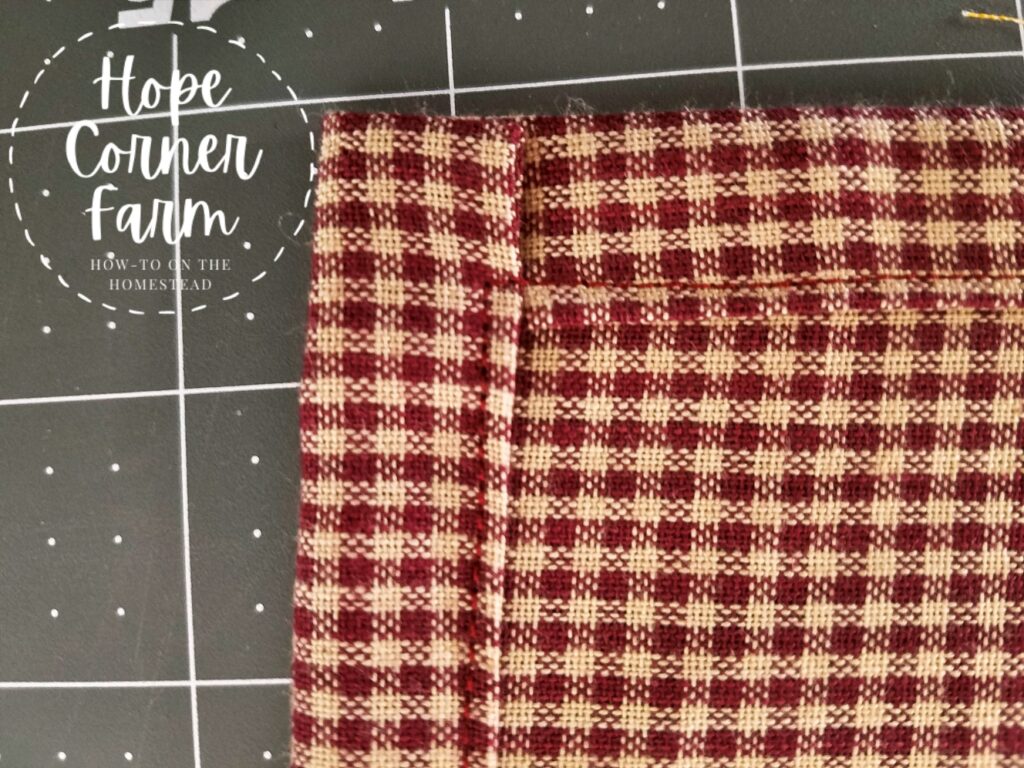
Step 3:
After pinning the edges, sew the hem on the 3 sides of the skirt. Don’t forget to backstitch when you begin stitching and end stitching!
Step 4:
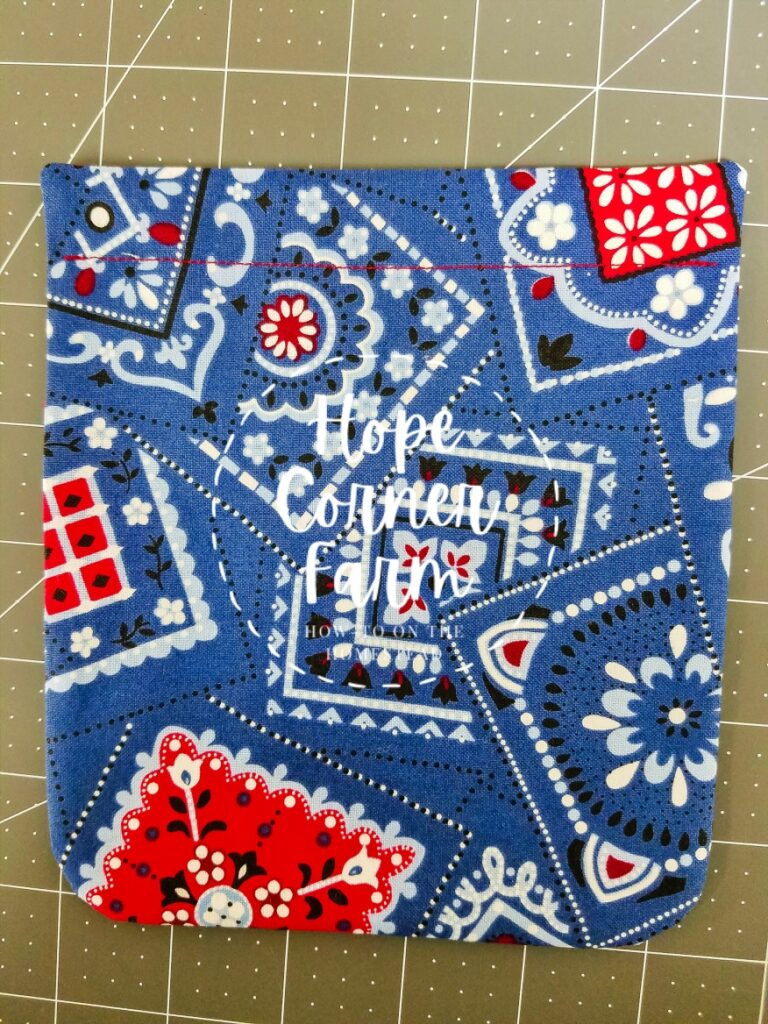
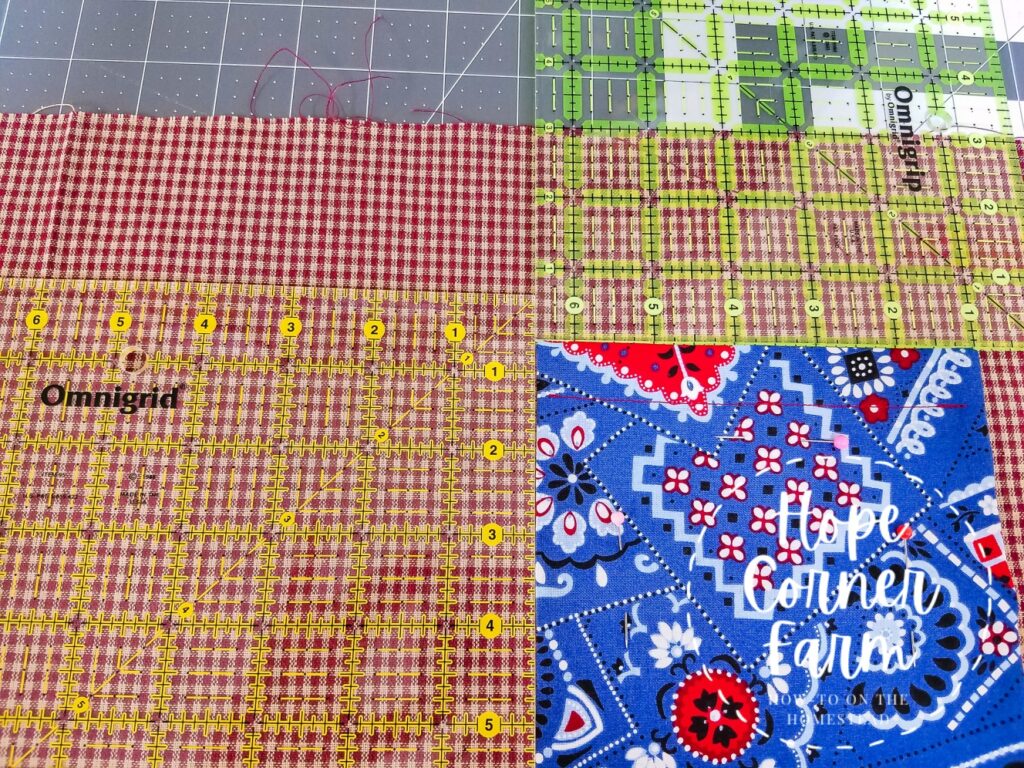
Gently round the two bottom corners of EACH of the pocket pieces. You can use this template to round the corners.
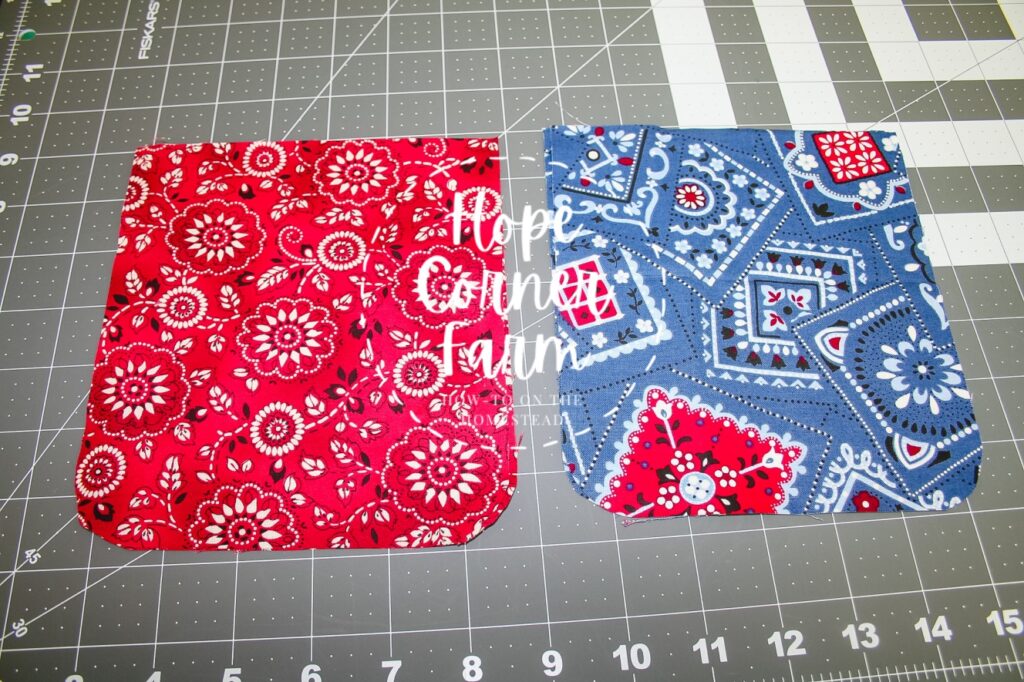
Step 5:
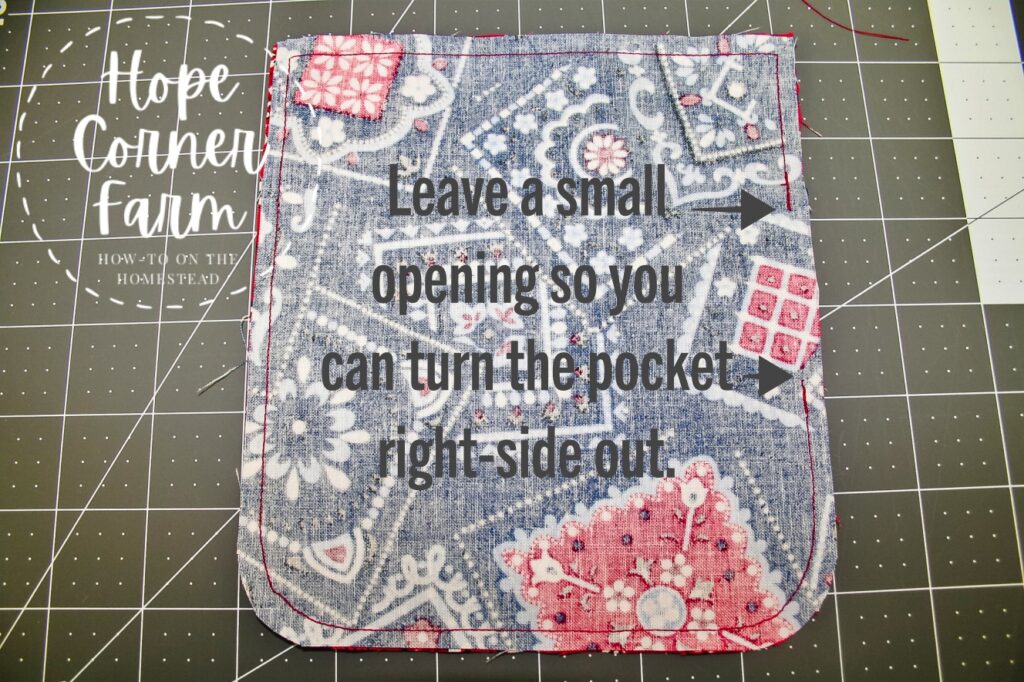
Place a front pocket piece (blue in my pic) and an inside pocket piece (red in my pic) right sides together. Repeat this for the second pocket.
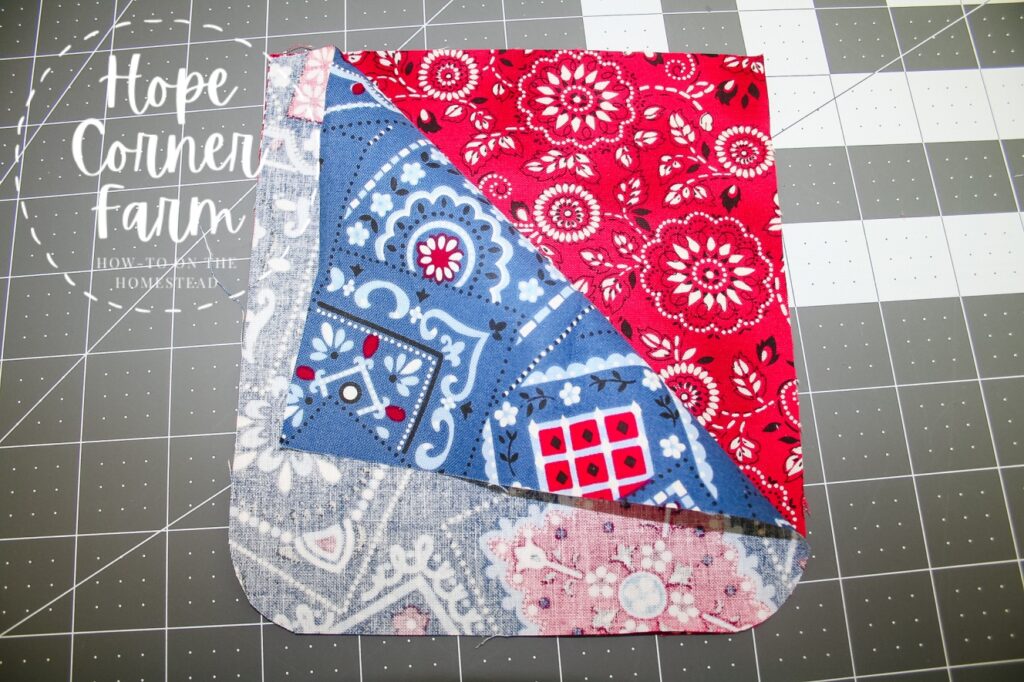
Sew the pocket together, leaving at least a 2″ opening for turning. Repeat for the second pocket.
Step 6:
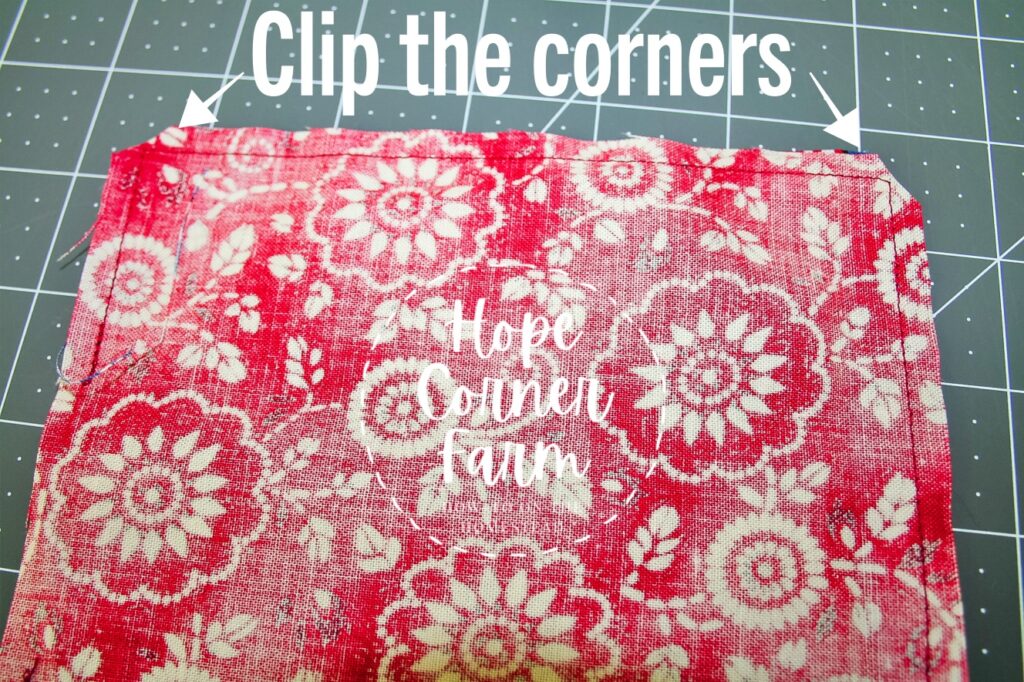
Clip the corners of the pockets before turning right side out.
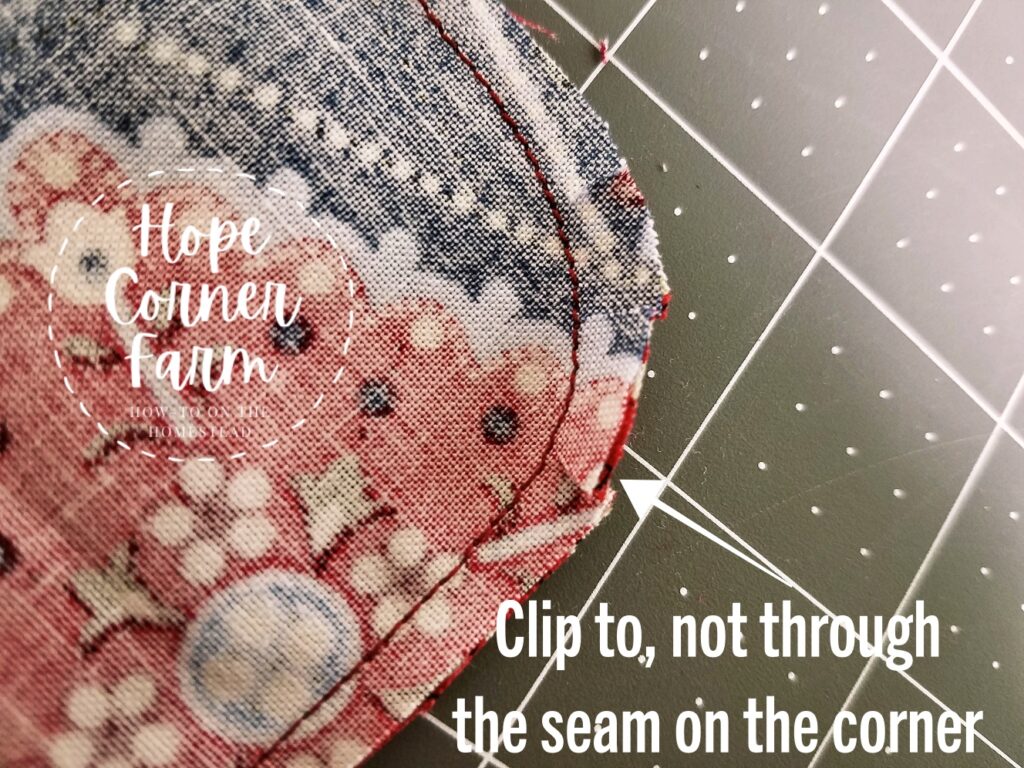
Turn the pockets right side out through the 2″ opening. Press the pocket flat, paying particular attention to pressing the turning opening closed.

Stitch across the top of the pocket, down 1″ from the top. Backstitch when you start stitching and when you stop.
Step 7:
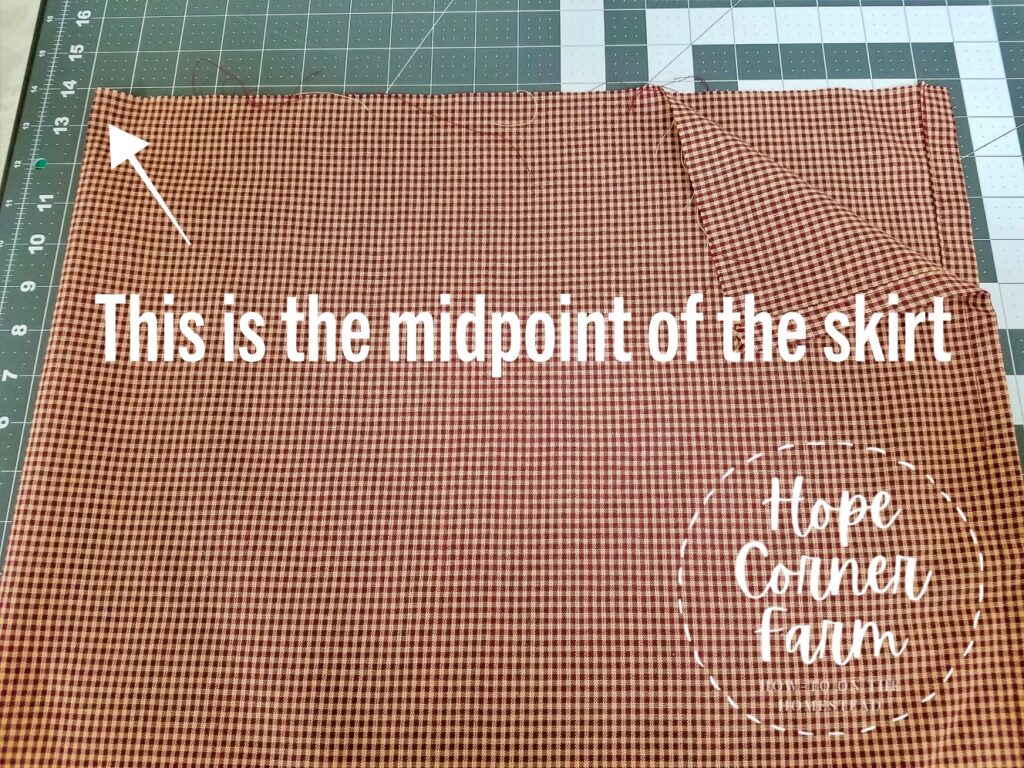
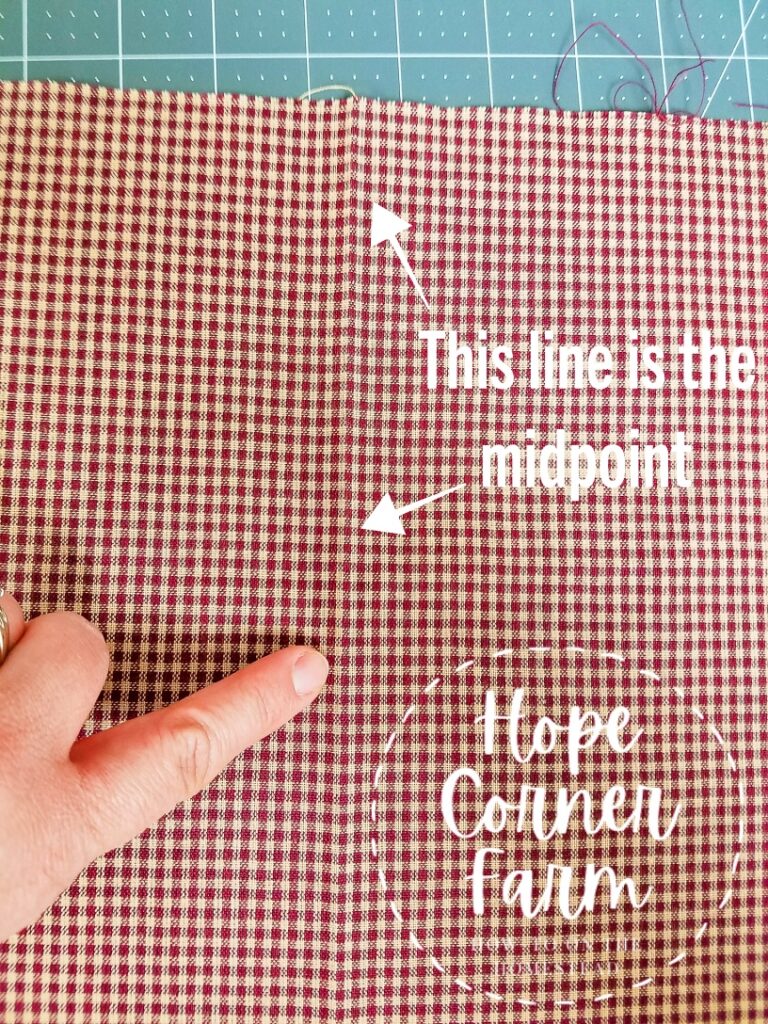
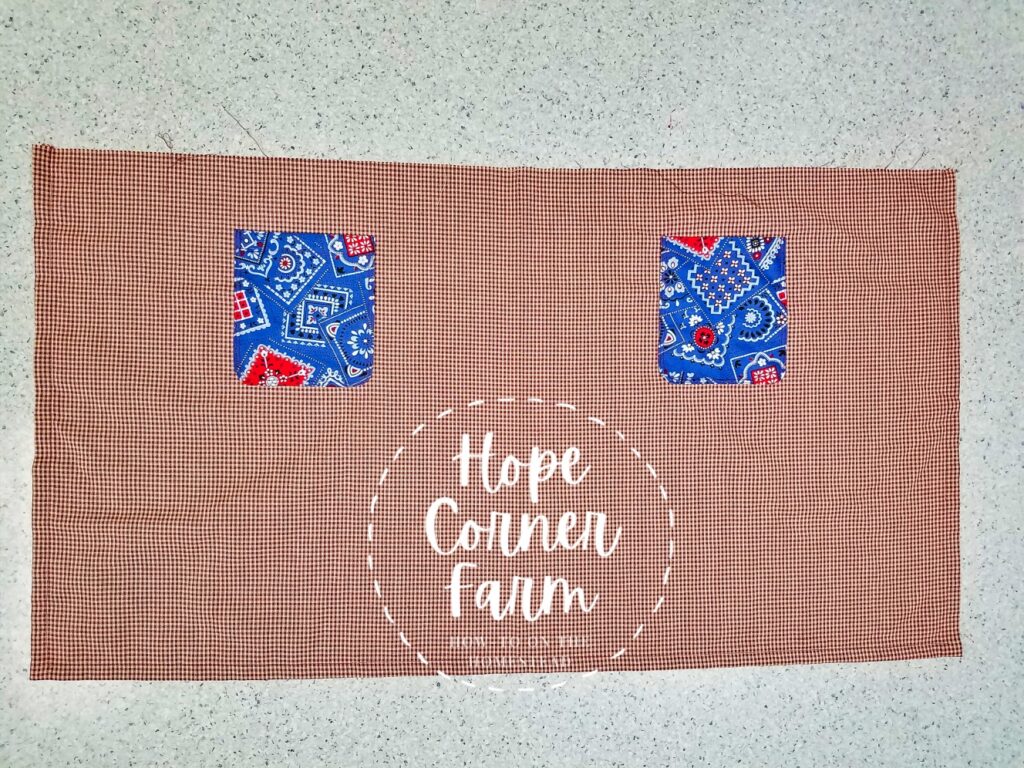
Find the midpoint of the skirt. Begin by folding the skirt piece in half. Lightly press to get the midpoint to show on the fabric.
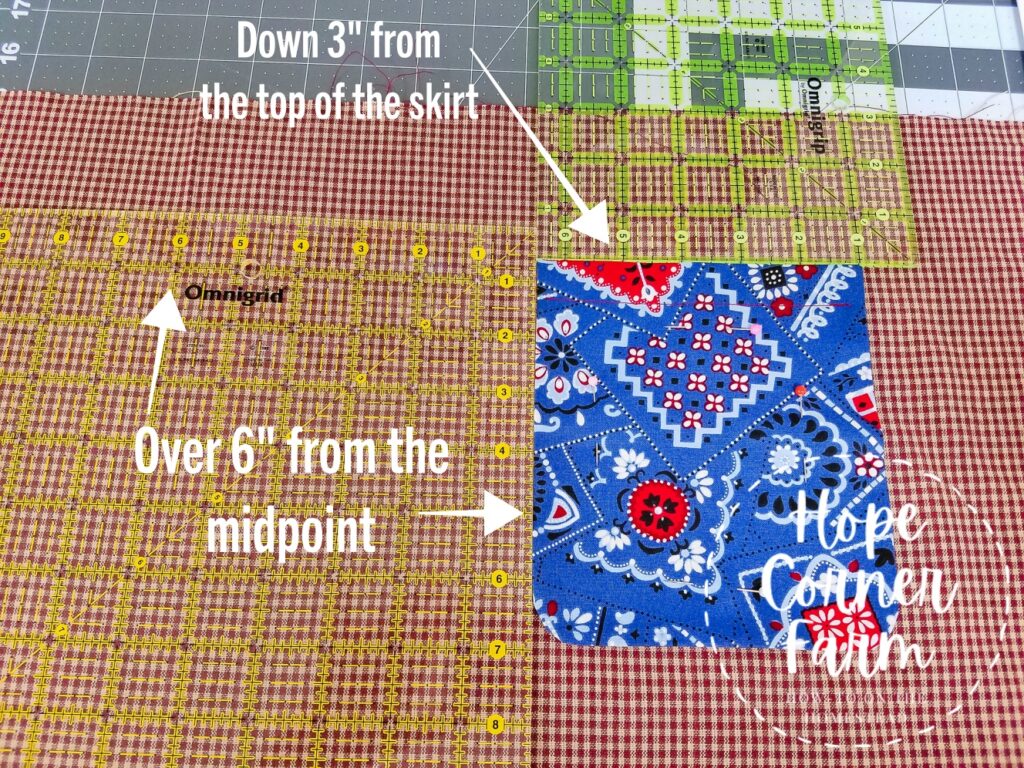
After finding the midpoint, place the pockets on the skirt. Each pocket should be over 6″ from the midpoint we just found, and down 3″ from the top of the skirt (the top is the one edge that we did not hem).
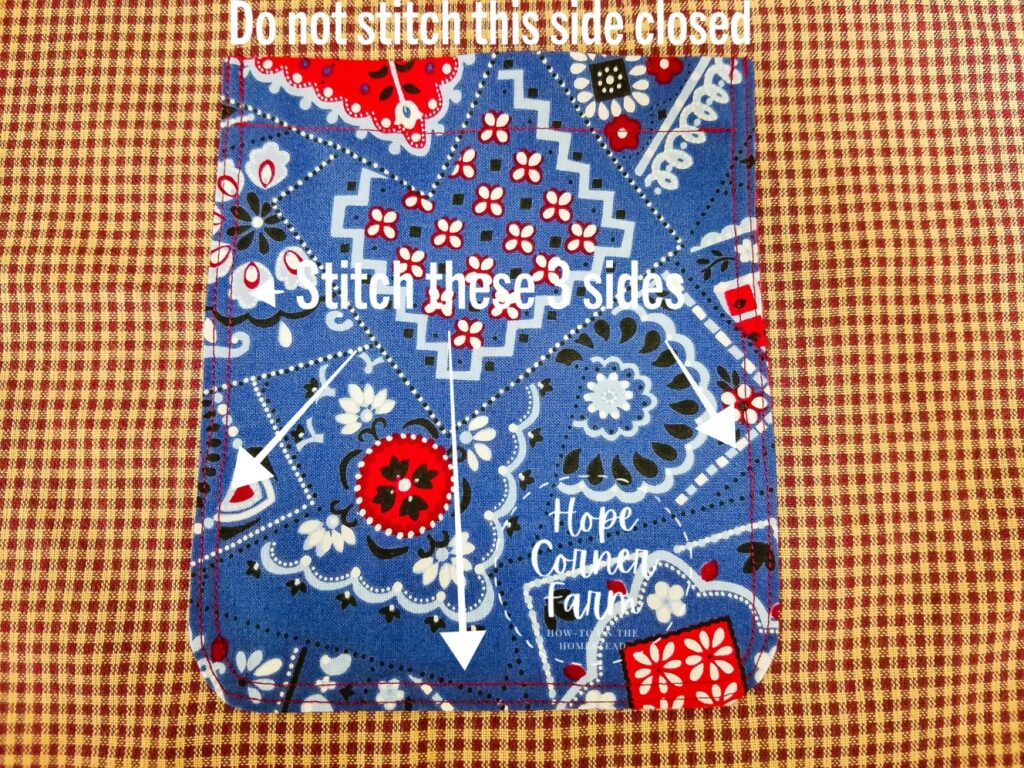
Stitch around the pocket using a 1/4″ seam allowance, leaving the top edge open (you will sew around 3 of the 4 edges). Back stitch when starting and stopping stitching.
Stitch around the the same edges, this time using an 1/8″ seam allowance. Back stitch when starting and stopping stitching.
Repeat for the second pocket.
Step 8:
Gather the UPPER STRAP PIECES (2 Inner and 2 Outer). These were the pieces that were cut as follows: 1 3/4″ x 21″.
Grab ONE Inner Upper Strap Piece and ONE Lower Upper Strap Piece.
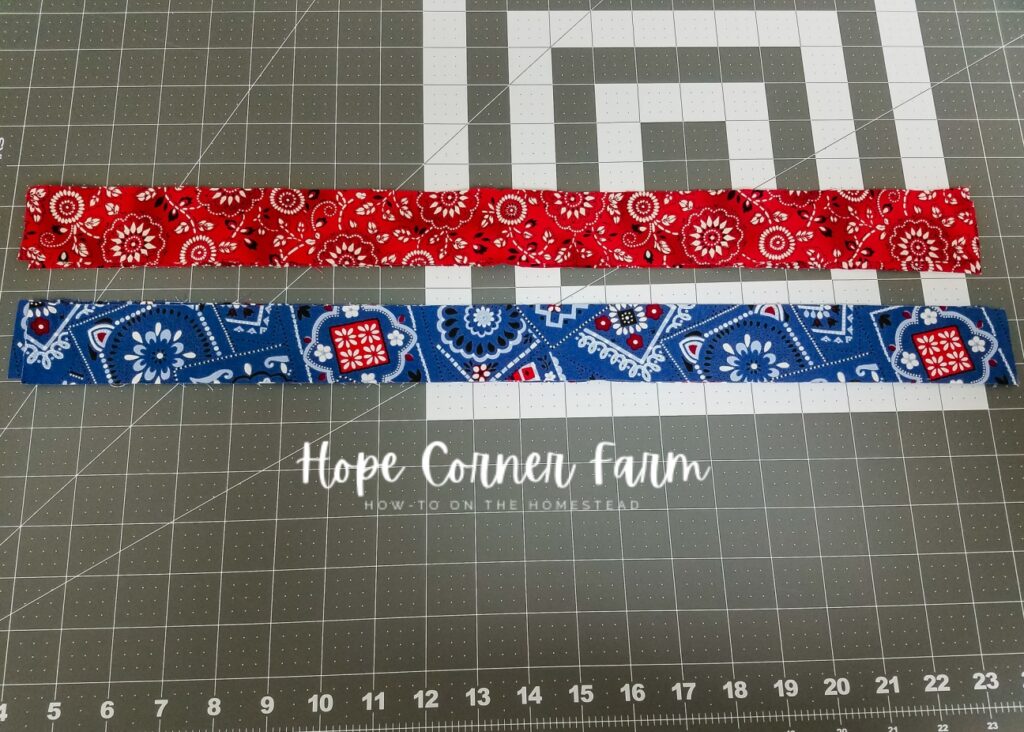
Place the two Upper Strap pieces right-sides together.
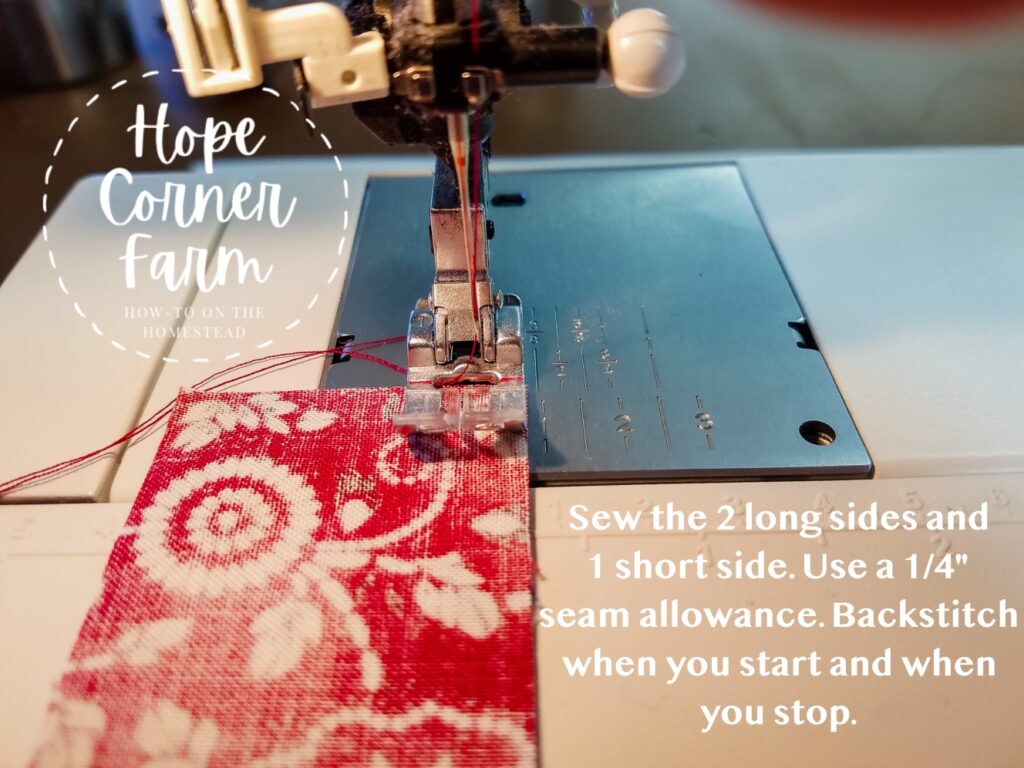
Sew the TWO long sides (the 21″ sides) and ONLY ONE of the short sides (the 1 3/4″ side). Use a 1/4″ seam allowance. Make sure to backstitch for reinforcement when starting sewing and stopping sewing. We are only sewing one of the short sides so that we can turn the strap right-side out. Repeat for the second strap.
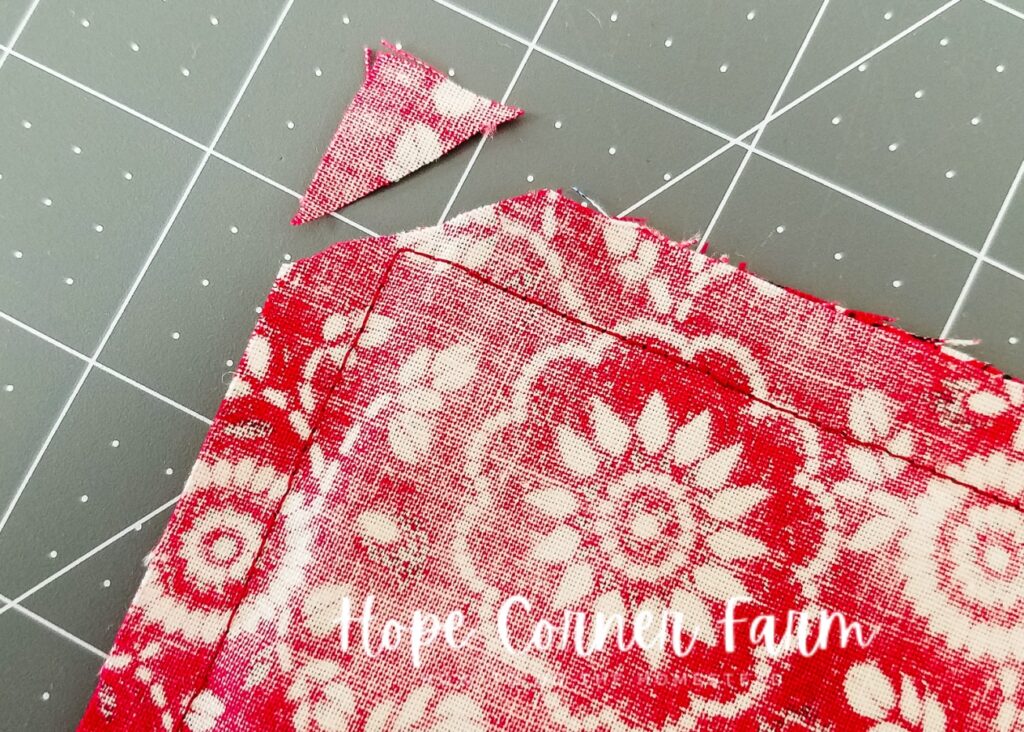
Clip the corners of the strap. Repeat for the second strap.
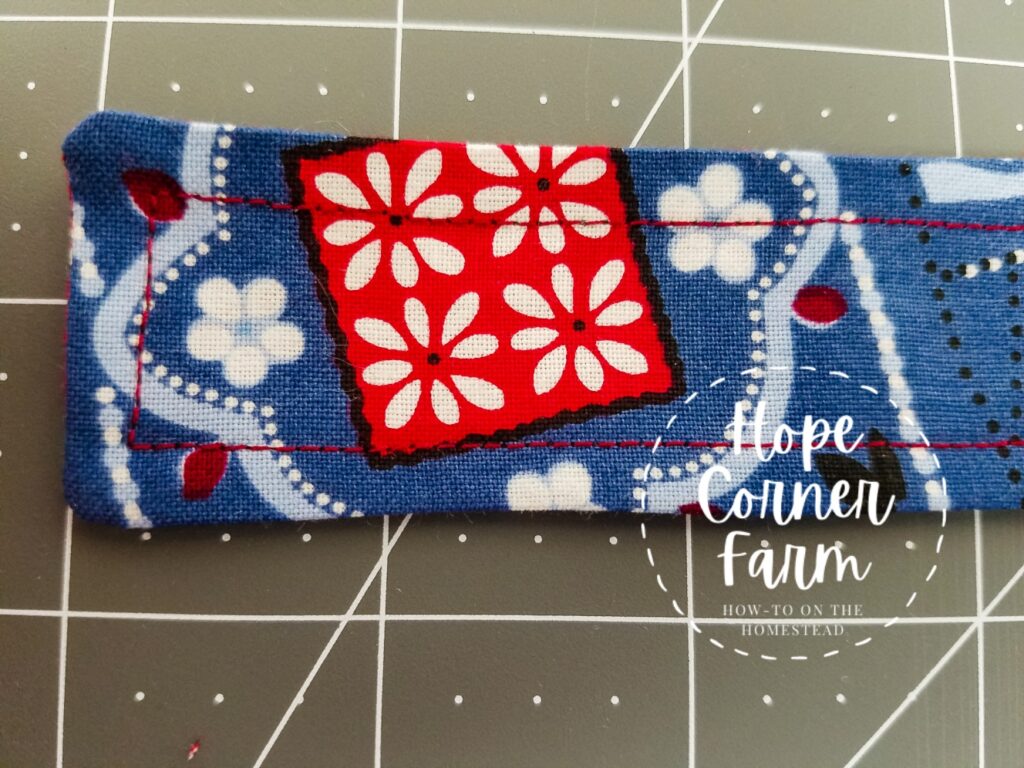
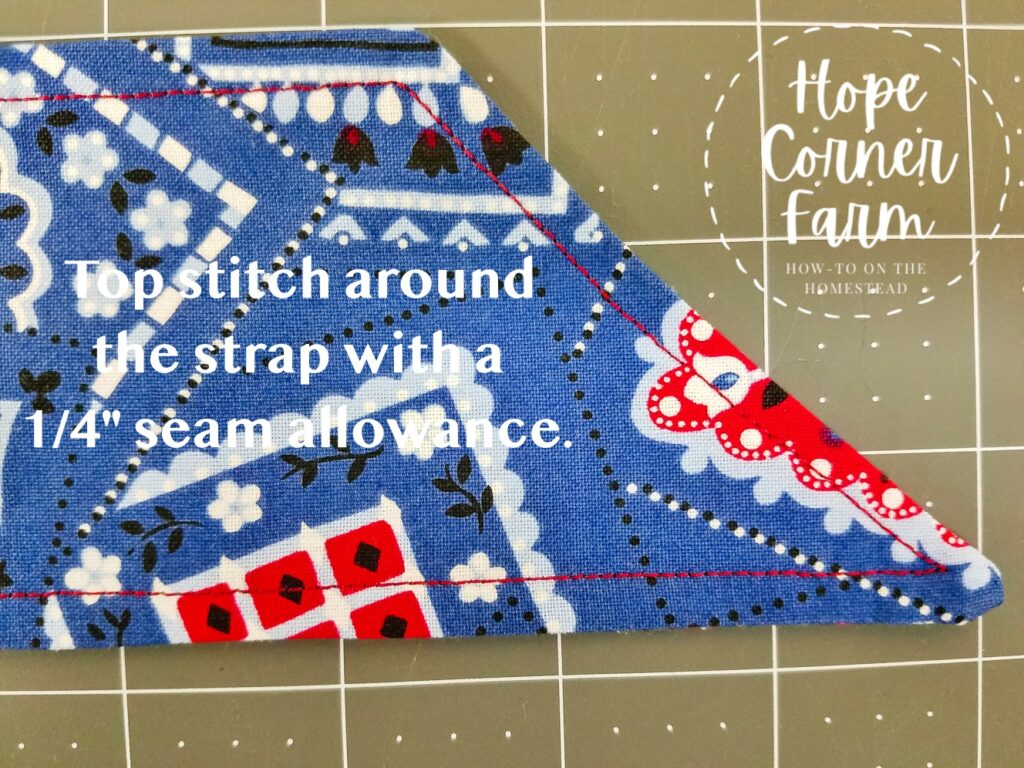
Turn the straps right-side out. Top stitch around the strap using a 1/4″ seam allowance.
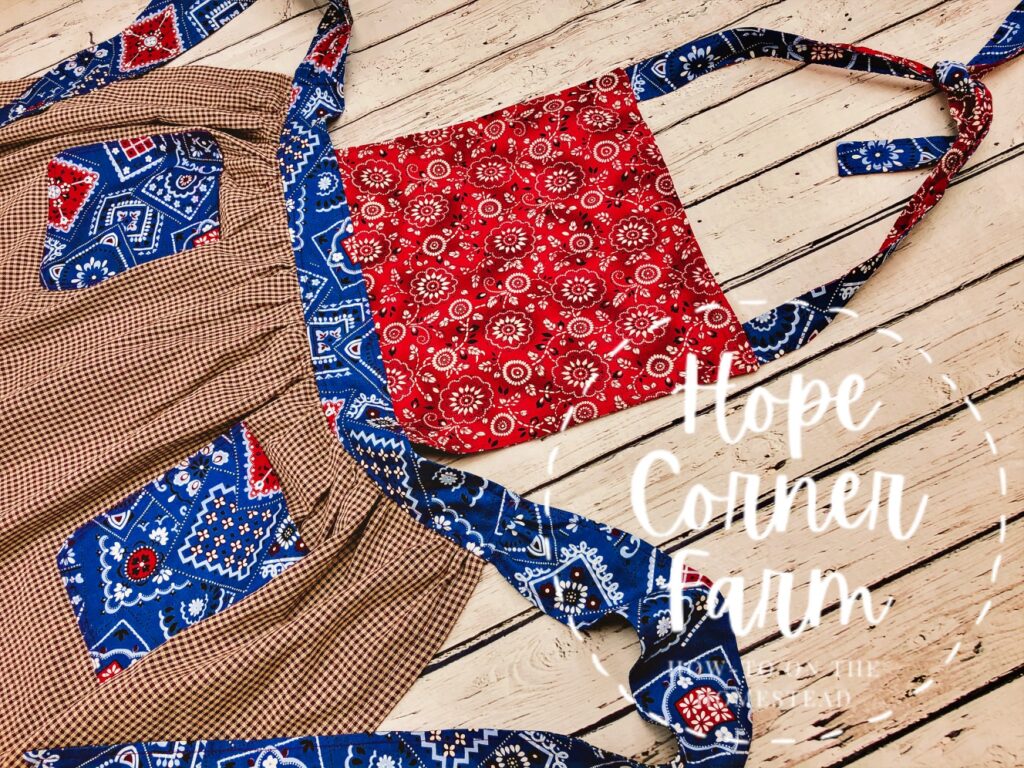
Step 9 – Apron Bib:
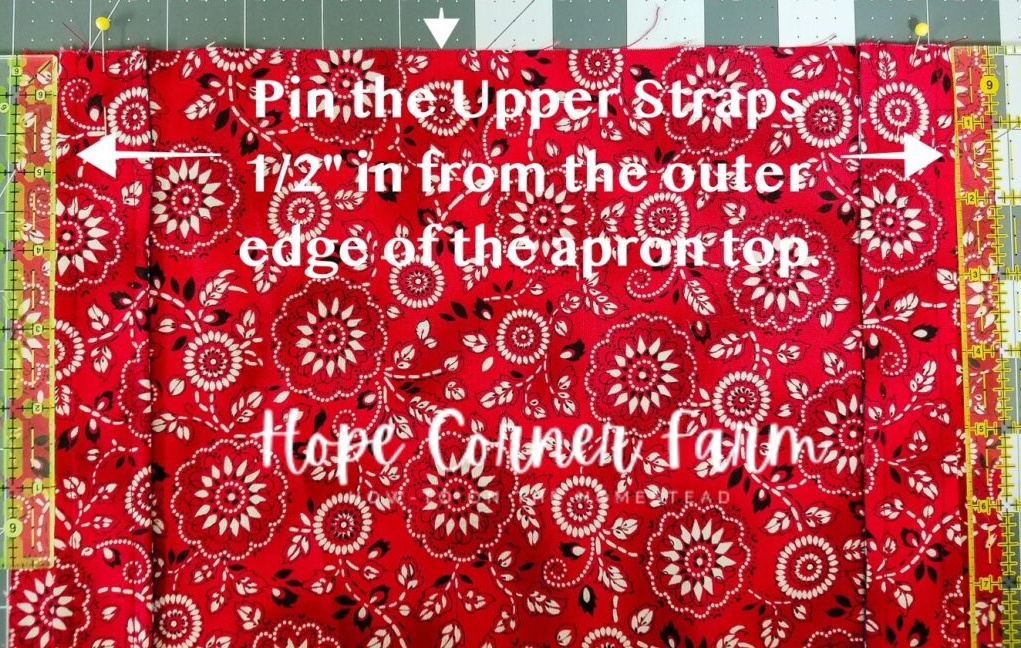
Grab ONE of the bib pieces. Place the Upper Straps even with the edge of the 13″ side of the bib. Place the Upper Straps in 1/2″ from the 10 1/2″ sides. Pin in place.
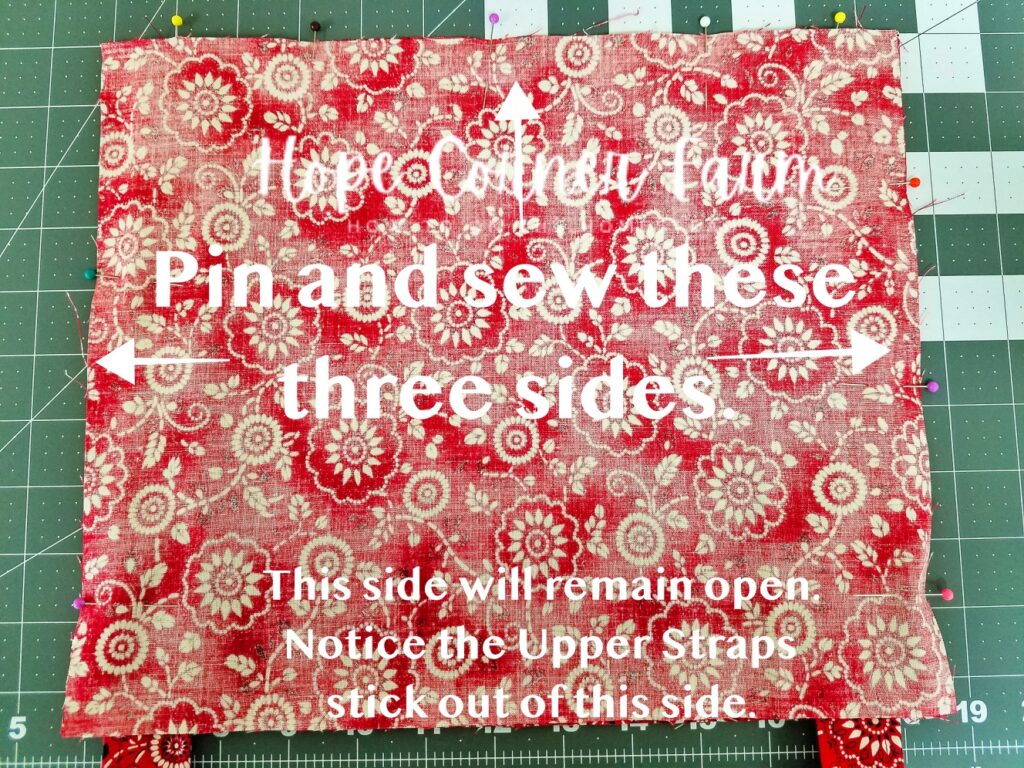
Place the second BIB PIECE on top of the first. Put right-sides together. Pin 3 of the sides and sew those three sides. Backstitch when you start sewing and when you stop. When sewing this seam, you will sew over the Upper Straps.
Sew using a 3/8″ seam allowance.
NOTE: The Upper Straps will stick out of the side that you don’t sew.
Clip the upper corners (near where the straps are sewn into the Bib).

Turn the Bib right sides out. Make sure to poke the corners fully out. Press.
Top stitch around the same three sides that were sewn together. Use a 1/4″ seam allowance.
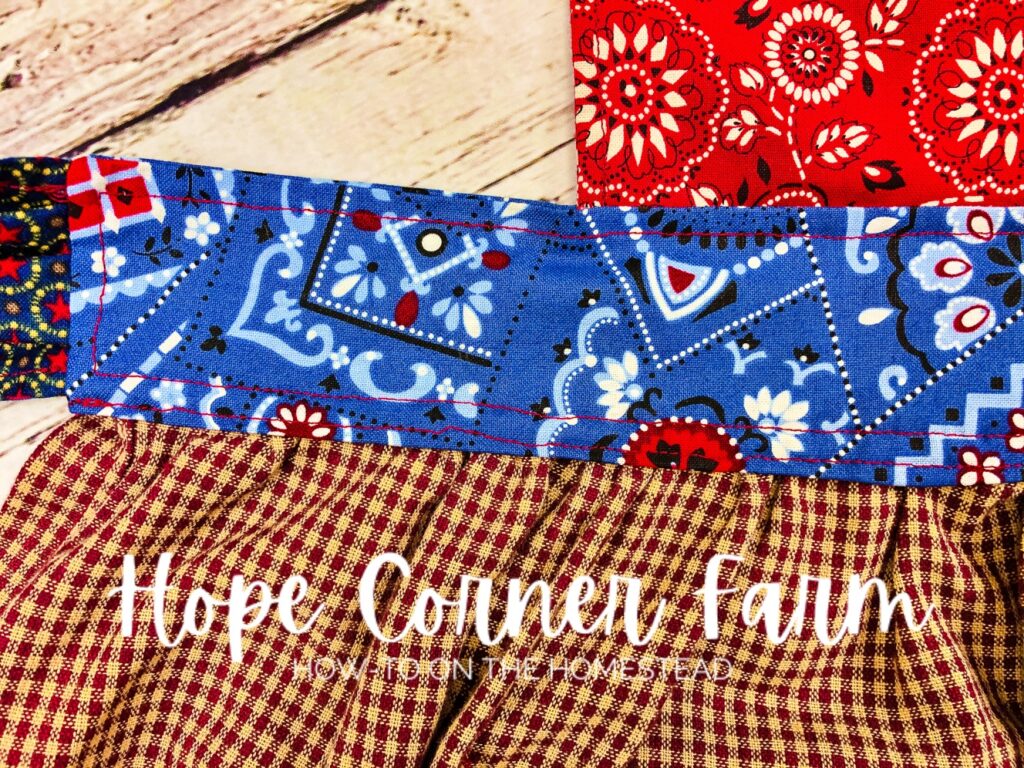
Step 10 – Apron Waistband:
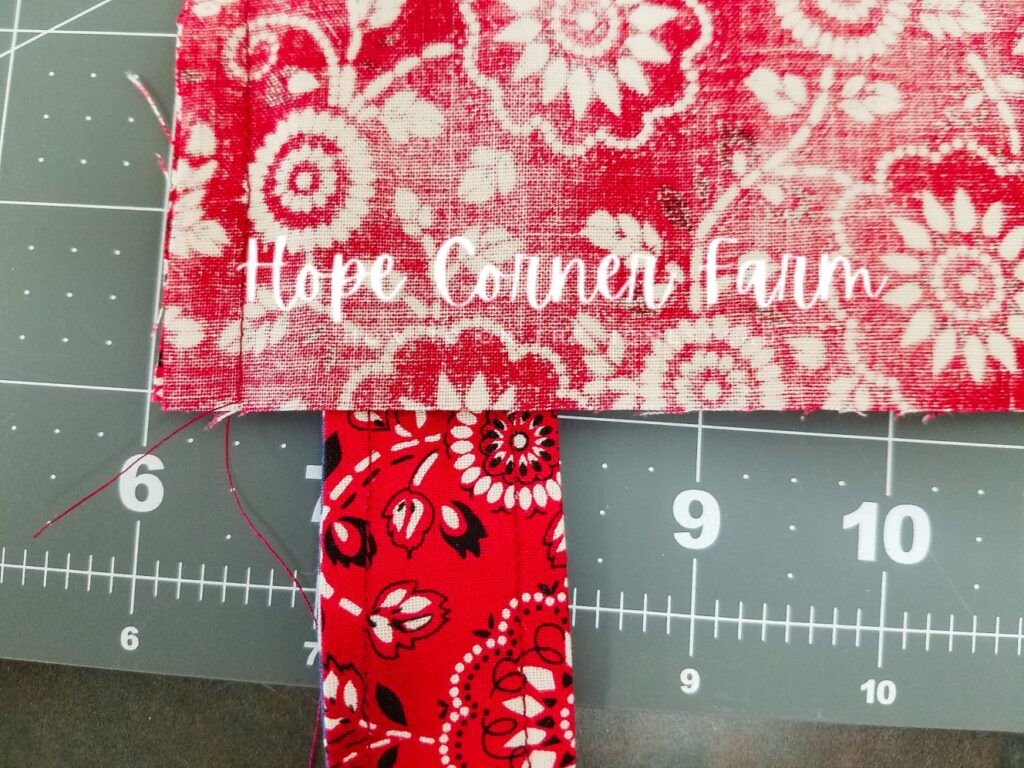
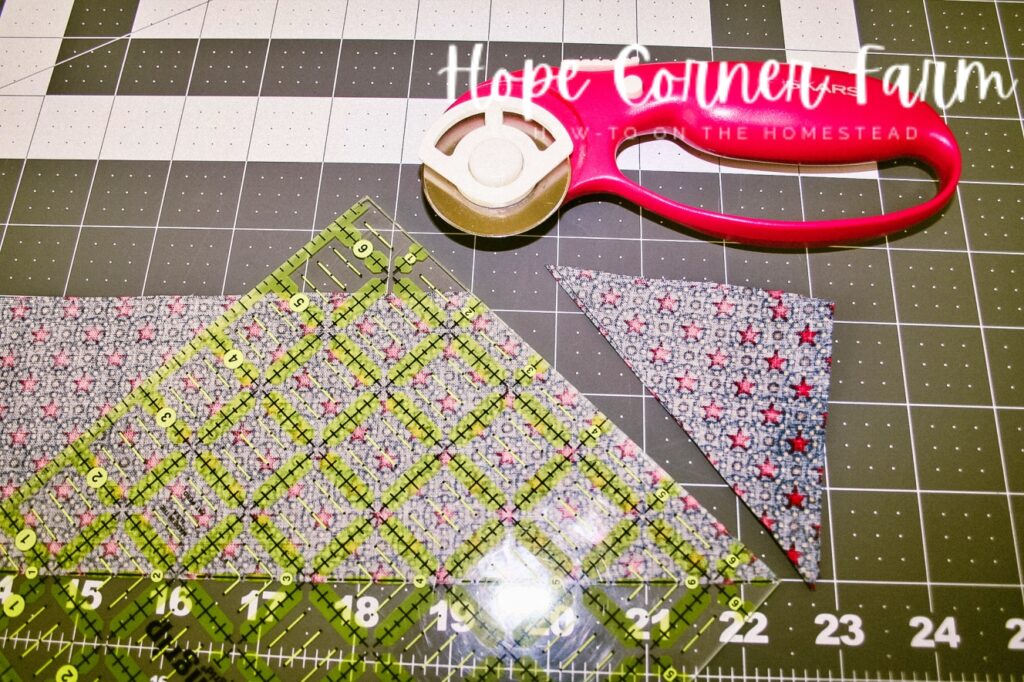
Locate both the OUTSIDE WAISTBAND STRAP PIECES (2) and the INSIDE WAISTBAND STRAP PIECES (2).
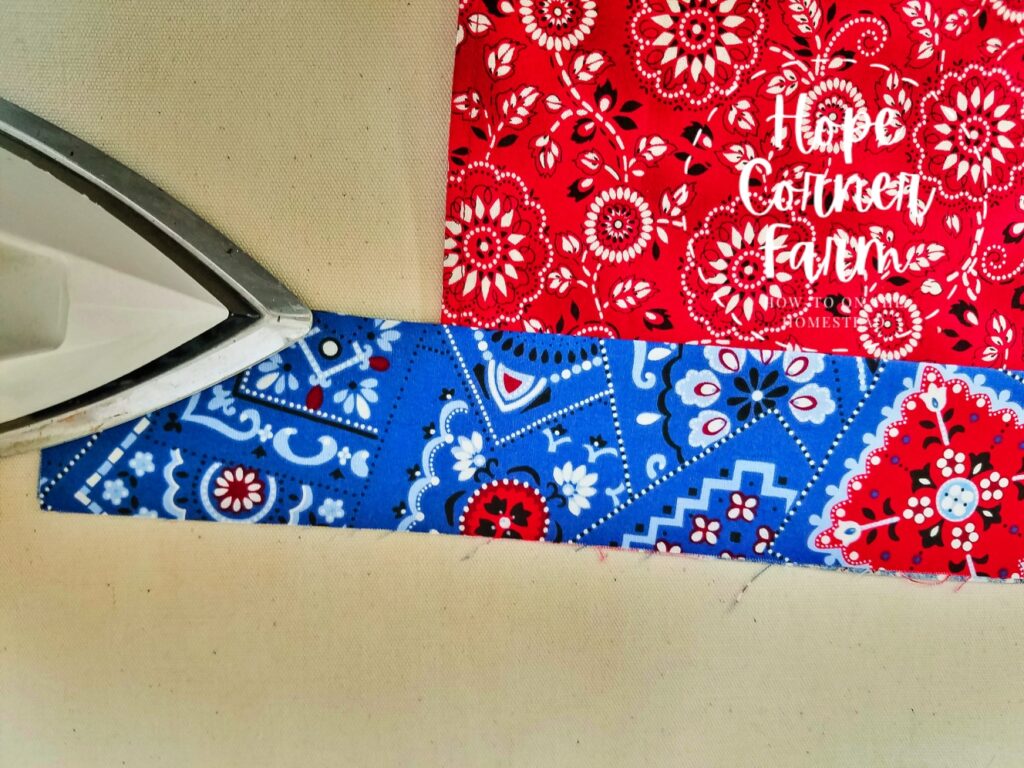
Cut one end of each of the pieces at a 45* angle. Be careful to cut the 45* angle so that the outside and inside strap pieces will be able to match up with each other to be sewn. See picture below for a better idea of what I mean.

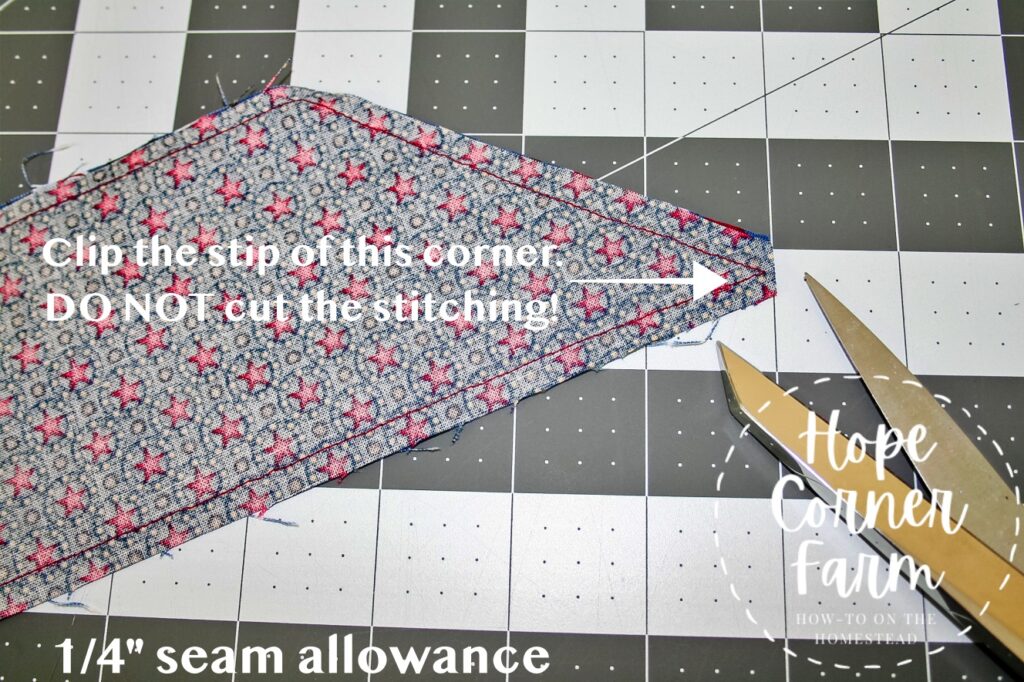
Sew the waistband straps together by placing ONE outside piece right-sides together with ONE inside piece. Make sure to match up the 45* angles and all sides! There will be 2 waistband straps when the sewing is completed.
Sew the strap together by sewing 3 of the 4 sides using a 1/4″ seam allowance. DO NOT SEW THE SHORT STRAIGHT EDGE CLOSED! It will be where we turn the straps right-sides out. Clip the tip of the 45* angle corner. Repeat for the second strap.
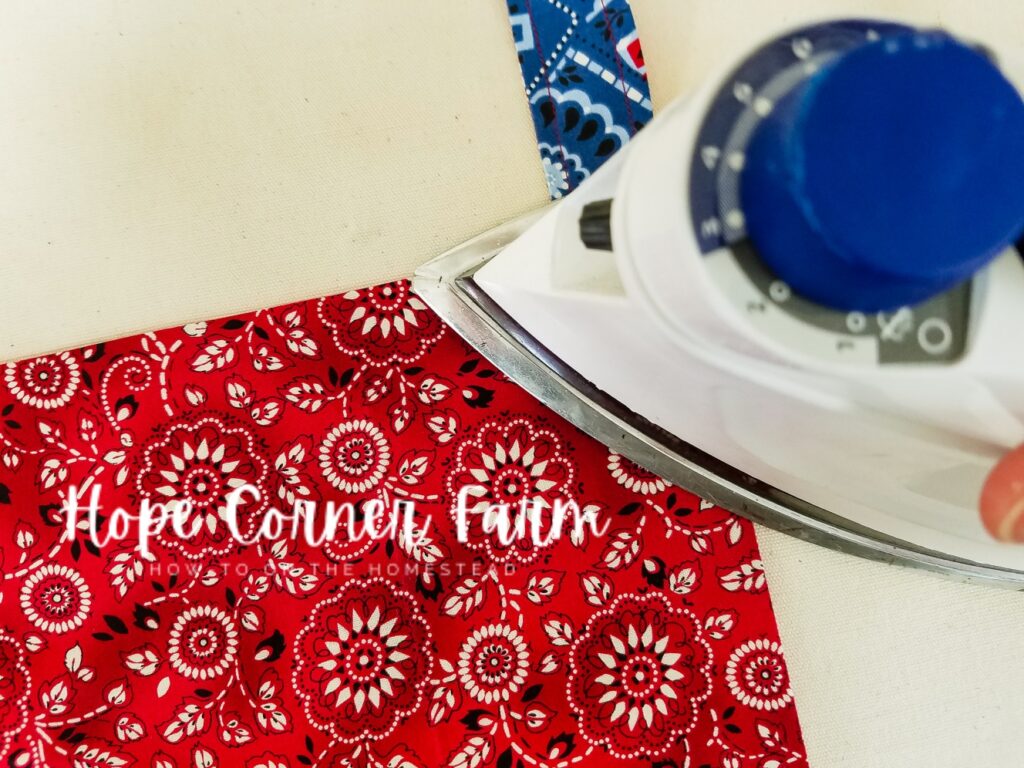
Turn the 2 straps right-sides out. Press. Top stitch around the straps using a 1/4″ seam allowance.
Step 11:
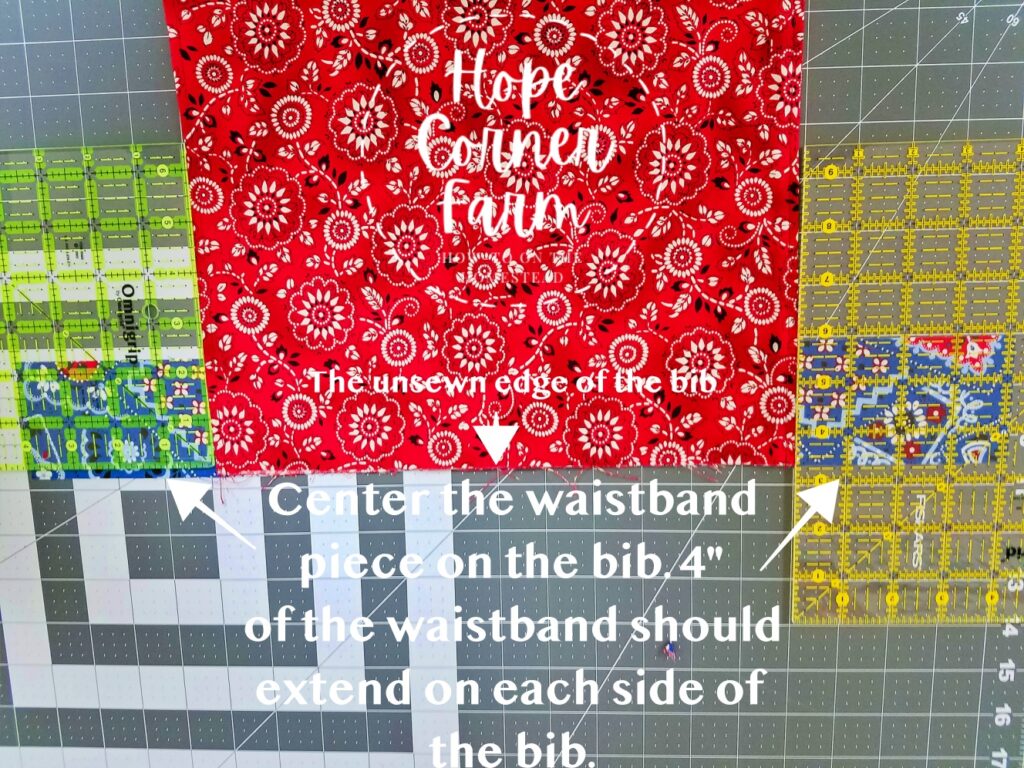
Locate the two waistband pieces (2 1/2″ x 20″).
Find the bib piece that we sewed in Step 9.
Center one of the waistband pieces on the bottom of the bib piece (the edge that was not sewed when we sewed the bib). Place right-sides together. The waistband piece should extend 4″ on each side of the bib. See the picture below for details.
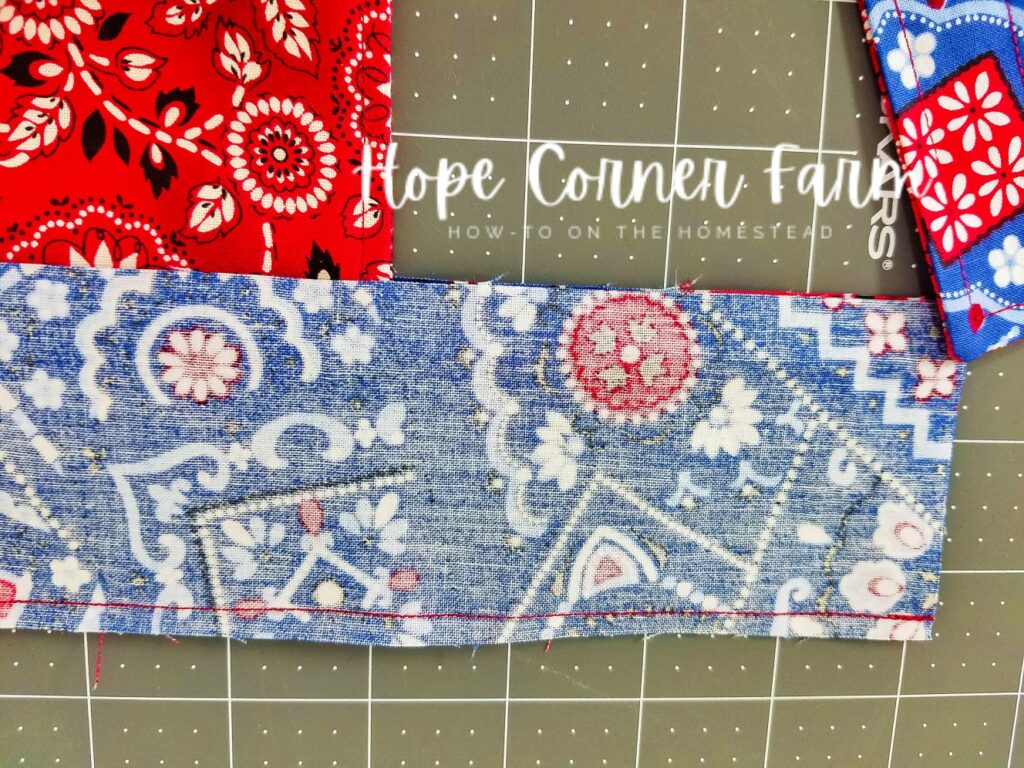
Place the second WAISTBAND PIECE right-sides together with the bib and first WAISTBAND PIECE.

Sew the WAISTBAND PIECES onto the BIB using a 1/4″ seam allowance. Remember to backstitch when starting the seam and ending the seam.
Press one side of the waistband down.
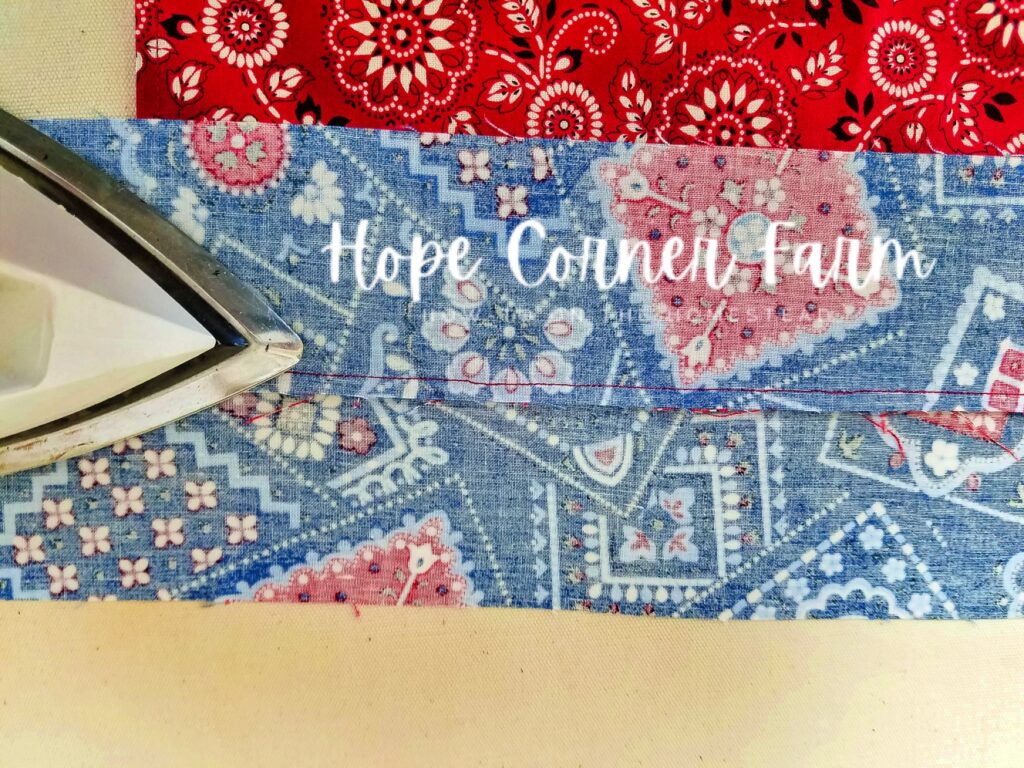
Press down the second side.
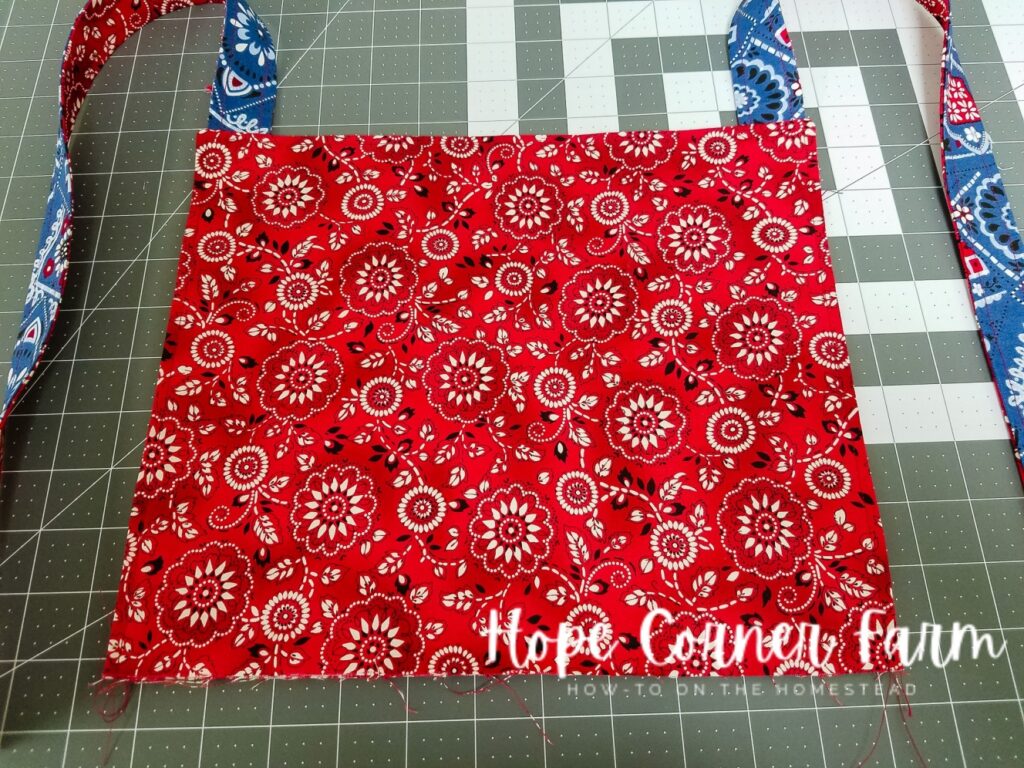
Step 12 – Adding Apron Skirt:
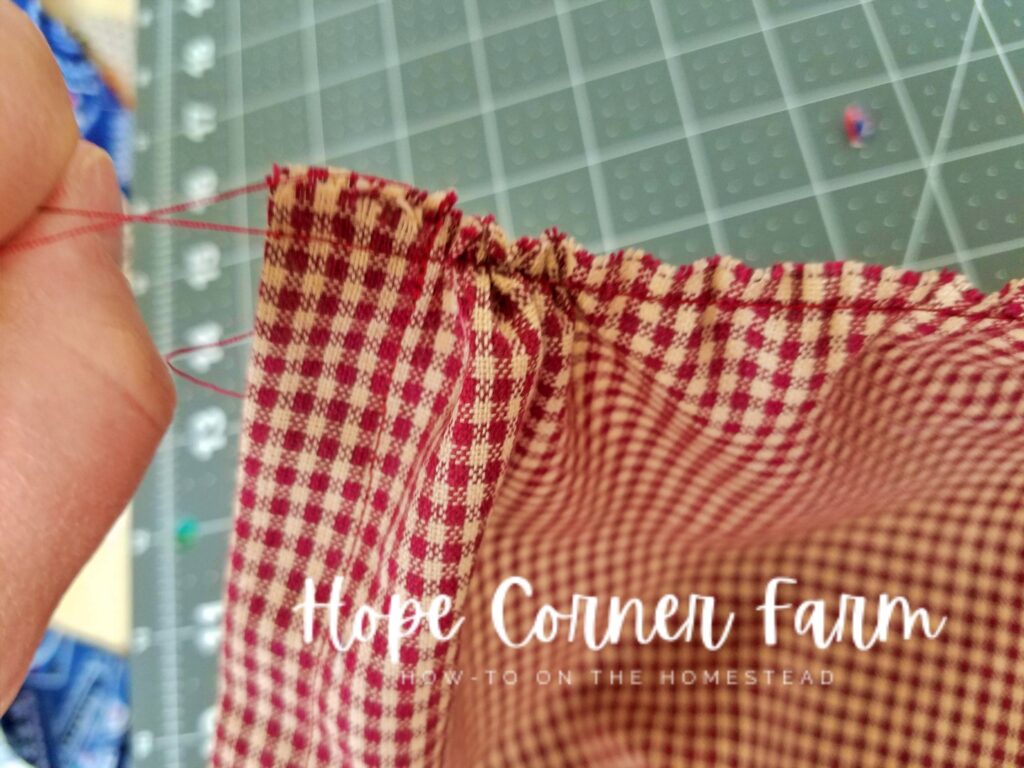
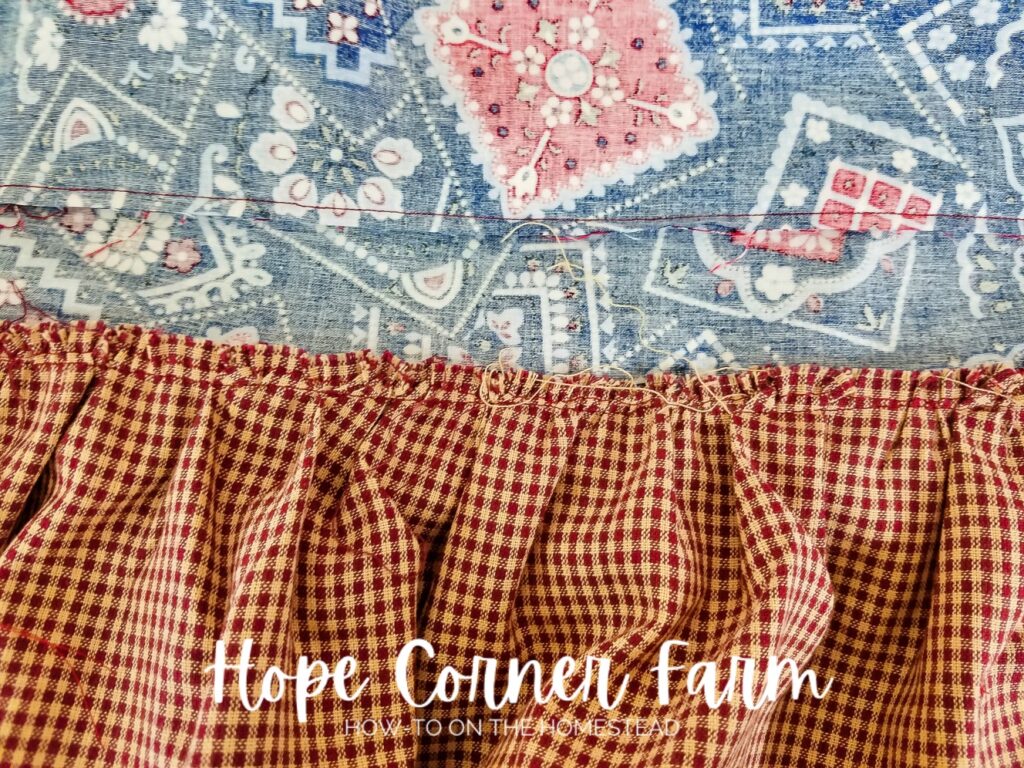
Run a gathering stitch along the top (un-hemmed) edge of the SKIRT.
Pull and gather the top of the skirt until is measures 19 1/2″.
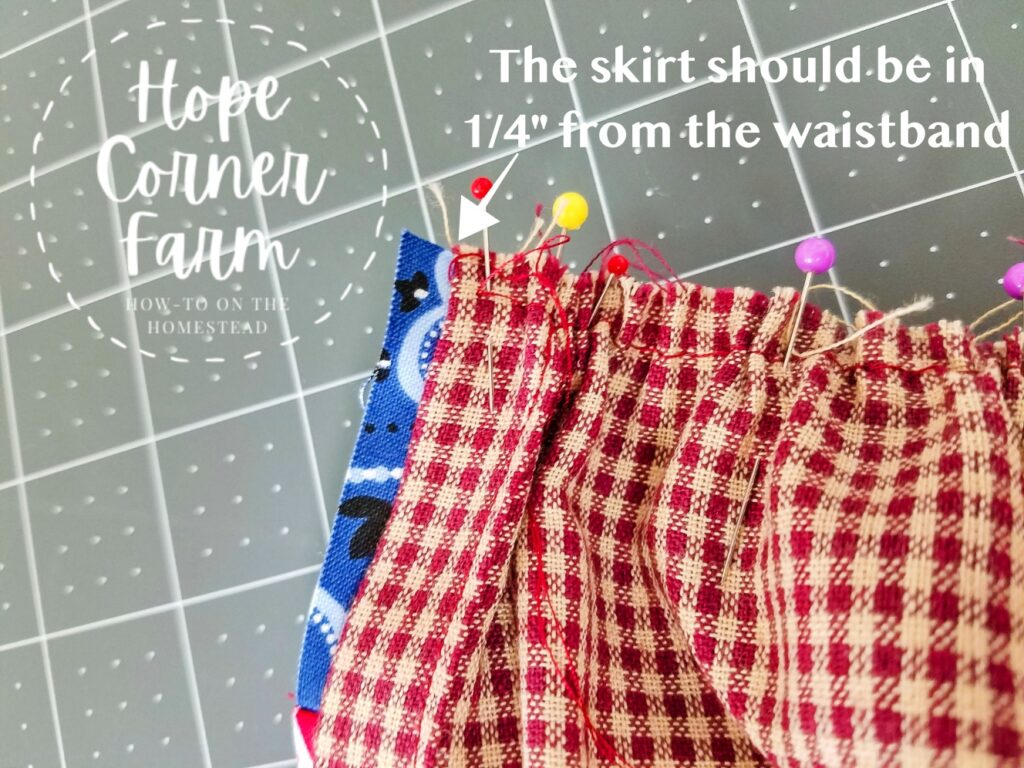
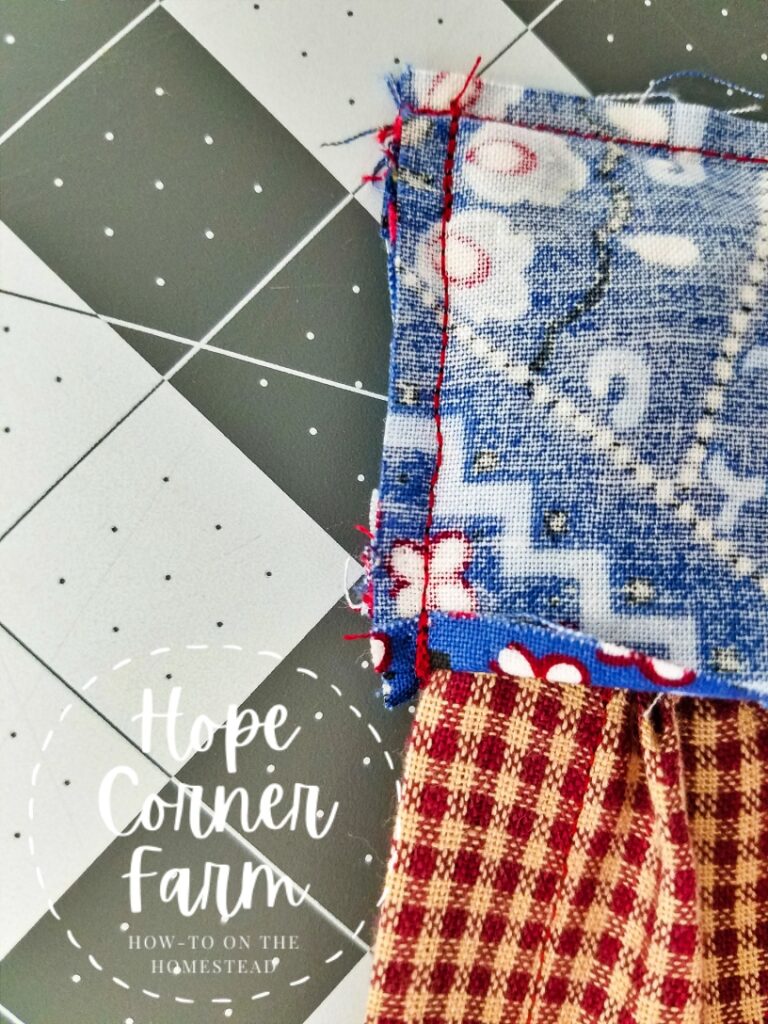
Pin the gathered skirt to the front waistband (the edge below the bib). The skirt should be centered on the waistband piece. The waistband should extend 1/4″ past the skirt on each side. Pin in place to sew.

Sew this seam using a 1/2″ seam allowance.
Press the seam toward the bib.

Step 13:
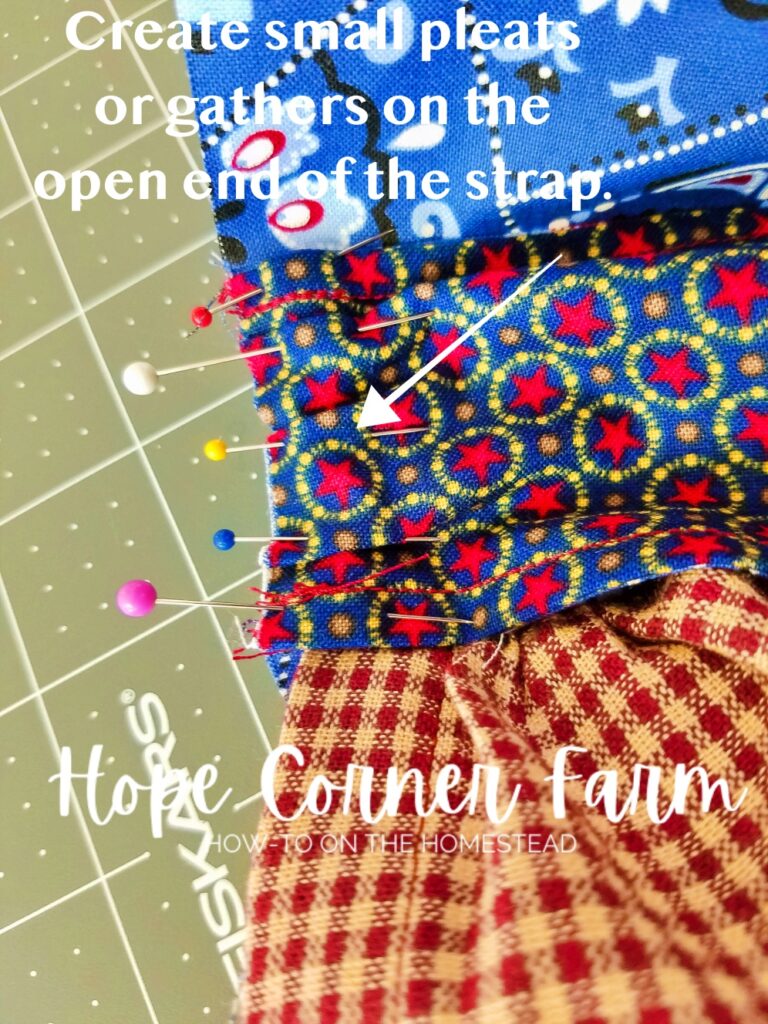
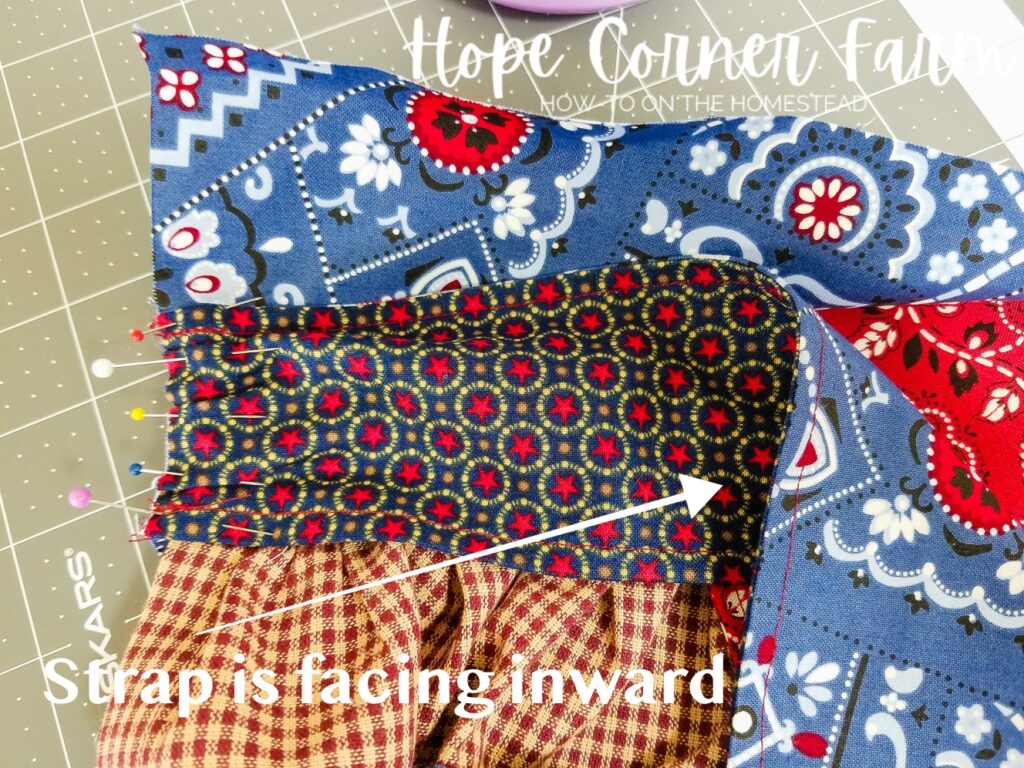
Locate the two WAISTBAND STRAPS. On the open/turning end of the straps, pleat or gather the strap so that it fits inside of the WAISTBAND. Pin in place.
Make sure when pinning the strap in place that the same fabric is facing outward on both straps. Also, make sure that the angles of the straps (the 45* angles) are facing the same way.
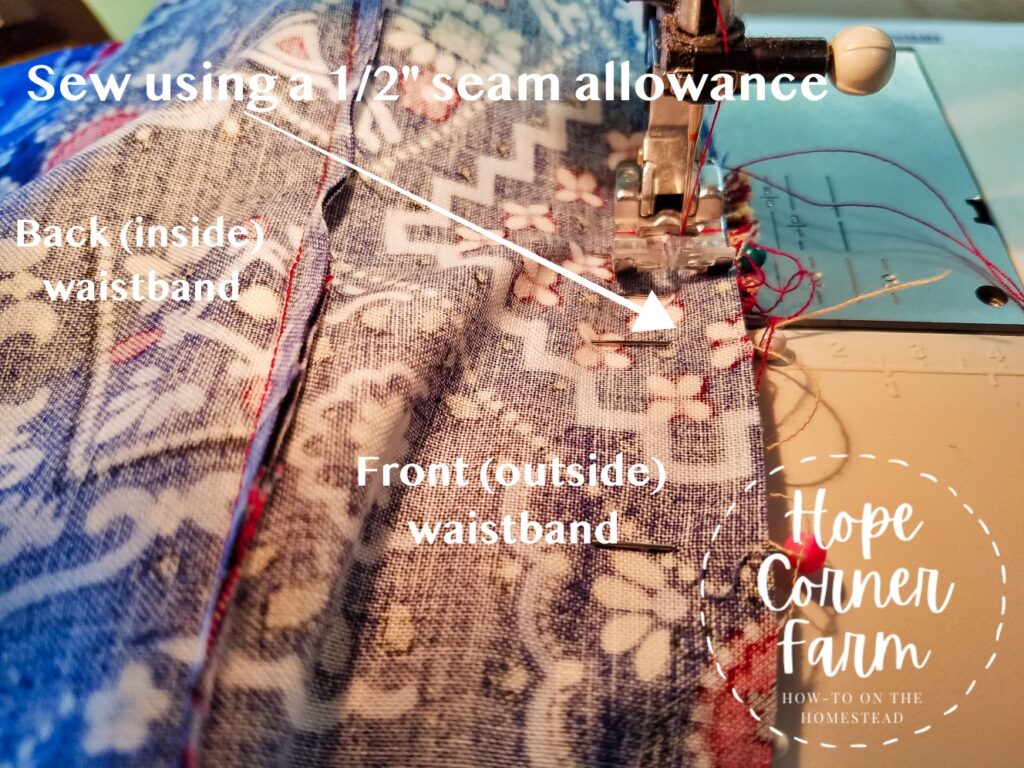
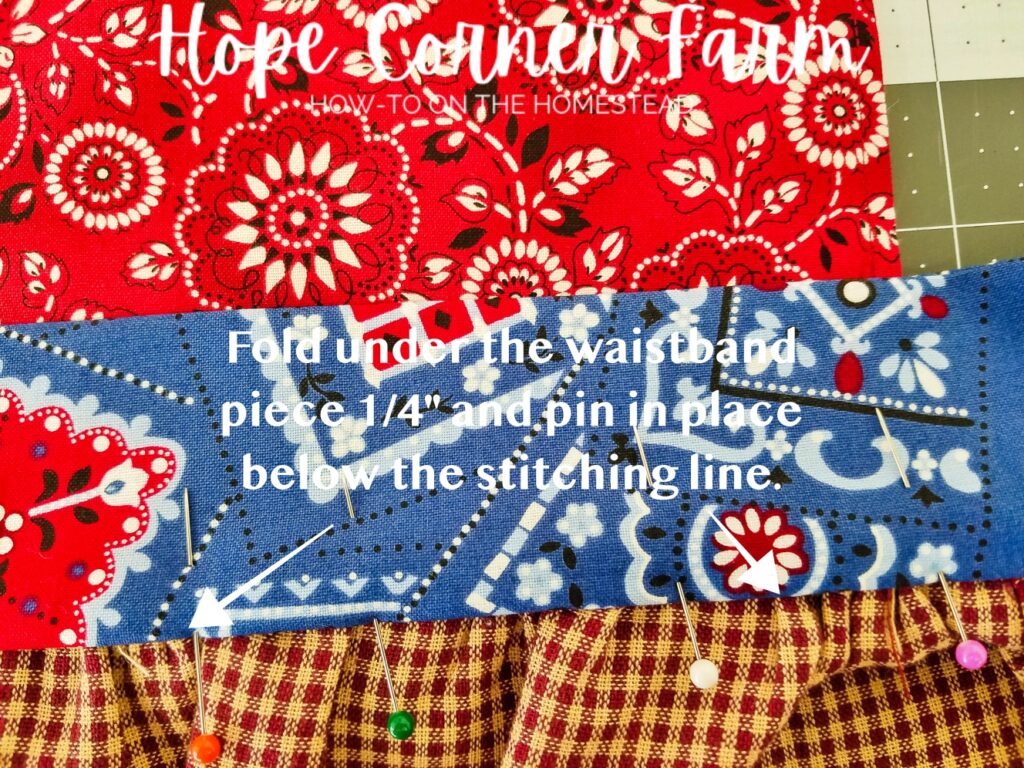
Fold the inside (or back) of the WAISTBAND down over the strap. Turn under 1/4″ on the open side of the inside waistband. Pin the end with the strap and sew with a 1/4″ seam allowance.
Step 14 – Finishing the Apron:
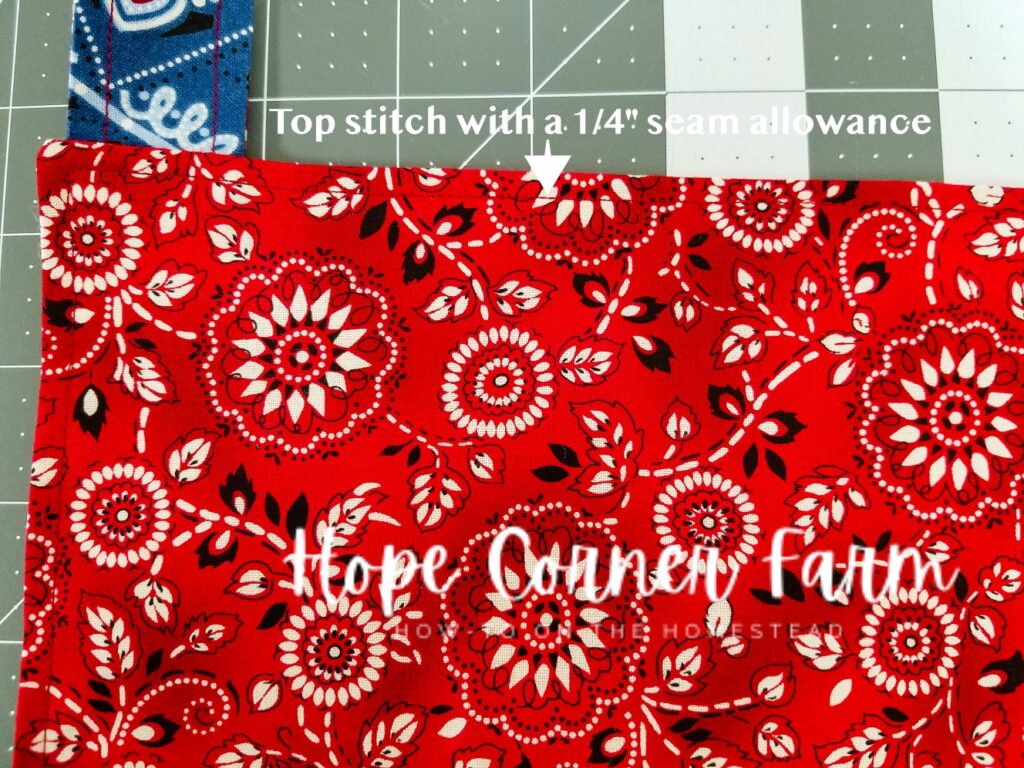
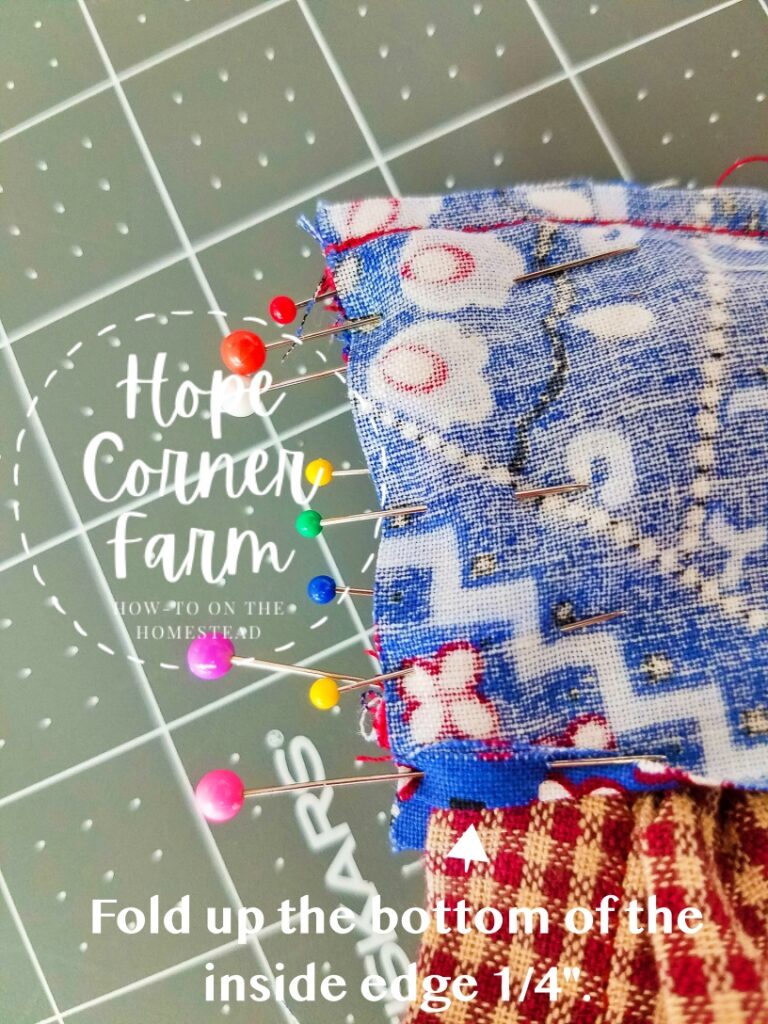
Turn the waistband right-sides out. Press under the inside bottom edge of the waistband 1/4″ and pin in place. Make sure that the pressed under edge completely covers the stitching from where the skirt was sewn to the waistband/bib.
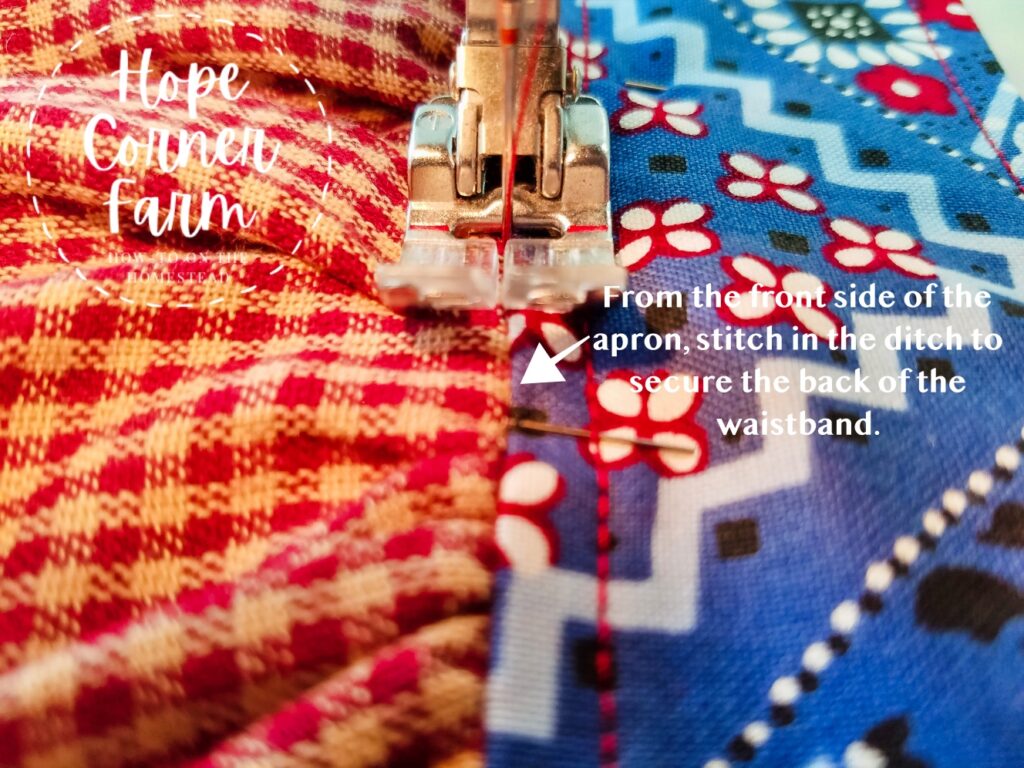
From the front-side of the apron, sew a 1/4″ top-stitch around all 4 sides of the waistband. DO NOT REMOVE THE PINS YET!
Again, from the front-side of the apron, stitch in the ditch across the bottom of the waistband.
Remove the pins and enjoy your completed apron!
Many Blessings,