
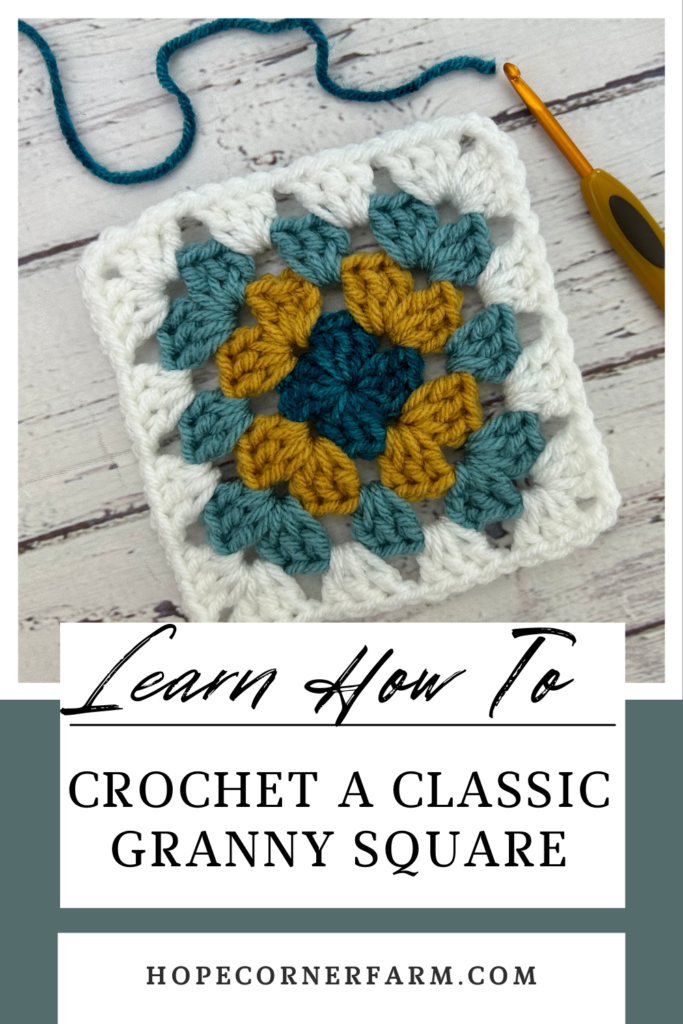
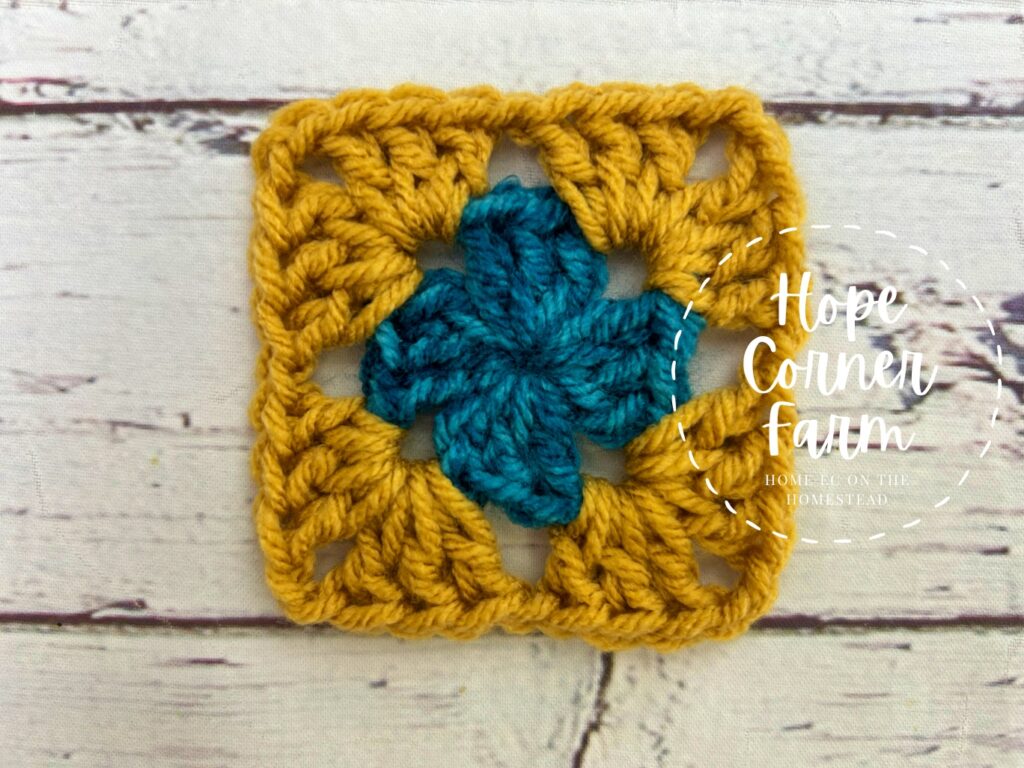
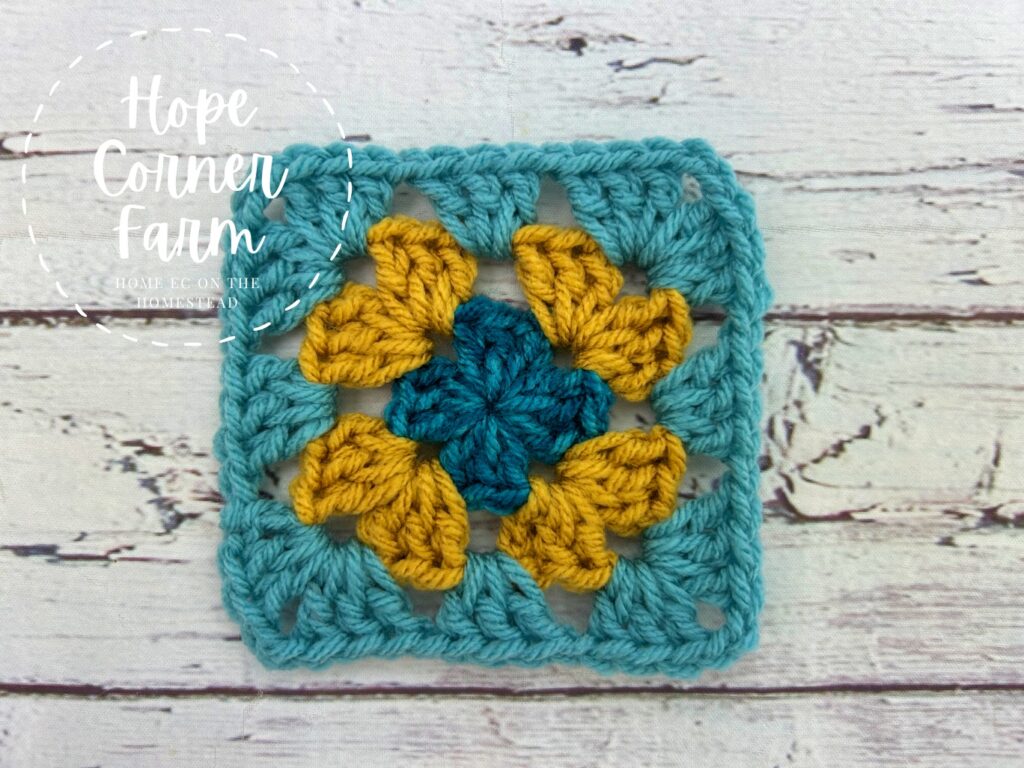
How to Crochet a Granny Square for Beginners


The granny square is a classic crochet project that is great for both beginner crocheter and advanced crocheters. It uses basic stitches such as the chain stitch, double crochet stitch, and slip stitch. My preference is to start the classic granny squares with a magic circle, but one could also start this project by chaining 4 and joining it with a slip stitch to the first chain to form a circle. I just like how tight the center of my squares are after using a magic circle! Either way, if you are ready to learn how to crochet a granny square for beginners, let’s grab a hook and some yarn and get crocheting!


Materials Needed:
G (4.0 mm) crochet hook
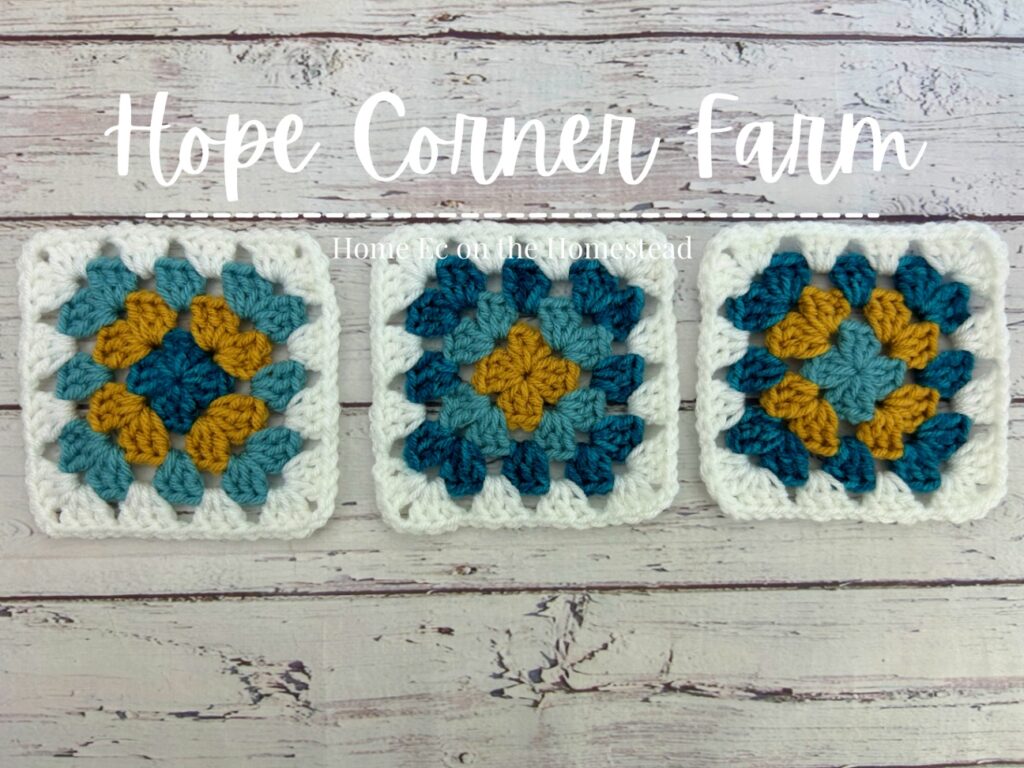
Medium weight yarn in 4 colors: In my example Color #1 = dark teal, Color # 2 = gold, Color #3 = turquoise, Color #4 = white. I used scrap yarn for this project, so 20 yards of each yarn is a good gauge for one block.
Yarn needle
Scissors
Crochet Stitches Used:
Round 1 – How to Crochet a Granny Square for Beginners:
To start, begin with either a Magic Circle OR you can ch 4 and join to the first chain to create a circle. I used a MAGIC CIRCLE for this tutorial.
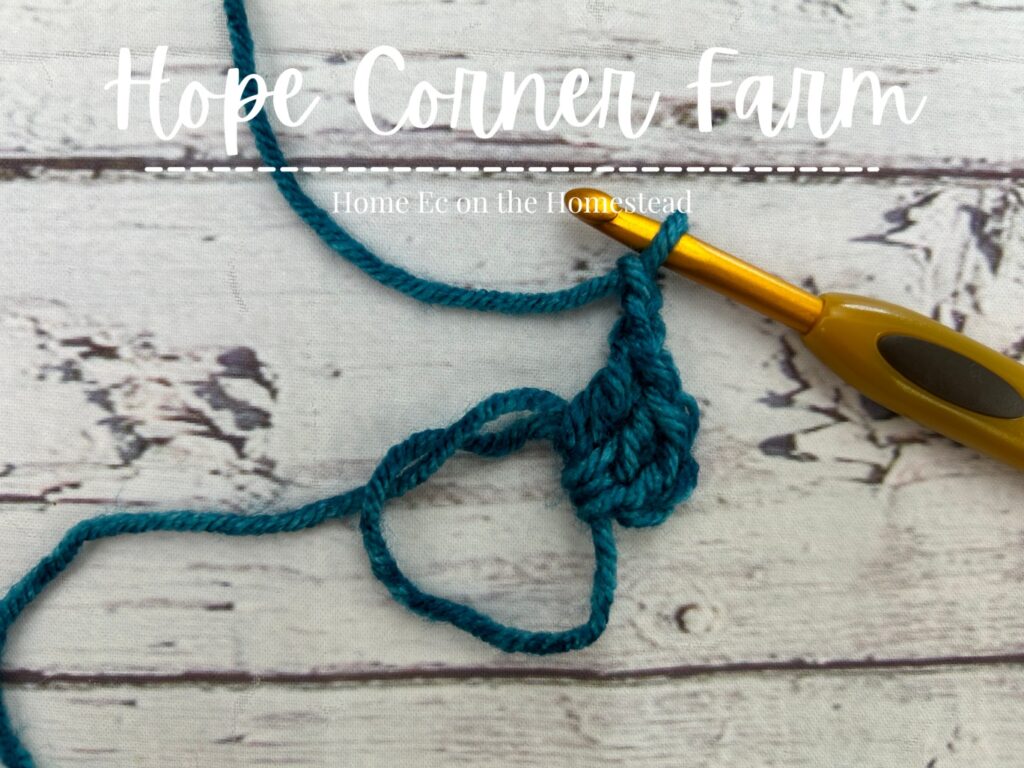
After creating the magic circle (or ch 4 circle), chain 3.
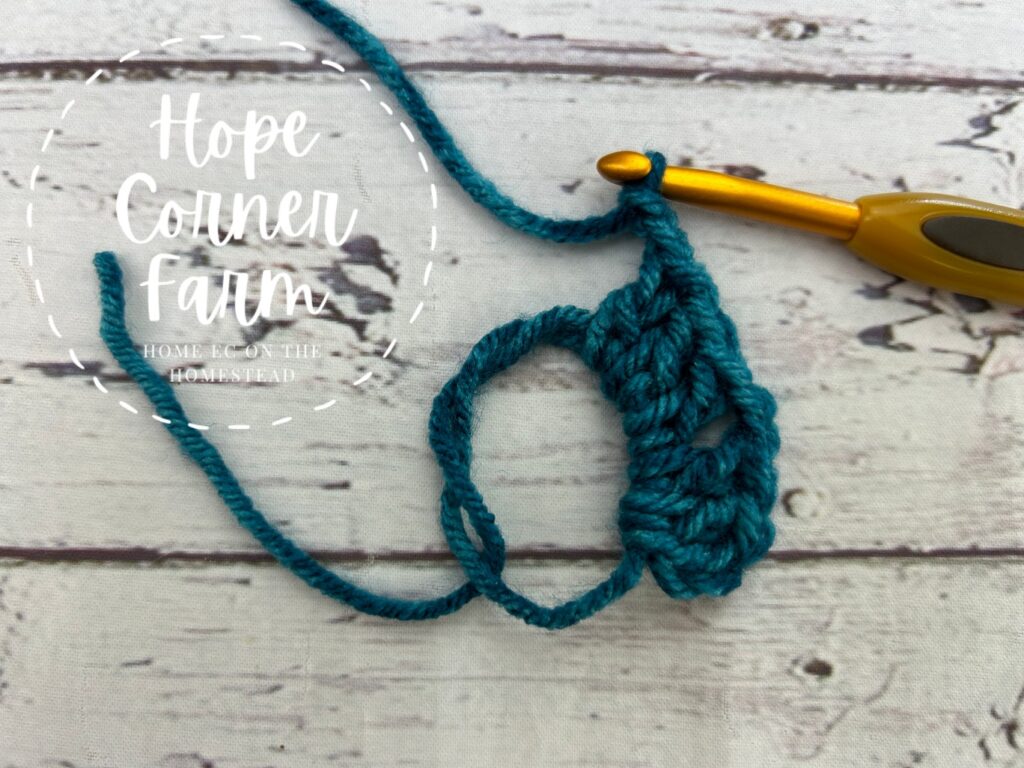
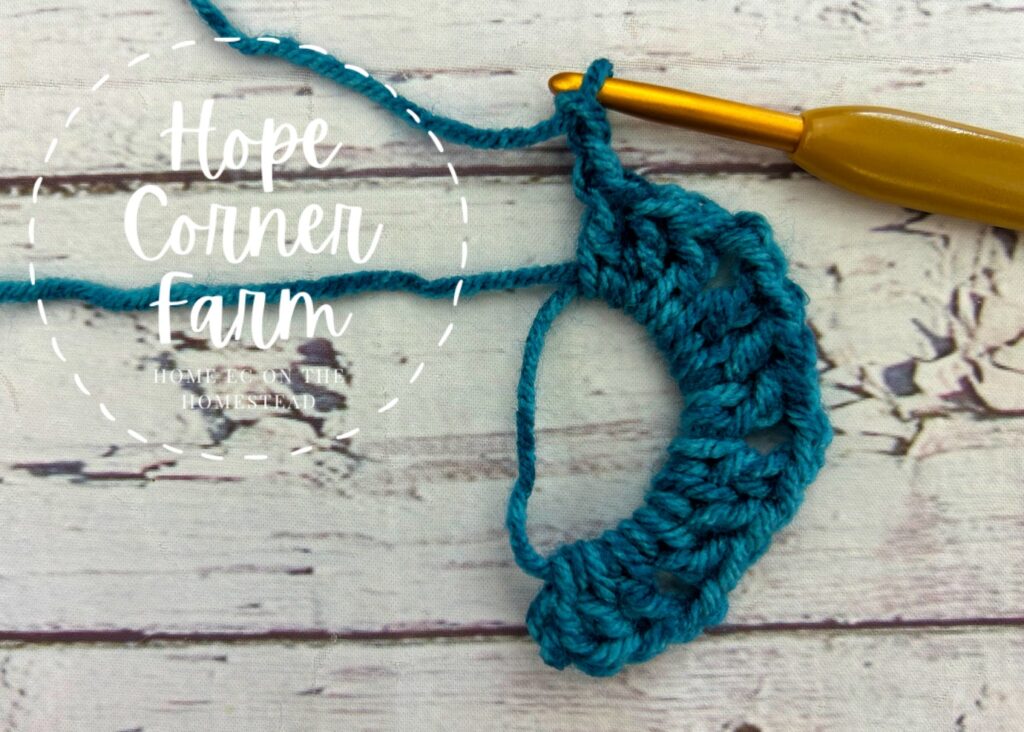
Next, into the circle place 2 DC and then ch 2.
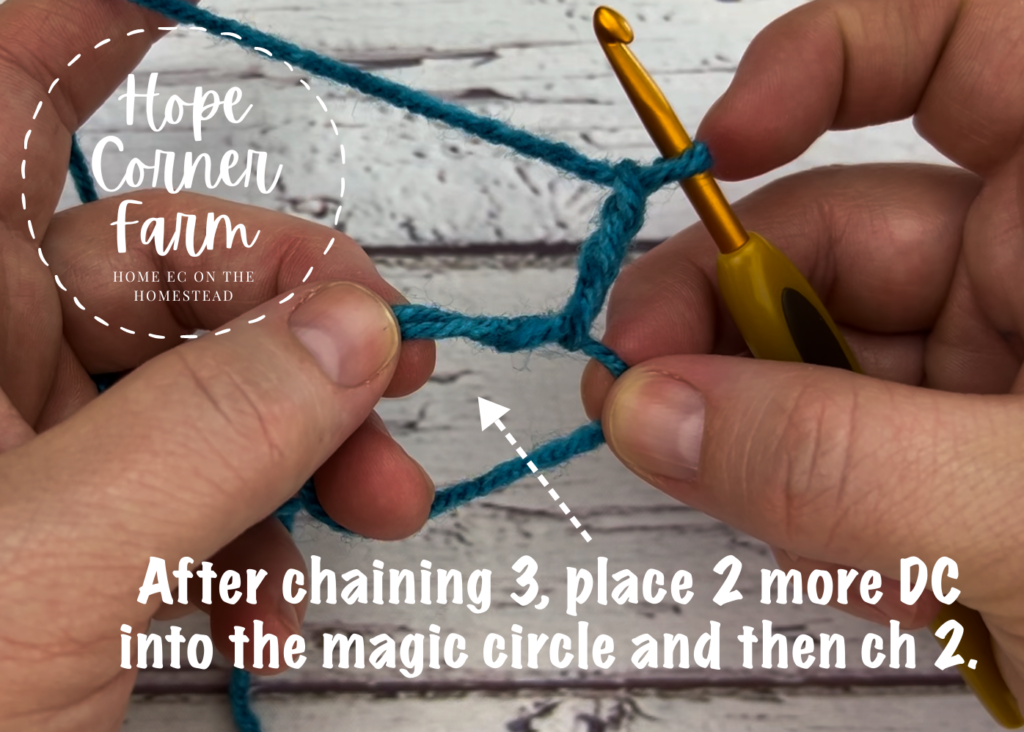
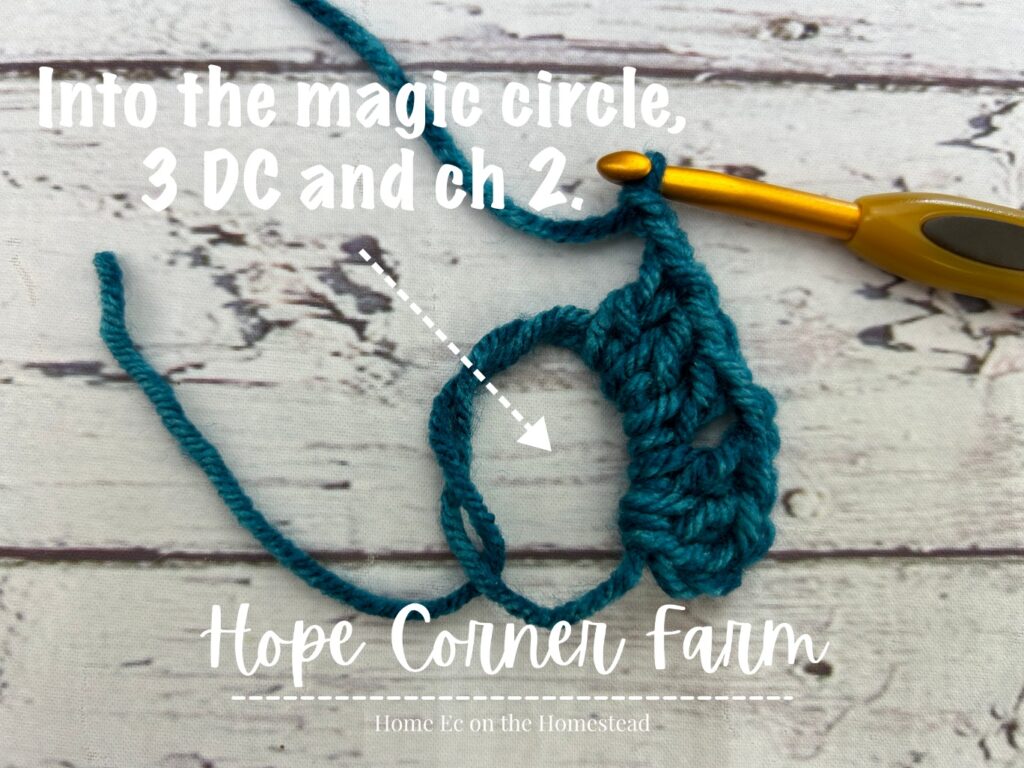
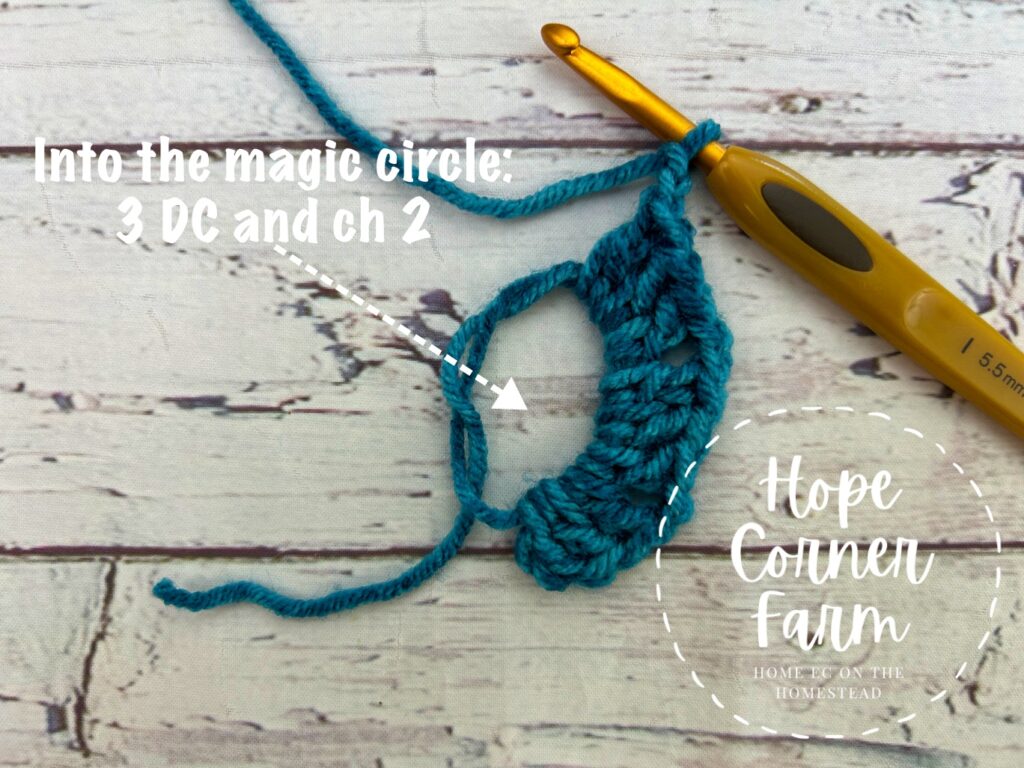
Now, into the magic circle, place 3 DC and chain 2.
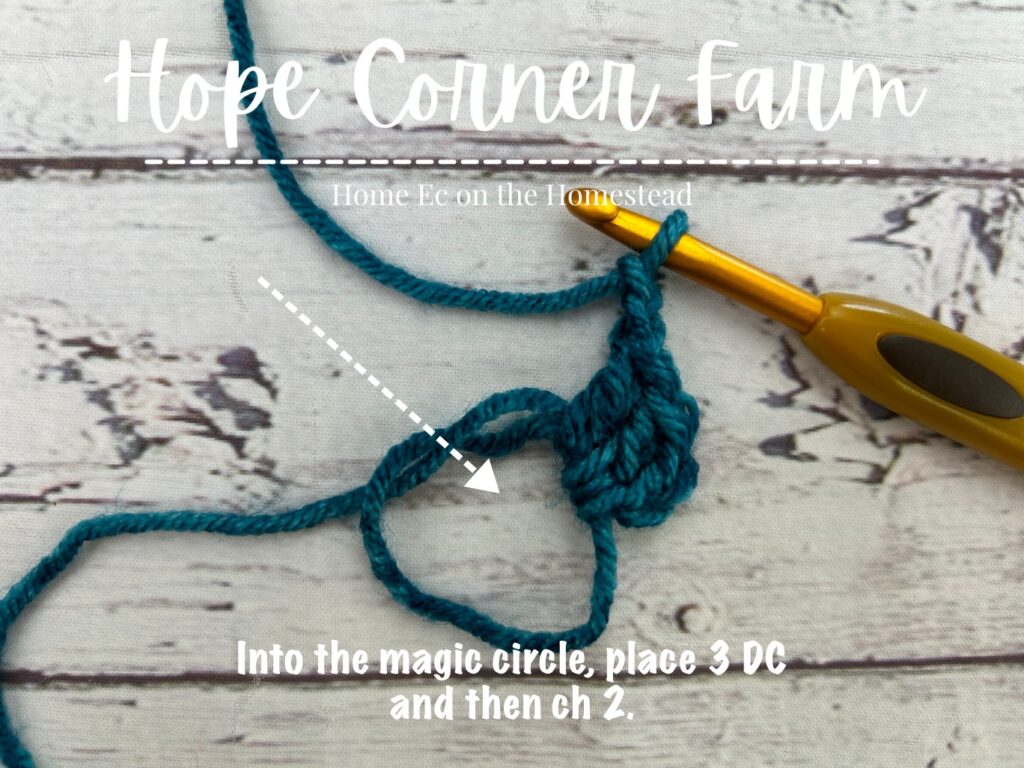
Next, into the Magic Circle, place 3 DC and chain 2.
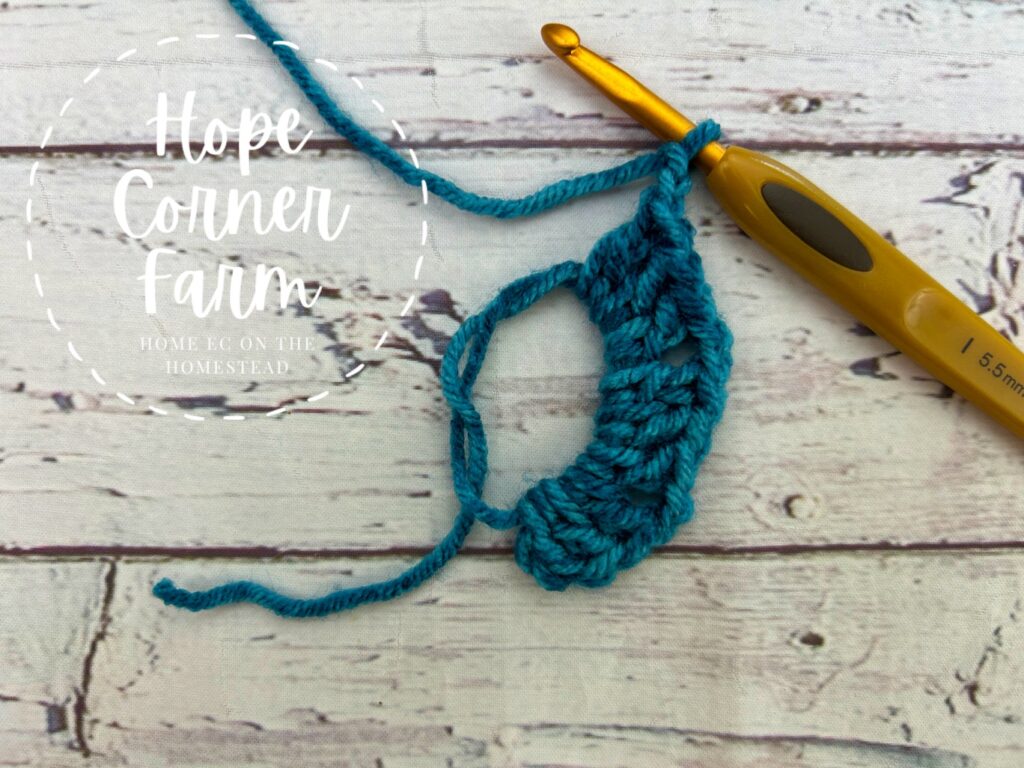
Again, into the Magic Circle place 3DC and chain 2.
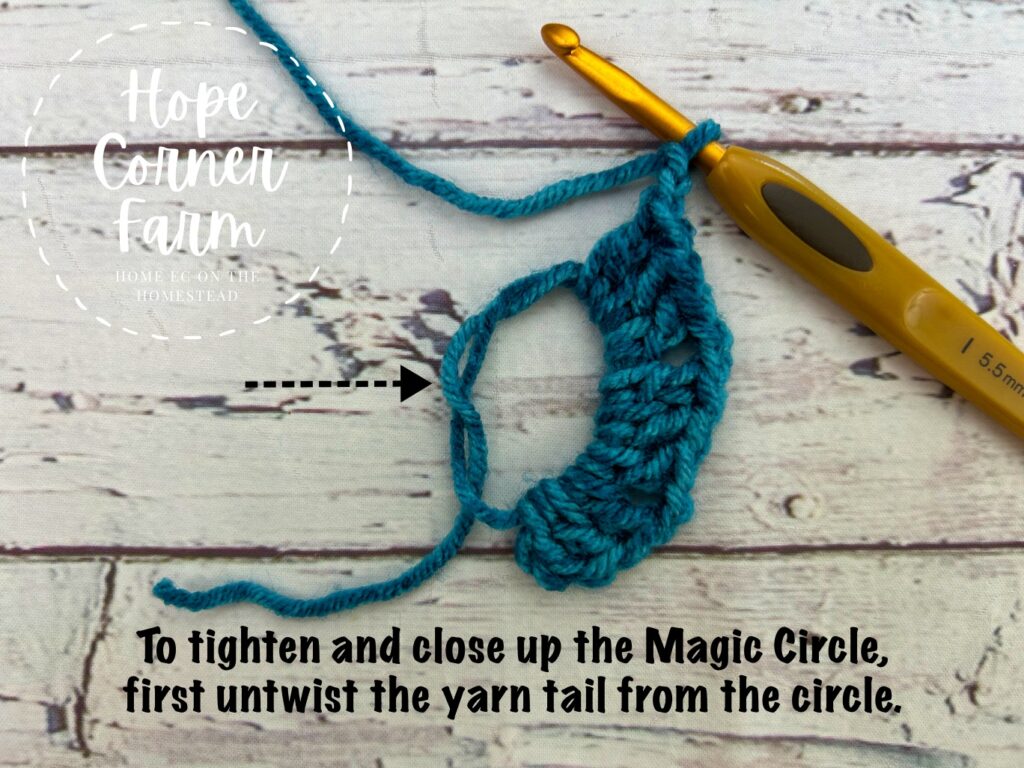
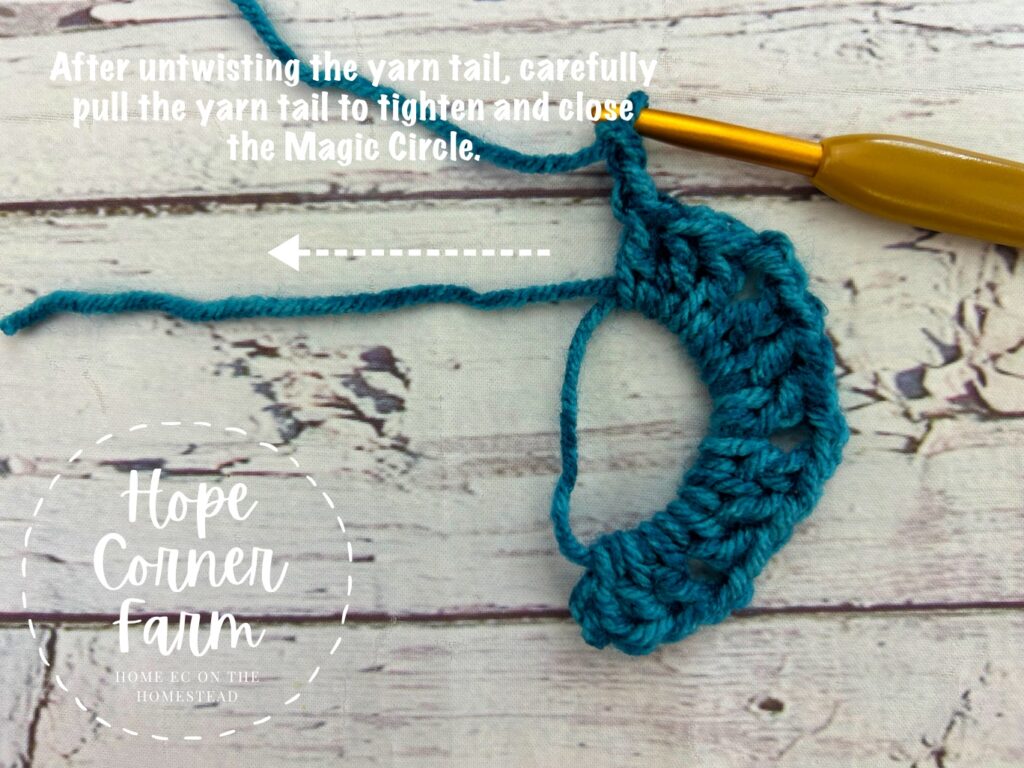
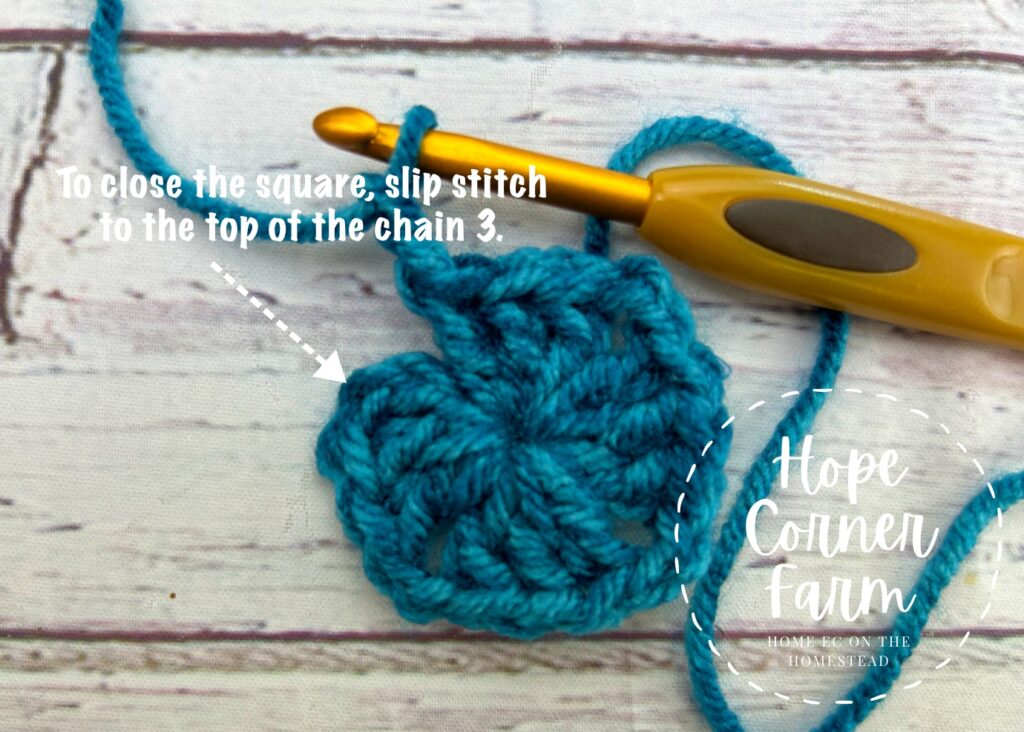
Now we are ready to close the Magic Circle. (NOTE: If you chose the ch 4, join with a slip stitch to the first stitch option to start the Granny Square move to the next paragraph!) To close the circle, first unwind the yarn tail from the circle, then pull on the yarn tail to close the circle.
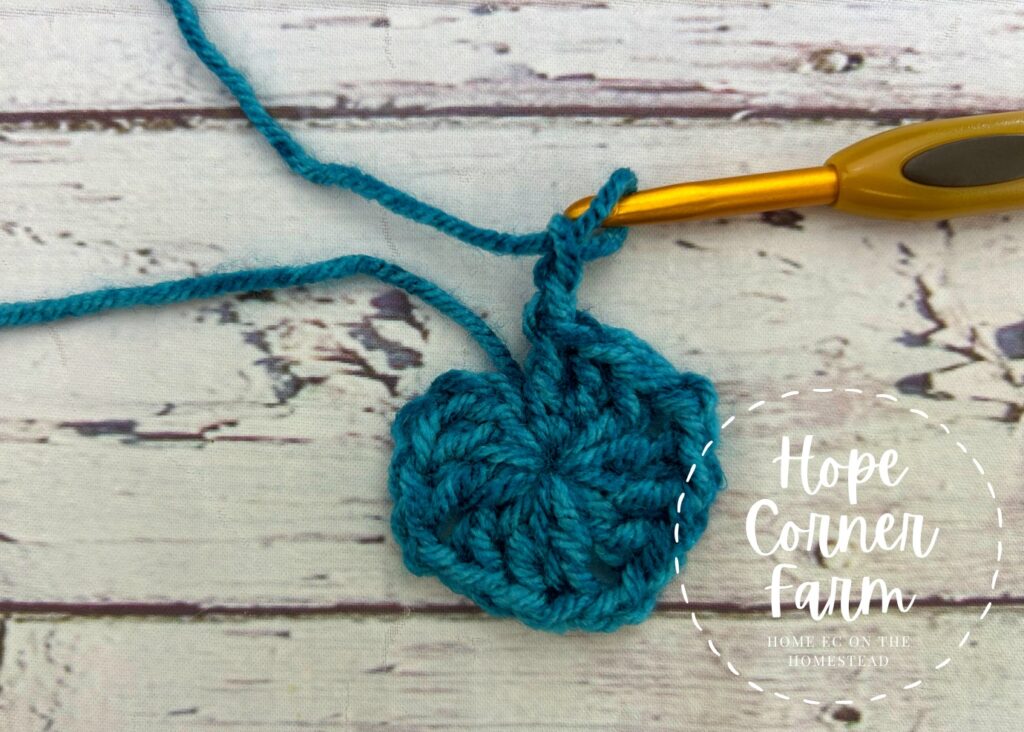
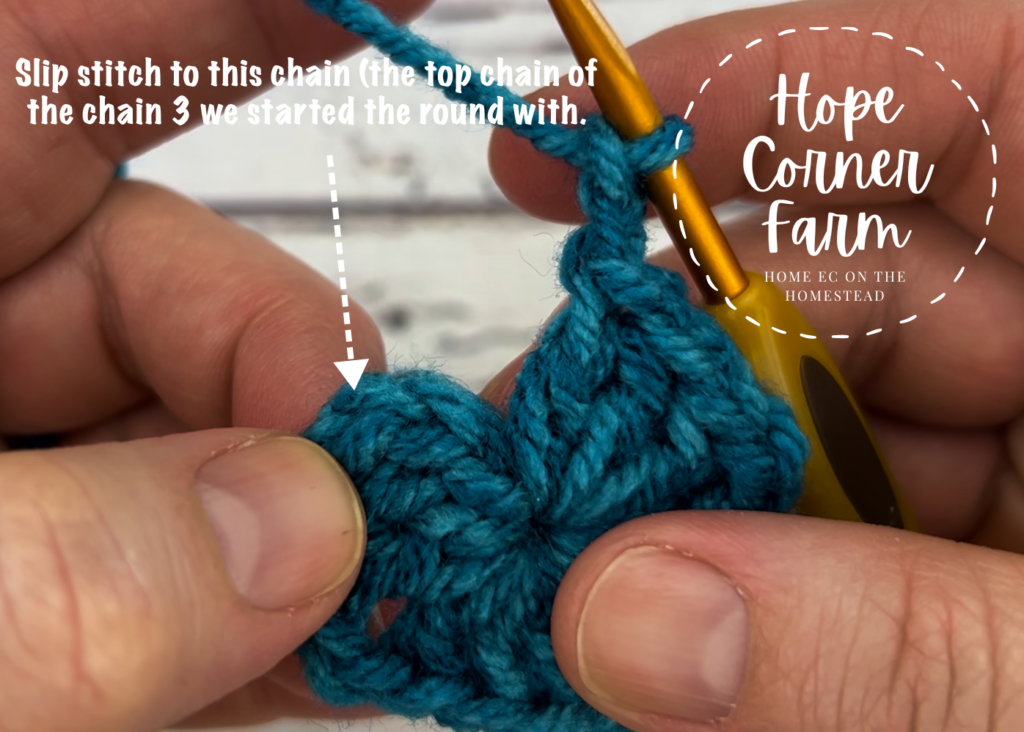
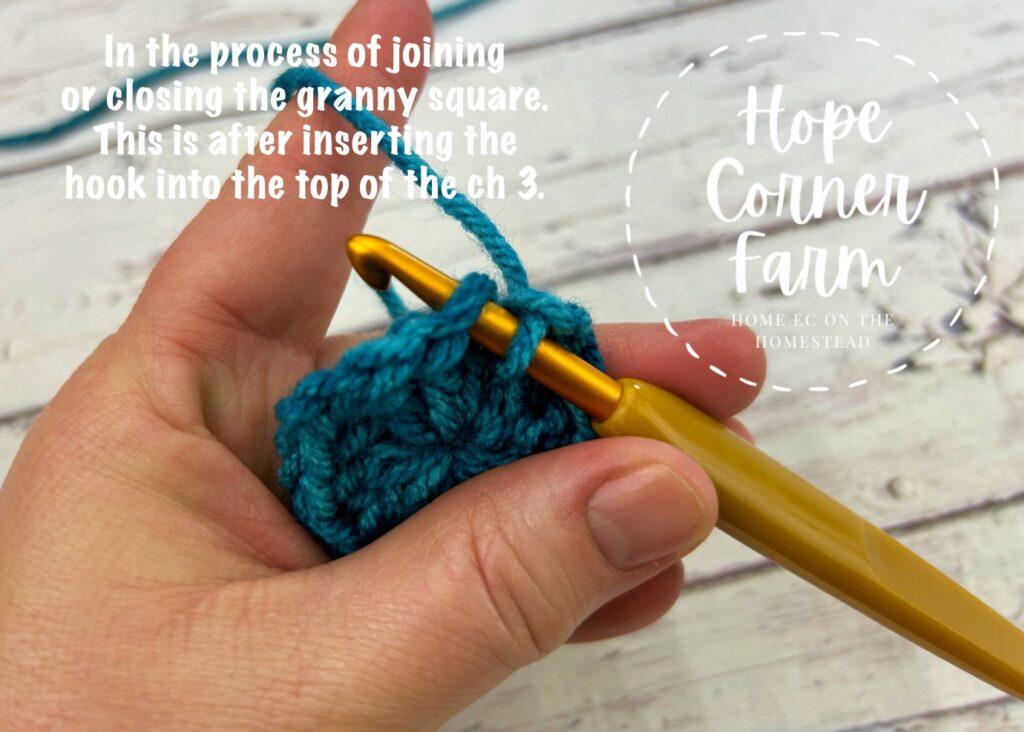
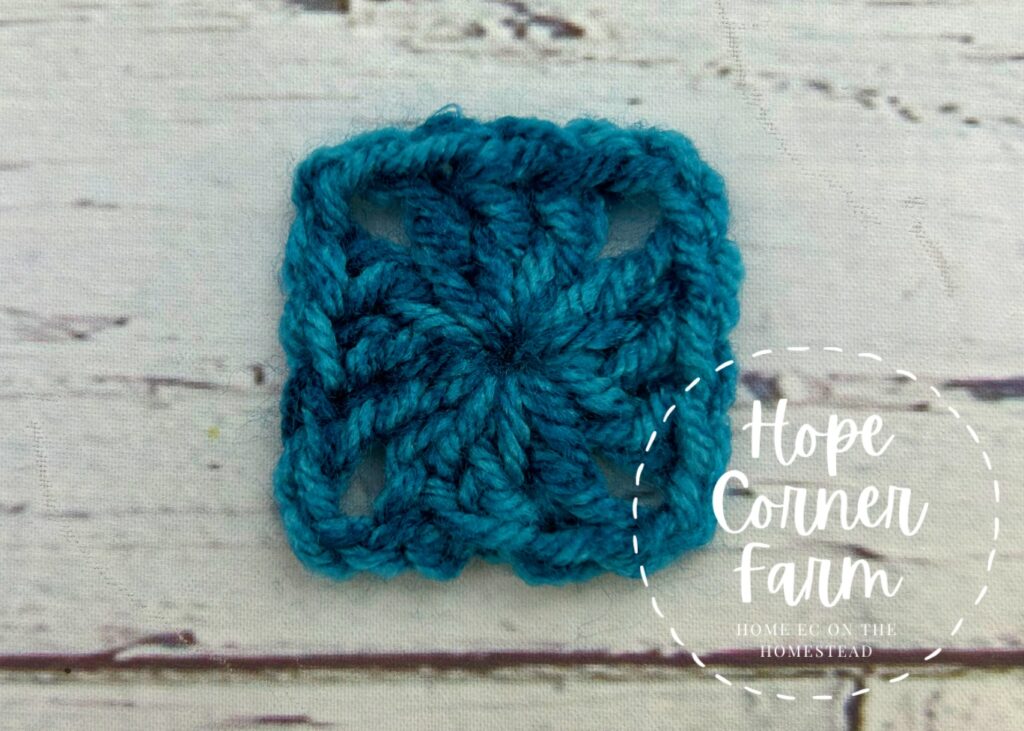
Finally, close the round by joining with a slip stitch to the top of the very first chain 3.
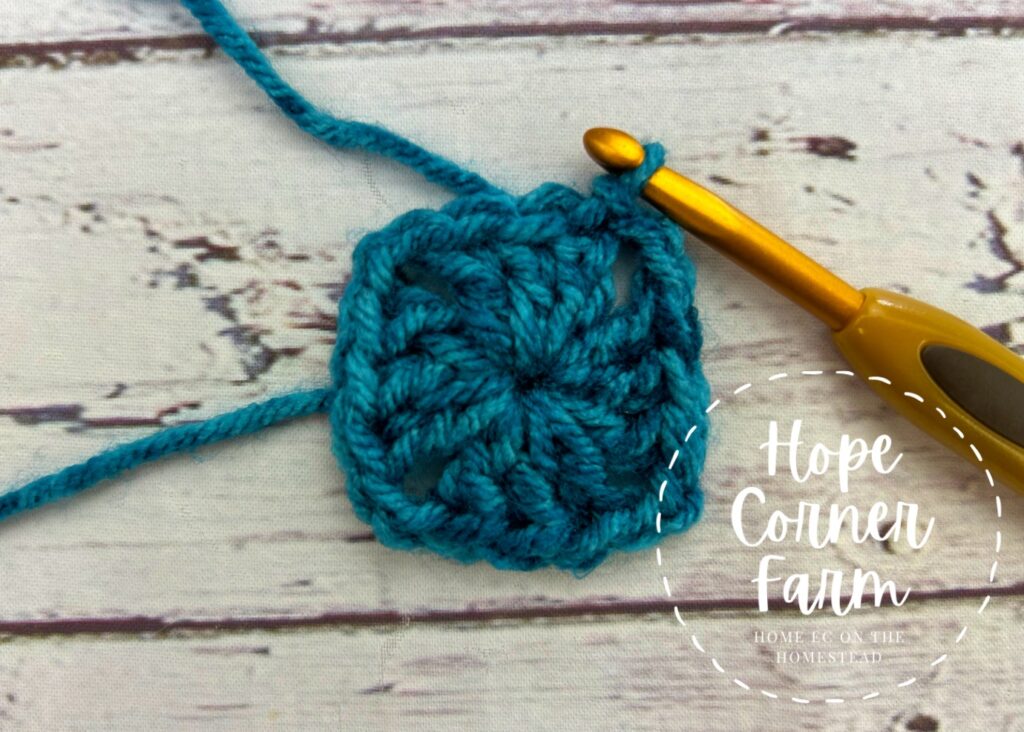
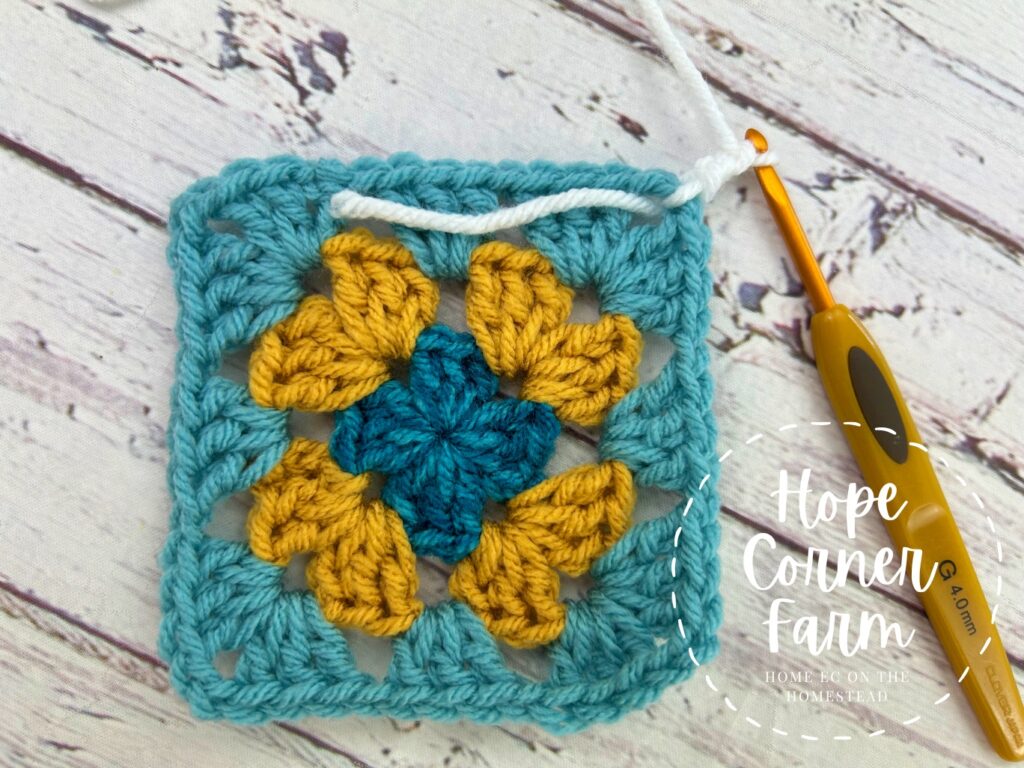
Now, cut the Granny Square free from the yarn skein. Fasten off and weave in the ends.
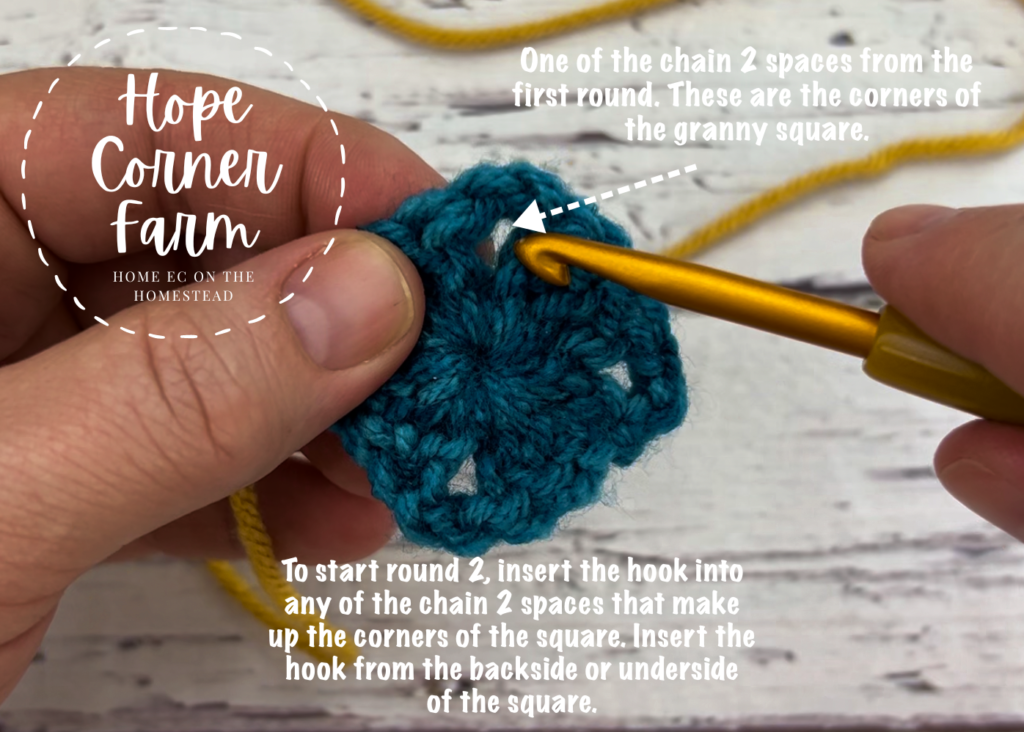
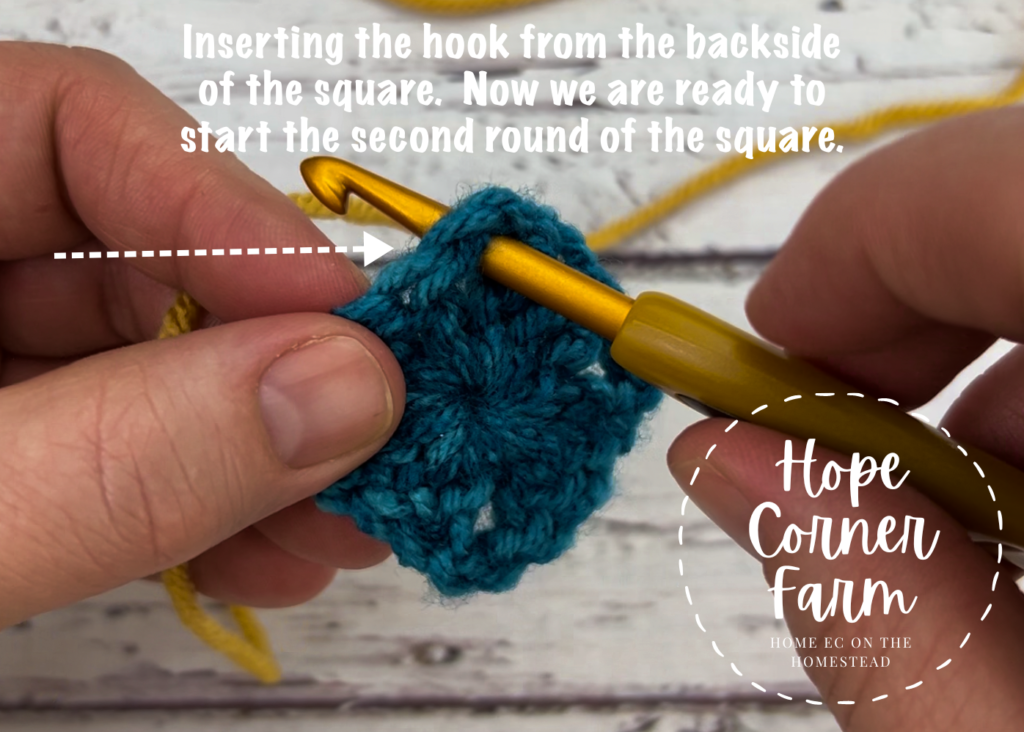
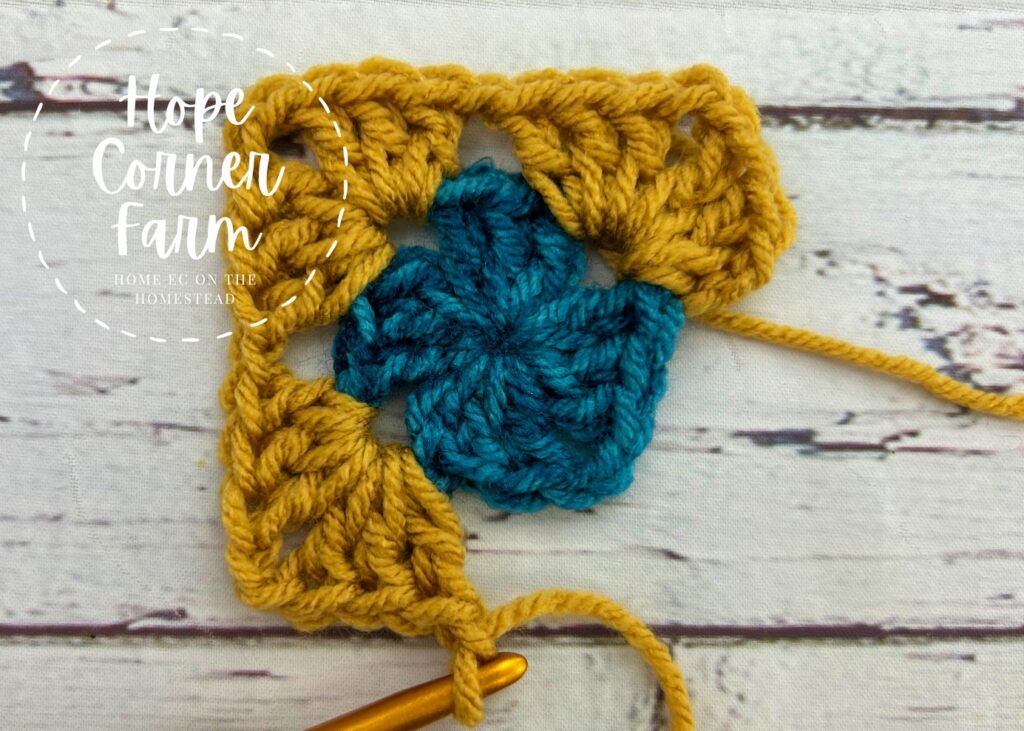
Round 2:
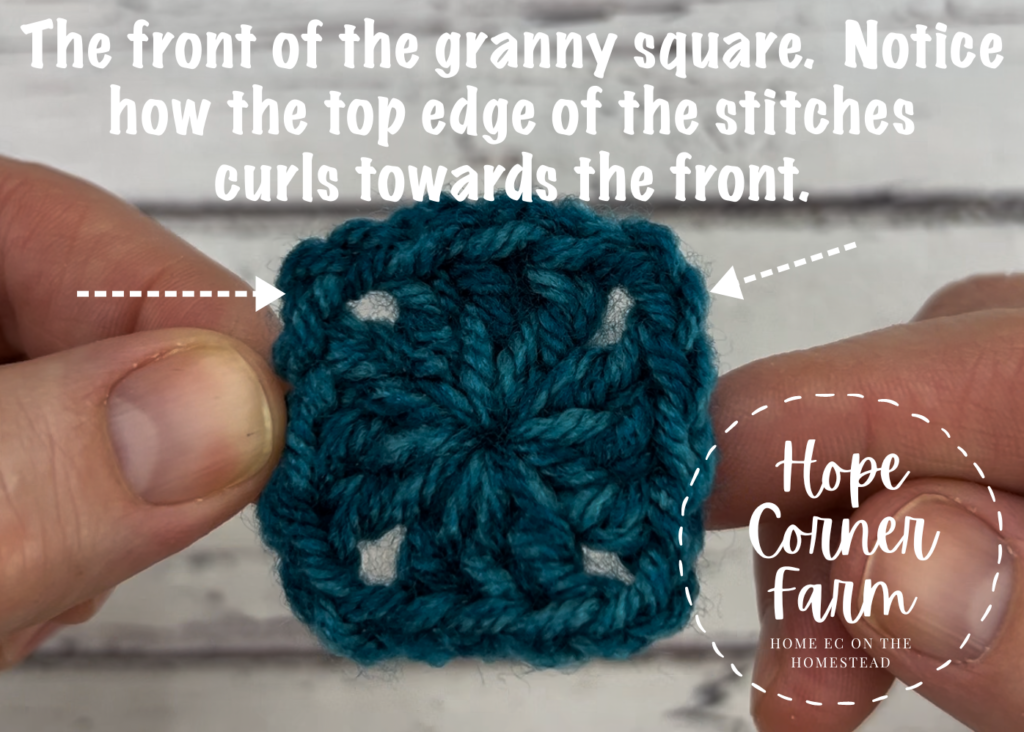
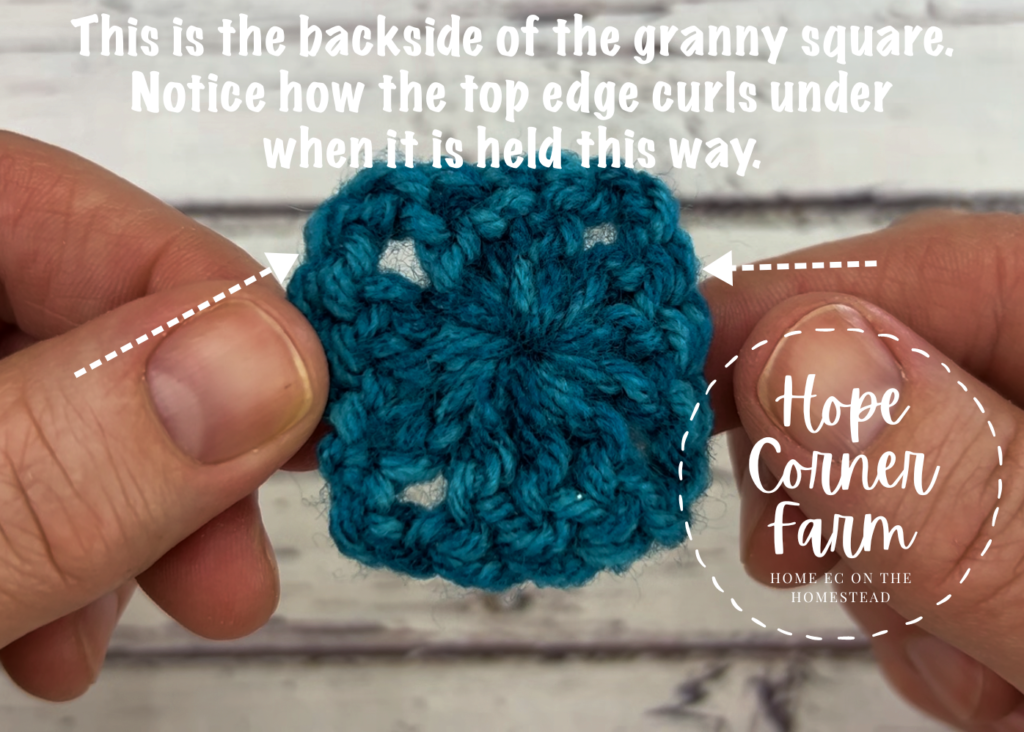
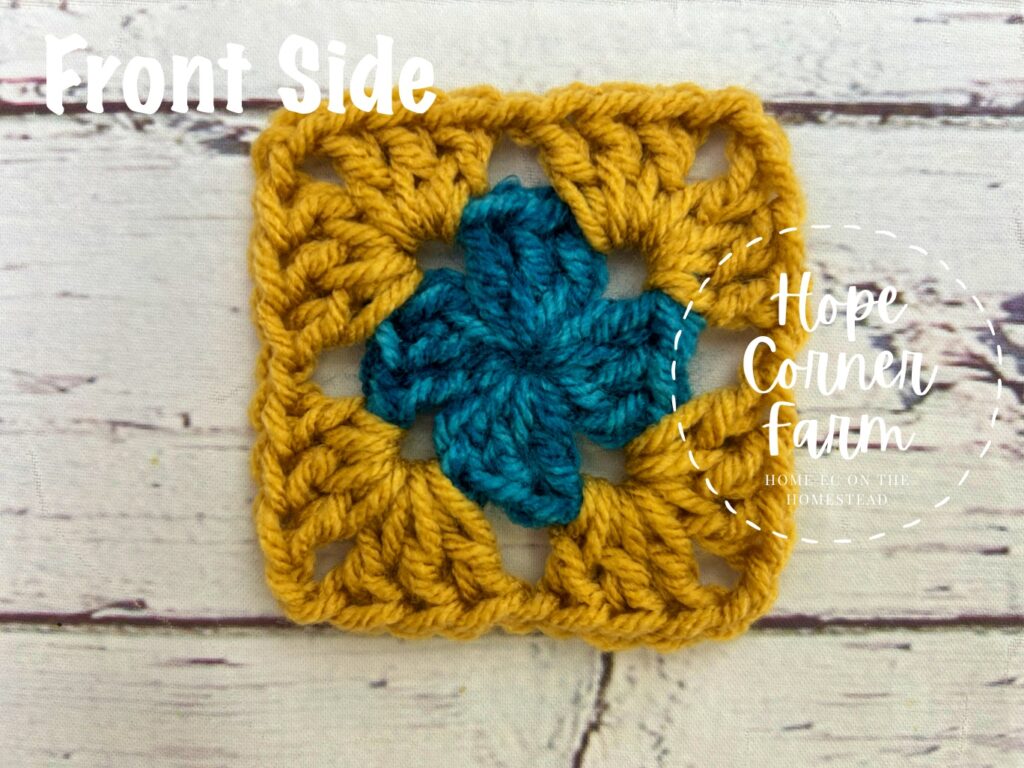
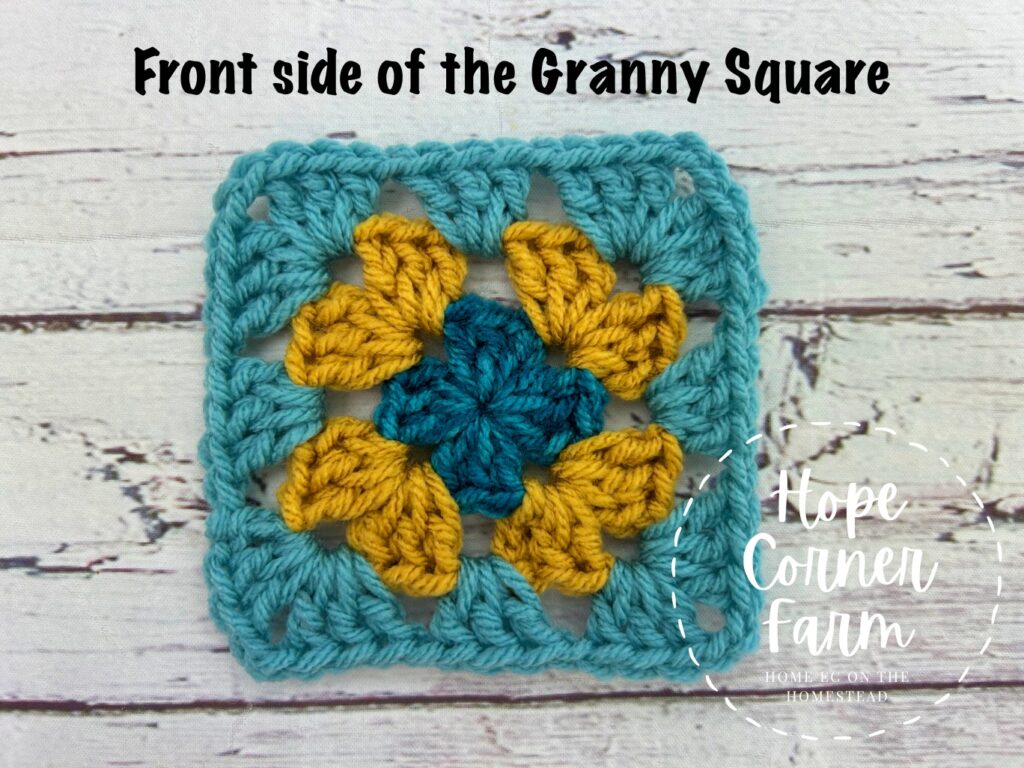
This round will be started on the backside of the previous round. It will eventually turn to the front side. See pictures below to identify the front and the back sides of the previous round.
Here is how the stitches will be worked for Round 2.
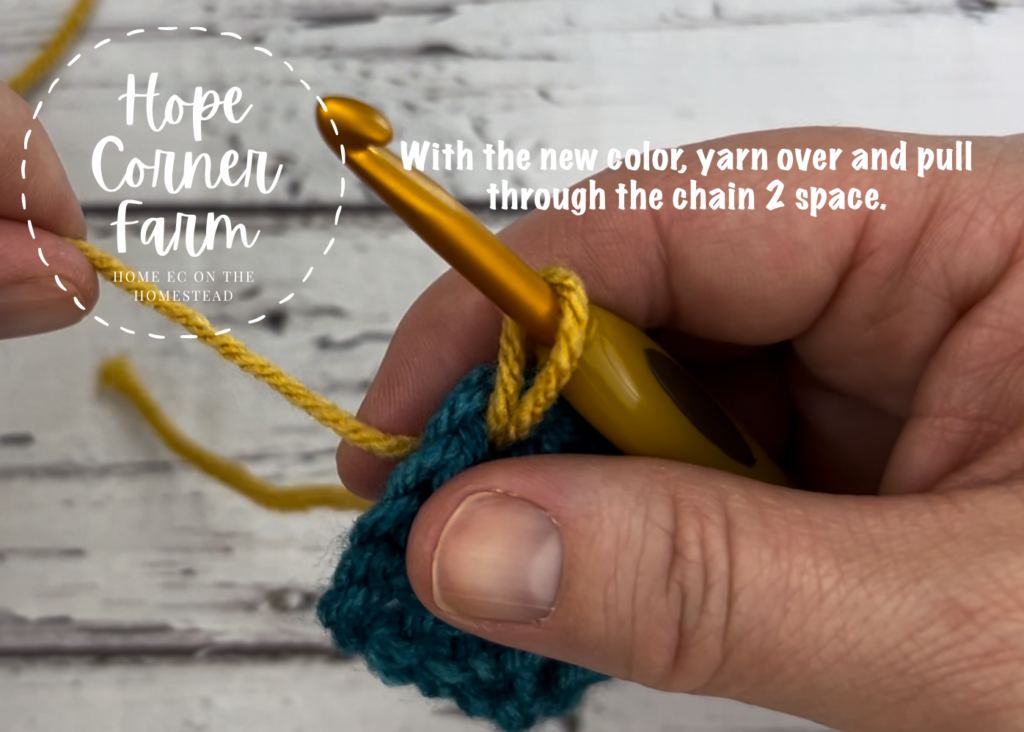
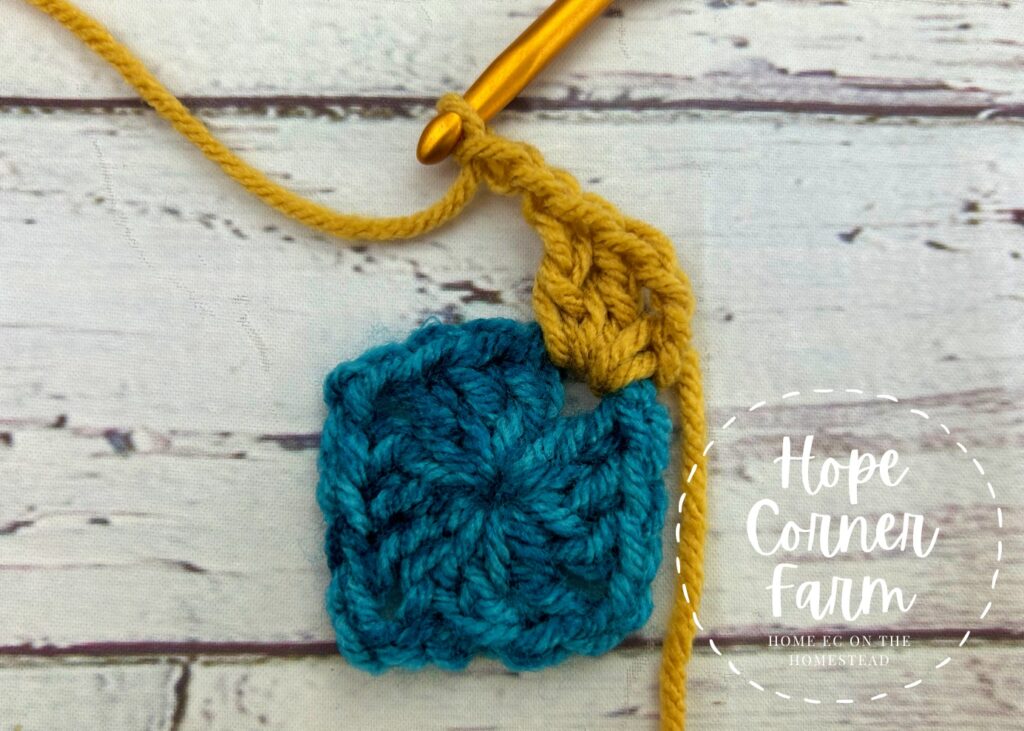
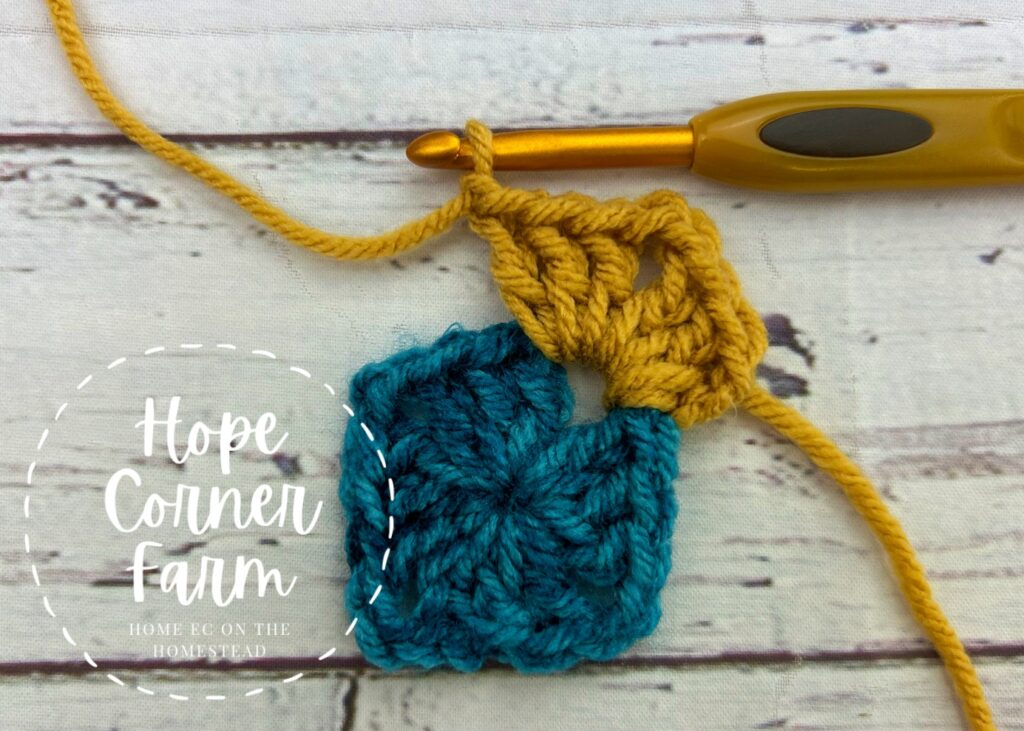
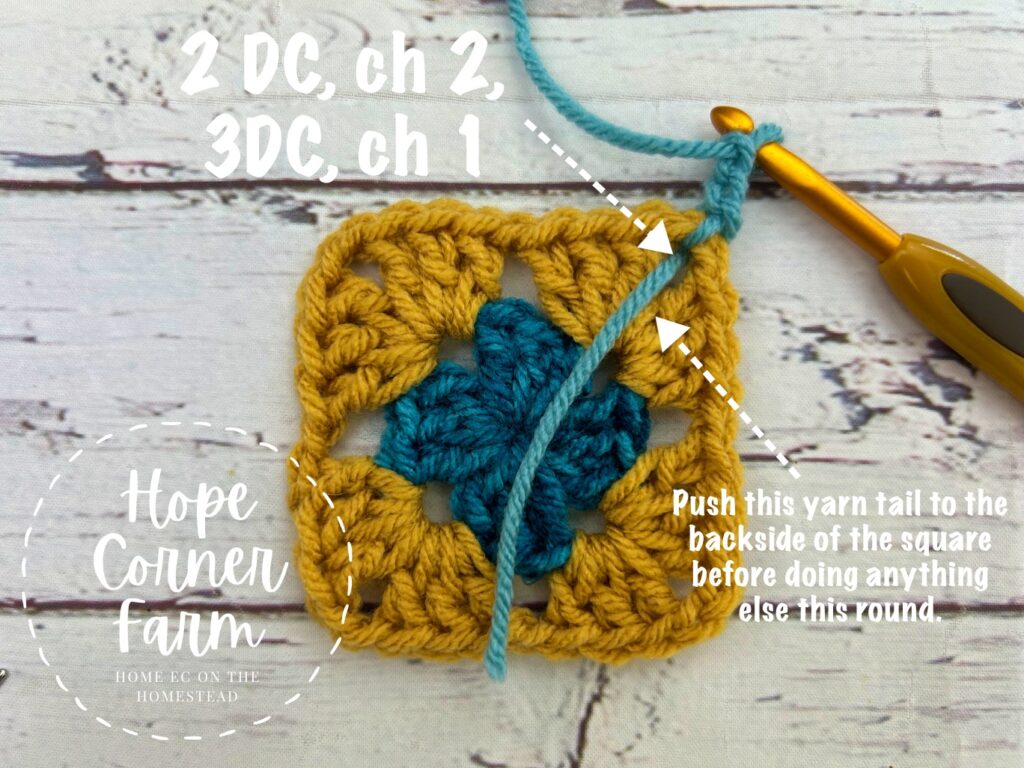
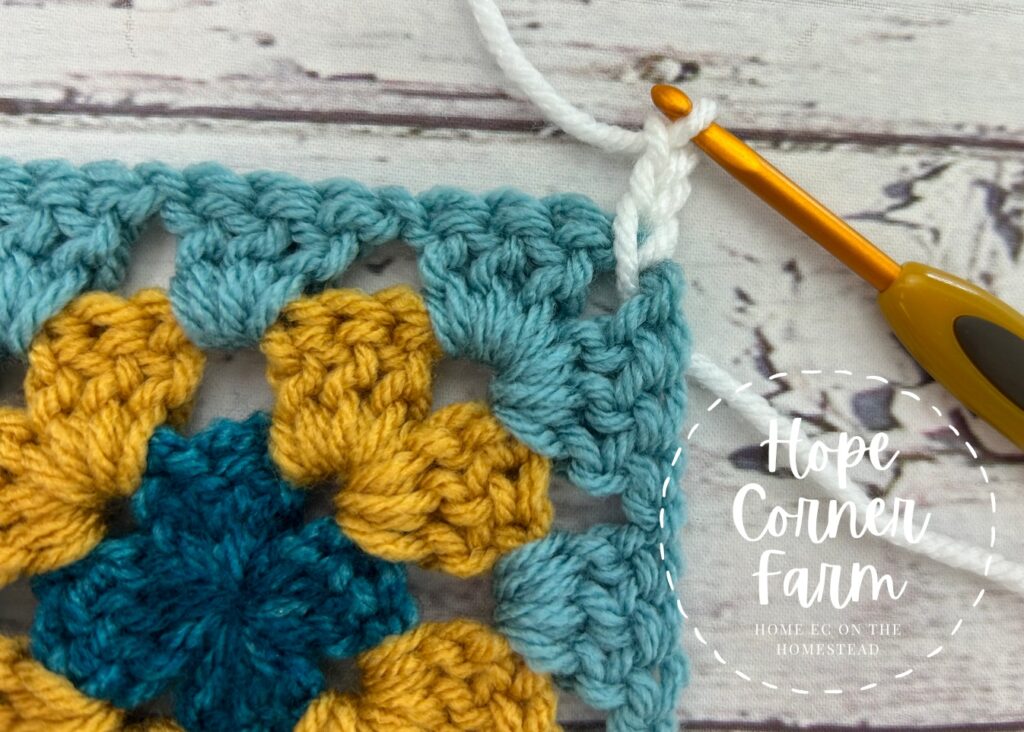
Insert the hook into any of the chain 2 spaces from the backside. With Color #2 (gold in my square), YO.
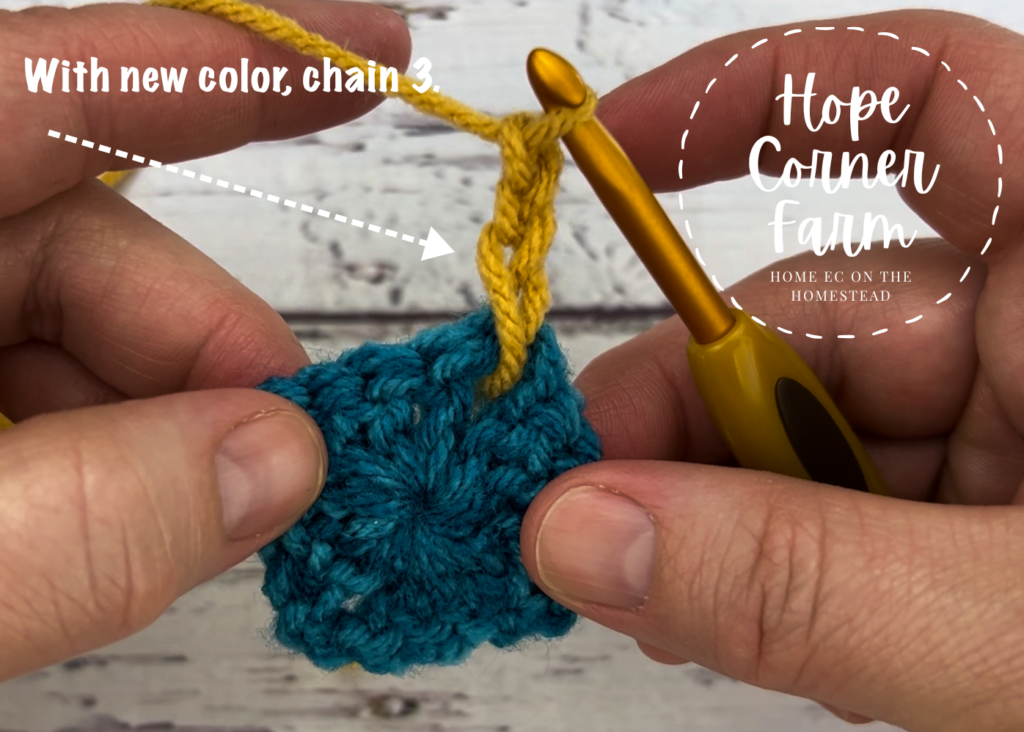
Chain 3 and then turn.
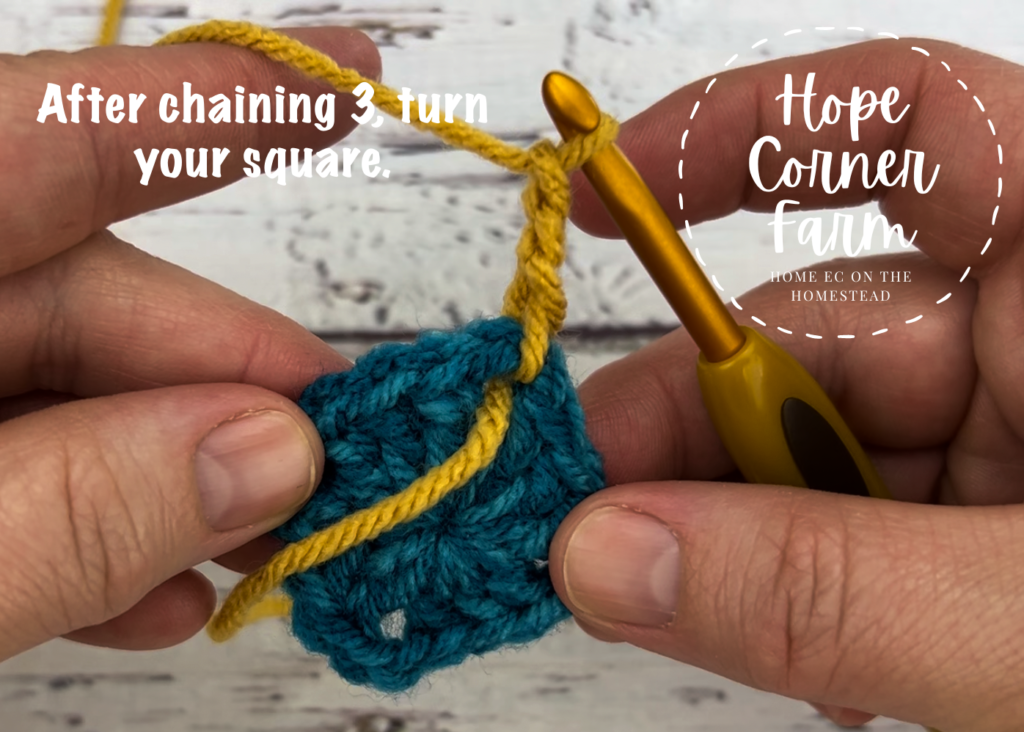
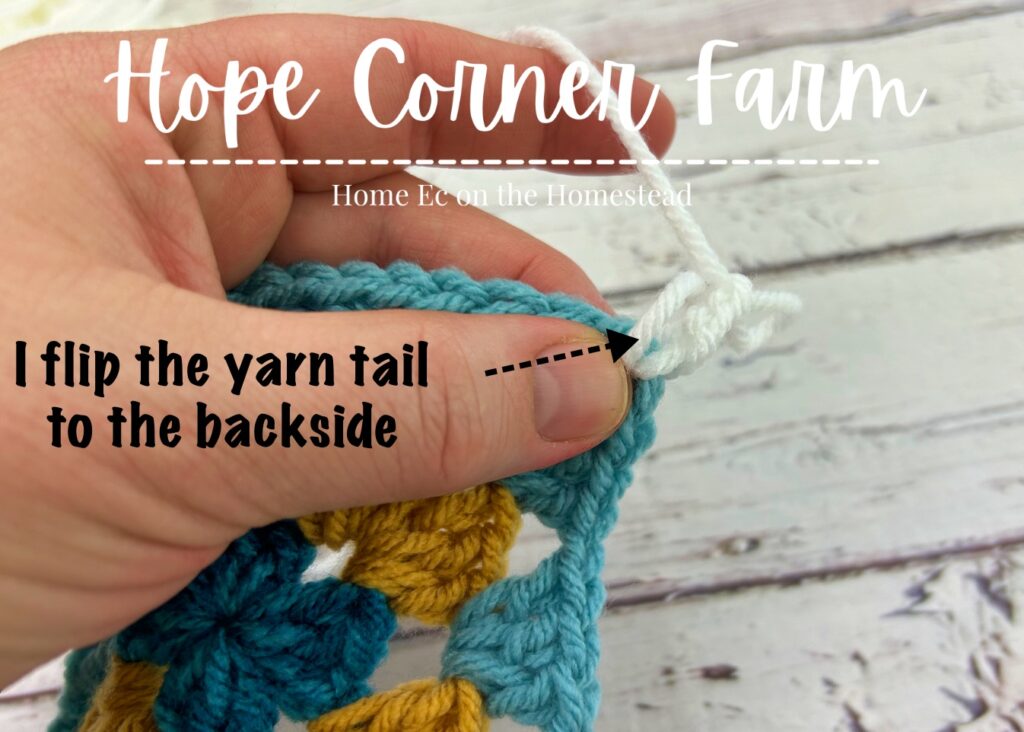
I like to push the yarn tail to the backside of the square before doing anything else.
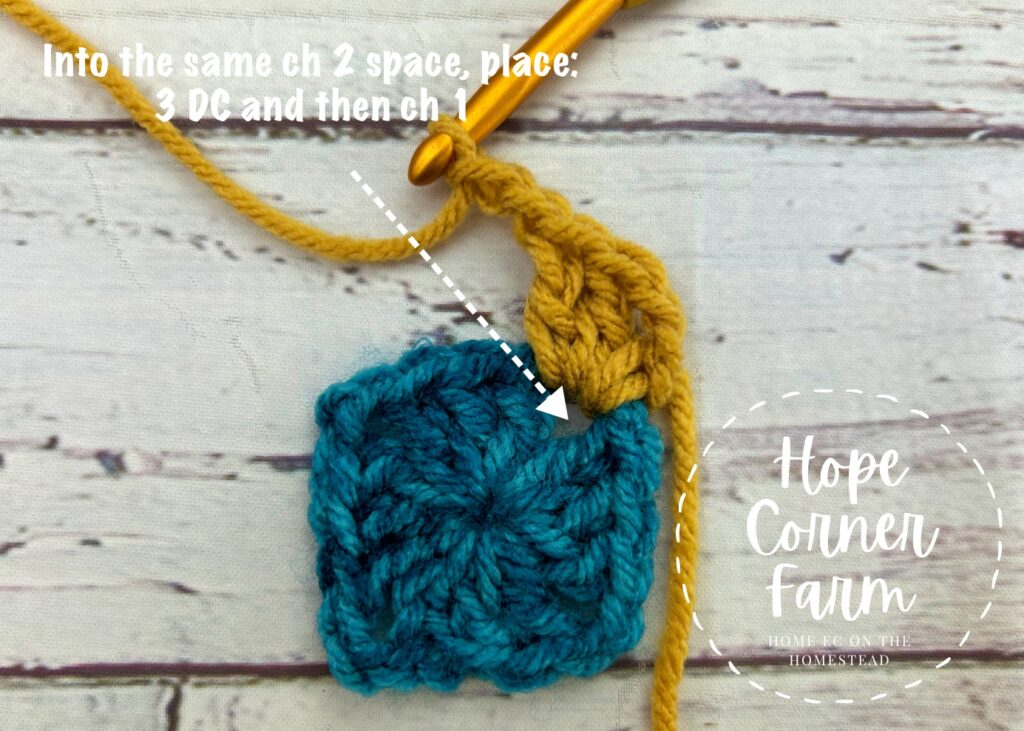
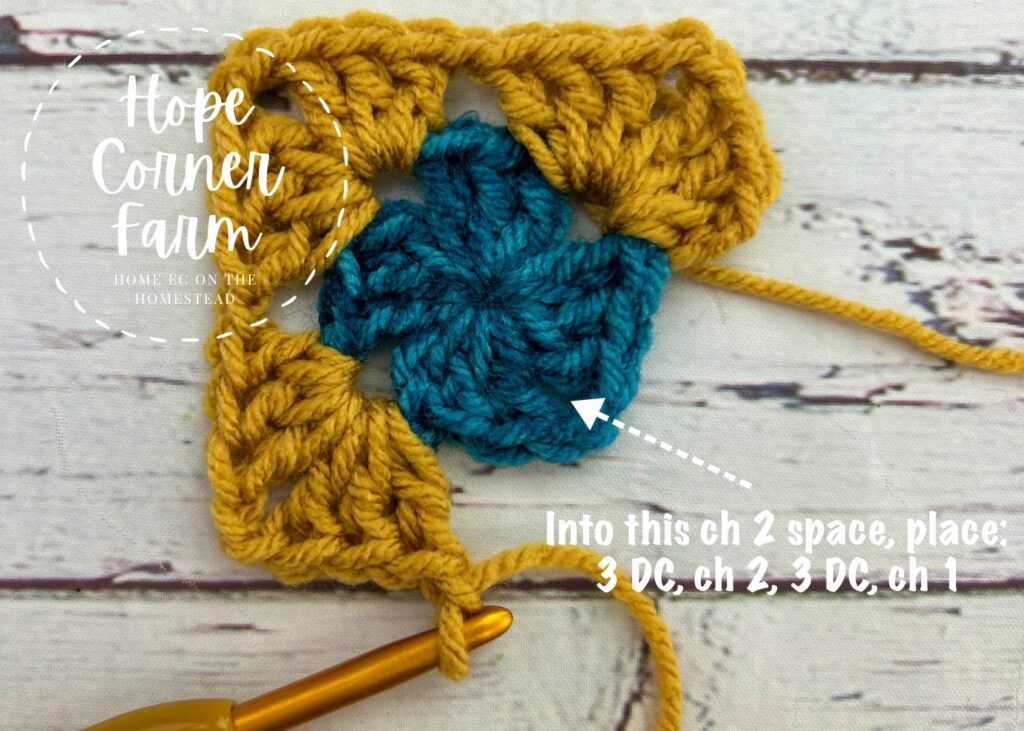
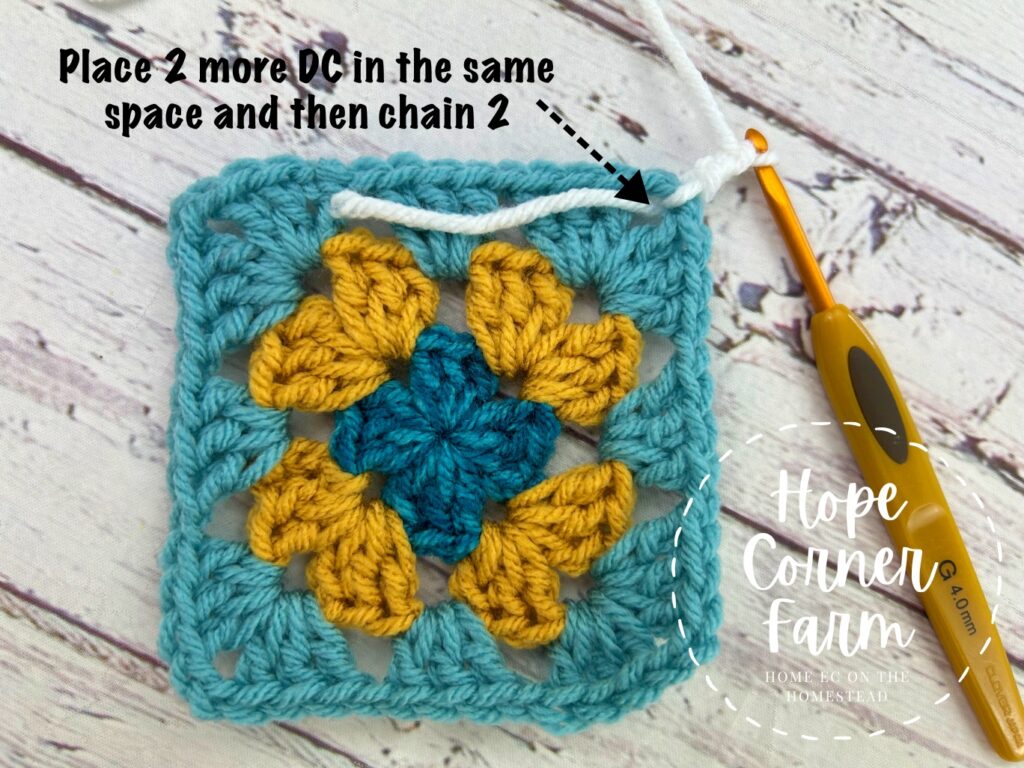
Into the same chain 2 space, place 2DC and then ch 2.
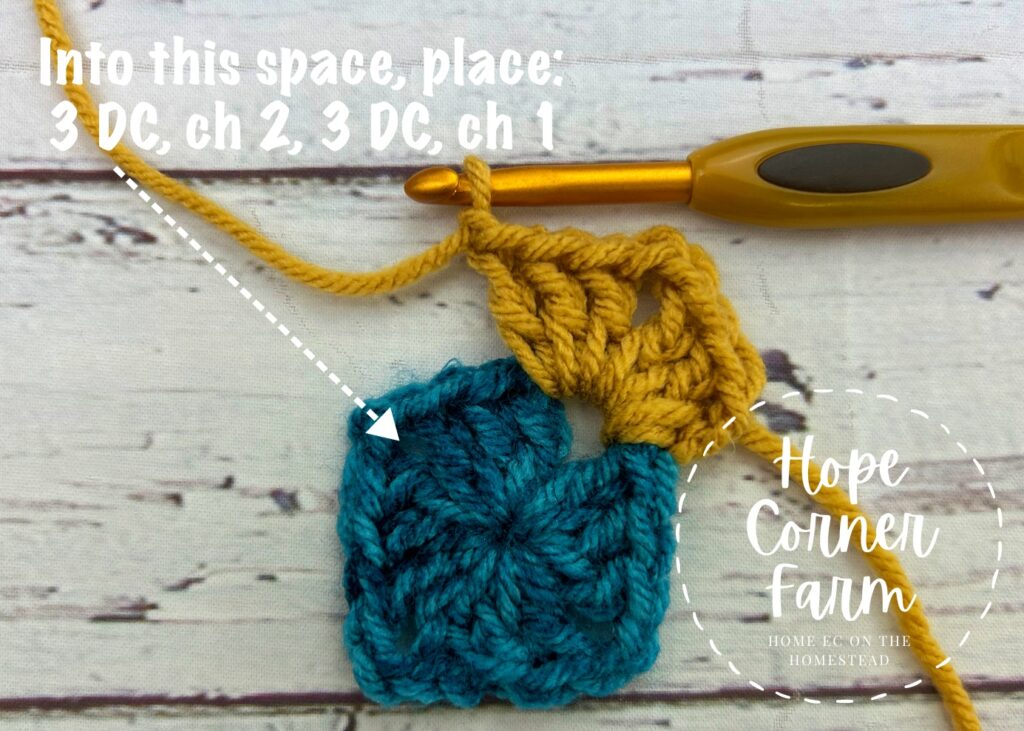
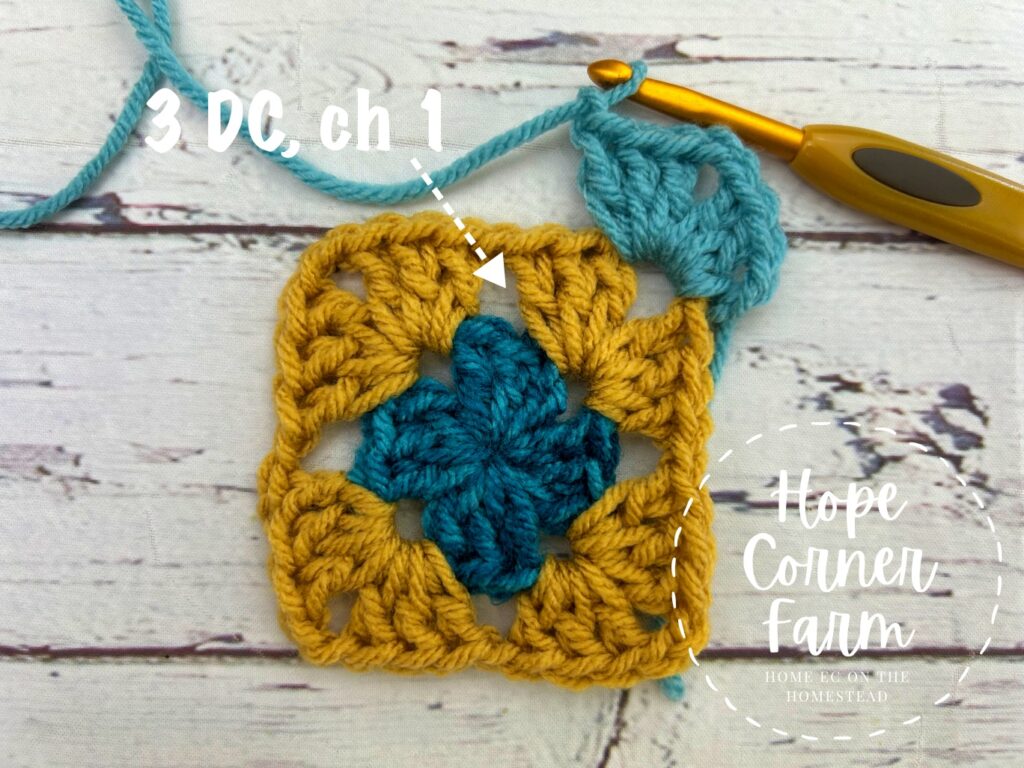
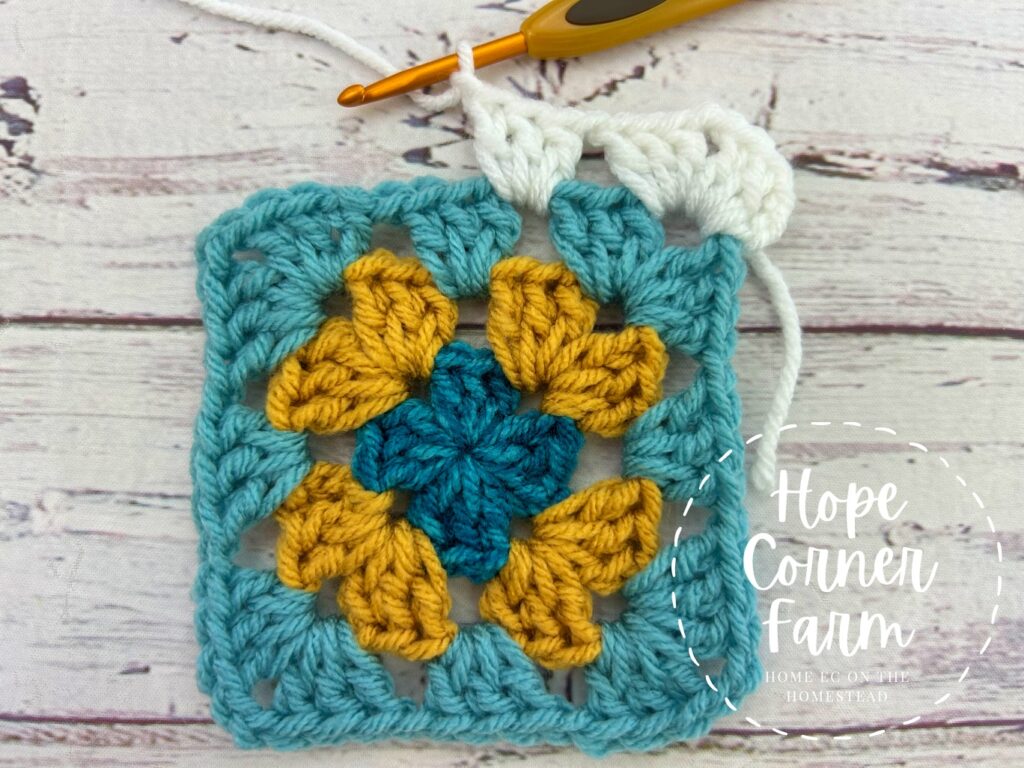
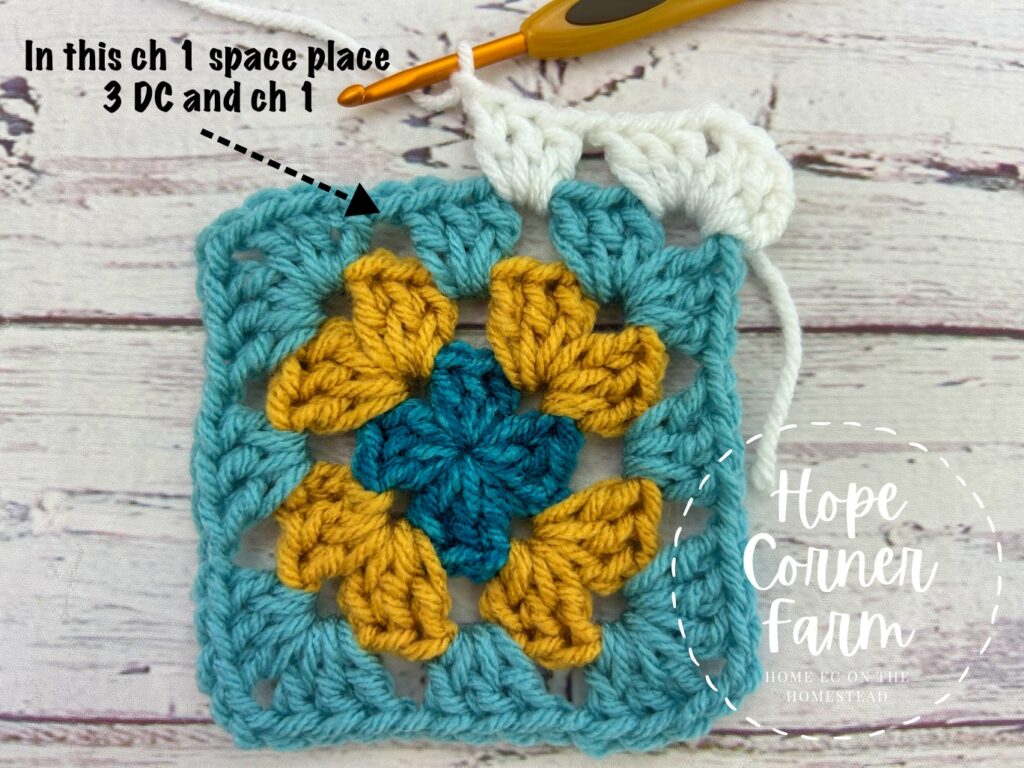
Next, into the same chain 2 space, work 3DC and then ch 1.
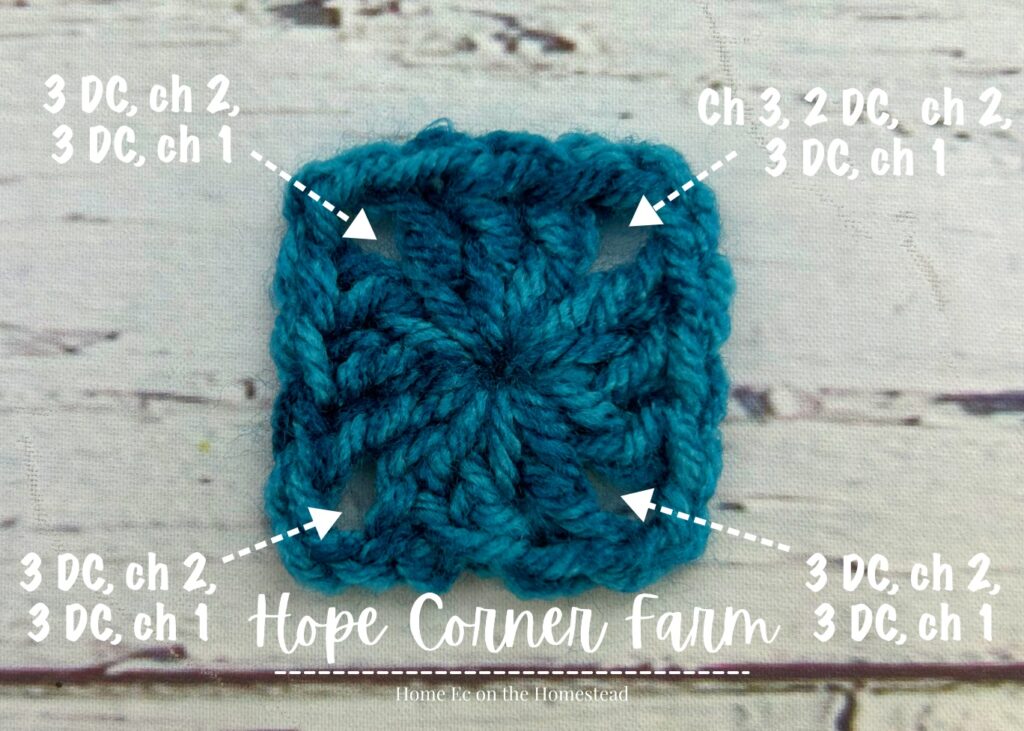
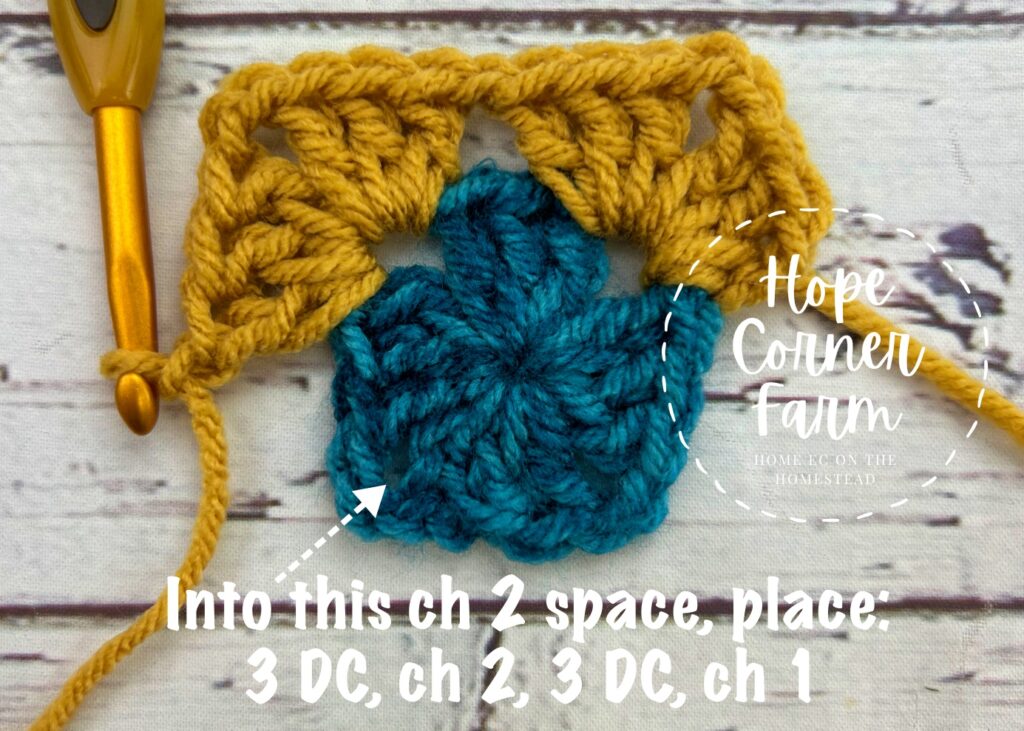
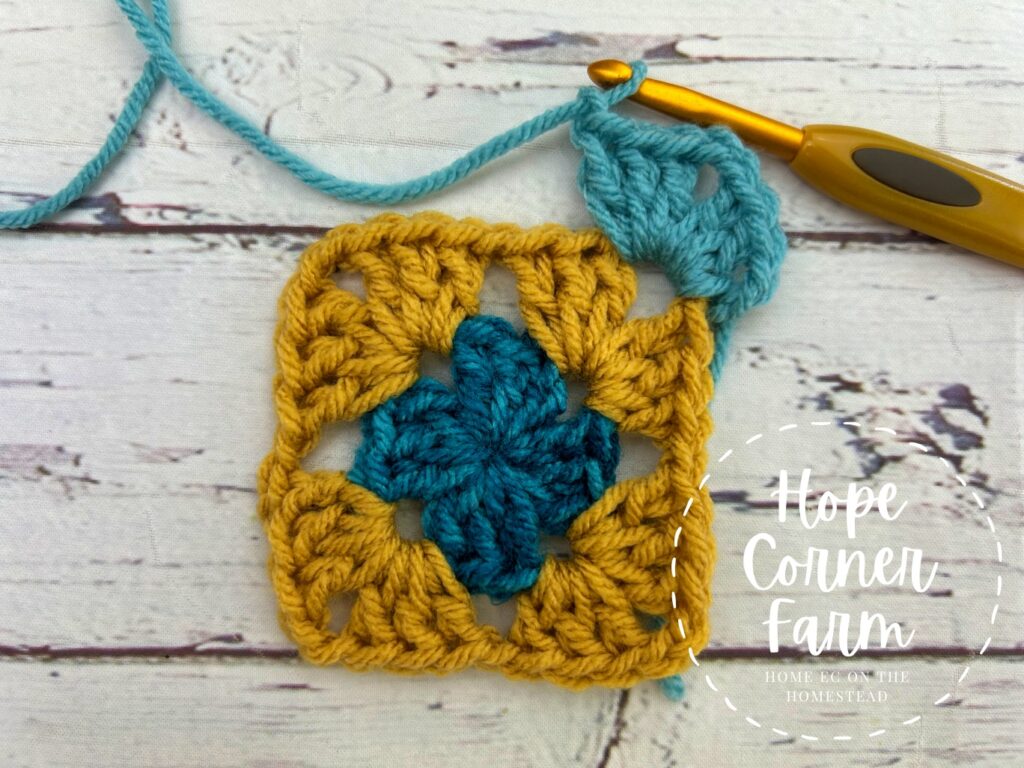
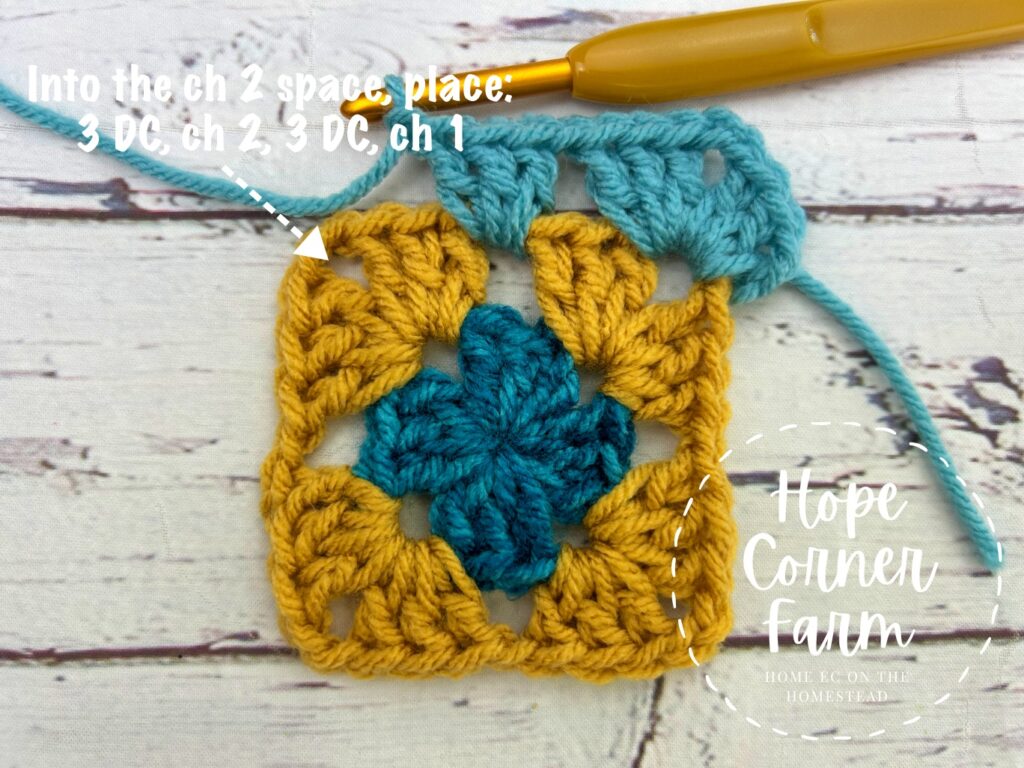
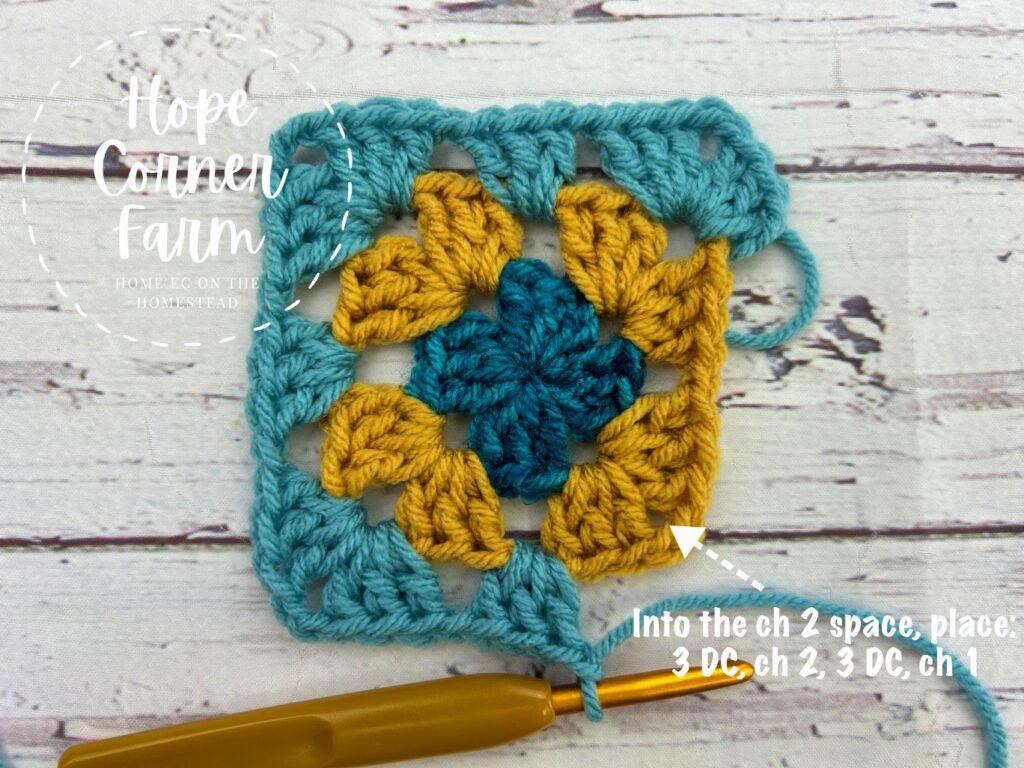
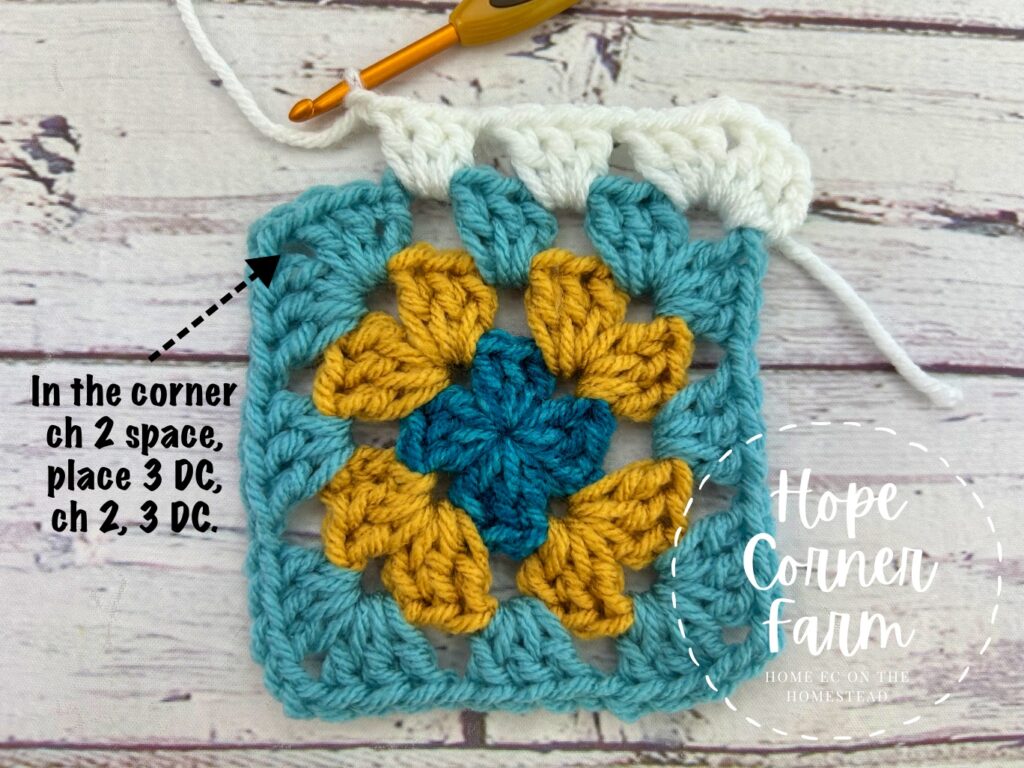
Into the next chain 2 space (from the previous round), place 3DC, ch 2, 3DC, ch 1.
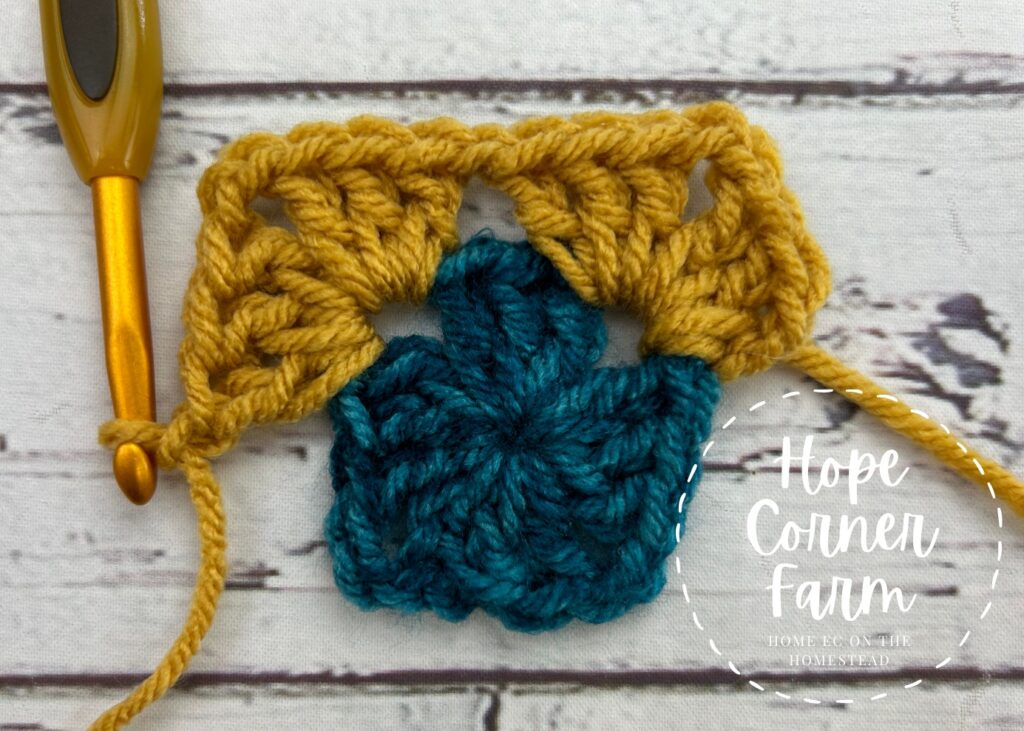
Now move to the next chain 2 space (from the previous round). Place 3 DC, ch 2, 3DC, ch 1.
This is worked into the final chain 2 space from the previous round. Into this ch 2 space work: 3 DC, ch 2, 3DC, ch 1.
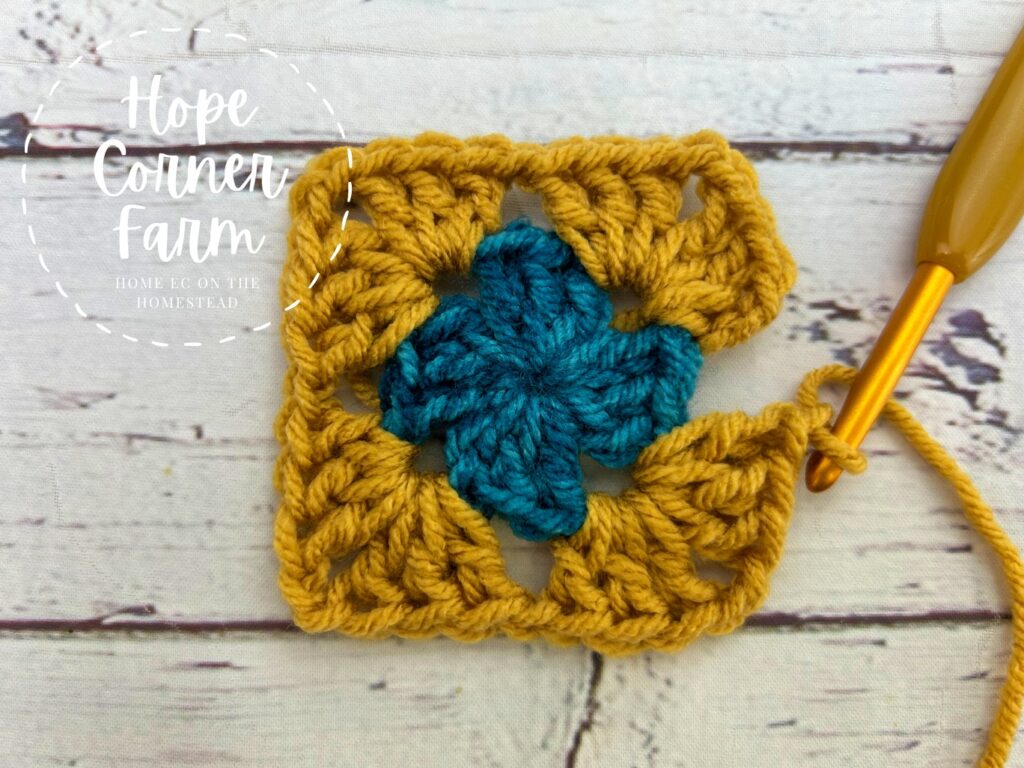
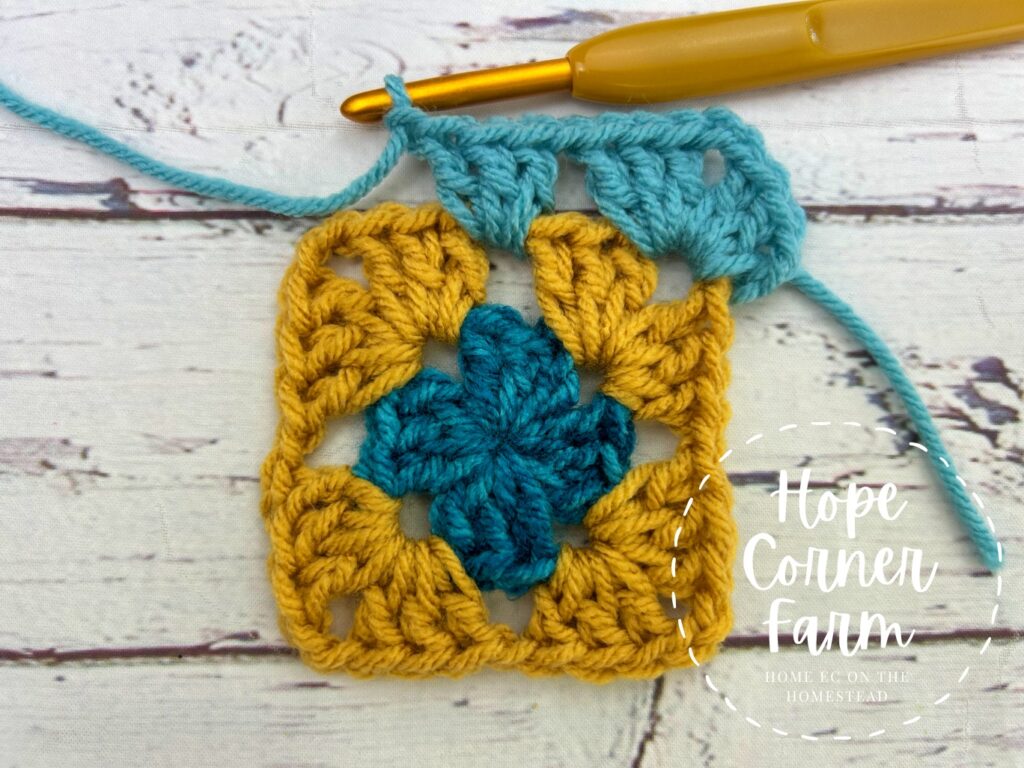
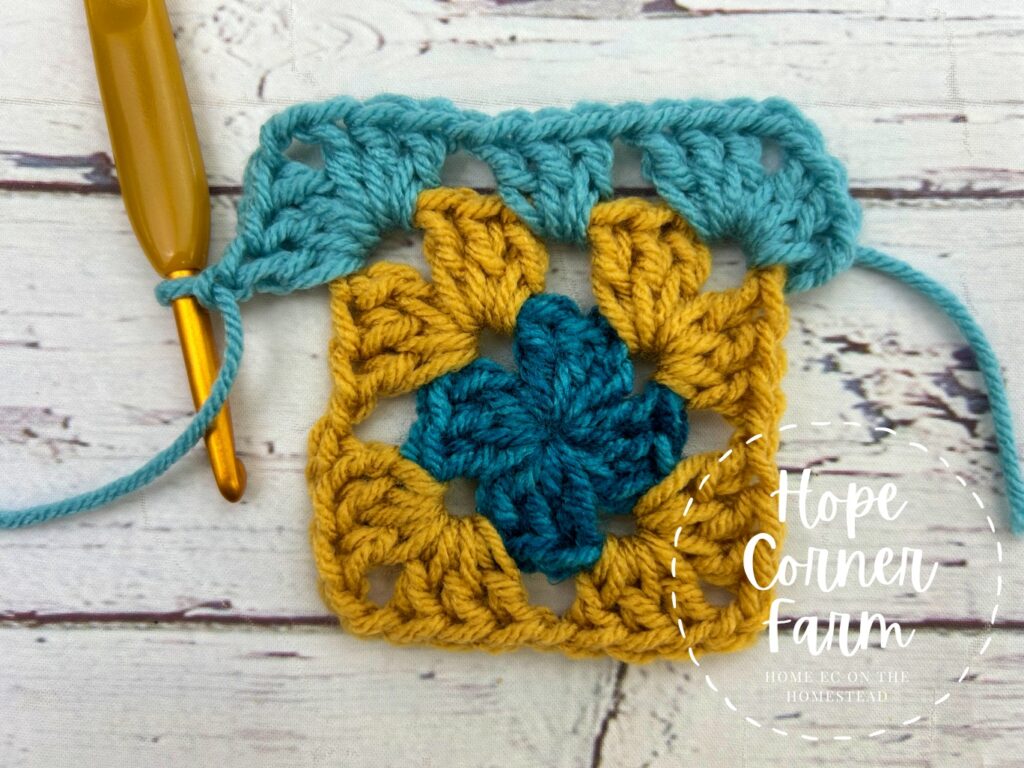
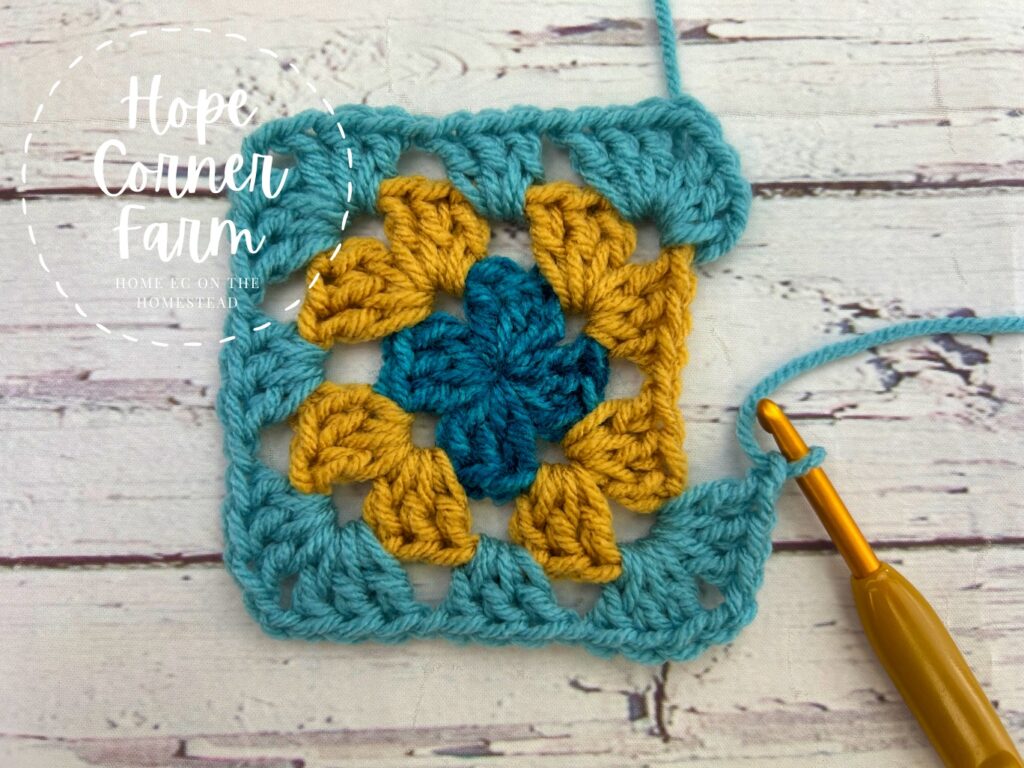
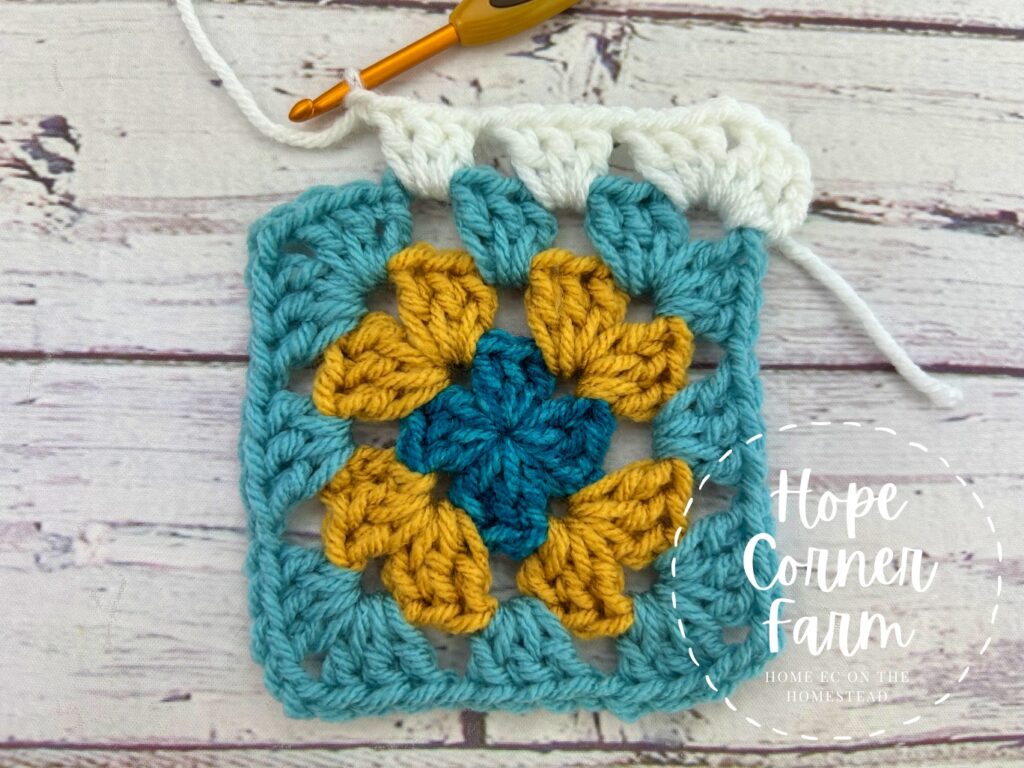
Join with a slip stitch to the top of the chain 3 to finish the round.
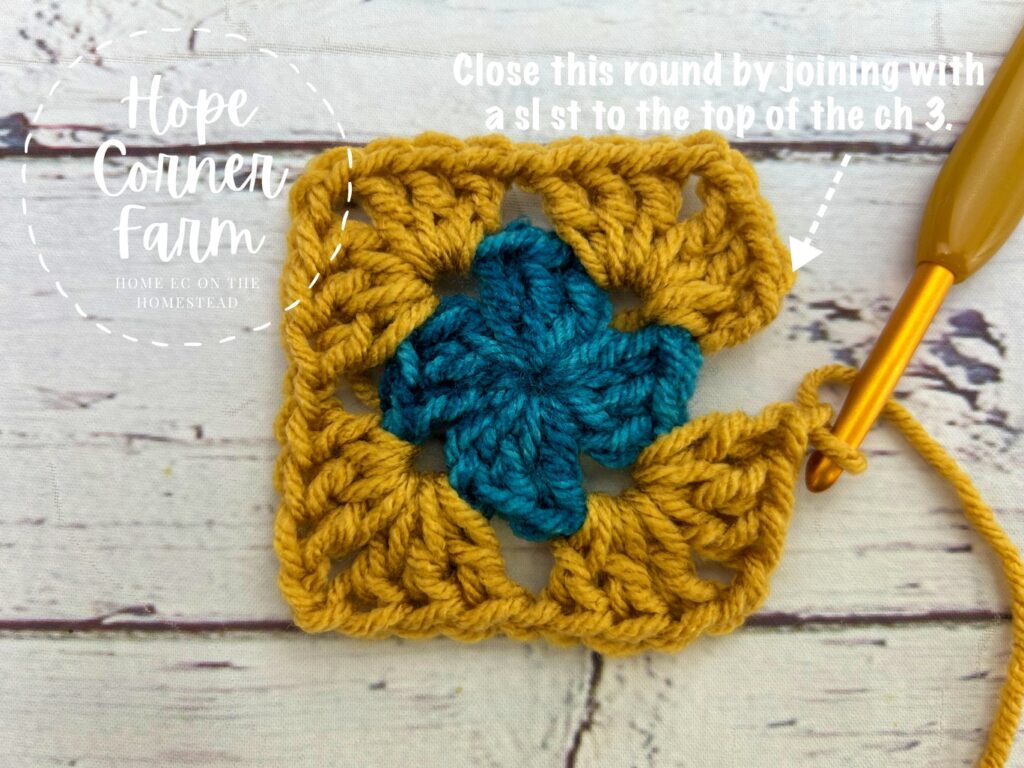
Cut the square free from the yarn skein. Fasten off. Weave in ends. That completes Round 2 of How to Crochet a Granny Square for Beginners.
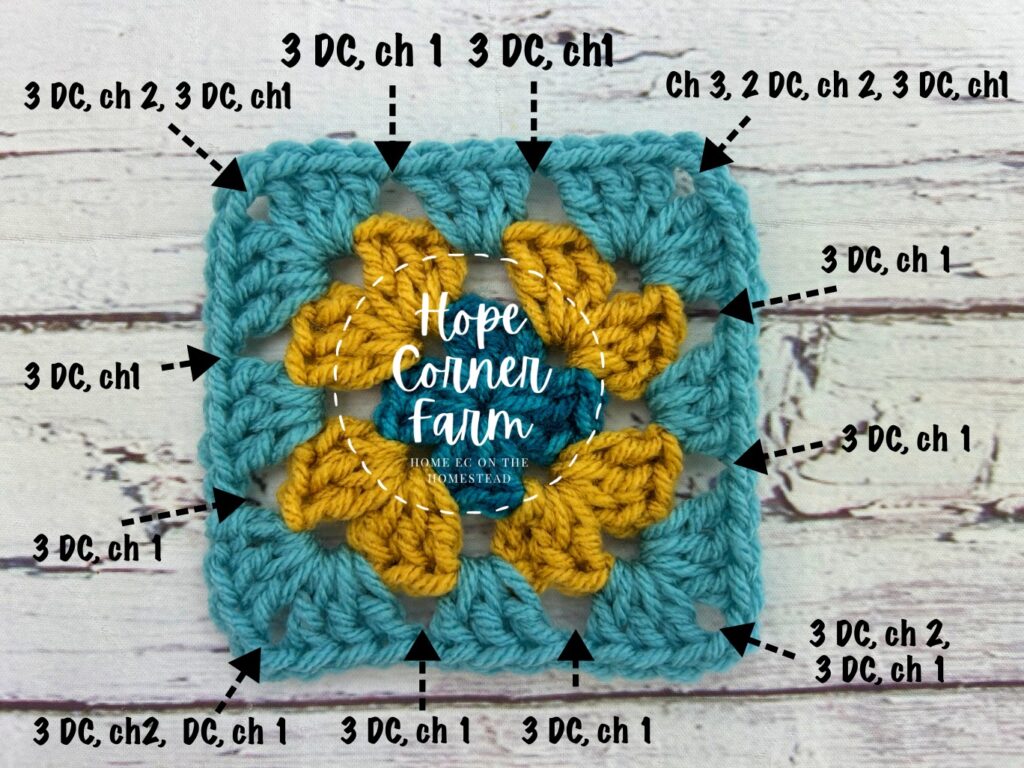
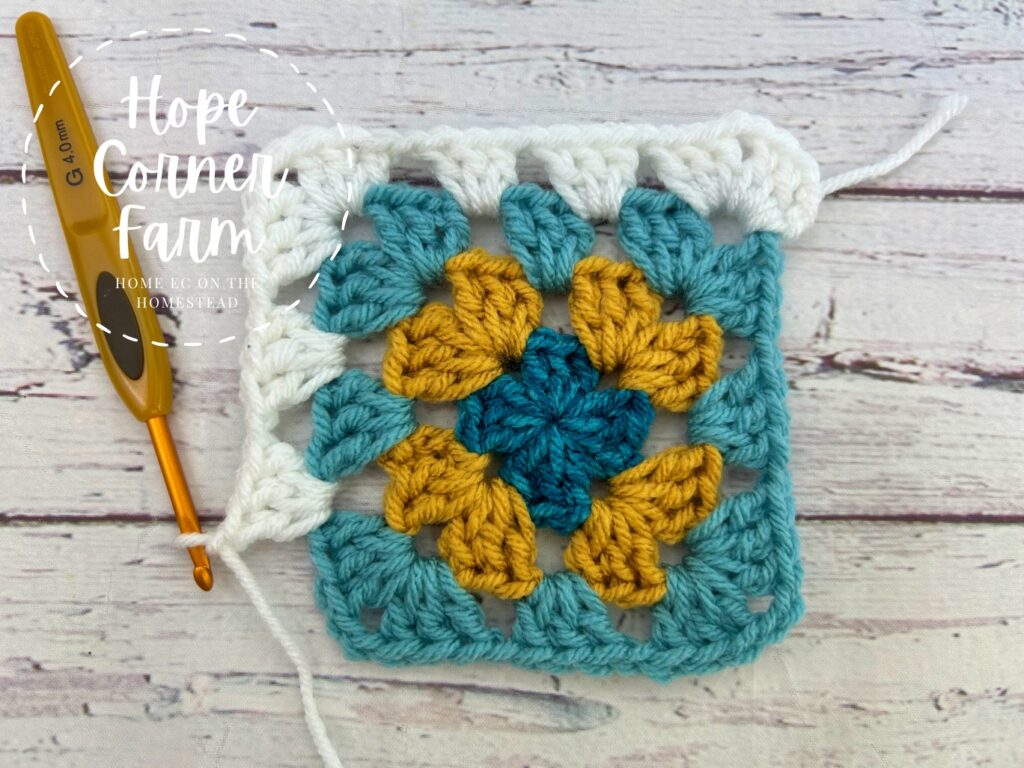
Round 3- How to Crochet a Granny Square:
Here are the stitch placements for this round:
Just like the previous round, we will start Round 3 from the backside of the square.

Begin this round by inserting the hook in any of the chain 2 spaces from the previous round from the backside of the square to the front. With Color #3 (turquoise in my square), YO and pull through the ch 2 space. Chain 3.
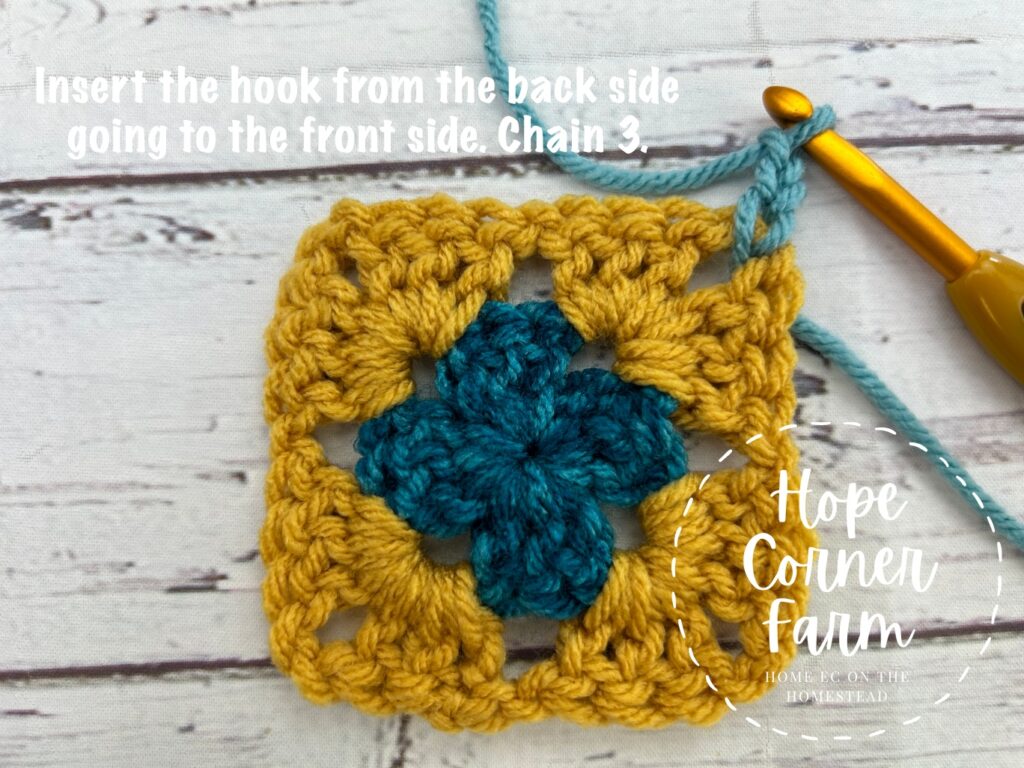
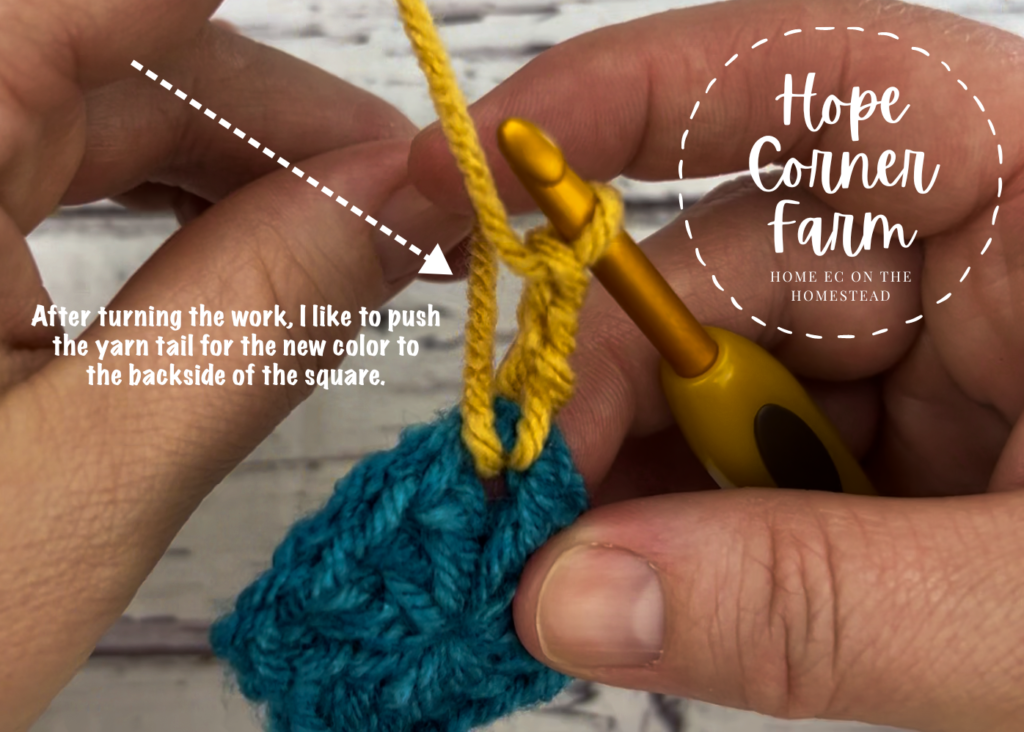
After chaining 3, we turn the square. I also like to push the yarn tail for Color #3 to the backside of the work.
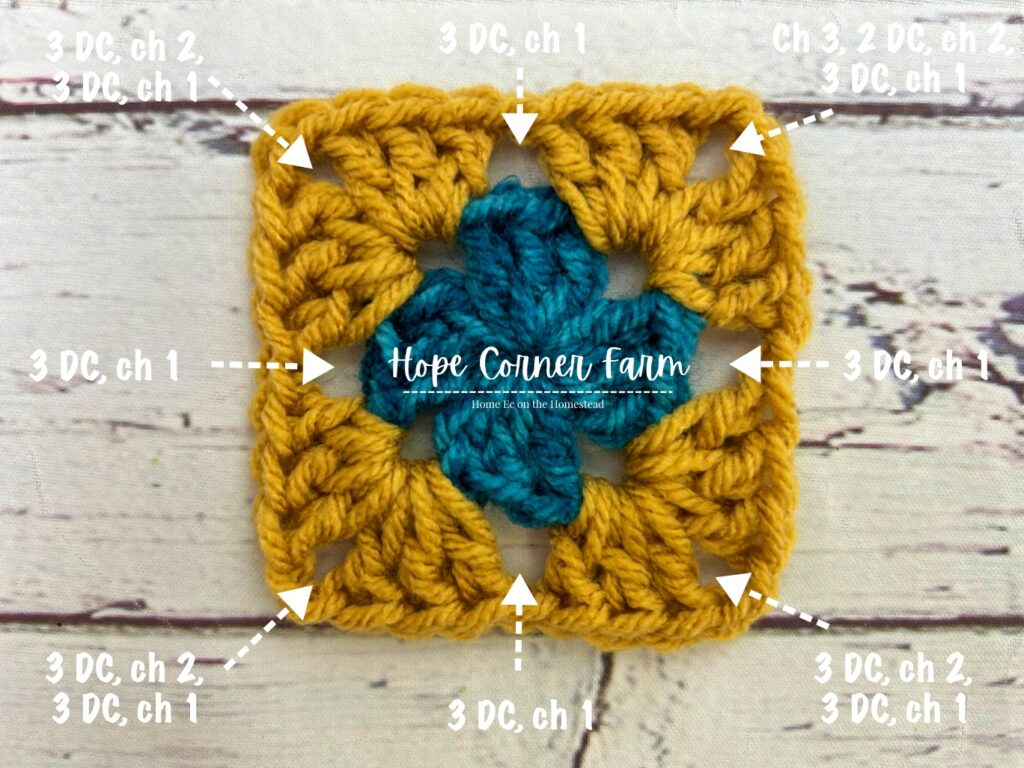
Once the yarn tail is pushed to the back, place the following stitches into the same chain 2 space that the chain 3 is in: 2 DC, ch 2, 3 DC, ch 1.
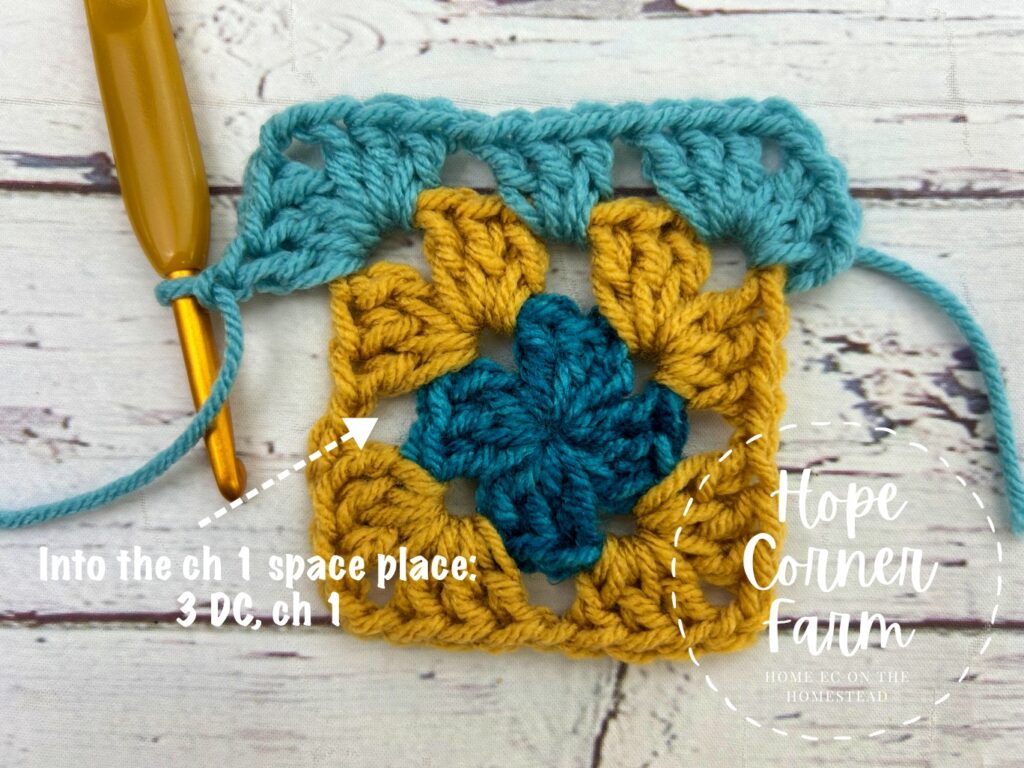
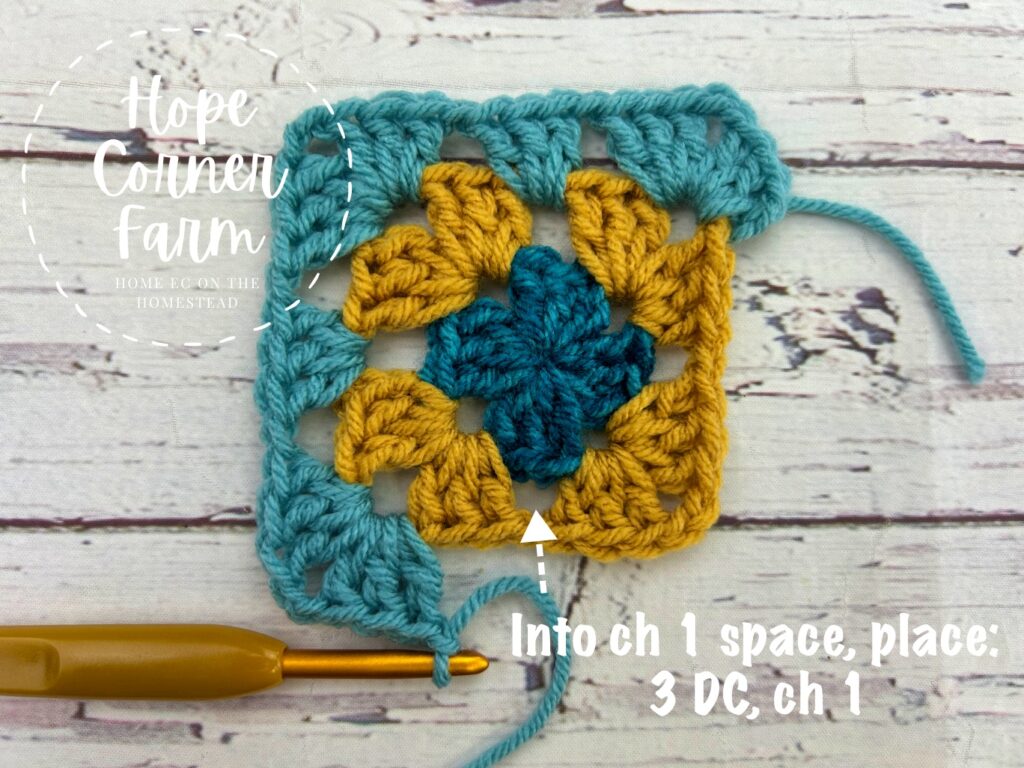
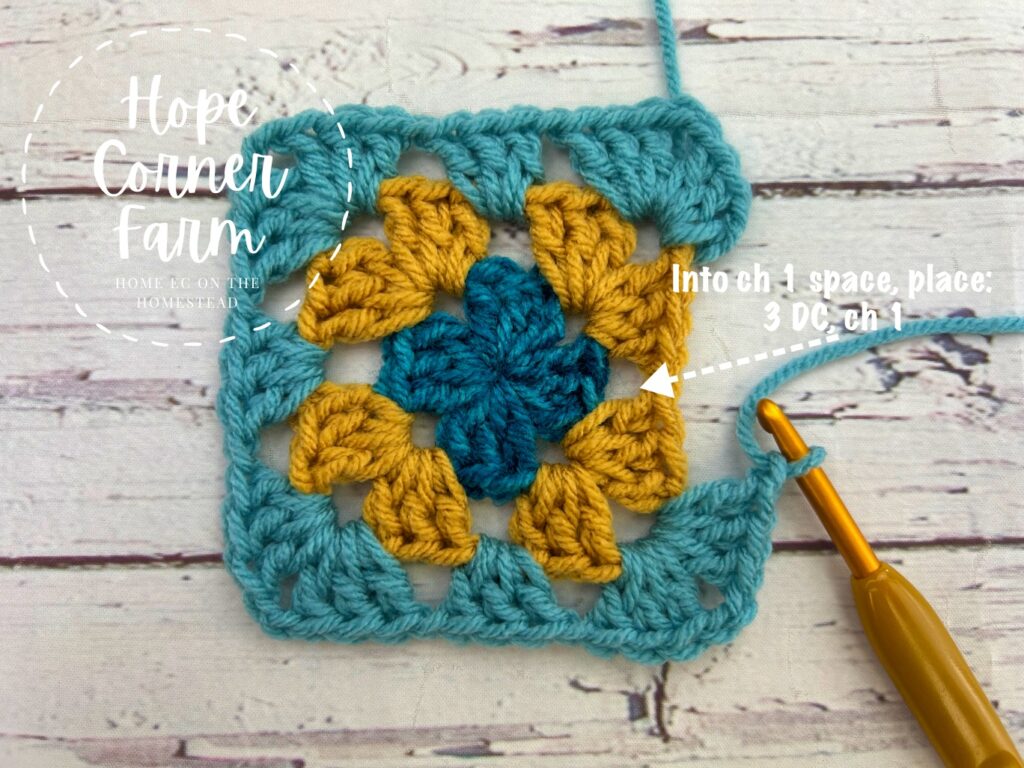
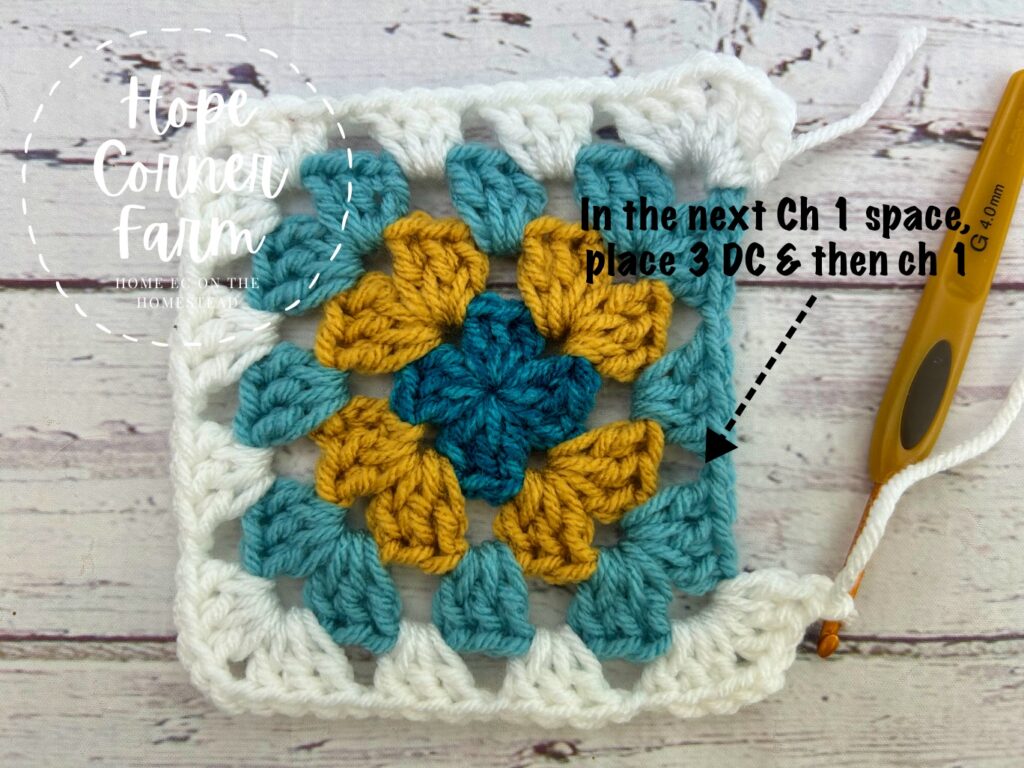
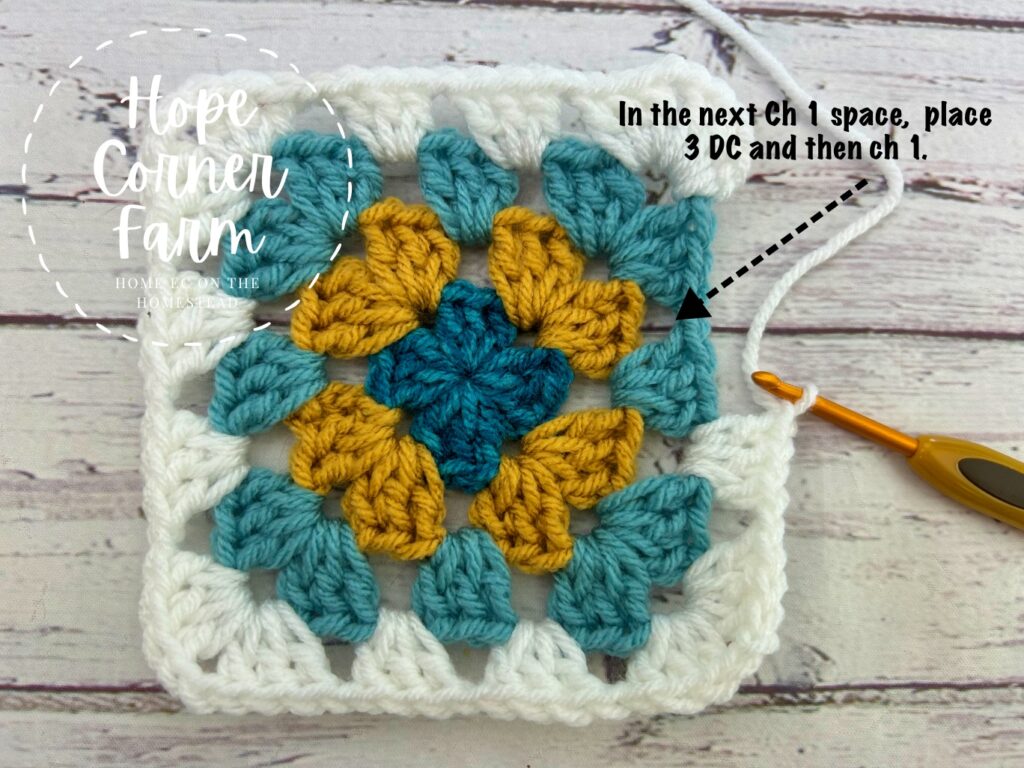
Into the chain 1 space from the previous row, place 3 DC and chain 1.
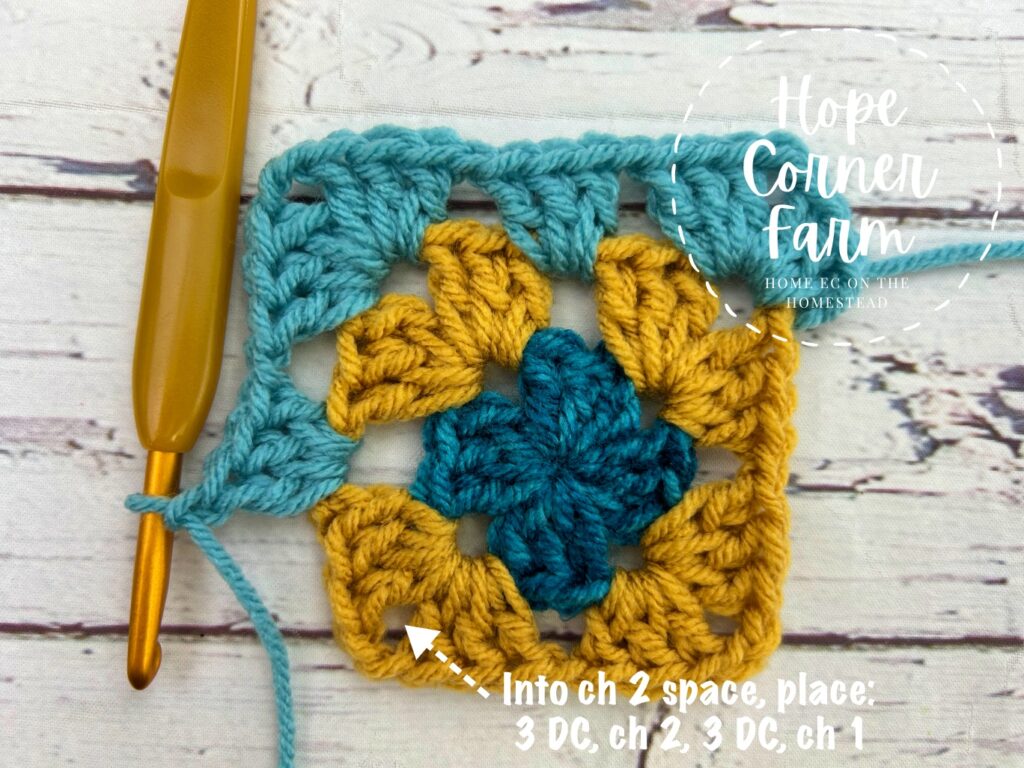
Now we move to the corner, and into the next ch 2 space place the following: 3 DC, ch 2, 3 DC, ch 1.
Next we work into the chain 1 space. Into this space place: 3 DC, ch 1.
Into the corner space (the next ch 2 space), work the following stitches: 3 DC, ch 2, 3 DC, ch 1.
Next, into the chain 1 space place: 3 DC, ch 1.
Now it is time for the final corner space. Into the next chain 2 space place the following: 3 DC, ch 2, 3 DC, ch 1.
Into the last ch 1 space from the previous row place: 3 DC, ch 1.
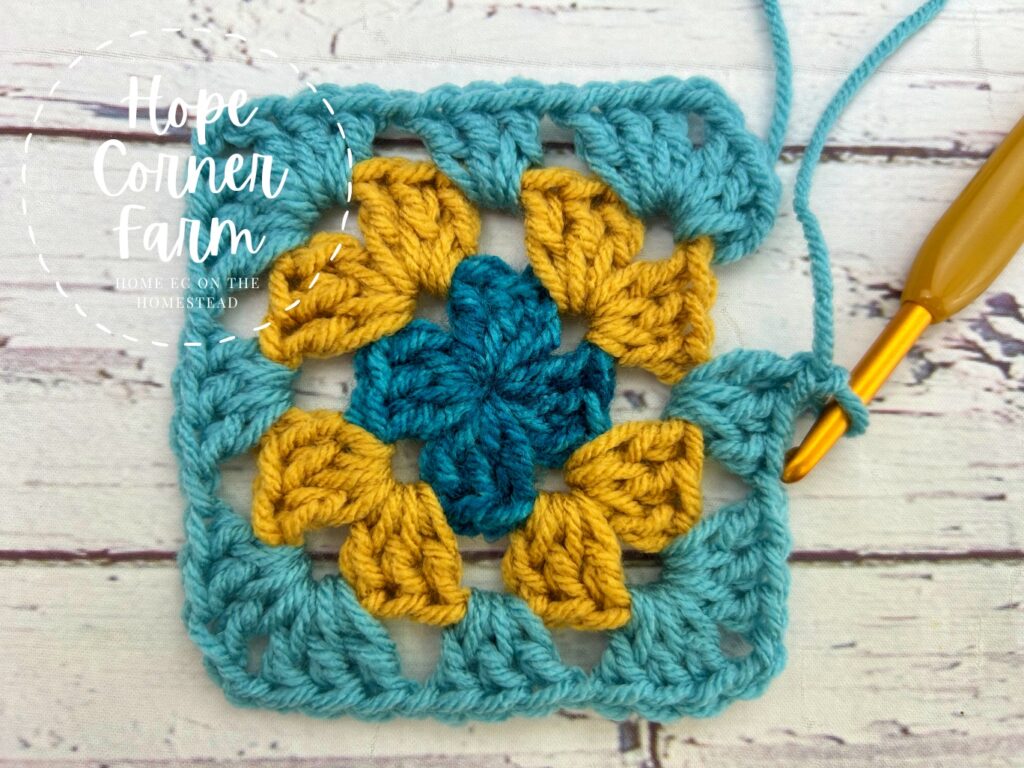
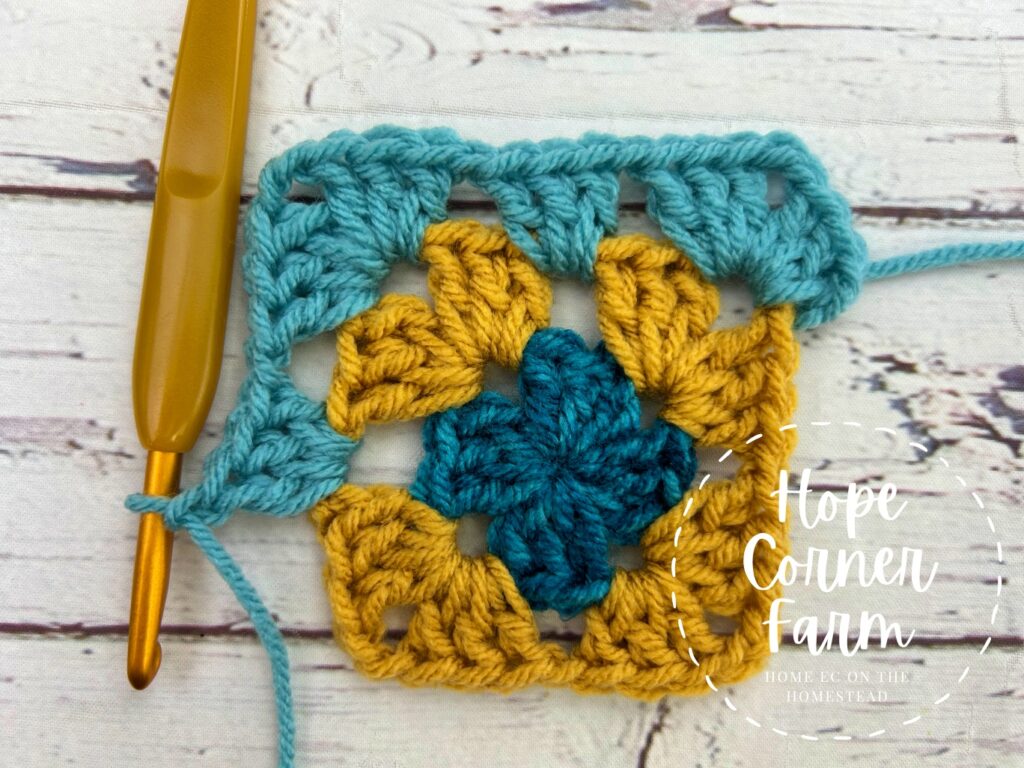
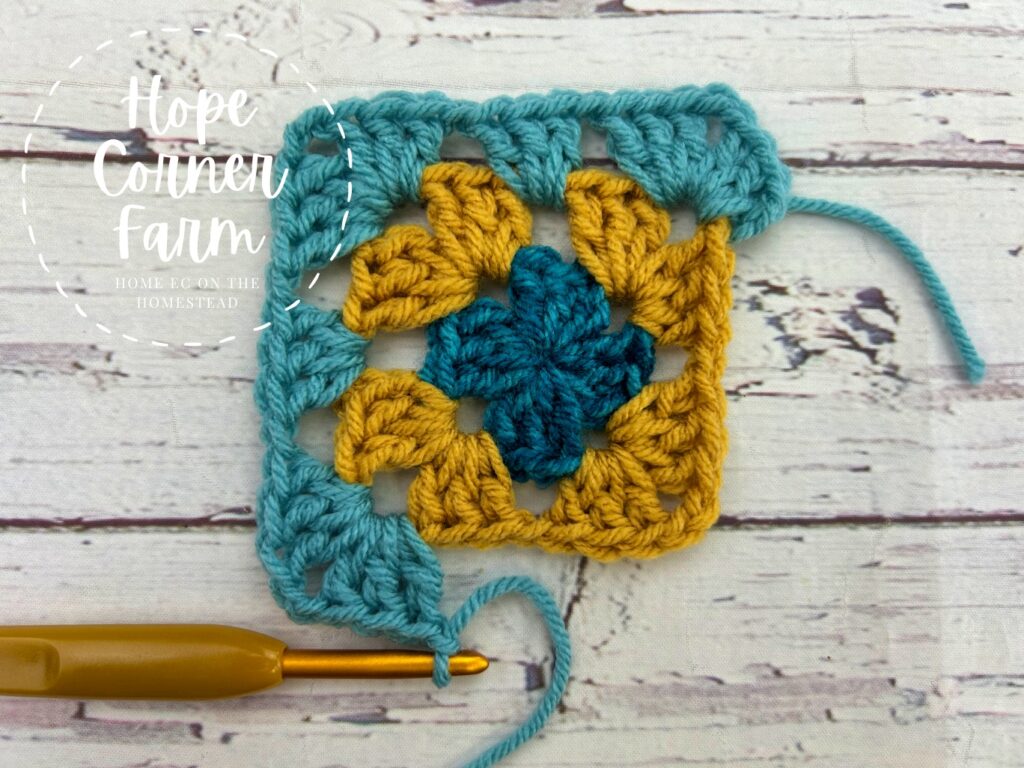
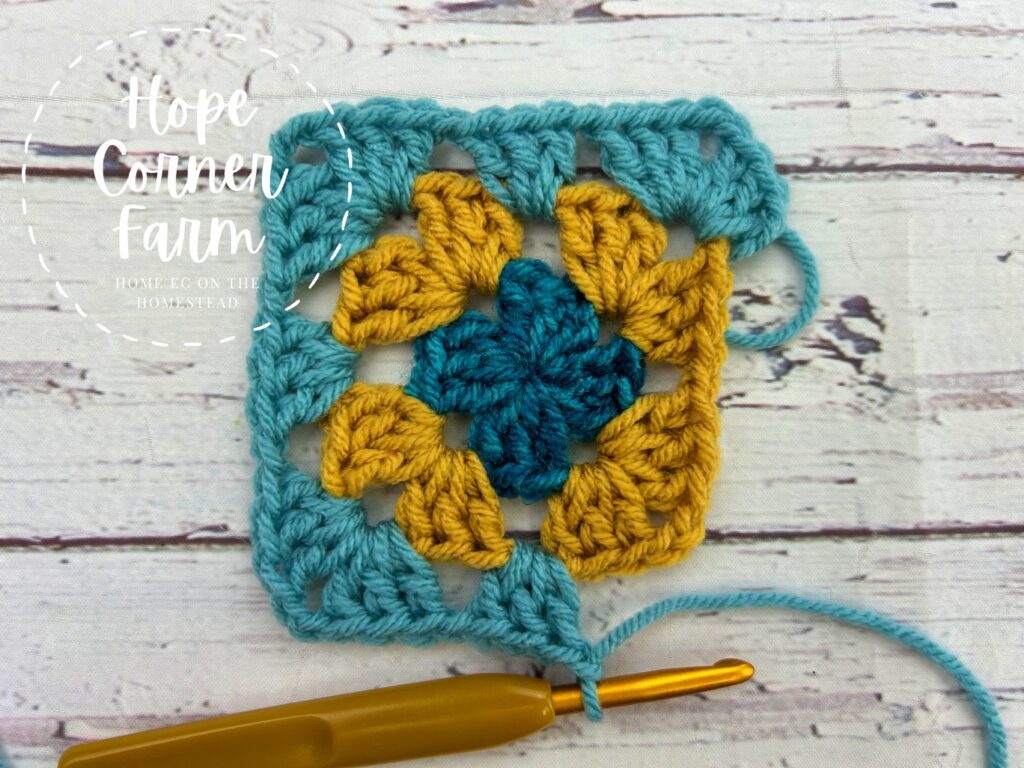
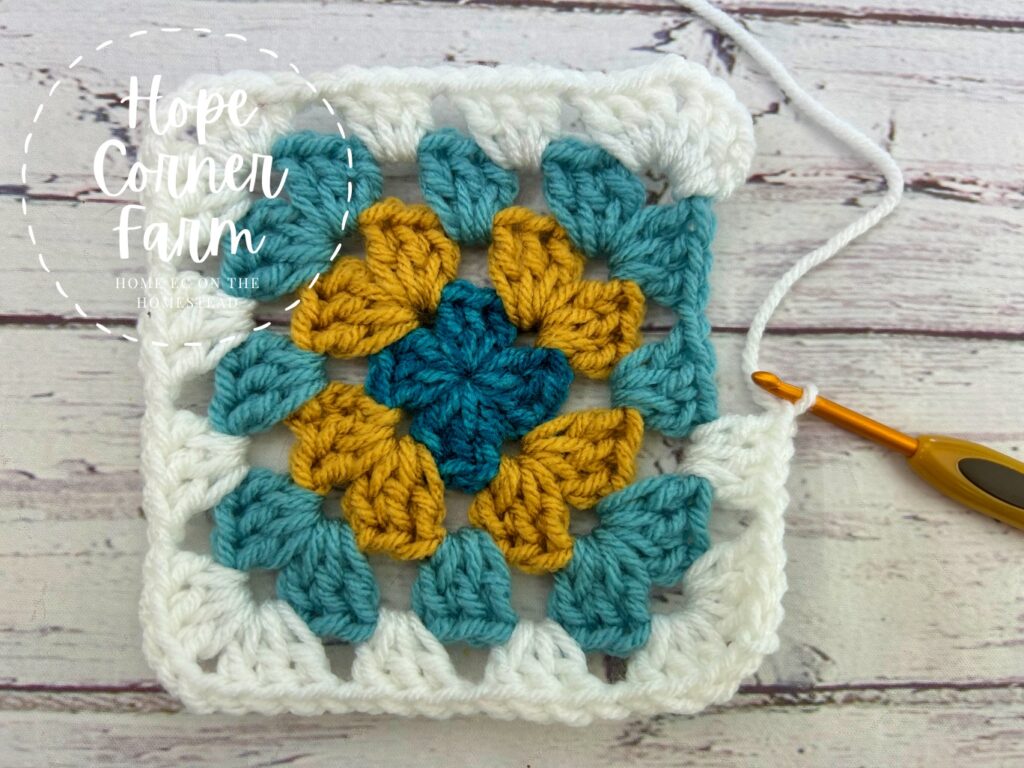
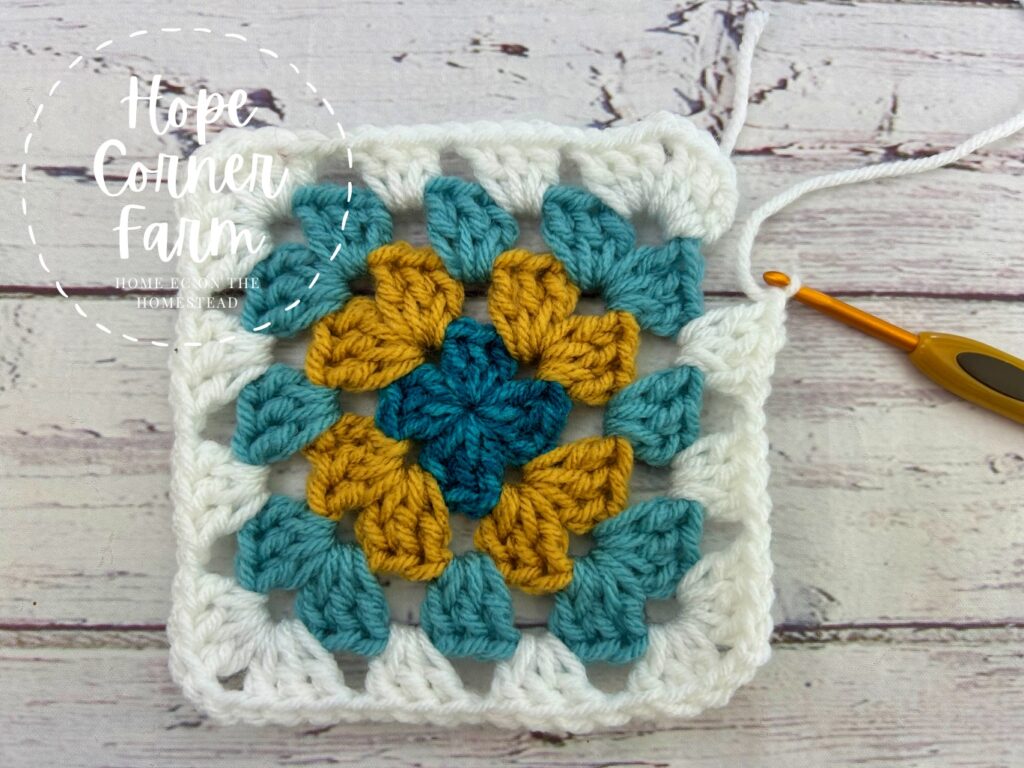
To end this round, join with a slip stitch to the top of the chain 3.
After slip stitching to close, cut the yarn free from the skein of yarn, fasten off, and weave in ends.
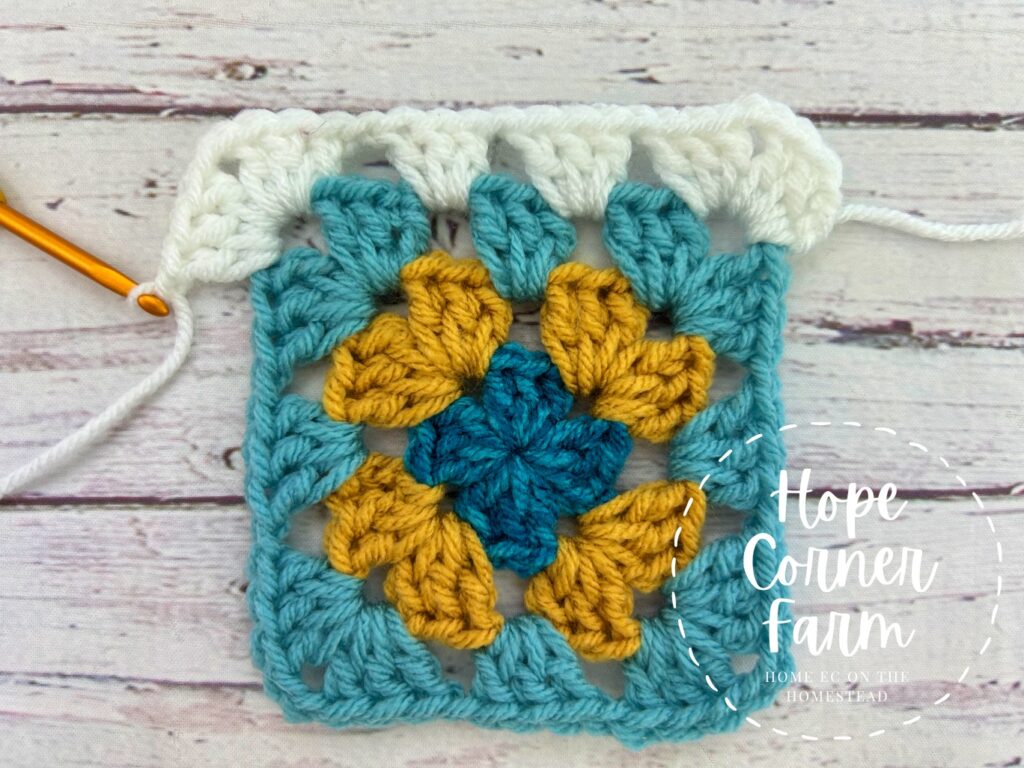
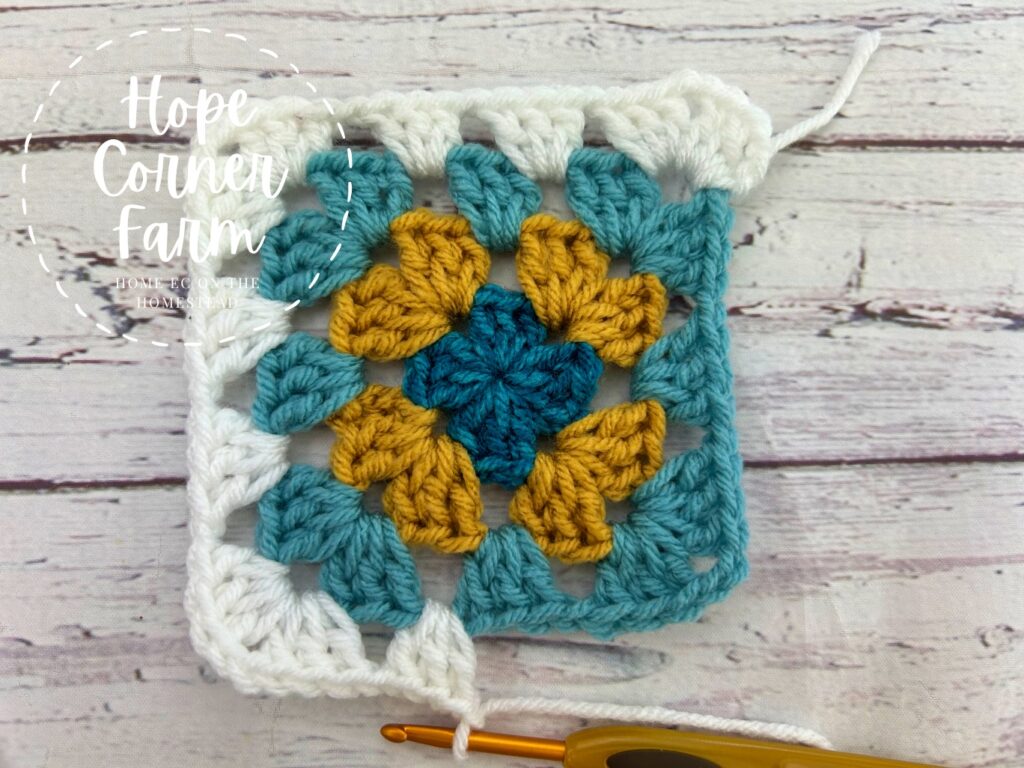
Round 4:
The stitch placements for this round.
Just like the previous rounds, start this round from the backside of the square.

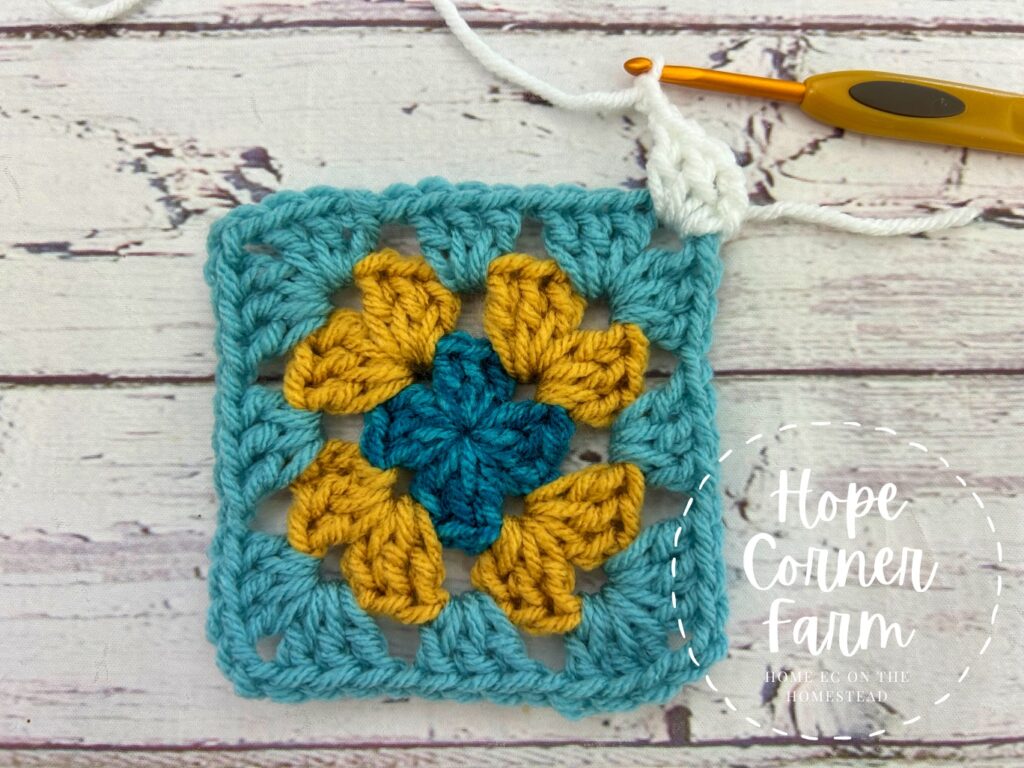
In any of the chain 2 spaces from the previous round, insert the hook from the backside going to the front. With Color #4 (white in my block), YO and pull through the chain 2 space.
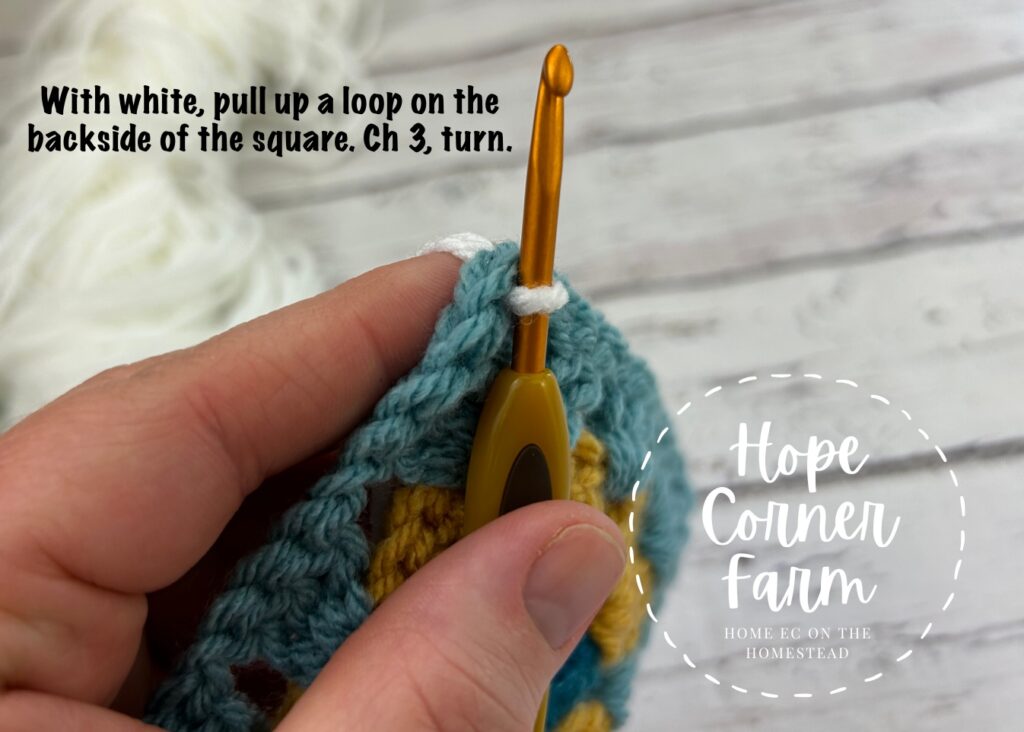
With the white yarn (color #4), chain 3.
After chaining 3, turn your block.
Before doing anything else, push the yarn tail to the backside of the yarn.
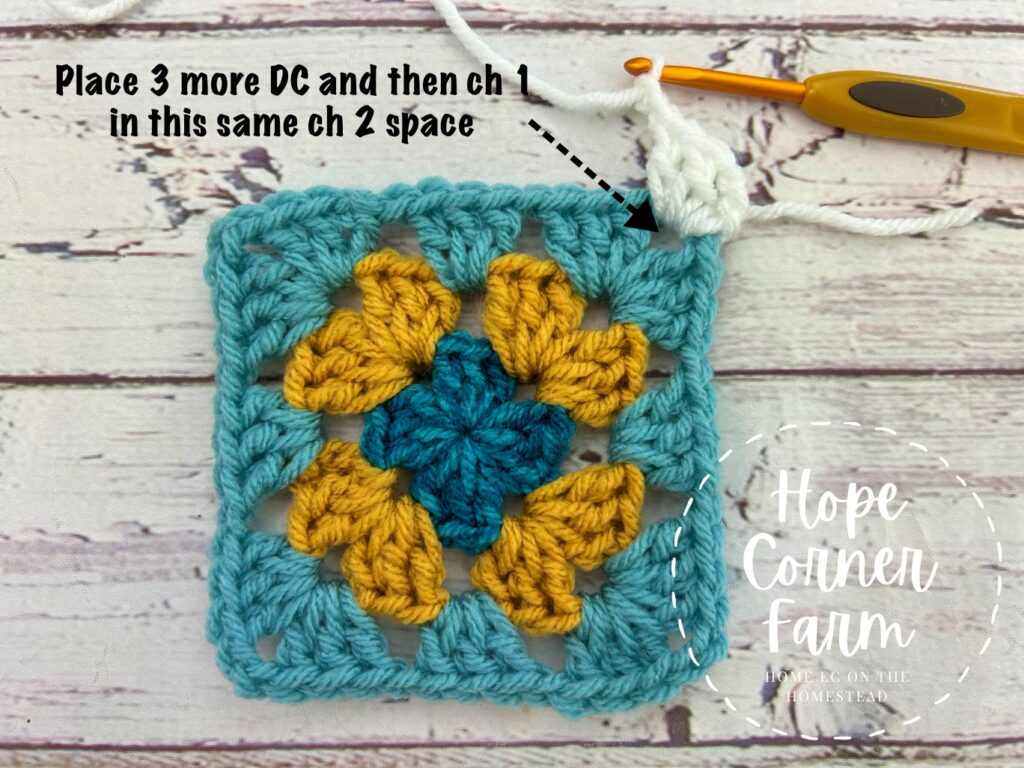
Into the same ch 2 space, place 2 DC and then chain 2.
Working into the same chain 2 space, place: 3 DC, ch 1.
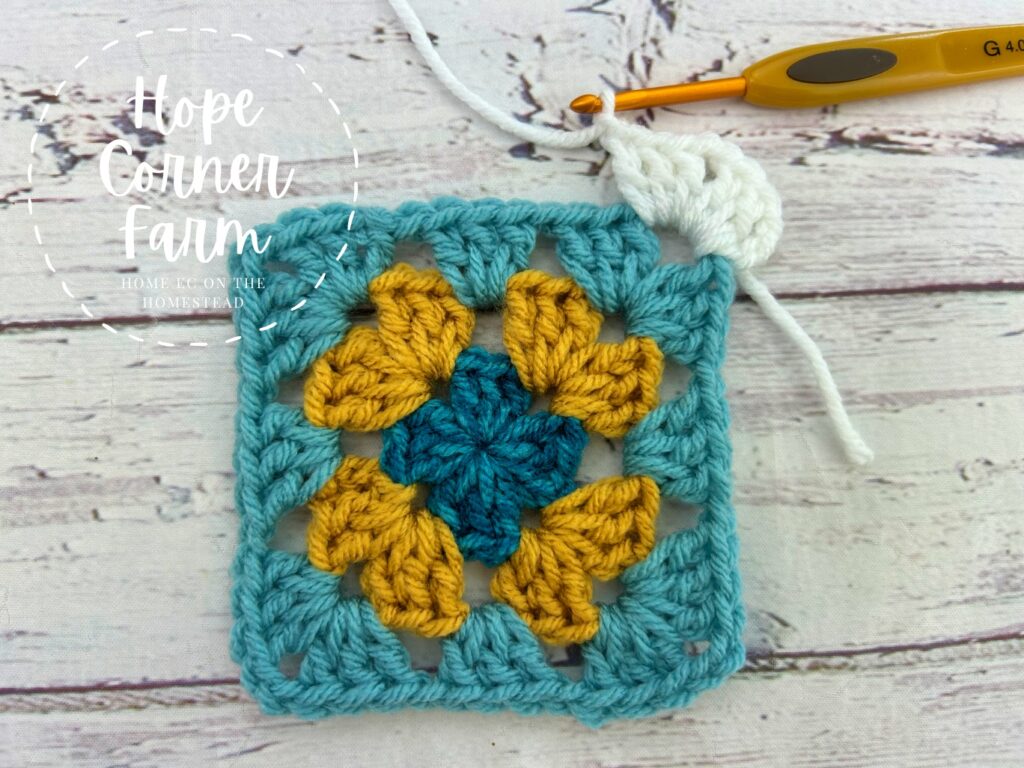
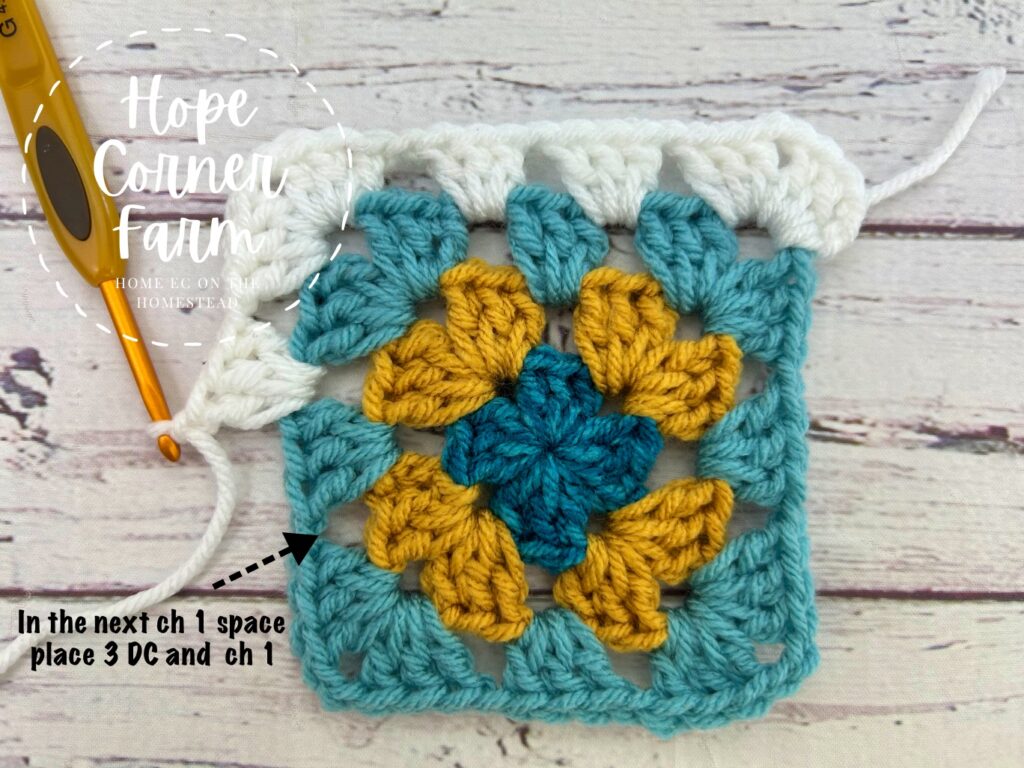
Into the next chain 1 space, work 3 DC and chain 1.
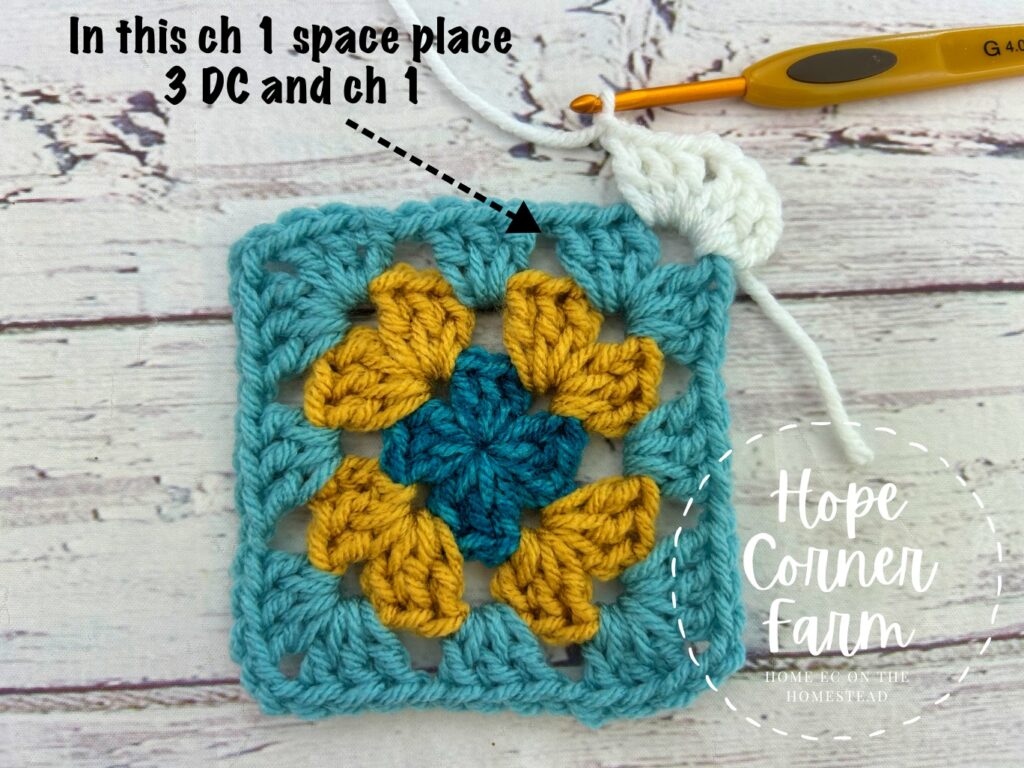
In the next chain 1 space place: 3 DC, ch 1.
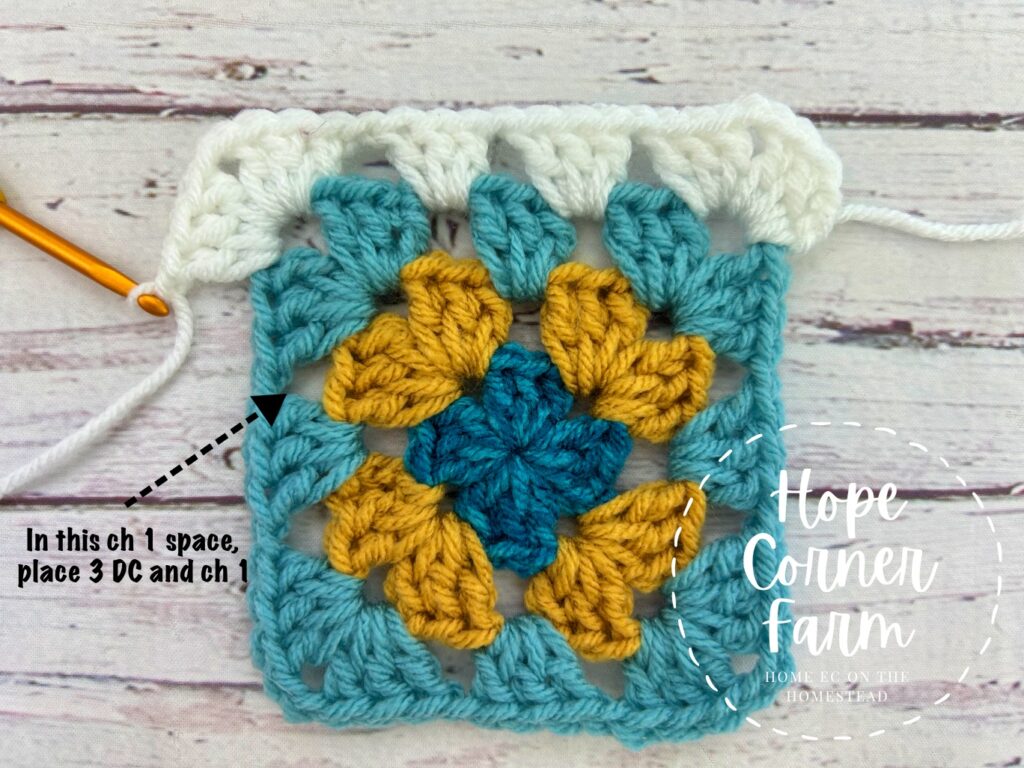
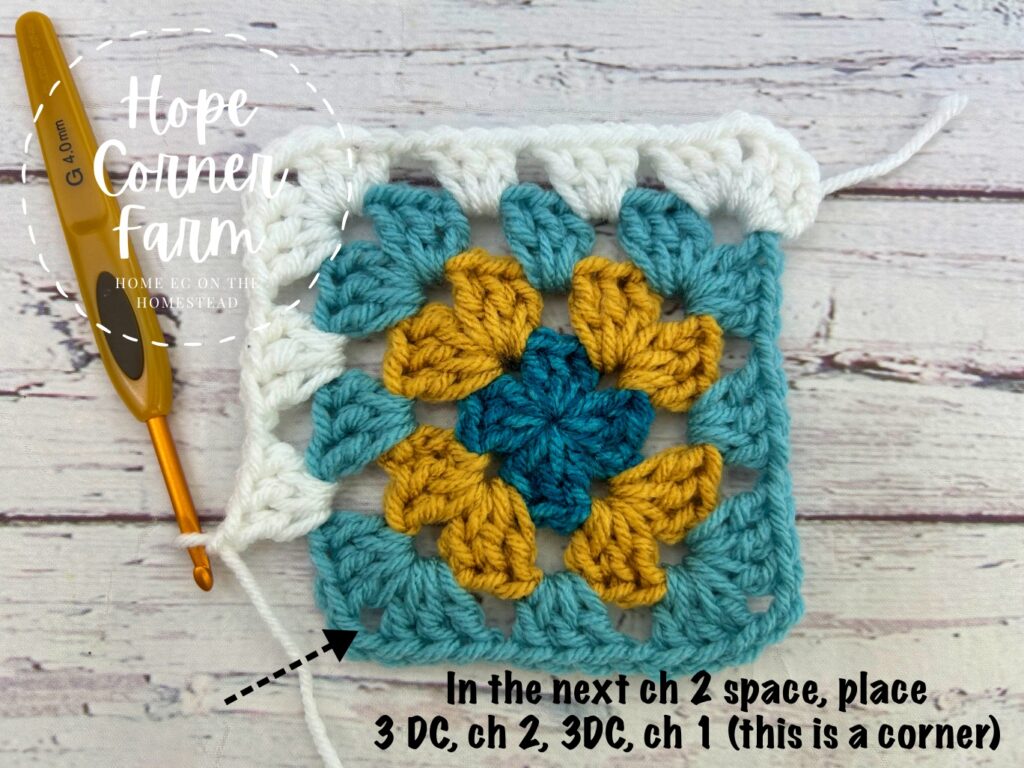
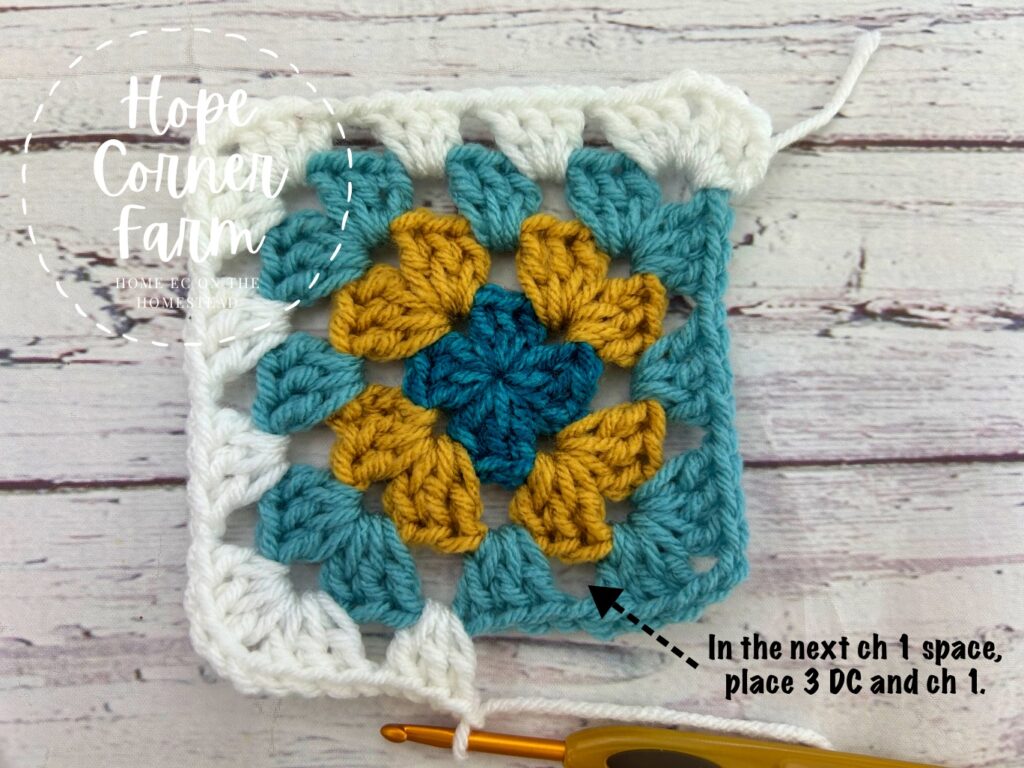
Now we are at the corner. In the chain 2 space, place the following: 3 DC, ch 2, 3 DC, ch 1.
Into the next chain 1 space, place 3 DC and ch 1.
In the next chain 1 space, place: 3 DC, ch 1.
Next, in the corner space – the next chain 2 space – place the following: 3 DC, ch 2, 3 DC, ch 1.
Now, in the next chain 1 space: 3 DC, ch 1.
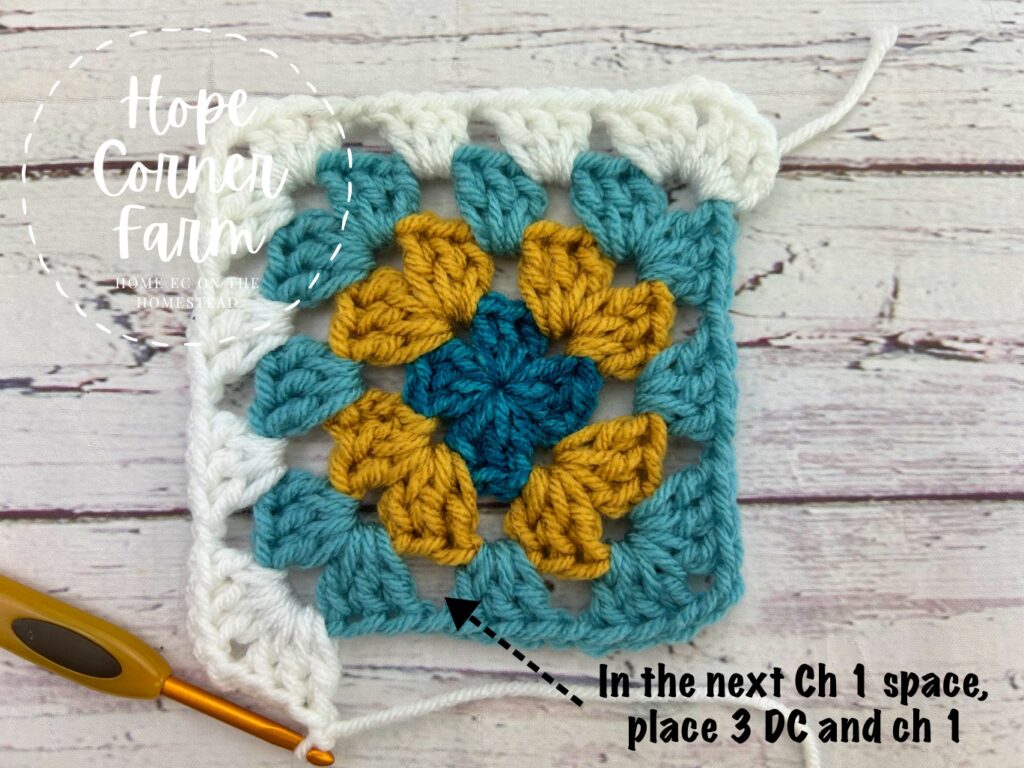
In the next chain 1 space, place: 3 DC, ch 1.
Now, in the final corner (ch 2 space) put: 3 DC, ch 2, 3 DC, ch 1.

Into the next chain 1 space: 3 DC, ch 1.
In the final chain 1 space, put: 3 DC, and chain 1.
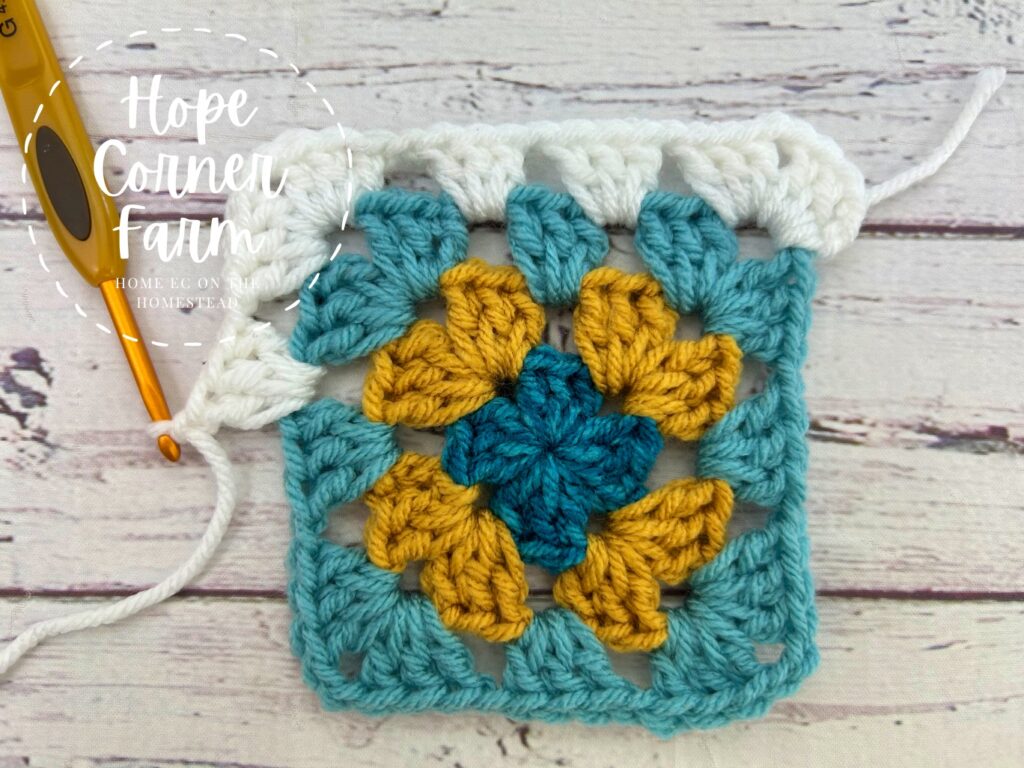
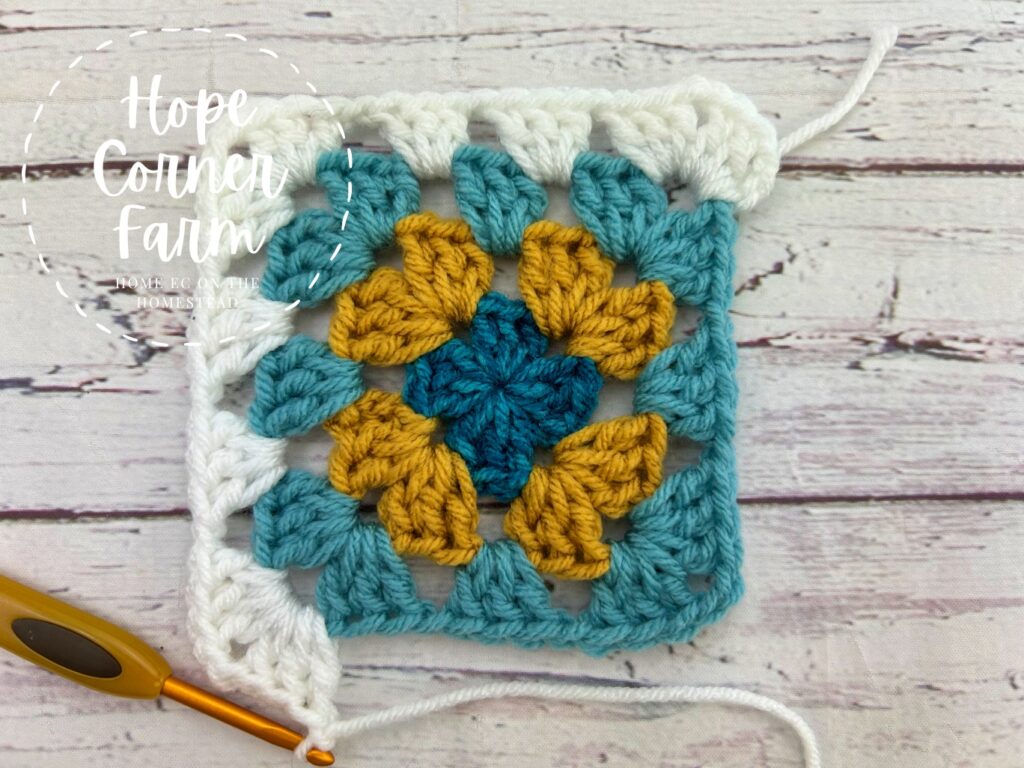
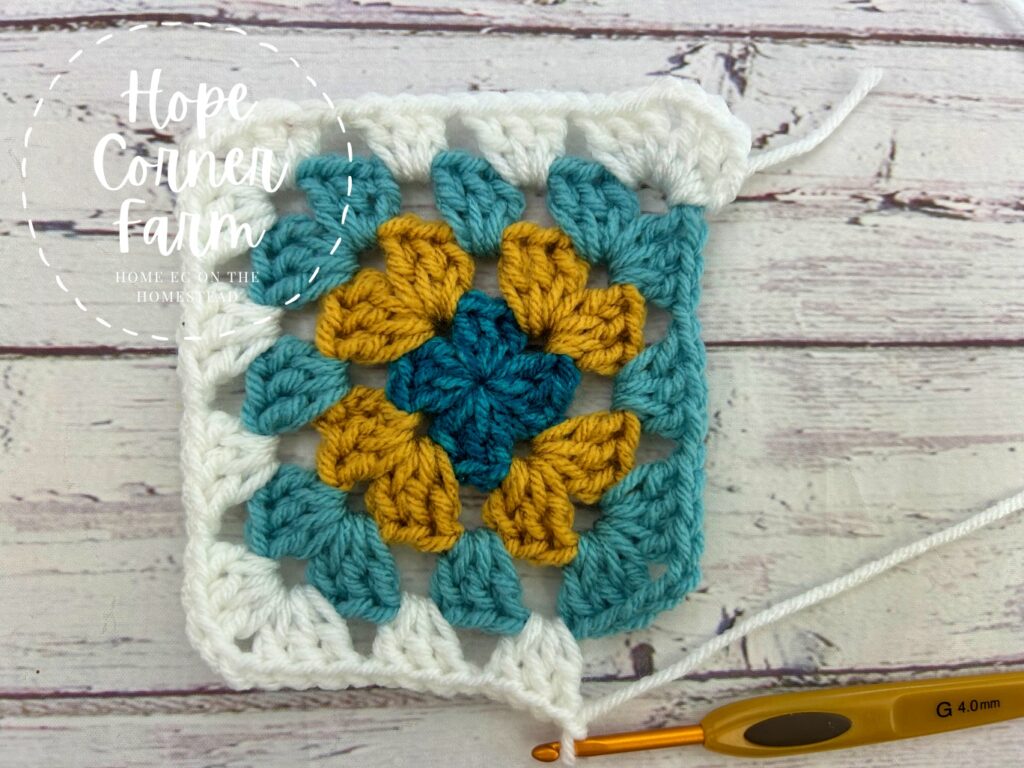
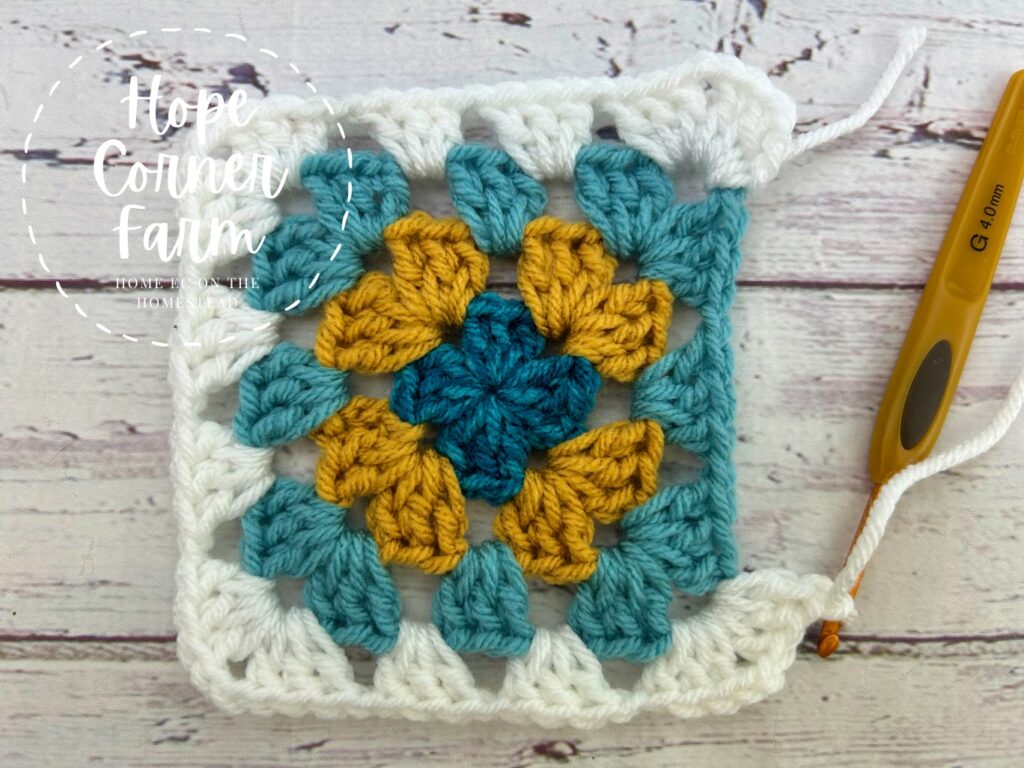
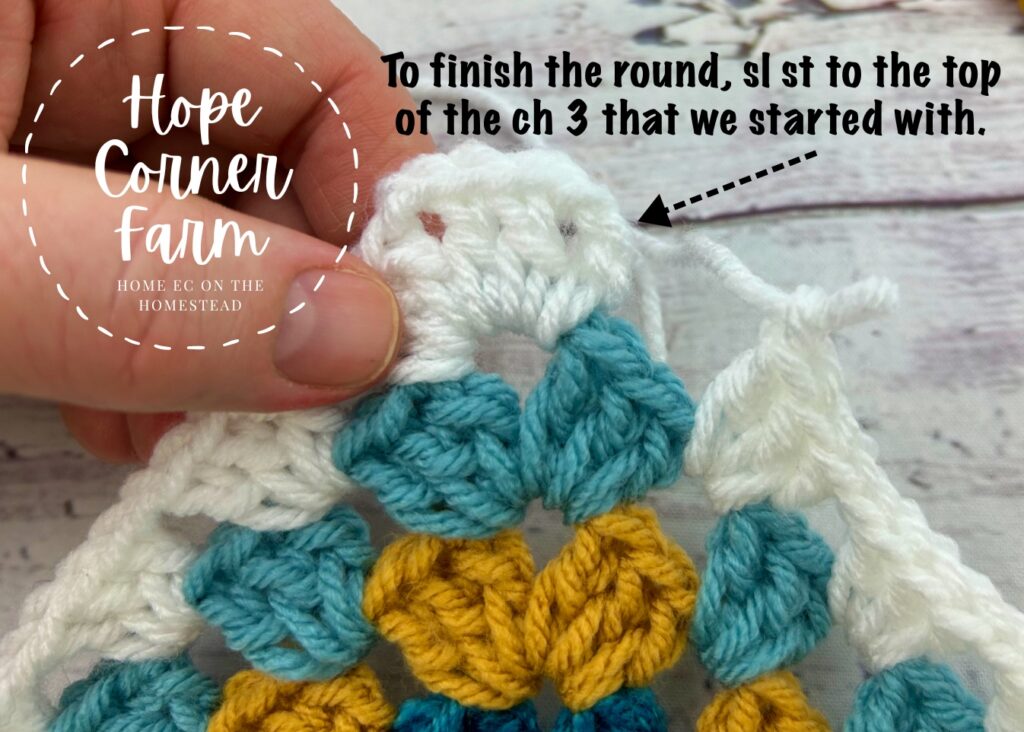
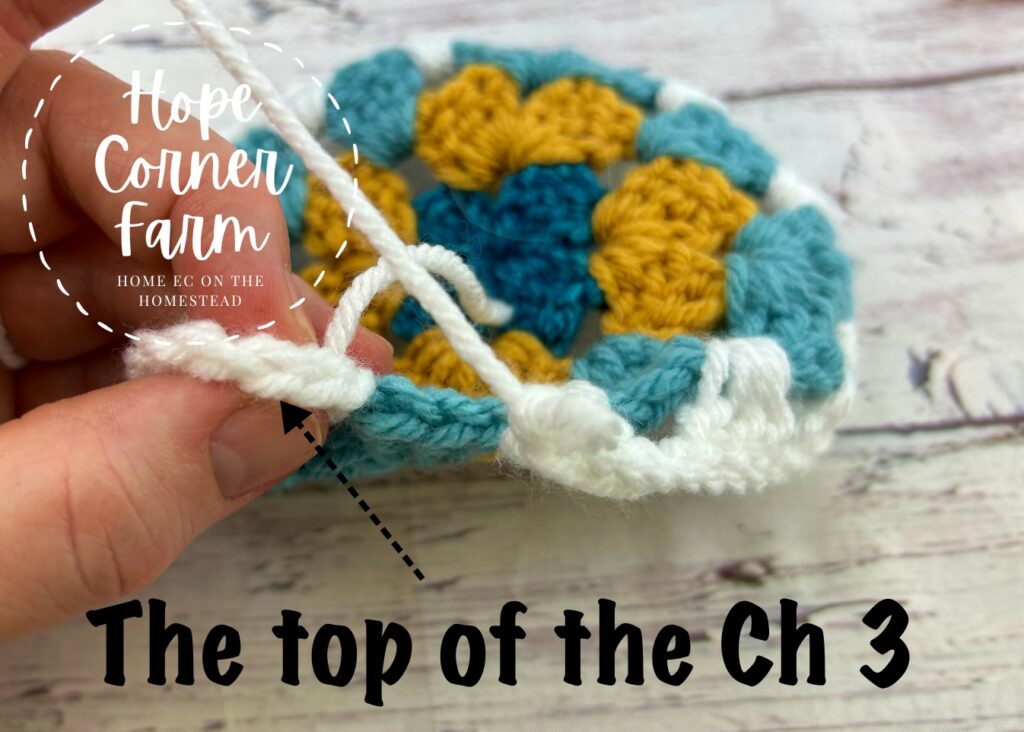
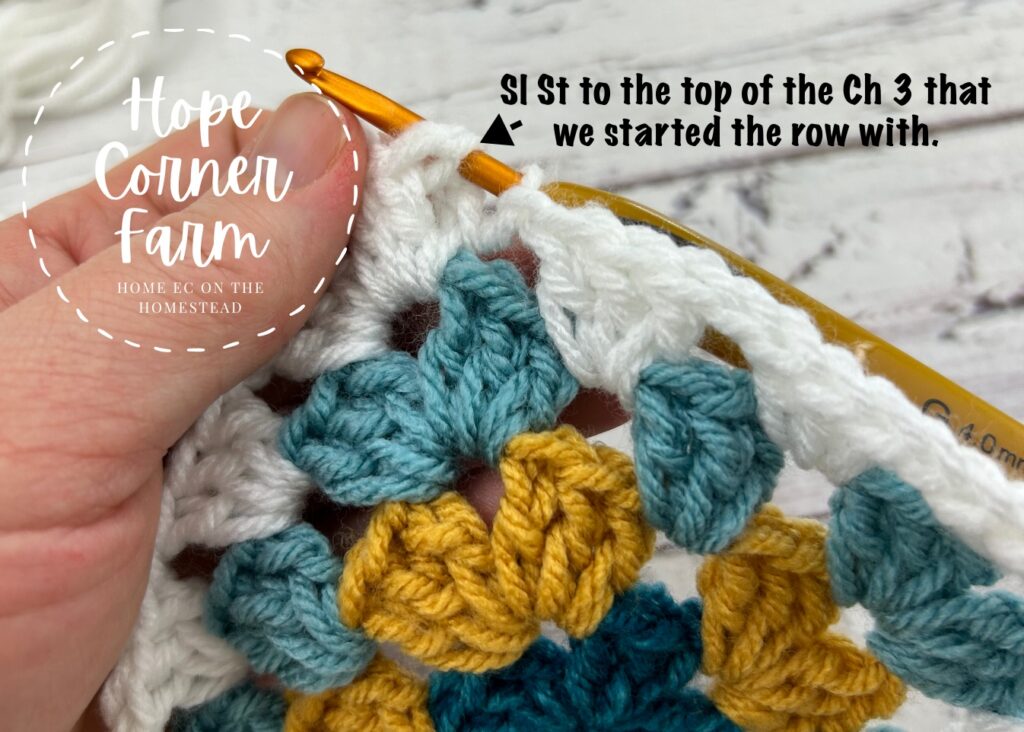
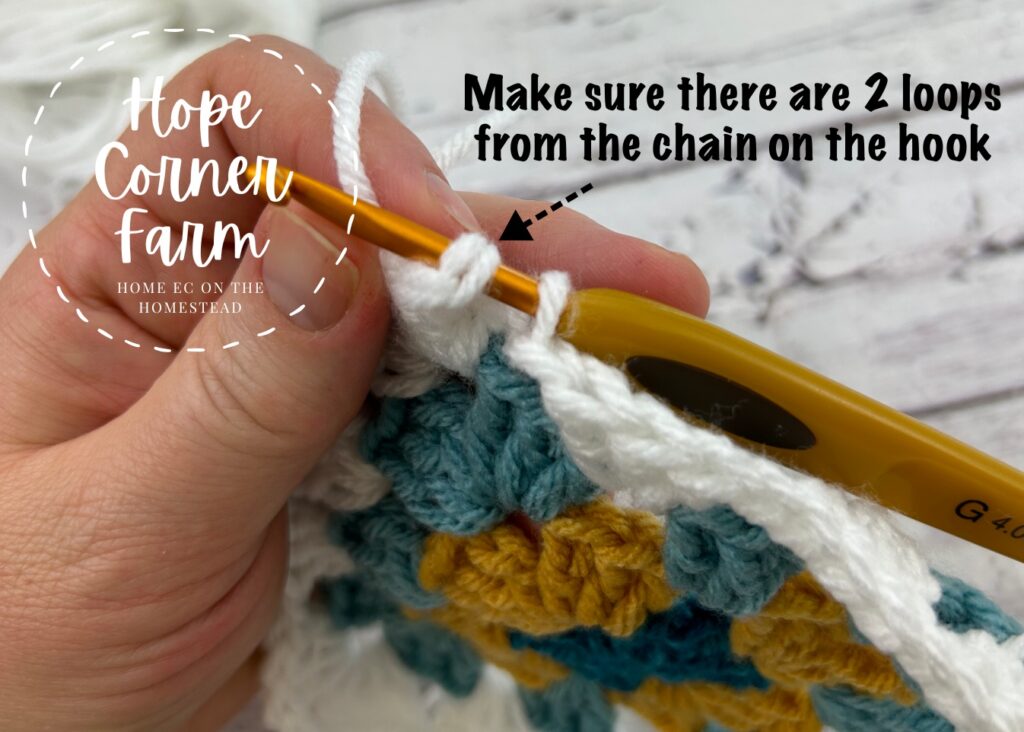
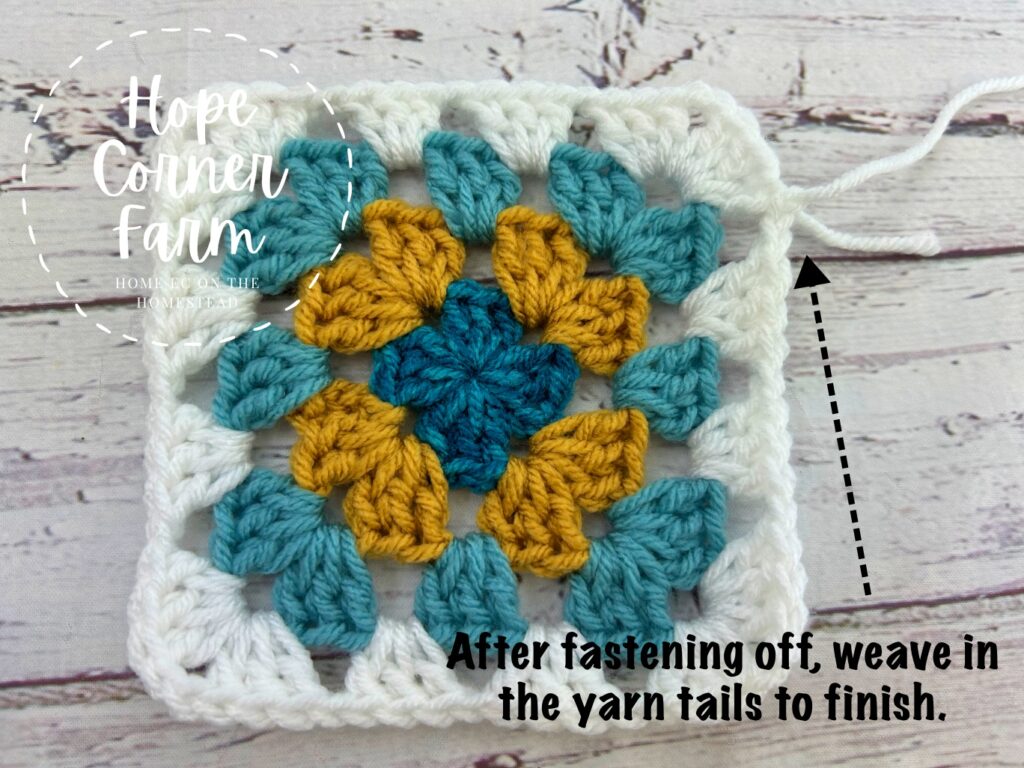
How to Finish the Classic Granny Square:
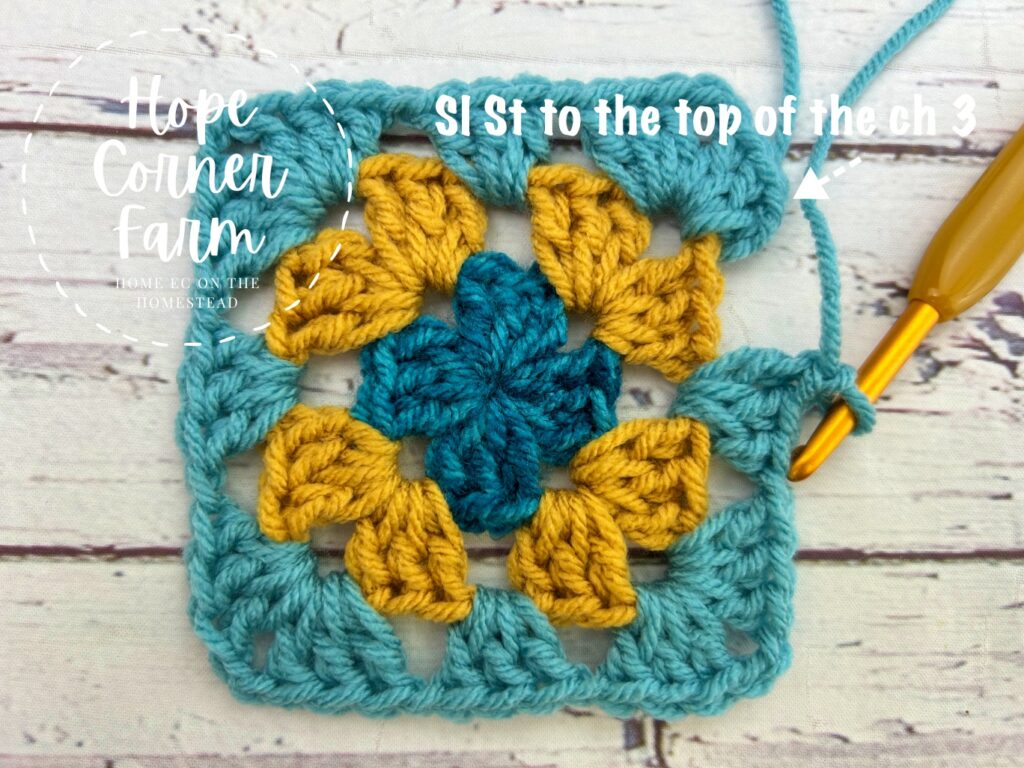
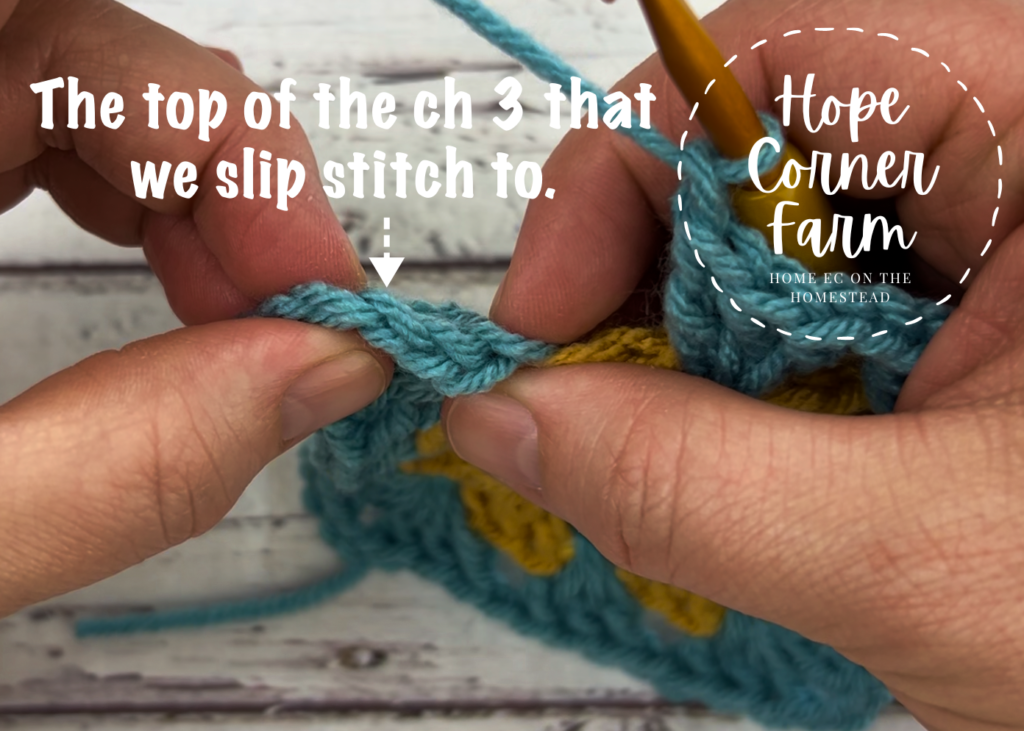
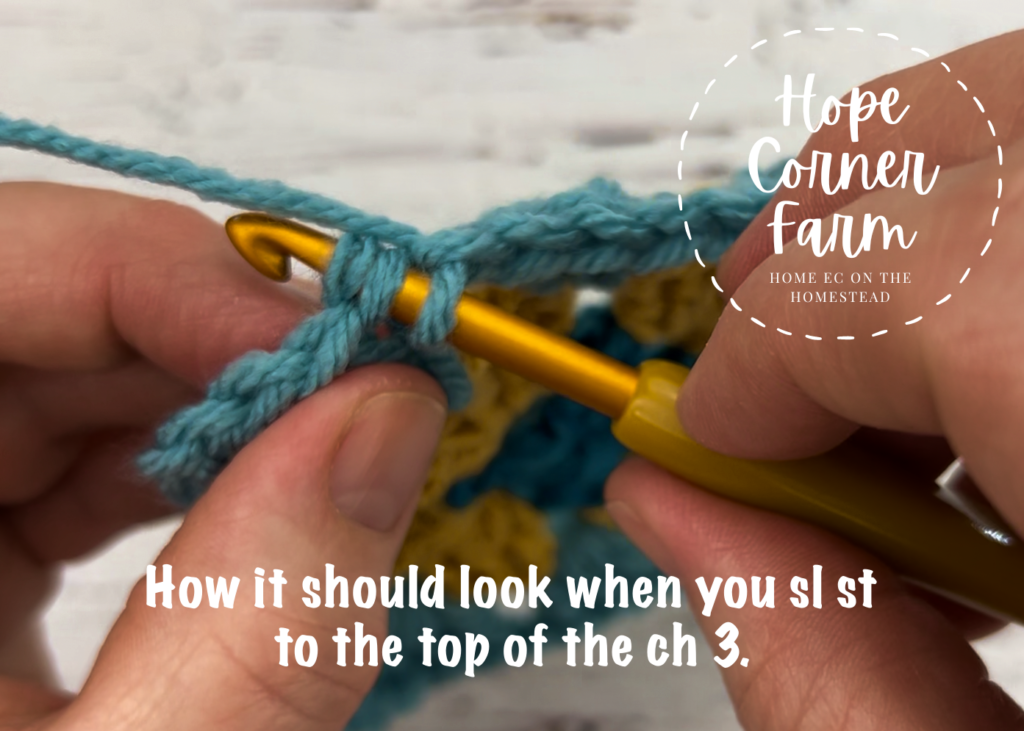
To close the round, join with a slip stitch to the top of the chain 3.
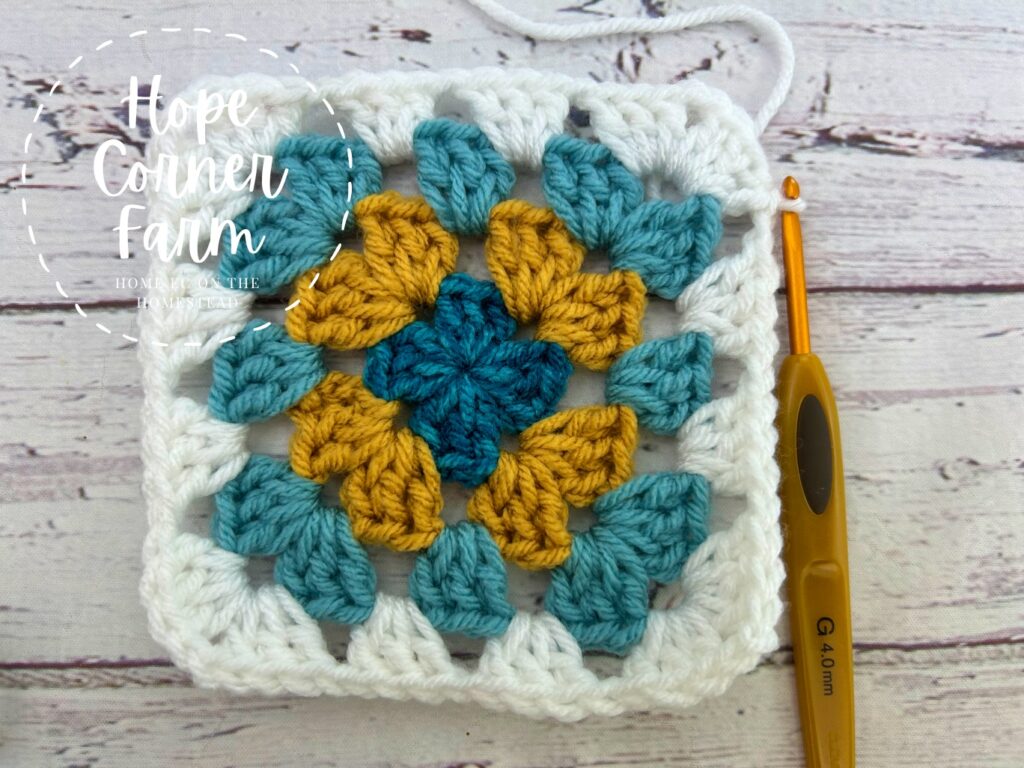
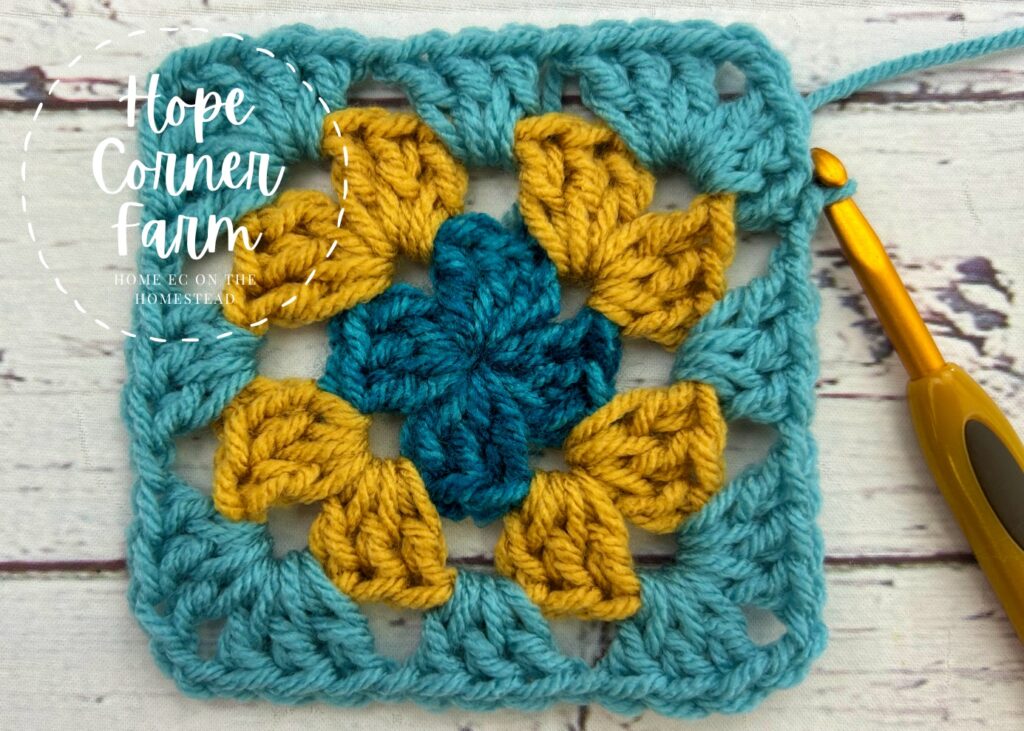
Cut the square free from the yarn. Fasten off and weave in ends. And that’s it!
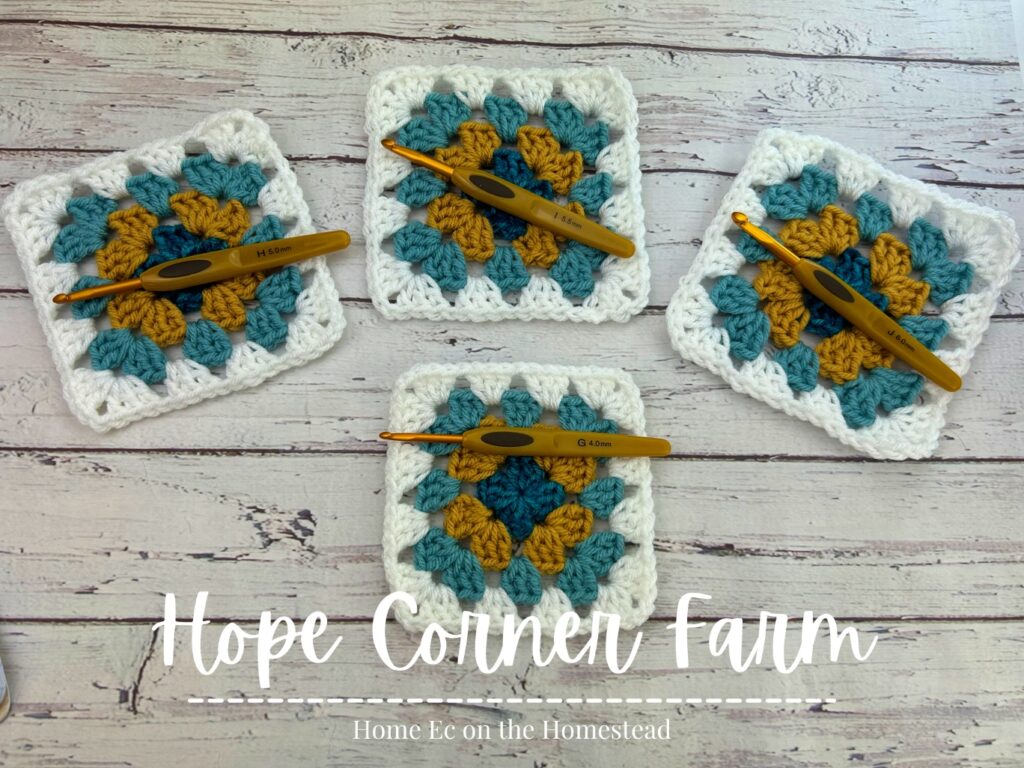
If you want to make this block a little bigger or smaller, change the hook size that you use and that can make the block a little bigger or smaller.
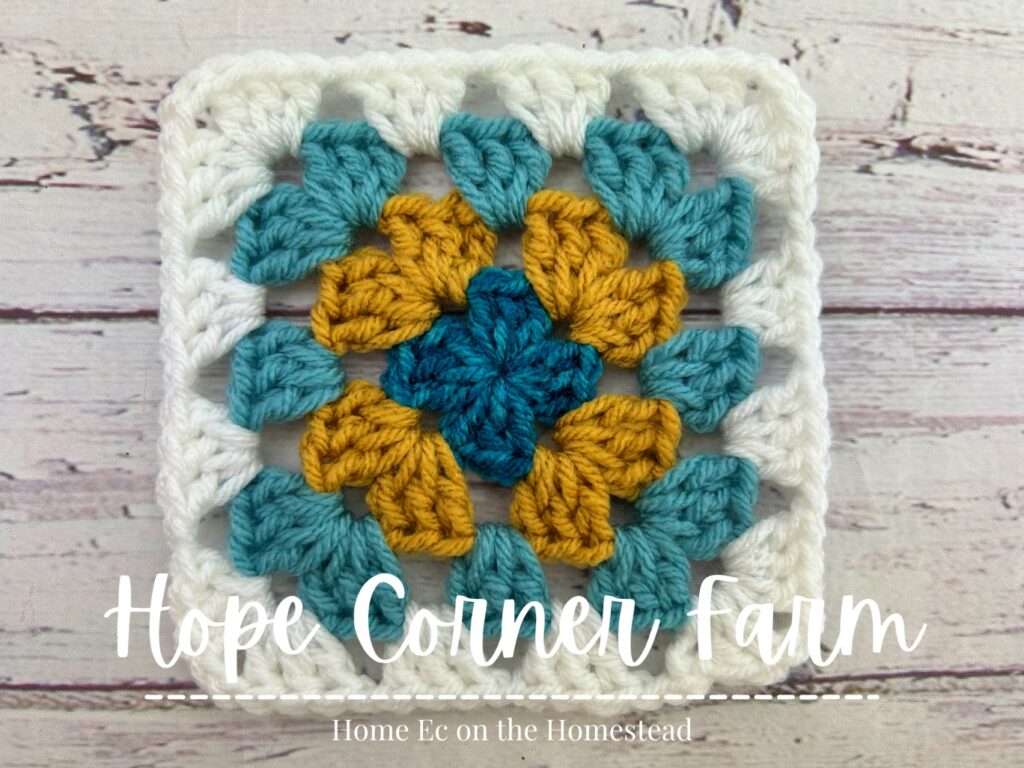
And that’s how to crochet a granny square for beginners! I hope you found this tutorial helpful! Don’t forget to check us out on social media and have a blessed day!
How to Crochet a Granny Square for Beginners – Video Tutorial:
Written Pattern ONLY:
Round 1:
With color #1, use either a chain 4 and slip stitch to the 1st chain to create a round, OR start with a magic circle. I prefer the magic circle start.
Chain 3. Into the magic circle, place 2 DC, ch 2, (3 DC, ch 2) 3 times. Join with a slip stitch to the top of the chain 3.
Cut the yarn. Fasten off. Weave in ends.
Round 2:
From the backside of the square, insert the hook into any of the chain 2 spaces. With color #2, YO and pull through the chain 2 space. Chain 3 and turn.
Now we are working on the front side of the square. Push the yarn tail to the backside.
Into the same ch 2 space, work 2 DC, ch 2, 3 DC, ch 1.
Go to the next ch 2 space and place 3 DC, ch 2, 3 DC, ch 1.
Into the next ch 2 space: 3 DC, ch 2, 3 DC, ch 1.
In the last chain 2 space: 3 DC, ch 2, 3 DC, ch 1.
Join with a sl st to the top of the ch 3. Cut yarn. Fasten off. Weave in ends.
Round 3:
From the backside of the square, insert the hook into any of the chain 2 spaces. YO with color #3 and pull up a loop. Chain 3. Turn.
Now we are working from the front side of the square. Push the yarn tail to the backside of the square. Into the same chain 2 space, put 2 DC, ch 2, 3 DC, ch 1.
Into the chain 1 space put 3 DC and chain 1.
Work into the next chain 2 space: 3 DC, ch 2, 3 DC, ch 1.
In the next chain 1 space: 3 DC, ch 1.
Into the next ch 2 space: 3 DC, ch 2, 3 DC, ch 1.
Work the following into the next chain 1 space: 3 DC, ch 1.
In the final chain 2 space: 3 DC, ch 2, 3 DC, ch 1.
Into the final chain 1 space: 3 DC, ch 1.
Join with a sl st to the top of the chain 3. Cut the yarn. Fasten off. Weave in ends.
Round 4:
From the backside of the square, insert the hook. With color #4, YO and pull up a loop. Chain 3. Turn.
Now we are working on the front side of the square. Push the yarn tail to the backside of the square.
In the same chain 2 space put 2 DC, ch 2, 3 DC, ch 1.
Into each of the next two chain 1 spaces place: 3 DC, ch 1.
Now, in the chain 2 space place: 3 DC, ch 2, 3 DC, ch 1.
Work the following into each of the next two chain 1 spaces: 3 DC, ch 1.
Next, in the chain 2 space place: 3 DC, ch 2, 3 DC, ch 1.
In each of the next two chain 1 spaces: 3 DC, ch 1.
Into the final chain 2 space put: 3 DC, ch 2, 3 Dc, ch 1.
Finally, in the last two chain 1 spaces place in each: 3 DC, ch 1.
Close the round with a sl st to the top of the chain 3. Clip yarn. Fasten off. Weave in ends. You may need to block your squares to get them perfectly square.

Many Blessings,


Looking for fun crochet projects? Check these out!