
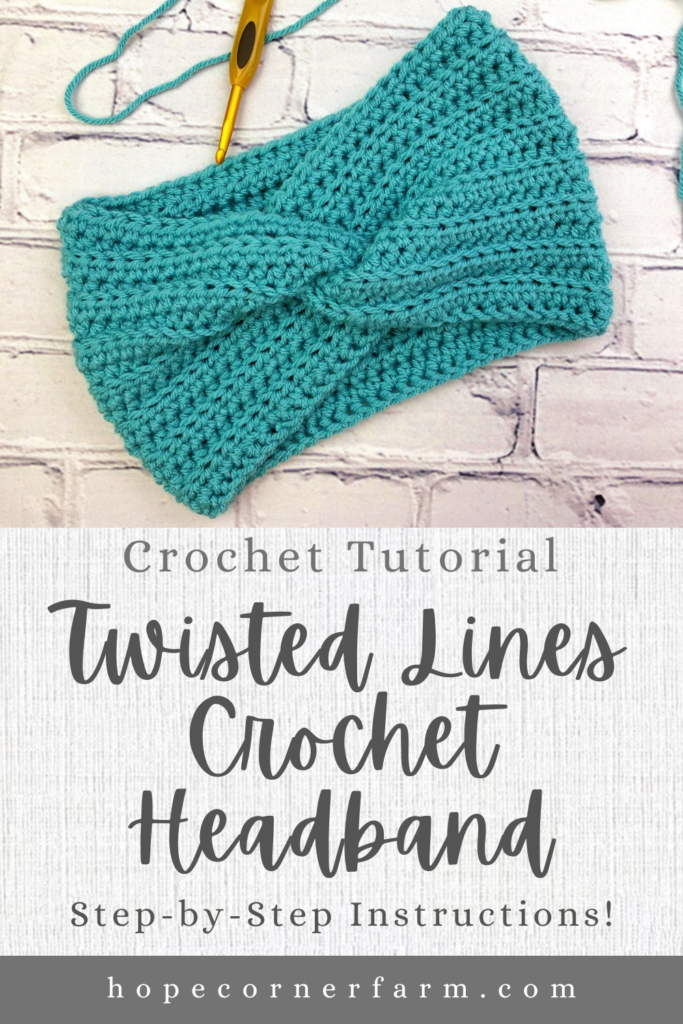
Twisted Lines Crochet Headband- Free Pattern
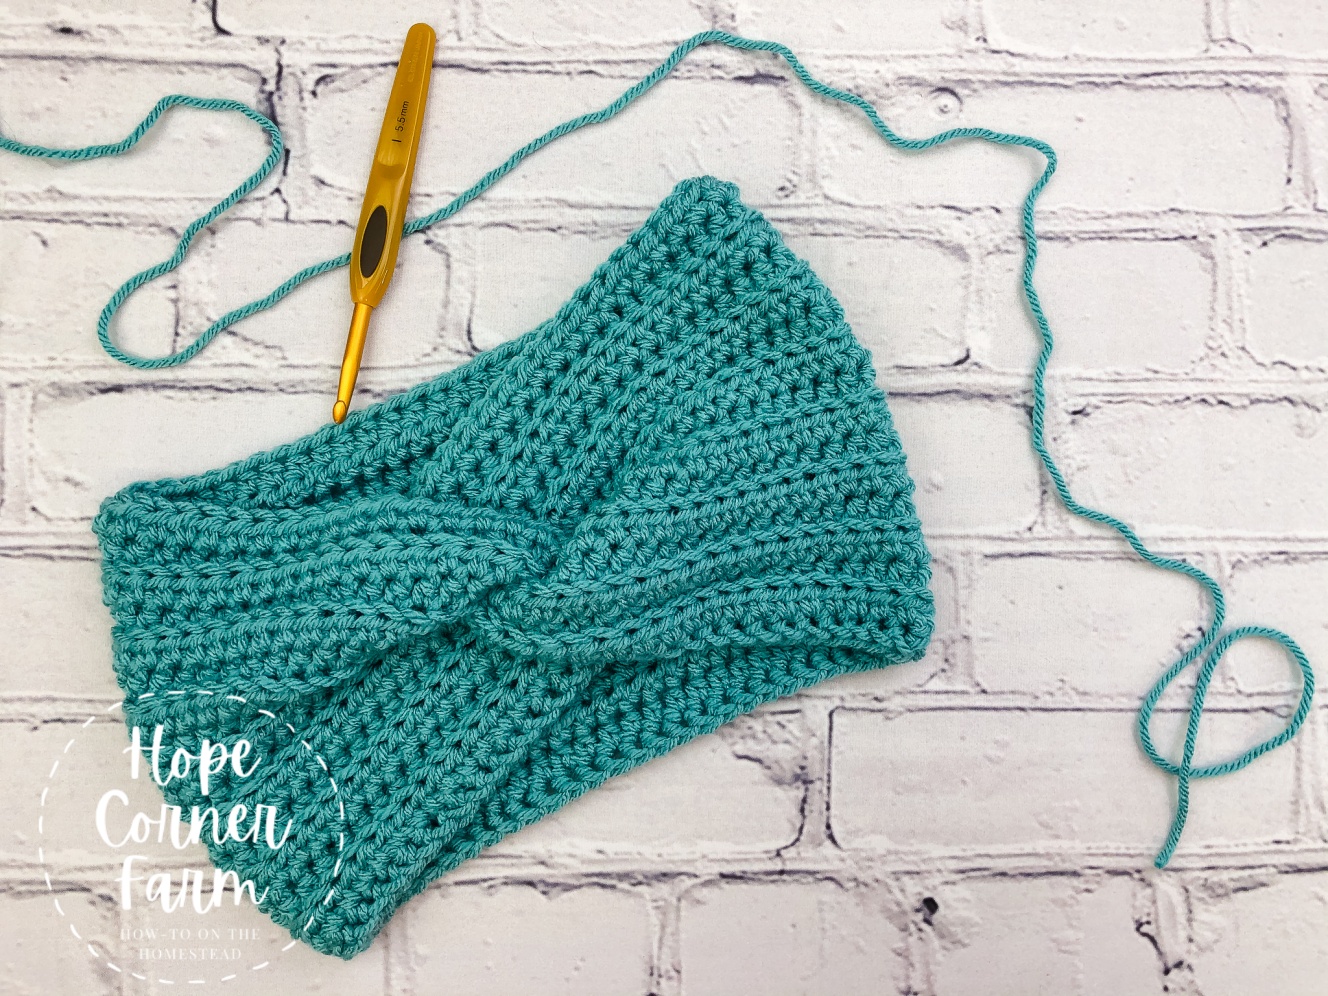

It gets cold in Montana…like really cold! In fact, this past February we had an entire week where the temperature was -30 F without the wind chill! Because I live in a deep freezer, I love cold weather gear that keeps me warm. I want to look fashionable while staying warm though. That’s why I spend a lot of time creating crocheted headbands (or ear warmers). Lately, I have become a fan of crocheted headbands with a twist, so that has been my recent focus. I am sharing my latest creation with you today: The Twisted Lines Headband (a free crochet headband pattern and tutorial).


First, check out our video tutorial on our You Tube Channel! Subscribe to get the latest crochet fun from Hope Corner Farm Crochet!
Materials Needed for the Twisted Lines Crochet Headband:
I (5.5mm) Crochet Hook
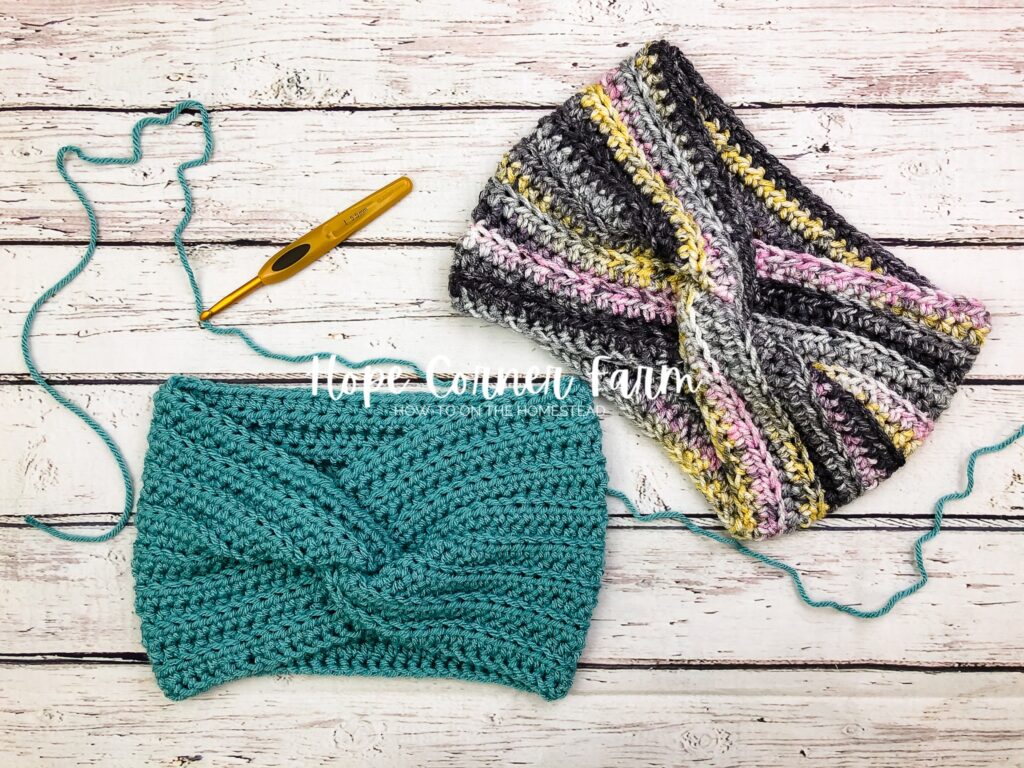
Medium weight yarn (I used Hobby Lobby’s I Love This Yarn)
Scissors
Yarn needle
Tape measure (for checking dimensions)
Crochet Terms Used:
Foundation Single Crochet (FSC)
Back Loop Half-Double Crochet (BLHDC)
To Begin the Twisted Lines Crochet Headband:
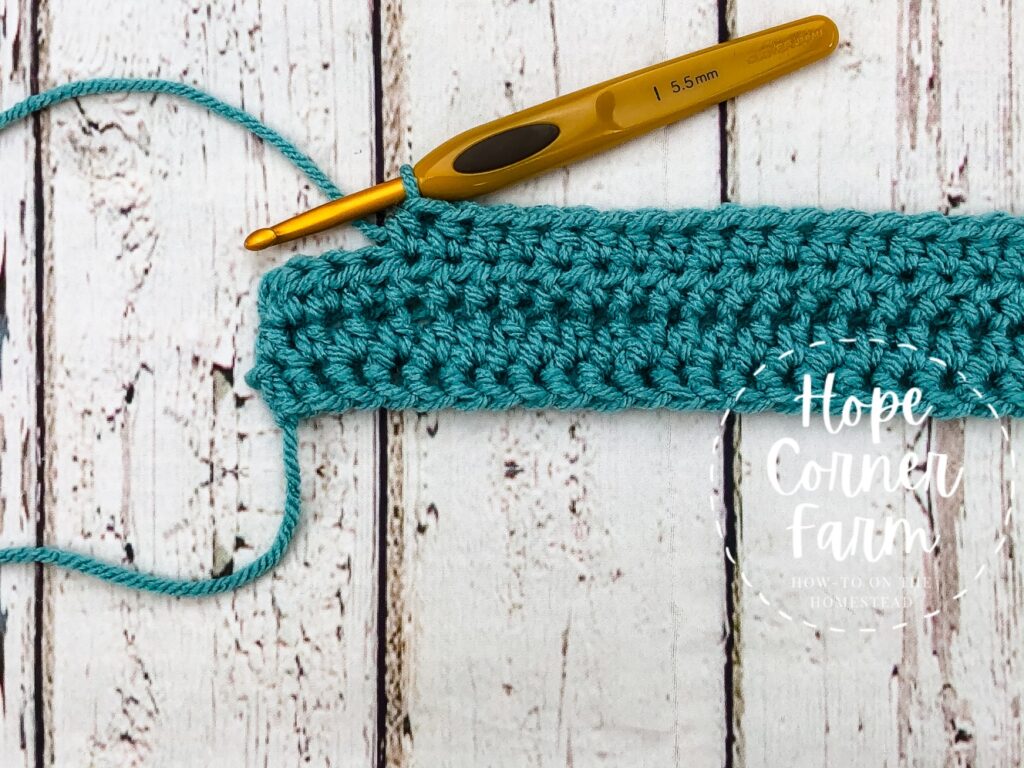
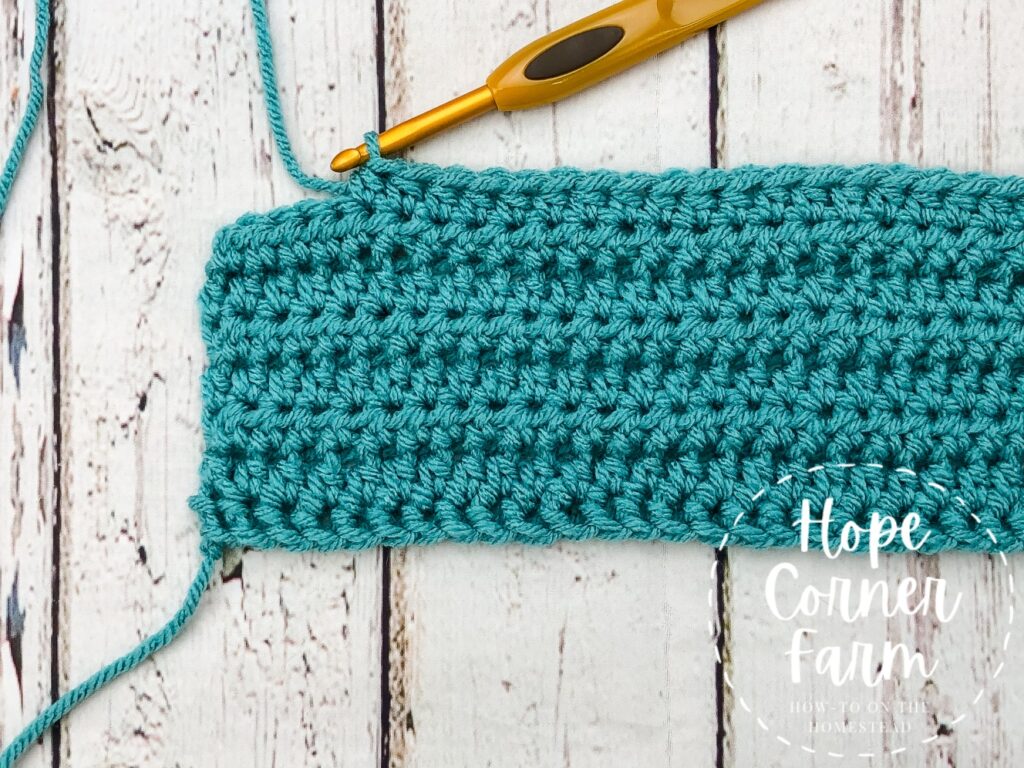
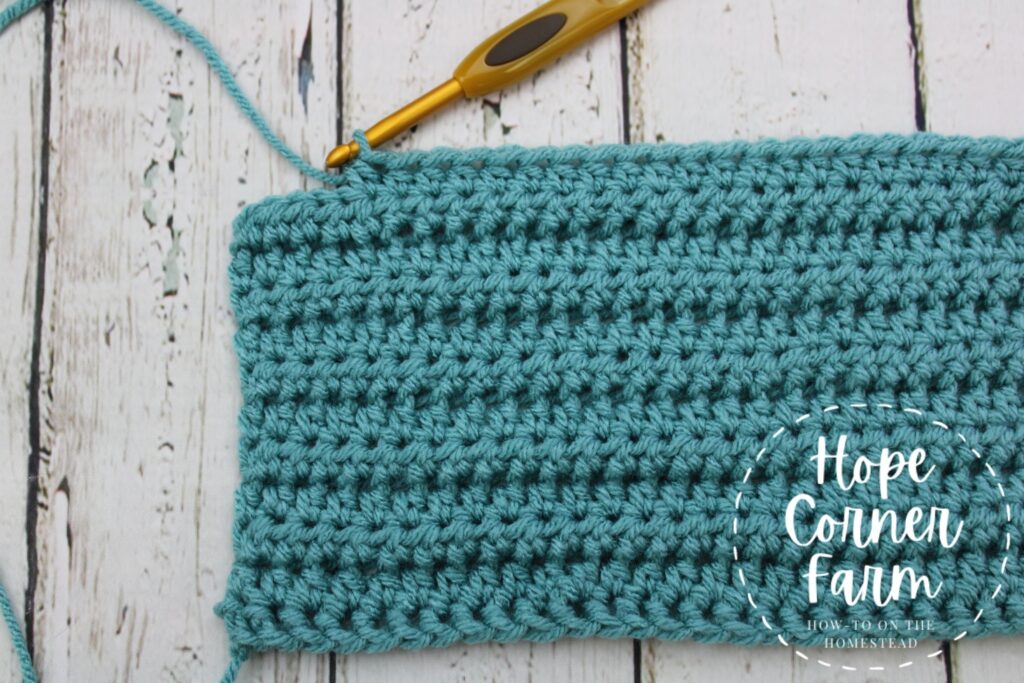
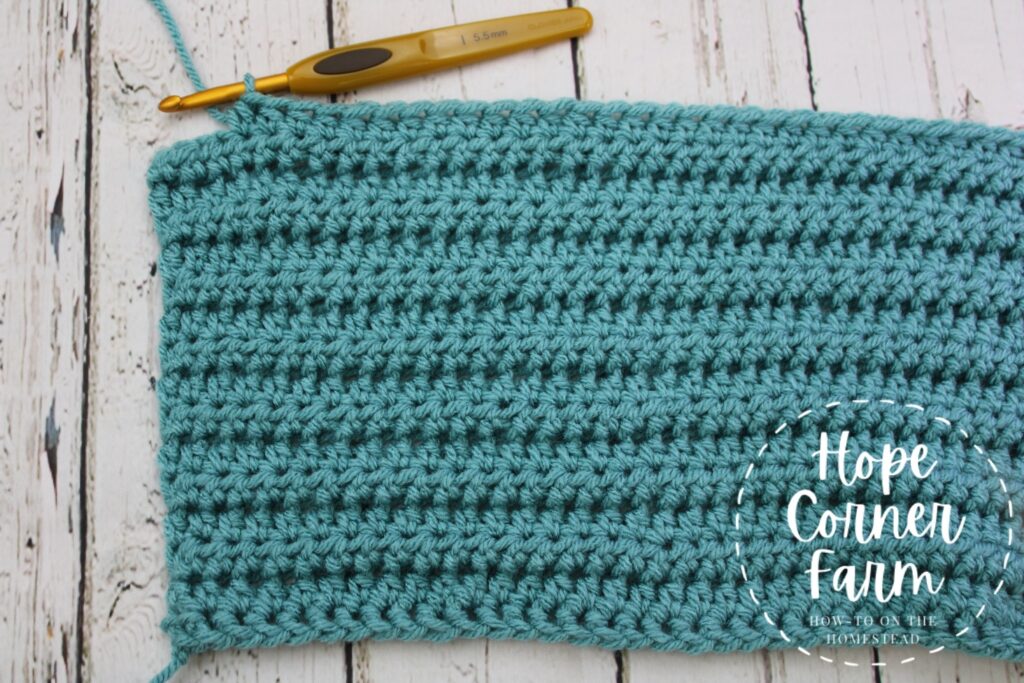
Begin by Foundation Single Crocheting (FSC) 68 times. If you are uncomfortable with the Foundation Single Crochet, you can chain 69 times, then turn and place a single crochet in the 2nd chain from the hook and a single crochet in each chain thereafter for a total of 68. Below is a video tutorial for how to Foundation Single Crochet. Once you get the hang of it you won’t go back! lol!

Row 1:
Chain 1, turn. Place one Half Double Crochet (HDC) in the first stitch and one HDC in each stitch across. (68)
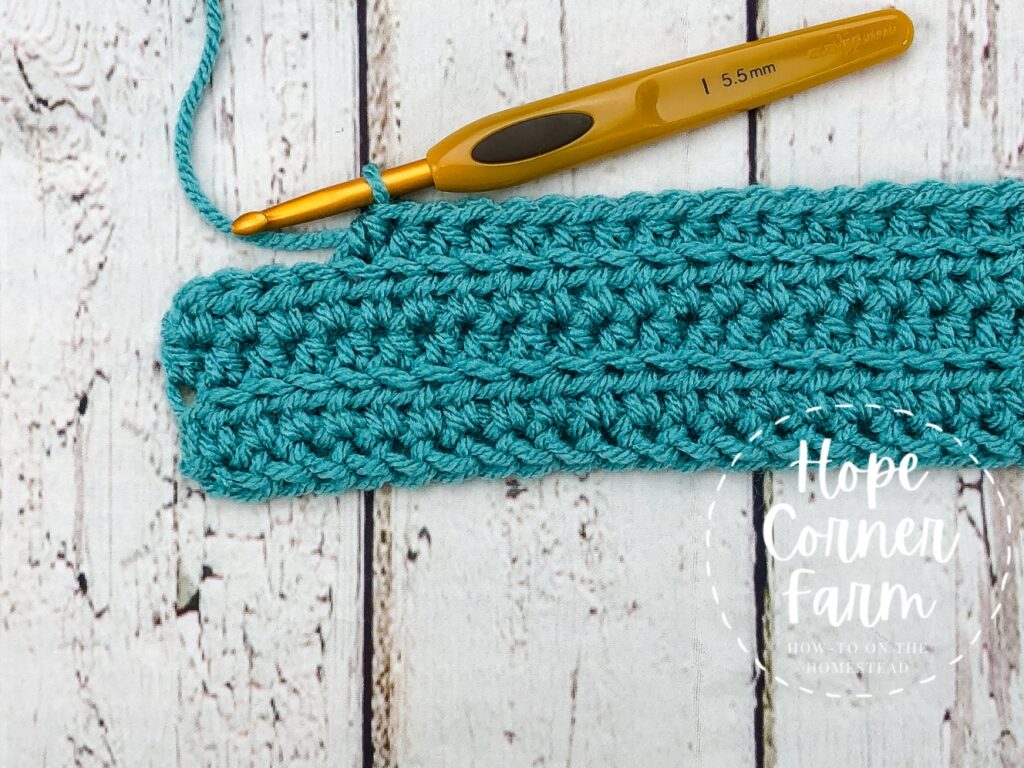
Row 2:
Row 2 starts by chaining 1 and then turning. Place one Back Loop Half Double Crochet in the first stitch and then one BLHDC in each stitch across. (68)
Row 3:
Chain 1, turn. Place one HDC in the first stitch and then one HDC in each stitch across. (68)
Row 4:
To begin Row 4, chain 1. Place one BLHDC in the first stitch and then one BLHDC in each stitch across. (68)
Row 5:
Chain 1, turn. Place one HDC in the first stitch and in each stitch across. (68)
Row 6:
Begin this row by chaining one and then turning. Place one BLHDC in the first stitch and then one BLHDC in each stitch across. (68).
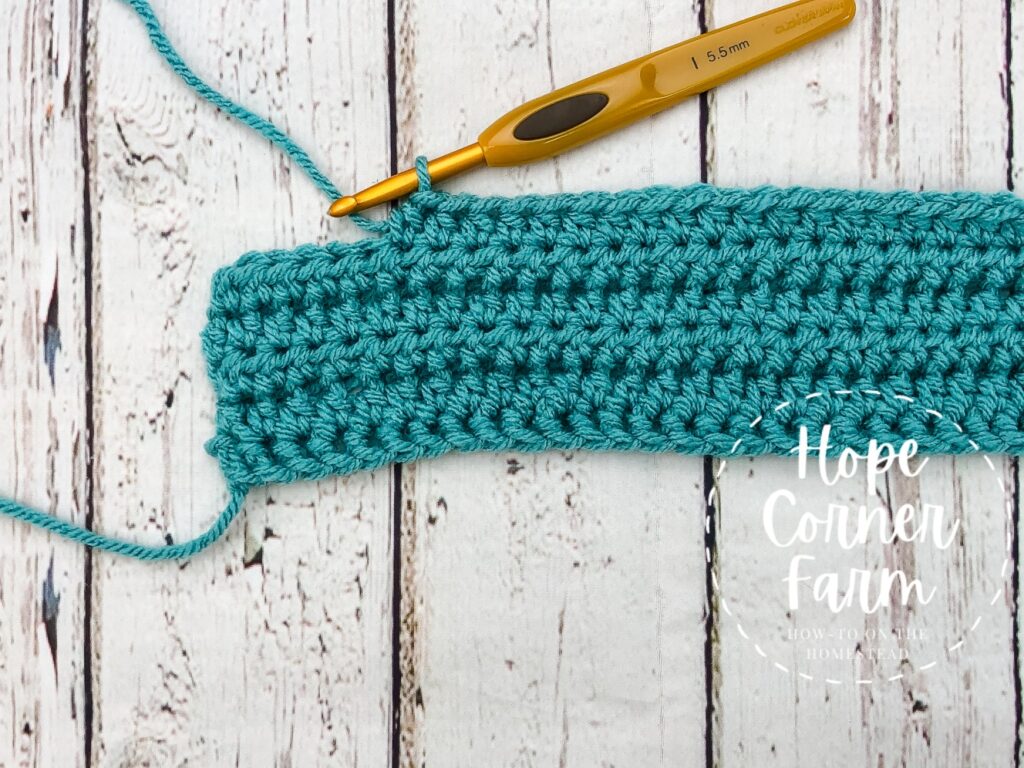
Row 7:
Chain 1, turn. Place one HDC in the first stitch and then one HDC in each stitch across. (68)
Row 8:
Start by chaining 1 and then turning. Place one BLHDC in the first stitch, then place one BLHDC in each stitch across. (68)
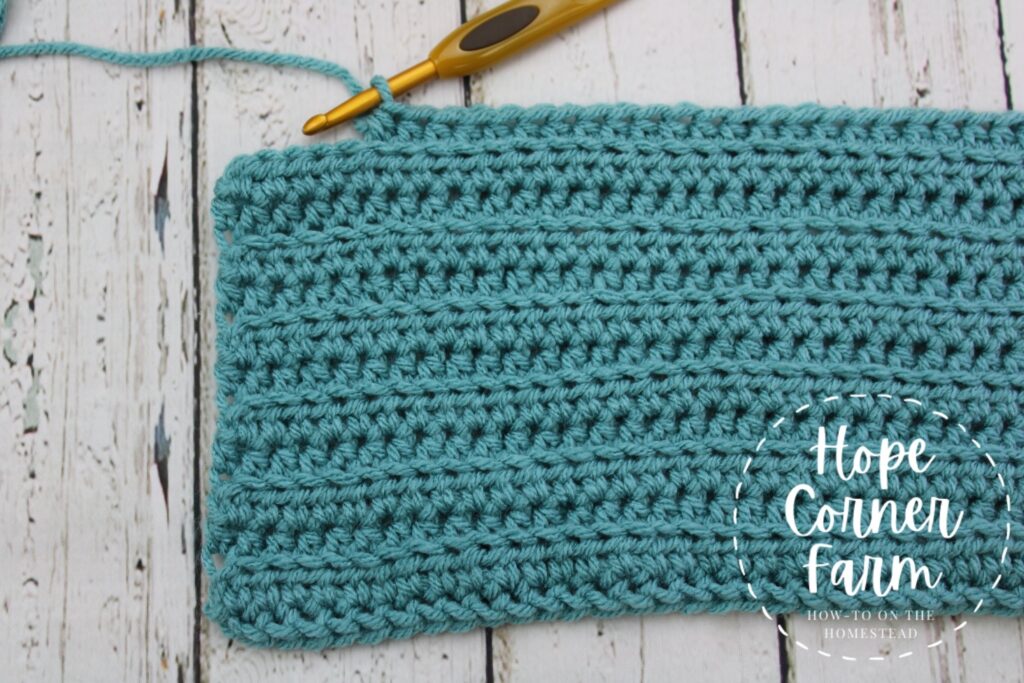
Row 9:
Chain 1, turn. Place one HDC in the first stitch and then one HDC in each stitch across. (68)
Row 10:
Start this row by chaining 1 and then turning. Place one BLHDC in the first stitch and then in each stitch across. (68)
Row 11:
Chain 1, turn. Place one HDC in the first stitch and in each stitch across. (68)
Row 12:
Begin by chaining 1 and then turning. Place one BLHDC in the first stitch and then in each stitch across. (68)
Row 13:
Ch 1, turn. Place one HDC in the first stitch and then one HDC in each stitch across. (68)
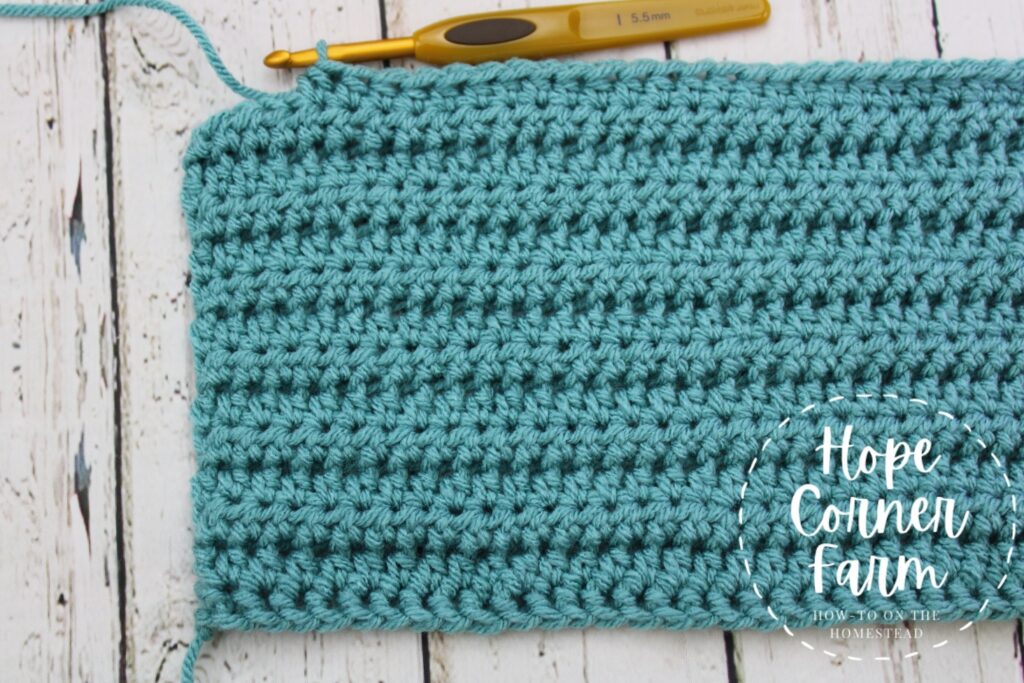
Row 14:
Begin by chaining 1 and then turning. Place one BLHDC in the first stitch and then one BLHDC in each stitch across. (68)
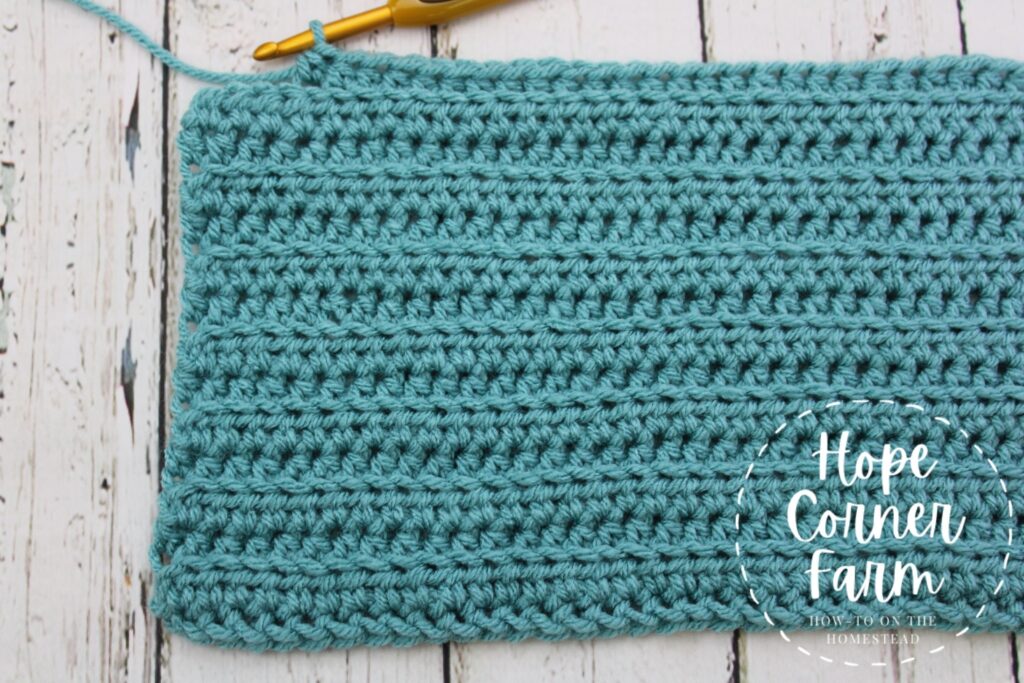
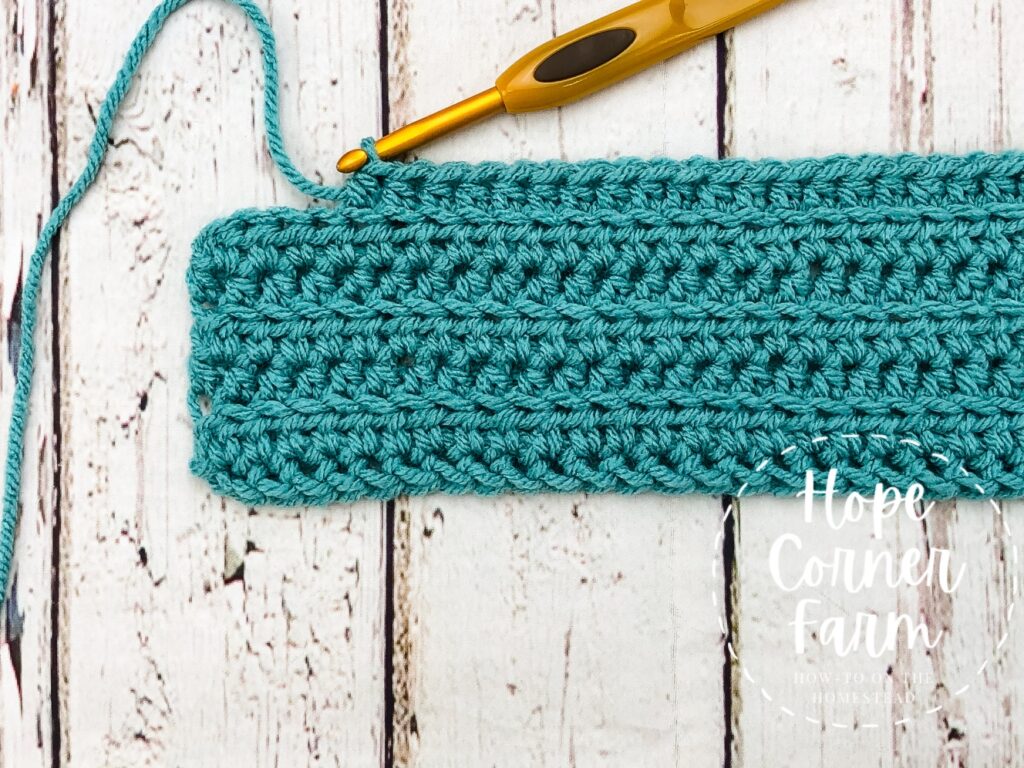
Row 15:
Ch 1, turn. Place one HDC in the first stitch from the hook and then one HDC in each stitch across. (68)
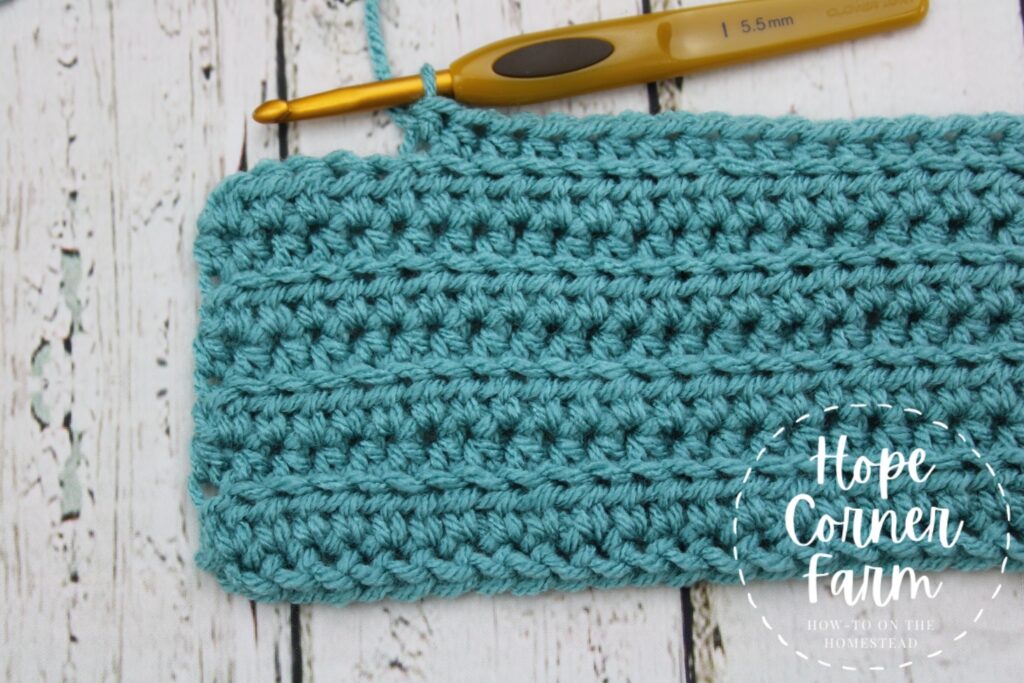
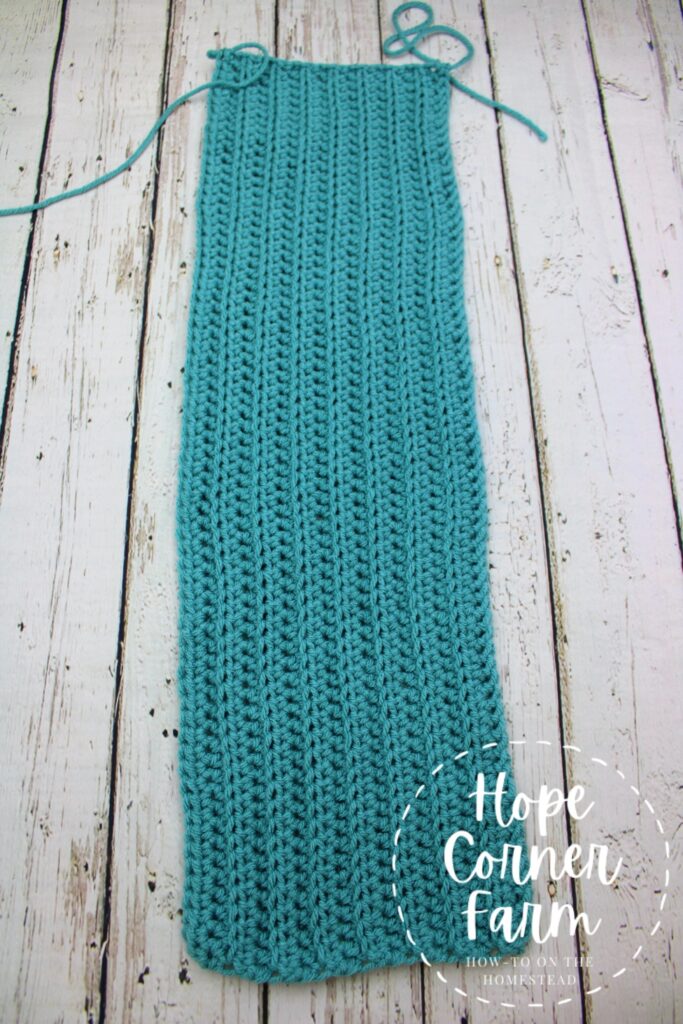
Folding the Twisted Lines Crochet Headband:
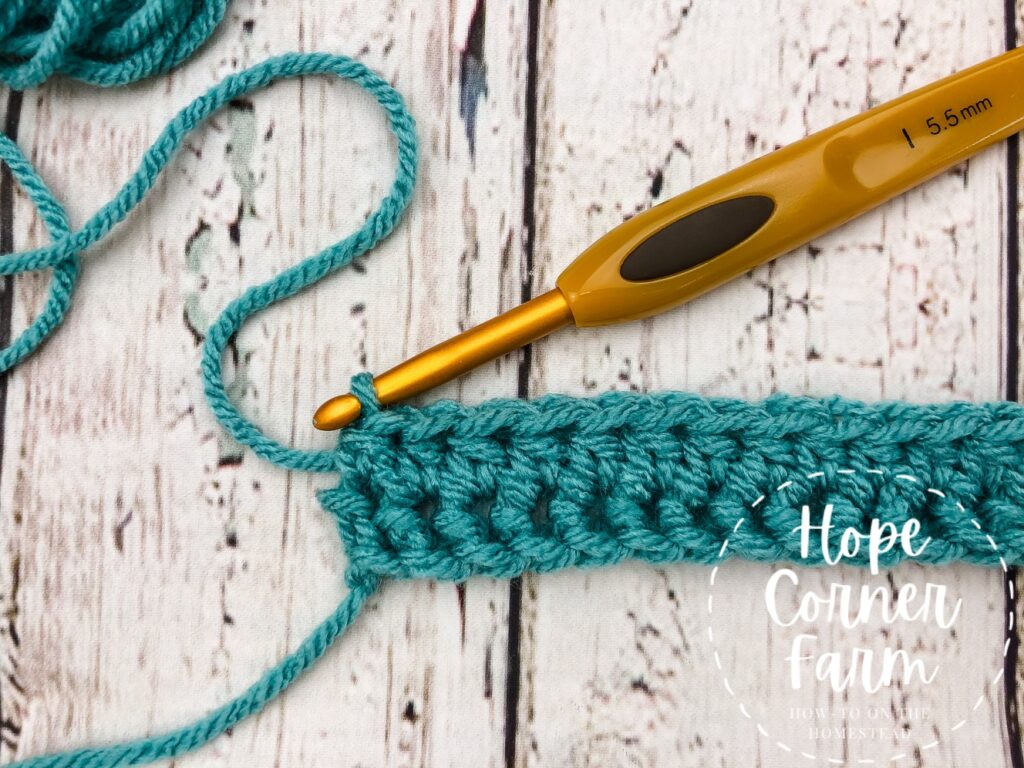
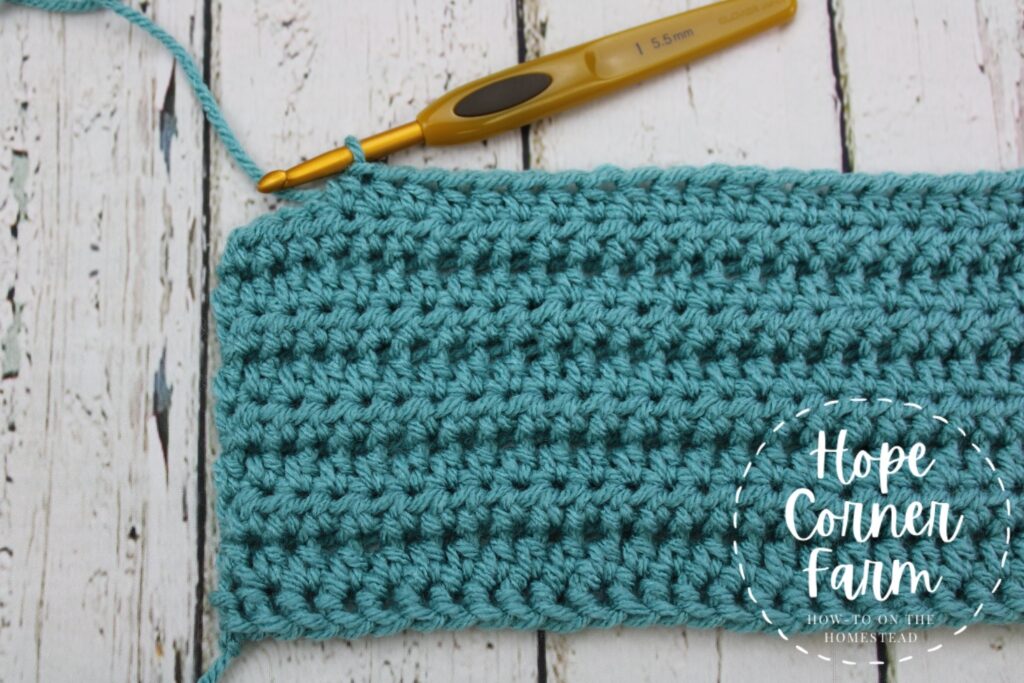
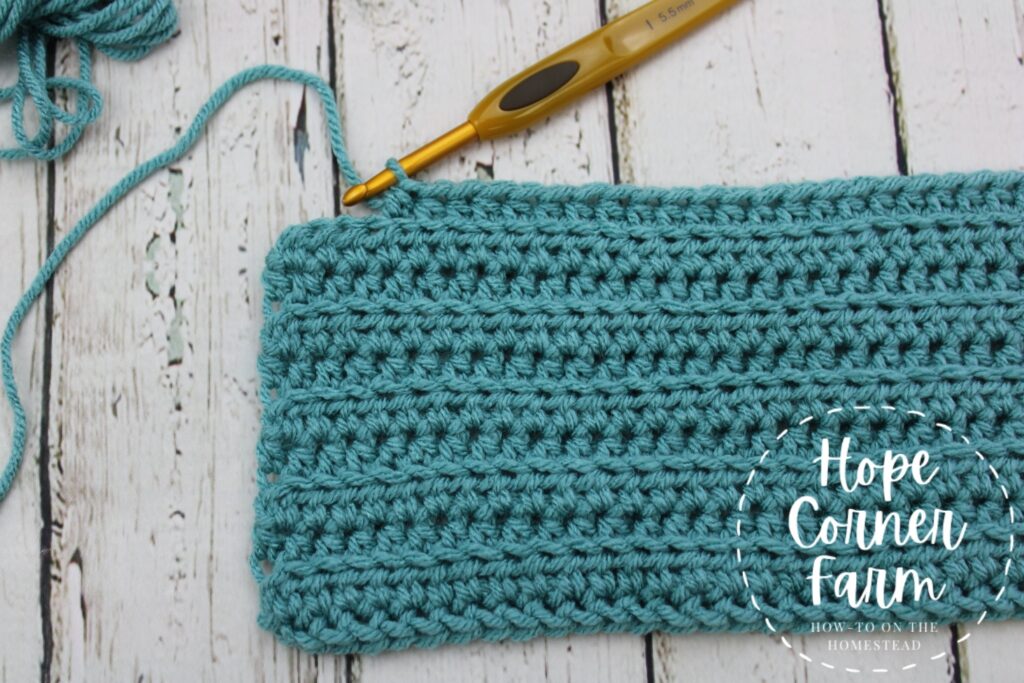
Clip the headband free from the skein of yarn. Slip stitch to secure the yarn tail.

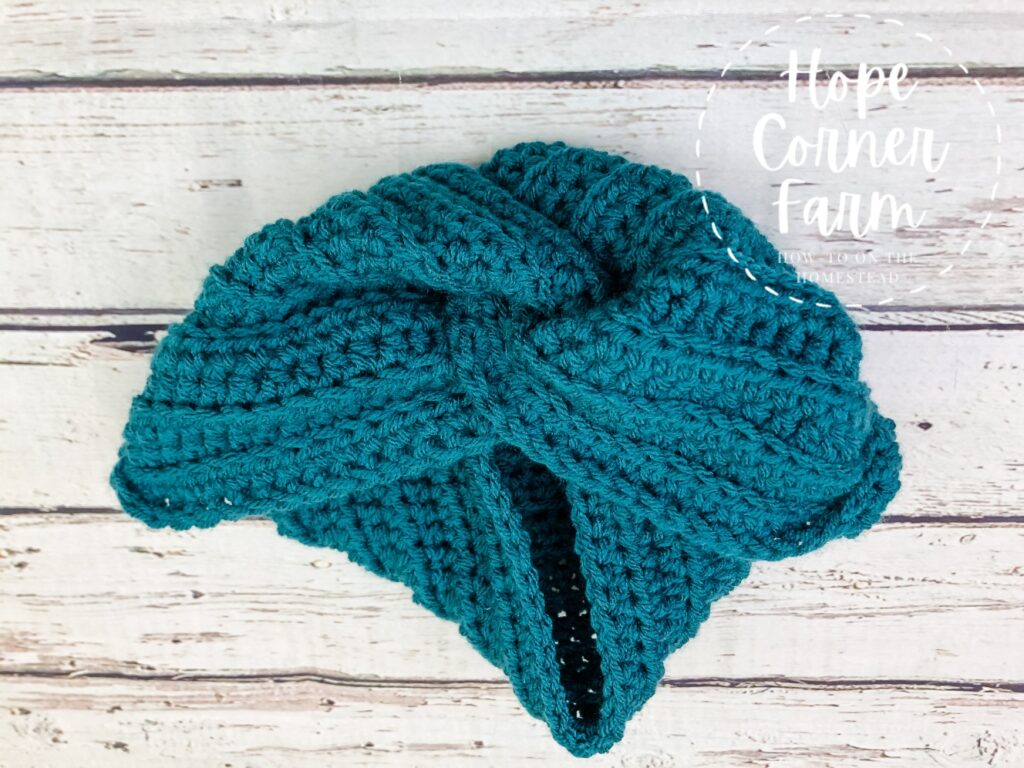
Lay the headband down on a table with the right side (the side you want facing out) up.
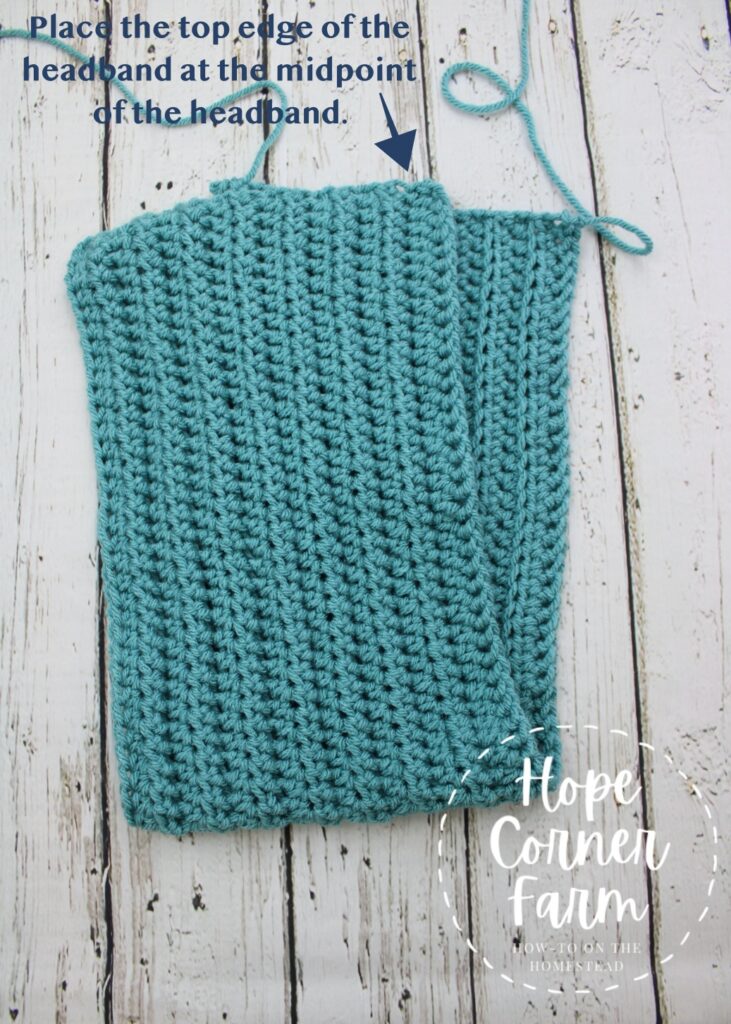
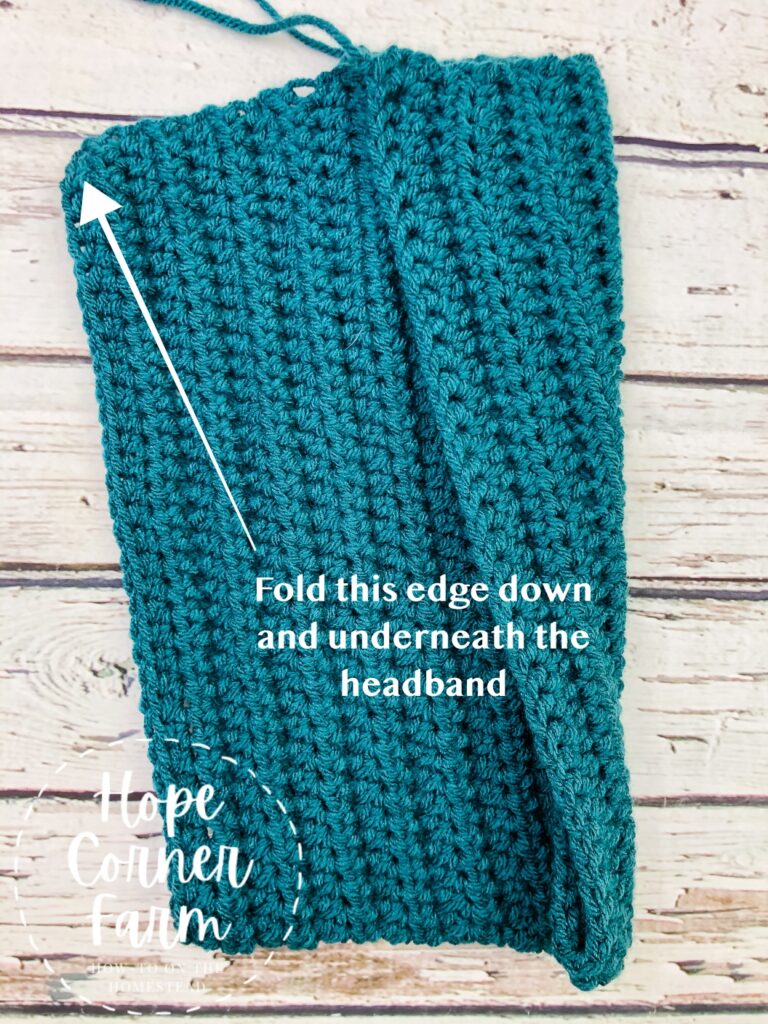
Fold the headband in half, but place the top edge of the headband at the midpoint of the headband (see picture for details).
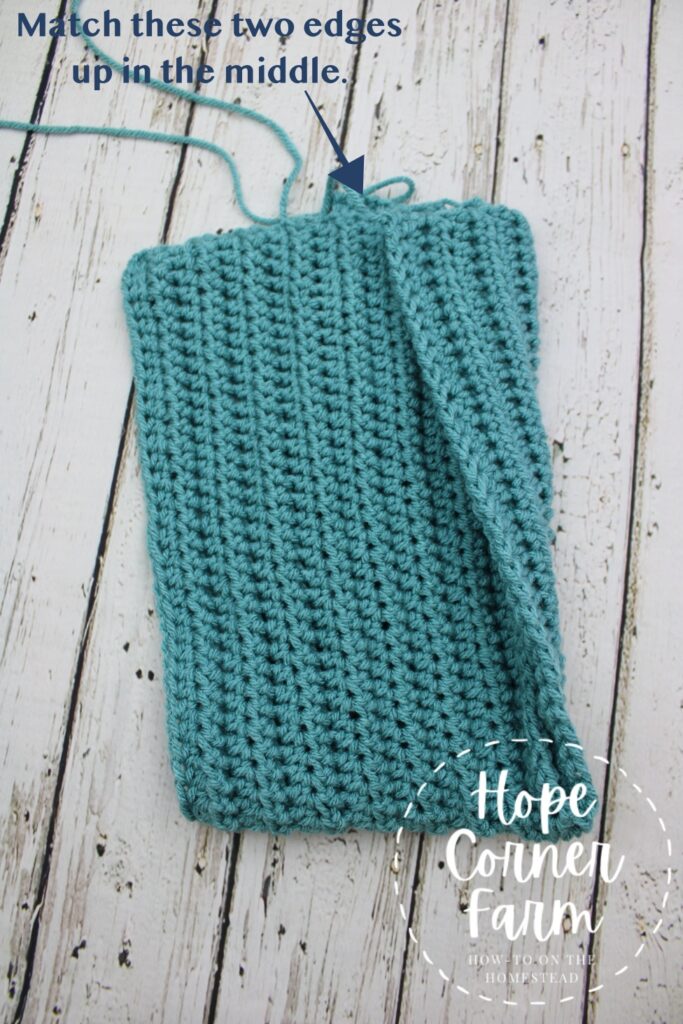
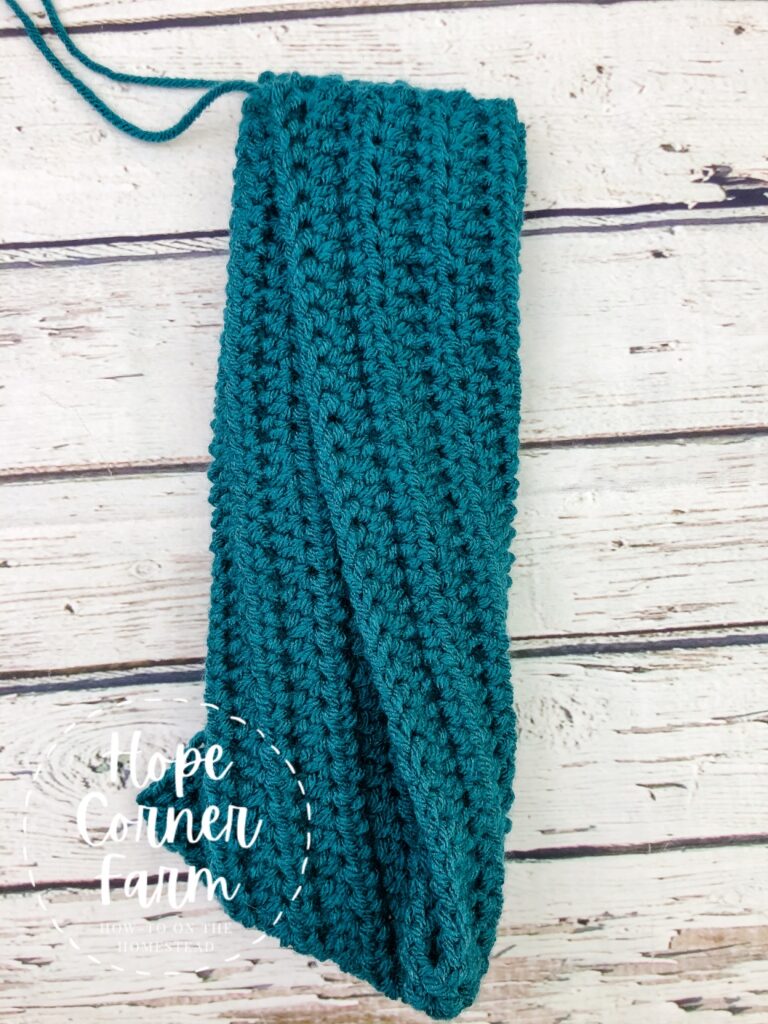
Now take the bottom side and fold it up and over the top of the headband. Make sure to match the two edges in the middle.
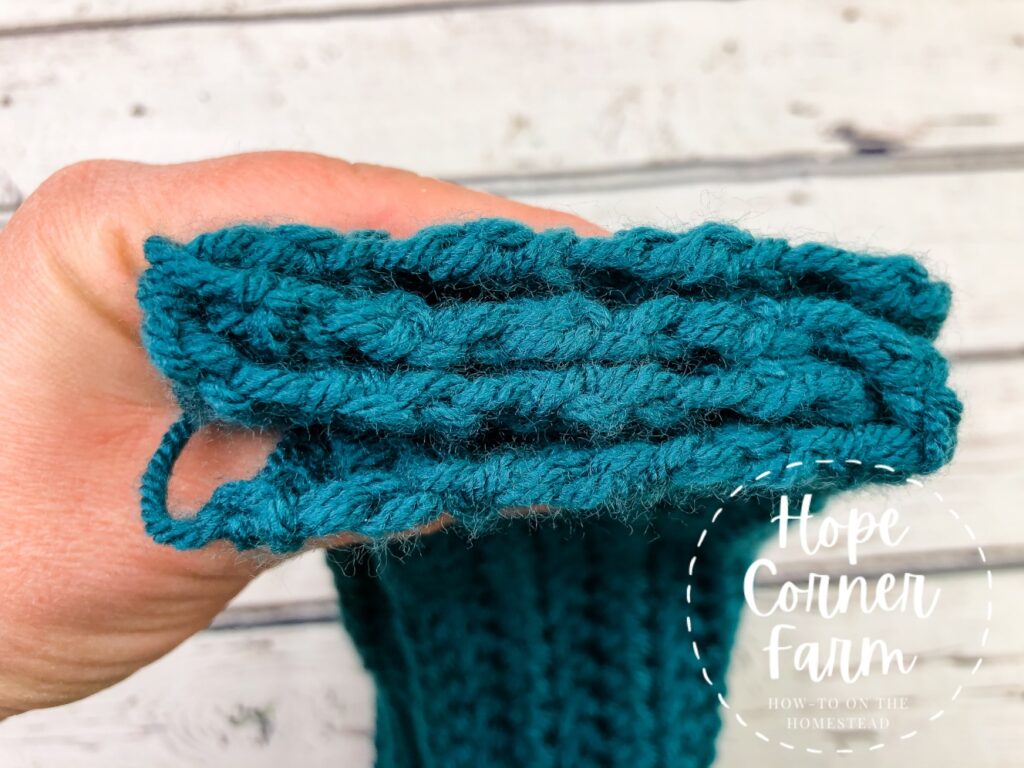
Next, fold the upper part of the headband down and underneath the headband. Make sure all of the edges are even before sewing the seam.
Sewing the Twisted Lines Crochet Headband:
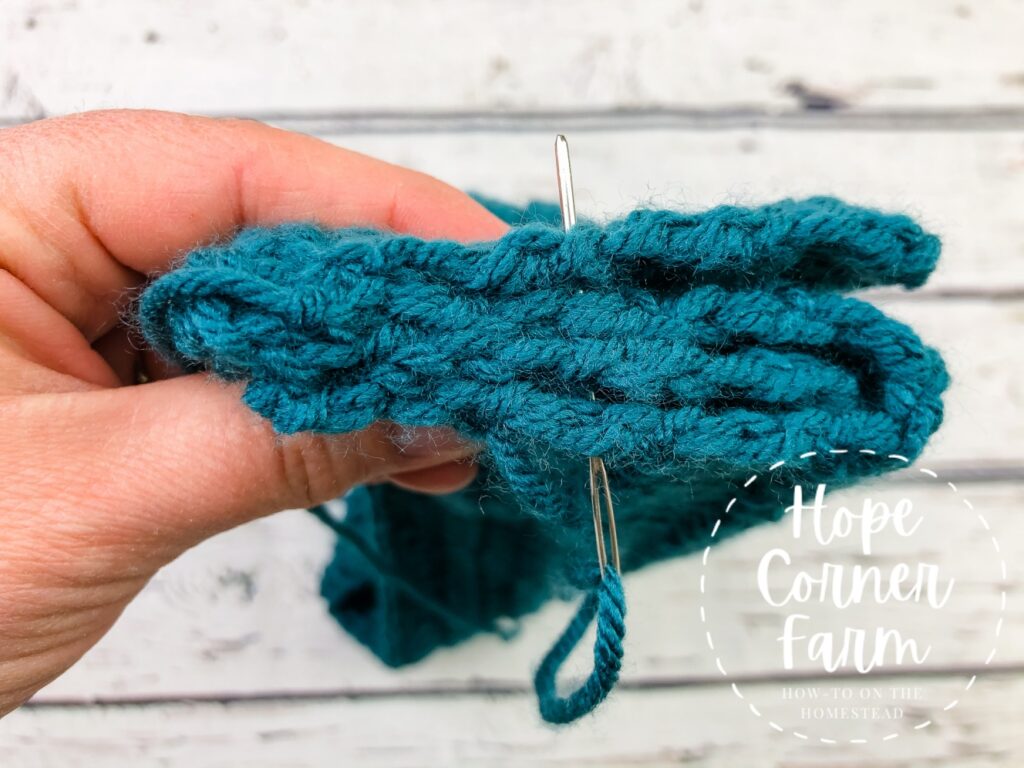
Using ONE of the yarn tails, sew across the folded edges using a running stitch. Make sure to catch all four sides when sewing!
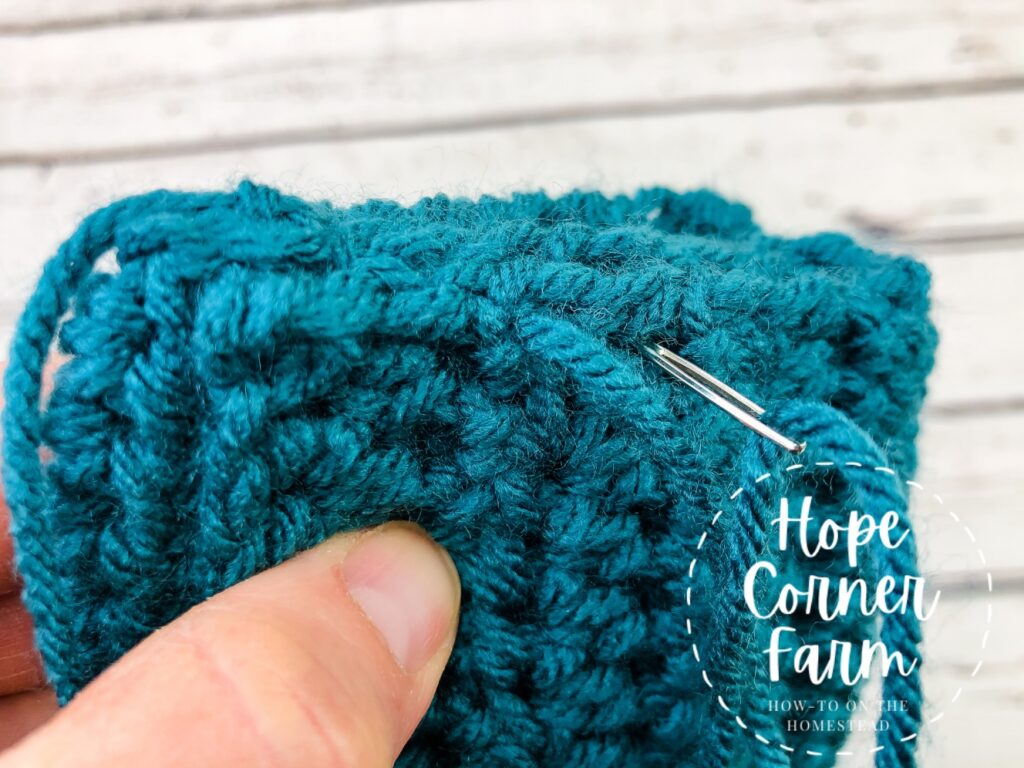
With the second yarn tail, sew across with a whip stitch over the edge of the seam. Again, make sure to catch all four edges with the stitching. Fasten off and weave in ends.
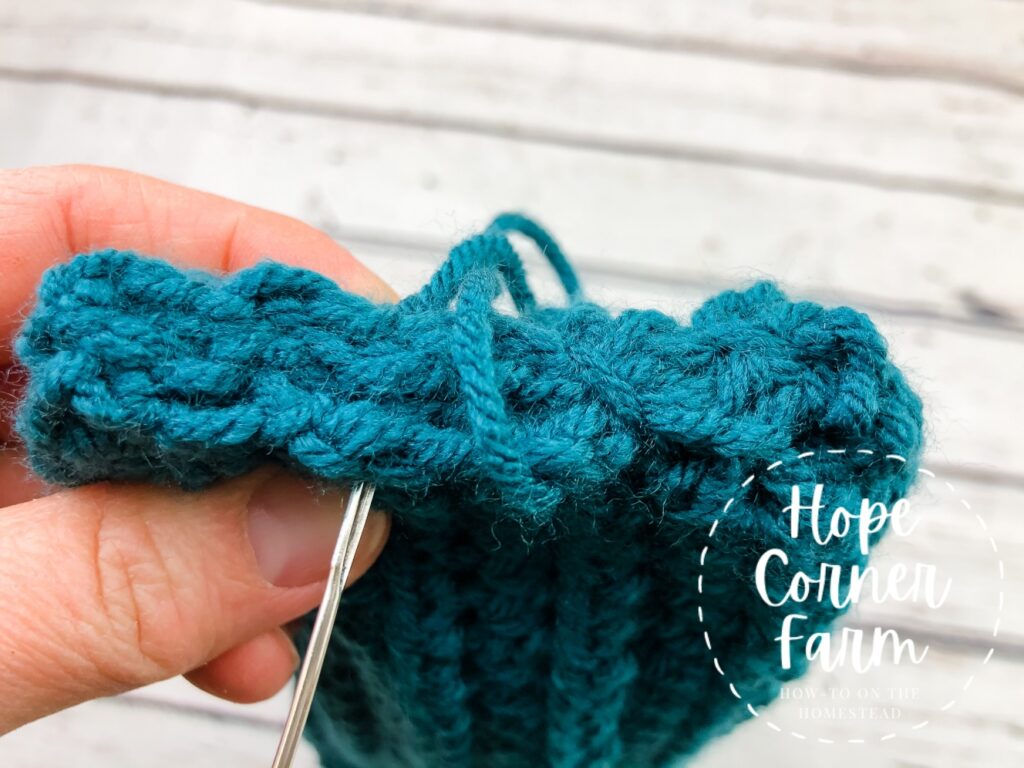
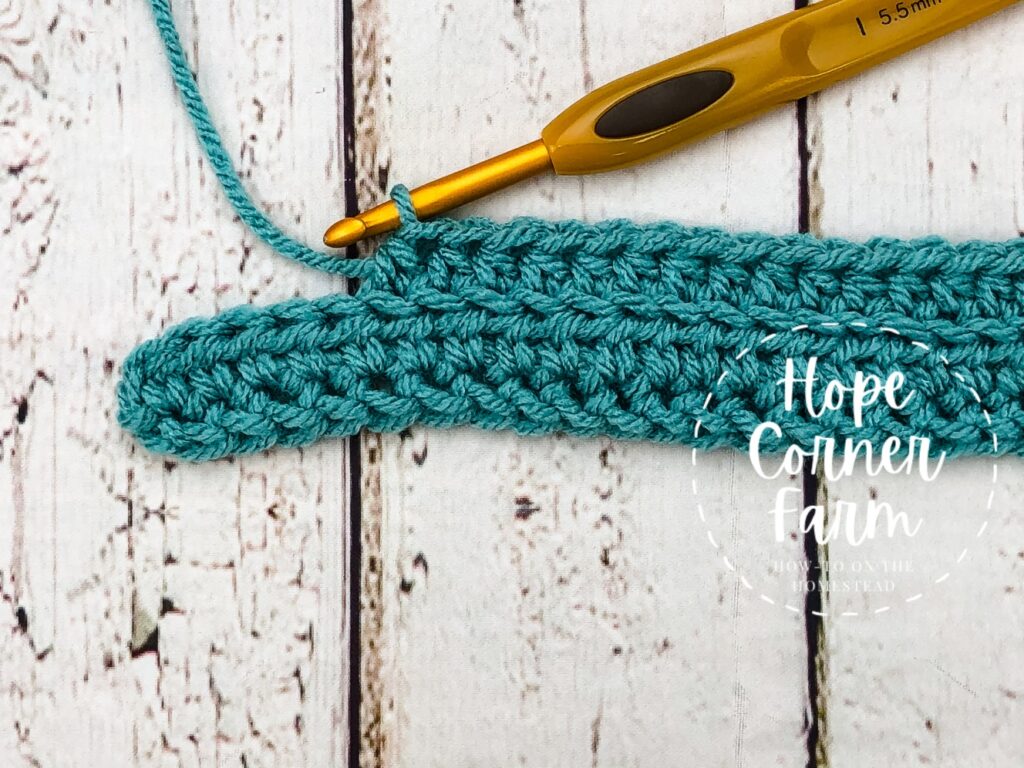
Turning the Crochet Ear Warmer:
To finish the twisted ear warmer, turn the headband right-side out. You will need to mess with it a little bit to get it to lay perfectly flat.
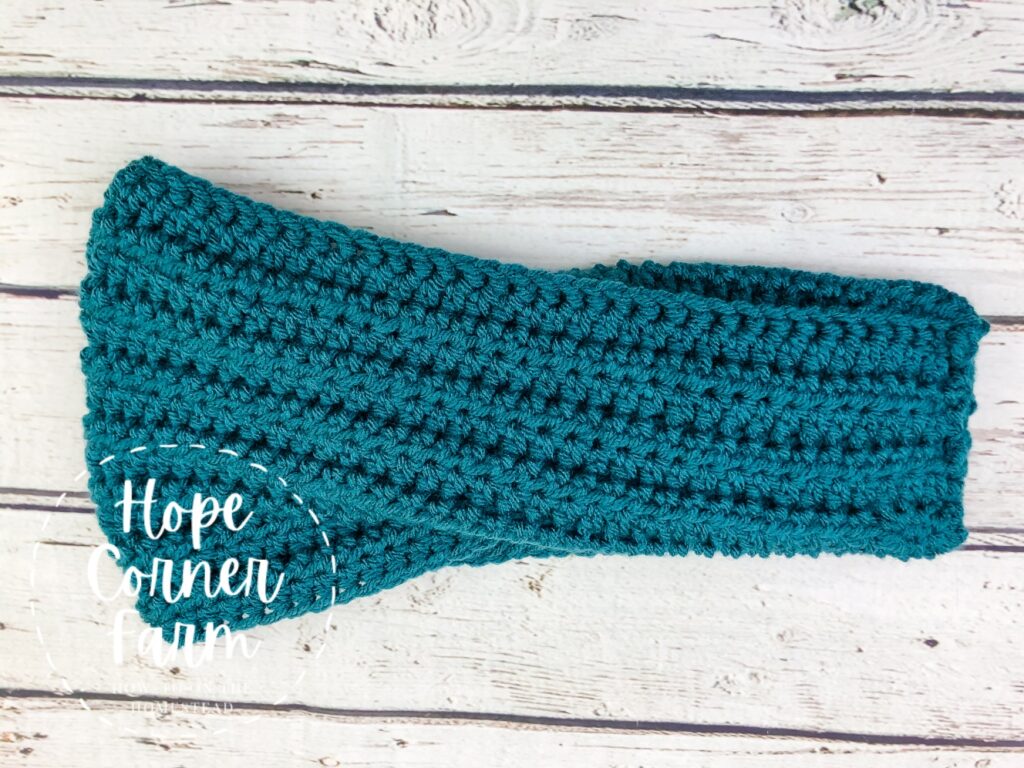
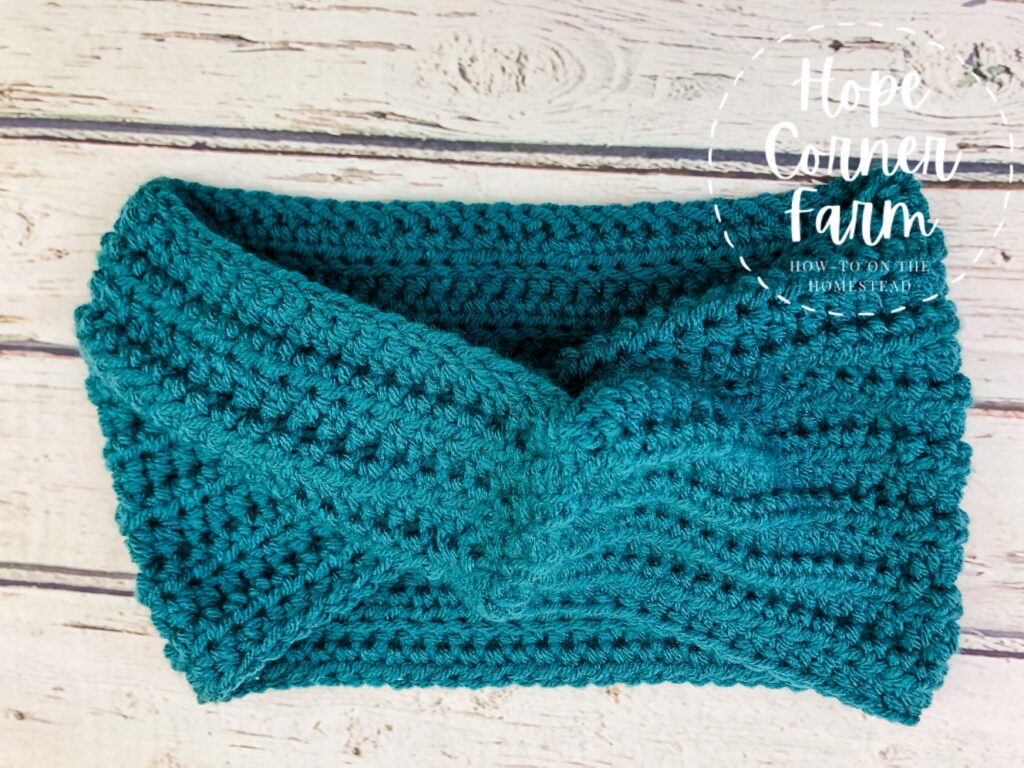
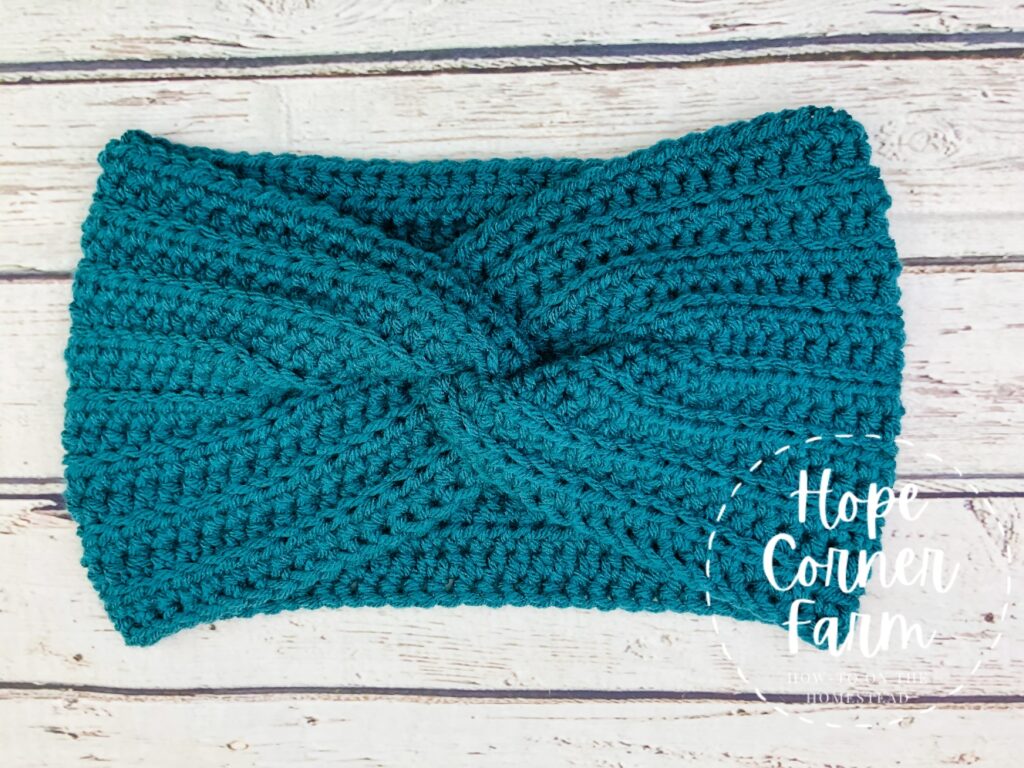
Now enjoy staying warm and looking fashionable too!
Video Tutorial for the Twisted Lines Crochet Headband:
Written Pattern for the Twisted Lines Crochet Headband:
To Start the Twisted Lines Crochet Headband:
Begin by Foundation Single Crocheting (FSC) 68 times. If you are uncomfortable with the Foundation Single Crochet, you can chain 69 times, then turn and place a single crochet in the 2nd chain from the hook and a single crochet in each chain thereafter for a total of 68.
Row 1:
Chain 1, turn. Place one Half Double Crochet (HDC) in the first stitch and one HDC in each stitch across. (68)
Row 2:
Row 2 starts by chaining 1 and then turning. Place one Back Loop Half Double Crochet in the first stitch and then one BLHDC in each stitch across. (68)
Rows 3, 5, 7, 9, 11, 13, & 15:
Repeat Row 1.
Rows 4, 6, 8, 10, 12, & 14:
These even rows are a repeat of Row 2.
Finishing the Twisted Lines Crochet Headband:
Clip the headband free from the skein of yarn. Slip stitch to secure the yarn tail.
Lay the headband down on a table with the right side (the side you want facing out) up.
Now take the bottom side and fold it up and over the top of the headband. Make sure to match the two edges in the middle.
Next, fold the upper part of the headband down and underneath the headband. Make sure all of the edges are even before sewing the seam.
Using ONE of the yarn tails, sew across the folded edges using a running stitch. Make sure to catch all four sides when sewing!
With the second yarn tail, sew across with a whip stitch over the edge of the seam. Again, make sure to catch all four edges with the stitching. Fasten off and weave in ends.
To finish the twisted ear warmer, turn the headband right-side out. You will need to mess with it a little bit to get it to lay perfectly flat.
Now enjoy staying warm and looking fashionable too!
Many Blessings,


Looking for More Free Crochet Headband Patterns? Check These Out!
How to Crochet a Buffalo Plaid Crochet Ear Warmer from Hope Corner Farm
Free and Easy Crochet Ear Warmer from Hope Corner Farm
Free Crochet Headband Pattern from Hope Corner Farm
Half Herringbone Twist Crochet Ear Warmer from Hope Corner Farm
Crochet Buffalo Plaid Twist Headband from Hope Corner Farm