
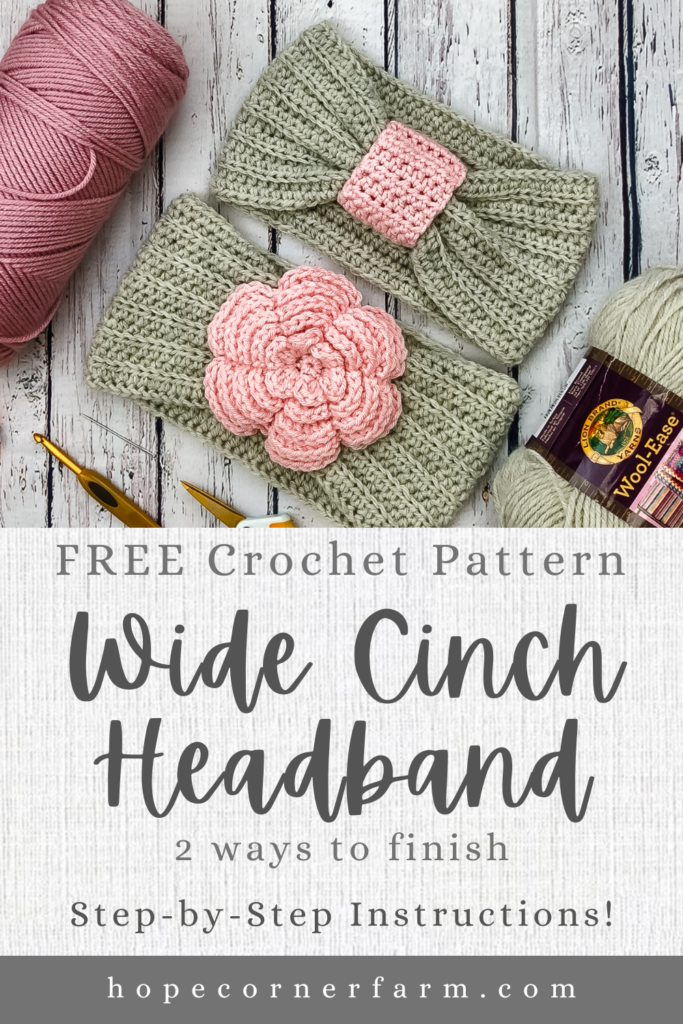
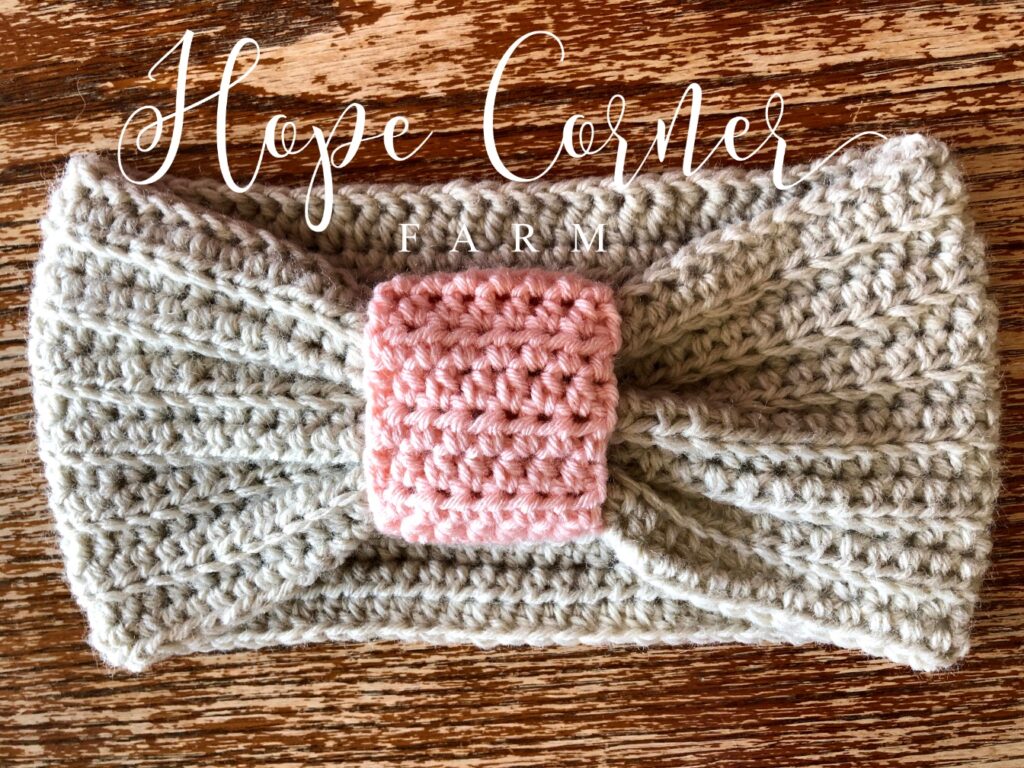
Wide Cinch Headband Crochet Pattern


September is here and there is a little bit of a chill in the air today. This is the time of year that I start working on warm winter gear. I love hats for their warmth, but I hate hat head! With that in mind, I decided to create a wider headband that would keep more of my head warm, but wouldn’t mess my hair up as much. I love this wide cinch headband! As a side note, this crocheted wide cinch headband has become one of the best sellers for me at craft fairs! Other people seem to like this headband a lot too!


First, check out our video tutorial on our You Tube Channel! Subscribe to get the latest crochet fun from Hope Corner Farm Crochet!
Materials Needed for Wide Cinch Headband:
This tutorial uses US crochet terms.
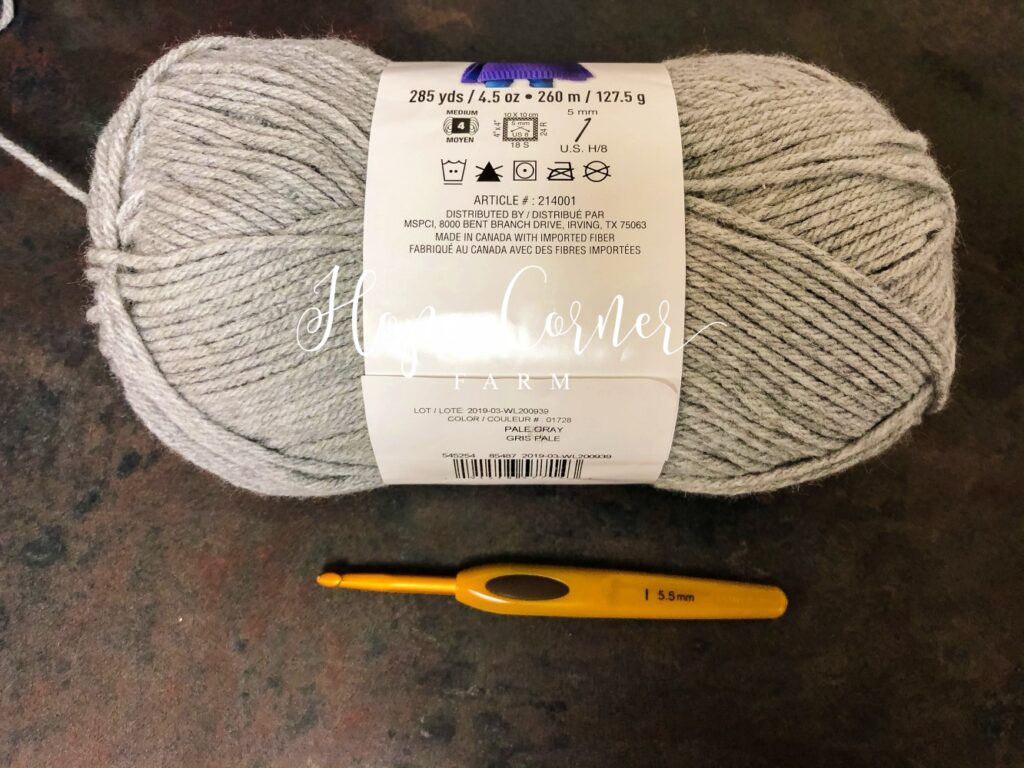
Size 4 – medium weight yarn in 2 different colors (headband body and flower or cuff finish)
Crochet hook – size I – 5.5mm
Tapestry needle/yarn needle
Scissors
Crochet Terms and Abbreviations:
Chain (CH)
Single Crochet (SC)
Foundation single crochet (FSC)
Half double crochet (HDC)
Back loop half double crochet (BLHDC)
Slip stitch (Sl St)
Gauge:
4 HDC wide x 4 HDC tall = 1″ square
Crochet Headband Dimensions:
19 1/2″ long x 5 3/4″ tall for the Adult Size
Stitches to Know:
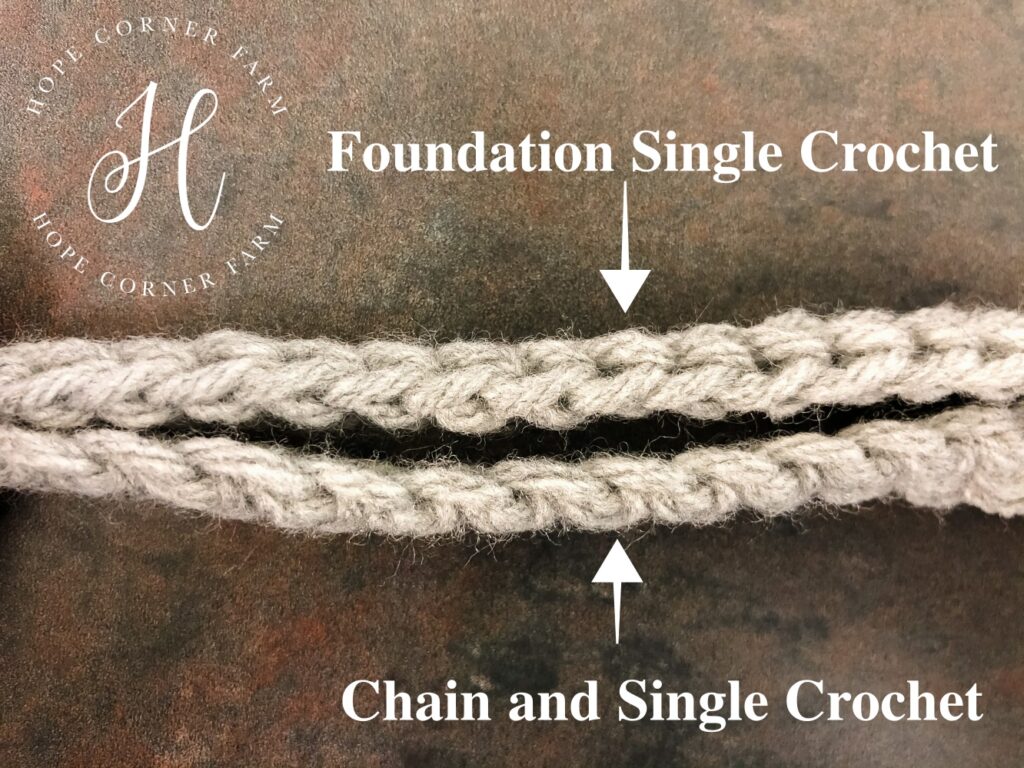
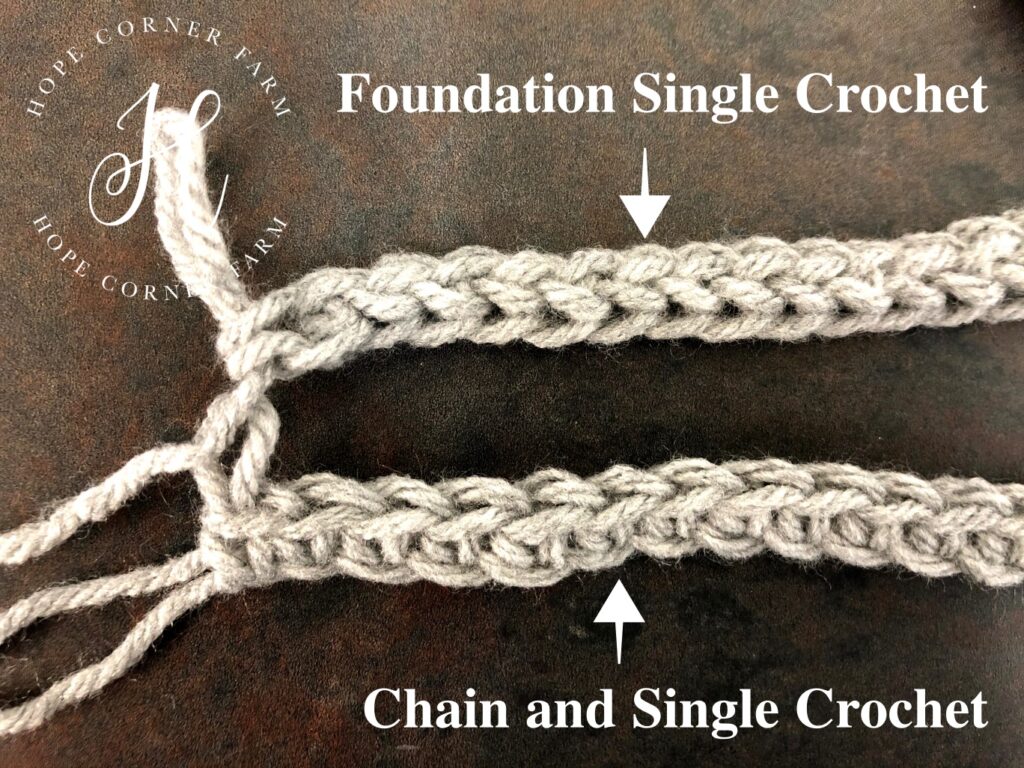
Foundation Single Crochet (FSC) – my preferred way to start the headband
1.) Chain 2.
2.) Insert hook into 2nd ch from hook. Yarn over and
draw up a loop.
3.) Yarn over and draw 1 loop on hook (now there are 2
loops on the hook).
4.) Yarn over and draw through both loops to complete
the single crochet (this counts as ONE FSC).
5.) Repeat as indicated in the pattern.
Chain and Single Crochet (Ch and SC) – an alternate way to start the wide cinch headband
1.) Begin with a slip knot on the hook. Bring yarn over
hook from back to front and grab it with hook.
2.) Draw hooked yarn through slip knot and onto hook.
This makes one chain stitch. Repeat as indicated.
3.) Beginning in the 2nd chain from the hook, Insert
hook into center of next chain stitch. Draw yarn
through the chain stitch and up onto the hook. There
are now 2 loops on hook.
4.)Bring yarn over hook from back to front, and draw it
through both loops on hook. One loop remains on the
hook, and you have just made one single crochet (SC)
stitch. Repeat as indicated.
Back Loop Half Double Crochet
1.)Yarn over the hook and insert hook under ONLY the
back loop of the stitch.
2.)Yarn over and pull the yarn through the
three loops on your hook.
3.) This makes one complete back loop half
double crochet (BLHDC). Repeat as indicated.
Instructions:
To Start
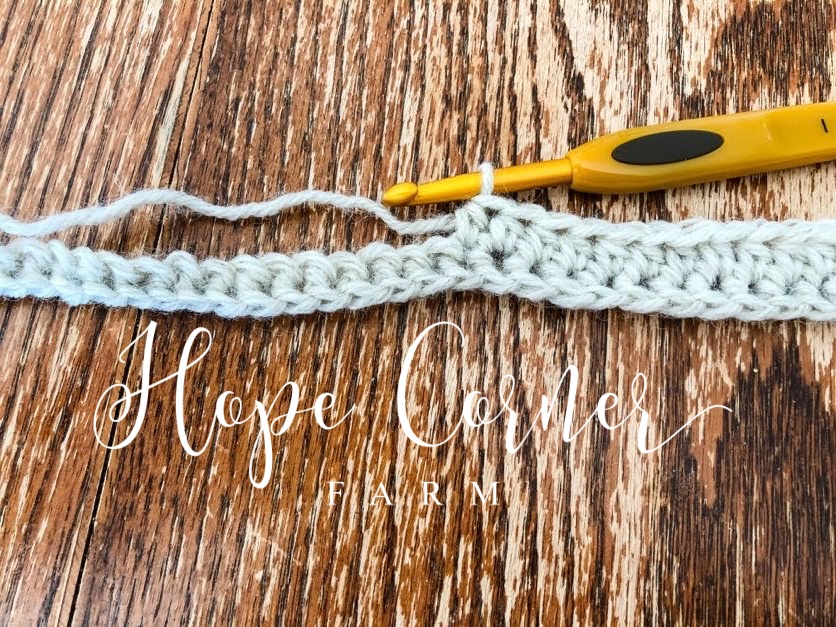
Either begin by Foundation Single Crocheting (FSC) 66 times, OR Chain 67 then single crochet (SC) into the second chain from the hook and single crochet in each chain across for a total of 66 single crochets. I prefer to FSC because it gives a nicer edge to the wide cinch headband. This is all personal preference, either method works, just CHOOSE ONE!
Row 1
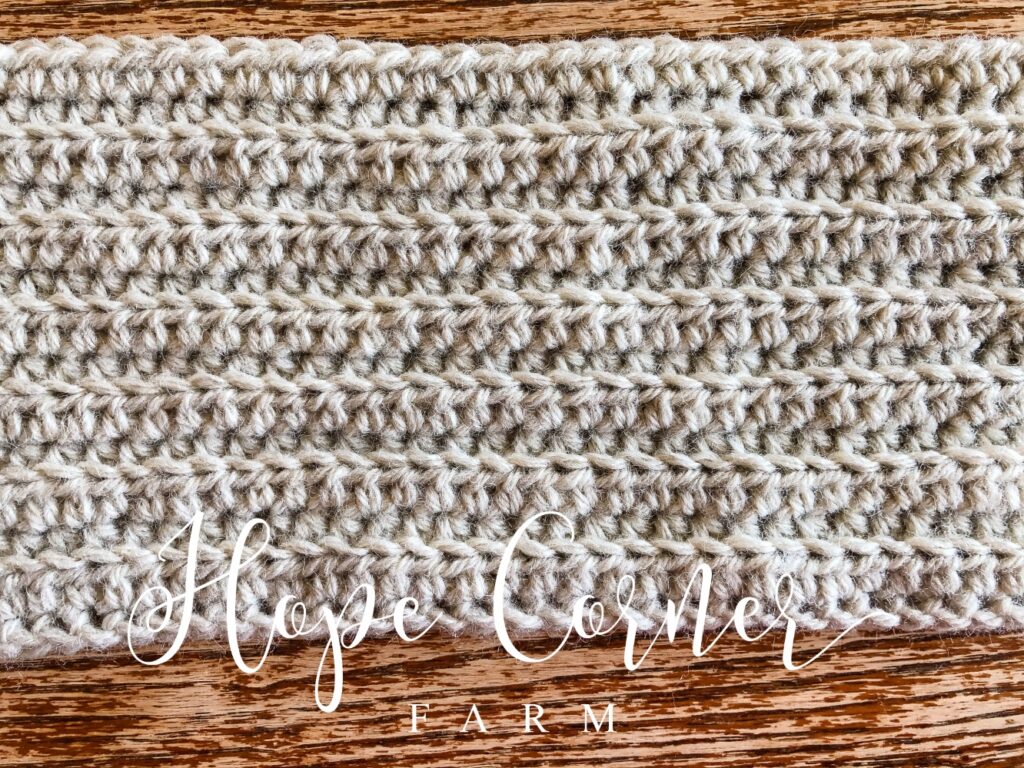
Ch 1, turn, HDC in each stitch across. (66)
Row 2
Ch 1, turn, BLHDC in each stitch across. (66)
Row 3
Ch 1, turn, HDC in each stitch across. (66)
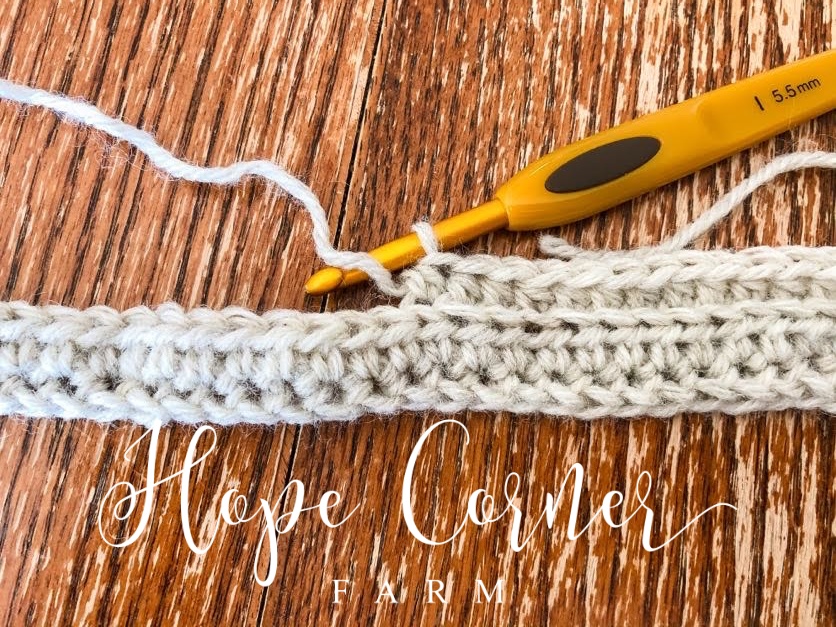
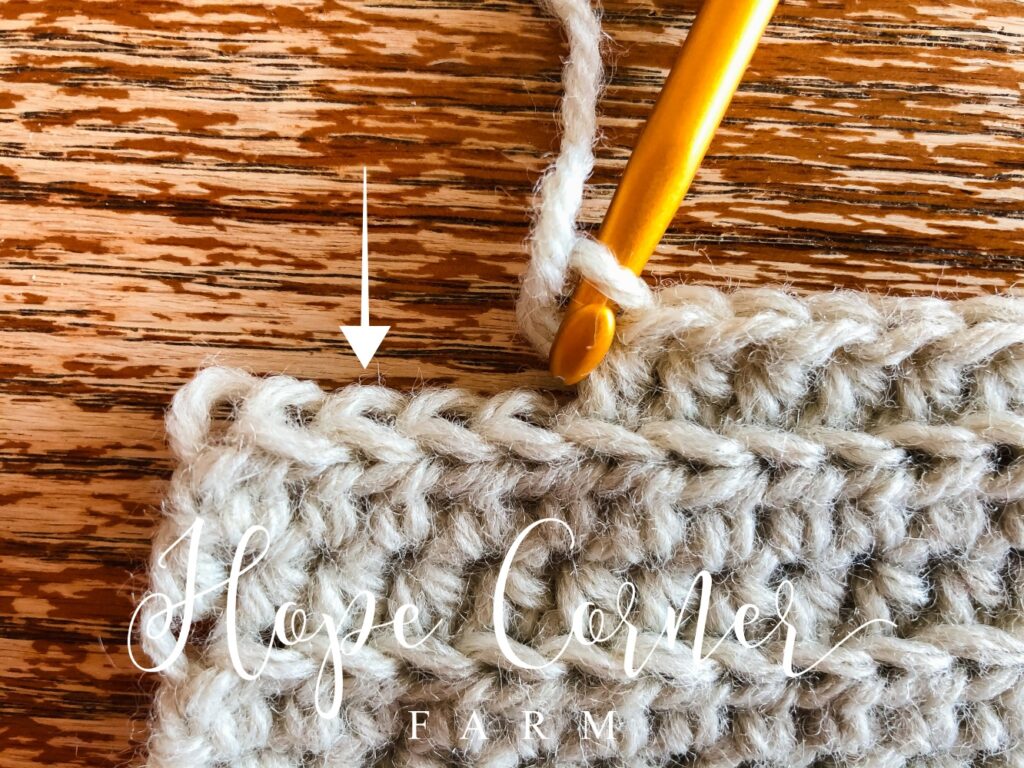
Please note:
Make sure that you are placing stitches in the very last stitch of the previous row. Sometimes it is easy to miss this one, so be aware! Check out the pictures below for better details.

Row 4
Ch 1, turn, BLHDC in each stitch across. (66)
Row 5
Ch 1, turn, HDC in each stitch across. (66)
Row 6
Ch 1, turn, BLHDC in each stitch across. (66)
Row 7
Ch 1, turn, HDC in each stitch across. (66)
Row 8
Ch 1, turn, BLHDC in each stitch across. (66)
Row 9
Ch 1, turn, HDC in each stitch across. (66)
Row 10
Ch 1, turn BLHDC in each stitch across. (66)
Row 11
Ch 1, turn, HDC in each stitch across. (66)
Row 12
Ch 1, turn, BLHDC in each stitch across. (66)
Row 13
Ch 1, turn, HDC in each stitch across. (66)
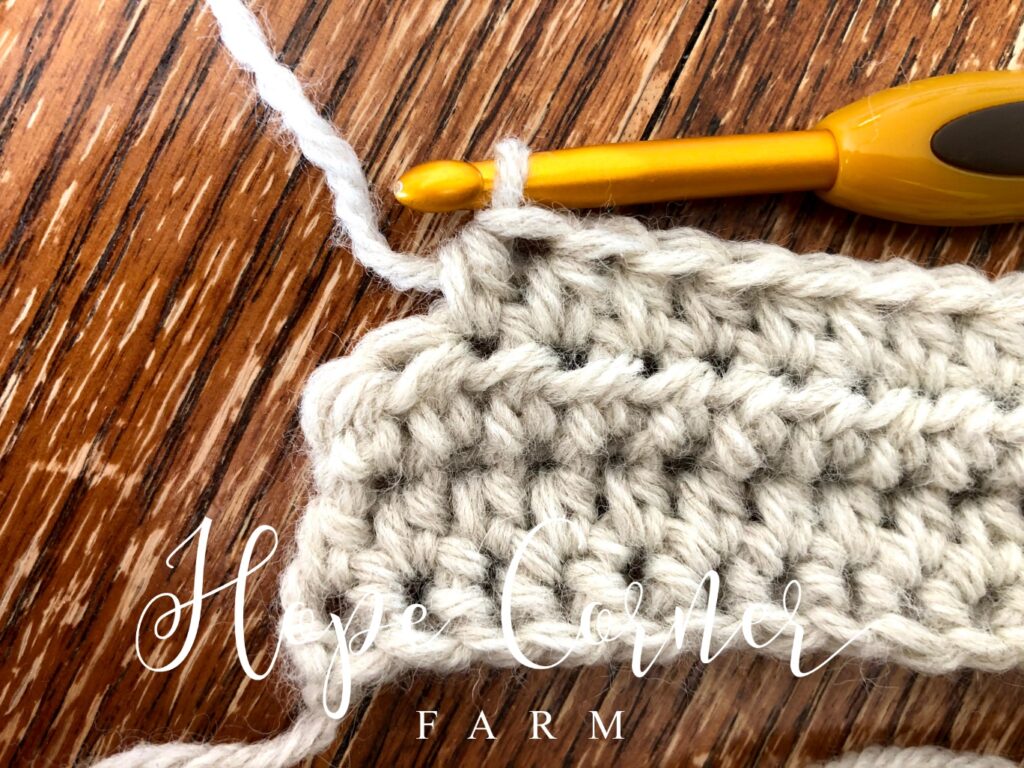
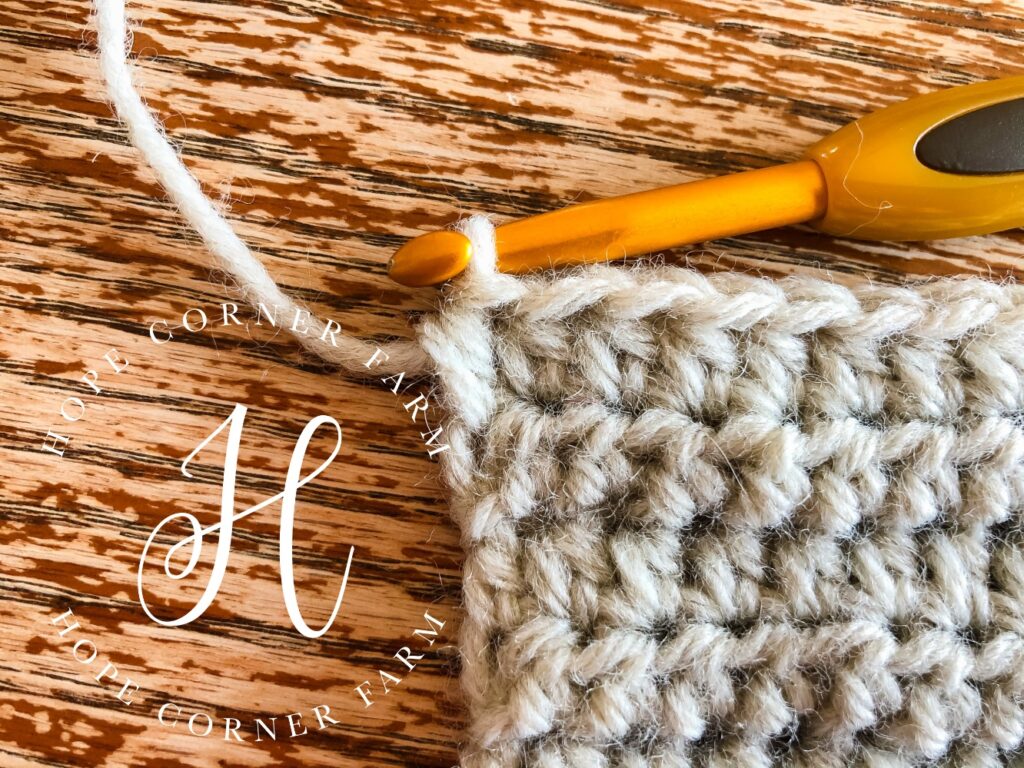
Cutting Yarn
Fasten off the yarn. Cut the yarn, leaving at least a 10″ length.
Sewing the Headband Together:
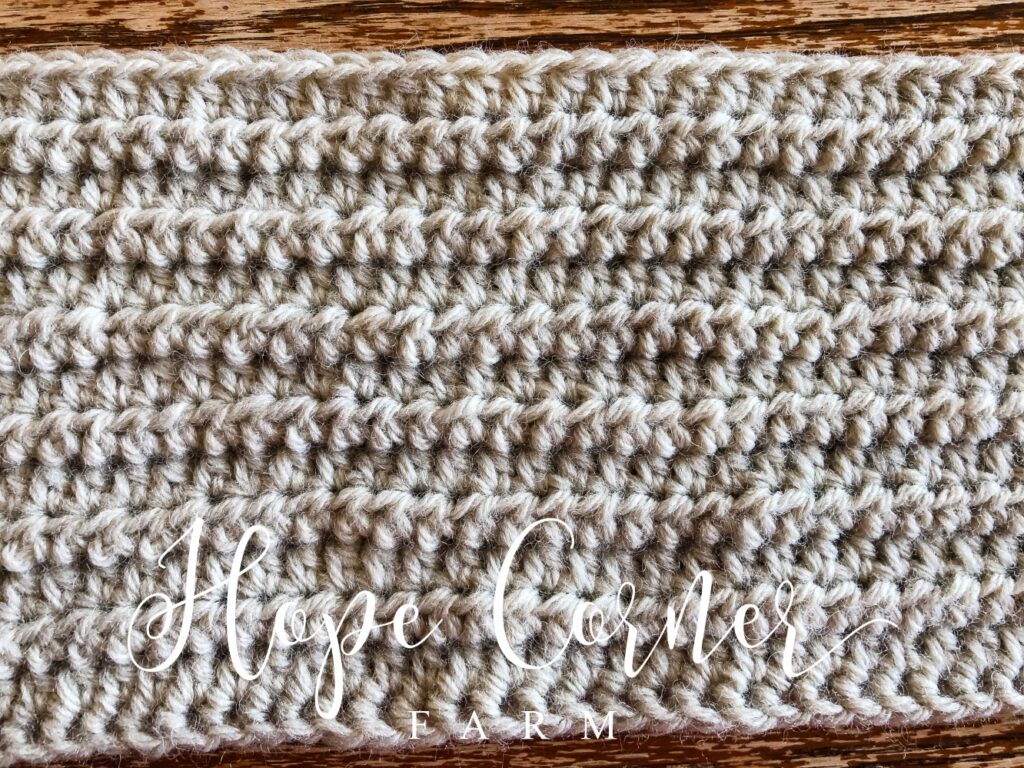
Make sure that the side with the lines of the BLHDC showing is facing outside. See the pictures below for details:
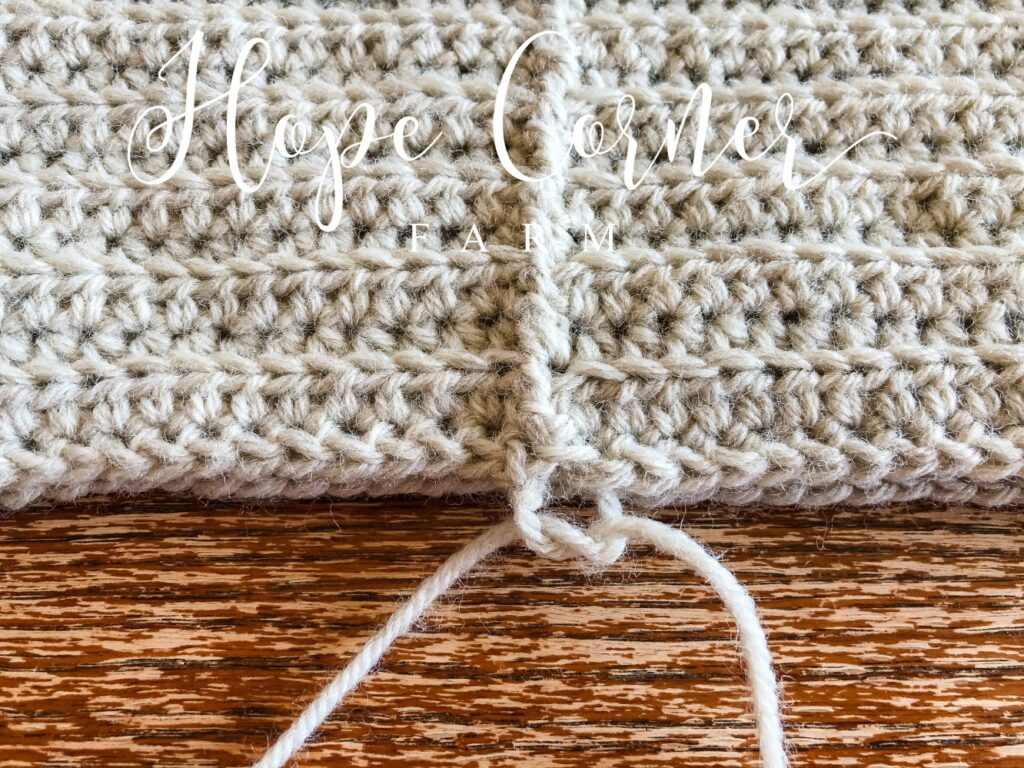
Bring the two short ends in to the middle of the headband and line them up.

Place a needle on the long tail of yarn. Sew the seam created by the two short ends together.

Once the entire seam is sewn, take the two ends and tie a knot. This helps to secure the yarn. DO NOT CUT THE YARN YET!
Creating the Cinch:
Take headband in your hand. Over the top of the seam, evenly pinch together the headband to create a cinched area.
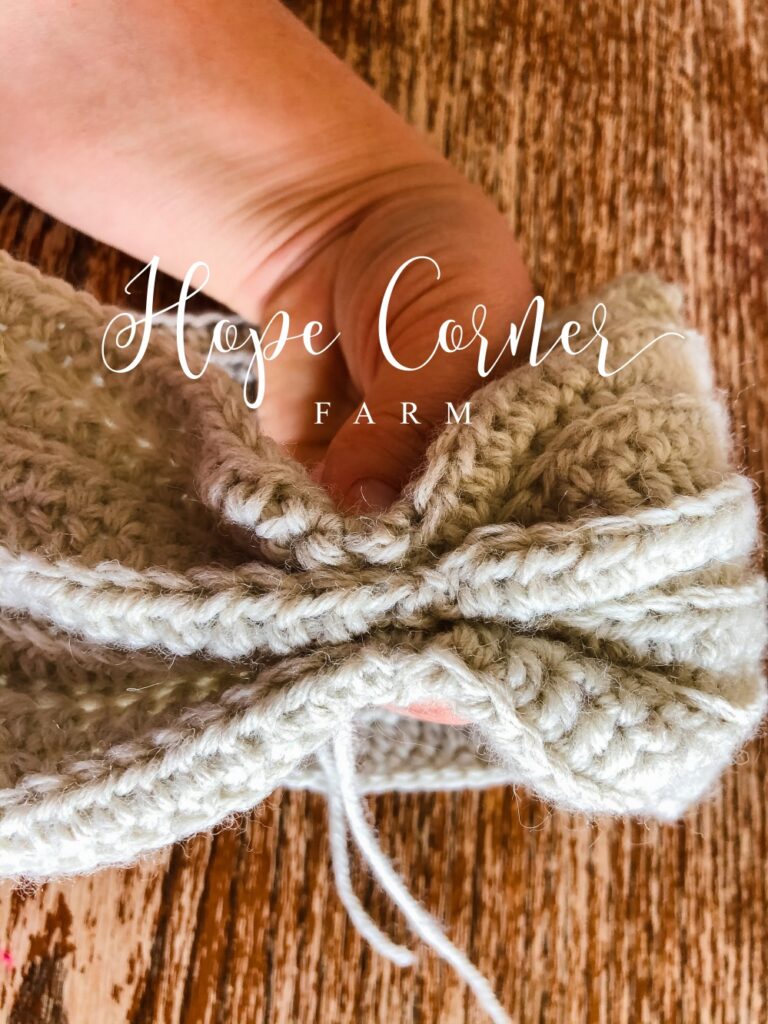
Take the two yarn tails and wrap them around the pinched area. Tie a double knot on the inside to secure the cinch. Weave in the ends and trim the yarn.
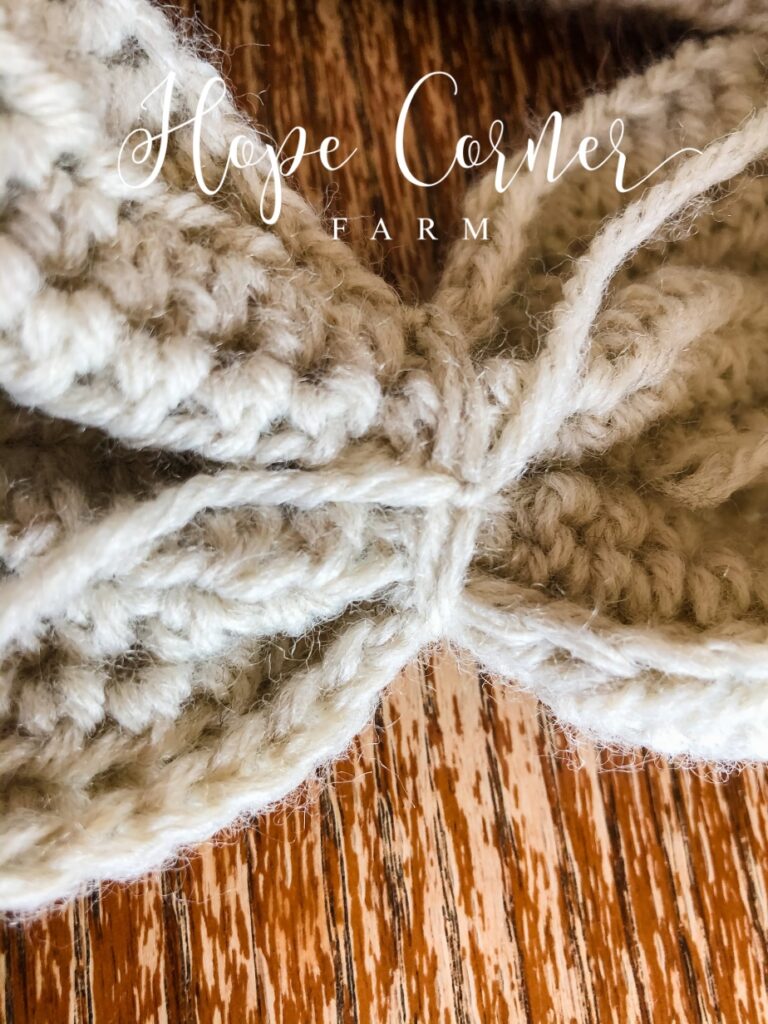
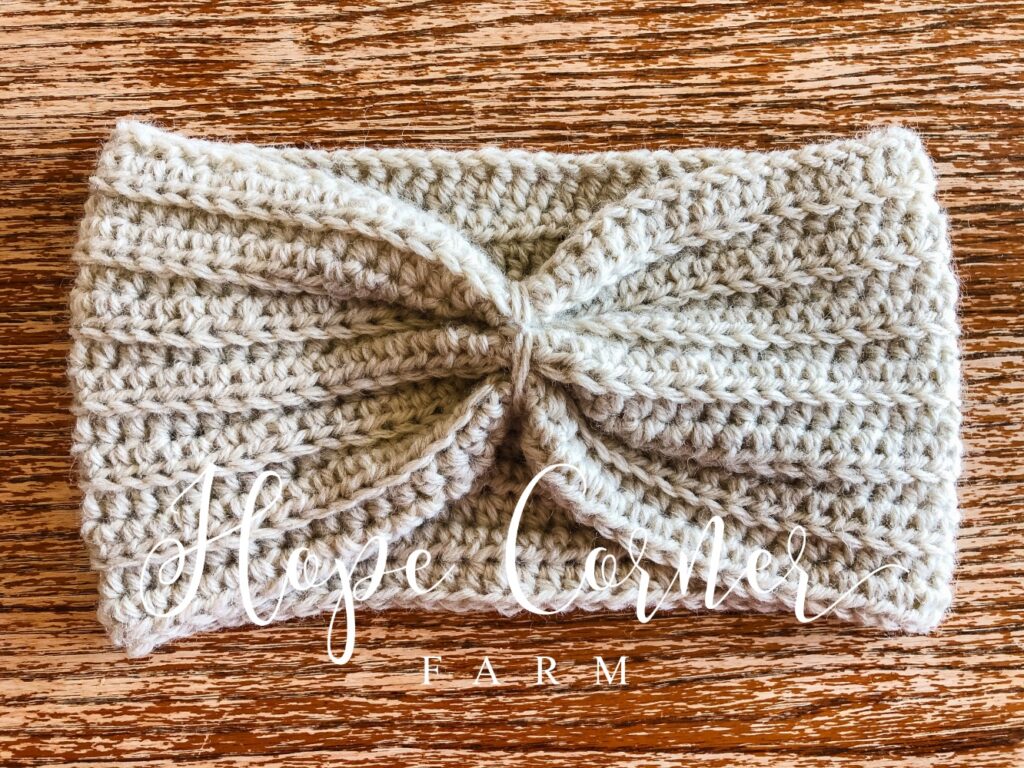
What it should look like at this point:
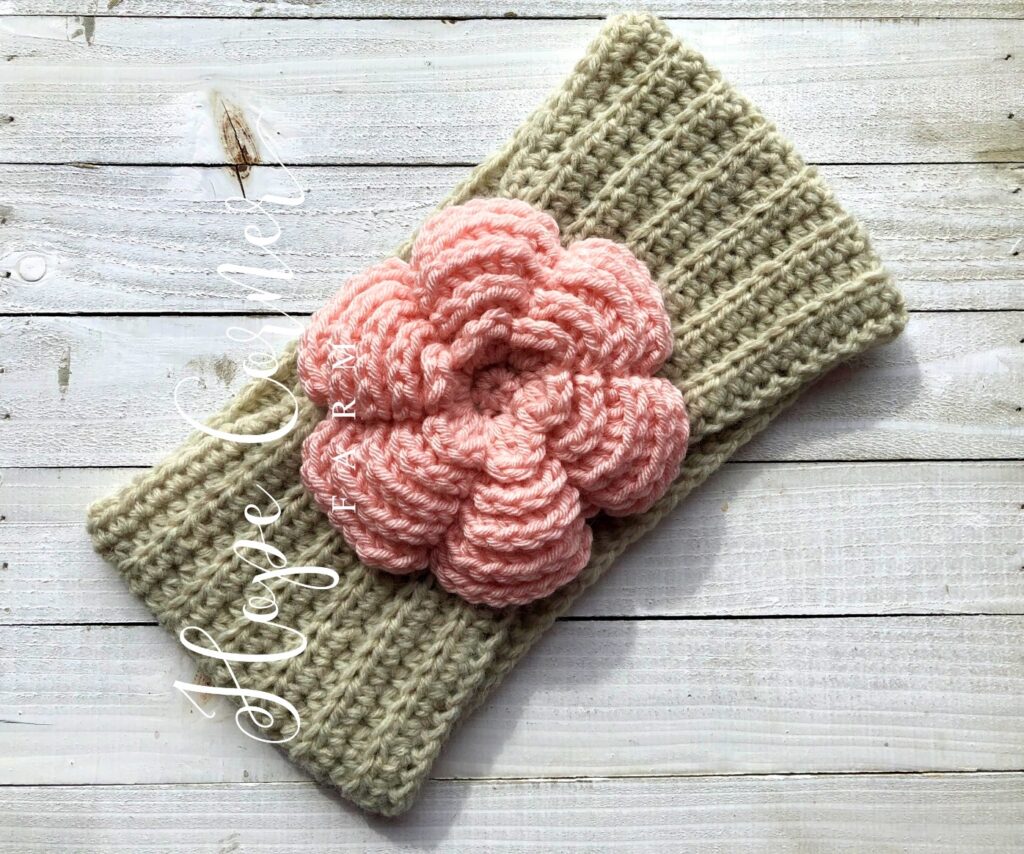
Adding the Flower Accent Piece:
I usually finish this headband with one of two different accents. One is by adding a Large Crochet Flower. The tutorial for this is found here: https://hopecornerfarm.com/large-crochet-flower-pattern/
Simply follow the instructions for the flower. After you have completed the flower, place it directly over top of the cinched area. Sew the flower in place.
Adding a Cuff Accent Piece:
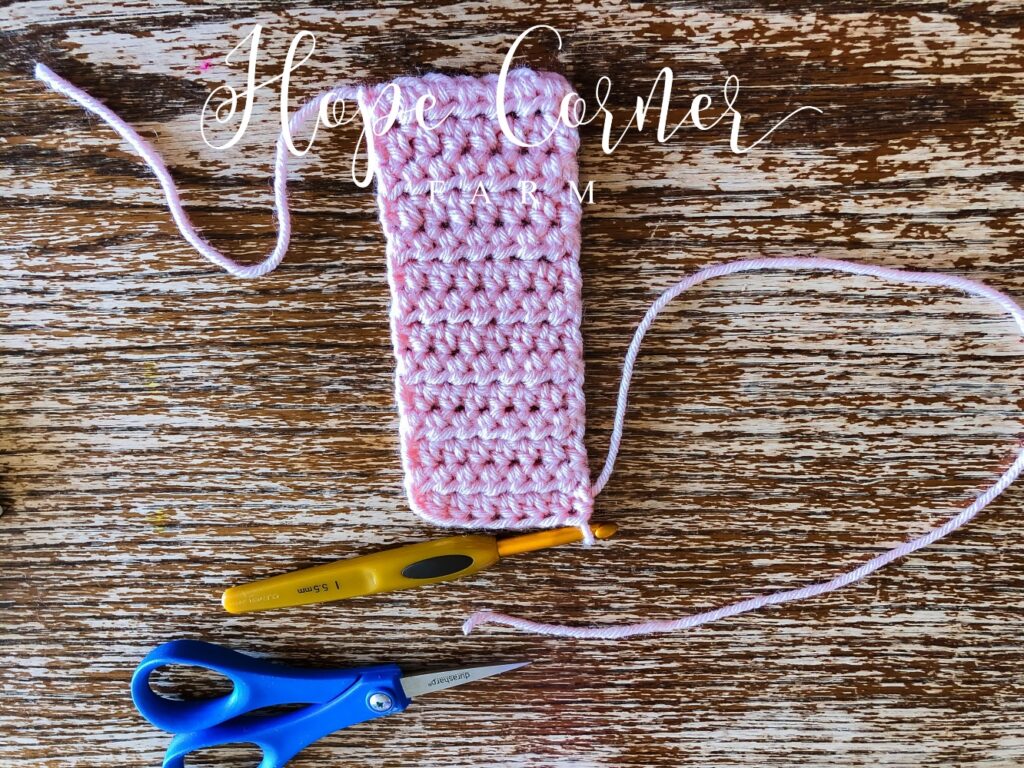
Foundation Single Crochet (FSC) 8, OR ch.9, then
single crochet (SC) into the 2nd chain from the
hook. SC in every chain across (8).
Row 1: ch 1, turn, HDC in each stitch across (8).
Row 2: ch 1, turn, HDC in each stitch across (8).
Rows 3-13: Repeat row 2
Fasten off the yarn and cut from the skien, leaving at
least a 10″ tail of yarn.
Place the cuff directly over the top of the cinch that
was created on the headband. Make sure that the seam will be placed on the inside of the headband so that it will not be seen.
The seam will be sewn together on the back side of
the cuff (the inside of the headband).
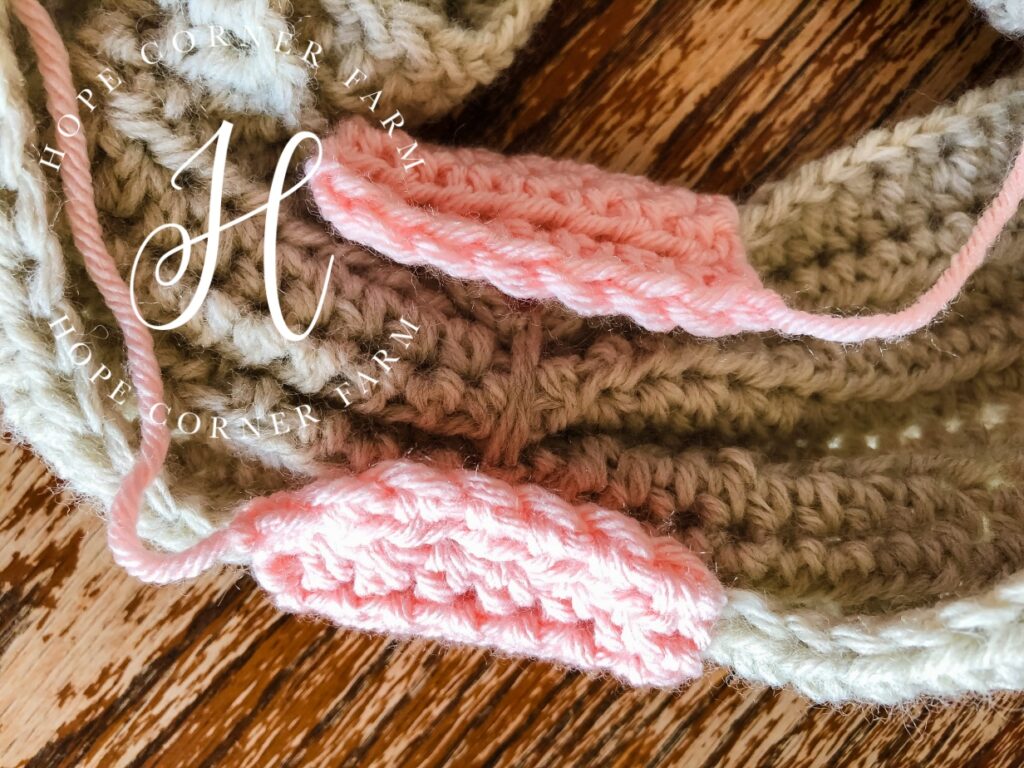
Sew the cuff together the same way that the
headband was sewn together.
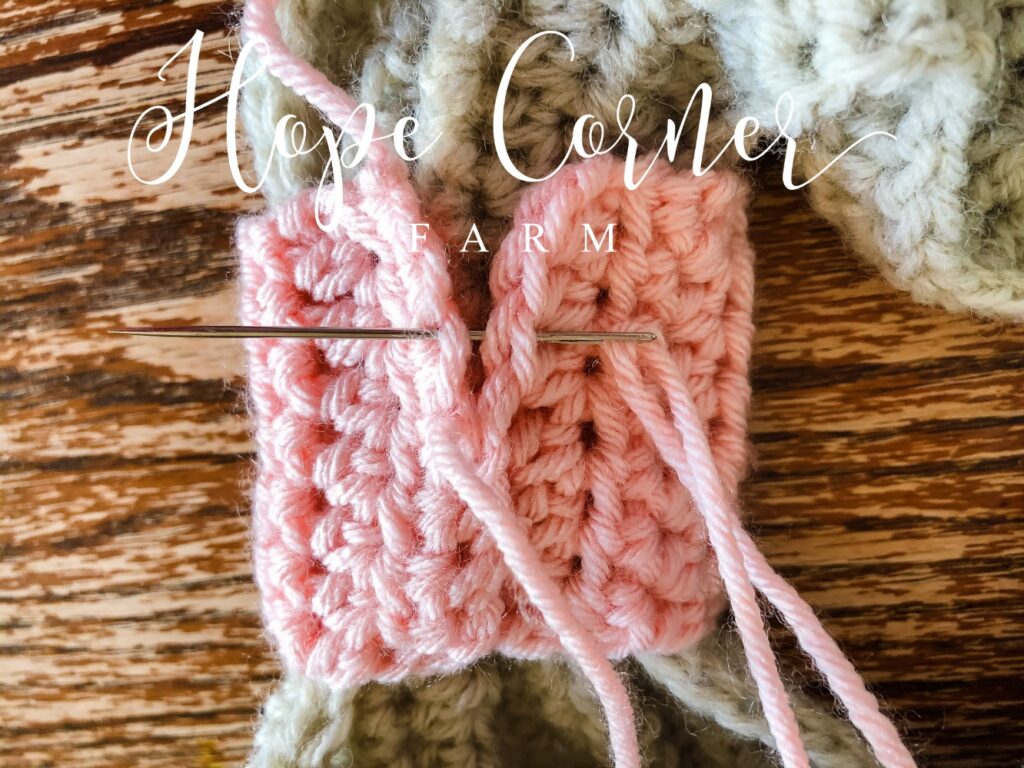
What it looks like after sewing:

Tie the ends in a double knot. Weave in the ends, trim the yarn, and enjoy!
More Sizes
If you are looking for additional sizes of this headband, or a PDF version of this headband, please click here:
Winter is coming and this headband is a great winter accessory. It sells like hotcakes at craft fairs, and it doesn’t give you terrible hat head (and that’s important! Let me know what you think of the pattern (or if you notice any mistakes in the pattern).
Video Tutorial:

Many Blessings,

Looking for more crochet ear warmer patterns? Check these out!
Crochet Buffalo Plaid Flower Headband pattern from Hope Corner Farm
The Sweetgrass Crochet Headband pattern from Hope Corner Farm
The Montana Crochet Ear Warmer pattern from Hope Corner Farm